manuals.online logo
Brands
  1. Home
  2. •
  3. Brands
  4. •
  5. Festool
  6. •
  7. Vacuum Cleaner
  8. •
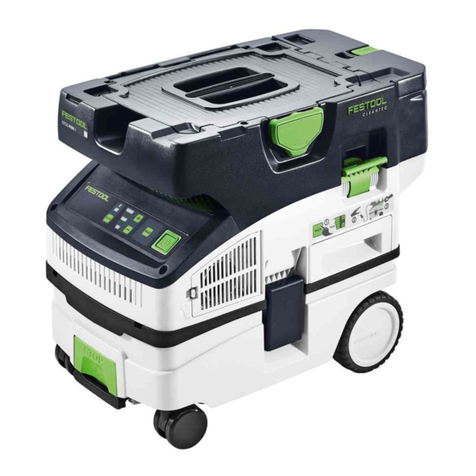
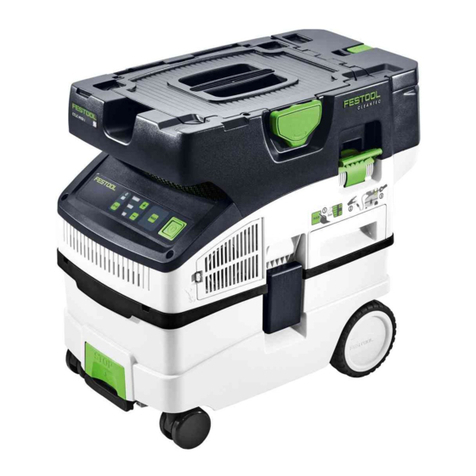
  9. Festool CTL MINI User manual

Festool CTL MINI User manual

468 010_002
Festool GmbH
Wertstraße 20
D-73240 Wendlingen
Telefon: 07024/804-0
Telefax: 07024/804-608
http://www.festool.com
CTL MINI
CTL MIDI
Bedienungsanleitung/Ersatzteilliste*) 4 - 7
Operating Instructions/Spare parts list*) 8 - 11
Mode d’emploi/Liste de pièces de rechange*) 12 - 15
Instrucciones de servicio/Lista de piezas de repuesto*) 16 - 19
Istruzioni d’uso/Elenco parti di ricambio*) 20 - 23
Gebruiksaanwijzing/Lijst met reserveonderdelen*) 24 - 27
Bruksanvisning/Reservdelslista*) 28 - 30
Käyttöohje/Varaosaluettelo*) 31 - 33
Driftsvejledning/Reservedelsliste*) 34 - 36
Bruksanvisning/Reservedelsliste*) 37 - 39
Instruções de uso/Lista de peças sobresselentes*) 40 - 43
Ðóêîâîäñòâî ïî ýêñïëóàòàöèè/Ïåðå÷åíü çàïàñíûõ ÷àñòåé*) 44 - 47
Návod k obsluze/Seznam náhradních dílù*) 48 - 50
Instrukcja obs³ug/Lista czêœci zamiennych*) 51 - 54
Seen at Ideal Tools.
8
The specified illustrations can be found
at the beginning of the operating instruc-
tions.
Pictograms
Note, Danger!
Manual, read the instructions.
1 Specified use
The vacuum cleaners are designed as spe-
cified for the aspiration and evacuation
of noxious dusts industrial threshold limit
values (LTL-values) up to 1 mg/m3and of
wood dusts corresponding to dust class ‘L’
in accordance with IEC 60335-2-69. The
vacuum cleaners are designed as specified
for extracting water. The vacuum cleaners
are designed in accordance with EN 60335-
1 and EN 60335-2-69 for a higher loading
in industrial use.
2 Safety instructions
- Use only accessories approved by Festool
(see the Festool Catalogue).
- Warning: The appliance may contain dust
that is hazardous to health.
The appliance must not be emptied, nor
must maintenance work, including filter
changes, be carried out, by anyone other
than autho-rized specialist personnel with
appropriate protective equipment. Do not
operate the appliance without a fully in-
stalled filter system.
- Note the applicable safety requirements
for the dust to be extracted.
- The appliance may be operated only in
an adequately ventilated space (in com-
pliance with national industrial safety
provisions).
- Do not suck in any sparks or hot chip-
pings.
- With the exception of wood dust, do not
suck in any flammable or explosive dusts
such as magnesium, aluminium etc. - Risk
of explosion!
- Do not use to extract flammable or explo-
sive liquids (e.g. petrol, thinners). - Risk
of explosion!
- Do not use to extract aggressive liquids
(e.g. acids, alkalis, solvents)
- Remove plug from mains socket when not
in use and before maintenance work.
- Do not pull plug out of mains socket by
its cable.
- Protect the cable against heat, oil and
sharp edges.
Technical data CTL MINI CTL MIDI
Power consumption 400 - 1,200 W 400 - 1,200 W
Connected load to appliance plug socket
max.: EC 2,400 W 2,400 W
CH, DK 1,100 W 1,100 W
GB 240 V 1,800 W 1,800 W
GB 110 V 500 W 500 W
AUS 1,200 W 1,200 W
Volume flow (air) max., turbine 168 m3/h 168 m3/h
Vacuum max., turbine 20,000 Pa 20,000 Pa
Filter surface 5,000 cm25,000 cm2
Suction hose ø 27 mm x 3.5 m ø 27 mm x 3.5 m
Sound pressure level in compliance
with EN 60704-1 72 dB(A) 72 dB(A)
Container capacity 10 l 15 l
Dimensions L x W x H 430 x 330 x 420 mm 430 x 330 x 470 mm
Weight 9.5 kg 9.7 kg
Power cable length 7.5 m 7.5 m
Protection type IP X4 IP X4
Seen at Ideal Tools.
9
- Do not leave devices out in the rain.
- Check the plugs and cables regularly and
have them replaced by an expert if dama-
ged.
- Do not lift or carry the devices by their
handles using a crane hook or lifting
gear.
- The device may only be used by persons
who have been trained in its use and who
are authorised to do so.
- If noxious dusts have been extracted, the
vacuum cleaner and all accessories must
be completely cleaned (inside and outside)
by suction and wiping, before removal
from the contaminated area.
Parts that cannot be completely cleaned
are to be packed for transport in a plastic
bag with an airtight seal.
- For safety reasons, only operate the ma-
chine using a totally earthed socket.
3 Appliance preparation and initial
operation
Stick the enclosed sticker in your national
language on the text area of the warning
plate (5.7).
3.1 Electrical connection
The operating voltage shown on the
rating plate must correspond to the
voltage of the mains power supply.
Make sure that the vacuum cleaner
is switched off when you plug the-
power cable in.
3.2 On/off switch (1.1)
In position 0 the vacuum cleaner is switched
off and the appliance plug socket (1.3) is
dead.
Two modes of operation are possible:
a) Switch position „MAN“
The appliance plug socket is live.
Before turning the switch to the
„MAN“ position, ensure that the tool
connec-ted to the appliance plug
socket is switched off.
The cleaner motor starts immediately.
b) Switch position „Auto“
The appliance plug socket is live.
Before turning the switch to the
„Auto“ position, ensure that the tool
connected to the appliance plug so-
cket is switched off.
The cleaner motor starts only when the tool
connected to the appliance plug socket is
switched on.
3.3 Suction force regulator (1.2)
The suction force regulator can be used to
vary the suction capacity. This permits a
precise adaptation to different substances
to be picked up.
3.4 Connecting an electric tool
Observe the maximum connected load on
the appliance plug socket (see “Technical
Data“)! Connect the electric tool to the ap-
pliance plug socket (1.3).
Make sure that the electric tool is
switched off when plugging it in and
unplugging it.
4 Operation
4.1 Changing the filter
During the following procedure, take care
not to raise dust more than is unavoidab-
le. Wear a P2 breathing protection mask
with health-hazardous dusts!
a) Changing the filter bag
Order No.:
CTL MINI 456772, CTL MIDI 494105
- Open locking clips (1.4), remove top sec-
tion (1.5),
- Change filter bag (2.1)–see print on filter
bag,
- Replace top section, close locking clips.
Note: A replacement filter bag can be
stored in the storage compartment (5.4).
b) Changing the filter element
Order No.: 456790
Do not operate machine without a
filter element. This may damage the
motor.
- Open locking clips (1.4), remove top sec-
tion (1.5),
- Fold over handle (3.2) and remove holder
(3.3),
- Remove used filter element (3.4) and re-
place with a new one,
- Replace holder and fold over handle until
it latches into place,
- Replace top section, close locking clips.
Seen at Ideal Tools.
10
4.2 Emptying the dirt trap
The dirt trap (2.2) can be emptied once the
top part has been removed.
4.3 Stand/Brake
Folding out the stand (4.5) prevents the
mobile dust extractor from rolling away. To
achieve this, lift the front end of the mobile
dust extractor slightly and push the stand
down-wards until it latches into place. Press
the button to release the stand (4.4).
5 Application
The extractor hose (4.2) is connected to
the extractor opening by the angle bracket
(4.1). During machine operation, the ex-
tractor hose is inserted through the opening
(4.3). A Systainer can be attached to the
storage area (5.6) via the four locking clips
(5.5).
5.1 Vacuuming dry materials
Before using the vacuum cleaner to
evacuate dry substances, a filter bag
must always be inserted in the con-
tainer. Then the evacuated material
can be disposed off easily.
The filter element becomes damp after
evacuating liquids. A damp filter element
suffers more wear and tear if it is used for
dry materials. Accordingly, the filter ele-
ment should be dried or replaced with a dry
one before dry operation.
5.2 Vacuuming liquids
The filter bag has to be removed be-
fore evacuating liquids. We recom-
mend use of a special wet filter.
When the maximum filling level is reached,
a level indicator (3.1) automatically inter-
rupts extraction.
Do not evacuate combustible liquids!
If foam or liquid escapes, stop work
immediately and empty the dirt con-
tainer.
5.3 The antistatic system (AS)
Friction in the suction hose causes electro-
static charges which can result in unple-
asant electric shocks for the operator.
In order to conduct these static charges to
earth, the extraction units are provided with
an antistatic system as a standard feature.
However, antistatic hoses and accessories
have to be used in this case.
The antistatic function will only work
if the plug is plugged into a totally
earthed socket.
6 After finishing work
- Switch off the cleaner and pull the plug of
the mains lead out of the plug socket.
- Empty dirt tank.
- Insert the suction hose (5.1) and con-
necting pipe (5.2) in the top section. The
mains cable then has to be inserted th-
rough the opening (5.3).
- Clean the vacuum cleaner inside and out-
side by suction and wiping.
- Deposit the appliance in a dry room, safe
from unauthorised use.
7 Temperature control
A temperature fuse switches the dust ex-
tractor off before this reaches a critical
temperature to protect against overheating
- switch dust extractor off and leave for
around 5 minutes to cool down. If the dust
extractor still cannot be switched back on,
please consult a Festool-service centre.
8 Maintenance and care
Always remove the mains plug from
the socket before carrying out any
maintenance work!
Any maintenance and repair work
requiring an opening of the motor
housing may only be carried out
by an authoris-ed customer service
workshop.
A safety test is to be carried out at least
once a year by the manufacturer or an in-
structed person, e.g. for possible damage
to the filter and leaks in the appliance,
and to ensure that the control devices are
functioning.
9 Accessories, filter
The accessory and filter order number can
be found in your Festool catalogue or on the
Internet under “www.festool.com”.
Seen at Ideal Tools.
11
10 Warranty
Our equipment is under warranty for at
least 12 months with regard to material or
production faults in accordance with nati-
onal legislation.
In the EU countries, the warranty period is
24 months (an invoice or delivery note is
required as proof of purchase).
Damage resulting from, in particular, nor-
mal wear and tear, overloading, improper
handling, or caused by the user or other
damage caused by not following the opera-
ting instructions, or any fault acknowledged
at the time of purchase, is not covered by
the warranty.
Complaints will only be acknowledged if
the equipment has not been dismantled
before being sent back to the suppliers or
to an authorised Festool customer support
workshop.
Store the operating instructions, safety no-
tes, spare parts list and proof of purchase
in a safe place.
In addition, the manufacturer’s current
warranty conditions apply.
Note
We reserve the right to make changes to
the technical data contained in this infor-
mation as a result of ongoing research and
development work.
Seen at Ideal Tools.

Other manuals for CTL MINI

5

Other Festool Vacuum Cleaner manuals

Festool CLEANTEX CT 26 E User manual

Festool

Festool CLEANTEX CT 26 E User manual

Festool CLEANTEC CTLC SYS I User manual

Festool

Festool CLEANTEC CTLC SYS I User manual

Festool CT MINI I HEPA User manual

Festool

Festool CT MINI I HEPA User manual

Festool CTM 26 E AC User manual

Festool

Festool CTM 26 E AC User manual

Festool CT 26 E HEPA User manual

Festool

Festool CT 26 E HEPA User manual

Festool CTL 48 E LE EC/B22 User manual

Festool

Festool CTL 48 E LE EC/B22 User manual

Festool CT SYS HEPA User manual

Festool

Festool CT SYS HEPA User manual

Festool CT 22 E User manual

Festool

Festool CT 22 E User manual

Festool CTM 26 E Installation instructions

Festool

Festool CTM 26 E Installation instructions

Festool CLEANTEX Series Installation instructions

Festool

Festool CLEANTEX Series Installation instructions

Festool CTC SYS I User manual

Festool

Festool CTC SYS I User manual

Festool CTL 48 E LE EC/B22 R1 Installation instructions

Festool

Festool CTL 48 E LE EC/B22 R1 Installation instructions

Festool CTM 22 E SG User manual

Festool

Festool CTM 22 E SG User manual

Festool CLEANTEX CTH 26 E/a User manual

Festool

Festool CLEANTEX CTH 26 E/a User manual

Festool SRM 45 E-LHS 225 Planex User manual

Festool

Festool SRM 45 E-LHS 225 Planex User manual

Festool CTL MINI User manual

Festool

Festool CTL MINI User manual

Festool CTM 26 E User manual

Festool

Festool CTM 26 E User manual

Festool CT 33 E User manual

Festool

Festool CT 33 E User manual

Festool CT MINI I HEPA User manual

Festool

Festool CT MINI I HEPA User manual

Festool CTL SYS Installation instructions

Festool

Festool CTL SYS Installation instructions

Festool CTM 26 E Installation instructions

Festool

Festool CTM 26 E Installation instructions

Festool CTH 26 E/a User manual

Festool

Festool CTH 26 E/a User manual

Festool CLEANTEX CT 26 E User manual

Festool

Festool CLEANTEX CT 26 E User manual

Festool CLEANTEX CT 26 E User manual

Festool

Festool CLEANTEX CT 26 E User manual

Popular Vacuum Cleaner manuals by other brands

KING P 286 Punto instruction manual

KING

KING P 286 Punto instruction manual

Bissell 2593 Series manual

Bissell

Bissell 2593 Series manual

Black & Decker HNV115B series instruction manual

Black & Decker

Black & Decker HNV115B series instruction manual

Bosch AquaWash&Clean BWD4 Series instruction manual

Bosch

Bosch AquaWash&Clean BWD4 Series instruction manual

Forme FVC-2510 instruction manual

Forme

Forme FVC-2510 instruction manual

EUROM Force 1430S instruction manual

EUROM

EUROM Force 1430S instruction manual

Samsung SC20F30 Series user manual

Samsung

Samsung SC20F30 Series user manual

Grundig VCH 9129 L user manual

Grundig

Grundig VCH 9129 L user manual

Black & Decker FLEX HFVAB320JC instruction manual

Black & Decker

Black & Decker FLEX HFVAB320JC instruction manual

Sebo SEBO AUTOMATIC XP 10 instruction manual

Sebo

Sebo SEBO AUTOMATIC XP 10 instruction manual

Dyson DC04 user guide

Dyson

Dyson DC04 user guide

DS Produkte MC607-1 instruction manual

DS Produkte

DS Produkte MC607-1 instruction manual

Philips FC8386/01 Instructions for use

Philips

Philips FC8386/01 Instructions for use

Vacmaster VK811PH owner's manual

Vacmaster

Vacmaster VK811PH owner's manual

Tower Hobbies RXEC10 manual

Tower Hobbies

Tower Hobbies RXEC10 manual

Philips HR 8881 Service manual

Philips

Philips HR 8881 Service manual

Bosch BCH65PET instruction manual

Bosch

Bosch BCH65PET instruction manual

Dyson DC 52 operating manual

Dyson

Dyson DC 52 operating manual

manuals.online logo
manuals.online logoBrands
  • About & Mission
  • Contact us
  • Privacy Policy
  • Terms and Conditions

Copyright 2025 Manuals.Online. All Rights Reserved.