FiDUS MVPS600 Series User manual

1www.fiduspower.com
MVPS600 Series
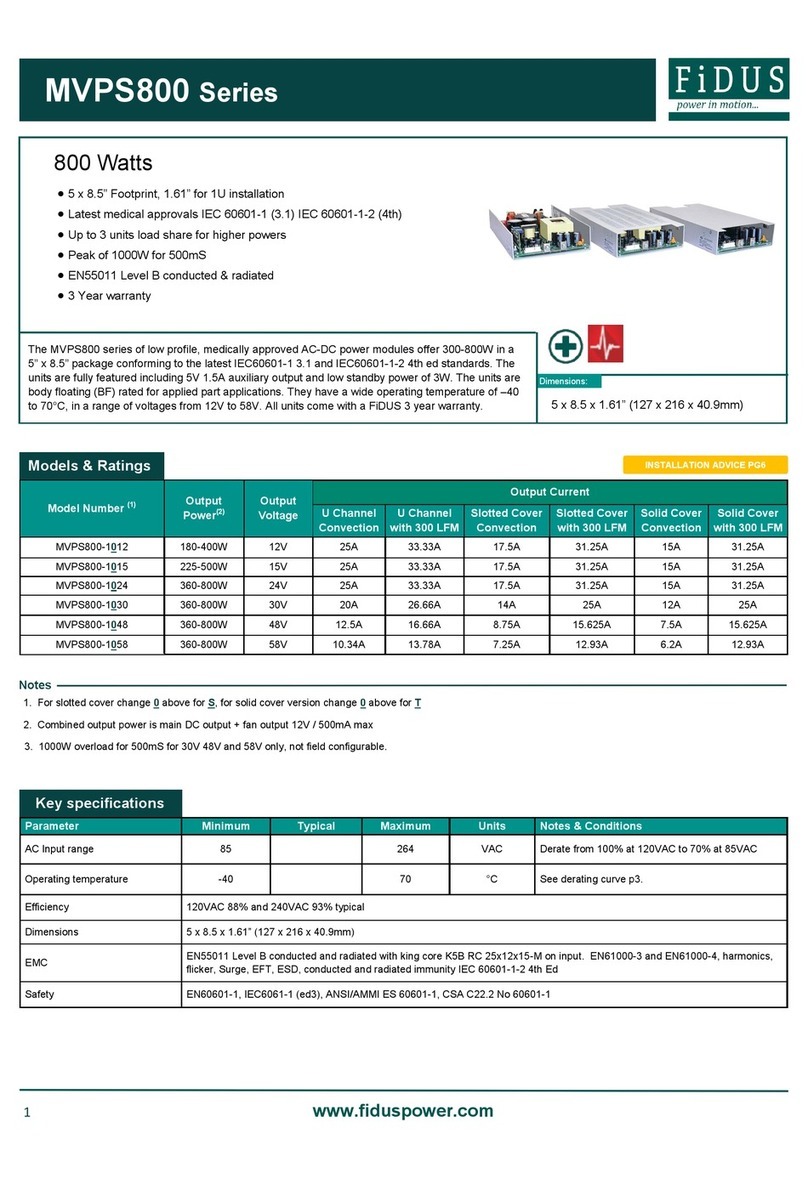
Model Number (1) Output Power(2) Output Voltage Output Current (Natural Convection)
U Channel Slotted Cover Solid Cover
MVPS600-1012 180-300W 12V 25A 17.5A 15A
MVPS600-1015 225-375W 15V 25A 17.5A 15A
MVPS600-1024 360-600W 24V 25A 17.5A 15A
MVPS600-1030 360-600W 30V 20A 14A 12A
MVPS600-1048 360-600W 48V 12.5A 8.75A 7.5A
MVPS600-1058 360-600W 58V 10.34A 7.25A 6.2A
Models & Ratings
Dimensions:
5 x 8.5 x 1.61” (127 x 216 x 40.9mm)
Parameter Minimum Typical Maximum Units Notes & Conditions
AC Input range 85 264 VAC Derate from 100% at 120VAC to 70% at 85VAC
Operating temperature -40 70 °C See derating curve p3.
Efficiency 120VAC 88% and 240VAC 93% typical
Dimensions 5 x 8.5 x 1.61” (127 x 216 x 40.9mm)
EMC EN55011 Level B conducted and radiated with king core K5B RC 25x12x15-M on input. EN61000-3 and EN61000-4, harmonics,
flicker, Surge, EFT, ESD, conducted and radiated immunity to IEC 60601-1-2 4th ed
Safety EN60601-1, IEC60601-1 (ed3), ANSI/AMMI ES 60601-1, CSA C22.2 No 60601-1
Key specifications
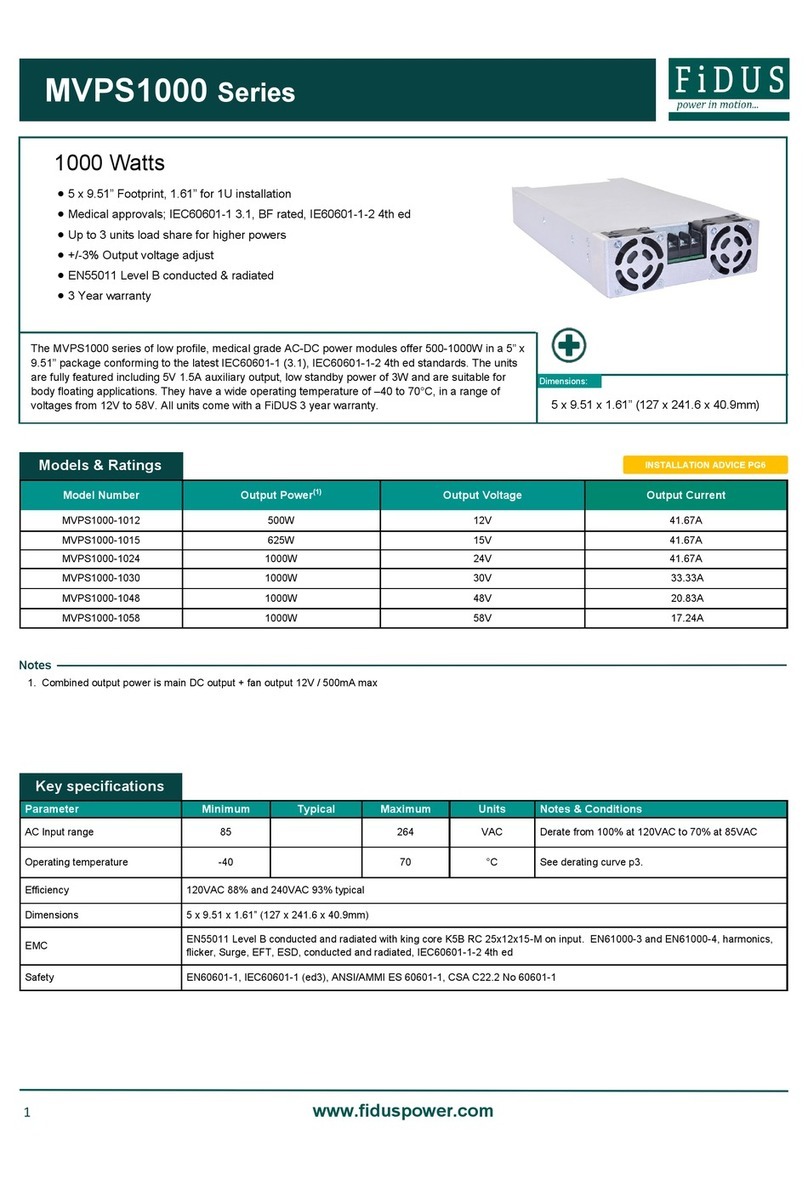
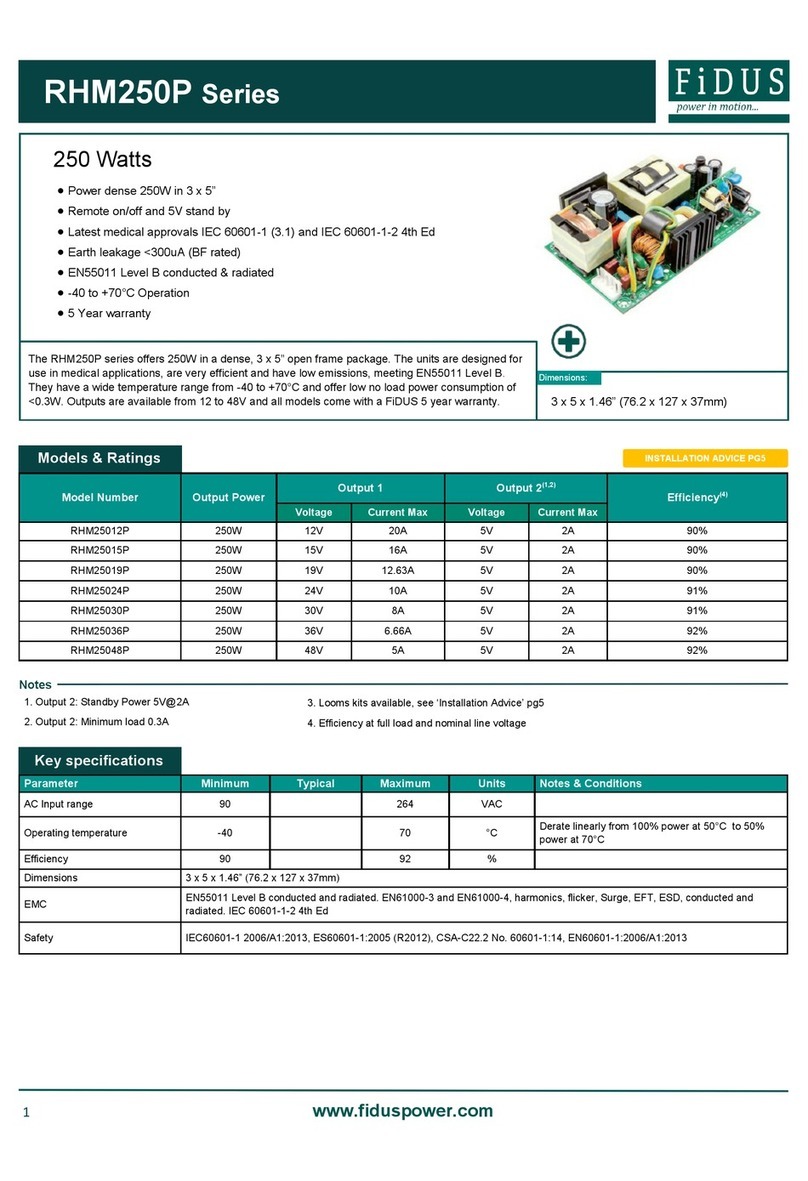
• 5 x 8.5” Footprint, 1.61” for 1U installation
• Latest medical approvals IEC60601-1 (3.1) IEC60601-1-2 (4th ed), BF rated
• Up to 3 units load share for higher powers
• Peak of 1000W for 500mS
• EN55011 Level B conducted & radiated
• 5 Year warranty
600 Watts
The MVPS600 series of low profile, medically approved AC-DC power modules offer 300-600W in a
5” x 8.5” package conforming to the latest IEC60601-1 3.1 and IEC60601-1-2 4th ed standards. The
units are fully featured including 5V 1.5A auxiliary output and low standby power of 3W. The units are
body floating (BF) rated for applied part applications. They have a wide operating temperature of –40
to 70°C, in a range of voltages from 12V to 58V. All units come with a FiDUS 5 year warranty.
Notes
INSTALLATION ADVICE PG6
2. Combined output power is main DC output + fan output 12V / 500mA max
1. For sotted cover change 0 above for S, for sold cover version change 0 above for T
3. 1000W overload for 500mS for 30V 48V and 58V only, not field configurable.

2www.fiduspower.com
ULP275 Series
Parameter Minimum Typical Maximum Units Notes & Conditions
Output voltage 12 58 VDC See Model & Ratings table
Output voltage Adjust ±3 %
Set point accuracy ±1 %
Line regulation ±0.5 %
Load regulation ±1 %
Minimum load 0%
Transient response 10 %50-100% step change 0.1A/uS slew 50% duty 50hz in <5ms
Ripple & Noise 2%
All models measured with 0.1uF ceramic and 10uF
electrolytic capacitor. 20 MHz bandwidth. At rated line and
25W min load.
Hold up time 8mS
Overload protection 110 %Hiccup mode, Auto recovery
Short circuit protection Latch reset
Overvoltage protection 114 %Latch reset
Over temperature protection 130 140 °CMeasured at primary heatsink. Auto recovery
Leakage current 400 uA 240VAC / 50Hz
Touch current 100 uA
Output
Parameter Minimum Typical Maximum Units Notes & Conditions
Efficiency 120VAC 88% and 240VAC 93% typical
Isolation: Input to Output 4245 VAC
Input to Ground 1625 VAC
Output to ground 1500 VAC
Switching frequency 85 100 kHz 100 kHz variable for power switching. Variable PFC
switching 85kHz
Power density 8.77 W/In3
MTBF >1.28 MHrs As per Telcordia-SR332– issue 3
Weight 1100 g
General
Parameter Minimum Typical Maximum Units Notes & Conditions
Operating temperature -40 70 °C Please see derating curve on page 3
Storage temperature -40 85 °C
Cooling Natural convection
Altitude 4876 12192 m4876m operating 12192m non operating
Humidity 595 % RH Non condensing
Environmental
Parameter Minimum Typical Maximum Units Notes & Conditions
Input voltage 85 264 VAC Derate from 100% at 120VAC to 70% at 85VAC
Input frequency 47 63 Hz
Power factor 0.95 0.98 EN61000-3-2 class D compliant, at full load. 0.98 at
120VAC and 0.95 at 240VAC
Input current (rms) 6.5 A At 120VAC
3.2 At 240VAC
Inrush current 25 A 230VAC cold start at 25°C
No load input power 3W 6W W3W output disabled 6W output enabled
Input
WLP350 Series VPS1000 Series VPS1000 Series MVPS600 Series

3www.fiduspower.com
ULP275 Series
Standard Test level Criteria Notes & Conditions
Conducted EN55011 BCISPR22-B, FCC PART15-B also
Radiated EN55011 BWith ferrite king core K5B RC 25x12x15-M on input
Harmonic current EN61000-3-2Class A
Voltage flicker EN61000-3-3
EMC: Emissions
Standard Test level Criteria Notes & Conditions
ESD EN61000-4-24A±8kV contact, ±15kV air.
Radiated EN61000-4-33A10V/m 80MHz-2.7GHz sine wave 80% AM 1kHz
EFT EN61000-4-43A2kV Power, 1kV I/O 5kHz
Surges EN61000-4-5Installation Class 3 A1kV Live-Neutral, 2kV Live/Neutral—Earth
Conducted EN61000-4-63A10V, 0.15 to 80MHz sine wave 80AM 1kHz
Magnetic Fields EN61000-4-8430A/M
Voltage Dips / Interruptions EN61000-4-11 100% for 0.5 & 1 cycle, 30% for 25 cycles: B,B,B
interrupt 250,300 cycles and 30% for 30 cycles: B,B,B
EMC: Immunity
Safety standard Notes & Conditions
UL/CSA ANSI/AMMI ES 60601-1, CSA C22-2 NO- 60601-1 UL Certificate No : 20190221-E173812
CB IEC60601-1 3rd ed CB Test Certificate No : NO105338
Nemko EN60601-1 3rd ed Nemko Certificate No : P19223365
CE 2015/863/EU RoHS Directive and 2014/35/EU Low voltage directive
Equipment protection class Class I
Safety Approvals
WLP350 Series VPS1000 Series MVPS600 Series
Power Derating Curve 12V
-40 -20 020 40 60
Temperature (ᵒC)
80
300
Load W
Power Derating Curve 15V Power Derating Curve Others
50
30
125
250
-40 -20 020 40 60
Temperature (ᵒC)
80
375
200
Load W
50
30
157
314
-40 -20 020 40 60
Temperature (ᵒC)
80
600
Load W
50
30
250
225
150
75
300
100
200
300
100
500
400
210
175
87
180
U Channel
Sloed cover
Solid cover
262
220
110
225
188
94
420
350
175
360
150

4www.fiduspower.com
ULP275 Series ULP275 Series WLP350 Series VPS1000 Series
AC Power Derating Curve
0
85 95 105 115
100
80
60
40
20
70
120 125 135 255 265
Application notes
Signals
Power Good: TTL output activated at 90% of Vout. Delay between 100 and 500mS
At least 1mS before Vout falls below 90% TTL signal switches low
Load share
The volt sense lines must all be connected to one point and the output voltage of each the
power supplies must be adjusted to be within 1% for the current share to operate. Should they
not be adjusted the current share will not function. When using the load share function derate
the cumulative power total by 10%. Please follow the below step by step process to ensure
smooth operation:
• Connect all output cables to Vout
• Connect all Vs cables and twist pairs together
• Terminate all the Vs lines to the same +/- points
• Connect the load share (LS pin 10 on J3) of all the units
• With other units tuned off, on each PSU use the output adjust to change
Vout within 1%
• The current share should be checked with a DC hall sensor showing that
the power supplies share the current within 10%
Remote Sense: Compensation for 200mV voltage drop on cable runs
Remote on/off: Unit comes pre-configured with pin 6 & 7 shorted to enable the unit
Current limit: Do not remove. This feature is not field configurable.
MVPS600 Series

5www.fiduspower.com
ULP275 Series
Notes
1. All dimensions shown in mm [inches]
2. J1: Input connector: TE Connectivity: NC6-P107-03
Mechanical Details
J2: Output Connector(3)
Pin Connections
Pin Function
J2A +Vout
J2B -Vout
3. J2: Output connector: 6-32 pan screw. Can accept AMP 8-31886-1
Tongue (11A max AWG16)
J3: I/O Connector(4)
Pin Connections
Pin Function
1GND
2+5V 1.5A
3PGPF
4VS-
5VS+
6GND
7Remote on/off
8Current limit p2
9Current limit p1
10 Load share
ULP275 Series WLP350 Series
4. J3: I/O header Molex: 22-23-2101 mating part Molex: 22-01-2107
MVPS600 Series
J1: Input Connector(2)
Pin Connections
Pin Function
1Line
2Neutral
3Earth
U Channel
Sloed cover
Solid cover
Side view
Boom view
MVPS600 Series

6www.fiduspower.com
Thermal
Thermal management is an important consideration when thinking about equipment service life. Electrolytic
capacitors within the PSU wear with time and are typically the first end-of-life failure. Keeping the operation
temperature of key components within the PSU, such as the electrolytic capacitors, as low as possible is para-
mount. As a general rule, for every 10°C drop in the operating temperature of the electrolytic capacitators you
double their lifetime, and thus the lifetime of the power supply. When looking at thermal performance it is helpful
to test under a worst-case set of conditions, to ensure component temperatures are in an acceptable range for
the required service life. Then consider the impact of operational time, load and temperature profile to estimate
a more realistic lifetime for your PSU.
Also, many FiDUS power supplies offer a Peak Power rating to provide for customers with pulsing loads. When
using a peak power capability customers must consider:
1) Peak duration rating: the maximum length of time the peak can be drawn for
2) Duty cycle: the frequency with which the peak can be drawn. (e.g. 10% duty cycle, 1 second on:9 seconds
off)
3) Average power value: datasheets will state the maximum average power acceptable with peak power PSUs.
If any of these elements are exceeded the supply may overheat, with performance and lifetime suffering as a
result.
Installation Advice
Conducted and radiated emissions compliance is a common application consideration. It is important to remem-
ber that even when using a properly filtered PSU, an application may still not achieve compliance if it is not de-
signed to minimise emissions. That being said, there are a number of things that can be done to optimise EMC
performance either as best practice, or if you are struggling for compliance:
1) Connect all marked EMI ground points to earth. Often these are combined with the safety earth point (in class
I installations), but on some power supplies there may be additional earth tags or mounting points.
2) Minimise the length of input/output wiring where possible and try to maintain max distance of the conductors
from the PSU, to prevent noise pick up. Avoid bundling input and output cables together. A common component
to avoid placing wiring near is the PFC inductor in power factor corrected power supplies.
3) Apply additional filtering before the PSU input (ensure consideration of which frequencies there are issues
with before selecting a filter).
4) When using an open frame PSU, mount the supply on a metal plate and connect EMI mounting points.
5) In multi circuit systems, decouple the circuits locally.
6) Ferrites added between the PSU and system input connector and/or the DC output cables can help in reduc-
ing radiated noise issues in systems. If seen, issues are commonly in the 30-150MHz area.
For more detailed assistance, if you still have any concerns with compliance, please get in contact with our Engi-
neering department who are on hand to assist with any queries.
EMC
On installation customers must consider the required creepage and clearance distances between the PSU and
the end-equipment enclosure. These distances vary depending on the installation class and safety standard
requirements.
For Class I installations there should be 3-4mm between any part of the PSU and any earthed metal part of the
enclosure. 3mm is acceptable for IT applications, 4mm required for medical applications. In Class I installations
the PSU earth point must be connected to system safety ground.
For Class II installations distances may need to be increased if being installed into a surrounding metal enclo-
sure.
Ensure consideration of components on the underside of the PCB or low lying spills when measuring clearance
distances between the PSU and the end-equipment. Also top surface especially in tight enclosures such as 1U
boxes. An insulation material can be used between PSU and metal if smaller gap required.
FiDUS recommends installing the PSU on 6mm stand offs typically, but check the distances.
Safety
ULP275 Series WLP350 Series VPS1000 Series MVPS600 Series
24/10/19
This manual suits for next models
6
Table of contents
Other FiDUS Power Distribution Unit manuals
Popular Power Distribution Unit manuals by other brands
Middle Atlantic Products
Middle Atlantic Products MPR Series instruction sheet

Omicron
Omicron CMC 850 user manual
BASE Electronics
BASE Electronics LV-8S Installation and operation manual
Konig
Konig CMP-POWG21 manual
LIGHTNING PROTECTION INTERNATIONAL PTY LTD
LIGHTNING PROTECTION INTERNATIONAL PTY LTD Stormaster ESE installation manual
Vertiv
Vertiv Geist user manual
