FINIS SwiMP3 User manual

www.megaoptima.ru
SwiMP3 2G
Instruction Manual
™

Table of Contents
About the SwiMP3™ 2G: 3
Wearing the Device; La out
Basic Functions: 6
ON/OFF; Switch Songs; Switch Pla lists;
Volume Control
A itional Functions & Features: 8
Pla /Pause; Shuffle; Low Batter Indicator
Loa ing Songs:
Manual Drag-and-Drop 10
Windows Media Pla er® 12
iTunes® (Windows) 14
iTunes® (MAC) 17
Importing from a CD 20
Charging 22
Safe Removal 24
Care, Tips & Up ates: 25
Troubleshooting: 26
Resetting; FAQ’s
Formatting 28
Customer Notes 30
Technical Support: 31
Customer Care; Safet ;
S stem Requirements
2

About the SwiMP3™ 2G
The SwiMP3™ 2G underwater MP3 pla er
provides an incredible audio experience
through its innovative Bone Con uction sound
transfer technolog . When the device is placed
on an bones of the skull (i.e. the cheek bones
or temple) it vibrates the audio directl into the
inner ear, b passing the ear canal. Thus
swimmers are able to clearl hear high-fidelit
music underwater where no air is present!
Wearing the Device
Place the SwiMP3™ 2G under our goggle
strap so the unit is flush against our
head.
It is recommended that the Bone
Conduction speakers be placed in front of
the ear, resting against our temple bone,
for ideal clarit .
As soon as ou insert ear plugs or
submerge our head underwater, ou will
be surrounded b high-fidelit music!
Tip: Be careful not to bend or break the goggle
clip and do no place the Bone Conduction
speakers over our ears.
3
www.megaoptima.ru
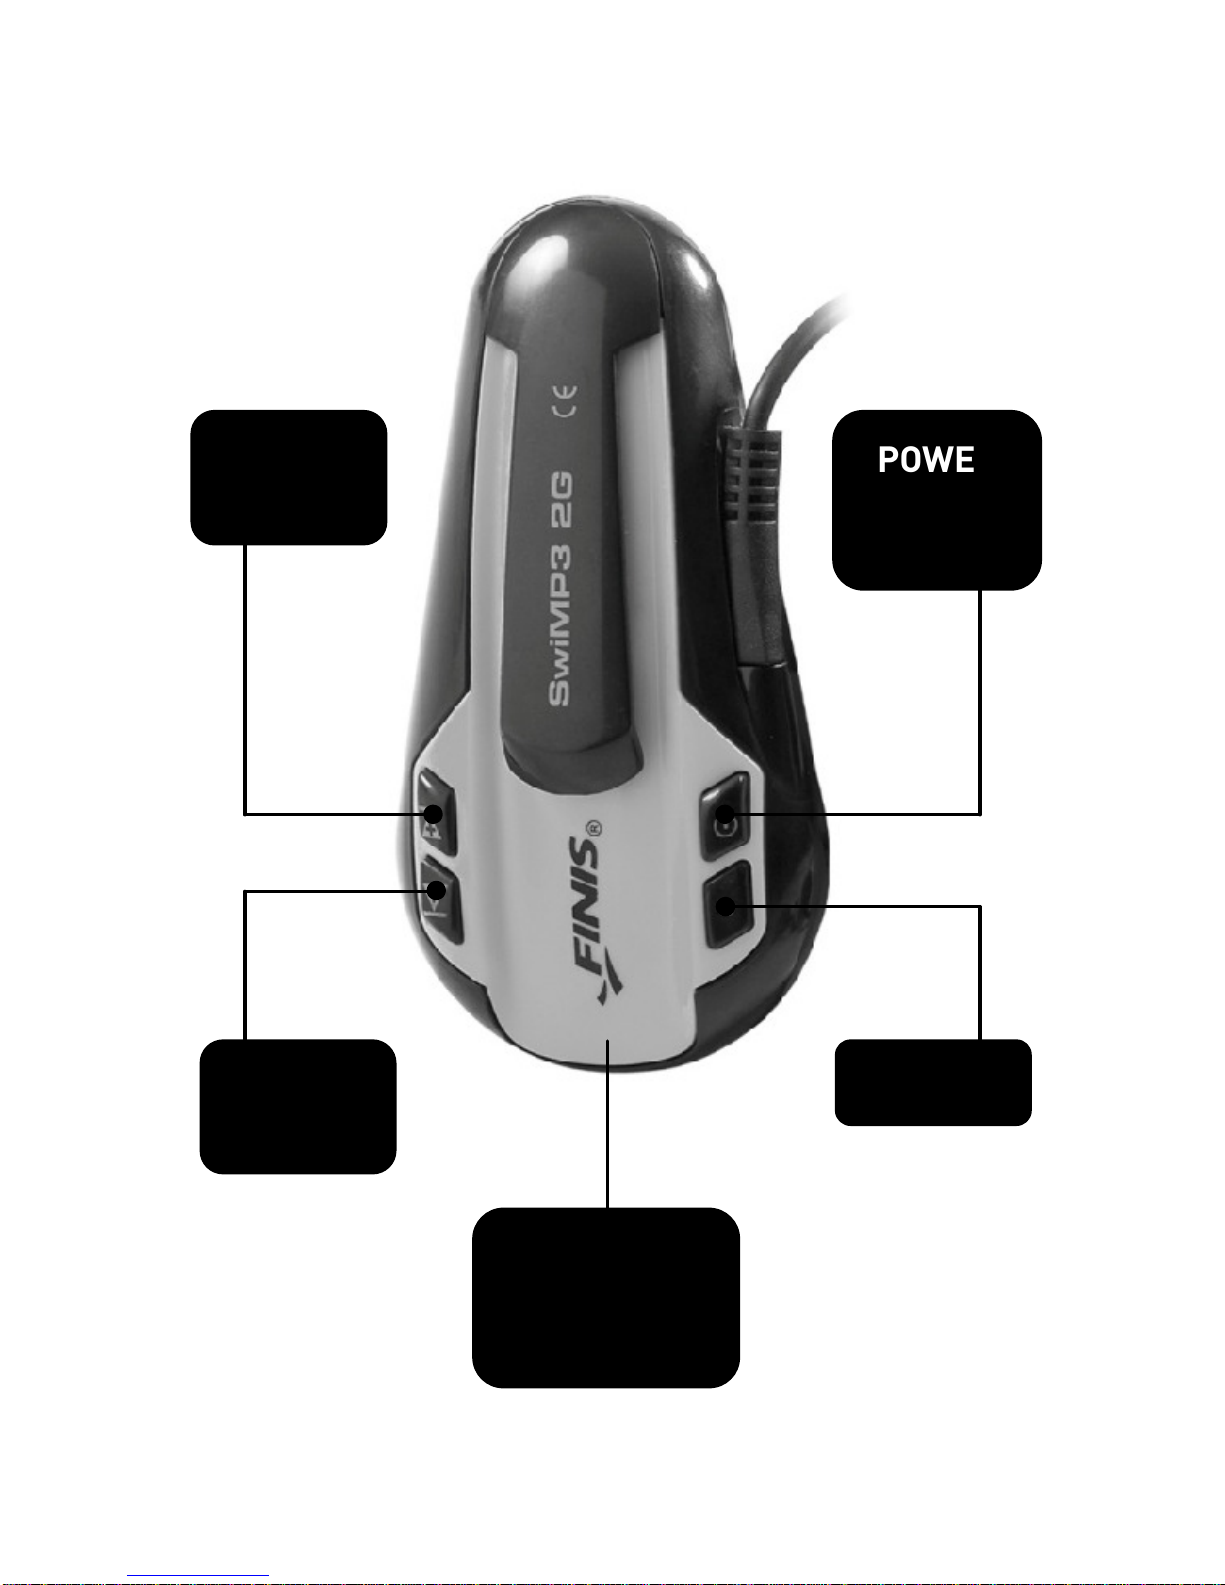
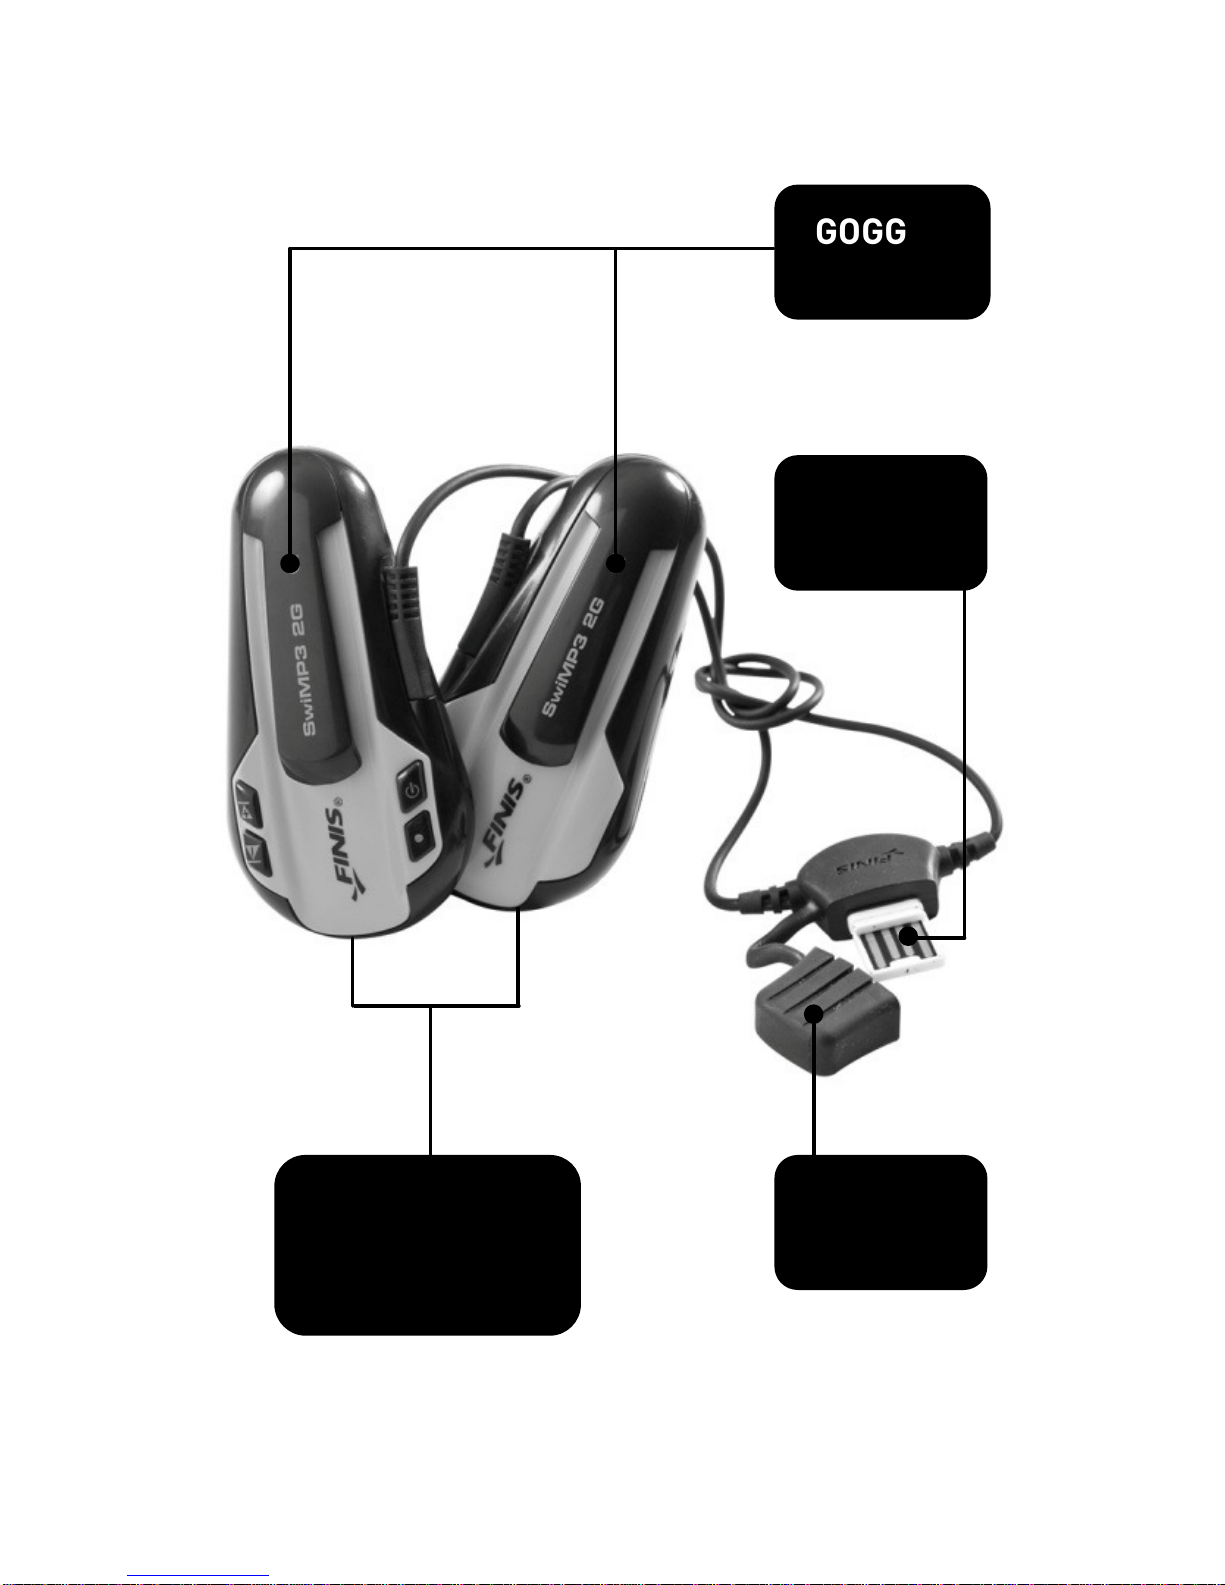
Device Layout
4
POWER
PAUSE
& PLAY
NEXT /
VOL (+)
PREV /
VOL (–)
RESET
GREEN
INDICATOR
LIGHT
www.megaoptima.ru
5
GOGGLE
CLIPS
USB
PLUG
BONE
CONDUCTION
SPEAKERS
USB
CAP
www.megaoptima.ru

Basic Functions
To turn ON the SwiMP3™ 2G:
1) Press and hold the POWER button for 3
seconds
2) The green indicator light will sta solid and
once off, the audio will begin to pla
3) While ON the green indicator light will
blink ever 7 seconds
To turn OFF the SwiMP3™ 2G:
1) Press and hold the POWER button for 3
seconds
2) The green indicator light will blink quickl
and the audio will turn off
To Switch Between Song Tracks:
1) When the unit is ON, press and release the
NEXT or PREV buttons
2) If ou are at the last song in a pla list and
ou press the NEXT button, the first song
in the next loaded pla list will begin to pla
3) Similarl if ou are at the first song in a
pla list and ou press the PREV button,
the last song in the previous pla list will
begin to pla
6

To Switch Between Song Playlists:
1) When the unit is ON, press both the NEXT
and PREV buttons at the same time
2) The next pla list folder will begin pla ing,
starting with the first song in that pla list
To A just the Volume:
1) When the unit is ON, press and hold the
VOL (+) to steadil increase the volume
2) Or press and hold the VOL (-) to steadil
decrease the volume
3) When the desired volume level is reached,
release the button
7

A itional Functions & Features
PLAY an PAUSE:
1) To pause the song during pla back, press
and release the PLAY/PAUSE button. The
green indicator light will then start
flashing ever 3 seconds indicating that
the unit is paused.
2) To resume pla back, press and release
the PLAY/PAUSE button again, and
pla back will continue where ou left off
3) If the pla er is paused for longer than 5
minutes, it will automaticall turn OFF to
save batter power
Shuffle Function:
1) To turn the Shuffle Function ON, press and
release the PLAY and NEXT buttons at the
same time
2) The songs within the current pla list
folder will pla at random
3)
To switch pla lists, press both the NEXT
and PREV buttons at the same time. The
songs in this next pla list will also pla in
random order.
4) The green indicator light will blink once
ever 5 seconds during pla back while the
Shuffle Function is ON
8

5) To turn the Shuffle Function OFF, press
and release the PLAY and PREV buttons at
the same time. The green indicator light
will blink once ever 7 seconds while
pla ing in normal mode.
Low Battery In icator:
While the unit is ON, the green indicator
light will flash once ever 1.5 seconds
when the unit has a low batter
For protection, the unit will turn off
automaticall if the batter level gets too
low
9

Loa ing Song Files:
Manual Drag-an -Drop
The easiest wa to load songs on our pla er is
to drag-and-drop MP3 or WMA music files
directl from our music librar onto the
SwiMP3™ 2G, just like a common USB thumb
drive:
1) As soon as ou plug our SwiMP3™ 2G into
our computer’s USB port, the computer
should automaticall recognize the pla er
as a new disk drive
a.
PC Users
: The new Removable Disk
Drive will appear in the “M
Computer” menu
b.
MAC Users
: The new Removable
Disk Drive will appear on our
desktop as “NO NAME”
2) Find our music librar on our computer
that includes all our desired MP3 or WMA
song formats
3) Drag the desired songs or folders of songs
onto the SwiMP3™ 2G Disk Drive
4) As soon as ou drop the desired songs
onto the new Disk Drive, the transfer will
automaticall start and a status bar will
appear showing the current progress
5) While transferring, the green indicator
light on the SwiMP3™ 2G will flash rapidl
10
Other manuals for SwiMP3
3
This manual suits for next models
1
Table of contents
Other FINIS MP3 Player manuals

FINIS
FINIS Neptune User manual

FINIS
FINIS SwiMP3 User manual

FINIS
FINIS SwiMp3 .1G User manual

FINIS
FINIS Neptune User manual

FINIS
FINIS SwiMP3 2G User manual

FINIS
FINIS SwiMP3 User manual

FINIS
FINIS Neptune User manual

FINIS
FINIS XtreaMP3 Operator's manual

FINIS
FINIS SwiMP3 User manual

FINIS
FINIS Duo Manual


