Finwing VTBIRD VTOL User manual
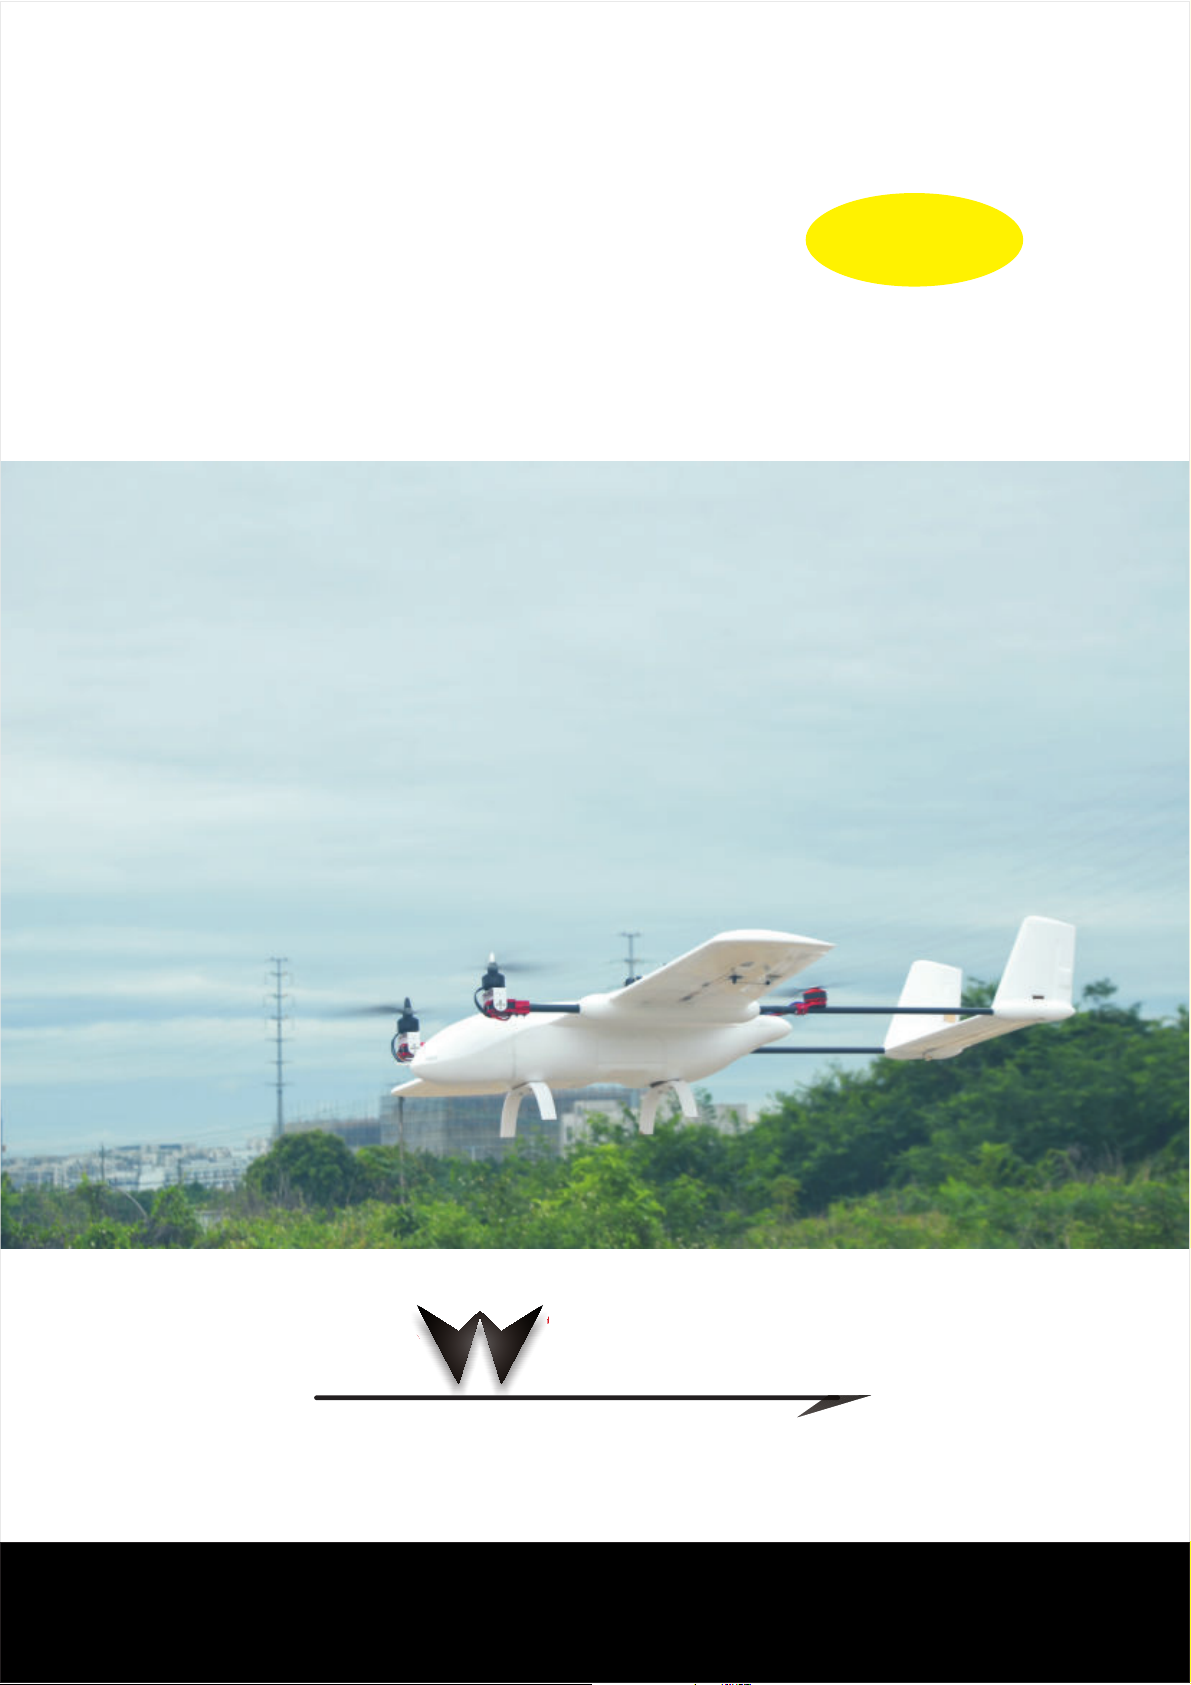
VTOL Version
VTBIRD
Building instructions of 4 1 and Tilt Rotor+
V2
FINWING TECHNOLOGY
PATENT OWNER FINWINGHOBBY:
Fin inghobby
Finwinghobby
WWW FINWINGHOBBY COM. .
User Manual
Manual updating version

. .
is an introductions to ing th
www
e
formation
This manual user on how to build plane.
Please visit the finwinghobby com official website for more in .
Please read through the manual before installation and flying
Warning:
1 This model airplane is not a toy don t recommended for anyone under 18 years old. , ' ,
2. Be cautious and prepared while flying this plane as a range of issues could lead to a crash
including the environment/weather, speed, pilot error, improper building/testing,
interference or other component failures
3. Flying field: Choose an adequate flying space at least 100 meters long/wide and in an unpopulated
and non-built up area for safe flying. This includes avoiding flying over cities or other populated areas.
4. Please don't fly this model airplane in bad weather including rainy and/or windy environments.
5. Remember to unplug your flight/video battery when not in use to avoid any interference to others
who might be on similar channels.
6. Please remember switch on the transmitter first before connecting the battery, and disconnect
the battery first before switching off your transmitter.
7. Keep away from the propeller when the Airplane is powered as it can be dangerous and could
lead to injury. Keep the powered plane away from children at all times to avoid any accidents or injury.
.
Welcome Join Facebook Groups
Sharing discussing building and,fly
Join Facebook Groups Finwinghobby FPV Aircrat www finwinghobby com< > . .
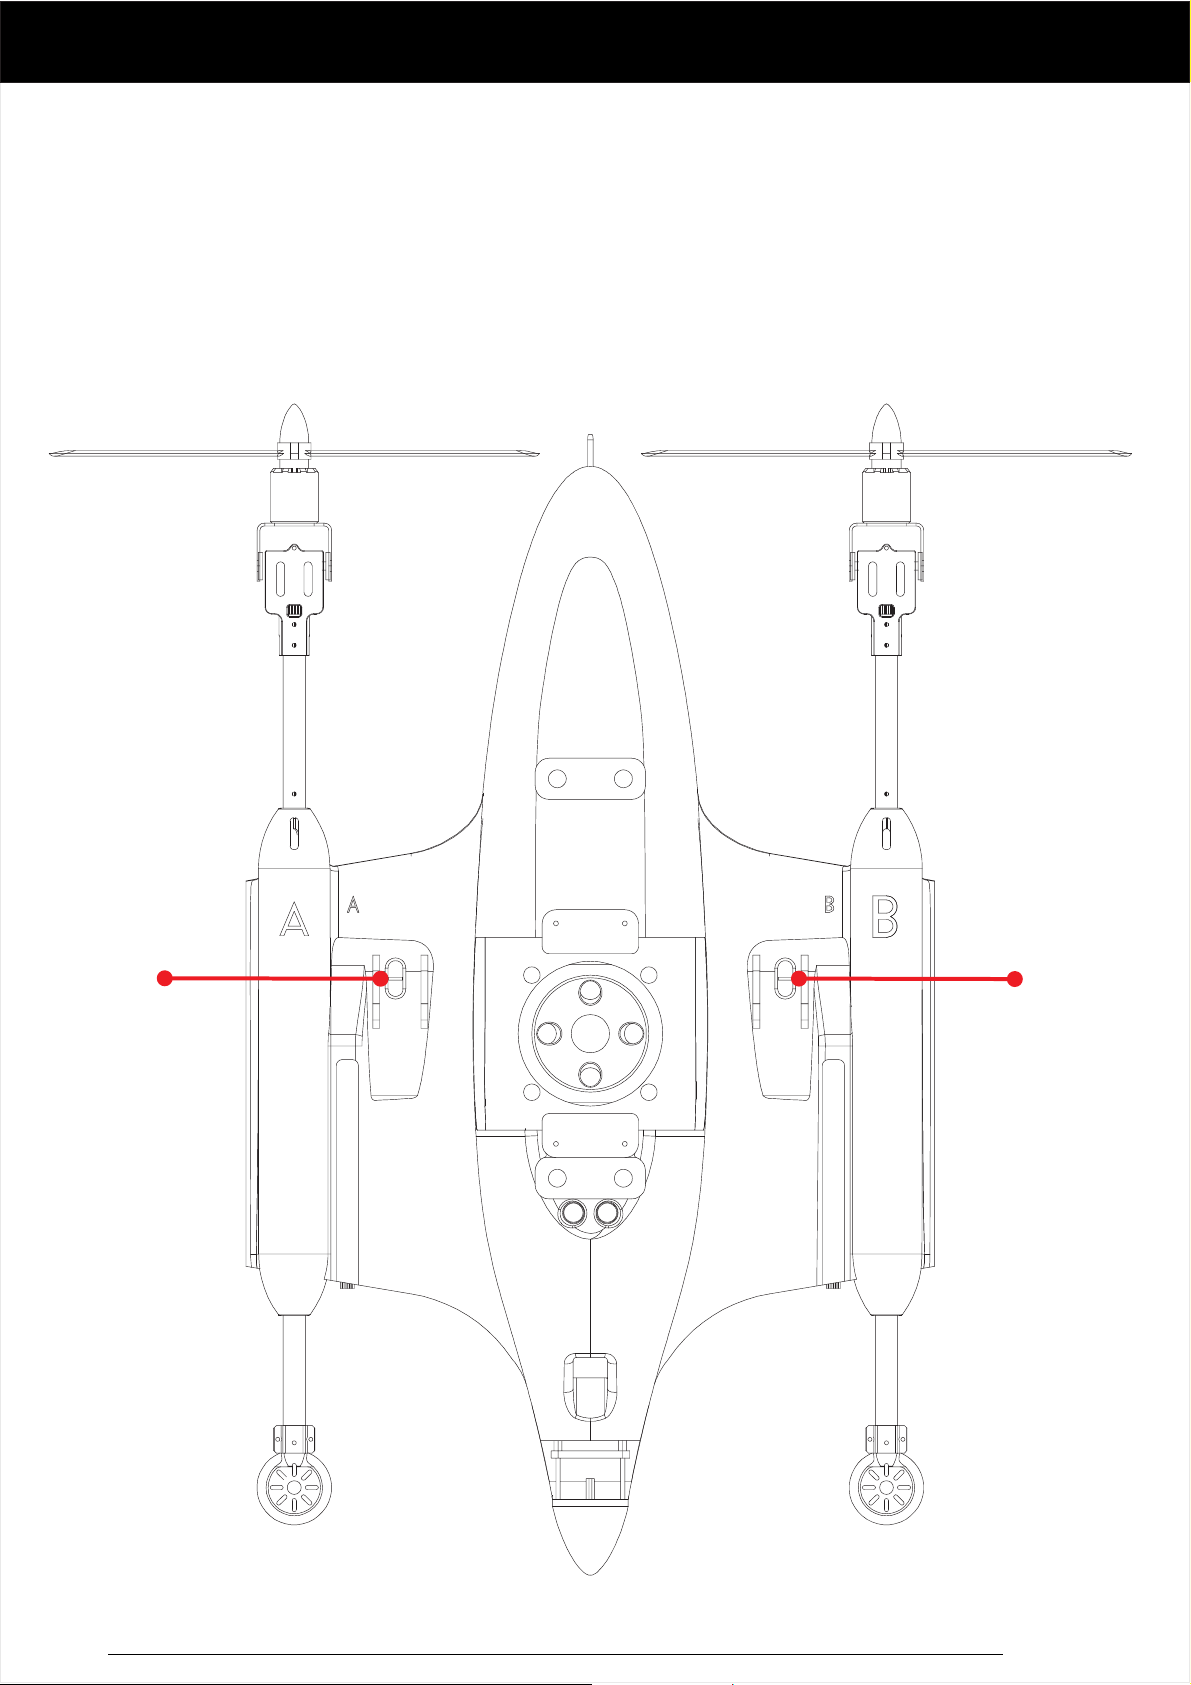
VTBIRD Center of Gravity
CG.
CG.
* . + ,
, -
CG s exactly the same location no matter 4 1
Tilt Rotor Fixed wing Dual motors and Pusher
i
*
,
Front motors should be Tilt Down forward
if balance CG for Tilt Rotor Version

Tilt Servo Wires Length need 750MM' : ,
,Customized Tilt Servo Wires is 750MM no n e e d e x t e n s i on wires
VTBIRD
VTOL Front Motor Wires 520MM 16AWG' :Length
VTOL Rear Motor Wires 360MM' : /16 18AWGLength AWG
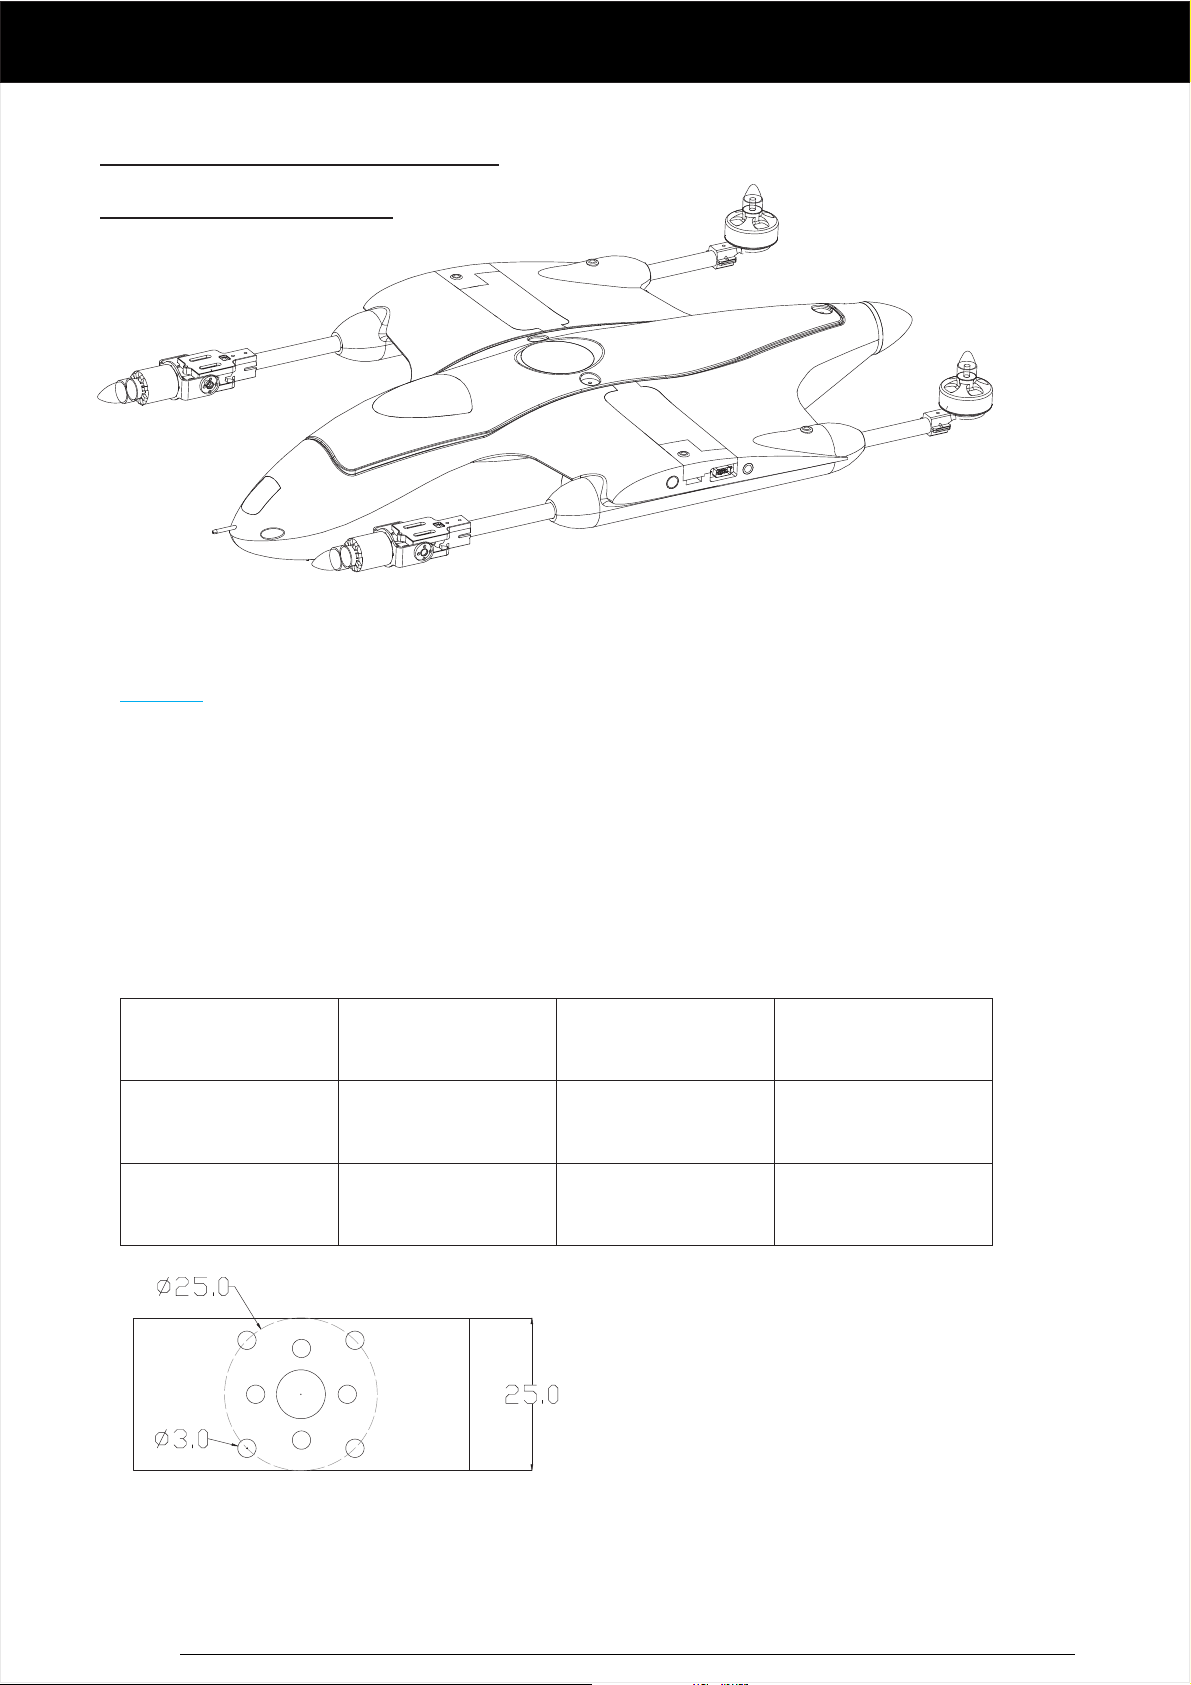
VTBIRD Tilt Rotor
Specifications
VTOL Front Propellers APC 14 8 5: * .
VTOL Rear Pr s Sunnyskyopeller :Eolo 1555
Motors Recommendations
Front*2
4 6 5 0kg. - .
Hole Distance should be 25MM
AUW
Rear*2
4010 4014. .4110
_KV400 KV450
5 0. -6kg U3515
_KV400 KV420
4014 4114 4112. .
_KV400 KV420
Motors
Testing listing
6A Thrust
1 1 1 2kg._.
* -
* - ( ) %- %
* - / ( ), . - /
Battery: 6S 16000mah 22000mah
VTOL Loiter Current around 24A 28A FYI Throttle 40 45
Recommend Cruising Speed 18 22m s not Limited Transition mini speed 16 m sm 18
Tilt Motor Arm
U3510
Kv420
Tilt Servo Size 0 15MM: * * (+/- . )40 40 20MM
6A Thrust
g. _ .1 2 1 3k
Front Motor Rear Motor
Front Motor
Rear Motor
VTOL ESC X Rotor 40A 4 2 6S- * -
Join Facebook Groups Finwinghobby FPV Aircrat www finwinghobby com< > . .
VTOL Tilt Rotor Specifications
Join Facebook Groups Finwinghobby FPV Aircrat www finwinghobby com< > . .
VTOL +4 1 Specifications
VTOL Front motor wires 430MM 16: /( )including Bullet 18AWG
VTOL Front motor wires 280MM 16 18AWG
VTOL ESC 3 5MM Bullet 4 1 pusher motor 4 5MM
: /
. , + .
( )including Bullet
VTOL Propellers APC 1: /1350MR 245
VTOL*4
4 6 5 0kg. - . 3520Kv560
Motor Outer Diameter
Motor Diamter 42 5MM.
V4014 X S
KV480 KV 0
.
_
411 2
50
4 1 why don t recommend 5 kg
4 1 Props Size limited to 1245 because of the pusher space required
only limited to 1245 so not power enough to fly heavier
+ ' . + ?
+ /
/ ,
5
1350
13 50
VTBIRD 4 1 Specifications+
VTOL ESC X Rotor 40A 2 6S- * -4
Pusher EoLo13 7 APC 13 EOLO 14 8: * / * / *Propellers 8
Motors Recommendations
AUW
Pusher Motor
* - ( ) %
* - / ( ), - - /
VTOL Loiter Current around 30A FYI Throttle 50
Recommend Cruising Speed 18 22m s not Limited Transaction mini speed 16 m s
35 A
18
4 6 5 kg. - .5 3520 Kv 560
Motor Outer Diameter
/ , -352 5 52 0
Motor Diamter 42 5MM.
X S 4114
KV480 KV 0
411 2
50_
Propeller
VTOL 1245
VTOL 1350
Pusher 13x7
Pusher 14x8
!"#$%
1!"&%
2
Newly upgraded
Props 1245
Props 1350
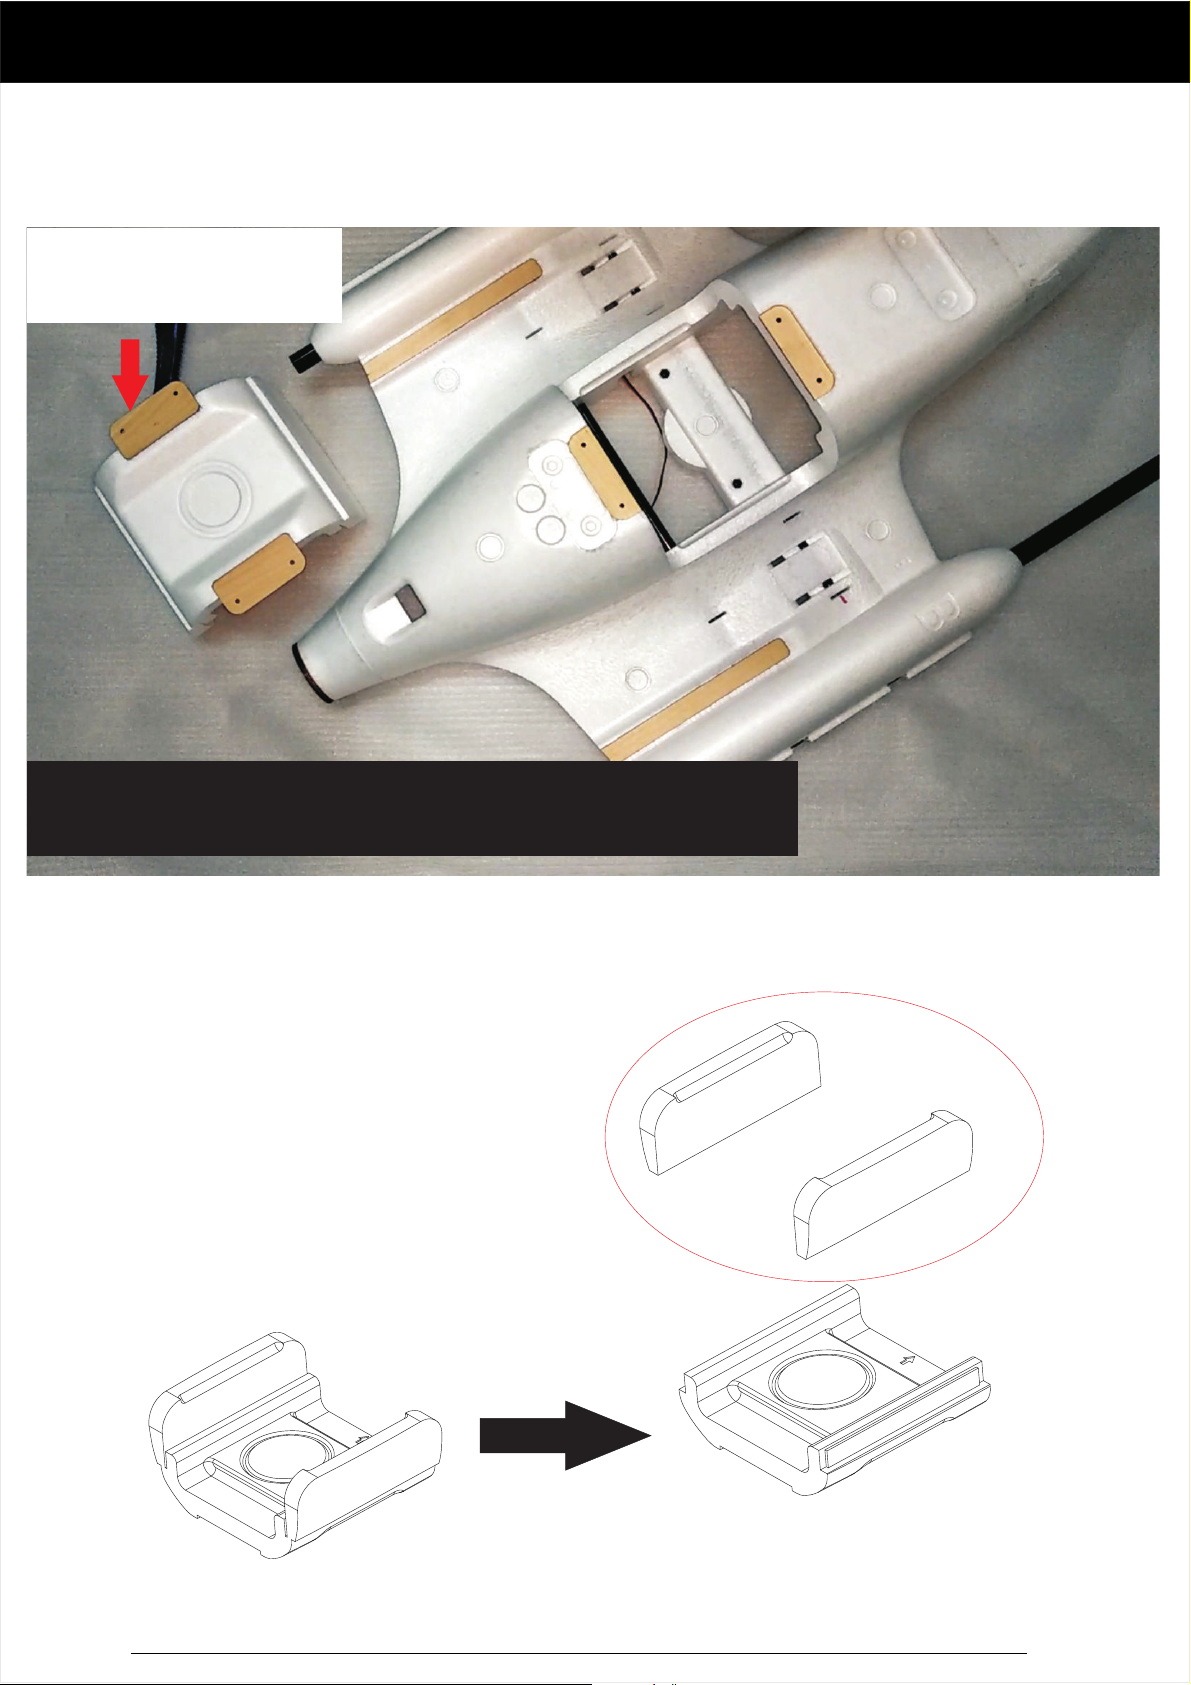
VTBIRD Camera Module
The whole plane was almost all pre glued assembled
Just install the camera module per your requirements
- &
Top parts glued to fuselage
Pre glued in the factory( - )
Removable bottom Module
Glue plywood
if keep removable
Join Facebook Groups Finwinghobby FPV Aircrat www finwinghobby com< > . .
You can glued the whole module to fuselage
or keep it removable DIY your own module
/

VTBIRD Wings
Install the metal hinge it s only 2 g but reliable( ' . )0
Servo Horn please refer to next page
Front Screw 2 6 10
Rear 2 8
( )
. *
*
Solder wires directly to DB 9 Pin
Join Facebook Groups Finwinghobby FPV Aircrat www finwinghobby com< > . .

Servo Horn and tail connection
This is newly upgraded Servo horn
Right one used
Thread locker glue
don't screw off
Adjust Left screw
secure push rod
Front 2 6 8
Rear
. *
2 0 6. *
The right Arm
There is a built in plug fly connection design
all was pre installed in the factory after more than Double quality inspections
Perhaps you would doubt by first impression because of feeling or previously
other factory s unsuccessful design but this one was proved to be good by
lots of testing and improved production technology
Anyway for anyone who don t trust there is a options as well
another arm is free you can use extension wires as traditionally did
- &
-
' ,
.
' ,
,
Concerned about Elevator onnectionC
Built in Connector-
Free to extension wires
Extension wires included
Join Facebook Groups Finwinghobby FPV Aircrat www finwinghobby com< > . .
The left Arm

Customized full steel Tilt Servo
4 8V 22kg cm 0 16s 60. . . / °
6 0V 25kg cm 0 15s 60. . . / °
1 Max 180 500 2500 Pulse width
you can adjust what angle you want by changing
Pulse Width PWM on the ground control station
. . , -
( )
°
6 0V 25kg cm 0 15s 60. . . / °
7 2V 27kg cm 0 14s 60. . . / °
2 Voltage recommend 5 5 6V. . -
Durable Steel gear
Aluminium centeral body
Aluminium Arm
3 Customized wires 750MM no need extra extention wires. ,
64g( )Without wires
VTBIRD Tilt Gears
* ,
( ' )
Tilt servo wire rquired 750MM if your own servo
Finwing Customized Tilt servo don t need extension wire anymore
need extension wire
Join Facebook Groups Finwinghobby FPV Aircrat www finwinghobby com< > . .
* . . . -
'
Voltage max 6 5V and recommended is 5 5V 6V is good
Don t use 7V or 5V
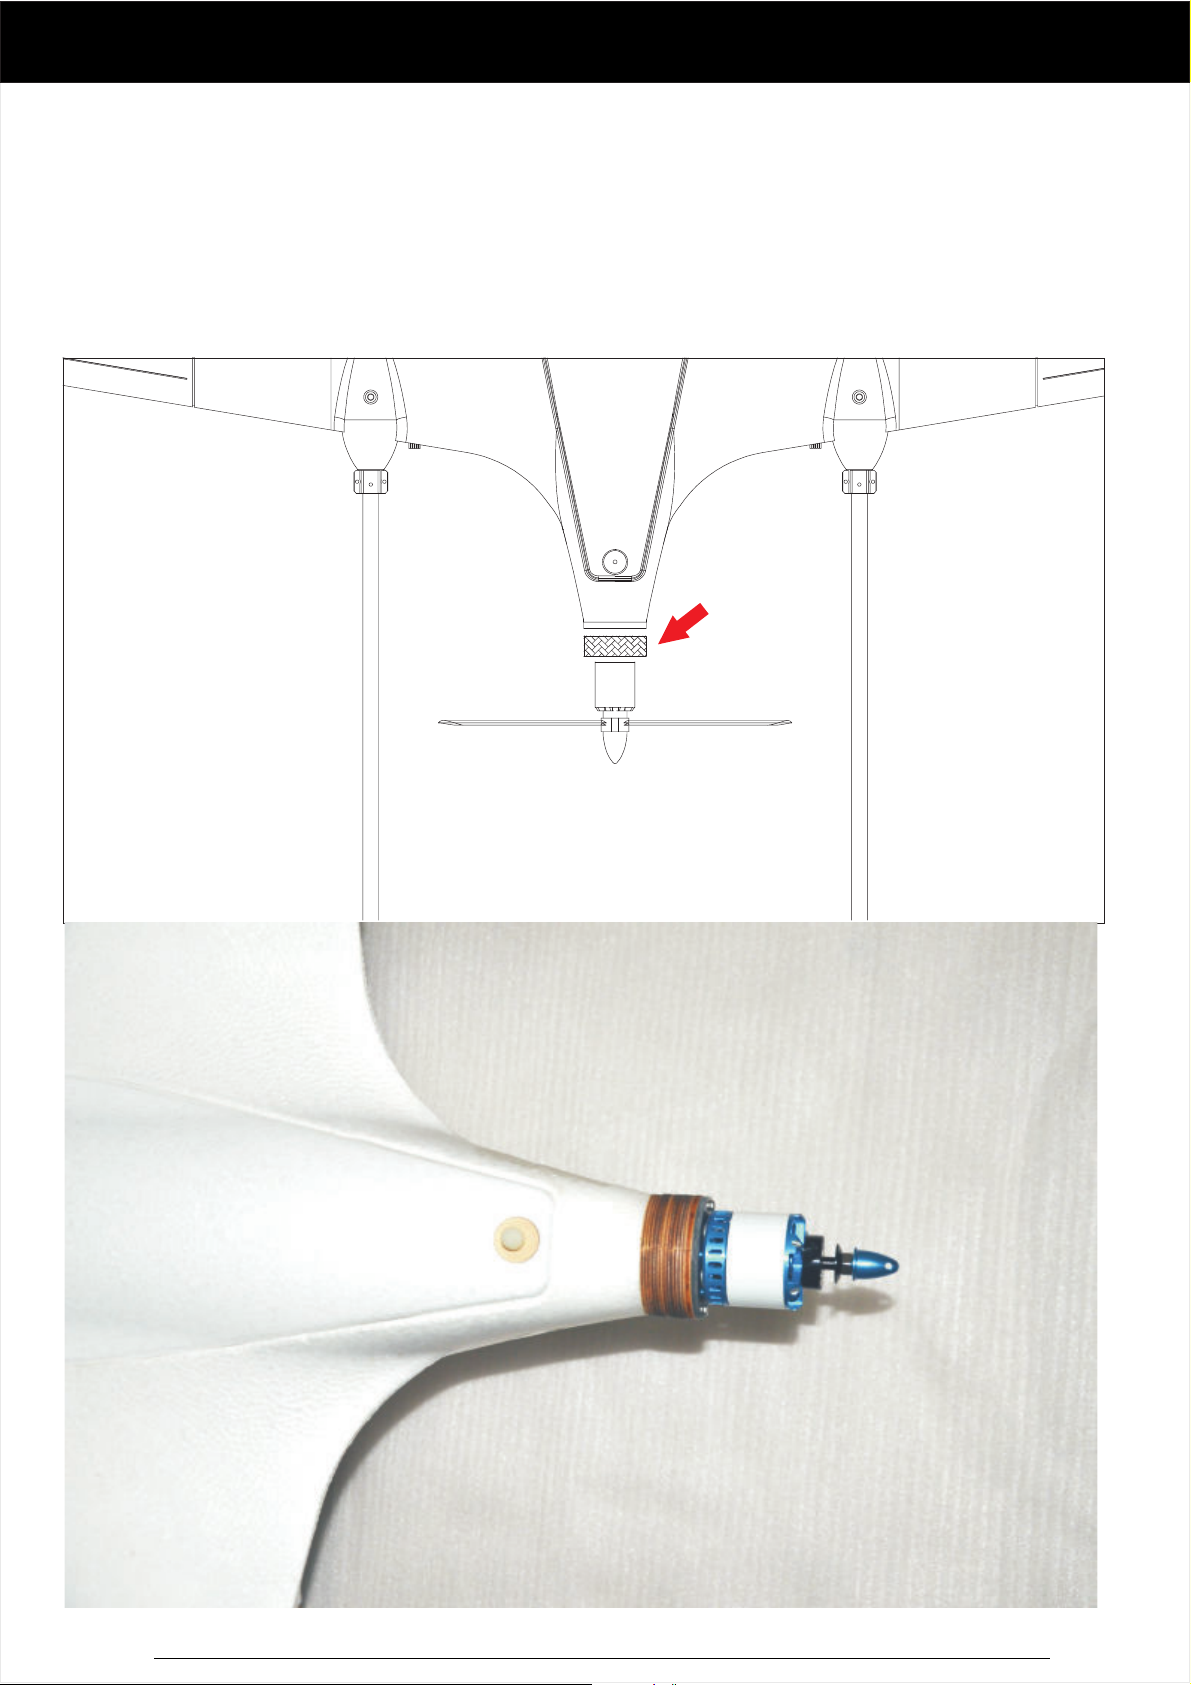
Must use foam glue spreading to the 3K carbon arm before install red pillar
let glue drying at least 12 hours prior to installing motors and servo
This is good to prevent it from loosing
Note:
EPO Glue


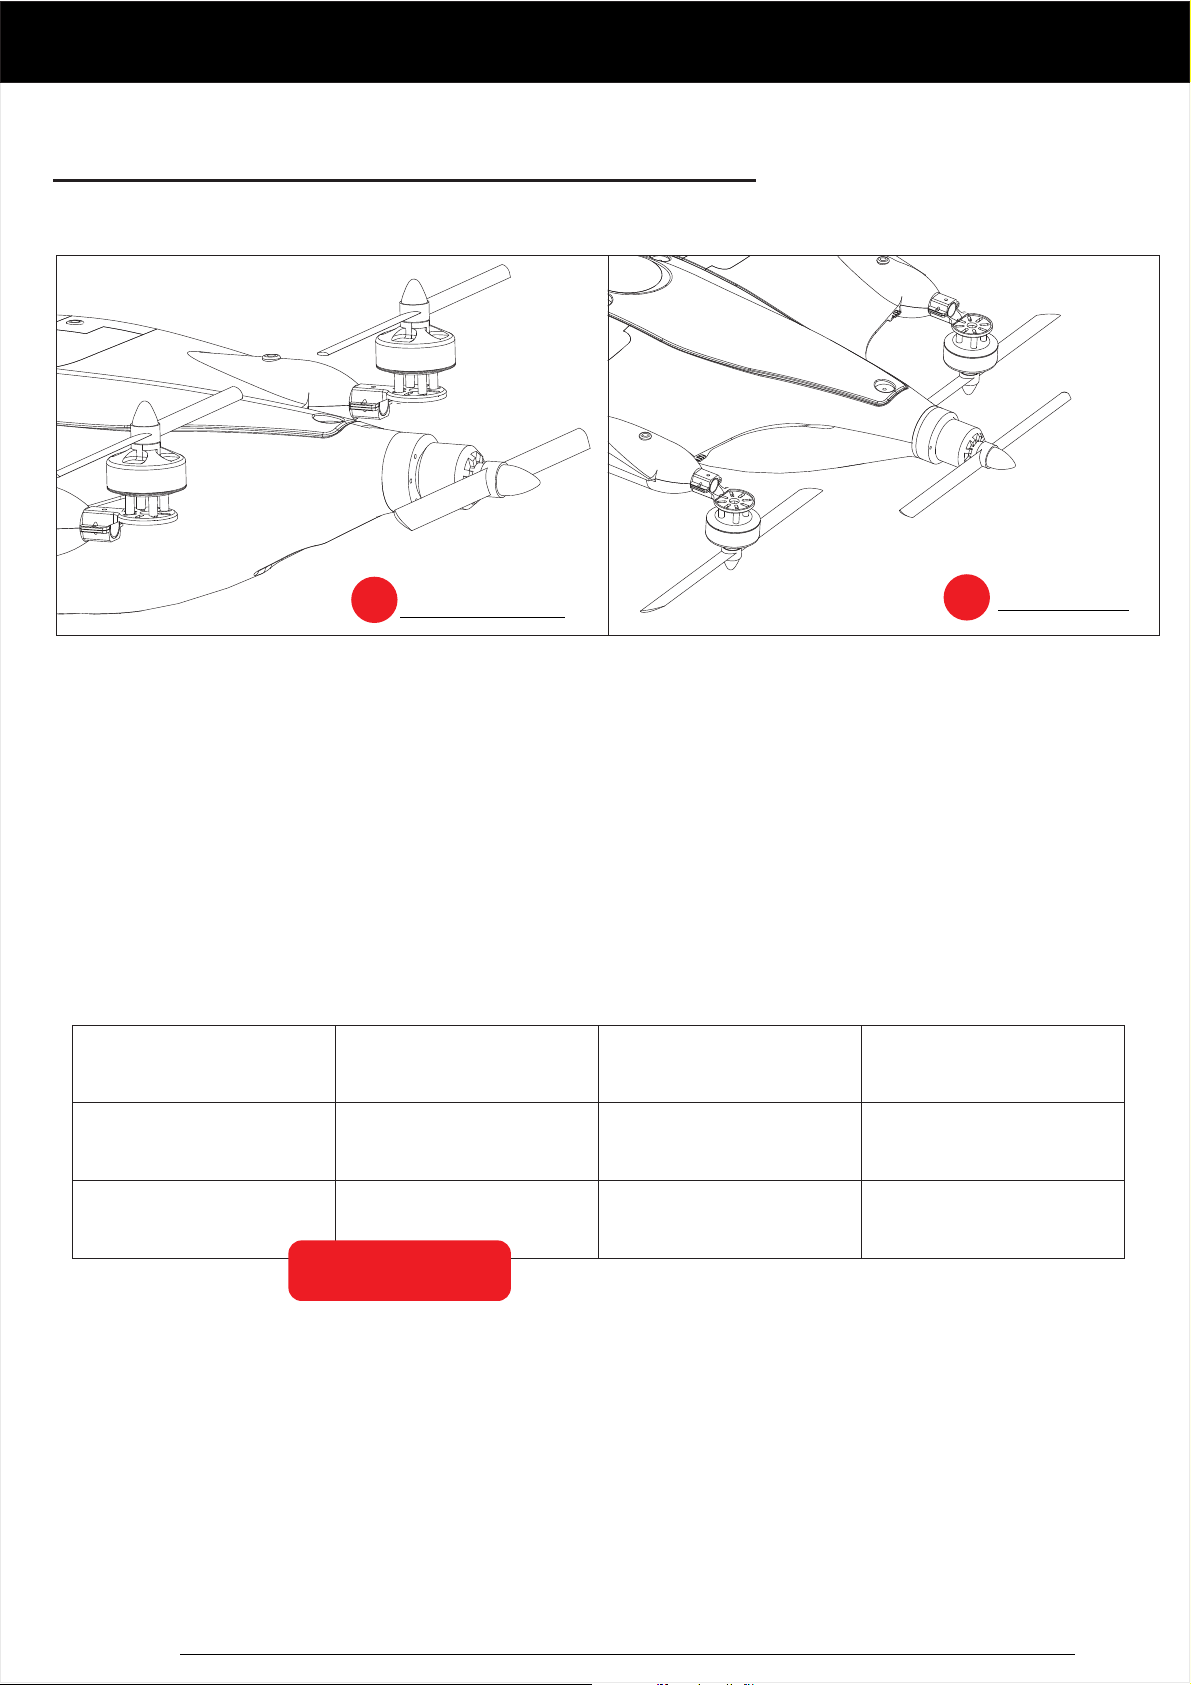
VTBIRD VTOL Motor Mount
It s exactly the same method to install 4 1 and Tilt rotor for this parts' +
Few foam glue is required to prevent it from loosing
drying at least 12 hours prior to installing motors
Inverted 4 1(+)
Fiber Glass motor mount
4 1+
The hole was designed for you to find the right position
* + .4 1 Rear motors inverted is good for Propeller Airflow
Tilt Rotor rear motors is unnecessary to be inverted
< : , )Note Motor inverted but Propeller no inverted character still on stop
Inverted 4 1( + )
Propeller Character
Join Facebook Groups Finwinghobby FPV Aircrat www finwinghobby com< > . .
EPO Glue
This is riginal 4 1 building
Please refer to the bottom page
if upgrading to 13 propellers
+
"
o

4 1+
Join Facebook Groups Finwinghobby FPV Aircrat www finwinghobby com< > . .
4pcs Metal shims between
Fibre glass and motor is required
VTBIRD VTOL Motor Mount
Beware of the hole position very important
do it exactly the drawing
( )
as
EPO Glue
This is riginal 4 1 building
Please refer to the bottom page
if upgrading to 13 propellers
+
"
o
Tilt Rotor
VTBIRD VTOL Motor Mount
Beware of the hole position very important
do it exactly as the drawing
( )Beware of the hole position very important
do it exactly as the drawing
( )
Join Facebook Groups Finwinghobby FPV Aircrat www finwinghobby com< > . .
EPO Glue

VTBIRD ESC
Parallel soldering together don t forget to mark 1 2 3 4, ' . . .
VTOL ESC for 4 1 and Tilt Rotor is the same+
Recommend 0mm 190mm-1 8
Join Facebook Groups Finwinghobby FPV Aircrat www finwinghobby com< > . .
Note2
recommend to make
thread wire like this
is good to anti
electronic magnetic
interference
:
-
Note1
ESC Power wires to be
as backward as possible
it s good to avoid
interferences to Compass
:
'

VTBIRD FC Board
Join Facebook Groups Finwinghobby FPV Aircrat www finwinghobby com< > . .
Pre designed Flight controller location-
*Assembly is the same except the rear motors are differently
*Better efficiency and more thrust after upgraded
* ,Original Desing is VTOL Propeller 1245 Tail Pusher Propellers 13 7*
1. ,
/ / )
' / / ( )
First step pusher motor has been moved backward 18MM
All order after 1 9 2020 including all those parts
Buyers order before 1 9 2020 can ask for free offer except shipping cost
4 1 Propellers Upgrading+
Join Facebook Groups Finwinghobby FPV Aircrat www finwinghobby com< > . .
* ,Upgrading To VTOL Propeller 1350 Tail Pusher Propellers 14 8*

This is good for Propeller Airflow
Motor up
1
Join Facebook Groups Finwinghobby FPV Aircrat www finwinghobby com< > . .
2. s
/ / )
' / / ( )
Second step Aluminum Pillar per motor
All order after 1 9 2020 including all those parts
Buyers order before 1 9 2020 can ask for free offer except shipping cost
ad d ed 4P C S
8PCS Pillars
4 1 Propellers Upgrading+

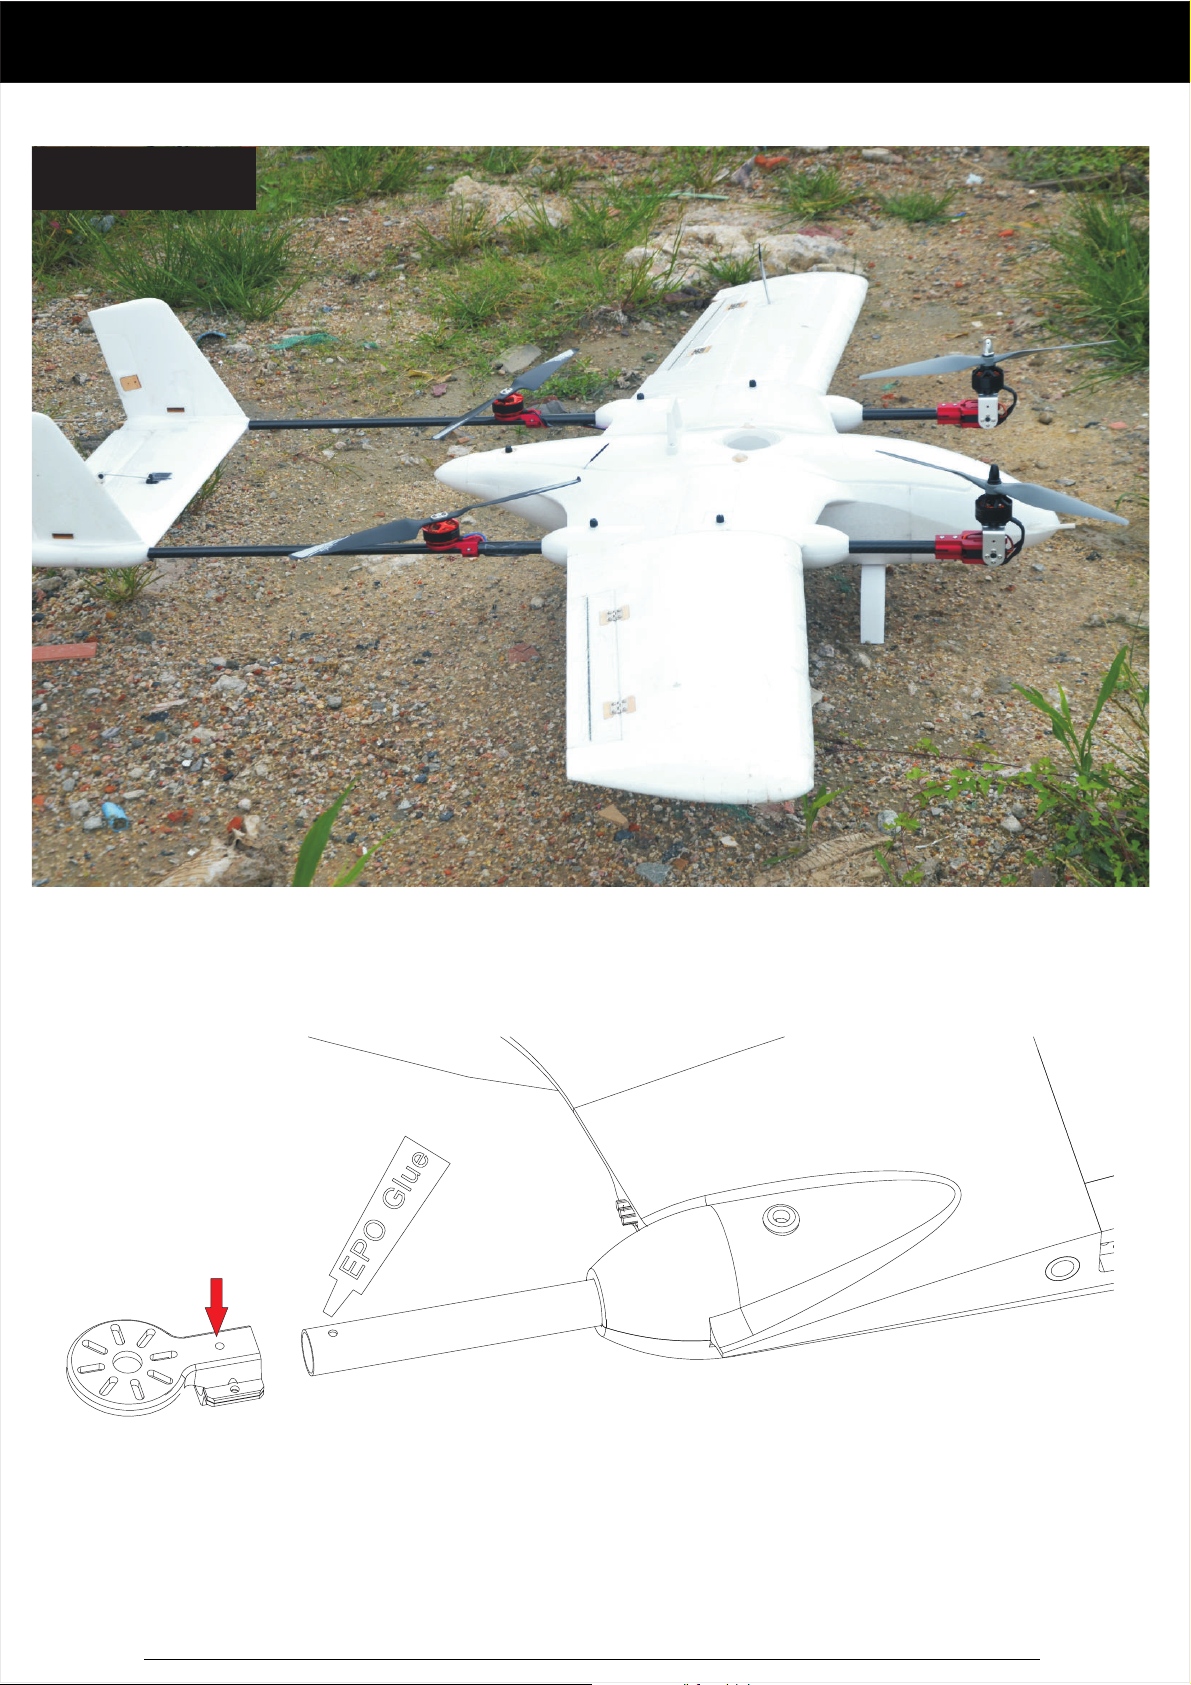
4 1Newly upgrading Testing plane+
Join Facebook Groups Finwinghobby FPV Aircrat www finwinghobby com< > . .
4 1 Propellers Upgrading+
Flight testing Successfully
Table of contents
Popular Aircraft manuals by other brands


AEROPRAKT
AEROPRAKT A22LS-POH-04 Pilot operating handbook

SKY PARAGLIDERS
SKY PARAGLIDERS APOLLO 2 Series user manual

Van's Aircraft
Van's Aircraft RV-7A Pilot operating handbook

EScale
EScale ElectraGlide Assembly instructions

Cessna
Cessna Hawk XP Pilot operating handbook

MAC PARA
MAC PARA MacJet user manual