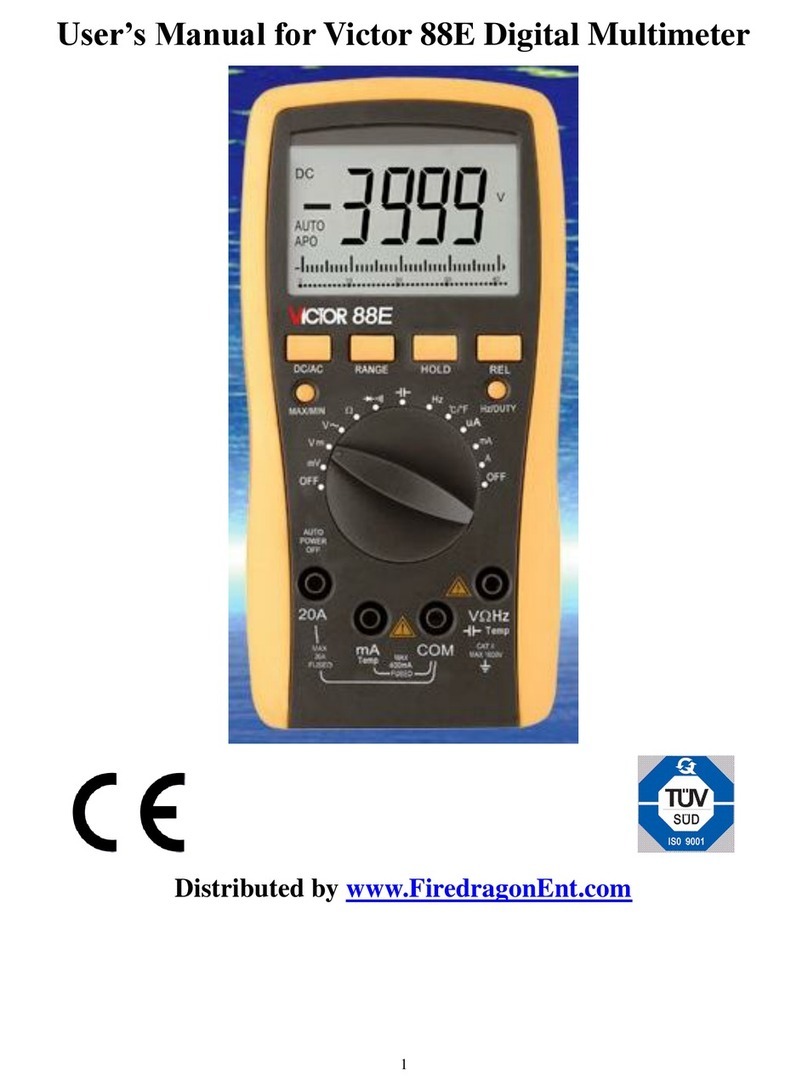
FIREDRAGON Victor 88E User manual

1
User‟s Manual
for Victor 88E Digital Multimeter©
Distributed and Copyrighted by www.FiredragonEnt.com

2

3
OVERVIEW
The Victor 88E digital multimeter is a battery-driven 3-3/4” digital
multimeter. It uses an LCD with a 1" display for easy reading. The 15
second backlight and overload protection make all types of operation more
convenient. The digital multimeter has the function of measuring DCV,
ACV, DCA, ACA, resistance, capacitance, frequency, temperature, duty
cycle and diodes and acts as a continuityperformance tester . The meter can
provide functions including analog bar and unit symbol display, data
holding (HOLD), relative value measuring (REL), maximal/minimal value
measuring (MAX/MIN), auto/manual range switching (RANGE), auto
power off and warning functions. It adopts a double integral A/D converter
as its core. It is an ideal tool for labs, factories, radio-technology and HVAC
field use.

4
SAFETY NOTES
The instrument is designed according to IEC1010 standard (safety
standard issued by International Electro Technical Committee).
Please read the following before operation.
1. Voltage is less than 36V and is a control and safety voltage.
When measuring voltage higher than DC 36V, AC 25V, check the
connection and insulation of test leads to avoid electric shock.
2. Do not input a limited voltage higher than DC 1000V or AC 750V
when measuring.
3. When measuring voltage higher than DC 60V, AC 40V, please be
careful.
4. Select correct function and range to avoid faulty operation.
5. Move the test leads away from the test points when switching the
meter's function.
6. Never input voltage when measuring current.
7. Never modify the meter‟s internal circuits. Modification results in
warranty termination.

5
8. Safety symbols:
= high voltage present;
= GND;
= dual insulation;
= refer to manual;
= Low battery
SPECIFICATIONS
General Features
Display: LCD; Max display: 3999 (3-3/4") digits automatic polarity and
unit symbol display.
Measurement method: double integral A/D conversion.
Sampling rate: approximately 3 times/sec.
Over-range display: „OL‟ displayed in the highest digit.
Low battery display
Working environment: 32°F to 104°F, relative humidity: less than 80%.
Power supply 2 pieces 1.5V battery „AAA‟ 7# battery
Dimension: 7.4" x 3.8" x 1.3" (length x width x height);
Weight: approximately 14 ounces (including battery)

6
The Victor 88E Standard Package comes complete with U36 Deluxe
Test leads, #C1 Clip Set, TP3 Temperature Probe, Duracell®batteries
and P25 hard case.
The Victor 88E-C comes with Standard Package, L36 Test Leads, FSG1
Flame Safeguard Adapter, GA1 and GA2 Gas Burner Thermocouple
Adapters, PT1 Probe Pins and one pair of J1 Jumpers.
The Victor 88E-C/A comes with 88E-C Package and 88CP9
AmpKlamp. (see Appendix A).

7
TECHNICAL FEATURES
Accuracy: ± (a% × reading data + digits), environment temperature at
(23°C±5), relative humidity less than 75%,
DC Voltage DCV
Range
Accuracy
Resolution
400mV
±(1.5%+6)
0.1mV
4V
±(0.5%+6)
1mV
40V
10mV
400V
100mV
1000V
±(1.0%+4)
1V
Input impedance 400mV Range 10MΩ, other range is 40MΩ.
Overload protection 1000V DC or 750V AC.
AC Voltage ACV
Range
Accuracy
Resolution
400mV
±(1.5%+6)
0.1mV
4V
±(0.8%+6)
1mV
40V
10mV
400V
100mV
750V
±(1.0%+6)
1V
Input impedance 400mV Range 10MΩ, other range is 40MΩ. Overload
protection 1000V DC or 750V AC. Frequency response: mV and 750V
range: 40 to 100Hz, other range: 40 to 400 Hz. Display: Sine wave
RMS (Average value response).

8
DC Current DCA
Range
Accuracy
Resolution
400uA
±(1.0%+5)
0.1μA
4000uA
1μA
40mA
10μA
400mA
100μA
20A
±(1.2%+10)
10mA
MAX measurement voltage drop: full range mA: 1.2VA :100mV Max
input current: 20A (within 15 seconds) Overload protection: 400mA/
250V and 20A/250V fast acting fuse.
AC Current ACA
Range
Accuracy
Resolution
400uA
±(1.5%+5)
0.1μA
4000uA
1μA
40mA
10μA
400mA
100μA
20A
±(2.0%+15d)
10mA
MAX measurement voltage drop: full range mA: 1.2V A: 100mV Max
input current: 20A (within 15 seconds) Overload protection: 400mA/
250V and 20A/250V fast acting fuse.
Frequency response 20A range: 40 100Hz,other range: 40 to 400Hz

9
Resistance Ω
Range
Accuracy
Resolution
400Ω
±(0.8%+5d)
0.1Ω
4kΩ
±(0.8%+4d)
1Ω
40kΩ
10Ω
400kΩ
100Ω
4MΩ
1kΩ
40MΩ
±(1.2%+5d)
10kΩ
Open circuit voltage: 400mV Overload protection: 250V DC or AC
peak value; NOTE: At a range of less than 400 Ω, short-circuit the test
leads to measure the wire resistance, and then subtract it from the real
measurement.
Capacitance C
Range
Accuracy
Resolution
40nF
±(2.5%+6d)
1pF
10pF
400nF
±(3.5%+8d)
100pF
4μF
1nF
40μF
10nF
400μF
±(5.0%+8d)
100nF
Overload protection: 250V DC or AC peak value;

10
Frequency F
Range
Accuracy
Resolution
100Hz
±(0.5%+4d)
0.1Hz
1000Hz
1Hz
10kHz
10Hz
100kHz
100Hz
1MHz
1kHz
30MHz
10kHz
Input sensitivity: 1.0V. Overload protection: 250V DC or AC peak
value;
Diode and continuity performance test
Range
Value displayed
Testing condition
Forward voltage drop of
diode
Forward DCA is approx.
0.5mA, the backward voltage
is approx 1.5V
Buzzer makes a long sound
while resistance is less than
(30±20)Ω
Open circuit voltage is approx.
0.5V
Over load protection: 250V DC or AC peak value;
CAUTION: DO NOT INPUT VOLTAGE WHEN OPERATING IN THIS RANGE!

11
Temperature
Range
Accuracy
Resolution
-40°C-1000°C
-0°C ±(1.0%+4)
0°C - 400°C ±(1.0%+4)
+400C ±(1.5%+15)
1°C
0°F-1832°F
-750°F ±(0.8%+5)
+750°F ±(1.5%+15)
1°F
Sensor: TP01 (K type thermocouple)
CAUTION: DO NOT INPUT VOLTAGE WHEN OPERATING IN THIS RANGE!
FIGURE 1

12
OPERATION
Meter Layout, see Figure 1
1. LCD: displays the measuring value and unit.
2. Function keys:
2-1. SELECT key: DC /AC mode, temperature C/F, Diode /
Continuity performance switch.
2-2. RANGE key: select auto range or manual range mode. Auto
range is the normal mode, it will display AUTO symbol. Press it to
change to manual range. Press it more than 2 seconds, it will return
to auto range mode.
2-3. HOLD key: press it, the presently measured value is held on
LCD and HOLD symbol displays. Press it again, HOLD symbol
disappears, and the meter exits the holding mode.
2-4. REL key: press it, reading clears and goes to relative value
measurement mode. REL symbol displays, press it again, REL
symbol disappears, and the meter exits the relative mode.
2-5. MAX/MIN key: press it, meter goes to MAX mode, it will
hold the max value of measured reading. Press it again, goes to
MIN mode, it will hold the minimum value of measurement. No

13
auto power off and analog bar display in this mode. Press it more
than 2 seconds, it exits MAX/MIN mode.
2-6. Hz/DUTY key: When measuring AC Voltage (Current), press
it, meter switches to Frequency/duty cycle/Voltage (Current). When
measuring the Frequency, it will switch frequency/duty cycle
1~99%.
3. Selector Knob: Selects measuring function and range
4. + TERMINAL: Temperature and VΩHz ; Voltage, Resistance,
Frequency, Capacitor and Temperature terminal. -TERMINAL: For
Temperature Probe
5. TERMINAL: Temperature and VΩHz ; Voltage, Resistance,
Frequency, Capacitor and Temperature (+) terminal.
6. TERMINAL, COM
7. TERMINAL: Less than 400mA and Temperature (-) terminal.
8. TERMINAL: 20A current

14
DCV Measurements
1. Insert the black test lead into the “COM” terminal and the red one to
“V/Ω/Hz” terminal.
2. Turn the selector knob to range;
3. Auto range is the normal mode, it will display AUTO symbol. Press
the RANGE key to change to the manual range mode, 400mV, 4V,
40V, 400V, 1000V range is selective;
4. Connect the leads in parallel across the electric circuit under test;
LCD displays polarity and voltage under test connected by the red test
lead.
Note:
1. Users should first set the select knob to the correct range, if users
have no idea about the range amount to be tested then select the AUTO
range for the displaying value. If LCD displays OL, it means meter is
over the maximum value of this range, select a higher range if in
manual mode.
2. Never input a voltage over 1000Vdc.
3. Be careful while measuring a high voltage. DO NOT touch the high
voltage circuit.

15
ACV Measurements
1. .Insert the black test lead into the COM terminal and the red one into
the V/Ω/Hz terminal.
2. Turn the selector knob to range.
3. Auto range is the original mode, it will display AUTO symbol. Press
the RANGE key to change to the manual range mode, 400mV, 4V,
40V, 400V, 750V range is selective.
Note: When measuring ACV under auto range mode, pressing the
RANGE key will display AC mV range.
4. Connect the leads in parallel across the electric circuit under test,
LCD displays voltage by the test lead.
Note:
1. Users should first set the selector knob to the highest range if in
manual mode, if users have no idea about the range of voltage under
test, then select the proper range based on displaying value. If LCD
displays OL, it means meter is over the maximum value of this range,
select a higher range.
2.Never input a voltage over 750Vac.
3. Be careful while measuring a high voltage. DO NOT touch the high
voltage circuit.

16
DCA Measurements
1. Insert the black test lead into the COM terminal and the red one into
the mA terminal (the Max. 400mA) or into the 20A terminal
(Max.20A). When measuring μA DC use the FSG1 adapter between the
meter leads and the control.
2. Use the selector knob and set to the proper DCA range, press the
DC/AC key to select the measurement mode, and then connect the leads
in series into the electric circuit under test. LCD displays current under
test.
Note:
Users should first set the selector knob to the highest range, if users
have no idea about the range of current under test then select the proper
range based on displaying value.
If the LCD displays OL, it means the current is over range. Now you
need to push the RANGE button to obtain a higher range.
Maximum input current is 400mA or 20A subject to the terminal the red
test lead is inserted into, too large a current will damage the fuse and
meter.

17
ACA Measurements
1. Insert the black test lead into the COM terminal and the red one into
the mA terminal (maximum 400mA) or to the 20A terminal (maximum
20A)
2. Use the selector knob to set the proper ACA range, press the DC/AC
key to select the measurement mode, and then connect the leads in
series to the electric circuit under test. LCD displays current under test.
Note:
1. Users should first set the RANGE button to the highest range, if
users have no idea about the range of current under test, and then select
the proper range based on displaying value.
2. If the LCD displays OL, it means the current is over range. Now you
need to select the knob to the higher range.
3. Maximum input current is 400mA or 20A subject to the terminal the
red test lead is inserted into, too large a current will damage the fuse
and meter.
Resistance Measurements
1. Insert the black lest lead into the COM terminal and the red lead into
the V/Ω/Hz terminal.
2. Turn the selector knob to Ω range.
3. Connect the leads in parallel with the resistance being measured.

18
3. Auto range is the original mode; press the RANGE key change to the
manual range mode.
4. When measuring the actual minimum resistance, short-circuit the test
leads first, press the REL button and then test the resistance, it will now
display the actual resistance.
Note:
1. The LCD displays OL when the resistance is over the selected range.
When measuring a value over 1MΩ, the reading will take a few seconds
to become stable. This is normal for high resistance measuring.
2. When the input lead is in an open circuit, overload displays OL.
3. When measuring in line resistors, be sure that the power is off and all
capacitors are completely discharged.
4. Never input any voltage while the meter is set for resistance range!
Capacitance Measurements
1. Discharge any capacitor to be tested by shorting the terminals of the
capacitor with an insulated device.
2. Turn the selector knob to “ ”range.
3. Insert the black lest lead into the COM terminal and the red lead into
the V/Ω/Hz terminal.
4. If the LCD doesn‟t display 0, press the REL button to clear the
reading;

19
5. Place the test leads in parallel with the capacitor being tested. The red
test lead is for the positive pole. LCD displays capacitance value.
Note:
Never input voltage or current to the VΩHz terminal when measuring
capacitance.
In order to assure an accurate reading, press the REL button to clear the
reading before testing.
There is only the auto range mode for testing capacitors.
The capacitance must be complete discharged before testing to protect
the meter.
A reading over the 400uF range will delay 15 seconds.
Frequency Measurements
1. Insert the black lest lead into the COM terminal and the red one into
the V/Ω/Hz terminal.
2. Turn the selector knob to the Hz range.
3. Place the test leads to the signal source or the load which is to be
tested.
4. Press the Hz/DUTY key to switch frequency/duty cycle; it will
display the frequency or duty cycle of the signal source which is tested.
Note:
There is only the auto range mode under the frequency mode.

20
The meter can still work if the input is higher than 10Vrms, but the
accuracy is not guaranteed.
In an RFI noise environment, you should use shielded cable to measure
a low signal.
When measuring high voltage circuits, no part of your body should
touch the high voltage circuit.
Never input a voltage higher than 250V DC or AC peak value, or it may
damage the meter.
Other manuals for Victor 88E
1
Table of contents
Other FIREDRAGON Multimeter manuals
