Firefox C159 User manual

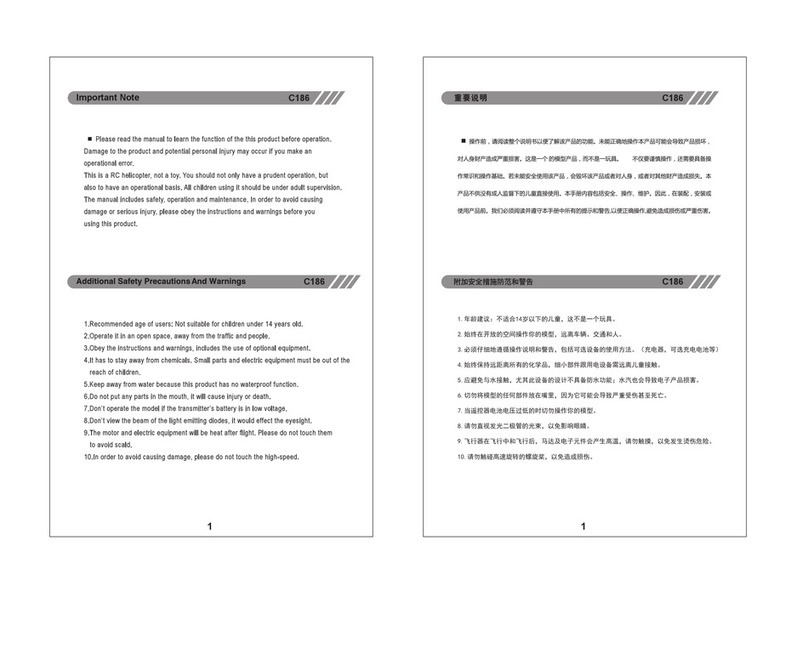
1. Age recommendation: not suitable for children under 14 years old, as this is not a toy.
2. Please always operate your model in an open space and away from vehicles, traffic and people.
3. Operating instructions and warnings must be followed, including the use of optional equipment.
(Chargers, optional rechargeable batteries, etc.)
4. Always keep away from all chemicals, small parts and electrical equipment that need to be kept
out of reach of children.
5. Water contact should be avoided; this device is not waterproof; water vapor can also cause
damage to electronic products.
6. It is forbidden to put any part of the model in one's mouth, because it may lead to serious
injury or even death.
7. Do not continue to operate your model when the battery voltage of the remote control is too low.
8. Do not look directly at the light-emitting diode beam to avoid damage to your eyes.
9. During and after the flight, the motor and electronic components will generate high temperatures,
please do not touch them to avoid burns.
10. Please do not touch the high-speed rotation of the blades to avoid damage.
1
Before you begin operation, please read this manual to understand the function of the
product. Failure to operate correctly may break the product or cause serious damage to
persons and property. This product is a model, not a toy. You must not only operate it carefully,
but also have the common knowledge and foundation to operate it. Failure to use this product
safely can destroy the product or cause personal injury to you, as well as other property damage.
The use of this product by children is permitted only under the supervision of an adult. This
manual includes safety, operation, and maintenance. Therefore, before assembling, installing,
or using the product, it is important that you read and follow all tips and warnings in the manual
so that you can operate it properly and avoid causing damage or serious injury.
Important Note C159
C159

Warnings! Failure to read the following carefully may cause the battery to leak, explode or catch
fire.
1. Do not put the battery into the water; store the battery in a cool and dry place when not in use
for a long time.
2. Keep the battery out of the reach of children; if a child accidentally swallows the battery, seek
medical help immediately.
3. Do not use or store the battery near heat-producing sources, such as fire or heating ovens.
4. When charging, use a charger that meets the specifications.
5. Do not reverse the positive and negative plates.
6. Do not connect the battery directly to a wall outlet or a cigarette lighter in a vehicle.
7. Do not put the battery into the fire or heat the battery.
8. Do not use wires or other metal objects to short-circuit the positive and negative terminals of the
battery.
9. Do not transport or store the battery with necklaces, hairpins, or other metal objects.
10. Do not hit or throw the battery, or hit the battery with hard objects.
11. Do not directly weld the battery terminals.
12. Do not pierce the battery casing with nails or other sharp objects, and prohibit hammering or
stepping on the battery.
13. Do not disassemble the battery in any way.
Note:The batteries should not be left idle for a long period of time at full charge and low charge,
otherwise the batteries will not be charged or will bulge. If the batteries are left for a long time,
please charge the batteries to 7.8V first and store them in a dry and safe place.
Note: The charger packaged with the C159 can be used for safe charging and we recommend
that you use the original USB charger. Using other brands of chargers can cause damage to the
battery resulting in property damage!
2
Battery Usage Warnings and Guides C159

256mm
260mm
80mm
3
C159
C159
Length: 260 mm
Height: 80 mm
Weight: 100G
Main Propeller Length:
Battery Specification:
256 mm
7.4V 350mAh
Flight Duration:Approx. 13-15 mins
Main Motor: 1020
Tail Motor: 0720
Charging Duration: Approx. 45 mins
Transmitter USB chargerLipo battery
Phillips screwdriver+hex wrench User Manual
Helicopter
Main Rotor / Tail Rotor
Model Plane Parameters
Package List

4
Description of Remote-Control Function C159
Power Indicator
Up & Down Throttle
Left & Right Rotation
Power switch
Forward & Backward
Left & Right Side Flight
One-Click Takeoff
Speed: L-M-H 123
MODE 1&2 switchover
One-Click Landing
Flight trims
Loop Flight
Emergency stop
Note: When flight offset occurs.
1. Press and hold the flight trims fine adjustment button for 2 seconds, there will be “di di” sound, then enter the
adjustment mode.
2. Toggle the rocker in the opposite direction to adjust the attitude until the flight is smooth.
3. Press the fine adjustment button again to save the data.
Transmitter
Battery Cover
Push
Please open the battery cover
first in the direction of the arrow.
Please use four AA batteries and assemble them in the direction
of positive and negative polarity (do not mix batteries of different sizes).

5
Batteries Charging Method C159
Charging Method 1:
Use the computer USB port to charge the battery
Instructions:
1. Please use the standard USB charger to connect to the computer port.
Charging - red indicator ON.
Fulled - indicator OFF.
Charging Method 2:
The phone power adapter is used to charge the battery.
Instructions:
2.Use the standard USB charger to connect the phone power adapter.
Charging - red indicator ON.
Fulled - indicator OFF.
Charging Method 3:
Use the cell phone's mobile power supply to charge the battery.
Instructions:
1.The standard USB charger is used to connect the cell phone's mobile power supply.
Charging - red indicator ON.
Fulled - indicator OFF.
Helicopter Parts C159
Landing Gear
Battery
Rotors Rotor Blade Clamp
Rotor Head
Swash Plate
Main Shaft
Tail Rotor
LED
Charging - red indicator ON.
Fulled - indicator OFF.

If you are not proficient at controlling the C159, take a few minutes to learn them and then
try your first flight.
6
Guidance on Operation Direction C159
1. Please make sure the battery voltage of both the remote control
and the helicopter model is sufficient.
2. A suitable flying site should be far away from crowds, cars, high
voltage towers, water pools, etc. to ensure a safe and enjoyable
flight.
3.The main rotor fixing screws should not be locked too tightly, and
the rotors should be kept folded flexibly, as over-tightening will
cause them to vibrate when they cannot be straightened.
4.When you encounter an emergency in flight that cannot be
adjusted, you can directly operate the “Emergency Stop” button,
long press the button for 3 seconds, and the aircraft will directly
stop and rotate to the ground (Note: the operation of this function
will have the risk of falling broken)
C159
Pre-Flight Precautions
Throttle
Throttle Up Throttle Down Down
Fuselage Left Rotation
Rudder Left Rudder Right
Direction
Fuselage Right Rotation
Up

Flight Operation Steps
7
1.Turn on the remote-control power switch.
2.Remove the nose covering, install the batteries safely into the battery compartment and make sure
it is firmly in place, then fix the nose covering, press and hold the power switch for 2 seconds to turn
on the power of the aircraft.
3.When the lights of the aircraft and the remote control are flashing at the same time, push the
throttle rocker of the remote control up to the bottom and pull it down quickly. When the remote
control makes a beeping sound and the aircraft and remote-control lights are on, the code matching
is complete.
4.Push the rocker to the trapezoidal angle at the same time to start the aircraft. (You can also press
the one-button takeoff to start the helicopter directly)
5.Please keep the head of the aircraft facing forward and keep a safe distance from the helicopter.
6.When manually operating the helicopter to land, please keep the throttle rocker in the down position
for 2-3 seconds and wait for the propeller to stop rotating completely before releasing the rocker.
(This action is not required to use one button landing).
Corresponding to step 1C Corresponding to step 3C Corresponding to step 4
Note:1. When the helicopter is flying, do not look at the helicopter horizontally to avoid accidental
injury.
2. Please make sure there is no working remote control of the same model around when
matching the code, so as not to affect the code matching.
C159
Elevator
UP Forward Down Backward
Aileron
Aileron Left Left Aileron Right Right

Note: Beginners should pay attention to the direction of flight, and make sure that the head of the aircraft
is pointing forward as much as possible to avoid damage caused by operational errors!
Forward Flight
8
Keep a safe distance of 2 meters or more.
Flight Yaw Correction Methods C159
If there is flight yaw, it can be corrected by directly toggling the fine adjustment button.
The product you have purchased has been set before shipment. If you are not satisfied with the aircraft
hovering or the aircraft still has a yaw, you can adjust it by the following settings.
Control the throttle of the aircraft to take off, and according to the current yaw direction, toggle the fine
adjustment button in the opposite direction until the aircraft can hover smoothly.
Helicopter
yawing
forward
or backward
Fine adjustment according
to the direction of the arrow
Fine adjustment according
to the direction of the arrow
Fine adjustment according
to the direction of the arrow
Helicopter
yawing
left or right
Helicopter
yawing
sideways

9
Warning
Please keep a height of more than one meter.
Introduction of the socket corresponding to the receiver
Gyroscope Calibration Methods
1. When the flight is yawed, you can try to land the plane first and then
calibrate the gyroscope.
2. When calibrating the gyroscope, you need to place the aircraft horizontally
and the ground should not be skewed.
3. When calibrating, the indicator light will flash rapidly, and the indicator light
will be on when calibration is finished, then take off again.
Notes on Correcting Flight Yaw
Main Motor
Tail Motor
Tail LED
Front LED
Left Servo
Right Servo
Front &
Rear Servos
Spare
Channel
Spare
Channel

10
Commonly used parts replacement instructions C159
The propeller is removed by using a hex wrench;
when a new propeller is installed, note that the
propeller should not be too tight and make sure
it can turn flexibly.
Withdraw the screws first, then pull the large
gear straight out downward. Pay attention to
the direction when installing the new gear,
the shaft plane should be aligned with the
hole plane inside the gear.
Remove the plug first, then remove the motor base
and take out the motor.
To remove and replace the tail motor, first,
remove the tail motor and tail rotor, unplug
the motor, and then install the new motor.
After installation, make sure the tail motor
and tail rotor are installed, and please pay
attention to the tail rotor installation direction!
When removing and replacing the tail rotor,
please pay attention to the direction and press the
motor shaft slowly to ensure a smooth rotation.

Solution to Abnormal Problems
11
C159
7
8
The helicopter is vibrating
badly.
The main rotor is deformed, the
cross shaft is bent, the tail rotor
is deformed, and the rotor clamp
screw is locked too tight, causing
the main propeller to not move.
Replace the main rotors,
replace the cross shaft, and the
tail rotor, and loosen the
propeller clamp screw properly.
After successful binding, the
helicopter is started and the
main rotor has continuous
rotation, but it does not take off.
Low helicopter battery voltage. Charge the battery or replace it
with a fully charged battery.
The motor does not working
when the throttle joystick is
pushed and the receiver alert
light begins to flash.
Low helicopter battery voltage. Charge the battery or replace it
with a fully charged battery.
No response from the
helicopter after turning on the
power switch.
Please check if the transmitter
and receiver are powered on;
and check their battery voltage.
Turn on the transmitter and
make sure the battery is installed
correctly; use a fully charged
battery; reinsert the battery.
Turn on the power switch of the
helicopter, the tail light keeps
flashing, and the operation is
not responsive.
Transmitter-receiver code
matching failed.
Please perform the transmitter-
receiver code matching again.
Slight yaw of the aircraft
after takeoff:
Misuse of the fine adjustment
button
1. Make trims adjustments in
the yaw direction until
corrected;
2. Reset the hover
The helicopter took off and
spun to the left.
The tail motor power is
insufficient, the propeller blade
is loose, and the tail motor is
damaged.
Check the fit of the tail propeller
blade and motor shaft, if loose
replace the tail propeller blade;
if the motor is damaged replace
the tail motor.
The helicopter has serious
yaw after takeoff.
Check whether the servos are
working properly.
Check whether the swash plate
has problem.
Check whether the connecting
rod is dropped.
Repair and replace the
damaged parts.
Other Firefox Toy manuals
