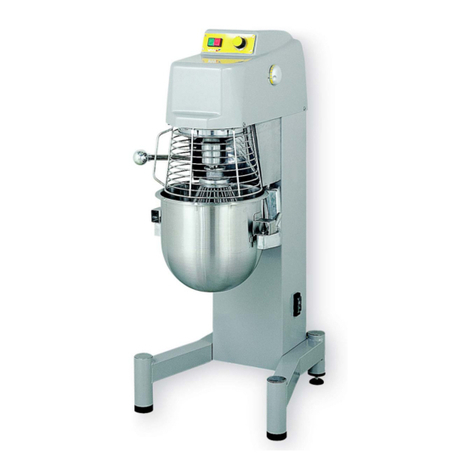
First Choice ESCHER M40 Guide

SPARE PARTS DIAGRAM FOR
First Choice Group
Blakeney Way, Kingswood Lakeside
Cannock, Staffs, WS11 8LD
TEL: 01543 577778 FAX: 01543504141
Email: [email protected]
Web: www.firstchoice-cs.co.uk
Mixer
M40
M60

1
USE AND MAINTENANCE MANUAL
SPARE PARTS
SPIRAL MIXERS
WITH FIXED BOWL
MODEL
M40 M60
M40 PREMIUM M60 PREMIUM
A MACHINE DESIGNED AND CONSTRUCTED
FOR MIXING BREAD AND PASTRY DOUGH
FOREWORD
P.1 User, aim and use of the manual……………3
P.2 Machine marking data……………………..3
SECTION A General information
A.1 Warnings ………………………………3
A.2 General description of the machine ………..3
A.2.1 Work environment ……………………….3
A.2.2 Dismantling …………………………3
A.3 Unacceptable conditions of use ……………3
A.4 Cleaning …………………………………3
A.5 Reference standards ………………….4
A.6 Operators ……………………….4
SECTION B Information regarding machine use
B.1 Technical data ……………………………4
B.2 Transportation and handling ………………4
B.3 Installation –Preparation for commissioning….6
B.4 Normal and safety shutoff ……..…….6
B.5 Control panel ………….…………….7
SECTION C Information regarding maintenance
C.1 Maintenance ……………………………8
C.2 Adjusting belt tension for spiral rotation …….8
C.2.1 Model M40 –M60………………………...8
C.2.2 Model M40 PREMIUM –M60 PREMIUM….…...9
C.3 Adjusting belt tension for bowl rotation ….10
C.4 Wiring diagram for power supply ….. ………11
C.5 Wiring diagram for control panel …..……….12
C.6 Wiring diagram for assembly ……………13
C.7 Spare parts list for 415 V system…………..14
C.8 Spare parts list for control panel ………….15
SECTION D Mechanical parts
Table 1 Head group of model M -exploded view…16
List 1 Head group list of model M…………….17
Table 2 Head group of model M PREMIUM
-exploded view
……………………….18
List 2 Head group list of model M PREMIUM……19
List 3 Bowl group list……………..…………20
Table 3 Bowl group -exploded view ……………21
Table 4 Machine structure -exploded view………22
List 4 Machine structure list…………………23
SPARE PARTS ENQUIRY
Always mention:
•Machine model
•Serial number
•No. of reference table
⇒Position in the list of the spare part requested
⇒Piece description
⇒Quantity needed
⇒Code
ESCHER MIXERS srl
Via Lago di Vico, 37 tel. +039 0445 576692
36015 SCHIO (VI)
-
ITALY
fax +039 0445 577280
UK SUPERMARKETS SPECIFICATIONS

3
FOREWORD
P.1 USER, AIM AND USE OF MANUAL
This instructions booklet is directed to:
•the personnel in charge of the workshop and maintenance
•the personnel in charge of installation
•the user
•the personnel in charge of dismantling
The user must take care of the manual, ensuring that it is not damaged, and
furthermore provide a place for it to be kept which is both safe yet easily
accessible.
The manual is divided into four sections: one foreword and three sections
regarding safety, use and maintenance.
•FOREWORD: The manufacturer’s details and machine data, which must be
quoted in all situations, are recorded in this section.
•SECTION A: Regards safety regulations and information.
•SECTION B: Machine characteristics –operation –transportation –
assembly of equipment are described in this section.
•SECTION C: Includes information regarding maintenance, lubrication and
plant drawings.
For further information, either contact the manufacturer directly or the
authorised agent; always quote the details stamped on the machine plate.
P.2 MACHINE MARKING DATA
MODEL ____________
SERIAL NUMBER ____________
DATE OF MANUF. ____________
VOLTAGE ____________
FREQUENCY ____________
PHASES ____________
AMPS ____________
This booklet is the Instructions Manual for the machine referred to above and
has been compiled in conformance with the EEC Directive 89/392, Enclosure I,
paragraph 1.7.4.
SECTION A: GENERAL INFORMATION
A.1 WARNINGS
In order to ensure maximum working reliability, ESCHER MIXERS takes great care
in the choice of materials and components to be used in the construction of its
equipment, which is fully inspected and tested before consignment. The long term
efficiency of the machine also depends on its correct use and the proper
preventive maintenance as specified in the instructions described in this manual.
The manufacturer wishes to point out that:
•Every part of this manual must be carefully read and fully understood
before using or tampering with the machine.
•The machine must not be tampered with, altered or modified, even
partially, and in particular, the protection guards must not be removed.
•The machine must not be used in conditions or for use other than those
specified in this manual. The manufacturer shall not be held responsible for
breakdowns, malfunctions or accidents caused by the non-observance of this
rule.
The EC plate is located on the lower rear part of the machine.
A.2 GENERAL DESCRIPTION OF THE MACHINE
The machine has been designed and constructed for professional use with
foodstuffs.
The aim of the mixer is to obtain a well-blended mixture for both bread dough
and pastry.
The tables which include the technical data, use of the machine and command
functions can be found below, in Chapter B.4.
A.2.1 WORK ENVIRONMENT
Acceptable work values for good machine performance:
•Temperature: from +5° to +40°C, with an average which must not be
above 35°C in a 24 hour period.
•Relative humidity: between 30% and 95% (without condensation).
Provide opportunities and means for carrying out cleaning and maintenance
operations.
Isolate the machine so that untrained personnel cannot access it.
Noise emission in the worst possible conditions is less than 70 dB.
A.2.2 DISMANTLING
In the event that the machine is to be scrapped, its parts must be disposed of
separately, taking into consideration the different compositions of the various
parts, and according to the law regulating the disposal of industrial waste.
None of the components are classified as toxic-noxious products.
A.3 UNACCEPTABLE CONDITIONS OF USE
The obvious conditions in which to avoid using the machine could include:
•Load greater than the allowed amount.
•Tampering of the safety systems.
•Use of equipment that is not supplied with the machine, that is not
suitable for handling food or that could scratch the surface of the bowl.
•Using the machine in unsuitable environments.
A.4 CLEANING
As the machine is used for handling food, cleaning must be thorough and
carried out on a daily basis.
Use only water together with a non-abrasive sponge and a plastic spatula to
remove any residual incrustations.
The area surrounding the machine must be cleaned, and the machine must
regularly be moved so that the area under the machine can also be cleaned.
When moving the machine disconnect the plug from the power outlet and raise
the feet.
A.5 REFERENCE STANDARDS

4
The model of the machine described in this manual is in compliance with
Directive 89/392/EEC, with its amending directives and with reference to the
following standards:
•UNI EN 292-1, UNI EN 292-2. Basic concepts for machine safety and
general design principles.
•UNI EN 294 Safety distances.
•UNI EN 349 Minimum distance to prevent crushing.
•EN 60204-1 Electrotechnical aspects.
•EN 453 Machines for the production of food products –Mixers.
SECTION B: INFORMATION REGARDING MACHINE USE
B.1 TECHNICAL DATA
*) In this reference dough, the amount of water used is 60% with respect
to the amount of flour.
PACKAGED DIMENSIONS [cm]
carton
on pallet
wooden
crate
wooden
box
Length 138 125 125
Width 88 80 80
Height 174 155 155
A.6 OPERATORS
The machine has been designed and constructed for professional use. Therefore:
•The operator must be familiar with the control panel functions, the
installed safety systems and regularly check their efficiency. He must be
familiar with all possible work cycles and the quantity of product to use.
He must clean the machine every day.
•Technician in charge of ordinary maintenance (see point C.1) can be one
of the user’s technicians who inspects the command and safety devices and
regularly checks the condition of the belts.
•Technician in charge of extraordinary maintenance and repairs (see point
C.1), while the machine is under warranty, must be authorised by the
manufacturer.
Refer to the chapter on Maintenance (Sect. C).
B.2 TRANSPORTATION AND HANDLING
To lift the machine use suitable means and equipment, and avoid oscillations.
The machine is off-centre, therefore take note of the precautions indicated on
the specifications sheet affixed to the outside of the packaging. An example is
reproduced below.
DOUGH
CHARACTERISTICS BOWL CHARACTERISTICS MACHINE
CHARACTERISTICS MOTOR
CAPACITY SPEED PACKAGED WEIGHT
MODEL
max
capacity
max
flour
water*
volume
diameter
height
from ground
length
width
height
weight
spiral
I/II speed.
bowl
spiral
I/II speed.
bowl
carton
on pallet
wooden crate
wooden
box
kg kg llmm mm mm mm mm daN kw kw rpm rpm daN daN daN
M 40 40 25 15 80 560 913 1055
590 1360
350 2.1
3.7 0.55
116
237 13 365 390 420
M 40
PREMIUM 40 25 15 80 560 913 1055
590 1360
365 2.1
3.7 0.55
90
180 13 380 405 435
M 60 60 37 23 100 630 913 1140
660 1360
355 2.1
3.7 0.55
116
237 13 370 395 425
M 60
PREMIUM 60 37 23 100 630 913 1140
660 1360
370 2.1
3.7 0.55
90
180 13 385 410 440

5
1. LIFTING THE PACKAGED MACHINE
The machine is transported on a wooden pallet A,
secured by a cross bar C, and fastened to the pallet by
means of two threaded rods B.
To lift by means of a pallet transfer unit or lift truck,
insert the forks in the positions indicated in the figure.
Before lifting, check the suitability of the equipment.
NOTE:
The material used for packaging, apart from the threaded
rods and the bar, can be recycled or disposed of as
urban waste.
2. LIFTING THE UNPACKAGED MACHINE
By means of a belt
Positioned between the column and the end of the tool
holder shaft, as shown in the figure.
It is advisable to use a suitable space bar (e.g. a
wooden plank with a minimum section of 25x130 mm)
in order to keep the belt away from the cover so that
it is not damaged.
As the machine is decentred with respect to the point
of suspension the machine hangs in an off-balanced
position. In no way, however, does this effect the
safety of the operators or the machine.
NOTE:
Avoid oscillations during this operation.
By means of a lift truck
Insert the forks in the positions indicated.
Lift carefully keeping the forks in a horizontal position.
Fork position
Belt
position
Space bar
Fork
position
C
B
A

6
B.3 INSTALLATION –PREPARATION FOR COMMISSIONING
•The machine must be positioned in an area which is suitable for working with
foodstuffs and that can be thoroughly cleaned.
•It is not necessary to fasten the machine to the ground; however it must be levelled
by adjusting the front feet which at the same time lifts the front wheel from the floor.
•Check that the electric line is correctly connected by means of an approved plug.
•Check all the commands and that the mobile guard protection microswitch is
functioning correctly. Adjustment is carried out by the manufacturer.
The user must contact the authorised technician if adjustment is required.
•Before commissioning, check the maximum quantities of the product to be loaded into
the bowl, by consulting the tables in Chapter B.1 relevant to the model purchased.
B.4 NORMAL AND SAFETY SHUTOFF
1. NORMAL SHUTOFF
•In manual mode: Stop the machine by pressing the machine shutoff push
button.
•In automatic or semiautomatic mode: The machine is automatically shutoff by
the timers.
2. SAFETY SHUTOFF
•The machine shuts-off whenever the mobile guard is lifted from the bowl.
•NOTE:
In all cases rotation is stopped, even if gradually, in less than 4 seconds.
3. MOVING THE MACHINE BY HAND
The machine may need to be moved in order to clean the area
under it.
To move the machine :
Tighten the threaded rod of the foot Cwhich when it retracts allows
the front pivoting wheel B to touch the floor. The other two points
of support are the two rear fixed wheels A.
Caution:
•Disconnect the feed cable Dbefore beginning the procedure
described above.
•After returning the machine to its original position, ensure its
stability by loosening the two threaded feet C thereby raising
the front wheel B from the floor
•To power the control panel, activate the general switch E.
C
B
A
D
E

7
B.5 CONTROL PANEL
1Timer for first spiral tool speed
6Timer for second spiral tool speed
When the pointer is below zero, (display unlit), the timed shutoff
function is deactivated.
The LED, bottom right, when lit indicates whether the reading scale
is in seconds (s), minutes (m) or hours (h). To change the scale
consult the qualified technician.
2Start push button for first spiral speed
Does not function with the bowl cover open.
It permits three types of functions:
•MANUAL WORK MODE IN FIRST SPEED
(Timers 1and 6deactivated)
Shutoff by pressing stop push button 5.
•SEMIAUTOMATIC WORK MODE IN FIRST SPEED
(Timer 1activated, 6deactivated)
Shutoff is controlled by timer 1.
•AUTOMATIC WORK CYCLE
(Timers 1and 6 activated)
The following sequence is carried out automatically:
1. Timed work phase in first speed.
2. Bowl stops for 2 seconds.
3. Timed work phase in second speed.
4. Automatic machine shutoff.
3Power indicator
When lit, it indicates that the electrical board is powered.
4Bowl jog rotation command in first speed
Also functions with bowl cover open.
When the push button is released the bowl stops rotating.
5Machine emergency/stop push button
Interrupts all modes of rotation.
NOTE
If the cover is lifted while the machine is running, the machine shuts off, but
the timers memorise the actual time reached. Once the cover has been closed
again and the start buttons 2 pressed, the machine restarts and the timers
permit the rest of the work cycle to be completed.
This memory is not stored if the machine is shut off by means of stop push
button 5.
4
1
23
5
6
Y
C
N
G
E
R
E
M
E
P
O
T
S
NUDGE
START

8
SECTION C: INFORMATION REGARDING MAINTENANCE
C.1 MAINTENANCE
1. ORDINARY: Includes:
•Daily cleaning
•Checking the belt tension ( monthly)
See chapter C.2 for operative methods.
•Checking the correct functioning of commands and safety devices
(every time it is turned on).
C.2 ADJUSTING BELT TENSION FOR SPIRAL ROTATION
The belt tension must be adjusted if, during a work cycle, the operator notices
a slowing down in the rotation of the spiral tool.
1. Remove the three side screws Vwhich secure the head guard T.
2. Lift the head guardTand disconnect the connector E.
3. Loosen the 4 screws Awhich secure the motor support plate (without
completely unscrewing them).
4. If necessary replace the belts:
•Loosen the two nuts B
•Tighten the two nuts C(in order to loosen the belts) and remove
them.
2. EXTRAORDINARY
This can be considered a preventive operation as well as an intervention
in the event of malfunctions and/or breakages.
These operations must be carried out by personnel authorised by the
manufacturer or by one of his direct resellers. In the event that the user
has specially trained personnel at his disposal, once the warranty has
expired, he can request the manufacturer provide him with more detailed
drawings and lists, as well as exploded views of the mechanical parts. In
this case the user is responsible for any damage caused to persons and/or
the machine.
After 2000 working hours: it is advisable to have a technician inspect the
bearings and the other transmission parts.
5. If necessary adjust the belt tension:
•To increase the tension:
Loosen the two nuts C.
Tighten the two nuts B.
•To decrease the tension:
Loosen the twonuts B.
Tighten the two nuts C.
C.2.1 ADJUSTMENT FOR MOD. M40 –M60
T1 TV
E
C
C
B
B
A
A

9
6. Tighten the four screws Awhich secure the motor support.
7. Reconnect the connector E.
8. Put the protection guard Tback into its correct position with regard to
the head T1.
9. Tighten the three screws V.
The belt tension must be adjusted if, during a work cycle, the operator notices
a slowing down in the rotation of the spiral tool.
1. Remove the three side screws Vwhich secure the guard.
2. Lift the head guardTand disconnect the connector E.
3. Loosen nut Cand the two nuts C1, to allow movement of both the
transmission pulley support and the motor support.
4. Loosen the 4 screws Dwhich support the spiral motor (without completely
removing them).
5. Loosen the four screws Aof the transmission pulley support ( without
completely removing them).
6. If the belts need to be replaced, proceed as follows:
•Loosen the two nuts B.
•Loosen nut F.
•Remove the upper transmission plate Lby loosening the 4 screws I.
Now the belts are loose and they can be replaced. Before replacing
them ensure that the new belts have the same characteristics as
the original ones.
Firstly remove belts Gand then belts H.
Replace belts Hand then belts G.
•Reposition the upper transmission plate Land secure it by means of
the four screws I.
7. If necessary adjust the tension of belts G:
•To decrease the tension, loosen the nut and tighten C.
•To increase the tension, tighten nut Fand loosen C.
8. Secure the transmission plate by means of the four screws A.
9. Tighten the nut C.
10. If necessary adjust the tension of the belts H:
•To decrease the tension, loosen nut B and tighten C1
•To increase the tension, tighten nut B and loosen C1
11. Secure the motor plate by means of the four screws D.
12. Tighten the two nuts C1.
13. Reconnect the connector E.
14. Put the guard Tback in its correct closed position with respect to the
head T1.
15. Tighten the three side screws V.
C.2.2 ADJUSTMENT FOR MOD. M40 PREMIUM–M60 PREMIUM
V
T
T1
C
C1
D
D
I
L
B
A
H
A
G
E
F

10
C3 ADJUSTING THE BELT TENSION FOR BOWL ROTATION
The belt tension must be adjusted if, during a work cycle, the operator notices
a slowing down in the rotation of the bowl.
1. To increase the tension of the transmission belts C:
Use a wrench to rotate nut Ain a clockwise direction.
2. To increase the tension of the motor belts D:
Use a wrench to rotate nut B in a clockwise direction.
3. To replace the belts:
The belt compartment can be accessed by removing the side door.
•Rotate nut Bin an anticlockwise direction
•Rotate nut Ain an anticlockwise direction
Note: Ensure that the new belts have the same characteristics as the
previous ones.
Bowl
shaft
C
D
Transmis. belts
( tr.pulleys –bowl
Motor belts
( motor–tr.pulleys

11
C.4 WIRING DIAGRAM FOR POWER SUPPLY
Trans.
shaft
Motor
shaft
A
TRANSMIS. BELT
TENSION
B
MOTOR BELT
TENSION
MACHINE BASE

12
L1
L3
L2
QF1
KM1
KM2
KM3
X
Y
Z
U
V
W
QF2
KM4
KM5
X1
Y1
Z1
FU1
TC1
M1
M2
3
M
3
M
1
1
1
2
2
2
3
3
3
4
4
4
5
5
5
6
6
6
1
1
2
2
3
3
4
4
5
5
6
6
24
11
QS1
0
230
400
0
24
C.5 WIRING DIAGRAM FOR CONTROL PANEL

13
25
10
9
3
KT2
8
12
KA2
KM2
64
63
KA2
KA1
15
KA1
5
9
KA2
5
9
14
4
12
KA1
12
FU2
24
18
1
QF1
QF2
SB1
9
8
10
HL1
8
13
KT1
2
SB2
16
20
11
SQ1
KM1
KM2
KM1
53
54
21
22
A1
A2
4
5
SB2
KT2
19
21
6
7
53
54
21
22
A1
A1
A2
A2
KM2
KM1
KM2
KM3
83
83
84
84
21
21
22
22
A1
A1
A2
A2
KM4
KM5
KM5
KM4
KM1
KM2
SB3
9
17
KT1
10
22
23
11
6
7
2
2
1
1
4
4
3
3
KT1 on 5/6/8
KT2 on 2/5/8
KM1
KM2
73
73
74
74
6
7
8
1
C.6 WIRING DIAGRAM FOR ASSEMBLY

14
TC1
QF1
QF2
QS1
FU1
FU1
FU2
KM5
KM4
KM3
KM2
KM1
W
13
8
Z1
Y1
X1
Z
Y
X
V
U
L3
L2
L1
SB2
SB1
SB3
HL1
10
5
1
20
10
1
CONNECTOR
J1
35 cm
35 cm
KT1
KT2
RTASHEATH
130 cm
KA2
KA1
C.7 SPARE PARTS LIST FOR 400-415V 50-60 Hz SYSTEM

15
ID DESCRIPTION MANUFACTURER CODE Q.TY
M1
SPIRAL TOOL MOTOR 132 B14 4/8 poles 2.1/3,7 KW
E00300 1
M2
BOWL MOTOR 80 B3 6 poles 0,55 KW
E00000 1
QS1
MAIN SWITCH WITH HANDLE CONTROL ILME ZQE 323 1
RODE ILME ZR 3280 1
TC1
TRANSFORMER CED 150VA 0..230.420 0.24 CE 1
KA1
RELAY FINDER 5532 24V 1
SOCKET FINDER 9472 1
KA2
RELAY FINDER 5532 24V 1
SOCKET FINDER 9472 1
KM1
CONTACTOR GE MC1 A301 AT1 1
GE MAR N44 OAT 1
KM2
CONTACTOR GE MC1 A301 AT1 1
GE MAR N44 OAT 1
KM3
CONTACTOR GE CL01 A301 T1 1
KM4
CONTACTOR GE MC1 A301 AT1 1
KM5
CONTACTOR GEMC1 A301 AT1 1
QF1
MAGNETO THERMAL GE SFKO-K1
GE SFAL 11N 1
QF2
MAGNETO THERMAL GE SFKO-G1
GE SFAL 11N 1
FU1
FUSE HOLDER WEBER PCH 1 10x38 1
FUSE WEBER 2A GL 2
FUSE HOLDER WEBER PCH 1 10x38 1
FUSE WEBER 2A GL 2
FU2
FUSE HOLDER WEBER PCH 1 10x38 1
FUSE WEBER 10A GL 2
GROUND CONNECTING TERMINALS 4 mm²WIELAND AB1 TP435U 4
CONNECTING TERMINALS 4 mm²WIELAND AB1VV435U 14
SQ1
LIMIT SWITCH TELEMECANIQUE XCKP102 1
J1 24-POLE CONNECTOR P ILME CHI 24 1
24-POLE CONNECTOR F ILME CNF 24 1
C.8 SPARE PARTS LIST FOR CONTROL PANEL

16
ID DESCRIPTION MANUFACTURER CODE Q.TY
J1 24-POLE CONNECTOR P ILME CHO 24 1
24-POLE CONNECTOR M ILME CNM 24 1
SB1 EMERGENCY-STOP PUSH BUTTON CEMA P9MER4RN 1
CEMA P9B01VN 1
SB2 START PUSH BUTTON TELEMECANIQUE ZB5 AA3 1
TELEMECANIQUE ZB5 AZ101 1
PROTECTIVE PUSH BUTTON COVER TELEMECANIQUE BPO 1
SB3 JOG BOWL PUSH BUTTON TELEMECANIQUE ZB5 AA6 1
TELEMECANIQUE ZB5 AZ101 1
PROTECTIVE PUSH BUTTON COVER TELEMECANIQUE BPO 1
HL1 POWER ON LIGHT SLIM 24 V 1
KT1 1ST SPEED TIMER SITEC D01 SC.10 1
SOCKET 1
KT2 2ND SPEED TIMER SITEC D01 SC.20 1
SOCKET 1
Table 1: Head group of model M

17

18
List 1: Head group of model M
POS. DESCRIPTION Qty CODE
1Belt SPZ 1587 5C01211
2Motor pulley 1D11116
3Spiral motor slide 1D13101
4Tie rod M12 2C02914
5Motor support 1D04200
6Motor 1*
7Sump 1D08201
8Spiral 1D12200
9Screw 3D15000
10 Screw cover 3D07500
11 Spiral shaft 1D01100
12 MIM ring 65/100x12 1C11900
13 Column with foot 1D12100
Column without foot 1D12103
14 Bearing 3211 1C00100
15 Spiral shaft support 1D04002
16 Bearing 6310 2RS 1C00004
17 Pulley 1D11100
18 Locking assembly 1C01301
* see wiring diagrams
Table 2: Head group of model M PREMIUM

19

20
List 2: Head group of model M PREMIUM
POS.
DESCRIPTION Qty CODE
1Belt SPZ 1587 5C01211
2Pulley 50 Hz 1D11119
Pulley 60 Hz 1D11120
3Bearing 62206 2RS 3C00001
4Reinforcing plate 1D13000
5Belt SPZ 862 (50 Hz) 4C01203
Belt SPZ (60 Hz) 4
6Transmission pulley 1D11111
7Bearing 6310 2RS 1C00004
8Tie rod M12 1C02913
9Transmission support 1D04600
10 Screw TE UNI 5739 M12x130 2C02012
11 Spiral motor slide 1D13101
12 Motor 1*
13 Sump 1D08201
14 Spiral 1D12200
15 Screw 3D15000
16 Screw cover 3D07500
17 Spiral shaft 1D01100
18 MIM ring 65/100x12 1C11900
19 Column with foot 1D12100
Column without foot 1D12103
20 Bearing 3211 1C00100
21 Spiral shaft support D04002
22 Bearing 6310 2RS 1C00004
23 Pulley 1D11100
24 Locking assembly 1C01301
*) see wiring diagrams
List 3: Bowl group
This manual suits for next models
3
Table of contents
Other First Choice Mixer manuals
