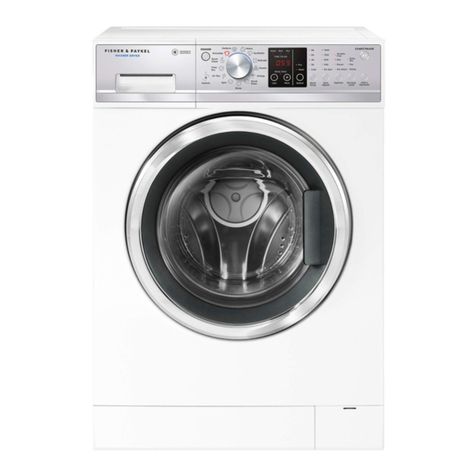
Fisher & Paykel DE4024P2 User manual

INSTALLATION GUIDE / USER GUIDE
GUIDE D’INSTALLATION / GUIDE D’UTILISATION
US CA
FRONT LOADING CONDENSER
CLOTHES DRYER
DE4024P model
SÉCHEUSE À CONDENSATION
À CHARGEMENT FRONTAL
Modèle DE4024P

English Page 1 – 38
Français
Page 41 – 78

1
CONTENTS
IMPORTANT!
SAVE THESE INSTRUCTIONS
The models shown in this User guide may
not be available in all markets and are
subject to change at any time. For current
details about model and specification
availability in your country, go to our
website fisherpaykel.com or contact your
local Fisher&Paykel dealer.
Registration
Register your product with us so we can
provide you with the best service possible.
To register your product visit our website:
fisherpaykel.com
EN
Introduction 3
Safety and warnings 4
Installation instructions 6
Operating instructions 18
Caring for your dryer 26
Before you call for service 28
Fault codes 29
Troubleshooting 30
Limited Warranty 35


3
INTRODUCTION
Welcome to your new condenser dryer
Thank you for purchasing a Fisher&Paykel clothes dryer. Your new dryer gives you the
convenience of tumble drying and your clothes the advantage of not being subjected to the
harsh overdrying effects of the sun. Your clothes will feel softer, retain their shape better
and require less ironing.
At Fisher&Paykel we aim to provide innovative products that are simple to use, ergonomic,
energy efficient and kind to the environment. Thousands of tons of laundry and 75years
of laundry experience have been programmed into your dryer to help give you the best
possible performance.
Your dryer has the benefit of not needing to be vented outside, instead it condenses
themoisture from the clothes and collects this in a water tank, or can pump it directly into
adrain.
This dryer has been specifically designed to complement our front loading Fisher&Paykel
WashSmart™ and FabricSmart™ washers. We are proud of this dryer andtrust it will serve
you well for many years.
Your condensing dryer has numerous cycles and options so you can perform every drying
task (including flat drying) with ease, allowing you to spend less time in the laundry. With
the ability to automatically sense when your clothes are dry, your dryer ismore efficient,
making it kinder on your wallet and the environment.
Please take the time to read these instructions carefully before you begin using your dryer.
Following the advice in this User guide will ensure you get the performance you expect
from your dryer and that you get the best possible results. Keep these instructions for
future reference and pass them on with your dryer, if it changes hands.
We hope you enjoy your new dryer. We have certainly enjoyed designing it for you.
Condenser clothes dryer
EN

4
SAFETY AND WARNINGS
READ AND SAVE THIS GUIDE
! WARNING!
Electric Shock Hazard
Follow the safety precautions outlined in this User guide
Failure to do so can result in death or electric shock.
IMPORTANT SAFETY INSTRUCTIONS
WARNING!
To reduce the risk of fire, explosion, electric shock, or injury to persons when using your
appliance, follow basic precautions, including the following:
zRead all instructions before using the appliance.
zThis dryer, when installed, must be electrically grounded in accordance with local
codes, or in the absence of local codes, with the National Electrical Code,
ANSI/NFPA70, or the Canadian Electrical Code, CSA C22.1.
zThis clothes washer is not intended for use by persons (including children) with
reduced physical, sensory or mental capabilities, or lack of experience and knowledge,
unless they are supervised or given instructions on how to use the washer by someone
responsible for their safety.
zDO NOT dry articles that have been previously cleaned in, washed in, soaked in,
or spotted with gasoline, dry-cleaning solvents, or other flammable or explosive
substances, as they give off vapors that could ignite or explode.
zDO NOT place items exposed to cooking oils in your dryer. Items contaminated with
cooking oils may contribute to a chemical reaction that could cause a load to catchfire.
To reduce the risk of fire due to contaminated loads, the final part of the tumble dryer
cycle occurs without heat (cool down period). Avoid stopping a tumble dryer before
the end of the drying cycle unless all items are quickly removed and spread out so that
the heat is dissipated.
zDO NOT allow children to play on or in this appliance. Close supervision of children
isnecessary when this appliance is used near children.
zBefore the appliance is removed from service or discarded, remove the door to
thedrying compartment.
zDO NOT reach into the appliance if the drum is moving.
zDO NOT install or store this appliance where it will be exposed to the weather.
zDO NOT tamper with controls.
zDO NOT repair or replace any part of this appliance or attempt any servicing unless
specifically recommended in the user-maintenance instructions or in published
user-repair instructions that you understand and have the skills to carry out.
zDO NOT use fabric softeners or products to eliminate static unless recommended
bythe manufacturer of the fabric softener or product.
zDO NOT dry articles containing foam rubber or similarly textured rubber-like materials.
zClean lint screen before or after each load.
zDO NOT operate the dryer without the lint filter and condenser in place.
5
SAFETY AND WARNINGS
zDO NOT store combustible materials, gasoline or other flammable liquids near the
dryer. Keep area around the air intake vent on the front of the dryer and adjacent
surrounding areas free from the accumulation of lint, dust and dirt.
zThe interior of the appliance should be cleaned periodically by qualified
servicepersonnel.
zDo not place items exposed to cooking oils in your dryer. Items contaminated with
cooking oils may contribute to a chemical reaction that could cause a load to catch fire.
zTo reduce the risk of fire due to contaminated loads, the final part of a tumble dryer
cycle occurs without heat (cool down period). Avoid stopping a tumble dryer before
the end of the drying cycle unless all items are quickly removed and spread out so that
the heat is dissipated.
zUnplug the appliance or turn off the circuit breaker before servicing.
Pressingthe‘POWER’ or button DOES NOT disconnect power.
zDO NOT operate this appliance if it is damaged, malfunctioning, partially disassembled,
or has missing or broken parts, including a damaged cord or plug.
zA damaged power cord must be replaced by a Fisher & Paykel trained and supported
service technician or similarly qualified person in order to avoid a hazard.
zDO NOT spray any type of aerosol into, on or near dryer at any time.
DONOTuseanytype of spray cleaner when cleaning dryer interior. Hazardousfumesor
electrical shock could occur.
zSee ‘Electrical connection information for electric dryers’ located in the Installation
Instructions for grounding instructions.
EN

6
INSTALLATION INSTRUCTIONS
Before you begin
Read these instructions completely and carefully.
IMPORTANT!
Save these instructions for local electrical inspector’s use.
IMPORTANT!
Observe all governing codes and ordinances.
zInstall the clothes dryer according to the manufacturer’s instructions and local codes.
zNote to Installer – Be sure to leave these instructions with the Consumer.
zNote to Consumer – Keep these instructions for future reference.
zClothes dryer installation must be performed by a properly trained installer.
zBefore the old dryer is removed from service or discarded, remove the dryer door.
zService information and the wiring diagram are located in the control console.
zDo not allow children on or in the appliance. Close supervision of children is necessary
when the appliance is used near children.
zProper installation is the responsibility of the installer.
zProduct failure due to improper installation is not covered under the limited warranty.
zInstall the dryer where the temperature is above 50°F (10°C) for satisfactory operation of
the dryer control system.
! WARNING!
Fire Hazard
zClothes dryer installation must be performed by a properly
trainedinstaller.
zInstall the clothes dryer according to these instructions and
localcodes.
zDO NOT install or store this appliance in any location where it could
beexposed to water or weather.
zTo reduce the risk of severe injury or death, follow all
installationinstructions.
zSave these instructions. (Installers: Be sure to leave these
instructions with the customer.)
If you are planning to stack the washer and dryer, order a Stacking Kit separately
forthisdryer.
Unpacking your dryer
Tilt the dryer sideways and remove the foam
shipping pads by pulling at the sides and
breaking them away from the dryer legs.
Besure to remove all of the foam pieces
fromaround the legs.
Remove and retain the bag containing the
literature.

7
INSTALLATION INSTRUCTIONS
Product dimensions
DE4024P
PRODUCT DIMENSIONS INCHES (MM)
A Overall height of product* 331/4” (845)
B Overall width of product 237/16” (595)
C Overall depth of product (including dial and door whenclosed) 251/4” (640)
D Depth to door open 42” (1067)
MAXIMUM CAPACITY† CU FT
4.0
* Note:
With leveling legs retracted: 331/4” (84.5cm).
With leveling legs fully extended: 335/8” (85.4cm).
Stacked: 661/2” (168.9cm).
† Capacity refers to the maximum dry weight of items the machine can dry at any one time.
Note: some cycles have a lower maximum capacity (see the ‘Drying cycles’ section).
A
B C
D
EN
Electrical connection dimensions
Power cords
We strongly recommend the use of
Fisher & Paykel Appliances specified
parts. Select the power cord to fit
your installation requirements.
Power socket
available in DE4024P2 model only
The socket matches with the power
plug of a Fisher & Paykel washer
WH2424P2 model.
201/2” (52.1cm)
30” (76.2cm)
Back view
Power socket

8
INSTALLATION INSTRUCTIONS
Requirements for alcove or closet installation
! WARNING!
Explosion Hazard
● Keep flammable materials and vapors, such as gasoline, away from dryer.
● Place dryer at least 18" (46cm) above the floor for a garage installation.
● Failure to do so can result in death, explosion, or fire.
zMinimum clearance between dryer cabinet and adjacent walls or other surfaces is:
z3/4” (20mm) sides, front, and top
z1” (25.4mm) rear
zConsideration must be given to provide adequate clearance for installation and service.
zCloset doors must be louvered or otherwise ventilated and have at least
60squareinches (387cm2) of open area. If the closet contains both a washer and a
dryer, doors must contain a minimum of 120squareinches (774cm2) of open area.
Minimum clearance other than alcove or closet installation
zMinimum clearance to combustible surfaces and for air opening are:
z3/4” (20mm) sides and top
z1” (25.4mm) rear
zConsideration must be given to provide adequate clearance for installation and service.
Mobile or manufactured home installation
zInstallation MUST conform to the MANUFACTURED HOME CONSTRUCTION AND
SAFETY STANDARD, TITLE 24, PART 3280 or STANDARD FOR MOBILE HOMES
CAN/CSA-Z240 MH, or, when such standards are not applicable, with AMERICAN
NATIONAL STANDARD FOR MOBILE HOME, ANSI/NFPA NO. 501B.
zProvide an opening with a free area of at least 25 square inches (161cm2)for introduction
of outside air into the dryer room.
zSee the sections for electrical connection information.
Bathroom or bedroom installation
The installation must conform with local codes or, in the absence of local codes, with the
NATIONAL ELECTRICAL CODE, ANSI/NFPA NO. 70 (for electric dryers).

9
INSTALLATION INSTRUCTIONS
Undercounter installation
If an undercounter installation is desired:
zNo special dryer installation kit is required.
zIf the dryer is installed alone, a minimum of 60 square inches (387cm2) of open area
is required for ventilation at the front of the dryer. If a washer and dryer are installed
together, a minimum of 120 square inches (774cm2) of open area is required.
Door fully open
1113/16” (300mm)
25” (635mm)
Dryer installed alone
Washer and dryer installed together
Washer and dryer power connection
Door fully open
1113/16” (300mm)
Door fully open
1113/16” (300mm)
493/16” (1250mm)
163/4”
(427mm)
min 1”
(25.4mm)
34” (865mm)
min clear space required
263/16” (665mm)
43” (1090.4mm)
163/4”
(427mm)
min 1”
(25.4mm)
34” (865mm)
min clear space required
263/16” (665mm)
43” (1090.4mm)
EN
Dryer power socket
Washer power plug

10
INSTALLATION INSTRUCTIONS
Before making the electrical connection, turn off
the circuit breaker(s) or remove the dryer’s circuit
fuse(s) at the electrical box. Be sure the dryer cord is
unplugged from the wall.
IMPORTANT!
Never leave the access cover off the terminal block.
Dryer power cord kit
UL rated 120/240V, 30A with 3 or 4 prongs. Identify the plug type
as per the house receptacle before purchasing line cord. Stacking
installations may require a power cord up to 6feet (1.8m) in length.
The power cord is supplied in all models except for
DE4024P1 US dryer model. You need to provide your own power cord
for this model.
Connecting an electric dryer
Tools you will need:
Slip-joint pliers Level Phillips screwdriver Flat-blade screwdriver
Materials you will need:
Safety glasses Gloves 3/4” Strain relief
(UL recognized)

11
INSTALLATION INSTRUCTIONS
Electrical connection information for electric dryers
For electrical connections using a power cord:
! WARNING!
Fire Hazard
zUse a new UL-listed 240V 30 amp dryer power supply cord with closed
ring terminals or spade terminals with upturned ends.
zUse a UL-listed strain relief.
zDisconnect power before making electrical connections.
zConnect neutral wire (white or center wire) to center terminal.
zGround wire (green or bare wire) must be connected to green
groundconnector.
zConnect remaining two supply wires to remaining two terminals.
zSecurely tighten all electrical connections.
zReplace the terminal block cover.
zFailure to do so can result in death, fire or electrical shock.
Grounding instructions
For a grounded, cord-connected dryer:
This dryer must be grounded. In the event of a malfunction or breakdown, grounding
will reduce the risk of electric shock by providing a path of least resistance for electric
current. This dryer uses a cord having an equipment-grounding conductor and a grounding
plug. The plug must be plugged into an appropriate outlet that is properly installed and
grounded in accordance with all local codes and ordinances.
WARNING!
Improper connection of the equipment-grounding conductor can result in a risk of
electric shock. Check with a qualified electrician, or service representative or personnel,
if you are in doubt as to whether the appliance is properly grounded.
DO NOT modify the plug on the power supply cord. If it will not fit the outlet, have
aproper outlet installed by a qualified electrician.
Only a 4-conductor cord shall be used when the appliance is installed in a location where
grounding through the neutral conductor is prohibited. Grounding through the neutral
conductor is prohibited for
1 new branch-circuit installations
2 mobile homes
3 recreational vehicles
4 areas where local codes prohibit grounding through the neutral conductors.
SAVE THESE INSTRUCTIONS
EN

12
INSTALLATION INSTRUCTIONS
Electrical connection information for electric dryers
For direct wire connections:
! WARNING!
Fire Hazard
zUse 10 gauge copper wire.
zUse a UL-listed strain relief.
zDisconnect power before making electrical connections.
zConnect neutral wire (white or center wire) to center terminal.
zGround wire (green or bare wire) must be connected to green
groundconnector.
zConnect remaining two supply wires to remaining two terminals.
zSecurely tighten all electrical connections.
zReplace the terminal block cover.
zFailure to do so can result in death, fire or electrical shock.
Grounding instructions
For a permanently connected dryer:
This dryer must be connected to a grounded metal, permanent wiring system, or
anequipment-grounding conductor must be run with the circuit conductors and connected
to the equipment-grounding terminal on the appliance.
WARNING!
Improper connection of the equipment-grounding conductor can result in a risk of
electric shock. Check with a qualified electrician, or a Fisher&Paykel trained and
supported service technician if you are in doubt as to whether the appliance isproperly
grounded.
SAVE THESE INSTRUCTIONS

13
INSTALLATION INSTRUCTIONS
Connecting dryer using 4-wire connection (must be used for mobile home installation)
Note:
Since January 1, 1996, the National Electrical Code requires that new constructions use a
4-wire connection to an electric dryer. A 4-wire cord must also be used where local codes
do not permit grounding through the neutral. 3-wire connection is NOT for use on new
construction.
L1 NL2
Cover
Green wire from
power cord
3/4” Strain relief
and bracket
4 #10 AWG minimum copper conductors or 120/240V 30A power supply cord kit marked for use with
dryers and provided with closed loop or spade terminals with upturned ends (not supplied)
1 Turn off the circuit breaker(s) (30 amp) or remove the dryer’s circuit fuse at the
electrical box.
2 Be sure the dryer cord is unplugged from the wall receptacle.
3 Remove the power cord cover located at the upper back.
4 Remove green ground screw and retain for use in Step 7. Remove center screw
(markedN) in terminal block. Remove and discard ground strap.
5 Install 3/4 in. UL-recognized strain relief to power cord entry hole. Bring power cord
through strain relief and bracket.
6 Connect power cord as follows:
zConnect the 2 hot lines to the outer screws of the terminal block (marked L1 and L2).
zConnect the neutral (white) line to the center of the terminal block (marked N).
7 Attach ground wire of power cord with the green ground screw (hole above strain
reliefbracket). Tighten all terminal block screws (3) securely.
8 Properly secure power cord to strain relief and bracket.
9 Reinstall the cover.
IMPORTANT!
Never leave the cover off of the terminal block.
EN

14
INSTALLATION INSTRUCTIONS
Connecting dryer using 3-wire connection
If required, by local code, install external ground (not provided) to grounded metal,
coldwater pipe, or other established ground determined by a qualified electrician.
L1 NL2
Cover
Ground strap
3/4” Strain relief
and bracket
3 #10 AWG minimum copper conductors or 120/240V 30A power supply cord kit marked for use with
dryers and provided with closed loop or spade terminals with upturned ends (not supplied)
Three-wire connection
zNot for use in Canada.
zDO NOT use for Mobile Home Installations.
zNOT for use on new construction.
zNOT for use on recreational vehicles.
zNOT for use in areas where local codes prohibit grounding through the
neutralconduction.
1 Turn off the circuit breaker(s) (30 amp) or remove the dryer’s circuit fuse at the
electrical box.
2 Be sure the dryer cord is unplugged from the wall receptacle.
3 Remove the power cord cover located at the upper back.
4 Install 3/4 in. UL-recognized strain relief to power cord entry hole.
Bringpowercordthrough strain relief and bracket.
5 Connect power cord as follows:
zConnect the 2 hot lines to the outer screws of the terminal block (marked L1 and L2).
zConnect the neutral (white) line to the center of the terminal block (marked N).
6 Be sure ground strap is connected to green ground screw on cabinet rear.
Tightenallterminal block screws (3) securely.
7 Properly secure power cord to strain relief and bracket.
8
Reinstall the cover.
IMPORTANT!
Never leave the cover off of the terminal block.

15
INSTALLATION INSTRUCTIONS
Back view
A
A
B
Drain hose Hose guide
Cable ties
58”
(147cm)
Max.
EN
Connecting the drain hose
Draining water without using the water tank
You can use the dryer without using the water tank by
following the procedures below.
To connect the drain hose:
1 Disconnect the drain hose A.
2 Connect the drain hose Ato the other hole.
3 Connect accessory hose B(long drain hose)
adjacent to hose A.
zWhen connecting hose B, take care that the height
of the hose does not exceed 58”(147cm).
zAfter connecting the drain hose, you can now
directly drain the condensed water to a standpipe
or washstand.
4 Over the edge of a wash basin:
The drain hose must be placed lower
than 58” (147cm). To keep the drain
hose spout bent, use the plastic hose
guide as supplied with the washer.
Secure the guide to the wall with a
hook or to the tap with a piece of
string to prevent the drain hose from
moving.
5 Assemble the drain hose and the hose
guide and fix them with the cable-tie.
Do not push the drain hose in the
standpipe any further than 4” (10cm).
Pushing the drain hose further in the
standpipe can cause leaking.

16
INSTALLATION INSTRUCTIONS
Final setup
Level the dryer
1 Stand the dryer upright near the final location
and adjust the four leveling legs at the corners to
ensurethat the dryer is level from side to side and
front to rear.
Plug dryer in
2 Note: stacking installations may require a power
cord up to 6feet (1.8m) in length.
Dryer startup
3 Press the ‘POWER’ button.
Note: if the dryer has been exposed to temperatures
below freezing for an extended period of time, allow
it to warm up before pressing ‘POWER’. Otherwise,
the display will not come on.
The dryer is now ready for use.
49-90571 19
Ensure proper
ground exists
before use.
Levelling the feet

17
INSTALLATION INSTRUCTIONS
Completing the installation
Installation test cycle
IMPORTANT!
Ensure the installation test cycle is completed before you dry any items in your dryer. This
is to check that your dryer is installed correctly and that it is functioning properly prior to
use.
1 Turn your dryer on by pressing the ‘POWER’ button.
2 Select the ‘Time Dry’ (30 mins) cycle. Ensure the drum is empty and the door is closed
(you will hear it click shut).
3 Touch the button. The drum will start rotating.
zObserve the machine for any problems.
zThe dryer will beep and display any faults on the screen if there are any problems.
Refer to pages 28 and 29.
4 At the completion of the cycle open the door and check that there is warmth inside
thedryer. This indicates the dryer is operating normally.
IMPORTANT!
If there are any problems, you must address these before proceeding with normal use.
The dryer will automatically turn off at the end of the cycle if there are no problems.
Before you start, it is a good idea to go through the following checklist:
1 Has the packaging been removed?
2 Is the machine correctly levelled, and the cabinet corners clear of the floor and walls?
3 Are the water tank, condenser and lint filter correctly in place?
4 Has the power cord been connected to an appropriate power supply and the power
turned on?
5 Have you performed the installation test cycle?
6 If external draining is preferred, is the drain hose attached to the correct outlet and
hooked into a standpipe or tub?
EN

18
OPERATING INSTRUCTIONS
WARNING!
To reduce the risk of fire, electric shock, or injury to persons, read the
IMPORTANTSAFETY INSTRUCTIONS before operating this appliance.
zCheck the lint filter is clean and the water tank is empty before every load. Ensureboth
are replaced correctly before using your dryer.
zSort and load items into the dryer drum, ensuring no items are in the way of the door.
Close the door (you will hear it click shut).
1 Press ‘POWER’ to activate your dryer.
2 Your dryer will default to the ‘Everyday’ cycle. Select your desired drying cycle by
turning the SmartTouch™ Control Dial.
3 Select your preferred drying options, using the SmartTouch™ buttons on the right
hand side of the panel (if you wish to select options different from the default options
for thecycle).
4 Touch the button to start the cycle.
Condenser dryer control panel
3
12 4
This manual suits for next models
4
Table of contents
Languages:
Other Fisher & Paykel Washer Dryer manuals

Fisher & Paykel
Fisher & Paykel WD8060P1 Operating instructions

Fisher & Paykel
Fisher & Paykel WD8560F1 Manual

Fisher & Paykel
Fisher & Paykel 11 Series User manual

Fisher & Paykel
Fisher & Paykel WD8060P1 User manual

Fisher & Paykel
Fisher & Paykel WD7560P1 User manual

Fisher & Paykel
Fisher & Paykel WD8560F1 Mounting instructions
Popular Washer Dryer manuals by other brands

Infiniton
Infiniton WSD-B684 owner's manual

Hotpoint
Hotpoint AQUALTIS AQD970F 49 Instructions for installation and use

Bosch
Bosch WDU28560TR Instruction manual and installation instructions

FEMP
FEMP FEMP Clothes Washer Specification sheet

Indesit
Indesit IWC 71450 Instructions for use

Hanseatic
Hanseatic HWD86W114BE user manual