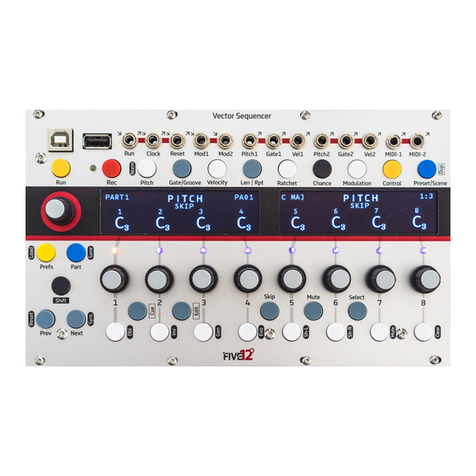
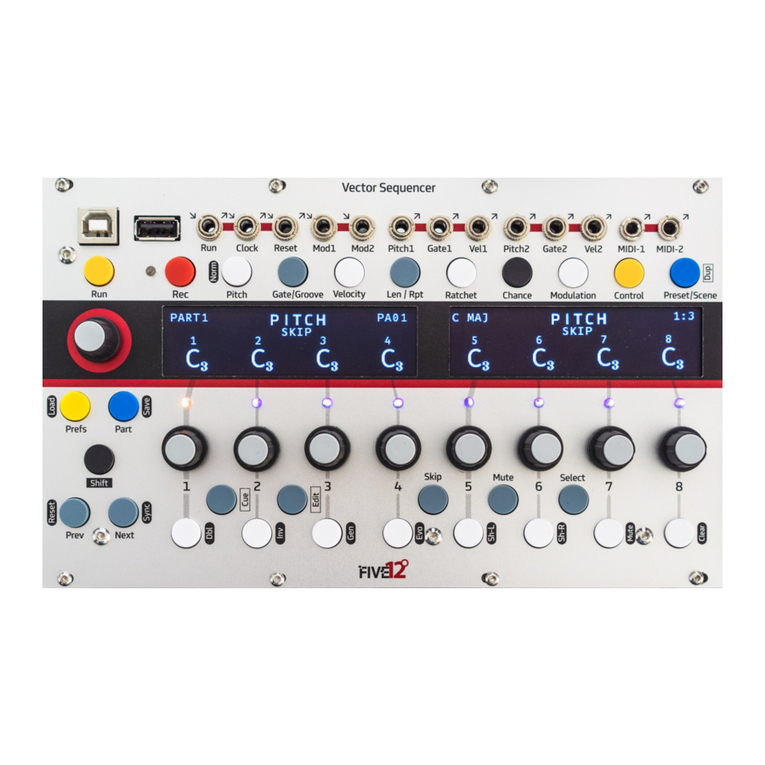
Five12 Vector Sequencer User manual

User Guide
Vector Sequencer

The Vector Sequencer is a digital sequencer in the Eurorack modular
format. It provides a flexible sequencing engine with support for eight
independent parts. Parts may be monophonic, chords or drum type.
There are two sub-sequencers per part for internal modulation, as well
as chance operations, and presets with a playlist function. The Vector
has both MIDI and CV connections for interfacing with a wide variety of
electronic musical instruments.
An optional Jack Expander module adds support for 4 more analog
voices (Pitch, Gate, Velocity), 8 more trigger outputs (6 can also be
used for input), MIDI in and out on DIN jacks, and dedicated jacks for
DIN Sync (in and out).
Installation
Take the Vector out of its protective anti-static bag and have a look at
the back. The power connector is on the right side of the circuit board
and is labeled 'Power'. Connect a 16-pin Eurorack power cable if you
have not already, red stripe DOWN per usual.
If you have the Jack Expander module, you should connect it to your
Vector before adding them to your case. Lay both the Vector and the
Expander face down in front of your case, with the Expander just to the
left or the right of the Vector. Identify the two 20-pin connectors on the
Vector labeled 'J20' and 'J13'. On the Expander, the matching
connectors are 'J200' and 'J130'. Using the two ribbon cables that
come with the Expander, connect J20 to J200 and J13 to J130. Make
sure to keep the orientation of the red strip UP for these connections.
Now add the Vector (or Vector/Expander combo) to your Eurorack-
format case. Don’t forget to power down first! The Vector consumes
140mA on +12V, 20mA on -12V. The Expander adds 30mA on both +12
and -12. Anything plugged into the USB A ‘to device’ jack may draw
additional current on +12V. Most controllers (including Launchpads) pull
less than 100 mA, but a cellphone or tablet may pull up to an additional
210 mA.
Firmware Updates & Support
It is a good idea to check regularly for firmware updates at http://vec-
tor.five12.com. For questions & support, and to be added to a mailing list
Limited Warranty
Five12 warrants the Vector Sequencer to be free of defects in assembly or
materials for one year from the date of purchase by the owner. This
warranty does not cover damage due to misuse such as: Incorrect
power supply voltages, extreme heat or moisture, modified firmware
or physical damage. Determination of misuse is at Five12's discretion.
During the warranty period, defective products will be repaired or replaced
as determined by Five12.
instructions. The owner is responsible for shipping fees to Five12. Return
shipping will be paid for by Five12.
Acknowledgments
A very special thank you goes to Joe Grisso, without whom this could not
have happened. Many thanks also to Charles Buckingham, Jason Fink,
Michael Koehler, Henry Jackson, Chris Meyer, Eric Williamson, Jeff
Wojciechowski, David Small, Michael Stearns, Ron Sunsinger, and Andy
Yih.
1
Getting Started

USB B ‘To Host’
Hook up to a computer or iOS device
for MIDI I/O. Hold down Shift
on startup to run in Disk Mode.
Run, Clock, Reset
Sync In or Out, Triggers In or Out,
Set operating mode in Global.
USB A ‘To Device’
Plug in a MIDI Keyboard for
programming sequences, or send MIDI
to a synth. Devices only, no hubs!
Mod CV In
0-5V, set mapping in
Modulation.
Sequence Editing
Main edit pages for sequences:
Rec, Pitch, Gate, Velocity, etc.
The 9th Encoder
Edits values for all steps in most edit
modes. Select steps to edit just
those steps as a group.
Parts
View part activity, switch between parts,
mute & solo parts. The current part name
is shown top-left of the 2nd OLED.
Globals
Tempo & sync settings,
default key & scale, part names and
types, output assignments.
Shift : Sequence Ops
Use Shift + other buttons to trigger operations global
to a sequence. Shift+Pitch to reset all pitch values
to their defaults, ditto for gate, velocity, etc. Use Shift +
[skip|mute|select] to un-[skip|mute|select] all steps.
One-Octave Keyboard
Use for step-recording & transposing
in Rec mode. Use white keys for skip,
mute & select in other modes.
Presets & Scenes
Per-part presets, and a preset
playlist w/ looping. Use Scene
mode for ad-hoc arrangements.
8 Encoders
Twist to edit values displayed
on-screen. Shift + Twist for
quantized value jumps.
Two HiRez OLEDs
Status readouts across the top,
values for the current edit page
along the bottom.
Skip, Mute, Select
In most sequence editing modes, sets the behavior
of the white keys in they keyboard. This sub-mode is
displayed top-center of the 1st OLED.
CV and MIDI Outputs
Flexible output assignments,
setup in Globals.
2
Front Panel Tour

For your first sequence, connect the Pitch1 and Gate1 outputs of the
Vector to other modules in your system, such as an oscillator for pitch
and an envelope generator for gate. If you want to connect via MIDI,
use one of the included 3.5mm to DIN MIDI adapters to connect
MIDI-1 on the Vector to a MIDI synthesizer.
Now press Gate on the Vector and twist a few encoders to turn on the
gates for those steps. By default, all of the gates for all parts are off, so
we need to turn at least one on to hear something. Press Run to start
the sequence. Now you are ready to start exploring the other edit
pages.
The most common parameters for sequence editing are accessed via
the Pitch, Gate, Velocity, Len/Rpt and Ratchet buttons. Repeated-
ly pressing those buttons will cycle into secondary pages such as Glide
and Groove. The current edit mode is shown top-left of the 1st OLED,
and each page has a distinctive graphic value readout that makes it
easy to keep track of where you are. Use Next & Prev to edit steps
other than the first 8.
Pitch:Sets the pitch value for each step in semitones from C1 to C9.
Glide:For monophonic parts, sets the glide time for pitch from 0% to
100%. Use longer gate times for smooth glides.
Chord:For chord-based parts, sets the output chord, from unison
through all dyads to an octave, then triads and seventh chords. To set a
part to chord mode, see Parts on page 11.
Gate:Sets the gate time for each step, from muted, to very short, up to a
tied (legato) note. When the gate is off, no MIDI notes are generated.
Groove:Adjusts the time of the step forward or backward just a touch.
Velocity:Sets the velocity CV output level and MIDI note velocity. The
minimum value is 1. To mute a note, use a zero gate or mute the step.
CC1, CC2, CC3:Sets the output value for three lanes of MIDI CC outputs.
If a CC number is set for a lane (see Sequence Controls on the next
page), a CC message is generated for every step that is not muted.
Step Len:Sets the length of a step in multiples of the base step time.
Repeat:Sets the step to repeat up to 8 times.
Ratchet:Sub-divides the step up to 4 times.
3
Pitch Gate Velocity Len/Rpt Ratchet
Sequence Editing

The Seq Ctl pages contain overall settings for the sequence, such as
sequence length and rate. There are three sub-pages here, turn encoder
9 to move between them.
START, LEN: Sets the starting step and pattern length within the
maximum sequence length for that part.
DIR: Direction: Forwards, backwards, alternate with or without repeating
the ends, or run randomly.
RESET: Sets the sequence to reset automatically, every n beats, or
externally (EXT). For external reset, see Tips & Tricks on page 16.
RATE, MODE: The default rate for sequences is set using common
musical divisions (MDV), but there are several alternate modes:
MDV : Musical Division X16, X8T, X8 : Crossfade modes
PCT : % of a beat P16, P8T, P8: Phase modes.
SPD : Speed, higher is faster. 1/1 - 16/16 : Fractions of a beat.
4
The X and P modes are phase-based, where the rate deviates (faster or
slower) from a default rate of 16th, 8th note triplets or 8th notes. The X
modes have a wider range than the P modes.
OCT & TRANS: Add an octave or semitone transposition to all notes.
Sequence Controls: Page 2
VEL VAR, TIM VAR: Add random variations to velocity and timing (groove).
KEY, SCALE: Override the global settings for key and scale.
TIP: The master tempo for the Vector, and the default key and scale
settings for all parts are in Globals.
GEN: Sets the algorithm for pattern generation. See Generate & Evolve
on page 8 for details.
EVO: Set the amount of change the evolve operation has: Low, Medium or
High.
Sequence Controls: Page 3
CC 1-3: Sets the CC numbers for the three CC lanes in the Velocity pages.
PQNT: Preset Quantization, sets whether presets change immediately, on
the next beat, or on the next bar.
Control
Sequence Controls

The GLOBALS pages have a wide range of configuration settings for
the Vector. There are three main sections: GENERL, PARTS, and
ROUTING. Use Prev &Next to move between them. Use encoder 9
to dial through the sub-pages of each section.
TEMPO, SYNC, KEY: Set the global tempo, swing amount, sync
mode, key and scale. This is also where you turn the Preset Playlist on
and off. For more on sync, see External Sync on page 14.
MIDI SYNC OUT: MIDI Clock on/off for all MIDI outputs.
MIDI PROG IN: Enable reception of MIDI program change or note
number messages to change Presets and Scenes on the Vector. MIDI
Channels 1-8 control parts 1-8, channel 16 is for scenes. NN48 mode
starts with note number 48 (C4), NN60 starts with note 60 (C5).
FILE SETTINGS: Preferences for Autoload and Autosave. Autosave
happens when you stop the transport.
USB STATUS: Connection status for both USB ports. To connect an
iOS device, use Apple’s Camera Adapter.
PARTS: See Parts on page 11 for more on these settings.
ROUTE: For each output on the Vector you can set which Part it is
assigned to.
5
CV OUT: These are two sets of Pitch, Gate & Velocity outputs on the
Vector, and four more on the Expander. Use the encoders to set the part
assignment for each output. For Chord and Drum parts, hold Shift and
twist the encoder to set which voice is output.
RUN, CLOCK, RESET: When not used for sync, these jacks can
generate clock values or other trigger types. The STx, GTxand RSx
modes will output step triggers (ST), gates (GT) or sequence resets (RS)
directly from a Part.
J-EXP TRIGS: For the optional Jack Expander module, these are set to
output clock divisions by default. The first 6 triggers can also be config-
ured as inputs, see page 16 for more details. Trigger outputs use a 2-step
edit process: Turn the encoder to pick a value, push the encoder to
activate it.
MIDI, USB: Each MIDI Output (USB A, USB B, MIDI-1, MIDI-2 and
Expander MIDI Ports) has 8 ‘slots’ to output up to all 8 parts. Shift +
Twist an encoder to set the MIDI channel for that slot.
Global
Globals, Tempo, Routing

On the Rec page, you can enter or modify sequences using the built-in
one-octave keyboard, any USB MIDI Class-compliant host or device, or,
if you have the Jack Expander module attached, a MIDI keyboard
connected via a traditional 5-pin MIDI cable. When a recording mode is
active, the LED next to the REC button glows red (for step record) or
purple (for other modes).
Pitch values for the sequence are displayed in a compressed
format on the left display, with parameters for adjusting the recording
mode and source on the right. Only currently active notes for the
sequence are displayed. So if your sequence starts on step 1 and runs
for 8 steps, only eight note values will be shown. Skipped or muted
notes are displayed in gray.
The right OLED display shows parameters for recording mode and
source.
6
The recording modes are:
OFF: No recording activity.
STEP: MIDI notes are used to program the pitch values for each step of
the sequence one by one. Use encoder 9to move the cursor.
TRANS: Incoming MIDI notes are used to transpose the sequence.
MIDI Note number 60 is used as the center point.
THRU: Incoming MIDI notes are sent directly to the outputs for the
current part, both CV and MIDI. In this mode, you can use the Vector as
a MIDI to CV converter while recording is active.
The SRC param sets which source of MIDI notes the record modes listen
to.
VKBD: The one octave keyboard on the Vector.
USBA: The USB A ‘to device’ connection.
USBB: The USB B ‘to host’ connection.
JEXP: The DIN MIDI jack on the Expander.
When using the on-board keyboard, the Next and Prev buttons shift the
keyboard up and down by octaves. The current octave is always shown in
the top-middle of the first OLED display.
Rec
Recording

Chance operations allow you to add variability to a pattern, such as
randomly skipping or muting a step, jumping to another step, or changing
the pitch. For each step in a sequence, you can pick an operation and the
probability that it will happen. You can also set the operation to happen
only on even bars, odd bars, or every 3rd or 4th bar.
Chance operations are represented by icons. Their probability of
occurring ranges from 0% to 100% and is represented by a circle around
the operation icon. The bar setting is represented by a letter or number
below and to the right of the operation icon.
There are three pages for chance ops, use the Chance button to cycle
between them.
CHANCE PROB: Set the probability that op will happen.
CHANCE OP: Pick an operation (the default is mute).
CHANCE BAR: Limit the operation to specific bars.
A couple examples:
7
Mute a Step, Un-Mute a Step
Skip a Step, Un-Skip a Step
Jump: Backwards, Anywhere, Forwards
Velocity: Less, More, Max
Gate: Shorter, Longer, Tie
Ratchet: 2, 3, 4
Pitch Up: Random, Random Shift Up,
Shift Up by Semitone
Pitch Down: Random, Random Shift Down,
Shift Down by Semitone
Jump backwards, 50% of the time,
only every 4 bars.
Mute, 30% of the time.
All Operations:
Mute One or More: (Drum Parts only),
Mute one or more random voices.
Mute Voice: (Drum Parts only),
Mute one or more specific voices
Swap Voice: (Drum Parts only),
Swap any two voices.
Jump: To a Specific Step
...
...
...
...
...
Chance
Chance Ops

Sequence Operations
A variety of sequence transformations can be triggered by holding down
the Shift key and pushing any of the white keys on the mini keyboard.
The names for these operations are printed vertically just to the right of
each button.
Dbl:Doubles the current pattern.
Inv:Invert all pitches, using the base pitch as the center point.
Gen:Generates a new sequence.
Evo:Modifies (evolves) the current sequence. Set the amount of
variation on the 2nd Control page.
Sh-L:Shifts the sequence one step to the left.
Sh-R:Shifts the sequence one step to the right.
Mute:Mutes the current part. This is the same as muting a part
on the Part page.
Clear: Restores all parameters of a sequence to their original value,
and marks the current preset as 'empty'.
TIP: Hold Shift and press any the edit mode buttons to 'normalize' that
parameter, which will reset it to its original value.
Generator Algorithms
To set the algorithm used for sequence generation look at the 2nd SEQ
CTL page.
ACD1: Acid 1: Generates a 16 step sequence at 1/16th notes with a
variety of pitch tones, including minor seconds and tritones. Gates and
Velocity steps are set to %50, and then a few accents (Velocity @ 100%)
are added.
ACD2:Acid 2: similar to ACD1, but adds in a few pitch glides.
ACD3, ACD4 : Similar to ACD1 & 2, but no changes to SEQ CTL
settings.
BRL1: Berlin School 1: Generates an 8 step sequence at 1/8th notes,
emphasis on octaves and fifths.
BRL2: Similar to BR1, but no changes to SEQ CTL settings.
357:Generates a 'cell' based pattern that is 3, 5 or 7 steps long,
repeated out to 16 steps.
OBL1:Obliq 1: Generates a cell based pattern that anywhere from 2 to 7
steps long, repeated out to 16 steps and evolved. Affects Pitch, Gate,
Velocity & Step Length.
OBL2:Obliq 2: Generates more radical sequences than OBL1.
RND1:Randomize Pitch & Gate.
RND2:Randomize Pitch, Gate, Velocity.
RND3:Randomize Pitch, Gate, Velocity, Step Length, & Ratchet.
ECLG: Euclidean Gate: Applies a Euclidean pattern to just gate values.
TIP: You can push generated sequences in very different directions by
pre-adjusting unaffected parameters, such as Glide and Rate. For
continuous variation, use lots of Chance Ops. To widen the pitch range,
set a Sub Sequencer to modulate semitones or octaves.
8
Shift
Sequence Ops, Generate & Evolve

In addition to the main sequence, each Part on the Vector Sequencer
has two simpler CV-only sub-sequencers for internal modulation. These
sequencers are limited to a maximum length of 8 steps and a range of
speeds based on standard musical divisions. They can be used to
modify the transposition, rate, length and other parameters of the main
sequence. You can also assign any of the Velocity outputs on the
Vector to one of the modulation sequencers for direct output of the sub
sequencer's CV values.
There are five pages in the Mod section, two for each sub-sequencer
and one for setting up external modulation. Turn encoder 9to move
between them. The first page for a sub-sequencer has settings for
length, direction, rate and target parameter, the second has settings for
the value of each step.
To setup modulation of a parameter:
1. Set the length and rate of the sub-sequence.
2. Pick the parameter you want to modulate. The Min & Max values
will automatically update to match the range of the target parameter.
Also, the initial values of the sub-sequence will be set to the current
value of that parameter.
3. Enable the parameter modulation by turning encoder 8to ON.
4. Turn encoder 9 to page over to the steps for the sub-sequence so you
can edit them. There are three rows of numbers here. The top row are
the step numbers, of course. The bottom row are the sub-sequence
actual values, which will be offset amounts. The values in the middle row,
which are gray, will show the caculated, modulated value of the target
parameter.
Parameters targeted by sub-sequence modulation will display a
super-script S1 or S2 to indicate their values are modulated by a sub-se-
quencer.
TIP: To directly route the output of a sub-sequencer to a velocity output,
navigate over to the Route page in Globals, and use encoder 9to move
to the page with the velocity output you would like to assign. Turn the
encoder to select the part, then hold Shift and turn the encoder again to
select S1 to output sub-sequence 1 or S2 for the second sub-sequence.
9
Modulation
Sub Sequencers

The Vector Sequencer has two CV inputs (Mod1 and Mod2) that can
be used to control a variety of parameters such as gate time, velocity
scaling or the probability for chance operations. The input voltage range
is 0 to 5V. Each of the 8 parts of the Vector has two modulation busses
that can listen to either or both of the external modulation inputs.
To navigate to the external modulation page, press Mod, then turn
encoder 9 to navigate over to the fifth modulation page.
To setup external modulation for a part:
1. Pick a mod source (EXT1, EXT2, or OFF).
2. Pick a target parameter.
3. Set the amount of modulation, which ranges from -100% to 100%.
For most parameters, 50% is a good starting point. At 100% the
amount of modulation will be enough to range from the smallest value
for the parameter to the largest.
Modulation Targets:
GATE: Gate time.
STLN: Step Length.
STRP: Step Repeat.
RCHT: Number of ratchets.
PROB: The probability amount for Chance Ops.
STRT: Start step.
LEN: Sequence length.
DIR: Sequence direction.
RATE: Sequence rate.
For all targets, modulation is calculated at the start of each step. The
current value for the modulated param is read and then adjusted up or
down based on the input voltage and modulation amount. Parameters
with CV modulation will display a super-script X1 or X2.
TIP: For best results, it helps to know what the voltage range of your
modulation source is. Attenuator modules (or cables) and level shifters
(for bipolar voltages) can be handy for getting a CV source into the 0 - 5V
range of the Vector’s modulation inputs.
TIP: Using a VCA controlled by a pitch or velocity CV from the Vector can
be both a handy and interesting way to control the voltage level of a CV.
10
Modulation
CV Modulation

The Vector sequencer has 8 Parts, each of which has a main
note-based sequencer and two sub-sequencers for modulation. All of
the sequencers for all Parts start and stop with the Run button (or
external sync), and they all share a common tempo, but are otherwise
independent. They can have independent run rates, lengths, directions,
etc. Each Part also has its own set of Presets and Playlist settings.
Parts 5-8 can also be configured as polyphonic Chord or Drum
sequences. For an overview of how all this fits together, look at the
diagram on the back cover of this manual.
Use the Part button to view the names and activity for all 8 Parts on the
Vector at once. On this page, the white keys of the mini-keyboard can
be used to SELECT which Part you are currently editing. The PART
page can also run in MUTE or SOLO sub-modes. Use the gray buttons
between steps 4-7 to select which of the three modes to use.
TIP: From any sequence edit page, hold down the Part button and
press one of the white mini-keyboard keys to directly jump to the other
Part.
PART SETUP
To edit the name, colors, maximum length or type of a Part, look in
GLOBALS: Press Global and use Next/Prev to find the 2nd page,
titled PARTS.There are two sub-pages here, use the encoder 9to
move between them.
On the first PARTS page, use encoder 1to select the Part you want to
modify. Using encoders 3& 4you can set the LED colors for the
foreground (current step) and background (other steps).
The main sequence for each Part has a maximum length of 16, 32 or 64
steps, but longer sequences mean fewer Presets. To change the max
length, use encoder 5. Parts 5-8, can also be set to chord or drum types
(encoder 6). When you change the max length or type of a Part, you will
be prompted to use Shift+Clear to initiate the change, and then the
Next button to confirm. Warning: this process will erase ALL existing
Presets for that Part!
To rename a Part, use encoder 9to move to the second PARTS sub-sec-
tion in GLOBAL. On this page, use encoder 1to select the Part you want
to rename, and encoders 2-6to edit the name.
PARTS & ROUTING
The routing options for CV and MIDI outputs are very flexible. For details
on setting up Part assignments for outputs, see Routing on page 5.
11
Global Part
Parts

In addition to the default monophonic sequences, you can format
any of Parts 5-8 as four voice Chord or Drum sequencers. This can be
done on the 2nd GLOBALS page: Press Global, then Next, the page
title will be PARTS. Turn encoder 1until you are viewing Part 5 or
higher, turn encoder 6until it says CHORD or DRUM, then hold Shift
and press Clear to initiate the change. Press Next to confirm. All data
that was in that part will be erased and it will be reformatted into the
new sequence type.
CHORD PARTS
All the edit pages for a Chord Part are just like a Mono Part, except for
the PITCH page. Here Chord Parts display a base note for each step,
and either a single super-script indicator for the type of built-in chord, or
3 semitone offsets for a custom chord. A small, vertical gray cursor
always appears to the left of one of these editable values. Use encoder
9to move the cursor, which sets the value to be changed with any of
the 8 main encoders. Push encoder 9to switch to selection mode to
edit all steps at once.
The base note is always the lowest note of the chord. By default, the
chord type is ‘unison’, which means one note only. To edit the chord
type, turn encoder 9to move the cursor to the right of the base note,
and turn an encoder to pick one of the built in chords. These chords
progress through all dyads (two note chords) up to an octave,
represented by semitone values from 1to 12, followed by triads (M:
major, m: minor, A: augmented, D: diminished, S2: sus2, S4: sus4),
then seventh chords (M7 : maj 7th, D7: dominant 7th, m7: min 7th,
h7: half-diminished, d7: fully diminished).
If you want to make a custom chord, which allows much greater flexibility
in both note selection and pitch range, hold the Edit button and push the
encoder for any sequence step, or push encoder 9 to convert all chords to
custom. Repeat the process to convert back to the built-in chord selection.
In a custom chord you can edit up to 3 semitone offset values for each
chord. Offsets greater than an octave (12 semitones) are indicated with
small arrows to the right of the semitone value. The maximum offset is 60
semitones.
To setup CV outputs for a Chord Part navigate to the 3rd page of
GLOBALS: Press the Global button, then Next twice, to the page titled
ROUTE. Turn encoder 9 to get to the appropriate sub-page, such as CV
OUT 3-4 or CV OUT 5-6. Turn the encoder for the desired output to
pick a Part. Then hold Shift and turn the encoder again to pick the Voice.
The base note for the chord is Voice 1, and, depending on the chord type,
up to 3 more Voices can be generated.
To setup a MIDI output for a Chord Part, use encoder 9to scroll to one of
the MIDI outputs on the ROUTING page, then turn any encoder to select
the Part.
11
Global Part
Chord & Drum Parts

As with Chords, Drum Parts have four voices (a.k.a. 'lanes'), but no
pitch value, instead each Voice has a velocity level, which you can edit
on the PITCH page (re-titled DRUM on the display). The level values
are indicated by 4 columns on each sequence step, one per voice.
Below the value columns, there is a horizontal cursor, which indicates
the current Voice to edit. It works just like in a Chord Part: Turn encoder
9to move the cursor, push encoder 9to switch to selection mode. You
can also use the MUTE sub-mode to edit the pattern using the white
keys on the mini-keyboard.
There are several ways you can setup CV outputs for a Drum Part. You
can use 4 Gate and Velocity outputs on the Jack Expander module, or
use 4 trigger outputs only, or even combine 4 trigger outputs with 4
velocity CVs. Setting up a Gate or Velocity output for a Drum Part is the
same as for a Chord Part, except there is no need to route for pitch.
To setup a trigger out to work with a Drum Part, use encoder 9to scroll
to the ROUTING sub-page for RUN, CLOCK, RESET or J-EXP TRIGS.
Hold Shift while turning the encoder for the trigger you want to map,
and turn until you see D5.1, about 4 clicks depending on where the
trigger was set originally. The 'D' is for drums, '5' is for Part 5, and '1' is
the first Drum Voice. From there, release the Shift key and turn the
encoder to pick the Drum Part and Voice you want the trigger to output.
Then push the encoder to ‘latch’ the mapping change.
To setup a MIDI output for a Drum Part, use encoder 9to scroll to one of
the MIDI outputs on the ROUTING page, then turn any encoder to select
the desired Drum Part.
To set which MIDI notes are output for each Drum Voice, Go to the SEQ
CTL page for the Drum Part. Then turn encoder 9until you get to the
DRUM MAP page. Turn encoder 1to pick the Drum Voice, then turn
encoder 2to set the note, and encoders 3& 4to pick a two letter name.
Drum Parts also come with their own set of generator algorithms, as listed
below. Cell based algorithms use short, randomly generated patterns,
typically 2 - 8 steps long, repeated out to the full length of the sequence,
and then evolved in various ways.
CEL1, CEL2, CEL3 : Cell-based algorithms with increasing levels of
pattern density and complexity.
MAL1, MAL2: Two dual-cell algorithms.
ECL1: Euclidean with random ‘k’ amount per part, up to 16.
ECL2: Euclidean with less density on voices 1 & 2, and velocity random-
ization.
HYB: Hybrid, voices 1 & 2 use cell based algorithm, voices 3 & 4 are
euclidean.
SPRS: Sparse: A cell based algorithm tuned for longer patterns.
RND1, RND2, RND3: Increasing amount of randomization.
11
Global Part
Chord & Drum Parts

12
PROJECTS
The Vector stores your Projects on a micro-SD card located on the back
of the module. By default, Projects are auto-loaded when the Vector is
powered on, and auto-saved each time the transport is stopped. To
adjust those settings, see Globals. There is an icon for the SD card
near the top-center of the 2nd OLED. When a Project is changed, the
icon will have a dot in its center. For a saved Project, the icon will show
a solid rectangle.
To manually save a Project, hold down the Shift button and press
Part. Use encoders 1-7 to edit the Project name, then push Next to
save. If you change the name of a Project to the name of another
existing Project, you will see an overwrite warning.
Each Project gets its own folder on the SD card. The Vector keeps the
most recently saved version of a Project, along with several backups.
Projects that are saved manually end in the extension .VSM, autosaves
use .VSA.
To load a project, hold Shift and press Global. Use encoder 9to
select the project and Next to load it. To make a new Project, use
Shift+Global and pick ‘New Project’. A name for the new Project will
be automatically generated.
DISK MODE
Running the Vector in disk mode allows you to mount the contents of the
SD card onto your computer, which makes it very quick and easy to back
up copies of your Projects and calibration files, and for loading new
firmware.
To run the Vector in disk mode, connect it to your computer (Mac, PC,
Linux) with a USB A - B ‘Printer’ cable, and hold down the Shift button
while powering up. The Vector will start with large ‘Disk Mode’ titles on
both OLED screens, and after a few seconds the Vector’s SD card will
mount onto your computer. Look in the F12_VS folder for the PROJECT
folder, PREFS and calibration files.
For information on firmware updates, visit vector.five12.com.
Calibration Files
The Vector sequencer comes with one or two data files that store
calibration data for the Pitch CVs. The VSCAL.DAT is for the Vector,
EXCAL.DAT is for the expander. If you purchased your Vector and
Expander together, the two files may be pre-loaded. If you purchased an
Expander separately, you can download the file from
http://vector.five12.com.
About SD Cards
Your Vector Sequencer comes with a high quality SD card that has been
tested to work both speedily and reliably. SD cards from SanDisk and
Transcend are both recommended, in sizes from 8GB to 32GB.
Global
Projects

13
PRESETS
.
Each Part on the Vector supports up to 20 Presets, depending on the
maximum length of the sequence. Press the Preset button to see all
the Presets for the current Part in a grid. Empty Presets are shown as
"..", non-empty Presets are shown by name. To select a new Preset on
the current row, use the white mini-keyboard buttons. To change rows,
use encoder 9.
Use Shift+Preset to duplicate the current Preset into an empty Preset
'slot'. Use Shift+Clear to empty out a Preset. Preset changes are
quantized to bars by default. This setting, called PQNT can be changed
on the 2nd Seq Ctl page for each Part.
PLAYLISTS
To edit the name and Playlist settings for a Preset, push Preset, then
Prev or Edit. Alternatively, use Prev/Next to move between Preset
Edit, Preset and Scene pages.
The Playlist is simple in concept, but very flexible. Each Preset can:
• Play forever (by default).
• Play for xbeats/bars then go to a later Preset.
• Play for xbeats/bars then go to an earlier Preset and repeat ytimes.
Use encoders 4-8 to edit the Playlist settings for a Preset. The master
on/off switch for all Playlists is on the first GLOBALS page.
SCENES
The Scene page displays the current Presets for all 8 Parts. You can
directly set the Preset for a Part in the current Scene using the 8 main
encoders. Use encoder 9to move between Scenes. To trigger a new
Scene, use the Cue button. Scene changes are always quantized to a
bar.
Preset/ScenePreset/Scene
Presets, Playlists & Scenes

14
In addition to its internal clock, you can synchronize the Vector to DIN
Sync, MIDI Beat Clock, or an external clock pulse. If the clock source in
your modular can generate a run/stop CV and clock ticks at 24PPQN
(parts per quarter note), you can use the Run & Clock jacks for DIN
Sync. For all sync sources, the Vector will internally up-rez the signal to
480PPQN for accurate rendering of features like Pitch Glide, Groove
and Ratcheting. Sync settings are on the first page of GLOBALS.
DIN Sync:
1. Connect a DIN Sync source to the Vector through the Run & Clock
jacks, the STG Sync connector on the back panel, or the DIN IN Jack
on the Jack Expander module.
2. Select 'RC24' for Sync via the Run & Clock jacks, 'STG' for sync via
the STG Sync connector on the back panel, or 'JxDIN' for DIN Sync via
the DIN input connector on the Jack Expander.
3. Start playback from your DIN Sync source per usual.
MIDI Beat Clock:
1. Connect a MIDI Beat Clock source to the Vector via the USB A or B
jacks on the front panel, or use the 5-pin MIDI Input connector on the Jack
Expander.
2. In Globals, page 1, select 'USB-A' for sync via the USB ‘to device’
jack, 'USB-B' for sync via the USB ‘to host’ jack, or ‘JxMID’ for sync via
the MIDI Input on the Jack Expander.
3. Start playback from your MIDI Clock source.
External Clock Pulse:
1. Connect a clock pulse (gate or trigger) running at either 1 or 4 pulse(s)
per beat (PPQN) to the Clock jack on the Vector. Optionally connect a
reset pulse to the Reset jack.
2. Select ‘CR/1’ (for a 1 PPQN incoming clock) or ‘CR/4’ (for a 4 PPQN
clock) to use the Reset input as a global reset for all parts, or use ‘Cr/1’
or ‘Cr/4’ for optional reset. To set a part to reset in Cr/1 or Cr/4 sync
modes, on the Control page for that part, pick ‘EXT’ for Reset.
3. Start and stop the Vector using the Run button.
TIP: For primary sync, the Vector will track smooth tempo changes well,
but for random or ‘patterned’ triggering of sequences, see page 16,
External Resets & Triggers.
Global
External Sync

On the Seq Ctl page for any part, you can edit eight parameters at a
time for a single Part. The Dashboard is a series of pages that let you
edit one parameter for all eight Parts at once.
To get to the Dashboard, press Part to go to the PART page, and then
press Next. The top-left of the first OLED will list the parameter being
edited (START step), the top-left of the second OLED will be D-BRD,
for Dashboard. Each of the values for the 8 encoders will list the Part
name and the current value for the parameter.
To change the parameter being edited, you can turn encoder 9, or
press any of the white keys on the mini-keyboard. The white keys will
page through the parameters in the same order that they appear on the
SEQ CTL page: START, LEN, DIR, etc.
In addition to the 8 parameters from SEQ CTL, there are 3 additional
parameters only available in the Dashboard. You can reach them
using encoder 9, or by pressing Next. These parameters are:
- GATE SCL: Scale all gate values.
- VEL SCL: Scale all velocity values.
- CHAN SCL: Scale the probability for all chance operations.
Keep in mind: These scale values affect every step for that Part.
15
Part
The Dashboard

Copy & Paste
You can copy a preset from one ‘slot’ to another: Hold Shift and press
Select, to copy the Preset. Then move to the other Preset using one of
the white keys on the mini-keyboard. Hold Shift and press Skip to
paste the Preset. You can also copy and paste Presets between Parts,
as long as the destination Part has the same sequence type (MONO,
CHORD, DRUM) and size (16, 32, 64) as the source Part.
Shift+Twist
Holding the Shift key while turning an encoder will usually allow you to
jump quickly around the range of values available. For pitch values, it
increases or decreases the pitch by one octave. For values like gate
and velocity, it jumps between low, medium and high values. When
naming Parts and Projects, Shift+Twist will jump between vowels, the
number 0, the symbol + and a space character. Shift+Twist is
especially helpful for assigning the output of trigger jacks, which have a
very wide range of parameters.
Warm Reboot
If you press and hold Encoder 9for 5 seconds, the Vector will restart.
This is very handy for getting into and out of disk mode without having
to power cycle your entire system.
Disk Mode
Hold Shift while starting up and the Vector will run in Disk Mode. If
you then connect the Vector to a computer via USB, you can access the
contents of the SD card without having to remove the Vector from your
case.
External Resets & Triggers
The Reset jack and triggers T1 - T6 on the Jack Expander can be used to
reset individual Parts. First, on the ROUTING page in GLOBALS, set the
mode for the jack to be EXT. Then, on the Seq Ctl page for the Part, set
RESET to EXT (for the Reset jack) or T1 - T6 for jacks on the Expander.
You can also use the T1 - T6 triggers to manually step a sequencer from
an external source. Set the mode for the trigger to EXT, then on the Seq
Ctl page for a Part, set the RATE MODE to T1 - T6. The Vector will use
the RATE param to estimate gate lengths. When using RC24, CR/1 or
Cr/1 sync modes, triggers 5& 6on the Expander can only be used as
outputs.
Scale Descriptions:
CHR: Chromatic
MAJ: Major
MIN: Minor
DOR Dorian
PHY Phrygian
LYD Lydian
MIX Mixolydian
LOC Locrian
16
HM: Harmonic Minor
MM: Melodic Minor
WT: Whole Tone
O1: Octatonic 1,2
O2 :Octatonic 2,1
PT: Pentatonic
PTM: Pentatonic Minor
M7: Major 7th Chord
D7: Dominant 7th Chord
Tips & Tricks

Vector Sequencer Project -All projects stored on micro-SD Card
Part - Eight parts per project
Note Sequence - 16, 32, or 64 steps long
Preset -Up to 20 presets per part depending on sequence length
Sub-Seq 1 Sub-Seq 2 Ext Mod
Preset
Playlist
Scenes
Globals -Tempo, Key, Scale, Sync, Output Routings, etc.
www.five12.com
v1.4
Other manuals for Vector Sequencer
1
Table of contents
Other Five12 Recording Equipment manuals
