Smartmove IOIO User manual

Installation Guide
IOIO Box for use with
SmartMove Go tablet version
Version 2.0 –May 2021
STEP SUMMARY
PAGE
1
Overview
2
2
Equipment Checklist
3
3
Wiring Diagram
5
4
Installation
6
5
Bluetooth Setup
7
6
Wired Setup
9
7
Tablet Setup
10
8
Troubleshooting
12

SmartMove Installation Guide
Version: 2.0 –May 2021 Page2
Overview
The IOIO (pronounced “yo-yo”) Box is designed to interface the Android Tablet version of
the SmartMove Go vehicle software with various devices in a taxi. The interface box can:
Turn on (supplies power to) the Cabcharge Fareway meter when the driver logs into
SmartMove.
Turn off (cuts power to) the Cabcharge Fareway meter when the driver logs out of
SmartMove.
Detect the engaged/vacant states of an existing meter and reads the total fare at the
end of the job of compatible meters via serial connection.
Trigger the dome light on/off when the Cabcharge Fareway meter/SmartMove
softmeter is engaged/disengaged.
Receive a signal from the physical duress alarm and trigger the panic functionality in
SmartMove (e.g. make a silent call to the base so the base can hear what is going
on inside the car).
Charge the tablet (USB cable used for data/power).
Send fares directly to a CabCharge EFTPOS machine (when using the built-in Soft
Meter).
Important Note:
The IOIO Box is incompatible with the Samsung Knox lockdown system.
We have tested and can recommend Fully Kiosk by Fully Factory Kiosk Solutions, or
Surelock by 42Gears if you require a lockdown solution.
SmartMove Installation Guide
Version: 2.0 –May 2021 Page3
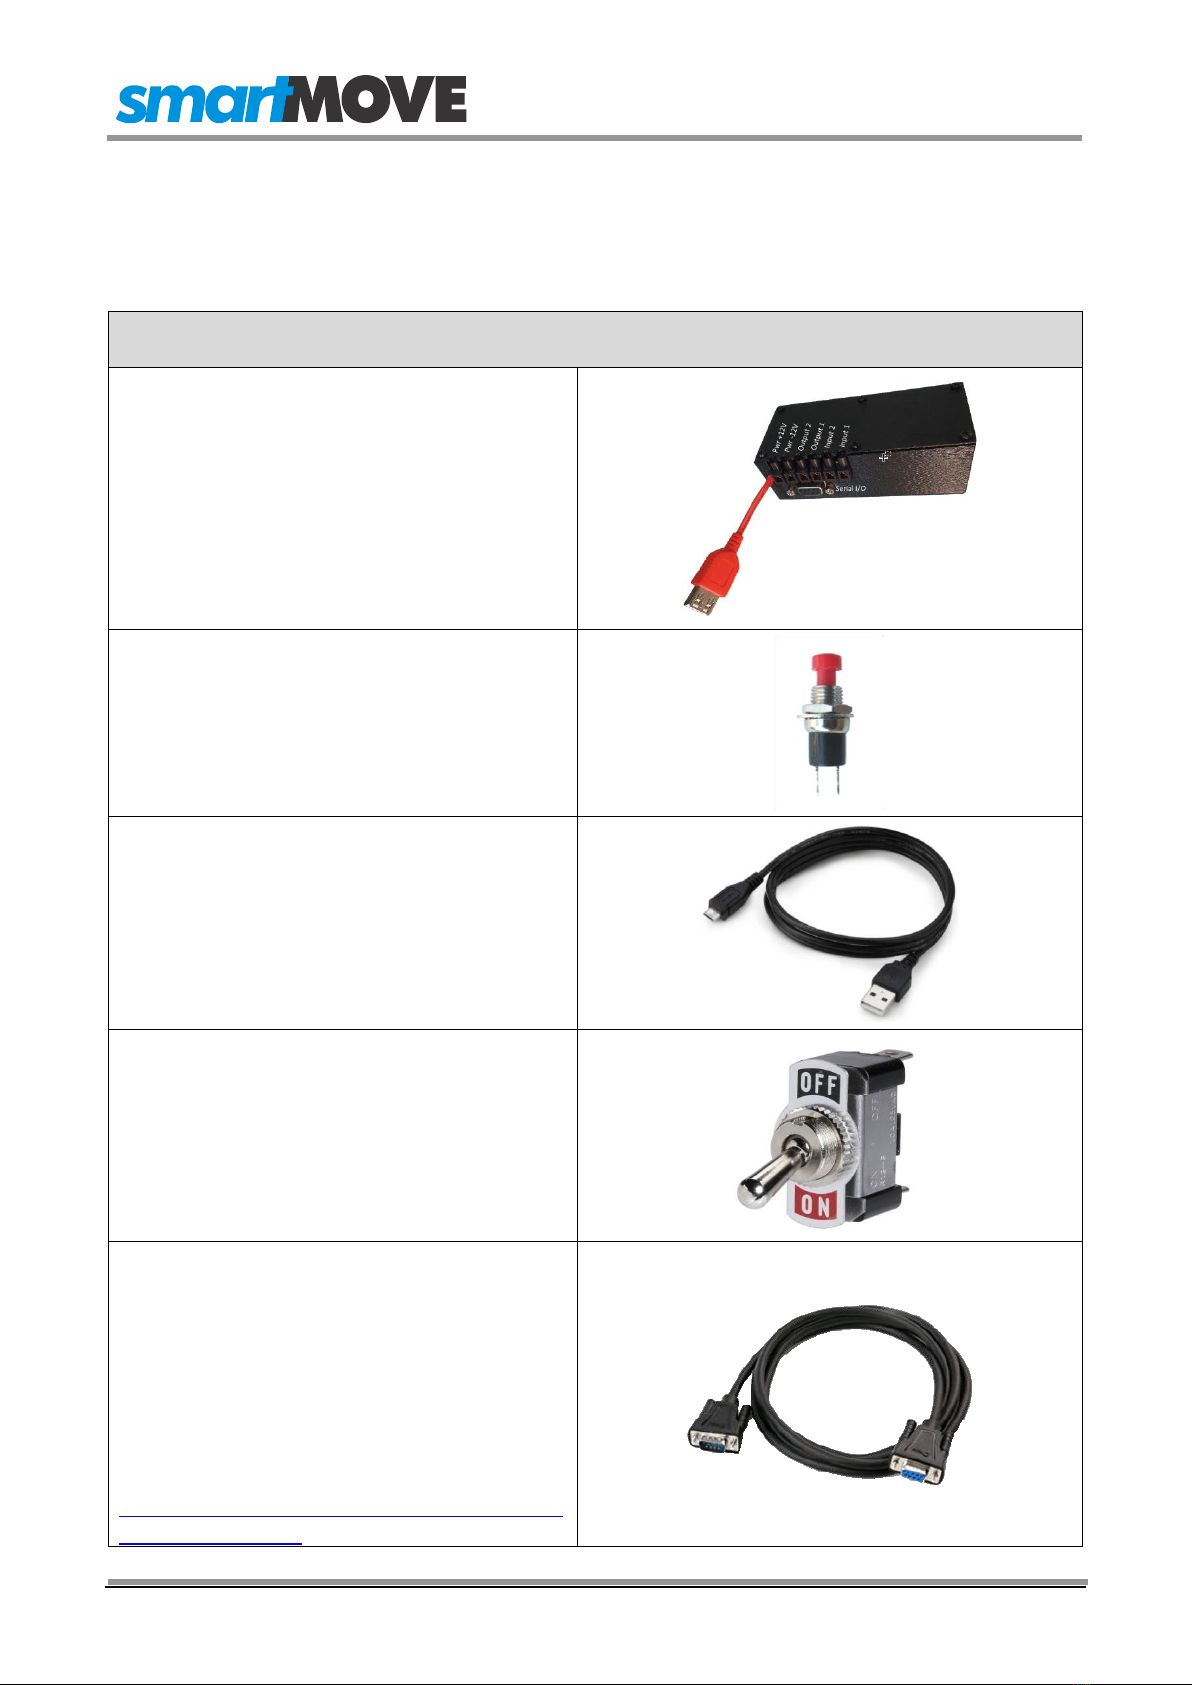
Equipment Checklist
The IOIO Box requires the following parts, some supplied by SmartMove.
Components:
1 x IOIO Box
(SmartMove supplied)
1x Panic Switch
(SmartMove supplied)
If previous equipment is installed, it is
possible to wire the old button to the
IOIO.
1 x USB data/charging cable
(Usually comes with the tablet or phone to
be used)
1 x Kill switch
(Not supplied)
See notes on pg. 6.
1x Male to Female null modem cable
(SmartMove supplied if required)
For use with the CabCharge Fareway
meter.
(Note: if the supplied cable is not long
enough, a “normal” RS232 extender cable
is required. Recommended part:
https://www.startech.com/en-au/where-to-
buy/mxt1003mbk)
SmartMove Installation Guide
Version: 2.0 –May 2021 Page4
1x Bluetooth Adaptor
(SmartMove supplied)
(Note: the model we supply has been
tested to work. Other models may not
work, so we do not recommend sourcing
these yourself.)
1 x ~25mm diameter Heatshrink
(Optional)
1x Serial-RJ45 adaptor + RJ12 cable
(Optional)
(SmartMove supplied if required)
For use with the CabCharge EFTPOS
machine.

SmartMove Installation Guide
Version: 2.0 –May 2021 Page5
Wiring Diagram

SmartMove Installation Guide
Version: 2.0 –May 2021 Page6
Installation
There are 6 screw
connectors on the side of
the IOIO Box.
From left to right:
1. Power, positive
2. Power, negative /
Ground
3. Meter power
4. Dome Light
5. Digital Meter input
6. Panic Button
Serial Out: Meter communication
Notes:
If your dome light is controlled by the Meter, then wiring it into
the IOIO Box (4) is optional. The benefit of wiring the dome light
is to allow control from the built in soft meter.
Powering the meter with the IOIO Box (3) is also optional. The
benefit of powering the meter directly allows the meter to be
powered on only when logged into SmartMove. A delay can be
configured after the driver logs out to allow them time to print the
End of Shift report, etc.
The panic button and dome light should have their grounds
(negative connection) wired to the car, or some other earth.
A kill switch (or relay) MUST be wired up to the power cable
connecting the battery to the IOIO Box, so the IOIO Box can be
turned off easily to facilitate easy power cycling for
troubleshooting.
Also, the default state of the dome light is “on” when everything
is connected, and this is a convenient way to turn it off.
Due to concerns about insufficient charging current, we also
provide an option to connect the IOIO box to the tablet with a
Bluetooth adaptor instead. This requires a USB power source
from elsewhere.
SmartMove Installation Guide
Version: 2.0 –May 2021 Page7
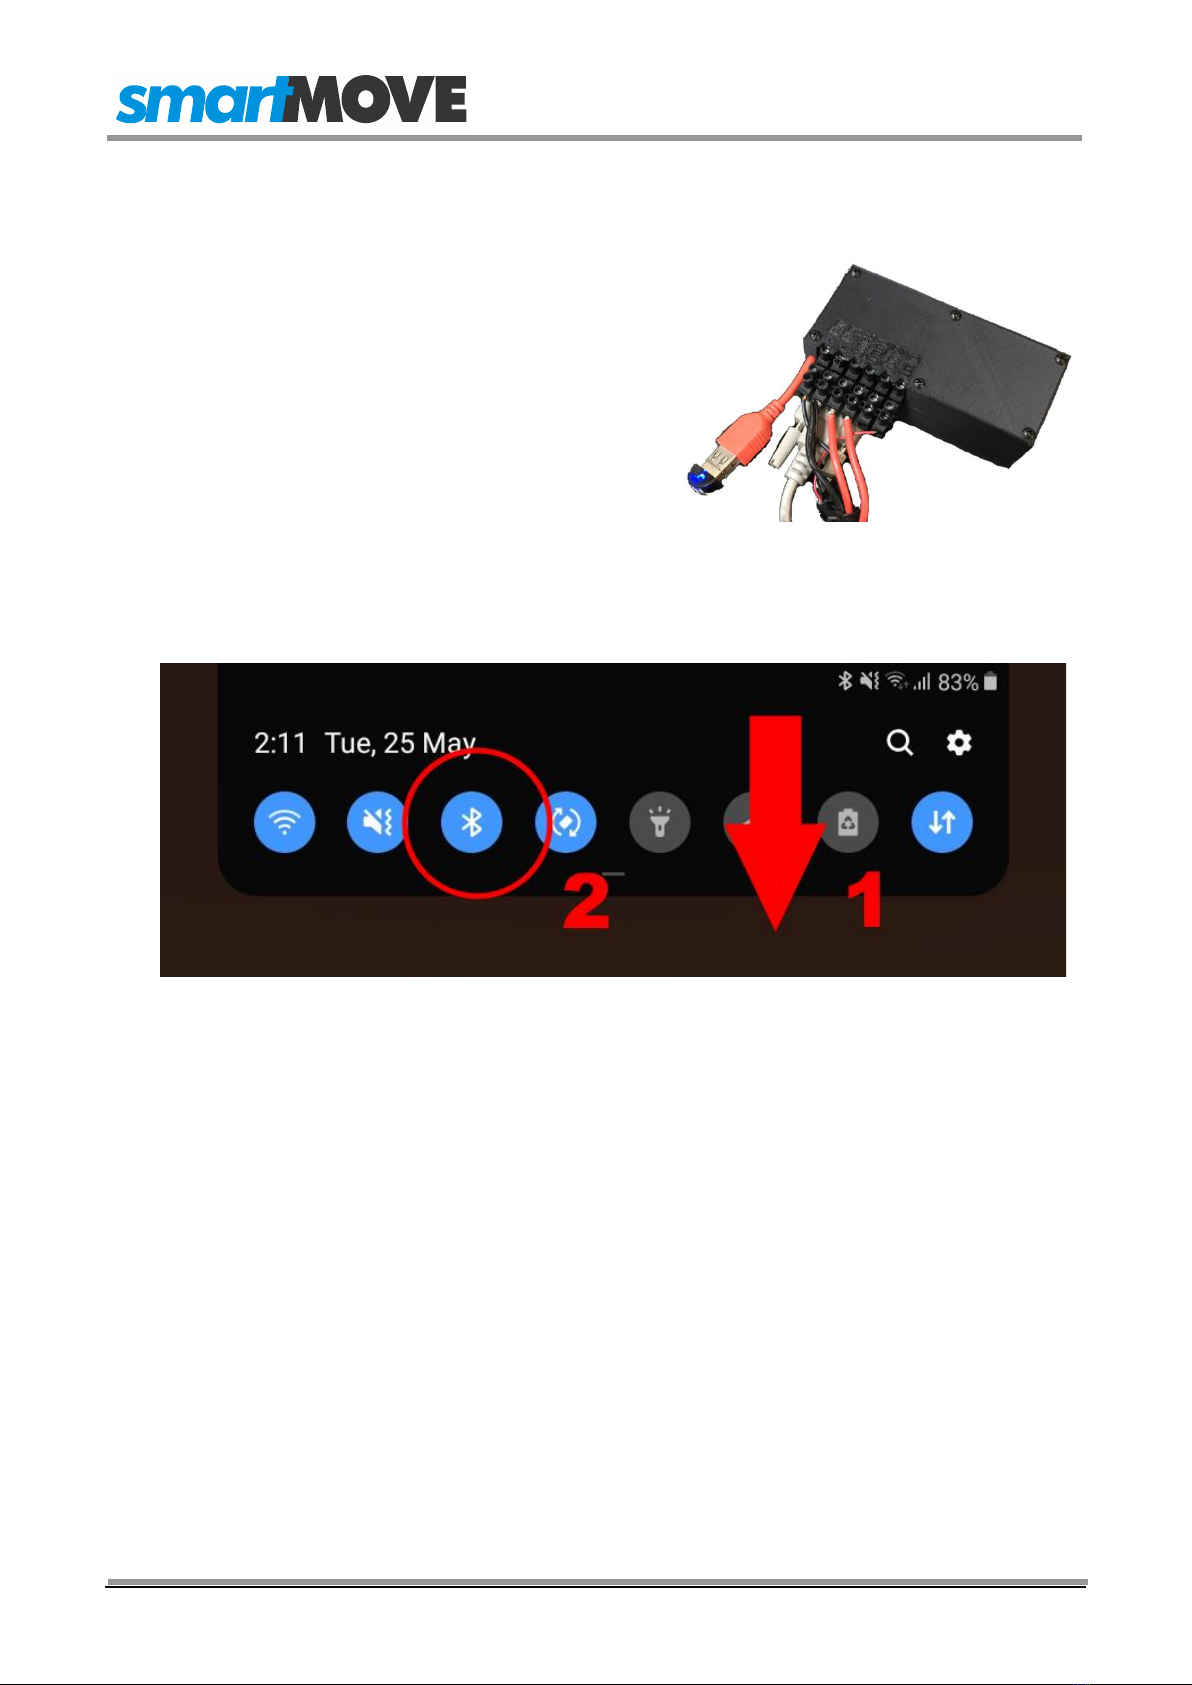
Bluetooth Setup
1.
Plug the Bluetooth adaptor into the USB out
of the IOIO Box. It should have a flashing
blue light.
If it doesn’t, power cycle the IOIO.
2.
Connect the tablet Bluetooth to the IOIO box.
Swipe down from the top of the screen to bring up the status bar, then hold down on
the Bluetooth icon to bring up the settings.
SmartMove Installation Guide
Version: 2.0 –May 2021 Page8
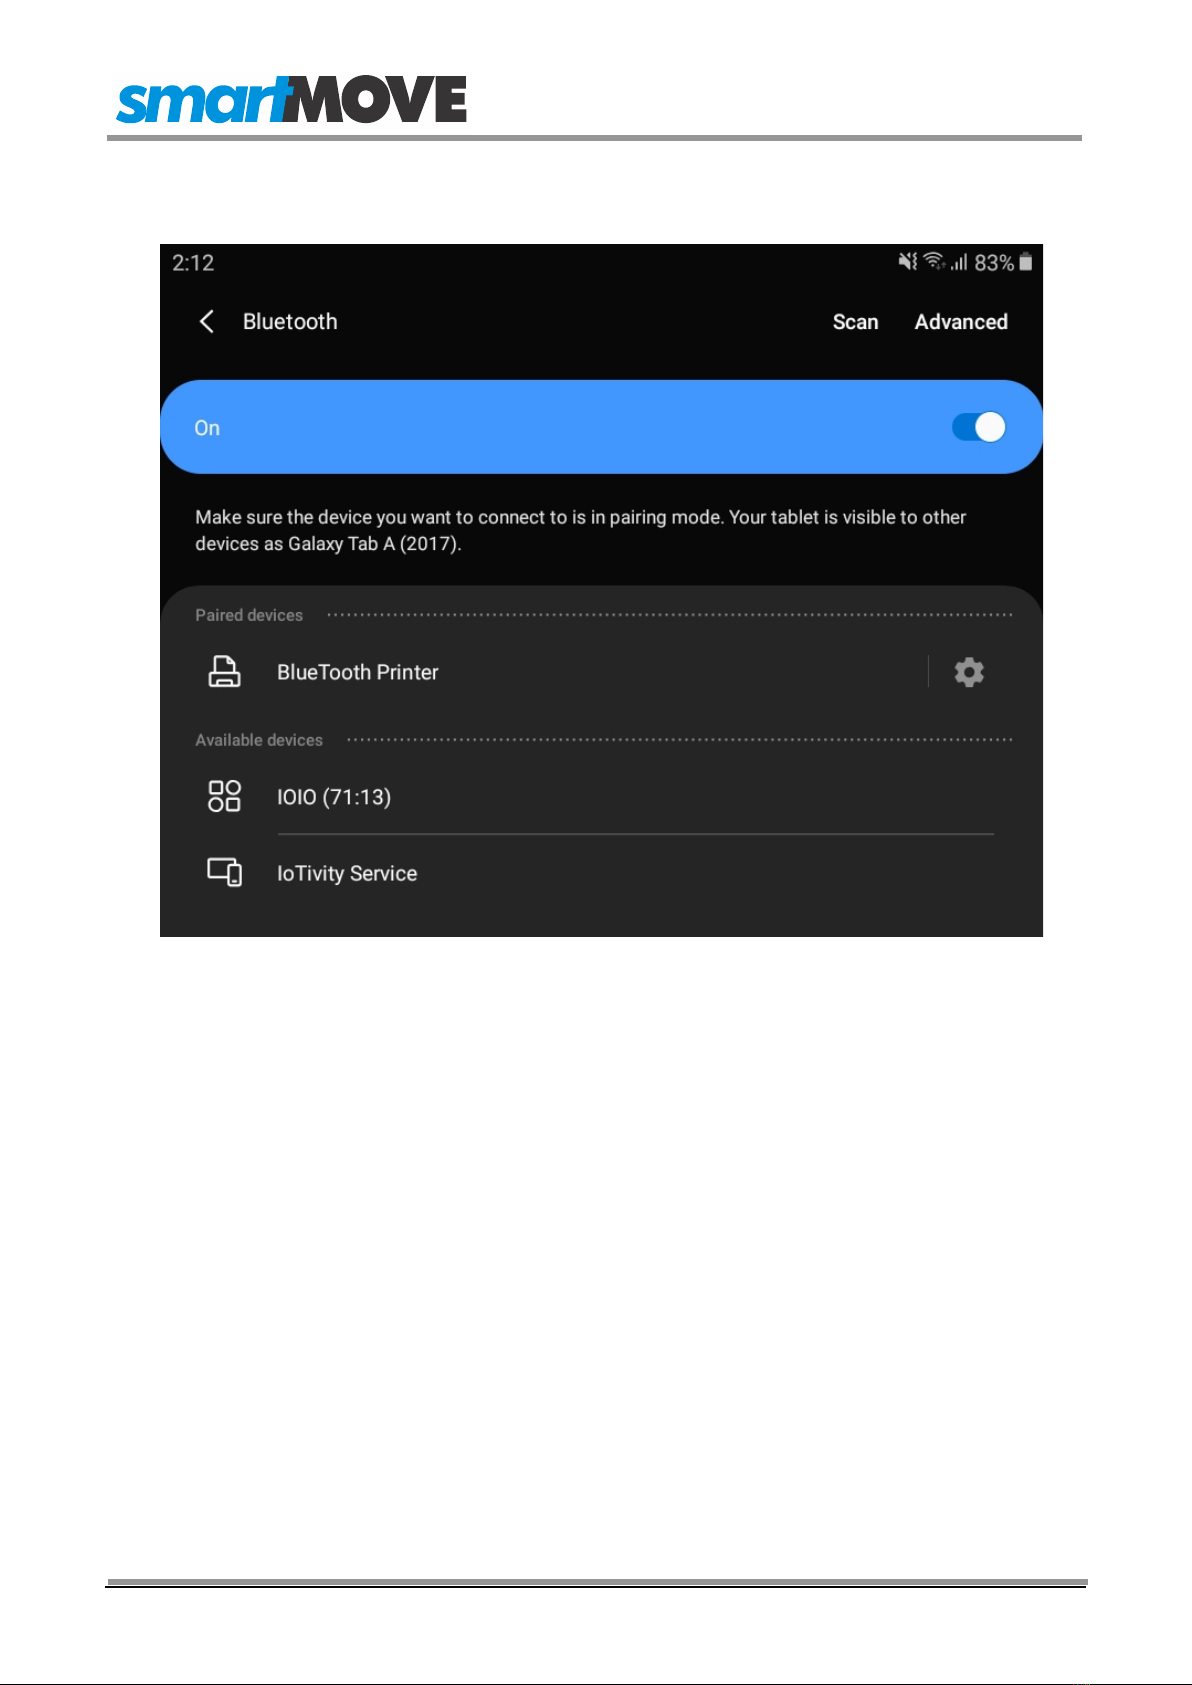
3.
Find the IOIO on the list (it will probably take a few seconds to resolve the name), tap
it, and enter the PIN: 4545.
4.
Run the SmartMove Go app.
The relay in the IOIO should click, and if wired up, the dome light will turn on.
If it’s too noisy, or the dome light isn’t wired into the IOIO box, alternate ways to test
the connection include running the meter, or engaging the duress alarm.
5.
Plug the USB charging cable into a point in the car such as a cigarette lighter adaptor
or built-in USB plug that is able to provide sufficient current to keep the tablet fully
charged.

SmartMove Installation Guide
Version: 2.0 –May 2021 Page9
Wired Setup
1.
Slide the heatshrink over the USB cable
from the IOIO Box.
2.
Connect the USB cables together and slide
the heatshrink up to the junction. Use a
heat gun or hair dryer to cover the
connection.
3.
The result should look similar to the
supplied picture (right). Application of the
heatshrink should ensure the longevity of
the cables.
4.
Plug the other end of the USB cable directly
into the tablet’s USB port.
NOTE: The IOIO Box also charges your
tablet so there is no need to remove for
charging purposes.

SmartMove Installation Guide
Version: 2.0 –May 2021 Page10
Tablet Setup
PLEASE NOTE: To ensure the correct functioning of the IOIO, it is critical that
these steps are followed closely, in order.
1.
In the Google Play Store, search for “SmartMove Go” (published by SmartMove
Systems Pty Ltd). Download and install the app, but do not run it just yet.
2.
(Wired option) Connect everything to the IOIO box, supply power to it and connect
the USB to the tablet being used. This popup should appear on the tablet:
Select the “always open” option, then press OK.
Sometimes the Android operating system will skip past this checkbox as it appears,
but it is imperative that it gets selected and confirmed, otherwise the IOIO box will be
unable to communicate with the SmartMove Go app.
3.
The SmartMove Go app will automatically open (Wired option) at this point. It will
ask for several permissions; choose “Allow” for each.
SmartMove Installation Guide
Version: 2.0 –May 2021 Page11
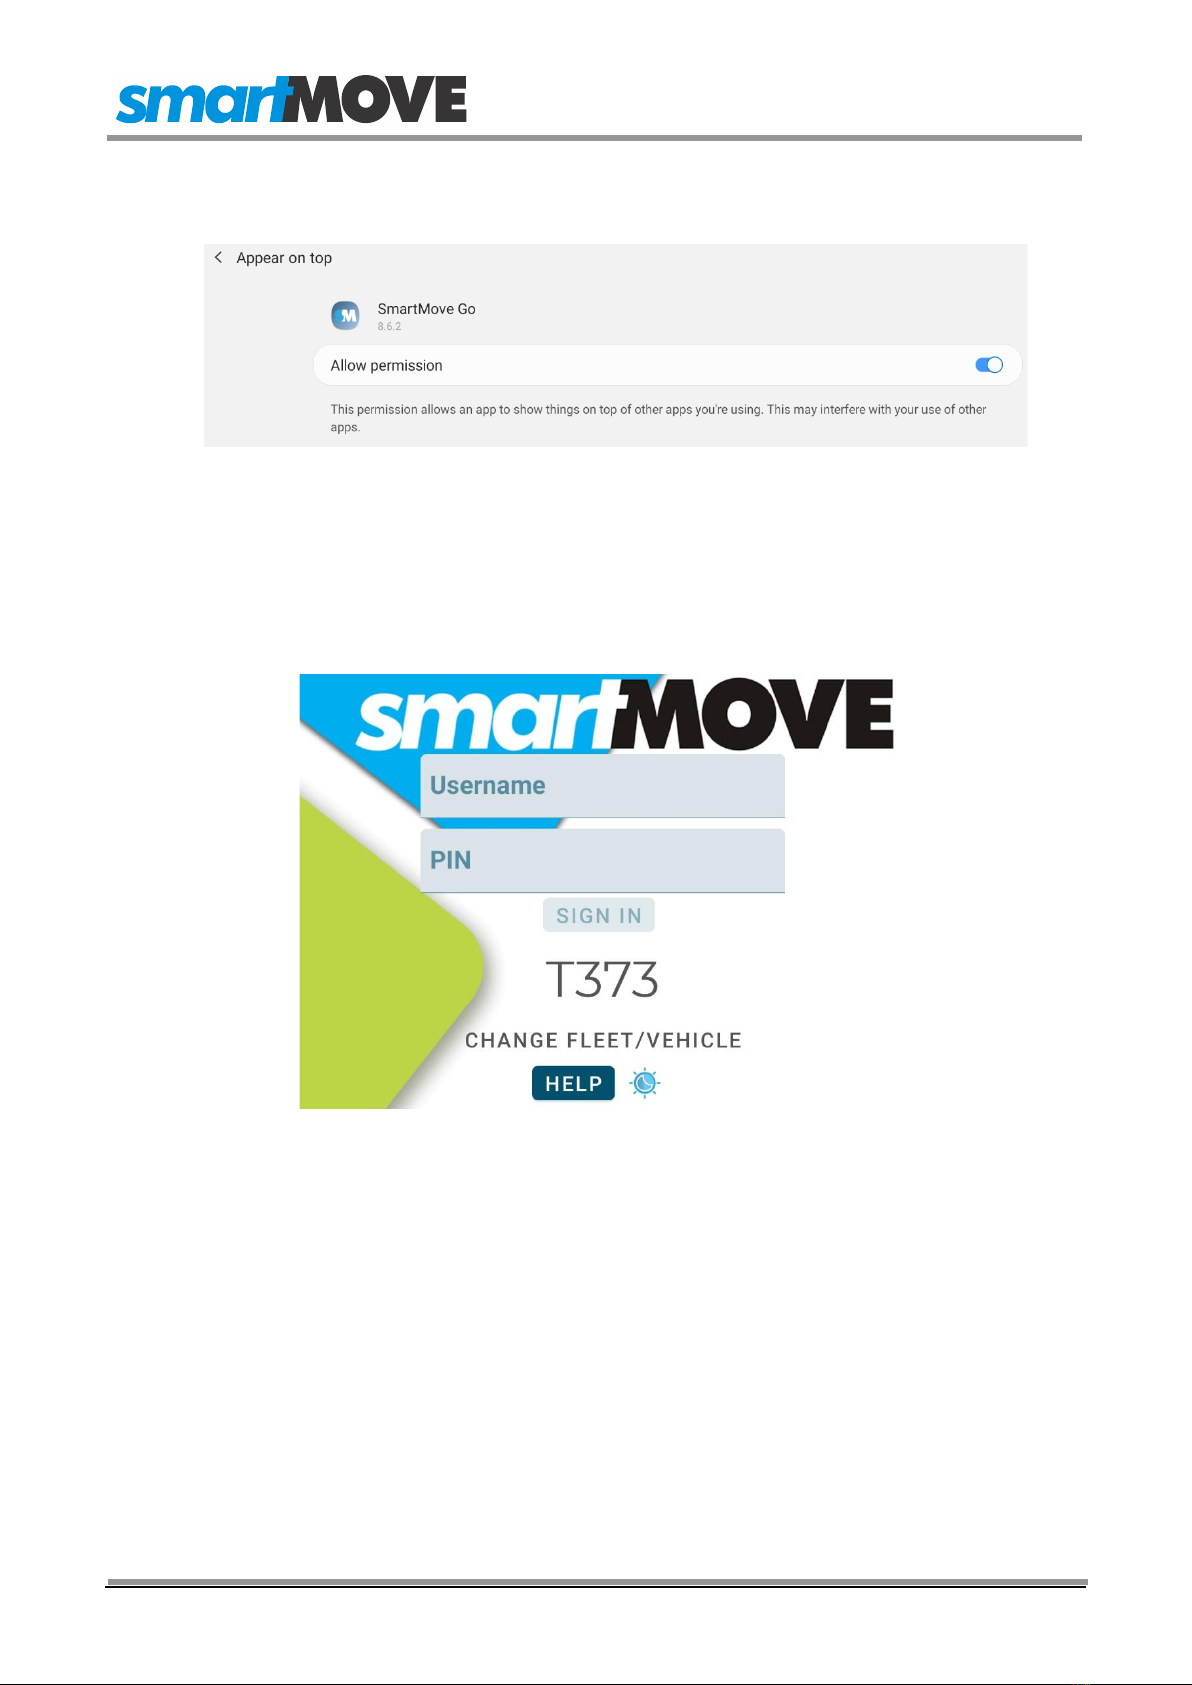
Additionally, it is strongly recommended to allow the “Appear on top” permission in
the device settings:
4.
Navigate back to the SmartMove Go app, and enter the fleet key*.
*Fleet keys are issued individually per vehicle and can be obtained on the SmartMove
Fleets website under “SmartMove Go Keys”. If you don’t have access to this, contact
your Network or SmartMove Support.
5.
Login with the supplied Username and PIN.
6.
Once the SmartMove Go is logged in, and the Cabcharge meter has booted up,
engage the meter, let it tick a couple of times, then end the fare to check that it’s
being correctly passed to SmartMove.
*To help diagnose this, go to the Admin menu (key icon) > Settings > scroll to the
bottom and choose “External Meter Test” if something isn’t working correctly.
7.
If you have access to the Dispatch Client, test the panic button is working and
sending an alert to the base.

SmartMove Installation Guide
Version: 2.0 –May 2021 Page12
Troubleshooting
Sometimes the connection between the tablet and the IOIO does not establish.
We build and test every box here to a high standard, so it’s unlikely a problem is with the
hardware itself.
Possible steps:
Power cycle the IOIO box.
Disconnect and reconnect the USB.
Force stop the app and re-start it. (Hold down on the app icon, tap “App info” and
then “Force Stop” on the page that appears.)
If the “Allow SmartMove Go to access IOIO Standard Application” Dialogue (on page
10) disappeared before it was selectable, it may appear on disconnecting the
reconnecting the USB.
In rare cases, the Bluetooth adaptor may be faulty out of the packet. If it won’t light
up after several power cycles, try another one.
Table of contents


