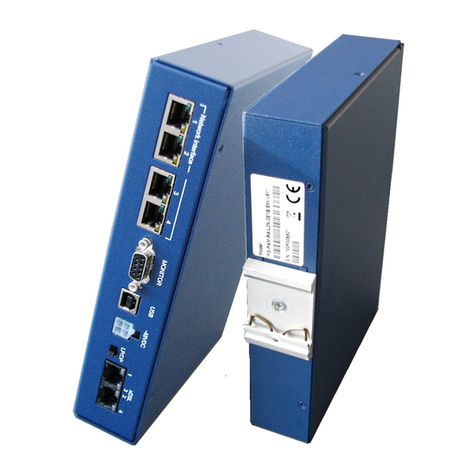
FlexDSL ORION 3 Parts list manual

User Manual LTU Orion 3
1
FlexDSL ORION 3
LTU DEVICES
TECHNICAL DESCRIPTION AND OPERATIONS MANUAL
Version 1.16
Document name UM_Flexdsl-LTU-Orion3_V1-16.Docx
Revision 30. August 2018

User Manual LTU Orion 3
2
© Copyright 2018 by FlexDSL Telecommunications AG. The content of this publication may not
be reproduced in any part or as a whole, transcribed, stored in a retrieval system, translated into
any language, or transmitted in any form or by any means, electronic, mechanical, magnetic,
optical, chemical, photocopying, manual, or otherwise, without the prior written permission of
FlexDSL Telecommunications AG. Published by FlexDSL Telecommunications AG. All rights
reserved.

User Manual LTU Orion 3
3
VERSION CONTROL.................................................................................................................8
SAFETY REGULATIONS ..........................................................................................................8
EU DIRECTIVE 2002/96/EC AND EN50419 ..............................................................................9
1SELECTION GUIDE .........................................................................................................10
2PRECAUTION ..................................................................................................................11
3TECHNICAL DESCRIPTION ............................................................................................12
3.1 General Information about FlexDSL Orion3................................................................12
3.2 Description of Orion3 LTU Devices.............................................................................13
3.2.1 Remote Power Supply and Wetting Current........................................................14
3.2.1.1 Compatibility of Remote Power and Wetting Current Supply Modes ............14
3.2.1.2 Configuration of Remote Power and Wetting Current Supply.......................14
3.2.2 Description of Orion3 Interfaces..........................................................................17
3.2.2.1 SHDSL Interface..........................................................................................17
3.2.2.1.1 Master/Slave.............................................................................................17
3.2.2.1.2 Multipair Mode..........................................................................................18
3.2.2.1.3 Reservation Mode.....................................................................................19
3.2.2.1.4 Automatic Configuration of a Link .............................................................22
3.2.2.2 E1 Interface (G.703/704)..............................................................................24
3.2.2.2.1 Framed and Unframed E1 ........................................................................24
3.2.2.2.2 CRC4 (Cyclic Redundancy Check)...........................................................24
3.2.2.2.3 AIS Generation (Alarm Indication Signal)..................................................24
3.2.2.2.4 AIS Detection............................................................................................25
3.2.2.2.5 Е1 Clock Modes .......................................................................................25
3.2.2.3 Nx64, RS-232/RS-485 and G.703/E0 Interfaces ..........................................26
3.2.2.3.1 Nx64 Clocking Modes...............................................................................27
3.2.2.3.2 Automatic V.54 Loops...............................................................................28
3.2.2.4 Input Sensor and Output Relay....................................................................28
3.2.2.5 Ethernet Interface.........................................................................................29
3.2.2.6 MAC Filter....................................................................................................32
3.2.2.6.1 MAC Filter Rules.......................................................................................33
3.2.2.7 IEEE 802.1x Access Control ........................................................................33
3.2.2.7.1 IEEE 802.1x Device Settings....................................................................34
3.2.2.8 Rapid Spanning Tree Protocol .....................................................................34
3.2.2.9 RADIUS .......................................................................................................35
3.2.2.9.1 RADIUS Server Setup with Defined Vendor Specific Attributes ................36
3.2.2.9.2 Simplified RADIUS Server Setup..............................................................38
3.2.2.9.3 RADIUS Server setup with defined Service-Type Attribute.......................39
3.2.2.9.4 Configuring User Access Rights ...............................................................39
3.2.2.10 LLDP............................................................................................................41
3.2.3 An Integrated Switch of 64-kbit/s Time Slots.......................................................42
3.2.3.1 E1 Transmission Mode (only E1 Time Slots)................................................42
3.2.3.2 E1, Nx64/RS-232/RS-485 and Ethernet Simultaneous Transmission Mode.42
3.2.4 Test Loops..........................................................................................................43
3.2.4.1 Analogue Loop back ....................................................................................44
3.2.4.2 Performance Monitoring...............................................................................44
3.2.4.3 G.826 Performance Monitoring ....................................................................44
3.2.5 BERT Test ..........................................................................................................45
3.3 Alarm Indication .........................................................................................................46
3.3.1 LEDs...................................................................................................................46
3.3.2 Alarm LEDs.........................................................................................................47
3.4 Management of Orion 3 Devices................................................................................49
3.4.1 Management by Local Craft Terminal or MONITOR Interface (RS-232 Interface)49
3.4.2 Management by Ethernet Interface .....................................................................50
3.4.2.1 Telnet...........................................................................................................50
3.4.2.2 WEB.............................................................................................................51
3.4.2.3 SNMP ..........................................................................................................54
3.4.2.4 SSH.............................................................................................................56

User Manual LTU Orion 3
4
4PROGRAMMING GUIDE..................................................................................................57
4.1 Command Structure...................................................................................................57
4.2 Orion3 Software .........................................................................................................59
4.3 Configuration and Application Storage .......................................................................59
4.4 Groups of Commands Requiring Confirmation...........................................................61
4.5 Command Syntax.......................................................................................................61
4.6 Commands.................................................................................................................62
4.6.1 Main Menu ..........................................................................................................62
4.6.1.1 System Invitation..........................................................................................62
4.6.2 General Commands............................................................................................63
4.6.2.1 <H> Command.............................................................................................63
4.6.2.2 <APPLY [ALL/GROUP]> Command.............................................................63
4.6.2.3 <CONNECT N:1..13/R> Command..............................................................63
4.6.2.4 <LINK [SN/00/FE]> Command.....................................................................63
4.6.2.5 <LINKCLEAR> Command............................................................................63
4.6.3 Performance Management Menu........................................................................64
4.6.3.1 <H> Command.............................................................................................64
4.6.3.2 <G826> Command.......................................................................................64
4.6.3.3 <G826 Е1> Command .................................................................................65
4.6.3.4 <ALLG826 N> Command.............................................................................66
4.6.3.5 <RESETG826> Command...........................................................................66
4.6.3.6 <RESETALLG826 N> Command.................................................................66
4.6.3.7 <NETSTAT [LAN/WAN]> Command ............................................................67
4.6.3.8 <NETERR [LAN/WAN]> Command..............................................................67
4.6.3.9 <RESETNETSTAT> Command ...................................................................68
4.6.3.10 <LINKSTAT> Command ..............................................................................68
4.6.3.11 <LINKALARM> Command ...........................................................................69
4.6.3.12 <ALARMLOG [N]> Command......................................................................69
4.6.3.13 <LINKDIAG> Command...............................................................................69
4.6.3.14 <M> Command ............................................................................................70
4.6.4 Fault and Maintenance Management Menu ........................................................71
4.6.4.1 <H> Command.............................................................................................71
4.6.4.2 <NM> & <LINKNM> Command....................................................................72
4.6.4.3 <STATUS> Command .................................................................................72
4.6.4.4 <STATUS ETH> Command .........................................................................73
4.6.4.5 <STATUS EXT> Command..........................................................................73
4.6.4.6 <STATUS LLDP> Command........................................................................73
4.6.4.7 <STATUS RADIUS> Command...................................................................74
4.6.4.8 <STATUS DOT1X> Command.....................................................................74
4.6.4.9 <STATUS ENCODE> Command .................................................................74
4.6.4.10 <LOOP1 ON/OFF [N=1..4]> Command........................................................75
4.6.4.11 <LOOP2 [N:A/R] [ON/OFF]> Command.......................................................75
4.6.4.12 <ALARM> Command...................................................................................75
4.6.4.13 <AСO [GROUP ON/OFF])> Command ........................................................77
4.6.4.14 <MACTABLE> Command............................................................................77
4.6.4.15 <LLDP STAT [IF/ALL]> ................................................................................78
4.6.4.16 <STARTAL [N]> Command..........................................................................79
4.6.4.17 <RESTART [N=1..4]> Command .................................................................79
4.6.4.18 <RESET> Command....................................................................................79
4.6.4.19 <CONFIRM> Command...............................................................................79
4.6.4.20 <BACKUP> Command.................................................................................79
4.6.4.21 <RESTORE> Command..............................................................................79
4.6.4.22 <DIFF N/R/S/B N/R/S/B> Command............................................................80
4.6.4.23 <DUMP N/R/S/B> Command.......................................................................80
4.6.4.24 <LOAD> Command......................................................................................81
4.6.4.25 <TLM> Command........................................................................................81
4.6.4.26 <TLM S [N:[Rnn-Rkk]] [ABC]> Command.....................................................82
4.6.4.27 <POWER DIAG> Command ........................................................................82
4.6.4.28 <LOG> and [LOG C] Command...................................................................83
4.6.4.29 <SOFTUPDATE> Command........................................................................83
4.6.4.30 <TFTP [CMD] [ARG1][ARG2]> Command ...................................................84

User Manual LTU Orion 3
5
4.6.4.31 <SOFTCONFIRM> Command .....................................................................84
4.6.4.32 <SOFTINFO> Command .............................................................................85
4.6.4.33 <PING x.x.x.x> Command............................................................................85
4.6.4.34 <MODEMVIEW> Command.........................................................................85
4.6.4.35 <SD SNAPSHOT> Command......................................................................85
4.6.4.36 <SD DIR> Command ...................................................................................85
4.6.4.37 <SD DEL [NAME]> Command .....................................................................85
4.6.4.38 <SD SAVE [N=0..9]> Command...................................................................86
4.6.4.39 <SD LOAD [N=0..9]> Command ..................................................................86
4.6.4.40 <SD BOOT [ON/OFF]> Command...............................................................86
4.6.4.41 <SD STATUS> Command ...........................................................................86
4.6.4.42 <BERT> Command......................................................................................86
4.6.4.43 <H> Command.............................................................................................87
4.6.5 Configuration Management Menu .......................................................................88
4.6.5.1 <H> Command.............................................................................................88
4.6.5.2 <ENCODE [NRSB]> Command ...................................................................89
4.6.5.3 <ENCODE KEY [N]> Command...................................................................89
4.6.5.4 <ENCODE [ON/OFF] [N]> Command ..........................................................90
4.6.5.5 <SECURE ON/OFF> Command ..................................................................90
4.6.5.6 <USERS> Command...................................................................................90
4.6.5.7 <USER> Command .....................................................................................90
4.6.5.8 <PASSWORD {users}> Command...............................................................93
4.6.5.9 <CONFIG N/R/S/B> Command....................................................................93
4.6.5.10 <MASTER ON/OFF [N = 1..4]> Command...................................................95
4.6.5.11 <AUTO ON/OFF> Command.......................................................................95
4.6.5.12 <EXT ON/OFF [N = 1..4]> Command...........................................................95
4.6.5.13 <BASERATE K/AUTO [N=1..4]> Command.................................................96
4.6.5.14 <PAM [16/32] [N]> or <PAM [4-128] [N]> Command....................................96
4.6.5.15 <PAYLOAD list/NONE [N=1..4]> Command.................................................96
4.6.5.16 <ANNEX A/B/AB [N=1..4]> Command .........................................................97
4.6.5.17 <SETCLOCK list [N=1..4]> Command..........................................................97
4.6.5.18 <MULTIPAIR [2/3/4/2+2/OFF]> Command...................................................97
4.6.5.19 <RESERVE [list]>, <RESERVE [list] [list]> Command..................................97
4.6.5.20 <G704 ON/OFF [N]> Command...................................................................98
4.6.5.21 <CRC4 ON/OFF [N]> Command..................................................................98
4.6.5.22 <AISGEN ON/OFF [N]>, <AISDET ON/OFF [N]> Commands......................98
4.6.5.23 <DSLTS list/NONE [N=1..4]> Command......................................................98
4.6.5.24 <WANTS [list] [N=1..4]> Command (Ethernet over E1)................................98
4.6.5.25 <E1CLOCK [DSL/RX/EXT/INT] [N]> Command...........................................98
4.6.5.26 <E1MODE [HDB3/AMI] [N]>, <E1MODE [SHORT/LONG] [N]> Commands.99
4.6.5.27 <POWER ON/OFF [N=1..4]> Command......................................................99
4.6.5.28 <ID string> Command..................................................................................99
4.6.5.29 <DEFAULT [0-4]> Command.......................................................................99
4.6.5.30 <DEFAULT EVERYTHING> Command .......................................................99
4.6.5.31 <DEFAULT DESC> Command ....................................................................99
4.6.5.32 <SERNUM> Command................................................................................99
4.6.5.33 <GSCOMPAT ON/OFF> Command...........................................................100
4.6.5.34 <NMTHR> Command.................................................................................100
4.6.5.35 <LATHR> Command..................................................................................100
4.6.5.36 <PTMP [ADD/DEL] [IF]> Command...........................................................100
4.6.5.37 <PTMP SHOW> Command........................................................................100
4.6.5.38 <G703CLOCK [DSL/INT/RX]> Command..................................................100
4.6.5.39 <MODE N> Command...............................................................................100
4.6.5.40 <LICENSE> Command..............................................................................101
4.6.5.41 <LICENSE ADD> Command......................................................................101
4.6.5.42 <RSIP> Command.....................................................................................101
4.6.5.43 <RSRATE [N]> Command .........................................................................104
4.6.5.44 <RSFORMAT [Format]> Command ...........................................................104
4.6.5.45 <RSDUPLEX [F/H] Command....................................................................104
4.6.5.46 <EXTRATE [N]> Command........................................................................104
4.6.5.47 <AUTOLOOP OFF/ALL/DATA> Command................................................104
4.6.5.48 <EXTCLOCK [SRC] [DIR]> Command.......................................................104

User Manual LTU Orion 3
6
4.6.5.49 <IOIP {OPTION} [IF]> Command ...............................................................105
4.6.5.50 <NET> Command......................................................................................107
4.6.5.51 <H> Command...........................................................................................107
4.6.5.52 <NETCONFIG [N/R/S/B]> Command.........................................................108
4.6.5.53 <COSCONFIG [N/R/S/B]> Command........................................................110
4.6.5.54 <RSTP DEFAULT> Command...................................................................111
4.6.5.55 <RSTP [A..E] [ON/OFF]> Command..........................................................111
4.6.5.56 <RSTP [A..E] PRIO [value]> Command .....................................................111
4.6.5.57 <RSTP [A..E] VLAN [1..8]> Command.......................................................111
4.6.5.58 <RSTP [A..E] HELLO [2..10]> Command...................................................112
4.6.5.59 <RSTP [IFACE] FWD [4..30]> Command...................................................112
4.6.5.60 <RSTP [IFACE] MA [6..40].........................................................................113
4.6.5.61 <RSTP [IFACE] PRIO [0..240]> Command ................................................113
4.6.5.62 <RSTP [IFACE] PCOST [AUTO/1..200000000]> Command......................114
4.6.5.63 <RSTP [IFACE] EDGE [ON/OFF]> Command ...........................................114
4.6.5.64 <RSTP CONF> Command.........................................................................114
4.6.5.65 <RSTP STATE> Command........................................................................115
4.6.5.66 <RSTP DIAG> Command..........................................................................116
4.6.5.67 <PBVLAN [IF] [A..E]> Command................................................................116
4.6.5.68 <MODE [IF] [ACC/TRUNK/MIX]> Command..............................................117
4.6.5.69 <VLAN [IF] [1..8]> Command.....................................................................117
4.6.5.70 <QOS [IF] [0..7]> Command.......................................................................118
4.6.5.71 <ALLOW [IF] [VLAN list]> Command .........................................................118
4.6.5.72 <VID [1-8] ID> Command...........................................................................118
4.6.5.73 <MACLIST SHOW> Command..................................................................118
4.6.5.74 <MACLIST [IF] ADD [MAC]> Command.....................................................119
4.6.5.75 <MACLIST [IF] DEL [MAC/N]> Command..................................................119
4.6.5.76 <MACFILTER [LAN1-5] [ON/OFF]> Command..........................................120
4.6.5.77 <MACRULE [LAN1-5] [RULE]> Command.................................................120
4.6.5.78 <DOT1X [LAN1-5] {OPTION}> Command..................................................120
4.6.5.79 <SETIP X.X.X.X> Command......................................................................121
4.6.5.80 <NETMASK X.X.X.X> Command...............................................................121
4.6.5.81 <GATEWAY X.X.X.X> Command ..............................................................121
4.6.5.82 <MTU> Command......................................................................................121
4.6.5.83 <WANIDLE [1/7E]> Command...................................................................121
4.6.5.84 <ETHSD [10H/10F/100H/100F/AUTO/OFF] [N=1..5]> Command ..............121
4.6.5.85 <FC [ON/OFF] [N1-4]> Command..............................................................122
4.6.5.86 <IRATE [speed/OFF] [N1-4]> Command....................................................122
4.6.5.87 <ERATE [speed/OFF]> Command.............................................................123
4.6.5.88 <CRATE [speed] [CoS] [WAN]> Command................................................123
4.6.5.89 <COS [QOS/VLAN] [N] [0..3/OFF]> Command ..........................................124
4.6.5.90 <SNMPACL> Command............................................................................124
4.6.5.91 <SNMP [V1|V2C|V3] [ON|OFF]> Command...............................................124
4.6.5.92 <TRAPIP [1/2] [IP/OFF]> Command ..........................................................124
4.6.5.93 <TRAP [1/2] [V1/V2C]> Command.............................................................125
4.6.5.94 <TRAP [1/2] V3 [RO/RW]> Command........................................................125
4.6.5.95 <COMMUNITY> Command........................................................................125
4.6.5.96 <SNMPSET [ON/OFF]> Command............................................................125
4.6.5.97 <SNMP [RO|RW] NAME> Command.........................................................125
4.6.5.98 <SNMP [RO|RW] AUTH [MODE]> Command............................................125
4.6.5.99 <SNMP [RO|RW] PRIV [MODE]> Command .............................................126
4.6.5.100 <SYSLOG [1/2] [IP/OFF]> Command.........................................................126
4.6.5.101 <LLDP [ON/OFF]> Command....................................................................126
4.6.5.102 <LLDP DEFAULT> Command ...................................................................126
4.6.5.103 <LLDP [PARAM] [VALUE]> Command ......................................................127
4.6.5.104 <LLDP [RX/TX] [ON/OFF]> Command.......................................................127
4.6.5.105 <LLDP INT VLAN [ON/OFF]> Command ...................................................127
4.6.5.106 <LLDP CONFIG> Command......................................................................128
4.6.5.107 <SNTP [1/2] [IP/OFF]> Command..............................................................128
4.6.5.108 <SNTP TZ [+/-]HH:MM> Command ...........................................................128
4.6.5.109 <DST> Command......................................................................................128
4.6.5.110 <[SSH|TELNET|HTTP|HTTPS] [ON/OFF]>................................................131

User Manual LTU Orion 3
7
4.6.5.111 <SSH PORT [N]>.......................................................................................131
4.6.5.112 <SSL [SHOW/DEL] [options]>....................................................................131
4.6.5.113 <RADIUS [1/2] SECRET>..........................................................................132
4.6.5.114 <RADIUS [1/2] TEST> ...............................................................................132
4.6.5.115 <RADIUS [1/2] [IP:P/OFF]>........................................................................132
4.6.5.116 <RADIUS RETRIES [0..10]>......................................................................133
4.6.5.117 <RADIUS TIMEOUT [1..5]>........................................................................133
4.6.5.118 <STATUS RADIUS [N/R/S/B]> Command .................................................133
4.6.5.119 <NETDEFAULT> Command......................................................................134
5SOFTWARE DOWNLOAD .............................................................................................135
5.1 Software Download via RS-232 Port (LCT) Using the Flash Loader Program ..........135
5.2 Software Download via RS-232 COM Port (LCT) Using Xmodem Protocol..............139
5.3 Software Download via Ethernet (1K-Xmodem and Telnet)......................................142
6SERVICE INSTRUCTIONS.............................................................................................143
6.1 General Requirements .............................................................................................143
6.2 Evaluation of the Digital Channel Quality and Operation Parameters.......................143
7APPENDICES.................................................................................................................145
7.1 Quick Installation Guide for Orion3 LTU Devices......................................................145
7.1.1 Enter an Orion3 Device.....................................................................................145
7.1.2 Configure an Orion3 Device ..............................................................................145
7.1.3 Checking of Correct Working.............................................................................148
7.1.4 Problem with Orion3 Device..............................................................................148
7.2 Connector Description..............................................................................................149
7.2.1 Ethernet Connector...........................................................................................149
7.2.2 SHDSL Connector.............................................................................................149
7.2.3 E1 120 Ohm Connector.....................................................................................149
7.2.4 E1 75 Ohm Connector.......................................................................................151
7.2.5 Nx64, RS-232 and G.703/E0 Connector............................................................151
7.2.6 Monitor (LCT, Local Craft Terminal) Connector (ACU, Minirack, UTTx).............156
7.2.7 Digital Input / Output Interface (4I4O) connector ...............................................157
7.2.8 -48VDС Connector (UTTx) ................................................................................157
8TECHNICAL SPECIFICATION .......................................................................................158
8.1 Interfaces.................................................................................................................158
8.1.1 SHDSL Line Interface........................................................................................158
8.1.2 E1 Line Interface...............................................................................................158
8.1.3 Nx64 and RS-232/RS-485 Interface..................................................................158
8.1.4 G.703/E0 Interface............................................................................................158
8.1.5 Monitor or Local Craft Terminal (RS-232) Interface...........................................159
8.1.6 Ethernet ............................................................................................................159
8.1.7 Digital Input / Output Interface (4I4O)................................................................159
8.2 Power Supply...........................................................................................................159
8.3 Environment.............................................................................................................160
8.3.1 Climatic Conditions............................................................................................160
8.3.2 EMC and Safety Standards...............................................................................160
8.4 Physical Dimensions and Weight .............................................................................160

User Manual LTU Orion 3
8
VERSION CONTROL
Manual
Version
Date
Software
Version
Major changes to previous version
1.0
02.11.2009
1.0.0
Initial Version
1.1
15.12.2009
1.0.0
Ethernet LED table corrected, Page 32
DB15 to 2xRJ45 adapter included, Page 89
Wetting Current Supply Jumper corrected, Page 12
1.2
19.8.2010
1.2.3
Nx64 added
1.3
27.9.2010
1.2.5
Cable corrected N21-DCE/N35-DCE, Page 96-97
Update remote power configuration, Page 13
1.4
03.01.2011
1.2.15
RSTP added
1.5
29.08.2011
1.4.8
WEB interface added, Software commands updated
1.6
27.03.2012
1.4.8
Alarm Connector corrected, Alarm Command updated, RS-
485 Connector added
1.7
03.12.2012
1.4.37
Status Ext changed, Commands adapted, MAC Filtering,
4xRS-232 Connector
1.8
07.05.2013
1.4.38
MIB’s adapted, WEB Interface, G.703 Interface included
1.9
22.10.2013
1.5.4
Connector 4xRS-232 corrected.
SSH & RADIUS added.
1.10
24.06.2014
1.6.6
SNMP& RADIUS updated, Commands updated incl. SD-Card
1.11
15.08.2014
1.6.6
2xRS485/422/232 interface card included
1.12
09.07.2015
1.6.19
LLDP chapter included
1.13
11.02.2016
1.7.2
802.1x included
4I4O daughter card included
1.14
10.02.2017
1.7.5
RADIUS Server setup with defined Service-Type Attribute
RFC-4133 Entity-MIB partially supported
RTS-CTS | DTR-DCD or RTS-DCD | DTR-CTS trigger for
RSIP
Rate example improved for IRATE, CRATE, ERATE
commands
RSTP commands improved
1.15
03.05.2018
1.7.8
New LTU versions added:
•FG-PAM-SR4L-4Eth-RP,V98
•FG-PAM-SR4L-2V24/4Eth-RP,V98
1.16
30.08.2018
2.0.6
Traffic Encryption support, commands ENCODE and
STATUS ENCODE.
HTTPs support, commands SSL, TFTP CA|CERT|KEY,
HTTPS [ON|OFF]
SAFETY REGULATIONS
IF THE UNIT IS NOT USED IN ACCORDANCE TO REGULATIONS DESCRIBED AND DEFINED IN THE
CHAPTERS ”TECHNICAL DESCRIPTION” AND “TECHNICAL SPECIFICATIONS”, FLEXDSL
TELECOMMUNICATIONS AG REFUSES TO TAKE ANY RESPONSIBILITY. FURTHERMORE, NO
WARRANTY IS GRANTED IN SUCH CASE!
IT’S ONLY ALLOWED TO USE EXTERNAL POWER SUPPLYS THAT ARE APPROVED ACCORDING
TO THE SAFETY STANDARD IEC/EN 60950-1.
IT’S ONLY ALLOWED TO USE THE UNITS WITH HOUSINGS SUPPLYED FROM FLEXDSL
TELECOMMUNICATIONS AG (SUBRACKS, MINIRACK, UTTX). THE RACK MUST BE CONNECTED
PERMANENTLY TO RELIABLE PROTECTIVE EARTH CONDUCTOR. THE NTU UNIT MUST BE
CONNECTED PERMANENTLY TO RELIABLE PROTECTIVE EARTH CONDUCTOR: THE LTU UNIT
HAS TO BE FIXED TO THE RACK PERMANENTLY WITH THE TWO PANEL SCREWS.
INCORRECT USE OF THIS DEVICE, USE IN ANY OTHER ENVIRONMENT AND/OR HOUSING THAN
PROVIDED BY FLEXDSL MIGHT LEAD TO HARMFUL CONDITIONS. FAILURE TO FOLLOW THESE
PRECAUTIONS MAY RESULT IN DEATH, SEVERE INJURY OR PROPERTY DAMAGE.

User Manual LTU Orion 3
9
Please read this manual carefully before operating the system.
Installation of this equipment has to be done by qualified personnel only.
EU DIRECTIVE 2002/96/EC AND EN50419
Our equipment is marked with the recycling symbol. It means that at the end of
the life of the equipment you must dispose it separately at an appropriate
collection point and not place it in the normal domestic unsorted waste stream.
(European Union only)

User Manual LTU Orion 3
10
1 SELECTION GUIDE
Functionality
FlexDSL
Orion3 Models
Standalone
Rail Mounting
Subrack Module
Protected Housing
Single Pair
Dual Pair Bonding
Triple Pair Bonding
Quadruple Pair Bonding
Point-to-Point
Point-to-Multipoint
E1 (120Ohm)
E1 (75Ohm) optional
Ethernet Bridge
Ethernet Add/Drop
Nx64kbps Interface
E1 Cross Connect
Remote Power Receiver
Remote Power Source
Console Port Management
Telnet Management
Web Management
SNMP Management
FG-PAM-
SRL-2E1B/4Eth-RP, V90
*1
*2
FG-PAM-
SRL-2E1B/N64/4Eth-RP,V91
*1
*2
FG-PAM-
SR2L-4E1B/4Eth-RP,V93
*1
*2
FG-PAM-
SR2L-2E1B/N64/4Eth-RP,V94
*1
*2
FG-PAM-
SR4L-4E1B/4Eth-RP,V96
*1
*2
FG-PAM-
SR4L-4Eth,V98
*1
FG-PAM-
SR4L-2N64/4Eth,V98
*1
FG-PAM-
SR4L-4Eth-RP,V98
*1
FG-PAM-
SR4L-2N64/4Eth-RP,V98
*1
*1 Yes, if you use UTT1
*2 Not yet supported, future development
Attention: The models with Nx64 (N64) could be mounted with V.24 (V24), RS-485 (485), G.703 or E0 (703), or
4I4O or any other future interfaces

User Manual LTU Orion 3
11
2 PRECAUTION
The present document describes devices of the FlexDSL Orion 3 LTU family. The document
contains the technical description of the devices, installation, configuration, and operation
instructions. Appendices and installation manuals containing additional information about the
system are also an integral part of the present document.
WARNING
BEFORE STARTING OPERATING THE EQUIPMENT, READ CAREFULLY THE CURRENT
MANUAL AND THE INSTALLATION MANUAL. FLEXDSL TELECOMMUNICATIONS AG
REFUSES NEITHER TAKING ANY RESPONSIBILITY NOR GRANTING ANY WARRANTY
TO ANY DEVICE MALFUNCTIONING OR ANY DAMAGES DUE TO FAILURE TO COMPLY
WITH THE REQUIREMENTS STATED IN THE MANUALS, ESPECIALLY IN THE SECTION
RELATED TO “SERVICE INSTRUCTIONS”.
WARNING
IMPROPER USE OF OUR EQUIPMENT, USE IN ANY OTHER ENVIRONMENT OR
IMPROPER INSTALLATION AND MAINTENANCE MIGHT LEAD TO HARMFUL
CONDITIONS. FAILURE TO FOLLOW THESE PRECAUTIONS MAY RESULT IN DEATH;
SEVERE INJURY OR PROPERTY DAMAGE.
FLEXDSL TELECOMMUNICATIONS AG REFUSES NEITHER TAKING ANY
RESPONSIBILITY NOR GRANTING ANY WARRANTY IN SUCH CASE.
WARNING
ELECTRONIC MODULES CAN BE DAMAGED OR DECREASED IN RELIABILITY BY
STATIC ELECTRICAL DISCHARGE. BEFORE HANDLING MODULES, WEAR AN
ANTISTATIC DISCHARGE WRIST STRAP TO PREVENT DAMAGE TO ELECTRONIC
COMPONENTS. PLACE MODULES IN ANTISTATIC PACKING MATERIAL WHEN
TRANSPORTING OR STORING. WHEN WORKING ON MODULES, ALWAYS PLACE
THEM ON AN APPROVED ANTISTATIC MAT THAT IS ELECTRICALLY GROUNDED. TO
PREVENT ELECTRICAL SHOCK, DO NOT INSTALL EQUIPMENT IN A WET LOCATION
OR DURING A LIGHTNING STORM.
WARNING
SOME MODULES CAN BE CONFIGURED TO HAVE REMOTE POWER. THIS MEANS,
THAT THERE COULD BE A HIGH VOLTAGE ACCORDING TO EN 60950-1 SAFETY
REGULATION. BE CAREFUL AND DO NOT TOUCH ANY COMPONENTS OF ANY
MODULE. ALSO IN NOT POWERED STATUS, SOME CAPACITORS MAY STILL CARRY A
HIGH VOLTAGE. PLEASE DO NOT TOUCH INSIDE OF ANY HOUSING.
WARNING
THE PROTECTIVE GROUND CONNECTION MUST BE APPLIED TO THE UNIT. MAKE
SURE THAT THE UNIT AND ALL EQUIPMENT CONNECTED TO IT USE THE SAME
PROTECTIVE GROUND FOR THE PURPOSE OF REDUCING NOISE INTERFERENCE
AND SAFETY HAZARDS.

User Manual LTU Orion 3
12
3 TECHNICAL DESCRIPTION
3.1 General Information about FlexDSL Orion3
The FlexDSL Orion3 SHDSL.bis Extended product family offers a broad range of products,
which are based on the latest SHDSL.bis standards (ITU-T G.991.2 & ETS TS 101 524), while
also being fully interoperable with all our existing SHDSL equipment (Orion1 & Orion2). The
FlexDSL Orion3 supports TC-PAM16/32 and the new TC-PAM4/8/64/128 line coding. The
support of these line codes ensures compatibility with existing SHDSL equipment that is already
installed, in order to protect customer investments, while at the same time providing an upgrade
path to the newest DSL technologies.
SHDSL.bis Extended allows symmetrical data and voice transmission at speeds up to 15.2Mbps
over a single pair of copper. In addition, the FlexDSL Orion3 modem range also supports DSL
channel bonding for up to 4 copper pairs in order to achieve speeds to 60.8Mbps! FlexDSL Orion3
SHDSL.bis Extended modems can provide up to 4 complete E1 interfaces, which support framed
and unframed services (G.703/G.704). An integrated 2 or 4 port Ethernet layer 2 managed switch
with VLAN support (10/100BaseT) ensures connectivity to IP services. Beside of E1 and Ethernet
we have additional interfaces like Nx64 that can be configured to be a V.35, V.36, X.21 or V.28
interface (cable selected). Also RS-232 and RS-485 (asynchrounous) are available. This makes
FlexDSL Orion3 SHDSL.bis Extended modems a perfect solution for a wide range of applications
in which TDM and IP services need to be transmitted over copper wires.
Like all FlexDSL Orion products, the Orion3 SHDSL.bis Extended modems family is based on
industrial components and is manufactured according to highest quality standards providing
additional value due to the extended temperature range and higher reliability.
The FlexDSL Orion3 SHDSL.bis Extended product family consists of
LTU devices (Line Termination Units)
Usually Central Office Equipment.
LTU’s can be powered from local DC power supply. (36-72VDC)
LTU’s has the possibility to have an on board remote power (120/200VDC).
NTU devices (Network Termination Units)
Usually Customer Premise Equipment.
NTU’s can be powered from local DC power supply.
NTU’s can be powered remotely from LTU’s.
RR devices (Repeater, Regenerator)
Increase (double) the distance.
RR’s can be powered:
•locally with DC voltage.
•remotely from LTU’s.

User Manual LTU Orion 3
13
Supported management features:
•Local Craft Terminal (RS-232), Telnet, SNMP and WEB
•Two levels of system users: administrator and user, protected with passwords
Supported operating modes:
•Multi-Service Operation, Point-to-Point, Point-to-Multipoint and Ring Applications
3.2 Description of Orion3 LTU Devices
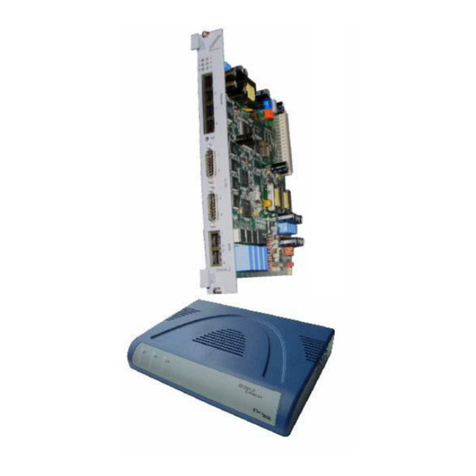
Orion3 subrack devices represent a printed circuit board with a front panel. The following LEDs
and connectors are located on the front panel of the device:
Element
Description
1
2
LED: status local device
LED: status remote device
3
4
LED: status 1st E1 port
LED: status 2nd E1 port
5
6
LED: status 3rd E1 port or Nx64/RS IF
LED: status 4th E1 port
1
Ethernet
RJ45: 1st Ethernet Interface
2
RJ45: 2nd Ethernet Interface
3
RJ45: 3rd Ethernet Interface
4
RJ45: 4th Ethernet Interface
Network IF
FG-PAM-SRL-2E1B/4Eth-RP,V90
DB15 (Male): 1st E1
FG-PAM-SRL-2E1B/N64/4Eth-RP,V91
DB15 (Male): 1st/2nd E1
FG-PAM-SR2L-4E1B/4Eth-RP,V93
DB15 (Male): 1st/3rd E1
1
FG-PAM-SR2L-2E1B/N64/4Eth-RP,V94
DB15 (Male): 1st/2nd E1
FG-PAM-SR4L-4E1B/4Eth-RP,V96
DB15 (Male): 1st/3rd E1
FG-PAM-SR4L-2N64/4Eth,V98
HD26 (Fem.): Nx64
FG-PAM-SR4L-2N64/4Eth-RP,V98
HD26 (Fem.): Nx64
FG-PAM-SRL-2E1B/4Eth-RP,V90
DB15 (Male): 2nd E1
FG-PAM-SRL-2E1B/N64/4Eth-RP,V91
HD26 (Fem.): Nx64
FG-PAM-SR2L-4E1B/4Eth-RP,V93
DB15 (Male): 2nd/4th E1
2
FG-PAM-SR2L-2E1B/N64/4Eth-RP,V94
HD26 (Fem.): Nx64
FG-PAM-SR4L-4E1B/4Eth-RP,V96
DB15 (Male): 2nd/4th E1
FG-PAM-SR4L-2N64/4Eth,V98
HD26 (Fem.): Nx64
FG-PAM-SR4L-2N64/4Eth-RP,V98
HD26 (Fem.): Nx64
3
4
RP
LED: Status RP (remote power) 3rd DSL
LED: Status RP 4th DSL
1
2
LED: Status RP (remote power) 1st DSL
LED: Status RP 2nd DSL
1
3
SHDSL
RJ45 con. 1st and 3rd DSL line + two LEDs
2
4
RJ45 con. 2nd and 4th DSL line + two LEDs
A) B) C) D)
A) FG-PAM-SR2L-4E1B/4Eth-RP,V93 / FG-PAM-SR2L-2E1B/N64/4Eth-RP,V94 / FG-PAM-SR4L-4E1B/4Eth-RP,V96 / FG-PAM-
SR4L-2N64/4Eth,V98 / FG-PAM-SR4L-2N64/4Eth-RP,V98
B) FG-PAM-SRL-2E1B/4Eth-RP,V90 / FG-PAM-SRL-2E1B/N64/4Eth-RP,V91
C) FG-PAM-SR4L-4Eth,V98
D) FG-PAM-SR4L-4Eth-RP,V98
Table 3.1 Connectors and LEDs on the front panel of the LTU devices

User Manual LTU Orion 3
14
3.2.1 Remote Power Supply and Wetting Current
The wetting current and remote power supply modes can be changed by jumpers and the
configuration management. Despite the safe voltage on each DSL copper wire with respect to the
ground (<120 Volts according to EN 60950), the use of the remote power supply has to be done
strictly according to the following rules:
•When working with DSL copper lines make sure that the remote power is switched off.
•The insulation of cable pairs, junctions (junction boxes, distribution frames, etc.) should be
checked against the remote power voltage (norms and standards of the network)
3.2.1.1 Compatibility of Remote Power and Wetting Current Supply Modes
Devices operating in pairs should be configured for mutual operation! The mode «» means
recommended and possible.
The use of the mode «-» is not recommended because it may cause high power consumption,
degradation of communication (communication stability), and additional safety measures.
The mode «inc» (incompatible) will not allow the devices to establish communication (because
in this case one or both devices will be de-energized).
Remote Power and
Wetting Current
Supply Modes
NTU/RR
LTU
Power DP
Distance P.
Power LP
Local P.
Remote
Power
Supply
Wetting
Current
Supply
Wetting
Current
Consumption
No
NTU/RR
Power DP
Distance Power
inc
inc
inc
inc
inc
Power LP
Local Power
inc
-
-
LTU
Remote Power
Supply
-
Х
Х
Х
-
Wetting Current
Supply
inc
-
Х
Х
-
Wetting Current
Consumption
inc
Х
No
inc
-
-
Table 3.2 Compatible operation of remote power supply and wetting current supply modes
WARNING
TO PREVENT THE FAILURE OF THE EQUIPMENT, THE USE OF “X”
MODES IS STRICTLY PROHIBITED!
3.2.1.2 Configuration of Remote Power and Wetting Current Supply
Each LTU SHDSL channel can be configured to supply wetting current, to consume wetting
current, to supply remote power or being passive. The switching between these modes is
performed by setting the corresponding jumpers separately for each DSL channel of the modem
and to use one configuration command in the modem software menu (POWER [OFF/ON] N).
Be aware, that you can configure up to 4 SHDSL channels at 120Volts each or up to 2 SHDSL
channels at 200Volts (200Volts mode is supported for DSL-1 and DSL-2 only).
The default delivery setting for any LTU is 120VDC and 60mA. It is short circuit protected and at
any failure the system will restart automatically.

User Manual LTU Orion 3
15
Remote Power and Wetting
Current Supply Modes
Voltage
Current
Restrictions
Remote Power Source
120VDC
60, 90
125mA not
available for
120VDC
XM60 DSL-1
XM38 DSL-2
XM65 DSL-3
XM35 DSL-4
XM52 DSL-1
XM54 DSL-2
XM51 DSL-3
XM53 DSL-4
XM42 DSL-1/2
XM50 DSL-3/4
XM47 DSL-1/2
XM48 DSL-3/4
XM55 DSL-1
XM58 DSL-2
XM56 DSL-3
XM57 DSL-4
Configuration SW:
POWER [OFF/ON] N
Remote Power Source
200VDC
60, 90, 125mA
200VDC only, if half
of the SHDSL
channels are used
XM60 DSL-1
XM38 DSL-2
XM65 DSL-3
XM35 DSL-4
XM52 DSL-1
XM54 DSL-2
XM51 DSL-3
XM53 DSL-4
XM42 DSL-1
XM50 DSL-2
XM47 DSL-1
XM48 DSL-2
XM55 DSL-1
XM58 DSL-2
XM56 DSL-3
XM57 DSL-4
Configuration SW:
POWER [OFF/ON] N
Wetting Current Supply
47VDC
3.5mA
XM60 DSL-1
XM38 DSL-2
XM65 DSL-3
XM35 DSL-4
XM52 DSL-1
XM54 DSL-2
XM51 DSL-3
XM53 DSL-4
XM42 DSL-1/2
XM50 DSL-3/4
XM47 DSL-1/2
XM48 DSL-3/4
XM55 DSL-1
XM58 DSL-2
XM56 DSL-3
XM57 DSL-4
Wetting Current Consumption
Termination
XM60 DSL-1
XM38 DSL-2
XM65 DSL-3
XM35 DSL-4
XM52 DSL-1
XM54 DSL-2
XM51 DSL-3
XM53 DSL-4
XM42 DSL-1/2
XM50 DSL-3/4
XM47 DSL-1/2
XM48 DSL-3/4
XM55 DSL-1
XM58 DSL-2
XM56 DSL-3
XM57 DSL-4
Table 3.3 Possible remote power and wetting current supply modes
WARNING
IN CENTRAL EUROPE IT IS STRICTLY PROHIBITED TO SETUP THE
REMOTE POWER TO MORE THAN 120VDC. EXCEPTIONS WITH MORE
THAN 120VDC HAVE TO BE INSTALLED ACCORDING THE SAFETY
STANDARD EN 60950.
When a dual/quad DSL channel LTU is connected to NTU/RR and LTU and the remote power
feature is used, a DCL alarm may appear. In this case we recommend to remove the jumpers for
the corresponding remote power channel to the LTU (XM60, XM38, XM65 or XM35).
WC
60mA
90mA
125mA
WC
60mA
90mA
125mA
WC
60mA
90mA
125mA
WC
60mA
90mA
125mA

User Manual LTU Orion 3
16
Figure 3.1 Remote power jumper location
In the following two figures two main applications are showed for clarifying the description about
remote power modes.
Figure 3.2 Example 120Volts, 60mA
XM58
XM57
XM55
XM56
XM47
XM48
XM54
XM52
XM53
XM51
XM38
XM60
XM35
XM65
XM50
XM42

User Manual LTU Orion 3
17
Figure 3.3 Example 200 Volts, 90mA
3.2.2 Description of Orion3 Interfaces
3.2.2.1 SHDSL Interface
The Orion3 devices are available with 1, 2 or 4 SHDSL interfaces. The interfaces can operate
fully independent of each other as well as they can be combined to operate in multipair mode.
Therefore all independent SHDSL interfaces and groups of SHDSL interfaces (multipair mode)
can be configured separately from each other. The multipair mode, the reservation mode and the
automatic configuration detection mode naturally limit the independent working.
All SHDSL interfaces support plesiochronous data transmission. It means that reference clock
frequencies, which are used to clock data transmission, are transmitted together with the data in
different directions of one SHDSL link. The clock frequencies of different SHDSL channels are
completely independent if they do not operate in the multipair mode.
An SHDSL channel working in the independent mode can simultaneously transmit one or several
E1 streams, Nx64 or RS-232/485 data and one WAN stream. E1 transmission is plesiochronous.
All E1 streams received by one SHDSL interface should use the same clock frequency in one
direction.
Table 3.4 Line settings per SHDSL interface, single pair
3.2.2.1.1 Master/Slave
To establish a connection, it is necessary that one transceiver side is configured as Master and
the other as Slave. In this case, the connection is controlled by the Master device.
Mode
Coding Type
Baserate
Transmission
Data Rate
Standard
Master/Slave
Fix Configuration
PAM16
3..60
Baserate* 64
kbit/s
Annex A, Annex B,
Annex AB (autodetection)
PAM32
12..89
Master
Autodetection
PAM16
Auto (3..60)
Annex AB (autodetection)
PAM32
Auto (12..89)
Slave
Autodetection
Auto (PAM16/32)
Auto (3..89)
Annex AB (autodetection)

User Manual LTU Orion 3
18
3.2.2.1.2 Multipair Mode
If 2, 3 or 4 SHDSL channels are configured to operate in the multipair mode, they work at the
same clock frequency and line rate like one SHDSL channel with doubled, tripled or quadrupled
transmission capacity. Similarly to the independent channel, such a combined channel can
simultaneously transmit one or several E1 streams and one WAN stream. This transmission is
also plesiochronous. All E1 streams that are transmitted over one SHDSL interface should use
the same clock frequency per direction.
In multipair mode, one SHDSL channel serves as a “master”channel, while the other SHDSL
channels serve as “slave”channels. If the link in one channel fails, links in all other channels
break too and the procedure of connection/activation restarts.
The four-channel modems provide a possibility to organize pair-wise channels, i.e., these two
two-pair links will operate independently from each other.
The main application for the multipair mode is the increasing of the transmission range. In this
case, some channels operate at low transmission rates. In multipair mode some limitations are
imposed on the Baserate parameter.
Mode
Coding Type
Baserate
Transmission
Data Rate
Standard
2-pair, Master/Slave
Fix Configuration
PAM16
3..60
2*Baserate* 64
kbit/s
Annex A, Annex B,
Annex AB (autodetection)
PAM32
12..89
2-pair, Master
Autodetection
PAM16
Auto (3..60)
Annex AB (autodetection)
PAM32
Auto (12..89)
2-pair, Slave
Autodetection
Auto (PAM16/32)
Auto (3..89)
Annex AB (autodetection)
3-pair, Master/Slave
Fix Configuration
PAM16
3..60
3*Baserate* 64
kbit/s
Annex A, Annex B,
Annex AB (autodetection)
PAM32
12..85
3-pair, Master
Autodetection
PAM16
Auto (3..60)
Annex AB (autodetection)
PAM32
Auto (12..85)
3-pair, Slave
Autodetection
Auto (PAM16/32)
Auto (3..85)
Annex AB (autodetection)
4-pair, Master/Slave
Fix Configuration
PAM16
3..60
4*Baserate* 64
kbit/s
Annex A, Annex B,
Annex AB (autodetection)
PAM32
12..64
4-pair, Master
Autodetection
PAM16
Auto (3..60)
Annex AB (autodetection)
PAM32
Auto (12..64)
4-pair, Slave
Autodetection
Auto (PAM16/32)
Auto (3..64)
Annex AB (autodetection)
Table 3.5 Line settings per SHDSL interface, multipair mode.
The next figure shows an example of an Orion3 device working in four-pair operation mode (the
<MULTIPAIR> command is used to configure multipair operation mode). Four SHDSL channels
are combined into one group. Through this multipair channel one E1 stream and Ethernetpackets
are transmitted. This mode allows increasing the transmission range, compared to the use of only
one single SHDSL channel, because the data rate of each SHDSL channel is lower (the
advantage in the transmission range will depend on the cable parameters and noise immunity).

User Manual LTU Orion 3
19
Figure 3.4 Example of four-pair multipair data transmission
3.2.2.1.3 Reservation Mode
Reservation is provisioned for 2- and 4-channel FlexDSL Orion3 devices. The main task of
reservation is to transmit the most important data even in the case of the failure of one or several
SHDSL connections. Reservation also takes care about an efficient bandwidth usage over all
SHDSL channels like the normal transmission modes.
Reservation will not guarantee a continuous transmission of important data in the case of a failure.
When one or several DSL connections fail, a sort-term loss of Ethernet packet and E1 data can
occur.
SHDSL channels with successive numbers (example: DSL-1, DSL-2 or DSL-2, DSL-3, DSL-4)
are merged into a group of channels with reservation. For these merged channels, the traffic in
the SHDSL channels with the lowest numbers has higher priority than the traffic with higher
numbers. For example, DSL-1 has a higher priority than DSL-2, and DSL-2 has a higher priority
than DSL-3. If the communication in one or several SHDSL channels inside the reservation group
is broken, remaining working channels transmit the data of the failed high-priority channels. At
any failure the system always operates as if the low-priority channels failed.
Consider the reservation with two channels: DSL-1 and DSL-2 (DSL-1 has a higher priority
compared to DSL-2). If the DSL-2 channel fails, the DSL-1 channel continues to operate without
any changes. If the DSL-1 channel fails, the DSL- 2 channel transmits the data of the DSL- 1
channel. Hence, the DSL-1 channel should transmit the high-priority data.
If the substitute channel has a lower transmission capacity than the main channel, the transmitted
data will be decreased. First, the volume of WAN data will be decreased up to 1 timeslot (TS,
64kbit/s), and then, the number of transmitted E1 timeslots will be decreased. If multiple E1
streams are transmitted, the streams at the end of the list will be decreased (if E1-1, E1-2 are in
the list, the E1-2 stream willbe deleted). First, timeslots with large numbers aredeleted. However,
there is an exception for TS 16, which, if transmitted, will be deleted before or after TS 0.
Mode
Normal Mode
Reserve Mode
DSL-2 down
Reserve Mode
DSL-1 down
DSL-1
DSL-2
DSL-1
DSL-2
DSL-1
DSL-2
DSL-1: Baserate 72
DSL-2: Baserate 61
E1-1
40 TS WAN
E1-2
29 TS WAN
E1-1
40 TS WAN
Failure
Failure
E1-1
29 TS WAN
Total
E1-1, E1-2
69 TS WAN
E1-1
40 TS WAN
E1-1
29 TS WAN
DSL-1: Baserate 72
E1-1, E1-2
61 TS WAN
E1-1, E1-2
Failure
Failure
E1-1

User Manual LTU Orion 3
20
Table 3.6 Examples of reservation with two channels
The following pictures illustrate the last example in the previous table with reservation of two
channels (The <RESERVE> command is used to configure reservation).
DSL-2: Baserate 61
8 TS WAN
8 TS WAN
28 TS E1-2
1 TS WAN
Total
E1-1, E1-2
69 TS WAN
E1-1, E1-2
8 TS WAN
E1-1, 28 TS E-12
1 TS WAN
DSL-1: Baserate 72
DSL-2: Baserate 61
72 TS WAN
E1-1
29 TS WAN
72 TS WAN
Failure
Failure
61 TS WAN
Total
E1-1
101 TS WAN
72 TS WAN
61 TS WAN
DSL-1: Baserate 89
DSL-2: Baserate 89
E1-1
57 TS WAN
E1-2, E1-3
25 TS WAN
E1-1
57 TS WAN
Failure
Failure
E1-1
57 TS WAN
Total
E1-1, E1-2, E1-3
82 TS WAN
E1-1
57 TS WAN
E1-1
57 TS WAN
Other manuals for ORION 3
1
This manual suits for next models
1
Table of contents
Other FlexDSL Modem manuals
Popular Modem manuals by other brands
SMC Networks
SMC Networks EZ Connect SMC7003-USB user guide

Mega
Mega 200VWR user guide

Cradlepoint
Cradlepoint CBA750 Series user manual

ActionTec
ActionTec External 56K Call Waiting user manual
ZyXEL Communications
ZyXEL Communications VMG1312-B10A Support notes
SIRETTA
SIRETTA ZETA- P Series Hardware manual
