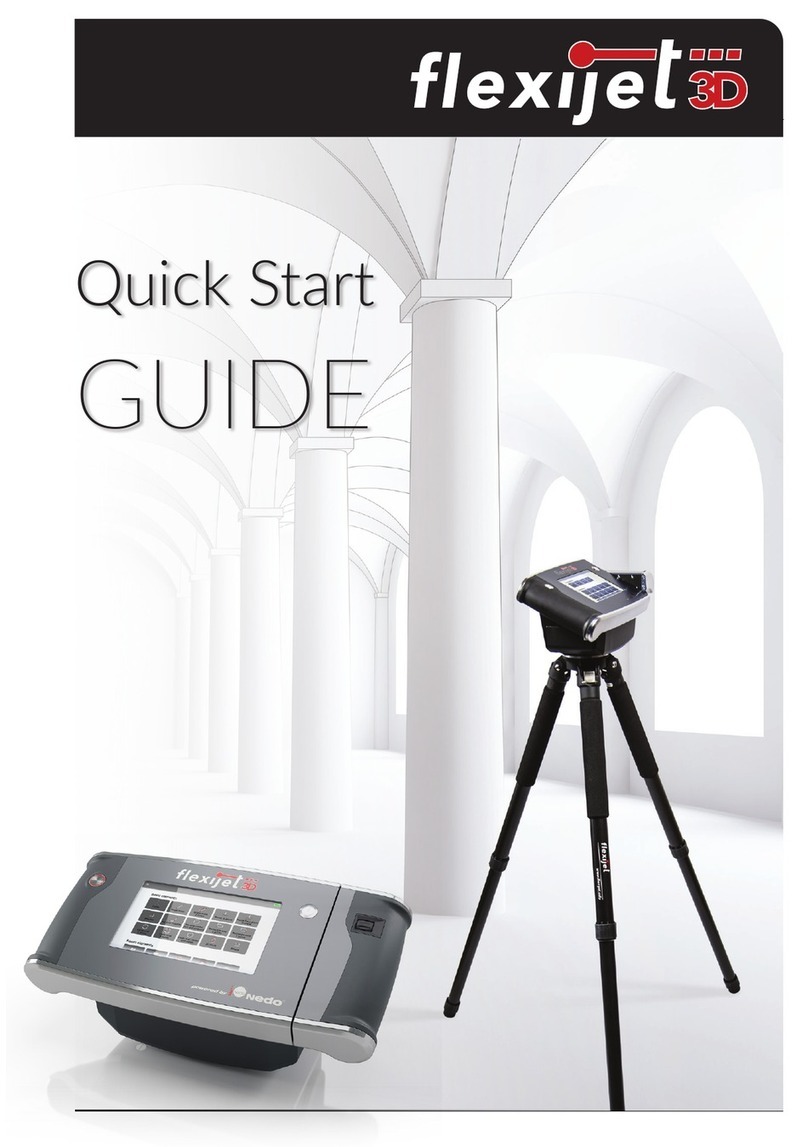
Flexijet 3D 710100 User manual

Quick Start Guide
for Countertops
Flexijet North America
Tel: 1 844 MY-FLEXI
Email: sales@exijet.info
Support: helpdesk@exijet.info
Web: www.myexijet.com
Flexijet GmbH
Krellstraße 10
32549 Bad Oeynhausen
GERMANY
Tel: +49 5731 18 660 60
Fax: +49 573118 660 61
Email: ofce@exijet.info
Web: www.exijet.info
Full Flexijet Stone Online Manual
at www.myexijet.info

2 3
1 Overview of Flexijet 3D
Version: Quick-Start Guide for Countertops
Date: 04.2021
Copyright © 2021
All rights reserved. No part of this publication may be reproduced, distributed, or transmitted in any
form or by any means, including photocopying, recording, or other electronic or mechanical methods,
without the prior written permission of the publisher. Violation of these rights will result in the pursue
of damages. All rights reserved in patents, utility model and design registration.
Whilst every effort has been made to ensure the accuracy of the information contained in this
guide, no guarantee can be given that all errors and omissions have been excluded. No liability
for loss occasioned to any person acting or refraining from action as a result of the material in this
publication can be accepted by Flexijet GmbH.
Likewise, Flexijet GmbH will not incur any liability for direct damage or consequential damages
resulting from improper use of the laser. When using the laser, country specic health and safety
regulations including the warnings in this manual must be observed.
All product names and brand names used are the property of their respective owners and are not
explicitly marked as such.
Flexijet GmbH reserves the right to make changes to the content without notice.
Table of Contents
1 Overview of Flexijet 3D ...................................................3
2 Description ................................................................4
2.1 Delivered Components ....................................................4
3 Technical Data .............................................................5
3.1 Battery and Charging ......................................................5
3.2 Installing Flexijet Stone/FlexiCAD software ..............................6
3.3 About Flexijet Stone/FlexiCAD ............................................6
3.4 Flexijet Stone/FlexiCAD software layout .................................7
4 Getting Started ............................................................8
4.1 Care and Transportation ..................................................8
4.2 Setting Up Flexijet 3D Hardware ..........................................8
5 Using Flexijet 3D ..........................................................9
5.1 Connecting to Flexijet 3D .................................................9
5.2 Getting Started: Auto-Level ..............................................10
5.3 Measure a Countertop ...................................................10
5.4 Measure additional countertop areas ....................................11
5.5 Adding Backsplash ........................................................11
5.6 Measuring Full-height Backsplash ........................................12
5.7 Measuring a wall ..........................................................13
5.8 Repositioning .............................................................14
6 Reference info ............................................................15
6.1 Using the Xbox Controller ................................................15
6.2 Default Xbox functions ...................................................15
6.3 Flexijet Smart Remote App ...............................................15
6.4 Quick-list of common functions ..........................................16
6.5 See measurement points/photos .........................................16
7 Safety Information. . . . . . . . . . . . . . . . . . . . . . . . . . . . . . . . . . . . . . . . . . . . . . . . . . . . . . . .17
7.1 Documentation ...........................................................17
7.2 Laser radiation ............................................................17
7.3 Environmental Considerations ...........................................17
7.4 Warning Labels ...........................................................18
7.5 Intended Use .............................................................18

4 5
2 Descripon
2.1 Delivered Components
3.1 BaeryandCharging
Flexijet 3D's built-in Li-Ion battery has a voltage of 14.8 V and a capacity of 5.200
mAh.
The main power switch must be ON to charge the battery. Only the supplied power
adapter should be used for charging - use of another power supply may damage
Flexijet 3D and cause personal injury.
The LED ring of the measurement button indicates the charging status.
Flexijet 3D can be used while charging. This will increase charging time, and the ability
to use Flexijet 3D during charging may be delayed if the battery is nearly empty.
Possible causes of error during the loading process are:
nCharging outside the permitted temperature range (0° to + 55° C)
nDefective power supply and/or defective battery.
In the event of a charging error, disconnect the power supply from Flexijet 3D,
eliminate the cause of the fault and restart the charging process.
3 Technical Data
Measuring system Flexijet 3D
Item No. 710100
Auto Leveling ± 1.8 ° in both axes
Laser Type Laser class 2, p <1 mW, 635nm
according to DIN EN 60825
Power Supply Built-in Li-ion battery / 14.8V /5,200 mAh
Operating Time max. 8 hr
Charging Time approx. 2.8 hr with completely empty battery
Charging Temperature 0° C to + 55° C
Storage Temperature -20° C to + 70° C
Operating Temperature 0° C to + 40° C
Weight 5 kg
Dimensions (length/width/height) 370mm × l80mm × 180mm
Angle Measuring System (resolution) Optical rotary encoder with a resolution of 3"
Built-in camera 5 Mpx (2,592 × 1,944 px), colour
LED colour LED indicator Meaning
Green Illuminates intermittently Charging in progress
Green Illuminates permanently Charging completed
Red Illuminates intermitently Error - Charging was aborted

6 7
3.2 InstallingFlexijetStone/FlexiCADsoware
Before you commence the installation, please ensure that your Tablet/
Computer is connected to the internet.
Please contact Flexijet Support at 1-844-MY-FLEXI or helpdesk@exijet.
info for assistance in installing and conguring your software. If you wish
to proceed, more detailed instructions are online at www.myexijet.info
nInsert the supplied USB ash
drive into your laptop and open
the folder "Flexijet Installation".
nNow double click
"SetupFlexijetSoftware-3.0.exe".
nThis will begin the installation of FlexiCAD. Follow the on-screen
instructions to complete the installation.
nThere will also be 'patch' update le saved on the software USB. This le
will be called something like 'exicad_3_0_19_0_patch.exe'. After the main
installation is complete, cancel the 'Flexijet Software-Update Tool', and run
this patch le to install the latest software updates
Note: Your Flexijet Stone/FlexiCAD Software serial number is different
from your Flexijet 3D hardware serial number, and will be issued
separately
3.3 AboutFlexijetStone/FlexiCAD
nFlexijet Stone and FlexiCAD are both designed for creating accurate and
efcient measurement drawings with Flexijet 3D.
nFiles created in Flexijet Stone can be opened and edited in FlexiCAD, and
vice-versa with no limitations.
nFlexijet Stone is designed specically for the Stone countertop industry with
tools and shortcuts to make measuring easy and accurate, including a 1-step
'Countertop' and 'Backsplash' button.
nWe recommend that new users in the counterop industry use Flexijet Stone,
and may use FlexiCAD for extra and advanced functions as needed.
3.4 FlexijetStone/FlexiCADsowarelayout
The Flexijet Stone and FlexiCAD software interface consists of 4 parts:
nTopcontrolandRibbons(tabs)locatedacrossthetop
This is where most of the functions used to control Flexijet and draw/edit
in Flexijet Stone/FlexiCAD are located. These functions are organized into
Ribbons or Tabs of similar functions.
In Flexijet Stone, the left Quick-Access buttons are visible on all ribbons.
nProjectExplorerandPropereslocatedontheleside
The Folders/planes created will be available here and can be selected. Note
that a folder is selected by clicking on the text of the folder - the checkboxes
next to the folders turn visibility for other folders on/off.
The Properties pane allows for the editing of selected elements, or of the pen
to dene elements to be measured or drawn.
nCanvas/WorkAreainthecentreofthescreen
This is where the measurement drawing will be created and edited. In Touch-
mode, pinch-to-zoom and move the canvas with a single held touch. In PC
mode, scroll in and out on the mouse to zoom, and click and move the centre
scroll wheel to move the canvas.
nCommandWindowandboomcontrols
Messages and prompts relating to the active functions will appear in the
Command Window. When using functions, follow these steps and prompts in
this command window for steps and validation of the inputs.
If your window panes are accidentally moved,
you can reset their position back to this standard
conguration by selecting 'Reset application layout
to standard' in the '?' (Help) ribbon.

8
5 Using Flexijet 3D
Note: This is intended as a short introductory guide.
Fullonlinemanualisavailableatwww.myexijet.info
5.1 ConnecngtoFlexijet3D
nSetup Flexijet 3D, and turn on Flexijet 3D by pressing the Power button.
nTurn on yout laptop/tablet, but do not launch FlexiCAD/
Flexijet Stone software yet.
nThe 'Tilt Monitoring' screen will be visible on the
Flexijet's screen. Generally, you will quickly see that the
Flexijet is close to level, then turn off Tilt Monitoring by
sliding the Red toggle switch to the left, and then tapping
'close' button.
See www.myflexijet.info for more.
nThe 'Waiting for incoming WLAN
connections' screen will now be visible on
your Flexijet.
nSelect the Flexijet's WiFi network from your
Tablet/laptop. The WiFi name will be the
Flexijet serial number (eg Flexijet2-000001).
Enter the password (slide the "Show
password" slider on the Flexijet 3D LCD
screen to reveal the password).
nThe Flexijet's screen will turn green to
visually indicate that the connection has
been established. Green means 'Go' to open
Flexijet software!
nOpen FlexiCAD/Flexijet Stone on
your laptop/tabet. Flexijet Stone is
recommended for users measuring
countertops.
nFrom the preferences window, ensure
'Flexijet 3D 2' is selected from the Flexijet
Mode section. Click OK to proceed You may
also select between 'Touch-Mode' and PC-
Mode'
nOnce Flexijet is powered on and connected
to Flexijet Stone, you are ready to begin
measuring.
nVisit the Online Manual at www.myexijet.info for more info on settings and
customizing FlexiCAD and Flexijet Stone.
4 Geng Started
4.1 CareandTransportaon
nFlexijet 3D's moulded plastic carrying case is
designed to protect Flexijet during transportation.
The Flexijet should always be transported in this case,
with the power off.
nThe Measurement Head automatically locks and unlocks
when Flexijet is Powered ON and OFF.
nIt is preferable that Flexijet 3D is operated in dry indoor
spaces. Flexijet 3D can certainly be used in
outdoor scenarios with the aid of the red glasses.
Do not use Flexijet in damp weather, especially
during persistent rainfall.
nProtect Flexijet from dust and other jobsite
hazards.
nThe laser and camera lenses should be regularly inspected
for dust and debris, and cleaned with a soft microbre cloth
(such as an Eyeglass cloth).
4.2 SengUpFlexijet3DHardware
nExtend the carbon bre tripod to the required height
(normally 1 full extension of the tripod legs).
nOptional: Set up the auxiliary tripod at the desired height,
attaching the desk plate.
nSet the Flexijet head unit on the tripod. Hold the Flexijet
securely with one hand and screw the mounting screw
into the Flexijet.
nVerify that the Flexijet is securely mounted, and can spin
freely horizontally. You may now power on Flexijet.
When powering on, you will hear a ‘click’ as Flexijet's
rotating head unit automatically unlocks.
nOptional: insert the batteries into the Xbox controller and pair with your computer.
See page 15 of this guide for more information.
9

10 11
5.4 Measureaddionalcountertopareas
nAuto-Level Flexijet in every new location. If you are moving to a new
location using Repositioning/3D Locations to relocate Flexijet in
relation to the original position, Auto-leveling may be selected as
part of the ‘Resume location’ function. To learn more Repositioning,
visit www.myexijet.info
nNow, use ‘Align to object’ (simple placement) to orient your the new
canvas area by measuring a point on the left and right of the back
wall or cabinets. Note: be sure to use ‘Align to object’ on additional
countertop areas, as the ‘Align’ function will now rotate all your
folders/sheets.
nSelect the Root folder (Home folder, often named
‘Kitchen’) from the Project Explorer by clicking on its
text. (Don’t check the checkbox for this, select the
folder by clicking on the text of the name)
nFrom the ‘Measurement’ tab, select ‘Countertop’ and name your
new countertop, and measure the point to set the horizontal plane
of your new countertop surface.
n When switching between countertops, ensure that
the correct folder is selected (active) in the Project
Explorer before measuring. Select a folder by clicking
on the text of the folder.
5.5 AddingBacksplash
nIn Flexijet Stone, Select the
‘Measurement Tab’
nSelect the ‘Backsplash” button
nFrom the backsplash dialog window, enter
the ‘Height’ of the backsplash, and the ‘Offset’
(how far from the countertop the backsplash
will be drawn) and click 'OK'
nTap or click to select the left point where
you would like your backsplash to begin,
then tap the point on the right
nYour backsplash will now be created in
the area!
5.2 GengStarted:Auto-Level
nSelect ‘Auto Levelling’ on the screen of the Flexijet, or in the
Software to automatically level Flexijet 3D.
Always Auto-Level the Flexijet every time you begin a
measurement, or move the Flexijet to a new location!
nOPTIONAL: Use ‘Align to Object’ to align the Flexijet to a wall or bank of
cabinets with 2 points, among other options. Follow the command prompts.
NOTE: The ‘Align to Object’ command should only be used BEFORE you
begin measuring. To rotate the view of a drawing afterwards, use the
'Align' button in Flexijet Stone, or 'Horizontal Alignment' in FlexiCAD.
5.3 Measure a Countertop
nIn Flexijet Stone, go to the ‘Measurement’ ribbon and click/tap the
‘Countertop’ button. Name the Countertop folder, and press ‘OK
Note: This button is a 'shortcut’ that creates a project (root folder),
and a horizontal plane folder simultaneously. These can also be
created separately.
nNow, the Command Window will display, ‘Please measure a point on the
countertop’. Aim the Flexijet at the surface
of the countertop/cabinets to be measured
and activate the measurement button to
set the horizontal plane. Note: simply swipe
the measurement sensor to measure the point,
no need to activate the 'points' function before
measuring this point.
nWhen completed, the command line will
display ‘Folder Countertop Active’, and the Project
Explorer will display the Root folder (Kitchen) and
the Countertop Folder that was just created, with
the Countertop folder selected (text bold).
nMeasure the countertops. Use ‘Multiple lines’ to
measure straight sections, measuring 2 points
on each straight section. For walls and other
surfaces that may bow in and out, use ‘Polyline’
or ‘Iines’ to measure (scribe) with multiple
points on the surfaces.
nRemember: Measure the opposing surface
or plane of the horizontal plane you created.
That is, measure on the vertical surfaces of
the cabinet sides and the wall around the
countertop. Use targets as required when
surfaces are not visible.

12 13
5.7 Measuringawall
nIf measuring only a wall: In the
‘Measurement’ ribbon, click on ‘New
Project’. This is different from measuring
countertops because the ‘Countertop’
button creates a project folder for you
automatically! This will make a root/
project folder in the File Explorer.
nNow, click the ‘New Folder’ button. The
New Folder dialog window will pop up,
allowing you to name the new folder
and choose the type of plane. For
vertical surfaces, select the vertical
plane button on this window.
nYou will be prompted to measure
2 points to set the vertical surface
to set the plane – on the face towards
the left, and on the face towards the
right. These 2 points should be as far
apart horizontally as possible.
nYour folder structure will show the created
folder, with the Vertical Plane icon.
nNow, measure the geometry into this
wall using Multiple Lines and Polylines.
Similar to how a countertop is measured
but on a vertical plane, measure the
surfaces that intersect to the wall to
capture the outside shape of the wall
with Multiple Lines for straight sections,
and Polylines/Lines for scribed sections.
Each measured point will be attened
perpendicularly to the vertical plane.
nFor additional walls, click back on the root
(Project) folder, and follow the steps above
to create the folder and set the plane for each additional wall.
nTo measure the elevation of a wall manually, use
'Distance Point to Plane' and measure on the surface
of the wall. A measurement point with a distance
between that point and the set plane will be drawn on
screen.
nTo scan a wall (digitize hatch), see www.myexijet.info
5.6 MeasuringFull-heightBacksplash
With countertop measured:
nClick on the ‘Backsplash’ button on the measurement ribbon
nDeselect the ‘Add backsplash to
countertop’ section, and select the ‘Create
Full-Height Layer (full-height) section. Also,
name your backsplash
nClick on the left side point of the Full-
Height backsplash area. You may also
measure this point with Flexijet by aiming
and capturing a point on the full-height
backsplash area.
nThen, click on the right side point of
the Full-Height backsplash area. You
may also measure this point with Flexijet
by aiming and capturing a point on the full-height backsplash area.
nYou have now created your Full-height
backsplash folder. You must select that folder
from the Project Explorer by clicking on it
before proceeding to measure that area. Newly
measured elements will always be created within
the active folder.
nWhen measuring full-height
backsplash, be sure to measure to the
edges of the surface to be measured.
For example, to measure the top edge
of the Full-height at the underside of
the cabinets, it is typical to measure
on the underside of the cabinets
themselves. Follow the same principles as measuring a countertop, but on
the Vertical plane.
nTo create additional Full-Height backsplash folders, simply select the
‘Countertop’ or other corresponding folder and again use the ‘backsplash’
button to create another vertical folder
Note: To measure Full-Height Backsplash without measuring countertops
at the same time, create a Project Folder before selecting the 'Backsplash'
function.

14 15
6 Reference info
6.1 UsingtheXboxController
nThe Xbox controller can be used to control
Flexijet remotely. The aim, functions, and
measurements can be activated by the buttons
on the controller.
nTurn on the Remote Control (Xbox controller). If
the controller is paired, the home button will
illuminate with a solid white light and it is ready
to be used.
nIf it is not paired, the home button will ash.
To pair the controller with your tablet/computer, press hold the small pairing
button (located on the top edge of the controller) until the home button
ashes rapidly.
On your tablet/computer, go to the Start Menu àSettings àDevices àAdd
Bluetooth or other device and add the Xbox controller as a Bluetooth device.
When paired, the home button will be solid.
Visit www.myexijet.info for more information.
nFlexiCAD/Flexijet Stone will nd
connected remote controls on
Startup.
If the Xbox controller was not
turned on when FlexiCAD
was started, turn on the Xbox
controller, then go to File (the
round F3D/FStone button) and
open 'General Preferences' window
and just click OK. FlexiCAD/Flexijet
Stone will search for and activate
paired remote controls.
6.2 DefaultXboxfuncons
(customizable in 'General Preferences')
• A – Multiple Lines • Left Bumper – Activate Measurement
• B - Polyline • Right Bumper – Laser ON/OFF
• X - Lines • Left Trigger – Show Next Point
• Y – Draw multiple points • Right Trigger – Transfer height (Cancel)
6.3 FlexijetSmartRemoteApp
Flexijet can be controlled using the Flexijet
Smart Remote App, available for iOS and
Android!
Visit www.myexijet.info for more info.
ON
(Home Button) Pairing Button
5.8 Reposioning
For more detailed info about repositioning, please visit www.myexijet.info
NOTE: Align' & 'Horizontal alignment' functions cannot be used after dening
a location!
nFrom the Flexijet Ribbon, click on the ‘3D Locations’ button.
nSelect the ‘Dene’ button in the ‘New Location’
section of the Relocation window.
nMeasure location points (2 minimum
required) with Flexijet. The points should be at
approximately the height of the Flexijet, and
should be as far apart as possible. Ideally, the
two points should have a slight vertical height
variation (one point slightly higher/one lower)
TheXboxcontrollershouldbeusedforaccuracy
nA minimum of 2 relocation
points must be measured.
Additional points can be
added now, or later in order
to allow for repositioning
from multiple vantage points.
Flexijet will measure each
of these points 5 times for
added precision.
nAfter measuring the desired
amount of relocation points, press ‘Cancel’ button on the Flexijet or the
‘Conrm’ checkmark to end the command.
nNow you can move Flexijet to its new position. The shock sensor alarm will
be triggered - dismiss the warning to continue.
nTO RESUME LOCATION after moving Flexijet, again select ‘3D locations’
nNow, select the number of points to be used to be
re-measured (2 points recommended - see
www.myexijet.info for more information), and
click on ‘Resume’. With the checkmark next to
‘Automatic Leveling’ selected, Flexijet will Auto-
level, and is ready to re-measure the location
points.
nYou may re-measure any of the previously
dened relocation points, in any order.
Flexijet will automatically determine which
points have been measured and determine Flexijet’s new position.
nThe command window will read ‘Location was set’ when successful
Faster Movement
Fine Detail Movement
Customizable Buttons
Slover Movement

16 17
7 Safety Informaon
7.1 Documentaon
Observance of the following safety instructions as well as the country-specic
safety and health and safety regulations is a prerequisite for a trouble-free and
safe use of the laser. Therefore please read this manual and carefully following
these instructions whilst working with the laser.
7.2 Laserradiaon
The Flexijet 3D is a laser Class 2 device and complies with DIN EN 60825-1: 2014.
GENERALSAFETYINSTRUCTIONSWHENHANDLINGLASERRADIATION
nLaser beams can damage the eyes.
☛Avoid direct radiation of the eyes.
☛Do not point the laser at people or shine in the eyes.
☛Do not aim the laser at reective surfaces to avoid the beam
reecting into others eyes.
☛Do not operate the laser at eye level if possible.
☛The housing of the laser device must only be opened by a trained
service technician.
The emitted laser radiation has the following properties:
nClass 2: Performance ≤ 1mW
nWavelength : 630-680 nm
nStatic laser point
DANGER!
Never look into the laser beam!
Do not aim laser beam at people or animals!
7.3 EnvironmentalConsideraons
Flexijet GmbH asks that you consider the environment when disposing of any
components.
nProduct-specic laser disposal information can be
downloaded at
www.exijet.info.
nBatteries and rechargeable batteries are hazardous waste
and must not be disposed of with household waste. They must
be disposed of properly in accordance with the applicable
environmental regulations in your country or region.
WARNING!
WARNING!
LASER RADIATION
DO NOT LOOK DIRECTLY
INTO THE LASER BEAM
LASER CLASS 2
DIN EN 60825-1:2014
P ≤ 1mW
λ: 630-680 nm
6.4 Quick-listofcommonfuncons
nMultiple Lines: For measuring straight lines such as cabinets, panels, etc.
nPolyline: For measuring 'scribed' areas such as walls
nPoints: For measuring sink centres, particular points, cabinet panel ends, etc.
nDistance Point to Plane: Use to check level of cabinets/walls manually
nShow CAD-Point: Use to have Flexijet aim the laser at a chosen drawing point.
nImport Drop-In: Import DXF/DWG les for sinks and other cutouts
nInsert Installation Symbol: Insert custom installation symbols in your drawing.
nTake a picture: Take a picture and save to your le using the tablet's webcam
nRecord Voice Notes: Record audio notes and conversations on your tablet.
nAuto-Dimension: Add dimensions and angles to all elements. Can be removed
with 'Remove Auto-Dimension'
6.5 Seemeasurementpoints/photos
nOn the 'View' tab, select 'Show measurement points'.
nHover your mouse cursor over purple measurement points to see measurement
point photos.

18
7.4 WarningLabels
Warning labels are located on the device are for your
safety.
☛Warning labels must not be removed.
LASERBEAMOPENING
The laser beam exits through the
opening at the front of the swivel
component.
Always keep this clear and do not attempt to insert any objects through the
opening.
7.5 IntendedUse
nFlexijet 3D is a mobile 3D measuring system with which rooms and buildings
can be measured in three dimensions.
nWith the help of built-in servomotors and a laser, the projection of points
from a CAD drawing back onto a work site is also possible.
nIt is preferable that Flexijet 3D is operated in dry indoor spaces. Flexijet 3D
can certainly be used in outdoor scenarios with the aid of the red glasses.
Do not use this device in damp weather, especially during persistent rainfall.
nThe device is to be protected from dust.
nAny use other than that described above is not dened as an 'intended use'
and may void warranty.
WARNING!
19

20
NOTES
. . . . . . . . . . . . . . . . . . . . . . . . . . . . . . . . . . . . . . . . . . . . . . . . . . . . . . . . . . . . . . . . . . . . . . . . . . . . . . . . . . . . . . . . . . . . . . . . . . . . . . . . . . . . . . . . . . . . . . . . . . . . . . . . . . . . . . . . . . . . . . . . . . . . . . . . . . . . . . . . . . . . . . . . . . . . . . . . . . . . . . . . . . .
. . . . . . . . . . . . . . . . . . . . . . . . . . . . . . . . . . . . . . . . . . . . . . . . . . . . . . . . . . . . . . . . . . . . . . . . . . . . . . . . . . . . . . . . . . . . . . . . . . . . . . . . . . . . . . . . . . . . . . . . . . . . . . . . . . . . . . . . . . . . . . . . . . . . . . . . . . . . . . . . . . . . . . . . . . . . . . . . . . . . . . . . . . .
. . . . . . . . . . . . . . . . . . . . . . . . . . . . . . . . . . . . . . . . . . . . . . . . . . . . . . . . . . . . . . . . . . . . . . . . . . . . . . . . . . . . . . . . . . . . . . . . . . . . . . . . . . . . . . . . . . . . . . . . . . . . . . . . . . . . . . . . . . . . . . . . . . . . . . . . . . . . . . . . . . . . . . . . . . . . . . . . . . . . . . . . . . .
. . . . . . . . . . . . . . . . . . . . . . . . . . . . . . . . . . . . . . . . . . . . . . . . . . . . . . . . . . . . . . . . . . . . . . . . . . . . . . . . . . . . . . . . . . . . . . . . . . . . . . . . . . . . . . . . . . . . . . . . . . . . . . . . . . . . . . . . . . . . . . . . . . . . . . . . . . . . . . . . . . . . . . . . . . . . . . . . . . . . . . . . . . .
. . . . . . . . . . . . . . . . . . . . . . . . . . . . . . . . . . . . . . . . . . . . . . . . . . . . . . . . . . . . . . . . . . . . . . . . . . . . . . . . . . . . . . . . . . . . . . . . . . . . . . . . . . . . . . . . . . . . . . . . . . . . . . . . . . . . . . . . . . . . . . . . . . . . . . . . . . . . . . . . . . . . . . . . . . . . . . . . . . . . . . . . . . .
. . . . . . . . . . . . . . . . . . . . . . . . . . . . . . . . . . . . . . . . . . . . . . . . . . . . . . . . . . . . . . . . . . . . . . . . . . . . . . . . . . . . . . . . . . . . . . . . . . . . . . . . . . . . . . . . . . . . . . . . . . . . . . . . . . . . . . . . . . . . . . . . . . . . . . . . . . . . . . . . . . . . . . . . . . . . . . . . . . . . . . . . . . .
. . . . . . . . . . . . . . . . . . . . . . . . . . . . . . . . . . . . . . . . . . . . . . . . . . . . . . . . . . . . . . . . . . . . . . . . . . . . . . . . . . . . . . . . . . . . . . . . . . . . . . . . . . . . . . . . . . . . . . . . . . . . . . . . . . . . . . . . . . . . . . . . . . . . . . . . . . . . . . . . . . . . . . . . . . . . . . . . . . . . . . . . . . .
. . . . . . . . . . . . . . . . . . . . . . . . . . . . . . . . . . . . . . . . . . . . . . . . . . . . . . . . . . . . . . . . . . . . . . . . . . . . . . . . . . . . . . . . . . . . . . . . . . . . . . . . . . . . . . . . . . . . . . . . . . . . . . . . . . . . . . . . . . . . . . . . . . . . . . . . . . . . . . . . . . . . . . . . . . . . . . . . . . . . . . . . . . .
. . . . . . . . . . . . . . . . . . . . . . . . . . . . . . . . . . . . . . . . . . . . . . . . . . . . . . . . . . . . . . . . . . . . . . . . . . . . . . . . . . . . . . . . . . . . . . . . . . . . . . . . . . . . . . . . . . . . . . . . . . . . . . . . . . . . . . . . . . . . . . . . . . . . . . . . . . . . . . . . . . . . . . . . . . . . . . . . . . . . . . . . . . .
. . . . . . . . . . . . . . . . . . . . . . . . . . . . . . . . . . . . . . . . . . . . . . . . . . . . . . . . . . . . . . . . . . . . . . . . . . . . . . . . . . . . . . . . . . . . . . . . . . . . . . . . . . . . . . . . . . . . . . . . . . . . . . . . . . . . . . . . . . . . . . . . . . . . . . . . . . . . . . . . . . . . . . . . . . . . . . . . . . . . . . . . . . .
Flexijet North America
Tel: 1 844 MY-FLEXI
Email: sales@exijet.info
Support: helpdesk@exijet.info
Web: www.myexijet.com
Flexijet GmbH
Krellstraße 10
32549 Bad Oeynhausen
GERMANY
Tel: +49 5731 18 660 60
Fax: +49 573118 660 61
Email: ofce@exijet.info
Web: www.exijet.info
Full Flexijet Stone Online Manual
at www.myexijet.info
Table of contents
Other Flexijet Measuring Instrument manuals
Popular Measuring Instrument manuals by other brands
HP
HP 3455A Operating and service manual

DRONEDEFENCE
DRONEDEFENCE AEROPING Setup guide
Veris Industries
Veris Industries E50F2A installation guide
ABB
ABB i-bus EIB Delta-Meter Installation and operating instructions

M-system
M-system 47DM operating manual

Hioki
Hioki Memory HiCorder MR6000 instruction manual
