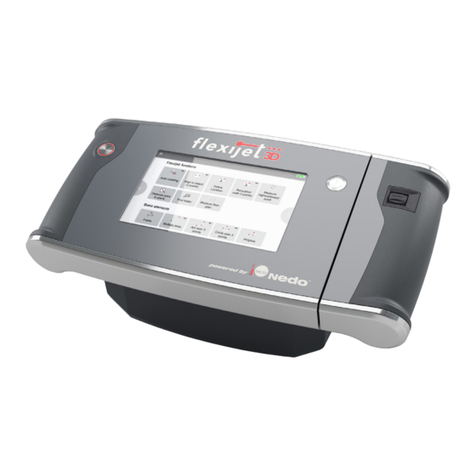
Flexijet 3D User manual

Quick Start
GUIDE

2
Imprint
Version:
Flexijet 3D
03.2021
Copyright© 2021
Flexijet Australia
420 Victoria Street
Brunswick VIC 3056
AUSTRALIA
Tel: +61 1300 077 977
Mobile: +61 414 873 372
Flexijet GmbH
Krellstraße 10
32549 Bad Oeynhausen
GERMANY
Tel: +49 5731 18 660 60
Fax: +49 573118 660 61
All rights reserved. No part of this publicaon may be reproduced, distributed, or transmied in any
form or by any means, including photocopying, recording, or other electronic or mechanical methods,
without the prior wrien permission of the publisher. Violaon of these rights will result in the pursue
of damages. All rights reserved in patents, ulity model and design registraon.
Whilst every eort has been made to ensure the accuracy of the informaon contained in this guide,
no guarantee can be given that all errors and omissions have been excluded. No liability for loss
occasioned to any person acng or refraining from acon as a result of the material in this publicaon
can be accepted by Flexijet GmbH.
Likewise, Flexijet GmbH will not incur any liability for direct damage or consequenal damages resulng
from improper use of the laser. When using the laser, country specic health and safety regulaons
including the warnings in this manual must be observed.
All product names and brand names used are the property of their respecve owners and are not
explicitly marked as such.
Flexijet GmbH reserves the right to make changes to the content without noce.

3
Table of Contents
1 About this manual.....................................4
1.1 Symbols used in this manual........................4
2 Safety informaon ....................................5
2.1Documentaon ..................................5
2.2Laserradiaon ...................................5
2.3 Intended use.....................................6
2.4 Transport and storage .............................7
2.5Environmentalconsideraons.......................7
3 Descripon ..........................................8
3.1 Delivered components ............................8
3.2 Technical data ....................................9
3.3Principlesofoperaon.............................9
4 Device components ..................................10
4.1 Overview of Flexijet 3D ..........................10
4.2 Controls of Flexijet 3D ...........................11
5 Power supply ........................................12
6 Starng Flexijet 3D for the rst me ...................13
6.1InstallingFlexiCADsoware.......................13
6.2SengUpFlexijet3DHardware ...................14
6.3SwitchingtheFlexijet3DOnandO...............15
6.4Preparingforyourrstmeasurement ...............15
7 FlexiCAD General Preferences.........................18
8 The Flexijet LCD Interface ............................19
9 Flexijet Smart Remote App ............................21
9.1HomeScreen ...................................22
9.2 Take a measurement .............................22
9.3 Take a picture ...................................23
9.4Usingthejoysck................................23
9.5 Finer movement of the laser.......................24
9.6Quicksengs...................................24
9.7 Menu..........................................25
10 Example Measurement Procedure......................26
10.1 Create Folders in the Project Explorer Window ......26
10.2 Auto Level and Align the Drawing .................26
10.3 Perform Your First Measurement ..................27
10.4 General Remarks ...............................28
11 Other resources on the USB disk.......................29
12 Flexijet STONE soware ..............................31
DeclaraonofConformity .....................back cover

4
1 About this manual
nDo not use the FLEXIJET 3D before fully reading and understanding this manual.
nAlways keep this manual with the FLEXIJET 3D.
1.1 Symbols used in this manual
The WARNING! symbol indicates an impending danger which can result
in serious injury if the warning is not heeded.
or property damage.
for use and handling of Flexijet 3D.
☛
danger.
General Information
CAUTION!
WARNING!
NOTE
Quick Start GUIDE

5
2 SafetyInformaon
2.1 Documentaon
working with the laser.
2.2 Laserradiaon
GENERAL SAFETY INSTRUCTIONS WHEN HANDLING LASER RADIATION
nLaser beams can damage the eyes.
☛
☛Do not point the laser at people or shine in the eyes.
☛
☛
☛
n
n
n
DANGER!
Do not aim laser beam at people or animals!
WARNING!
WARNING!
LASER RADIATION
DO NOT LOOK DIRECTLY
INTO THE LASER BEAM
LASER CLASS 2
DIN EN 60825-1:2014
P ≤ 1mW
λ: 630-680 nm

title
6
WARNING LABELS
☛
LASER BEAM OPENING
The laser beam exits through the
component. Always keep this clear and
through the opening.
2.3 Intended Use
nFlexijet 3D is a mobile 3D measuring system with which rooms and buildings can be
measured in three dimensions.
n
CAD drawing back onto a work site is also possible.
nIt is preferable that Flexijet 3D is operated in dry indoor spaces. Flexijet 3D can
certainly be used in outdoor scenarios with the aid of the red laser glasses.
Do not
n
n
WARNING!
Quick Start GUIDE

7
n
n
training with Flexijet GmbH or an authorised partner in your region.
nIt is also recommended that regular maintenance be carried out by Flexijet GmbH or
n
2.4 Transport and Storage
2.5 Environmentalconsideraons
of any components.
n
n
be disposed of with household waste. They must be disposed of properly
country or region.
CAUTION!

title
8
3 Descripon
3.1 Delivered Components
①Flexijet 3D.
②Remote control.
③Charger.
④Laser Glasses.
⑤
⑥
⑦
⑧
⑨
⑩
Quick Start GUIDE

9
3.2 Technical Data
3.3 Principleofoperaon
Measuring system Flexijet 3D
Item No. 710100
± 1.8 ° in both axes
Laser Type
according to DIN EN 60825
Power Supply
max. 8hr
Charging Time
Charging Temperature 0° C to + 55° C
Storage Temperature
0° C to + 40° C
Weight 5 kg
370mm x l80mm x 180mm

title
10
4 Device components
4.1 Overview of Flexijet 3D
①
②
③Scroll wheel.
④
⑤
⑥
⑦
⑧
⑨Charging socket
⑩.
Quick Start GUIDE

11
4.2 Controls of the FLEXIJET 3D
The Flexijet 3D has the following controls:
No: Operang
Element Funcon
1Measurement
Trigger
2
3 Scroll Wheel
4Escape
5 Main Switch
This switch allows the Flexijet 3D to be completely disconnected from
6WLAN
Dongle
by Flexijet GmbH may be used.
7
Compartment
partner.
8
Fixing screw
Compartment
partner.
9Charging
Socket
may be plugged into the charging socket. The use of another power
property or personal injury.
10
11 Lock

title
12
5 Power Supply
of 5.200 mAh.
adapter may be used for charging. Using another power supply may damage the Flexijet
3D and cause personal injury.
fully charge the Flexijet 3D. The ability to use the Flexijet 3D during charging may be
Possible causes of error during the loading process are:
n
n
nProblems with the power supply.
eliminate the cause of the fault and restart the charging process.
6 StarngFlexijet3Dfortherstme
LED colour LED indicator Meaning
Green Illuminates
Charging in progress.
Green Illuminates
permanently. Charging completed.
Red Illuminates regularly
Error.
Charging was aborted.
Quick Start GUIDE

13
6.1 InstallingFlexiCADsoware
connected to the internet.
the folder "Flexijet Installaon" .
Now double click "SetupFlexijetSoware-3.0.exe".
exicad_3_0_12_0_patch.exe
recommended that you also install these updates.
DONOTinstallthispatchleunlessyouhavecompetedthe
FlexiCAD3installaonrst!
FlexiCAD STONE
WHAT IS INSTALLED
n①FlexiCAD3
n② FlexiCAD PDF
n③ Flexijet Onlinesupport: This will launch the TeamViewer
n④ Flexijet-Soware Update-Tool
n⑤ Flexijet STONE
NOTE
WARNING!
①
②
③
④
⑤

title
14
6.2 SengUpFlexijet3DHardware
n
to the tripod.
n
away from the case will result in the case
n
has completed.
We will now set up the XBox remote
controller.
XBOX REMOTE CONTROL
nThe controller uses Bluetooth technology
to communicate with the laptop. The XBox
controller must be paired to your laptop. Pairing is
n
will illuminate
with a solid white light and it is ready to be used.
n
Task Bar àSengs àDevices àAdd Bluetooth or other
device
n
your measurements. If you need to use it later during a measurement and it was not
the remote control and will connect to it.
NOTE
Quick Start GUIDE
ON
(HomeBuon)
PairingBuon

15
6.3 SwitchingtheFlexijet3DOnandO
TO TURN ON:
on the LCD display will indicate the status of the start up process.
TO TURN OFF:
n
n
By tapping on the menu icon Shut Down
the Reboot
n
6.4 Preparingforyourrstmeasurement
n
before proceeding.
n
n
with the Tilt Monitor screen. Tilt monitoring allows Flexijet to
"Start tilt
monitoring"
monitoring slider to the left.

title
16
n
WiFi.
n
name will be the Flexijet serial number (eg
the "Show password" slider on the Flexijet
n
nNow start FlexiCAD on your laptop and select
"Flexijet 3D 2" in the preferences window.
Click OK to proceed.
Quick Start GUIDE

17
nFirmware update check.
General
Preferences
Firmware updates are installed in
Yes
nAnother dialogue box will now
Click OK to proceed.
n
n
The normal start up process should be:
☛
☛Start your laptop and log in.
☛Check that your laptop has connected to the Flexijet WiFi.
☛Start up FlexiCAD…
☛Wait for FlexiCAD to connect… ready!

title
18
7 FlexiCAD General Preferences
n
n
FlexiCAD
Flexijet 3D 2
Note that the Flexijet 3D
hardware and should not
be used.
n
personalise and customise
the CAD interface.
nYou can also set the
directory for templates
n
the window thus.
nTouchmode.
FlexiCAD can now be operated from
window enables you to operate
rather than using a laptop.
Quick Start GUIDE

19
8 The Flexijet LCD Interface
MAIN SCREEN
The main display of the LCD screen contains
some of the most commonly used commands.
LEFT SCREEN
The drawing created by FlexiCAD is displayed
display as it appears on the laptop. During
drawing as you perform your measurements.
RIGHT SCREEN
Tapping to the right screen will display the 2nd
layer keyboard. This comprises of eight keys
laptop keyboard. You can either display these
corner.
Laser
See image next page.
Tap to swipe screen.

title
20
LCD MENU
n
n
nTilt monitoring
Quick Start GUIDE
restart Flexijet 3D
shutdown Flexijet 3D
This manual suits for next models
1
Table of contents
Other Flexijet Measuring Instrument manuals
Popular Measuring Instrument manuals by other brands
Gas-Tec
Gas-Tec 1D instructions

AimTTi
AimTTi LCR400 instruction manual

Blackmagicdesign
Blackmagicdesign HyperDeck Shuttle HD Installation and operation manual

Centech
Centech 93297 Assembly & operating instructions
AutoMeter
AutoMeter 4366 installation instructions

Elecfreaks
Elecfreaks TOOCA Laser 1 user manual
