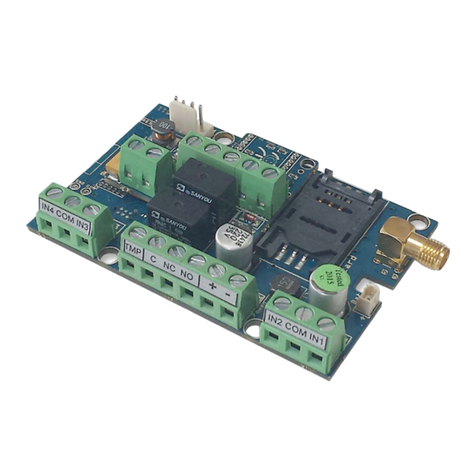
Flexitron Webdyn MTX-StarEnergy-M User manual

MTX-StarEnergy-M
Software User Manual
www.webdyn.com

contact@webdyn.com | webdyn.com
V1.0 subject to changes | Webdyn © by Flexitron Group
2
Index
General Notes .................................................................................................................. 4
Important Information ..................................................................................................... 4
Service and Support ........................................................................................................ 4
Introduction ...................................................................................................................... 5
Software............................................................................................................................ 6
1. Conguration Step by Step................................................................................................................... 6
1.1 Minimum Requirements .......................................................................................................... 6
1.2 USB driver installation ............................................................................................................. 6
2. Conguration......................................................................................................................................... 9
2.1 WAN .......................................................................................................................................... 9
2.1.1 WAN: Status ................................................................................................................ 9
2.1.2 WAN: Basic Settings ................................................................................................... 10
2.1.3 WAN: Keep Online....................................................................................................... 11
2.2 LAN ........................................................................................................................................... 13
2.2.1 LAN: Basic Settings .................................................................................................... 13
2.3 Firewall ..................................................................................................................................... 14
2.3.1 Firewall: Authorized IPs .............................................................................................. 14
2.4 Serial Settings: Serial portX..................................................................................................... 15
2.5 Other ......................................................................................................................................... 17
2.5.1 Other: AT Command.................................................................................................... 17
2.5.2 Other: SMS Control.................................................................................................... 18
2.5.3 Other: Periodic Autoreset........................................................................................... 20
2.5.4 Other: Time Server (NTP) ........................................................................................... 21
2.5.5 Other: Remote Console (TCP Server) ........................................................................ 21
2.5.6 Other: Passwords........................................................................................................ 23
2.5.7 Other: User Permissions ............................................................................................ 24
2.5.8 Other: Backup/Factory............................................................................................... 24
2.5.9 Other: SNMP ............................................................................................................... 26
2.5.10 Other: HTTPS............................................................................................................. 28
2.5.11 Other: Tacacs+.......................................................................................................... 29

contact@webdyn.com | webdyn.com
V1.0 subject to changes | Webdyn © by Flexitron Group
3
2.5.12 Other: Firmware Upgrade......................................................................................... 30
3. AT Commands ....................................................................................................................................... 30
ANNEX 1: Connection Quick Guide ................................................................................. 32
1. Connectors/indicators.......................................................................................................................... 32
2. Start Up ................................................................................................................................................. 33
3. Accesories ............................................................................................................................................. 34
ANNEX 2: Conguration Examples.................................................................................. 35
1. Example Scenario: Conguration to access an IEC60870-5-102 electric meter through IP connection
and GSM data call (CSD). ......................................................................................................................... 35
Sales Contact ................................................................................................................... 42

contact@webdyn.com | webdyn.com
V1.0 subject to changes | Webdyn © by Flexitron Group
4
General Notes
Product is deemed accepted by recipient and is provided without interface to recipient’s products. The
documentation and/or product are provided for testing, evaluation, integration and information purposes.
The documentation and/or products are provided on an “as is” basis only and may contain deciencies
or inadequacies. The documentation and/or products are provided without warranty of any kind, express
or implied. To the maximum extent permitted by applicable law, Matrix Electronica further disclaims all
warranties; including without limitation any implied warranties of merchantability, completeness, tness
for a particular purpose and non-infringement of third-party rights. The entire risk arising out of the use or
performance of the product and documentation remains with recipient. This product is not intended for
use in life support appliances, devices or systems where the malfunction of the product can reasonably be
expected to result in personal injury. Applications incorporating the described product must be designed
to be in accordance with the technical specications provided in these guidelines. Failure to comply with
any of the required procedures can result in malfunctions or serious discrepancies in results.
Furthermore, all safety instructions regarding the use of mobile technical systems, including GSM
products, which also apply to cellular phones, must be followed. Matrix Electronica or its suppliers shall,
regardless of any legal theory upon which the claim is based, not be liable for any consequential, incidental,
direct, indirect, punitive or other damages whatsoever (including, without limitation, damages for loss
of business prots, business interruption, loss of business information or data, or other pecuniary loss)
arising out the use of or inability to use the documentation and/or product, even if Matrix Electronica has
been advised of the possibility of such damages. The foregoing limitations of liability shall not apply in
case of mandatory liability, e.g. under the Spanish Product Liability Act, in case of intent, gross negligence,
injury of life, body or health, or breach of a condition which goes to the root of the contract. However,
claims for damages arising from a breach of a condition, which goes to the root of the contract, shall be
limited to the foreseeable damage, which is intrinsic to the contract, unless caused by intent or gross
negligence or based on liability for injury of life, body or health. The above provision does not imply a
change on the burden of proof to the detriment of the recipient. It is subject to change without notice at
any time. The interpretation of this general note shall be governed and construed according to Spanish
law without reference to any other substantive law.
Important Information
This technical description contains important information for the start up and use of the MTX-Tunnel
application. Read it carefully before you start working with MTX Terminal Java enabled & MTX-TUNNEL.
The warranty will be void should damage occur due to non-compliance with these instructions for use.
We cannot accept any responsibility for consequential loss.
Service and Support
To contact customer support please use the contact details below:
Address: Alejandro Sánchez 109, 28019 Madrid (Spain)
Email: iotsuppor[email protected]
Website: mtxtunnel.com, mtxm2m.com
REVISION INFORMATION: Version 5.1.4.10.6.5, Release: April 2020

contact@webdyn.com | webdyn.com
V1.0 subject to changes | Webdyn © by Flexitron Group
5
Introduction
The MTX-StarEnergy-M modem/router is a device belonging to the Titan router family. It has been specially
designed to be used in remote reading scenarios for energy meters.
We support all users of our MTX modems and routers when they need it with free, fast-response and
efcient technical support. So if after reading this manual you have any doubts, be sure to write to us at
the email address iotsuppor[email protected]. If you need a feature not included in our routers, or if you
need a special customization, let us know and we will study it.

contact@webdyn.com | webdyn.com
V1.0 subject to changes | Webdyn © by Flexitron Group
6
Software
1. Conguration Step by Step
The conguration of the MTX-StarEnergy-M is done through a web environment.
The MTX-StarEnergy-M uses its USB port to create a network connection through which it has access to
said web conguration environment.
1.1 Minimum Requirements
• A PC with Windows 10 and with a web browser (Chrome, IExplorer, Firefox...) and a USB port
• A USB cable to interconnect the PC with the MTX-StarEnergy-M
1.2 USB driver installation
If you don’t have the drivers installed on your computer this is the rst thing to do. The steps to install the
driver are as follows:
• Unzip le “1_Quectel_LTE_Windows_USB_Driver_V2.1.5.zip” and run the program “setup.exe”

contact@webdyn.com | webdyn.com
V1.0 subject to changes | Webdyn © by Flexitron Group
7
• Check if you are using a 32-bit or 64-bit system. To do this, go to Windows start menu and type
directly “System Information”, and a window like the following will appear
• Unzip the le “2_quectel_ecm_drivers_v1.02.0505.zip”. Run ecm_driver_setup.exe for 64 or
32 bits depending on your system and select option “1” and press “ENTER”
• Insert a SIM into the MTX-StarEnergy-M and connect the antenna. After that, power the device
and then connect it to your PC through a USB cable
• Go to the “Network Connections” menu (to do this, in the Windows Start menu directly type
“View network connections”) and check that a network connection named Quectel ECM has
been created as shown below
• In the connection properties of said interface, congure a network address with an IP
192.168.1.X, where X is different from 2 (since 192.168.1.2 is the IP address that the MTX-
StarEnergy-M has by default)

contact@webdyn.com | webdyn.com
V1.0 subject to changes | Webdyn © by Flexitron Group
8
• Open a browser and access the MTX-StarEnergy-M conguration web interface at
http://192.168.1.2. The default user is “admin” and the password is “admin”
In Annex II of this manual you will nd a step-by-step example of how to congure the MTX-StarEnergy-M
for remote access to an Energy meter through IP communications and CSD calls. We recommend reading
it.
If you need it, in the following sections you will nd detailed information on each of the conguration
sections.

contact@webdyn.com | webdyn.com
V1.0 subject to changes | Webdyn © by Flexitron Group
9
2. Conguration
2.1 WAN
The WAN section refers to everything related to the MTX-StarEnergy-M 2G/3G/4G congurations, from
the connection status, network conguration parameters and connection supervision.
2.1.1 WAN: Status
This screen shows the general status of the MTX-StarEnergy-M.
• Firmware Version: rmware version
• Public IP: WAN IP address (assigned from 2G/3G/4G connection) if it is available
• GSM Module: indicates the manufacturer and model of the internal GSM module of the MTX-
StarEnergy-M
• Network (2g/3g/4g): indicates whether the current WAN connection is using the 2G (GPRS),
3G or 4G network
• Signal Strength: indicates the strength of the signal. 0 = null, 31 = maximum
• Extra signal info: additional information when the modem is registered in 3G and 4G networks
• Internal temperature: shows the internal temperature of the processor (does not indicate
room temperature)

contact@webdyn.com | webdyn.com
V1.0 subject to changes | Webdyn © by Flexitron Group
10
2.1.2 WAN: Basic Settings
This section is used to congure the parameters of the WAN connection (2G/3G/4G). You will need to
know some information about your SIM card, such as the APN, the username and the password. Your
provider must provide them to you.
• Enabled WAN: check the box to allow MTX-StarEnergy-M to enable 2G/3G/4G connection
• Session time: indicates the minutes that the 2G/3G/4G connection should remain active. If you
specify “0” it means that the connection will always be active. If you specify a number greater
than 0, the connection will remain active for the specied minutes after an event such as the
receipt of an SMS message or a missed call. Go to the “Other> SMS Control” conguration
menu to activate and congure these events if you are going to specify a number> 0. This
parameter normally has a value of “0” for metering applications
• APN: APN of the operator. You should check with your GSM provider
• Username: username of the operator. You should check with your GSM provider
• Password: operator’s password. You should check with your GSM provider
• Call center: call center number. Usually * 99 *** 1 #
• Sim Pin: if your SIM card has a PIN, you must specify it here
• Authentication: you must indicate the authentication method. Normally PAP
• Network selection:
• auto: the MTX-StarEnergy-M will use 4G if there is coverage, or 3G and 2G otherwise
• 4G: the MTX-StarEnergy-M will use the 4g network in all cases. If there is no 4G coverage,
it will not change to 2G or 3G
• 3G: the MTX-StarEnergy-M will use the 3G network in all cases. If there is no 3G coverage,
it will not change to 2G
• GPRS: the MTX-StarEnergy-M will use the 2G network in all cases. In this mode, incoming
data calls (CSD) are also allowed
• DNS1 y DNS2: DNS servers for domain name resolution. It is recommended to use Google
8.8.8.8 and 8.8.4.4 or those indicated by your provider
• Remote management: if you check the box, you will be able to access the web conguration
of the MTX-StarEnergy-M remotely, through its public IP address (the one indicated in WAN>
Status)

contact@webdyn.com | webdyn.com
V1.0 subject to changes | Webdyn © by Flexitron Group
11
• Remote TCP port: indicates the remote conguration TCP port. For example, if you specify
8080, the conguration URL will be http: //x.x.x.x: 8080
ADDITIONAL NOTES
• Once the conguration is nished, press the “SAVE CONFIG” button to save the changes.
Remember that you must restart the device for the new changes to take effect
2.1.3 WAN: Keep Online
From this screen you can congure a PING to ensure the connectivity of the MTX-StarEnergy-M. In case
of PING failure three consecutive times, the 2G/3G/4G connection will restart.
• Enabled: check the box to allow the MTX-StarEnergy-M to send a periodic PING to verify
connectivity

contact@webdyn.com | webdyn.com
V1.0 subject to changes | Webdyn © by Flexitron Group
12
• Ping Server: indicates the IP address of the server against which to PING
• Period: indicates how many minutes a check PING should be performed
ADDITIONAL NOTES
• Once the conguration is nished, press the “SAVE CONFIG” button to save the changes.
Remember that you must restart the device for the new changes to take effect

contact@webdyn.com | webdyn.com
V1.0 subject to changes | Webdyn © by Flexitron Group
13
2.2 LAN
The “LAN” conguration section refers to the local network conguration part.
2.2.1 LAN: Basic Settings
This section allows you to congure the basic network parameters of the network connection (emulated
via the USB port).
• Static IP: a static IP address will be assigned. Only option available on this device
• IP Address: local IP address of the emulated IP interface (by default 192.168.1.2)
• IP Subnet Mask: subnet mask
• IP Gateway: Gateway IP address. Leave blank if you are using 2G/3G/4G connectivity. This
option is only useful if the MTX-StarEnergy-M is going to access the nternet through a PC via
the USB connection, which is not the case for metering applications
• DNS1: primary DNS server. Not necessary for metering applications
• DNS2: secondary DNS server. Not necessary for metering applications

contact@webdyn.com | webdyn.com
V1.0 subject to changes | Webdyn © by Flexitron Group
14
2.3 Firewall
Section to congure security aspects of the MTX-StarEnergy-M related to IP connectivity.
2.3.1 Firewall: Authorized IPs
This screen allows you to dene, if you wish, up to 3 IP addresses authorized to make connections to/
from the WAN port (2G/3G/4G interface) for the different MTX-StarEnergy-M services. For example, if you
specify an authorized IP address 90.166.108.200 (for example, your ofce), certain services will only be
accessible from that IP address.
• Authorized IP1: authorized IP address number 1
• Authorized IP2: authorized IP address number 2
• Authorized IP3: authorized IP address number 3
• Router conguration: species whether to accept remote connections to the web conguration
environment from any IP or only from authorized IP addresses
• Serial Gateways: species remote connections to 2G/3G/4G-RS232/485 gateway services
can be made from any IP or only from authorized IP addresses
• Remote console: species whether to accept remote connections to the remote console
service from any IP or only from authorized IP addresses
• PING: species whether to only respond to PING requests made from authorized IPs

contact@webdyn.com | webdyn.com
V1.0 subject to changes | Webdyn © by Flexitron Group
15
• Outgoing Connections: allows you to specify if from the MTX-StarEnergy-M it is possible to give
Internet access to all IP addresses or only to authorized IP addresses
ADDITIONAL NOTES
• Once the conguration is nished, press the “SAVE CONFIG” button to save the changes.
Remember that you must restart the device for the new changes to take effect
• If you use “Outgoing connections” restrictions, remember that you need to specify the IP
address of the DNS server to use.
• If you need more than 3 authorized IP addresses, you can specify more than one IP address in
any box, separating these by “,”
2.4 Serial Settings: Serial portX
From this section it is possible to congure a CSD/2G/3G/4G-RS232/RS485 transparent gateway to
remotely access serial devices, such as electricity meters.
• Baudrate: species the speed of the serial port (115200,…, 300)
• Data bits: species the number of data bits (7, 8)
• Parity: species parity (none, even [even], odd [odd])
• Stop bits: number of stop bits (1, 2)
• Flow Control: species ow control (none, hardware)
• Timeout ms: indicates the milliseconds to wait without receiving data through the serial port
before sending the data through IP. If you specify a “0” (default value), the data is sent via IP
as it arrives through the serial port. A number, for example 10, species that no data is sent
if there is not a minimum period of 10ms without receiving data through the serial port. This
allows data to reach the destination without the fragmentation problems common in some
protocols and data management platforms
• Allow incoming GSM call (CSD Data Call): selecting this box indicates that a CSD type call
is accepted. Only valid to work when the MTX-StarEnergy-M is congured to work in GPRS
(2G) mode. In this mode, when a CSD data call is received, it is accepted as long as a 2G-
RS232/485 gateway is not currently established. If so, the CSD call is rejected. In other words,
once a 2G-RS232 gateway is established, it takes precedence over the CSD call
• Function: Nothing or Used by External Device: select this operation option if you do not want to
use a certain serial port (such as IP/serial gateway)
• Function: Serial – IP Gateway (TCP Server): select this operation option if you want to establish
a transparent CSD/2G/3G/4G-RS232/485 gateway, that is, a scenario where the MTX-
StarEnergy-M device is at the it listens on a specic TCP port waiting to receive a connection to
establish the gateway. It is the usual function for metering applications
• TCP Local Port: TCP listening port for the Serial gateway - 2G/3G/4G
• RTS Line: allows you to select whether the RTS line will be active as long as a socket is
connected. By default Always on. RTS line is not usually used in metering applications

contact@webdyn.com | webdyn.com
V1.0 subject to changes | Webdyn © by Flexitron Group
16
• Socket timeout: species the time, in seconds, that must elapse to close an IP-RS232/485
gateway in the case of no trafc on it
ADDITIONAL NOTES
• Once the conguration is nished, press the “SAVE CONFIG” button to save the changes.
Remember that you must restart the device for the new changes to take effect

contact@webdyn.com | webdyn.com
V1.0 subject to changes | Webdyn © by Flexitron Group
17
2.5 Other
2.5.1 Other: AT Command
From this section it is possible to send an AT command directly to the internal modem of the MTX-
StarEnergy-M. For example, it can be interesting to check coverage, identify the surrounding telephone
cells, etc.
On the other hand, it is also possible to congure up to 5 special AT commands with which to congure
the MTX-StarEnergy-M at startup time (that is, they are self-executing each time the device is started).
• AT Command: AT command for real time execution (for example AT + COPS?). Once you press
the “SEND AT COMMAND” button, the AT command will be executed and you will see the
response
• AT1, … AT5: initialization AT commands

contact@webdyn.com | webdyn.com
V1.0 subject to changes | Webdyn © by Flexitron Group
18
ADDITIONAL NOTES
• Once the conguration is nished, press the “SAVE CONFIG” button to save the changes.
Remember that you must restart the device for the new changes to take effect
2.5.2 Other: SMS Control
This section allows you to congure the control of the MTX-StarEnergy-M by SMS. For example, you can
congure so that the MTX-StarEnergy-M connects to 2G/3G/4G after receiving an SMS command, or
make conguration changes/readings of status by SMS command, being able to specify the authorized
telephone numbers for this.
• SMS enabled: check the box if you want to be able to activate the MTX-StarEnergy-M’s
2G/3G/4G connection temporarily, after sending an SMS message. The SMS message that
has to be sent to activate the connection is “ROUTER ON”, in capital letters. This option has
no relevance (it does not need to be activated) if the MTX-StarEnergy-M is congured for a

contact@webdyn.com | webdyn.com
V1.0 subject to changes | Webdyn © by Flexitron Group
19
permanent 2G/3G/4G connection, as is usual in metering applications
• Send IP: check the box if you want the MTX-StarEnergy-M to send you an SMS message with
the acquired IP address after a connection by SMS
• AT enabled: check this box if you want to be able to send AT commands by SMS to the MTX-
StarEnergy-M, for example to know the coverage remotely, to perform a reset, change a
conguration...
• AT header: write the header text for command SMS messages here. For example, if you write in
this box “mtx”, when you send an AT command by SMS, let’s imagine the command AT + CSQ
to know the general level of coverage, you would need to send an SMS message with the text
“mtx AT + CSQ”
• All phones: check this box if you want all phones to be able to send AT commands by SMS to
the MTX-StarEnergy-M. Do not check this box if you want to specify authorized phone numbers.
You can also activate it if your telephone operator allows you to lter SMS, that is, the ltering
of phone numbers is done at the operator’s network level instead of at the device level
• Authorized Number X: in these boxes you can specify up to 5 authorized telephone numbers
in the event that the option “All phones” is not selected
• Alias / ATCommand: up to 10 aliases can be entered to execute SMS commands. For example,
the AT command that performs a reset of the MTX-StarEnergy-M is AT ^ MTXTUNNEL = REBOOT.
If, for example, you specify the alias “reset”, all you have to do is send an SMS with the text
“reset” to MTX-StarEnergy-M so that it restarts instead of having to send an SMS with the text
“mtx AT ^ MTXTUNNEL = RESET ”, longer and more complex to remember.
Aliases also allow the passing of parameters. For example, imagine that you have congured
the MTX-StarEnergy-M in “2g” mode to be able to accept IP connections and CSD calls. In
the future, where you will not need CSD calls (IP only) you will want to be able to change the
working mode to “auto” so that the MTX-StarEnergy-M connects to 2G/3G/4G depending on
the network availability in the area.
For this you can specify an alias such as “network [params]” together with the command “AT ^
MTXTUNNEL = SETPARAM, WAN_NETWORK, [* 1]”.
If you send the MTX-StarEnergy-M an SMS message with the text “auto network”, the setting
will change from “2g” to “auto”. (Note: Do not forget to send a reset SMS to the equipment so
that it takes the new conguration).
• Alias Result OK: text that will be sent as a response in the event that the execution of an ALIAS
command is successful
• Alias Result ERROR: text that will be sent as a response in the event that the execution of an
ALIAS command is wrong
ADDITIONAL NOTES
• Once the conguration is nished, press the “SAVE CONFIG” button to save the changes.
Remember that you must restart the device for the new changes to take effect

contact@webdyn.com | webdyn.com
V1.0 subject to changes | Webdyn © by Flexitron Group
20
2.5.3 Other: Periodic Autoreset
From this section you can congure a scheduled autoreset.
• Autoreset not enabled: activate the option if you do not want the device to reset automatically
• Autoreset every X hours: activate the option if you want the device to autoreset every certain
number of hours. Usually set to 24h in metering applications
• Auto-reset at specic time: select this option if you want the device to self-reset at a specic
time of day
• Auto-reset if router can’t obtain IP after X minutes: allows specifying the minutes after which
the device must autoset in case of not being able to obtain an IP address
ADDITIONAL NOTES
• Once the conguration is nished, press the “SAVE CONFIG” button to save the changes.
Remember that you must restart the device for the new changes to take effect
Table of contents
Other Flexitron Control Unit manuals
Popular Control Unit manuals by other brands
Texas Instruments
Texas Instruments TPS650380EVM-054 user guide
GESTRA
GESTRA TRS 5-40 Original Installation Instructions
WinSystems
WinSystems COMeT10-3900 Supplemental BIOS Manual
SICK
SICK IOLSHPB-P3104R01 operating instructions

SMC Corporation
SMC Corporation EX260-SPN1 Operation manual
CAME
CAME R Series manual
