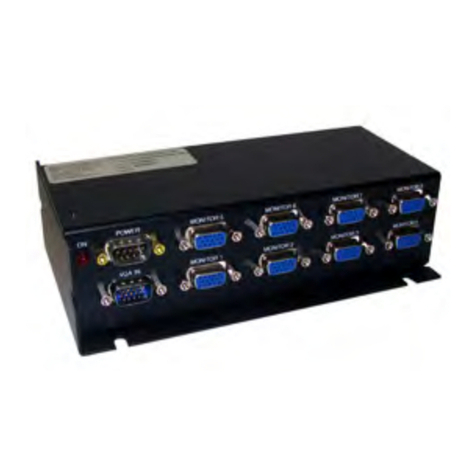
Flight Display Systems DAPS440-SW User manual

Document Number:
MAN –DAPS440-SW
Rev:
D
Revision Date:
09/14/2010
Page 1 of 15
DAPS440-SW
Installation and Operation Manual
Distribution Amp with Indicator Interface
TECHNICAL SUPPORT
678-867-6717, or
www.FlightDisplay.com
All manuals and user guides at all-guides.com
all-guides.com

Document Number:
MAN –DAPS440-SW
Rev:
D
Revision Date:
09/14/2010
Page 2 of 15
DAPS440-SW
Distribution Amp with Indicator Interface
© 2006 Flight Display Systems. All Rights Reserved.
Flight Display Systems
1765 Grassland Parkway
Alpharetta, GA 30004
678-867-6717 Phone
678-867-6742 Fax
www.flightdisplay.com
For the most current copy of all product manuals, please visit our website at
www.flightdisplay.com
All manuals and user guides at all-guides.com

Document Number:
MAN –DAPS440-SW
Rev:
D
Revision Date:
09/14/2010
Page 3 of 15
Table of Contents
General Information......................................................................................................................4
1. Front View..........................................................................................................................4
2. Additional Information....................................................................................................4
Specifications................................................................................................................................5
Installation Instructions .............................................................................................................5
1. Power ..................................................................................................................................5
Switch.............................................................................................................................................6
1. Switch Wiring Suggestion ...............................................................................................7
Video Wiring Suggestions .........................................................................................................8
1. S-Video/Composite and Audio Wiring ........................................................................8
2. Power and Ground Wiring..............................................................................................8
Power/Video..................................................................................................................................9
1. Pinout DB-15......................................................................................................................9
2. Pinout DB-25....................................................................................................................10
Troubleshooting.........................................................................................................................11
1. Video Noise......................................................................................................................11
2. Snow or Sweeping Lines................................................................................................11
3. No Power to Monitor, or No Video Input...................................................................11
4. Color Distortion...............................................................................................................11
5. Remote Control Inoperable ...........................................................................................11
Technical Support......................................................................................................................12
Instructions for Continued Airworthiness ...........................................................................12
Warranty ......................................................................................................................................13
Installation Drawing .................................................................................................................14
Log of Revisions.........................................................................................................................15
All manuals and user guides at all-guides.com

Document Number:
MAN –DAPS440-SW
Rev:
D
Revision Date:
09/14/2010
Page 4 of 15
General Information
The DAPS440-SW is a 4x4 Audio & Video input source distribution amplifier that will
remember and display four different audio/video input sources. In addition, the DAPS440-
SW supplies 3 Amps of 12VDC of power available for other cabin entertainment products
(i.e. Wireless Audio, DVD player, Glareshield Camera, or LCD monitors).
Front View
Additional Information
Traditionally, cabin entertainment switching equipment is very expensive to purchase and
can require long lead times depending on the complexity of the system. The cost for each
switch is about $1000. Flight Display Systems has designed a product that significantly
lowers the cost of switching, reduces lead times, and makes the overall installation simple.
Best of all, the operation of the equipment is very easy for the passengers to operate
As an example, if you have installed our Moving Map, Glareshield Camera and two DVD
players, the DAPS440-SW can sequence output from Moving Map, to Camera, to DVD1,
and then to DVD2.
The DAPS44-SW is set up so that all channels revert to input 1 upon power up (or power
cycle).
The DAPS440-SW is made of all metal components. DO-160 testing has been completed
and is available upon request.
All manuals and user guides at all-guides.com

Document Number:
MAN –DAPS440-SW
Rev:
D
Revision Date:
09/14/2010
Page 5 of 15
Specifications
Dimensions
9.5”(W) x 1.25”(H) x 7.25”(D)
Video System
NTSC/PAL
Input Sources
4 Audio/Video Channels
Output Sources
4 Audio/Video Each
Control Sequence
Source 1,2,3,4
Video Impedance
75 Ohms
Audio Impedance
8.2 KOhms
Weight
1 lb 8 oz
Power
28VDC @ 1.0 Amps
Remote Control
Via Eaton Switch (Not Supplied)
Mounting
6 Points on Flange
Source Selection
Switch(es):
Eaton (58210220) or Staco (982431)
Materials
Aluminum
D0-160
Section 21, Category B
Installation Instructions
All cabin entertainment equipment, such as the DAPS440-SW, should be installed on a
non-essential bus and have a dedicated circuit breaker. It is a requirement that a switch be
installed so that the pilot can de-energize the system should it become necessary.
There are six mounting slots located on the sides of the housing. Four holes are located at
the four corners of the back and two holes are located one on each side of the flange. It is
sufficient to mount the unit by two attach points. It is recommended that you leave about ¼
inch of space around the unit for air circulation.
Audio/Video inputs are paired and listed on the same side of the unit as the Power Input
DB-15. From left to right the video/audio inputs are line 1,2,3,4. Use the inputs
sequentially as you would like them selected by the operator.
On the opposite side of the unit is the output side. Here you will find four paired output
jacks.
Power
This is a 28VDC device that requires 1.0 Amps of power to operate.
All manuals and user guides at all-guides.com

Document Number:
MAN –DAPS440-SW
Rev:
D
Revision Date:
09/14/2010
Page 6 of 15
Switch
The new DAPS440-SW works with an off the shelf low-cost, no lead time Eaton 4 position
micro switch (Eaton P/N 58210220) or Staco switch (P/N 982431). Each time the switch is
activated it cycles and displays the current equipment source (Example shown below:
“MAP, DVD1, DVD2, CAM”). The Eaton switch uses 28 volt lamps, and the Staco switch
uses LEDs.
The DAPPS440-SW will support the installation of four independent switches at four
different seat locations. Each time the switch is activated, it will illuminate the current
source selected.
The switch illustrated above is from Eaton. Eaton and Staco switches can be ordered from
Dallas Avionics (800-527-2581) and can be customized to the customer’s requirements.
Lead time is one week for customization. The DAPPS440-SW does not include the Eaton
or Staco switch.
All manuals and user guides at all-guides.com
all-guides.com

Document Number:
MAN –DAPS440-SW
Rev:
D
Revision Date:
09/14/2010
Page 7 of 15
+28VDC
+28VDC
TOP RIGHT INDICATOR
TOP LEFT INDICATOR
BOTTOM LEFT INDICATOR
BOTTOM RIGHT INDICATOR
GROUND
NORMALLY OPEN
NO CONNECTION
4-POSITION LED SWITCH
SWITCHSWITCH
TOP RIGHTTOP RIGHT
BOTTOM RIGHTBOTTOM RIGHT
TOP LEFTTOP LEFT
BOTTOM LEFTBOTTOM LEFT
Switch Wiring Suggestion:
The diagram below shows a suggested wiring of the switch. From the DB-25 connector,
use the Normally Open pin and a DC ground (switch common) to establish the switch
connection.
To control the indicators, supply 28V DC power to the common Anode of the indicators (or
the power side). Connect each Cathode (or ground side) for each indicator to the DB pins
as indicated in this manual.
If there is a ground difference between the unit and the aircraft, this might cause the
switches not to operate properly. The DB-25 connector includes 28V DC and ground to
supply to the switches if such problem arises.
All manuals and user guides at all-guides.com

Document Number:
MAN –DAPS440-SW
Rev:
D
Revision Date:
09/14/2010
Page 8 of 15
Video Wiring Suggestions
All shields should be grounded to the connector at the source, and floating at the display.
Avoid routing video wiring parallel to:
•AC wiring
•Strobe wiring
•DC motor supply cables
•Inverter cabling
•Or any other potential noise source.
S-Video/Composite and Audio Wiring
Recommended cable for s-video/composite and audio purposes is PIC 75 Ohm Coax, P/N
V75268. This is a lightweight, flexible, and low signal loss cable which meets FAA
flammability requirements of FAR 23.1359(d), FAR 25.853(a) and FAR 25.869(a)(4).
Similar aviation coaxial cable can be used from other vendors, as well.
Some aircraft are prone to AC noise - we recommend adding to the composite source a
75Ohm video isolation transformer such as Deerfield Laboratory, Inc. Part No. 162-1
(www.deerfieldlab.com, (650) 632-4090). In most cases this should be added to the video
output of the source.
Power and Ground Wiring
22 AWG wire is recommended for Power and Ground applications.
All manuals and user guides at all-guides.com

Document Number:
MAN –DAPS440-SW
Rev:
D
Revision Date:
09/14/2010
Page 9 of 15
Power/Video
Pin out for P1 (High Density DB-15 Receptacle)
Part Numbers for DB-15 connectors, manufactured by Tyco or Amp.
High density, D-sub, 15 contact receptacle (female) P/N 748565-1
HD15F pins P/N M39029/57-354
Pin
Number
Description
1
28VDC Power In
2
28VDC Ground In
3
N/C
4
N/C
5
N/C
6
12VDC Power Out
7
12VDC Ground Out
8
N/C
9
12VDC Power Out
10
12VDC Ground Out
11
N/C
12
N/C
13
N/C
14
N/C
15
N/C
All manuals and user guides at all-guides.com

Document Number:
MAN –DAPS440-SW
Rev:
D
Revision Date:
09/14/2010
Page 10 of 15
Pin out for P1 (High Density DB-25 Receptacle)
Pin
Number
Switch
Description
1
28V Output
2
28V Output
3
1
Normally Open
4
1
Top Left Indicator
5
1
Top Right Indicator
6
1
Bottom Left Indicator
7
1
Bottom Right Indicator
8
2
Normally Open
9
2
Top Left Indicator
10
2
Top Right Indicator
11
2
Bottom Left Indicator
12
2
Bottom Right Indicator
13
Ground
14
3
Normally Open
15
3
Top Left Indicator
16
3
Top Right Indicator
17
3
Bottom Left Indicator
18
3
Bottom Right Indicator
19
4
Normally Open
20
4
Top Left Indicator
21
4
Top Right Indicator
22
4
Bottom Left Indicator
23
4
Bottom Right Indicator
24
Ground
25
Ground
All manuals and user guides at all-guides.com

Document Number:
MAN –DAPS440-SW
Rev:
D
Revision Date:
09/14/2010
Page 11 of 15
Troubleshooting
Video Noise
Check for an incorrect ground in the installation wiring. See specific examples of video
noise below, or visit http://flightdisplay.com/Grounding.pdf
Snow or Sweeping Lines
Lines that slowly sweep up and down are a result of AC noise. This AC noise can be
generated by a power cart on the aircraft. Take the power cart off of the aircraft. Be careful
of inverter wiring, which can also cause noise. Stand off the wires, if necessary.
If snow or sweeping lines persist, it is possible that the ground is at an incorrect point in the
aircraft. Try moving the ground to another location.
No power to Monitor, or No video Input
• Verify correct wiring. Check the base receptacle connectors for possibly damaged pins.
• Check that the video source is:
1. Powered on,
2. In Play mode, and
3. Displaying video.
Color Distortion
• Adjust brightness and contrast settings using the buttons on the monitor.
Remote Control Inoperable
•Confirm that the infrared eye on the LCD screen is visible.
•Replace battery in remote control.
All manuals and user guides at all-guides.com
all-guides.com

Document Number:
MAN –DAPS440-SW
Rev:
D
Revision Date:
09/14/2010
Page 12 of 15
Technical Support
Should you have any questions concerning this product or other Flight Display Systems
products, please contact our Product Support representatives at (678) 867-6717.
Flight Display Systems
1765 Grassland Parkway
Alpharetta, GA 30004
Phone: 678-867-6717
Fax: 678-867-6742
For further product information, technical data and sample wiring diagrams, please click on
the Dealers section of our web site at www.flightdisplay.com
Instructions for Continued Airworthiness
The DAPS440-SW is designed not to require regular general maintenance.
All manuals and user guides at all-guides.com

Document Number:
MAN –DAPS440-SW
Rev:
D
Revision Date:
09/14/2010
Page 13 of 15
Warranty Information
Flight Display Systems warrants the DAPS440-SW against material or manufacturing
defects for a two-year period (effective 1/1/2009 on all equipment shipped with 2009
pricing). Warranty begins on date of installation.
If product support is required, please call our Technical Support team at 678-867-6717 to
obtain assistance. If the return of the unit to the factory is required, an RMA number will be
issued at that time. Flight Display Systems will, upon receipt of the failed hardware,
remanufacture or replace the unit at our discretion.
Flight Display Systems will pay Ground Shipping charges for warranted items. Charges for
express shipment will be the responsibility of the sender.
This warranty is not transferable. Any implied warranties expire at the expiration date of
this warranty. We shall not be liable for incidental or consequential damages.
This warranty does not cover a defect or failure that has resulted from improper or
unreasonable installation, use or maintenance, as determined by Flight Display Systems.
This warranty is void if there is any attempt to disassemble or open this product without
factory authorization.
Any labor charges associated with the removal of product or related troubleshooting by a
firm other than Flight Display Systems or its designee will not be covered.
All manuals and user guides at all-guides.com

Document Number:
MAN –DAPS440-SW
Rev:
D
Revision Date:
09/14/2010
Page 14 of 15
Installation Drawing
All manuals and user guides at all-guides.com

Document Number:
MAN –DAPS440-SW
Rev:
D
Revision Date:
09/14/2010
Page 15 of 15
Log of Revisions
Rev
Date
Page
Description
A
10/29/2007
Initial Release
B
04/28/2008
1,5,6
Update Picture, Change Verbage, Update Pinouts
C
04/14/2009
2,9
Update Specifications, Warranty Info
D
09/14/2010
5,6,7,14
Revised Additional Info and Installation Instructions, Added
Switch Connection Drawing, Revised Installation Drawing,
Format Change
All manuals and user guides at all-guides.com
Table of contents
Other Flight Display Systems Amplifier manuals
