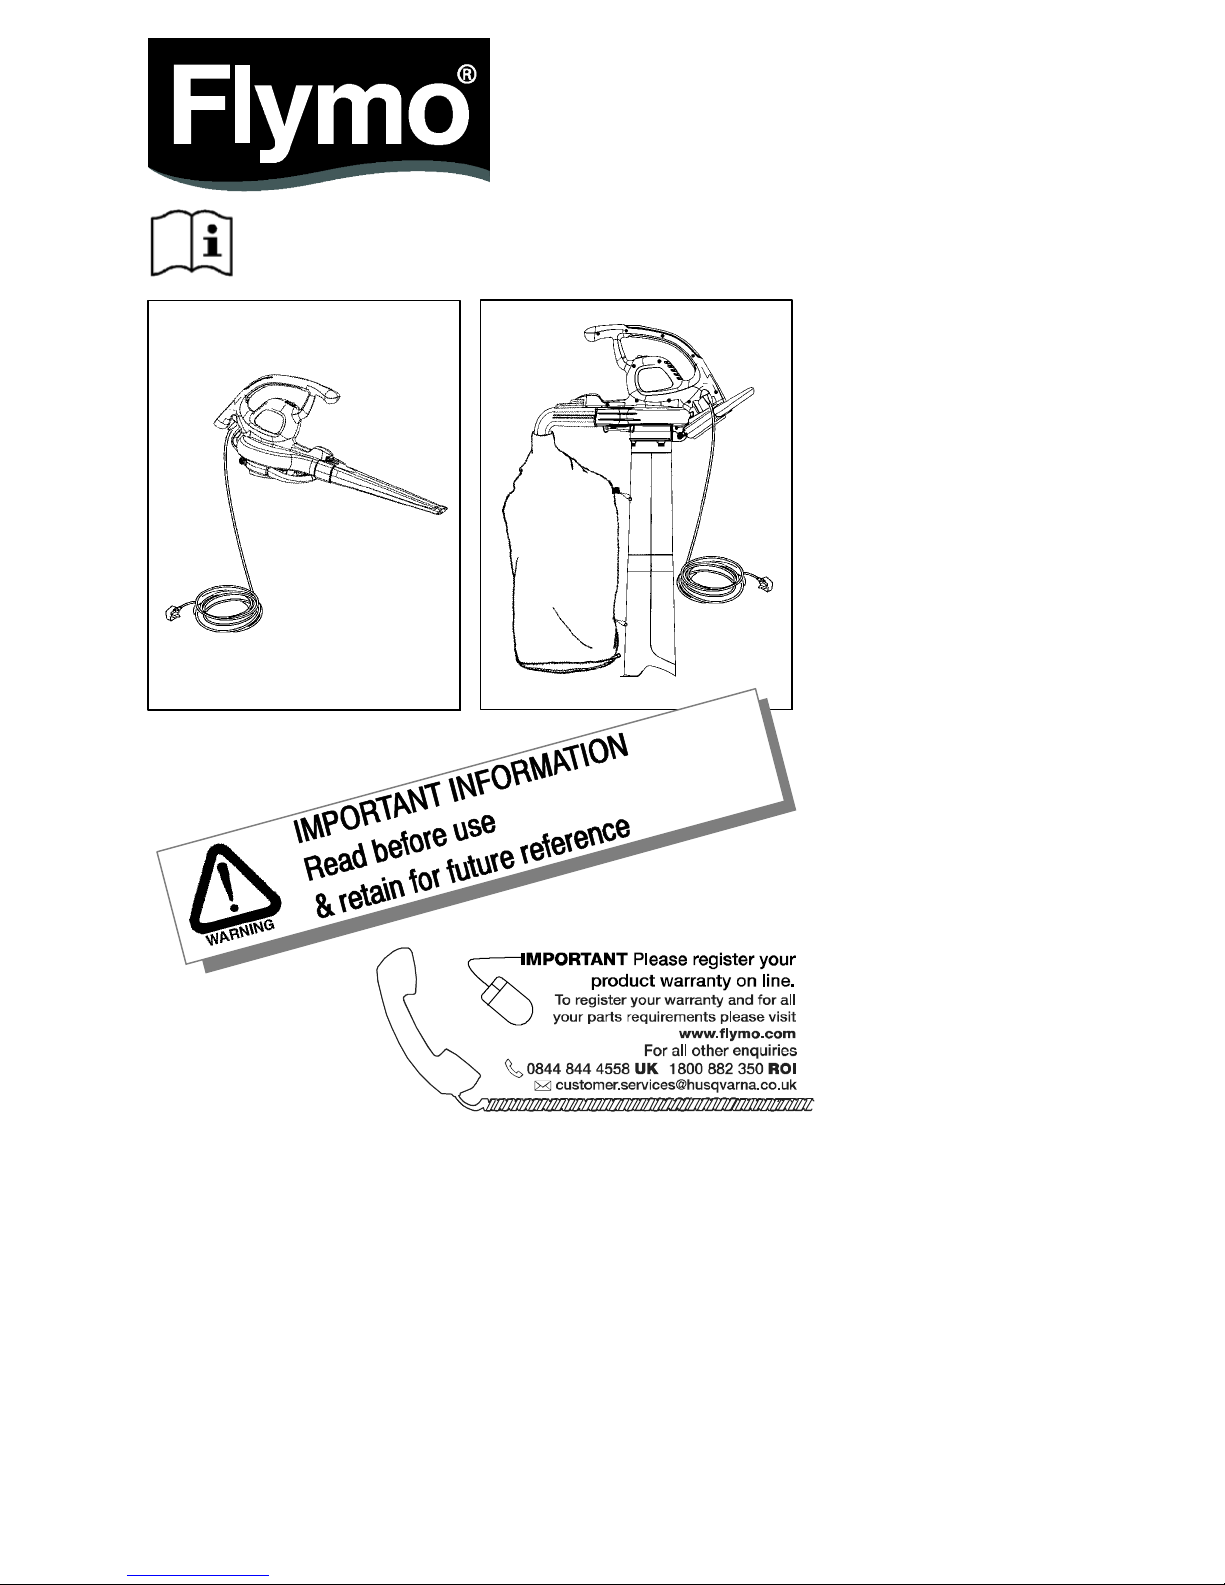
Flymo PowerVac 3000 User manual

Original instructions
PowerVac
3000
(PV3000)

2
Carton Contents
Top Handle
Inlet Cover Latch
Rear
Handle
Upper Vacuum Tube
Lower Vacuum Tube
Debris Bag Elbow Tube
Blower Tube
Vacuum Assist Handle
Tube Release Button
Shoulder Strap
Electric Cable
with moulded
on plug
ON/OFF Switch
Air Vents
Cord
Retainer
IMPORTANT! Please check the contents of the carton are correct BEFORE
assembling your new Flymo product.
IF ANY PARTS ARE MISSING CONTACT:
Husqvarna UK Ltd. Customer Service Department direct
Telephone: 0844 844 4558 UK 1 800 882 350 ROI Fax: 01325 302530
Safety
WARNING: If not used properly this product can be dangerous.
The warnings and safety instructions must be followed to ensure
reasonable safety and efficiency in using this product. The oper-
ator is responsible for following the warnings and instructions in
this manual and on the product. Never use the product unless the
guards provided by the manufacturer are in the correct position.

3
WARNING: This unit can
be dangerous! Careless or
improper use can cause
serious injury.
Read the user instructions
carefully to make sure you
understand all of the con-
trols and what they do.
Do not expose to rain.
Do not leave the product
outdoors while it is raining.
The use of eye and ear
protection is recommended.
Switch off! Remove plug
from mains before adjust-
ing, cleaning or if cable is
entangled or damaged.
Keep bystanders
away.
Explanation of symbols on the product
General Power Tool Safety Warnings
WARNING: Read all
safety warnings and all in-
structions. Failure to follow
the warnings and instructions
may result in electric shock,
fire and/or serious injury.
Save all warnings and instructions
for future reference.
The term “power tool” in the warnings
refers to your mains-operated (corded)
power tool.
1) Work area safety
a) This product is not intended for
use by persons (including chil-
dren) with reduced physical,
sensory or mental capabilities, or
lack of experience and know-
ledge, unless they have been
given supervision or instruction
concerning the use of the
product by a person responsible
for their safety. Children should
be supervised to ensure that
they do not play with the
product. Local regulations may
restrict the age of the operator.
Never allow children or people
unfamiliar with these instruc-
tionstousetheproduct.Power
tools are dangerous in the hands of
untrained users.
b) Never operate the product while
people, especially children, or
pets are nearby. Distractions can
cause you to lose control.
c) Never blow debris in the direc-
tion of bystanders. The operator or
user is responsible for accidents or
hazards occurring to other people or
their property.
d) Keep work area clean and well lit.
Cluttered or dark areas invite acci-
dents.
e) Do not operate power tools in ex-
plosive atmospheres, such as in
the presence of flammable li-
quids, gases or dust. Power tools
create sparks which may ignite the
dust or fumes.
2) Electrical safety
a) Power tool plugs must match the
outlet. Never modify the plug in
any way. Do not use any adaptor
plugs with earthed (grounded)
power tools. Use only on AC
mains supply voltage shown on
the product rating label. Unmodi-
fied plugs and matching outlets will
reduce risk of electric shock.
b) Avoid body contact with earthed
or grounded surfaces, such as
pipes, radiators, ranges and refri-
gerators. There is an increased
risk of electric shock if your body is
earthed or grounded.
c) Do not expose power tools to
rain or wet conditions. Water
entering a power tool will increase
the risk electric shock.
d) Do not abuse the cord. Never use
the cord for carrying, pulling or
unplugging the power tool. Keep
cord away from heat, oil, sharp
edges or moving parts. Before
use, examine cord for damage.
Replace cord if there are signs of
damage or ageing. Do not use the
product if the cord is damaged or
worn. Immediately disconnect
from the mains electricity supply
if the cord is cut, or the insulation
is damaged. Do not touch the
electric cord until the electrical
supply has been disconnected.
Do not repair a cut or damaged
cord. Replace it with a new one.
Damaged or entangled cords
increase the risk of electric shock.

4
e) The electric cord must be un-
coiled. Coiled cord can overheat
and reduce the efficiency of the
product. Always wind cord carefully,
avoiding kinks.
f) When operating a power tool out-
doors, use an extension cord
suitable for outdoor use fitted
with a coupler according to IEC
60320-2-3. Use of a cord suitable
for outdoor use reduces the risk of
electric shock.
g) If operating a power tool in a
damp location is unavoidable,
use a residual current device
(RCD) protected supply with a
tripping current of not more than
30 mA. Even with a RCD in-
stalled, 100% safety cannot be
guaranteed and safe working
practices must be followed at all
times. Check your RCD every
time you use your product. Use
of an RCD reduces the risk of elec-
tric shock.
3) Personal safety
a) Stay alert, watch what you are
doing and use common sense
when operating a power tool. Do
not use a power tool while you
are tired or under the influence
of drugs, alcohol or medication.
A moment of inattention while
operating power tools may result
in serious personal injury.
b) Use personal protective equip-
ment. Always wear eye protec-
tion and hearing protection. To
prevent dust irritation, the use of
a dusk mask in recommended.
Protective equipment such as dust
mask, non--skid safety shoes, hard
hat, or hearing protection used for
appropriate conditions will reduce
personal injuries.
c) Prevent unintentional starting.
Ensuretheswitchisintheoff
position before connecting to
power source, picking up or
carrying the tool. Carrying power
tools with your finger on the switch
or energising power tools that have
the switch on invites accidents.
d) Do not overreach. Keep proper
footing and balance at all times.
On slopes, be extra careful and
wear non--slip footwear. Do not
walk backwards while operating
your product. Walk, never run.
Do not use ladders while operat-
ing the product.
This enables better control of the
power tool in unexpected situ-
ations.
e) Dress properly. Always wear
suitable clothing, gloves, and
stout shoes. Do not wear loose
clothing or jewellery. Keep your
hair, clothing and gloves away
from moving parts. Loose clothes,
jewellery or long hair can be caught
in moving parts.
4) Power tool use and care
a) Only use the product in the man-
ner and for the functions de-
scribed in these instructions.
Do not force the power tool. Use
the correct power tool for your
application. The correct power tool
will do the job better and safer at
the rate for which it was designed.
b) Always make sure your product
is in a safe operating condition
before use. Do not use the power
tool if the switch does not turn it
on and off. Know how to stop the
product quickly in an emergency.
Any power tool that cannot be con-
trolled with the switch is dangerous
and must be repaired.
c) The impeller continues to rotate
after your product has been
switched off. The motor must be
stopped and the impeller blade no
longer turning to avoid serious in-
jury from the rotating blades.
d) Disconnect the plug from the
power source:
-- before removing or replacing
fully assembled debris bag;
-- before leaving the product unat
tended for any period;
-- before clearing a blockage;
-- before checking, cleaning or
working on the appliance;
-- if the product starts to vibrate
abnormally. Check immediately.
Excessive vibration can cause
injury.
-- before passing to another person.
e) Store idle power tools out of the
reach of children and do not al-
low persons unfamiliar with the
power tool or these instructions
to operate the power tool. Power
tools are dangerous in the hands of
untrained users.
f) Maintain power tools. Check for
misalignment or binding of mov-
ing parts, breakage of parts and
any other condition that may af-
fect the power tool’s operation.

5
If damaged, have the power tool
repaired before use. Keep all
cooling air inlets clear of debris.
Many accidents are caused by poor-
ly maintained power tools.
g) Use the power tool and accessor-
ies in accordance with these in-
structions, taking into account the
working conditions and the work
to be performed. Use the product
only in daylight or good artificial
light. Use of the power tool for oper-
ations different from those intended
could result in a hazardous situation.
5) Maintenance and storage
Have your power tool serviced by a
qualified repair person using only
identical replacement parts. This will
ensure that the safety of the power tool
is maintained.
-- Keep all nuts, bolts and screws
tight to be sure the product is in a
safe working condition.
-- Replace worn or damaged parts for
safety.
-- Use only genuine replacement
parts and accessories.
-- Inspect the debris bag regularly.
If the debris bag becomes worn or
damaged, replace.
-- Store in a cool dry place and out of
reach of children. Do not store out-
doors.
Blower safety warnings:
SInspect the area before using the
unit. Remove all debris and hard
objects such as rocks, glass, wire, etc.,
that can ricochet, be thrown, or
otherwise cause injury or damage
during operation.
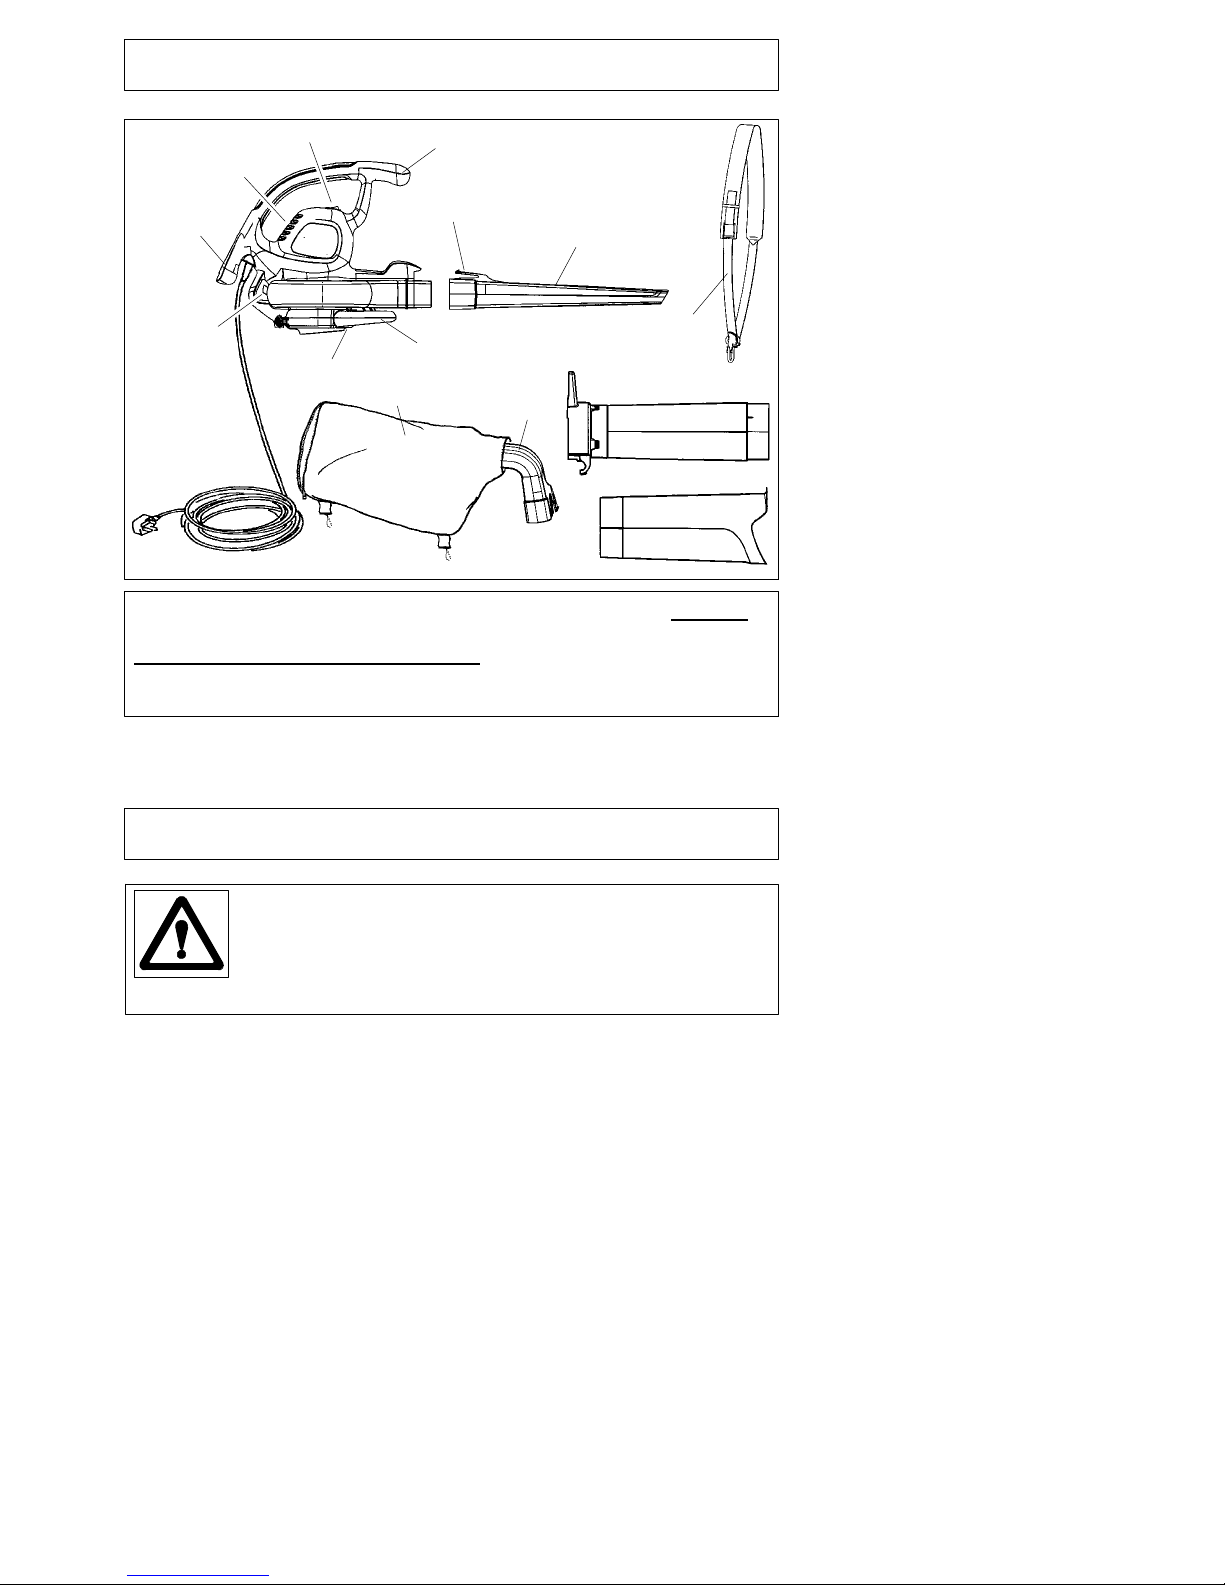
SNever run the unit without the proper
equipment attached. When used as a
blower, always install a blower tube.
Use only recommended attachments to
prevent personal injury.
SDo not use blower near leaf or brush
fires, fireplaces, barbecue pits,
ashtrays, etc. Proper use of the
blower will help avoid spreading fire.
SNever place objects inside the
blower tubes; always direct the
blowing debris away from people,
animals, glass, and solid objects
such as trees, automobiles, walls,
etc. The force of air can cause rocks,
dirt, or sticks to be thrown or to ricochet
which can hurt people or animals, break
glass, or cause other damage.
SNever use for spreading chemicals,
fertilizers, or any other substances.
This will prevent the spreading of toxic
materials.
Vacuum safety warnings:
DStop the motor and disconnect the
extension cord before opening the
air inlet door or attempting to insert
or remove the vacuum tubes. The
motor must be stopped and the impeller
blades no longer turning to avoid
serious injury from the rotating blades.
DInspect the area before using the
unit. Hard objects can be thrown
through the collection bag or the
housing and become dangerous
missiles which can cause serious injury
to the operator or others.
DDo not vacuum stones, gravel, metal,
broken glass, etc. Proper use of the
unit will reduce possible personal injury
and/or damage to the unit.
DDo not attempt to vacuum water or
other liquids. Water or other liquids
entering a power tool will increase the
risk of electric shock.
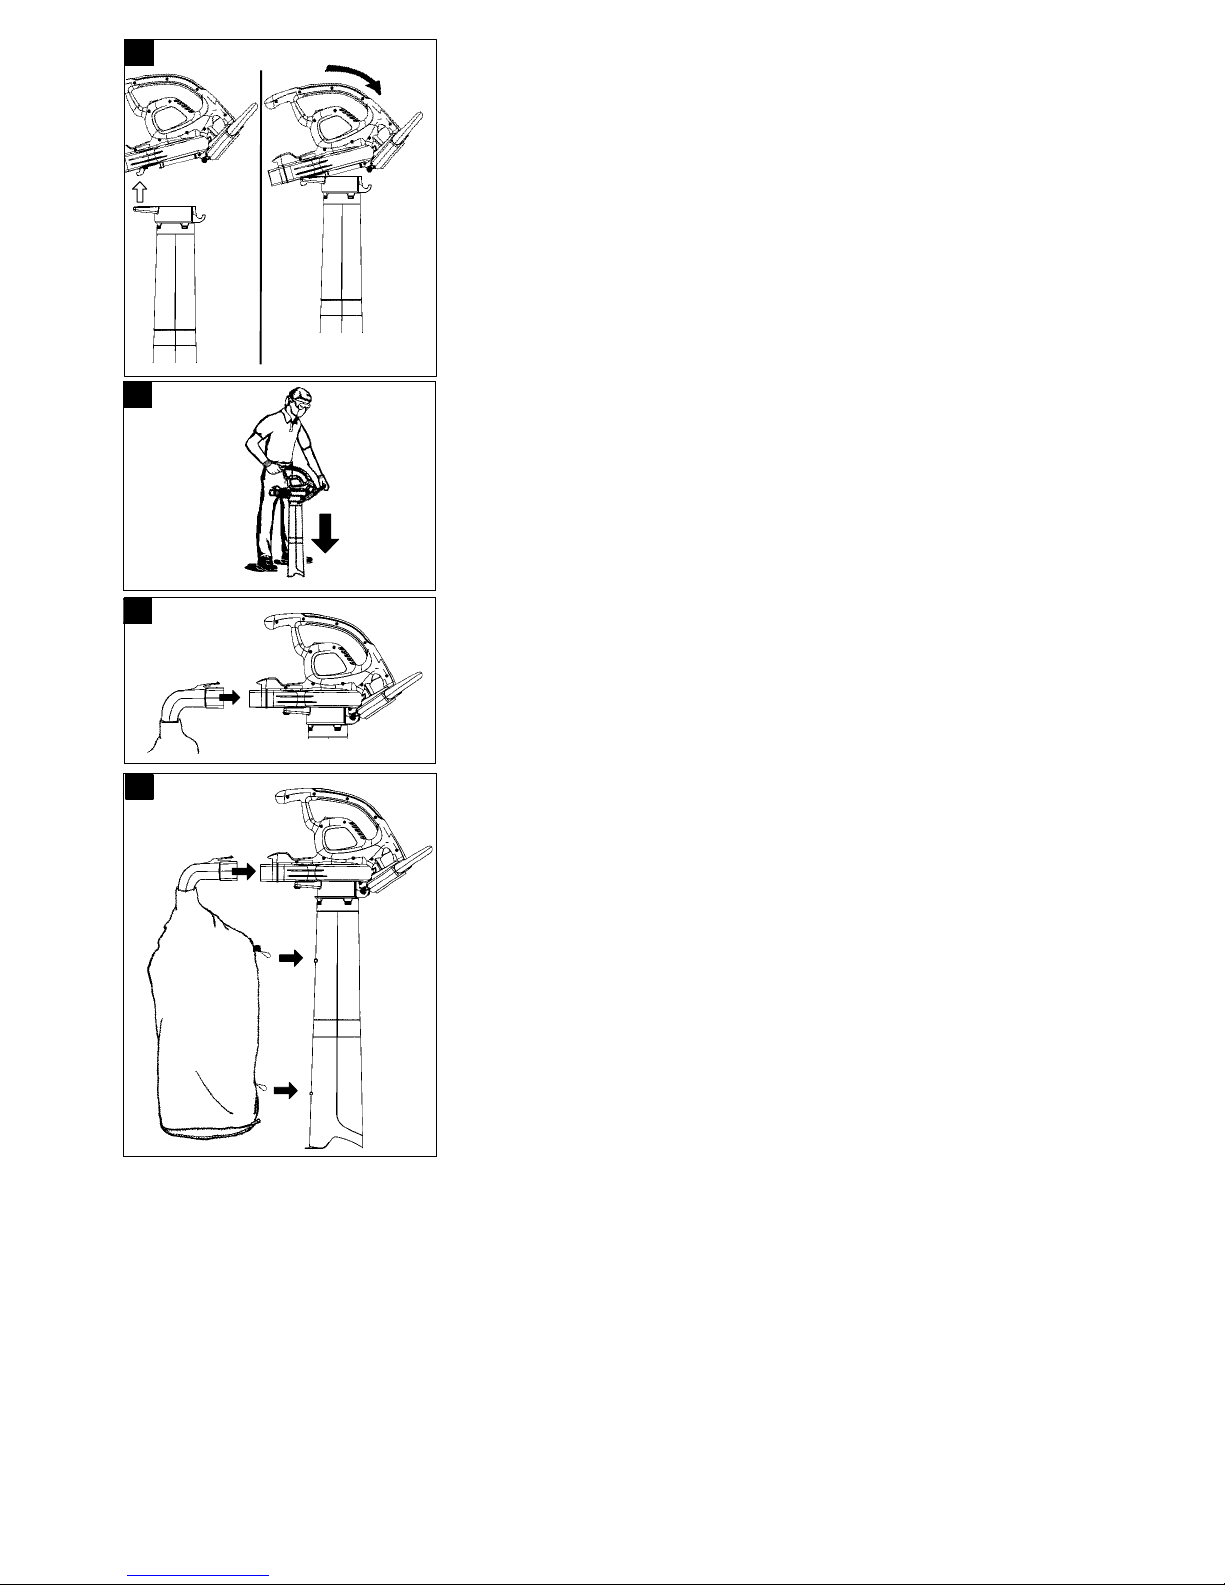
DNever run the unit without the proper
equipment attached. When used as a
vacuum, always install vacuum tubes
and collection bag assembly. Make sure
the collection bag assembly is
completely zipped when unit is running
to avoid flying debris. Use only
recommended attachments.
DDo not vacuum discarded matches,
cigars, cigarettes, or ash from
fireplaces, barbecue pits, brush piles,
etc. Avoid situations which could set the
collection bag on fire. To avoid
spreading fire, do not use blower near
leaf or brush fires, fireplaces, barbecue
pits, ashtrays, etc.
DAlways use the shoulder strap when
vacuuming. This will help maintain
control of the power tool.
DCheck air intake openings, elbow
tube, and vacuum tubes frequently,
always with the unit stopped and the
power source disconnected. Keep
vents and tubes free of debris which
can accumulate and restrict proper air
flow. Do not use with any opening
blocked. Keep free of dust, lint, hair and
anything that may reduce air flow.

6
Cables
IMPORTANT
Use only 1.00mm2sizecableupto30
metres length maximum.
Maximum rating :
1.00mm2size cable, 10 amps 250
volts AC.
YOUR PRODUCT IS SUPPLIED
WITH CABLE WIRED DIRECTLY
INTO THE PRODUCT.
1. Flymo Mains Cables and Extension
Cables are available from your lo-
cal Approved Service Centre.
2. Do not wire an extension cable
directly to your product yourself.
Please contact your local
Approved Service Centre for further
information on the connectors and
kits available.
3. Only use extension cables specific-
ally designed for outdoor use.
CONNECTORS
IMPORTANT
DFlymo connectors are suitable for use
with 2 core cable only. Under no
circumstances should these con-
nectors be used for earthed products.
DAll Flymo connectors and cables are
of splashproof construction. They are
not waterproof and must not be left
outside permanently nor should they
be submerged or immersed in water.
Do not let cable lay or trail through
pools of water or splashed with water
from hose pipes.
MAINS PLUG REPLACEMENT
IMPORTANT
DIf the plug supplied is cut off it
should be destroyed. There is an
electric shock hazard if a cut off
plug is inserted into a 13 amp
socket.
1. No earth required. Flymo products
are double insulated
to EN60335 and under no circum-
stances should an earth be con-
nected to any part of the product.
2. Ensure the mains voltage suits
your product.
3. IMPORTANT!
The wires in the mains lead are col-
oured in accordance with the fol-
lowing code:
BLUE -- NEUTRAL
BROWN -- LIVE
The wire which is coloured BLUE
must be connected to the Terminal
which is marked with the letter ‘N’
or coloured BLACK.
The wire which is coloured
BROWN must be connected to the
Terminal which is marked with the
letter ‘L’ or coloured RED.
4. It is important that the outer sheath
is clamped correctly into the 3--pin
plug.
5. If in doubt consult your local Service
Repairer or qualified electrician
before the machine is used.
6. A 13 Amp fuse must be fitted to
the Mains Plug.
7. The normal plug fuse and house-
hold fuse only protect the electrical
equipment and are not a safeguard
against electrocution.
If the mains cable is damaged, it
must be replaced with the correct
Flymo assembly. For further in-
formation on mains cable replace-
ment, contact: Husqvarna UK Ltd.
Customer Service direct:
Telephone: 0844 844 4558 UK
1800 882 350 ROI
Fax: 01325 302530
Assembly Instructions
WARNING: Switch off the
product and disconnect from the mains
electricity supply before opening the in-
let cover or attempting to insert or re-
move the blower tube or vacuum tubes.
The motor must be stopped and the im-
peller blades no longer turning to avoid
serious injury from the rotating blades.
WARNING: If received assem-
bled, ensure your product is properly
assembled and all fasteners are secure.
SA standard screwdriver is required
for assembly.

7
Blower Assembly
A
1. Switch off the product and discon-
nect from the mains electricity supply.
2. Align the grooves on the blower
tube with the grooves on the blower
outlet. Push the blower tube onto
the blower outlet until it snaps into
place as illustrated in figure A.
Tube is secured to blower unit by
tube release button.
3. To remove the blower tube, press the
tube release button while pulling on
tube.
Vacuum Assembly
B
1. Switch off the product and discon-
nect from the mains electricity supply.
2. Open the inlet cover by releasing
the latch as illustrated in figure B.
C
3. Pull up on the vacuum assist
handle as illustrated in figure C.
Allow latch to snap into rear handle
of blower.
DNOTE: There are 2 vacuum tubes,
an upper tube and a lower tube. The
upper tube has a hinge and hooks on
one end and is cut straight on both
ends. The upper tube attaches to the
blower unit. The lower tube has a
curved end that you point toward the
ground during vacuum use. The lower
tube attaches to the upper tube.
4. To attach the lower vacuum tube to
the upper vacuum tube, first align
the seams of the two tubes as illus-
trated in figure D.Pressthetwo
tubes together until the lower tube
is fully seated in the upper tube.

8
E
5. Place the hinge of the upper tube in-
to the hook on the bottom side of the
blower unit as illustration in figure E.
F
6. Using the ground for support, pivot
the blower unit until tube snaps into
the latches of the retaining posts
on the blower unit as illustrated in
figure F.
G7. Align the grooves on the elbow
tube with the grooves on the blower
outlet as illustrated in figure G.
Push the elbow tube onto the
blower outlet until it snaps into
place; elbow tube is secured by
tube release button.
H
8. Clip the debris bag to the loops on
the upper and lower vacuum tubes
as illustrated in figure H.

9
J13 For extra support when using your
product as a vacuum, a shoulder strap
isincluded.Attachthestraptothe
blower unit before operation. Snap the
hook onto the retainer as illustrated in
figure J.
Converting from Vacuum Use to Blower Use
K
L
WARNING: Switch off the product
and disconnect from the mains electricity
supply before opening the inlet cover or
attempting to install or remove the
blower tube or vacuum tubes. The motor
must be stopped and the impeller
blades no longer turning to avoid serious
injury from the rotating blades.
1. Switch off the product and discon-
nect from the mains electricity supply.
2. Remove the elbow tube and debris
bag as illustrated in figure K.
3. Remove the vacuum tubes by re-
leasing the latch on the vacuum inlet
cover and rotating the cover until the
tubes are released from the latches
on the retaining posts as illustrated in
figure L.
4. Close the inlet cover and make
sure it is latched closed.
5. Re-install the blower tube. Refer to
BLOWER ASSEMBLY for instructions
on how to attach this item.

10
Cable Restraint
M
1. Form loop in mains cable and push
the loop through the slot as illus-
trated in figure M.
N
2. To secure, position loop over the
hook and pull the cable back through
the slot as illustrated in figure N.
Starting and Stopping
WARNING: Switch off the product
and disconnect from the mains electricity
supply before opening the inlet cover or
attempting to install or remove the
blower tube or vacuum tubes. The motor
must be stopped and the impeller
blades no longer turning to avoid serious
injury from the rotating blades.
WARNING: You MUST make sure
the tubes are secure before using the
product.
WARNING: Do not use the
blower unit without the tubes or debris
bag properly attached to avoid flying de-
bris and/or impeller contact which can
cause serious injury. Always wear eye
protection to prevent rocks or debris
from being blown or ricocheting into the
eyes and face which can result in blind-
ness or serious injury.
Stopping your unit
Slide the ON/OFF switch to the OFF
position.
Starting your unit
Slide the ON/OFF switch to the ON
position.

11
How to Use
PUsing as a blower (figure P)
WARNING: Inspect the area
before using the product. Remove all
debris and hard objects such as rocks,
glass, wire, etc., that can ricochet, be
thrown, or otherwise cause injury or
damage during operation.
Use your product as a blower for:
DSweeping debris or grass clippings from
driveways, sidewalks, patios, etc.
DBlowing grass clippings, straw, or leaves
into piles, or removing debris from
corners, around joints, or between
bricks.
Direct air flow by directing the blower
tube down or to one side. Always work
away from solid objects such as walks,
large stones, vehicles, and fences.
Clean corners by starting in corners and
moving outward.
This will help prevent an accumulation of
debris which could fly into your face. Be
careful when working near plants. The
force of the air could damage tender
plants.
RUsing as a vacuum (figure R)
WARNING: Do not vacuum
stones, gravel, metal, broken glass, etc.,
to avoid severe damage to the impeller.
To avoid the possibility of electrical
shock, do not attempt to vacuum water
or other liquids.
Use your product as a vacuum to pick
up dry material such as leaves, grass,
small twigs, and bits of paper.
DFor best results during vacuum use,
operate your product at high speed.
DMove slowly back and forth over the
material as you vacuum. Avoid
forcing the product into a pile of
debris as this can clog the product.
DKeep the vacuum tube about an inch
above the ground for best results.
WARNING: If the product be-
comes clogged, switch off the product
and disconnect from the mains electri-
city supply. Wait until the impeller has
completely stopped turning, then re-
move the vacuum tubes. Carefully
reach into the vacuum opening and
clear out the clogged debris.

12
Maintenance
WARNING: Switch off the
product and disconnect from the mains
electricity supply before performing
maintenance.
General recommendations
The warranty on this product does not
cover items that have been subjected to
operator abuse or negligence. To re-
ceive full value from the warranty, the
operator must maintain the product as
instructed in this manual. Various adjust-
ments will need to be made periodically
to properly maintain the product.
Before each use
Check for loose fasteners and parts
SInlet Cover
SBlower Tube
SVacuum Tubes
SDebris Bag
Check for damaged or worn parts
Please contact your local Approved
Service Centre for further information
or for replacement of damaged or worn
parts.
SON/OFF Switch -- Ensure switch
functions properly by moving the
switch to the OFF position. Make
sure motor stops; then restart motor
and continue.
SInlet Cover -- Discontinue use of the
product if inlet cover fails to latch
properly or if it is damaged in any way.
SAfter each use
Inspect and clean blower unit and
labels
Switch off the product and disconnect
from the mains electricity supply.
SAfter each use, inspect the com-
plete product for loose or damaged
parts.
SUsing a soft brush, remove debris
from all air intakes. Clean the
product using a damp cloth with a
mild detergent. Wipe off the product
with a clean dry cloth as illustrated
in figure S.
Clean debris bag
IMPORTANT: THE DEBRIS BAG MUST
BE PROPERLY EMPTIED.
DYou must properly empty and main-
tain the debris bag to avoid deterio-
ration and obstruction of air flow.
DRemove the debris bag from the
product and empty after each use.
Do not store bag without emptying
the bag of all contents (grass,
leaves, etc.).
DWash the bag once a year. Remove
the bag from the blower and turn the
bag inside out. Wash the bag with a
water hose. Allow the bag to hang
and dry completely before you reuse
the bag.

13
Service
WARNING: All internal or electri-
cal service MUST be performed by your
local Approved Service Centre.
How to remove an object from the
air intake
WARNING: Switch off the
product and disconnect from the mains
electricity supply before opening the
inlet cover. The motor must be
stopped and the impeller blades no
longer turning to avoid serious injury
from the rotating blades.
1. Remove the vacuum tubes.
2. Carefully reach into the vacuum
opening and clear out the air intake
area. Clear all debris from impeller.
3. Inspect the impeller for cracks. If
cracked or damaged, do not use
the product. Have parts replaced
by your local Approved Service
Centre. Do not attempt to replace
them yourself.
Storage
WARNING: Perform the follow-
ing steps after each use:
SSwitch off the product and disconnect
from the mains electricity supply.
SAllow motor to cool before storing or
transporting.
SStore the product with all guards in
place. Position the product so that
any sharp object cannot accidentally
cause injury.
SStore the product disconnected from
the mains electricity supply, well out
of the reach of children.
Seasonal storage
Prepare the product for storage at the
end of the season or if it will not be
used for 30 days or more.
If your blower is to be stored for a peri-
od of time:
SSwitch off the product and disconnect
from the mains electricity supply.
SClean the entire product before
lengthy storage.
SOpen inlet cover and clean any dirt,
grass, or debris that has collected.
Inspect the blower and all tubes.
Close and make sure the cover is
latched.
SClean air vents and air inlet of debris.
SStore your product in a well
ventilated area and covered, if
possible, to prevent dust and dirt
accumulation. Do not cover with
plastic. Plastic cannot breathe and
may cause condensation and
eventual rust or corrosion.
SCheck the product for loose screws.
Replace any damaged, worn, or
broken parts.

14
Fault Finding Hints
Fails To Operate
1. Is the product switched on?
2. Is the blower tube, vacuum tubes,
or elbow tube/debris bag fitted cor-
rectly?
3. Check the fuse in the plug; if blown,
replace.
4. Fuse continues to blow?
Immediately disconnect from the
mains electricity supply and con-
sult your local Approved Service
Centre.
Poor Blowing
1. The air inlets may be blocked;
clean all air inlets.
2. Blower outlet may be blocked.
Remove blower tube and clear
blockage.
3. If poor blowing persists?
Immediately disconnect from the
mains electricity supply and con-
sult your local Approved Service
Centre.
Poor Vacuum
1. The air inlets may be blocked;
clean all air inlets.
2. The vacuum tubes, elbow tube or
debris bag inlet may be blocked.
Remove and clear blockage.
3. If poor vacuuming persists?
Immediately disconnect from the
mains electricity supply and con-
sult your local Approved Service
Centre
Excessive Vibration
1. Inspect the impeller for damage
and replace if necessary.
2. If excessive vibration persists?
Immediately disconnect from the
mains electricity supply and con-
sult your local Approved Service
Centre.
Guarantee & Guarantee Policy
If any part is found to be defective due
to faulty manufacture within the guaran-
tee period, Husqvarna UK Ltd., through
its Authorised Service Repairers will
effect the repair or replacement to the
customer free of charge providing:
(a) The fault is reported directly to the
Authorised Repairer.
(b) Proof of purchase is provided.
(c) The fault is not caused by misuse,
neglect or faulty adjustment by the
user.
(d) The failure has not occurred
through fair wear and tear.
(e) The machine has not been ser-
viced or repaired, taken apart or
tampered with by any person not
authorised by Husqvarna UK Ltd.
(f) The machine has not been used for
hire.
(g) The machine is owned by the origi-
nal purchaser.
(h) The machine has not been used
outside of the country for which it
was specified.
(i) The machine has not been used
commercially.
*This guarantee is additional to, and in
no way diminishes the customers stat-
utory rights.
Failures due to the following are not
covered, therefore it is important that
you read the instructions contained in
this instruction manual and under--
stand how to operate and maintain
your machine:
Failures not covered by guarantee
* Failures as a result of not reporting
an initial fault.
* Failures as a result of sudden im-
pact.
* Failures as a result of not using the
product in accordance with the in-
structions and recommendations
contained in this instruction manual.
* Machines used for hire are not cov-
ered by this guarantee.
* The following items listed are con-
sidered as wearing parts and their
life is dependent on regular mainte-
nance and are, therefore not nor-
mally subject to a valid warranty
claim: electric mains cable, debris
bag.
*Caution!
Husqvarna UK Ltd. does not accept
liability under the warranty for defects
caused in whole or part, directly or
indirectly by the fitting of replacement
parts or additional parts that are not
either manufactured or approved by
Husqvarna UK Ltd., or by the ma-
chine having been modified in any
way.

15
Service Recommendations
1. We strongly recommend that your
product is serviced at least
every twelve months, more often in
a professional application.
2. Always use genuine Flymo Spare
Parts.
3. Prepacked spares are available
from most Flymo Approved
Service Dealers.
4. Your product is uniquely identified
by a silver and black product rating
label.
5. If you have a problem with your
machine contact your local
Approved Service Centre ensuring
you have full details of your product
as described on the product rating
label.
6. Should it be necessary for work
to be carried out by your Service
Centre, it is important to take
your complete machine includ-
ing cable and any extension
cables used.
A network of specialist dealers can be
found in your local Yellow Pages.
To obtain service on your Flymo product
simply telephone or visit your local Ser-
vice Centre. Should you require service
under the terms of our guarantee the
Service Centre will require proof of pur-
chase.
All of the centres listed stock
genuine Flymo Spare Parts.
NOTE: Our Service Repairers act on
their own behalf and are not em-
powered to commit or legally bind
Husqvarna UK Ltd. in any manner
whatsoever.
Environmental Information
SAwareness of the environment must be considered when disposing of
‘end--of--life’ product.
SIf necessary, contact your local authority for disposal information.
The symbol on the product or on its packaging indicates that this product
may not be treated as household waste. Instead it shall be handed over to the
applicable collection point for the recycling of electrical and electronic equipment.
By ensuring this product is disposed of correctly, you will help prevent potential
negative consequences for the environment and human health, which could
otherwise be caused by inappropriate waste handling of this product.
For more detailed information about recycling of this product, please contact your
local council office, your household waste disposal service or the shop where you
purchased the product.

16
Specifications
Type PowerVac 3000 (PV3000)
Motor -- power consumption 3000 W max.
Mains voltage 220--240 V
Frequency 50 Hz
Vacuum flow
Blow speed Max. 310 km/h
Weight blower/vacuum Max. 4,5 kg
Capacity of debris bag 45 l
Sound power level LWA Measured 99,7 dB(A) / guaranteed 102 dB(A)
Hand/arm vibration avhw 3,25 m/s2,K:1,5ms
2
170 l/s
Mulch ratio 16:1
Sound pressure level 83,2 dB(A), KpA: 3,0 dB(A)

17
EC Declaration of Conformity
Husqvarna AB, 561 82
Huskvarna, Sweden
Declare under our sole responsibility that the product(s):
Category Electric Leaf Collector..........................
Model(s) PowerVac 3000 (PV3000)..........................
Identification of Series See Product Rating Label...............
Year of Construction See Product Rating Label................
Complies with the essential requirements & provisions of the following EC Direct-
ives:
2006/42/EC, 2004/108/EC, 2000/14/EC
based on the following standards applied:
EN 60335--1, Part of IEC 60335--2--100, Part of EN 15503, EN 62233,
EN 55014--1, EN 55014--2, EN 61000--3--2, EN 61000--3--3, EN ISO 3744,
ISO 11094
2000/14/EC: The Measured Sound Power LWA & Guaranteed Sound Power LWA
values are according to the tabulated figures.
Conformity Assessment Procedure Annex V....
Measured sound power level 99,7 dB(A ).........
Guaranteed sound power level 102 dB(A ).......
Newton Aycliffe, 15/11/2011
P. Lameli
Global R&D Director -- Hand held
Keeper of technical documentation

18

19

Our policy of continuous improvement means that the specification of products
may be altered from time to time without prior notice.
Copyright E2011 Flymo S.A.
All rights reserved.
FlymoRand other product and feature names are registered or unregistered
trademarks of Flymo S.A.
Husqvarna AB
561 82
Huskvarna
Sweden
115470126 Rev. 1 12/15/2011
Other manuals for PowerVac 3000
1
This manual suits for next models
1
Table of contents
Other Flymo Yard Vacuum manuals