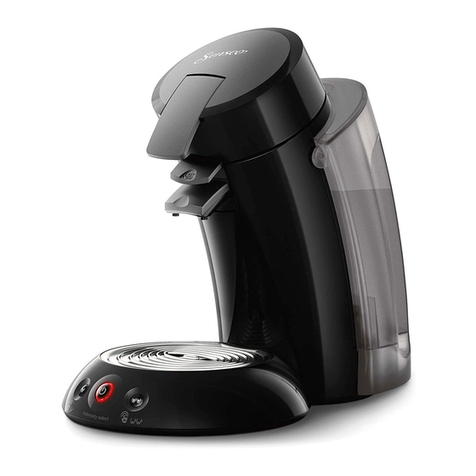
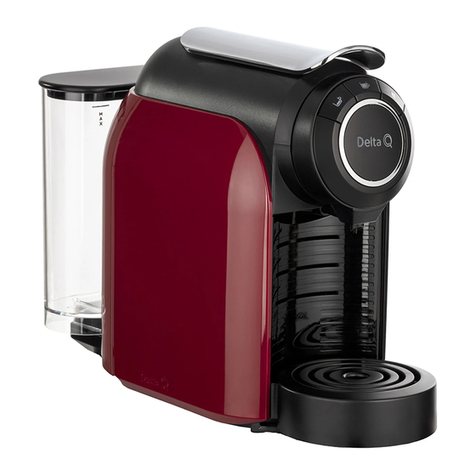
Flyte ONE PRO 2 User manual

ONE PRO 2
Manuale d’uso e manutenzione
Operations and maintenance manual
100% MADE IN ITALY

Italiano................................................................................. pag 3
English................................................................................ pag 12
INDICE DELLE LINGUE - LANGUAGE INDEX

B
A
P
O1
O2
N
H
R
M
D1 D1
I
EQ
E
F
G1 G2
F
C1
L1
L2
C2
A. Pomello erogazione vapore;
B. Accensione caldaia vapore;
C. Spiadiaccensionegruppocaè;
D. Interruttoreaccensionegruppocaè;
E. Spiaditemperaturagruppocaè;
F. Interruttoreerogazionecaè;
G. Sportello scorrevole;
H. Coperchio serbatoio acqua;
I. Manometro caldaia vapore;
L. Beccuccioerogazionecaè;
M. Interruttore di alimentazione generale;
N. Spia esaurimento acqua serbatoio;
O. Vaschetta raccogli-fondi;
P. Lancia vapore;
Q. Spia generale di alimentazione;
R. Ripiano scalda-tazze.
Tecno Meccanica S.r.l.
Tutti i diritti sono riservati
Nessuna parte di questo manuale può essere riprodotta, copiata o divulgata con qualsiasi mezzo senza
l’autorizzazione scritta della Tecno Meccanica S.r.l.
Indicazioni generali di sicurezza ............ pag 4
Smaltimento .................................................. pag 4
Caratteristiche tecniche ........................... pag 4
Installazione .................................................. pag 5
Riempimento serbatoio ............................ pag 5
Collegamento alla rete elettrica ............ pag 5
Beccuccioerogazionecaè ................... pag 5
Accensione .................................................... pag 6
Comefareilcaè ........................................ pag 6
Apparato vapore e acqua
calda (optional) ............................................. pag 7
Ripiano superiore scalda-tazze ............. pag 7
Puliziadeigruppicaè .............................. pag 7
Pulizia della lancia vapore ......................... pag 8
Pulizia della macchina ............................... pag 8
Anomalie e possibili soluzioni ................. pag 8
Condizioni di garanzia ............................ pag 10
INDICE DEGLI ARGOMENTI
ViringraziamoperaversceltolamacchinadacaèONEPRO2,unprodottodialtaqualità
progettato, sviluppato, fabbricato e collaudato totalmente in Italia. Questo prodotto è una
macchina da caè a capsule ad utilizzo prevalentemente professionale.
LamacchinaèadattaatuttelecapsuleLavazzaEspressoPoint(cosiddetteFAP).

Di seguito sono riassunte alcune indicazioni generali di sicurezza:
• Leggere attentamente le istruzioni d’uso prima di procedere alla messa in funzione della macchina;
• Noneettuaremaialcunaoperazioneconlemaniumideobagnate;
• Noncopriremailamacchina,neppureparzialmente,constronacciocontelidiprotezione;
• Nonmetterelemaniinprossimitàdeibeccuccierogazionecaè(rif.L),dellalanciaerogazione
vapore (rif. P) e del ripiano superiore scalda-tazze (rif. R) durante il funzionamento;
• Non immergere la macchina in acqua per la pulizia;
• Questoapparecchiopuòessereutilizzatodabambinidietànoninferiorea8annisoltantose
vengono adeguatamente sorvegliati, se sono istruiti all’utilizzo sicuro dell’apparecchio, e se ne
capisconoirischiconnessi.Operazionidipuliziae/omanutenzionenondevonoessereeettuate
dapartedibambini,amenocheessinonabbianoetàsuperiorea8anni,esoltantosesono
adeguatamentesorvegliati.Mantenerel’apparecchioedilcavofuoridallaportatadibambinidietà
inferiore a 8 anni;
• Questoapparecchiopuòessereutilizzatodapersoneconcapacitàsiche,sensorialiomentali
ridotte, oppure con mancanza di esperienza e conoscenza, soltanto se vengono adeguatamente
sorvegliate ed istruite all’utilizzo sicuro dell’apparecchio, e se ne capiscono i rischi connessi.
I bambini non devono giocare con l’apparecchio;
• Questoapparecchioèdestinatoadessereutilizzatoinapplicazioniprofessionaliesimilari,quali:bar,
ristoranti, agriturismo, alberghi e altre strutture di tipo ricettivo, trattorie e simili.
QuestoprodottoèconformealDL151/2005eallaDirettivaeuropea2002/96/
EC.Alterminedellapropriavitautile,l’apparecchioNONdeveesseresmaltito
comeriutogenericodomestico.Deveinveceessereportatoinunodeicentri
diraccoltadierenziataperriutielettriciedelettroniciapprontatidallaPubblica
Amministrazione.Unappropriataraccoltadierenziatacontribuisceadevitare
possibilieettinegativisullasaluteesull’ambiente!
Il danneggiamento, la rimozione o l’alterazione della targa identicativa deve
essere immediatamente segnalata al Rivenditore. Non saranno possibili interventi
in garanzia se la targa identicativa risulta danneggiata, rimossa o alterata.
Sulretrodellamacchina,accantoalconnettoredialimentazione,èappostalatargaidenticativacon
riportati i dati tecnici da comunicare al Rivenditore in caso di richiesta di informazioni o di assistenza
tecnica.
INDICAZIONI GENERALI DI SICUREZZA
SMALTIMENTO
CARATTERISTICHE TECNICHE
ALIMENTAZIONE: 220-230 V DIMENS. LxHxP: 520x360x390 mm
FREQUENZA:50/60 Hz CAPACITÀ SERBATOIO: 4,9 l
POTENZA MAX: 3.100 W CAPACITÀ VASCHETTE: 80 caps.
PRESS. MAX: 20 bar MATERIALE PRINCIPALE: acciaio
PESO: 17 Kg ca.
4

Estrarrelamacchinadall’imballoecollocarlasuunpianostabile,adattoasostenerneilpeso,inprossimitàdi
una presa di corrente idonea. Conservare l’imballo in tutte le sue parti per eventuali futuri trasporti.
INSTALLAZIONE
Togliere il coperchio di acciaio (rif. H) per accedere al serbatoio acqua. RACCOMANDIAMO L’UTILIZZO
DI UN FILTRO ADDOLCITORE O DI UN SACCHETTO ANTICALCARE che deve essere periodicamente
sostituito. Se ciò non viene fatto, all’interno della macchina si possono formare incrostazioni calcaree tali
dapregiudicarneilbuonfunzionamento,oltrechelavaliditàdellagaranzia.Dopoaverquindiintrodotto
illtroaddolcitoreall’internodelserbatoio,riempirequest’ultimoconacquapotabile,possibilmente
a basso contenuto di calcio. Si può eseguire il riempimento del serbatoio utilizzando un imbuto e una
bottiglia. Per tutte queste operazioni rimuovere esclusivamente il tappo rotondo a sinistra (quello con
i tubi di carico) del serbatoio. Il tappo rotondo a destra (quello con un solo tubo inserito) non va toccato.
Lamacchinaèdotatadiunsensoredilivelloacquanelserbatoio.Sel’acquaall’internodelserbatoio
raggiunge un livello troppo basso, le eventuali erogazioni in corso vengono interrotte e la spia di
esaurimentoacqua(rif.N)siaccende,segnocheènecessarioprocederealriempimentodelserbatoio
come spiegato sopra.
RIEMPIMENTO DEL SERBATOIO
COLLEGAMENTO ALLA RETE ELETTRICA
La tensione di alimentazione della macchina non è modicabile dall’utente.
Prima del collegamento alla rete elettrica, vericare che la tensione della
rete corrisponda alla tensione di alimentazione della macchina indicata nella
targhetta di identicazione.
Ilbeccuccioerogazionecaè,presenteinentrambiigruppi,serveadaumentareoarallentareilusso
delcaè.Selamacinaturaall’internodellacapsulaène,girateinSENSOORARIOilbeccucciomanon
eccessivamentepoichépotrebbesvitarsidallasuasede.Seinvecelamacinaturaèpiùgrossa,giratein
SENSOANTIORARIOilbeccuccio:intalmodoilussodelcaèdiminuirà.Questeregolazionipossono
essereeettuateesclusivamenteamacchinafermaovveronondurantel’erogazionediunabevanda.
BECCUCCIO EROGAZIONE CAFFÈ (rif. L)
Durante l’erogazione non toccare il beccuccio e non esporsi con il viso alle
parti calde dell’apparecchio (pericolo di ustioni). Le superci riscaldanti della
macchina sono soggette a calore residuo anche dopo l’uso!
5

Farescorrereunodeiduesportelli(rif.G)versodisé,etenerloaperto.
PER LA PRIMA EROGAZIONE: inserire una capsula nell’apposita sede e rilasciare DELICATAMENTE lo
sportello, accompagnandolo. Porre un bicchierino sotto al beccuccio corrispondente al gruppo utilizzato
(sinistroodestro)epremerel’interruttoredierogazione(rif.F);dopocirca5secondiinizieràl’erogazione
delcaè.Raggiuntoillivellodesideratonelbicchierinopremerenuovamentel’interruttoredierogazione
perfermarel’uscitadelcaè.Sedurantel’erogazionelarelativaspiadiriscaldamento(rif.E)sispegne,
signicasemplicementecheilgrupposistariscaldandoperportarel’acquaintemperaturaottimale;
l’erogazione può quindi tranquillamente continuare. E’ consigliabile invece attendere l’accensione della
suddettaspia(rif.E)primadierogareilcaèsuccessivo.
PER TUTTE LE EROGAZIONI SUCCESSIVE: si procede esattamente come sopra, tenendo però conto
delfattocheall’internodelgruppoègiàinseritalacapsulausatanellaerogazioneprecedente!Perciòla
nuova capsula va inserita spingendola leggermente verso il basso sino ad arrivare al suo alloggiamento
(siudràcaderelavecchiacapsulanellavaschettaraccoglifondi).
E’importantevuotarelevaschetteraccoglifondi(rif.O)dopol’erogazionedinonpiùdi40caèpergruppo.
COME FARE IL CAFFÈ
6
Utilizzare esclusivamente capsule del tipo Lavazza Espresso Point (originali e/o
compatibili). L’uso di capsule diverse da quelle per le quali la macchina è stata
concepita può danneggiare l’apparecchio.
Se le vaschette non vengono svuotate, le capsule possono incastrarsi
all’interno della macchina no a bloccarne il funzionamento!
Accenderelamacchinapremendol’interruttoregenerale(rif.M)postosulancodestrodellastessa;
laspiasottostante(rif.Q)siilluminerà.Perpoterutilizzareigruppiènecessariopremere,sulpannello
frontale dei comandi, i relativi interruttori d’accensione (rif. D); si illumineranno istantaneamente le
corrispondentispieblu(rif.C).Iduegruppisonoindipendentil’unodall’altro:pertantoèpossibileutilizzarli
simultaneamente,oppuretenerneaccesosoltantouno(quandoadesempioilcaricodilavoroèinferiore)
per ottenere così un apprezzabile risparmio energetico. Appena accesi i gruppi, inizia il rapido processo
di riscaldamento dei relativi corpi termici. Attendere l’accensione delle corrispondenti spie (rif. E): quando
ciòsivericavuoldirechel’acquaèintemperaturaottimalediesercizioecheigruppisonoprontiall’uso.
ACCENSIONE

Lamacchinaèdotatadiuncomodoepraticoripianoscalda-tazzeainduzione,cheraggiungela
temperatura ideale dopo circa 10 minuti dall’accensione dei gruppi. Per contribuire al risparmio energetico,
ilripianononvieneriscaldatodaunappositaresistenza,madaglistessigruppicaè.Pertanto,peravere
unadiusionedicaloreuniformesututtoilripiano,èconsigliabilel’accensionedientrambiigruppi.
RIPIANO SCALDA-TAZZE (RIF. R)
LaVostraOnePro2èdotatadell’apparatoperlaproduzionedivapore,pertantoVipreghiamodileggere
attentamentequantosegue.Perpoterutilizzaretaleapparatoènecessariopremere,sulancosinistro
dellamacchina,l’interruttored’accensione(rif.B)dellacaldaiaspecica;laspiasottostantesiilluminerà.
Attenderecirca6minuti,duranteiqualilacaldaiaandràinpressioneidealediesercizio.Vericareda
manometro(rif.I)chelapressionearriviacirca1,8bar:quandociòsivericavuoldirechelacaldaiaè
pronta ad erogare vapore.
Per erogare vapore: inserire la lancia vapore (rif. P) all’interno di una tazza o altro recipiente contenente
il liquido da scaldare o emulsionare (es. latte). Premere e tenere premuto il pomello (rif. A) in qualsiasi
direzione:ilvaporefuoriusciràdalterminaledellalancia(rif.P).Unavoltaottenutoilrisultatodesiderato,
potete rilasciare lo stesso pomello (rif. A).
APPARATO VAPORE
Non toccare il ripiano superiore scalda-tazze, e non esporsi con il viso alle
parti calde dell’apparecchio (pericolo di ustioni). Le superci riscaldanti della
macchina sono soggette a calore residuo anche dopo l’uso!
7
Igruppierogatoricaèeirelativibeccuccidevonoesserepulitisettimanalmente.Perfarquesto,inserire
unacapsulaVUOTA(precedentementesvuotatadelcontenutoelavata)nell’appositasedeerilasciare
DELICATAMENTE lo sportello, accompagnandolo. Porre un bicchiere abbastanza capiente sotto al
beccucciocorrispondenteepremereilrelativointerruttoredierogazione(rif.F);dopocirca5secondi
inizieràl’erogazionediacquacalda(nonidoneaperlapreparazionediinfusi).Dopocircadueminuti
premere nuovamente l’interruttore di erogazione per fermare l’uscita dell’acqua. Eseguire la suddetta
operazione per entrambi i gruppi.
PULIZIA DEI GRUPPI E DEI RISPETTIVI BECCUCCI
Durante l’erogazione non toccare la lancia vapore, e non esporsi con il viso alle
parti calde dell’apparecchio (pericolo di ustioni). Le superci riscaldanti della
macchina sono soggette a calore residuo anche dopo l’uso!

8
La lancia vapore deve essere pulita giornalmente, se utilizzata. A tale riguardo, inserire la lancia vapore (rif.
P) all’interno di una tazza o altro recipiente contenente esclusivamente acqua pulita e premere e tenere
premuto il pomello (rif. A) in qualsiasi direzione. Dopo 1 minuto potete rilasciare lo stesso pomello (rif.
A).perarrestareilvapore.Attenderechelalancia(rif.P)sisiasucientementerareddata,dopodichè
procedere alla sua pulizia esterna tramite un panno morbido inumidito di acqua calda. Eliminare tutte le
incrostazioni (ad esempio di latte) per evitare che vengano ostruiti i fori di uscita del vapore.
Qualsiasitipodipulizia,eccezionfattaquelladeigruppicaèedellalanciavapore,deveessereeseguita
amacchinaspenta(interruttoredialimentazionesuzero)edopochelamacchinasièrareddata.
Perpulirelasupercieesternadellamacchinausaresolamenteunpannomorbidoinumiditoconacqua.
Levaschetteraccoglifondi(rif.O)vannoestratteelavateconacquacaldaesaponeutilizzandouna
spugna non abrasiva, e devono essere accuratamente asciugate prima del loro reinserimento.
Se si rendesse necessaria la pulizia del serbatoio dell’acqua, utilizzare acqua calda.
PULIZIA DELLA LANCIA VAPORE (RIF. P)
PULIZIA DELLA MACCHINA
Non utilizzare la lavastoviglie per pulire la macchina o suoi componenti.
Si danneggiano irrimediabilmente! Non usare altresì solventi e prodotti o
materiali abrasivi.
Se si utilizzano detergenti per la pulizia del serbatoio, assicurarsi di
risciacquarlo scrupolosamente, poiché eventuali residui chimici all’interno del
serbatoio possono provocare pericolo di intossicazione alimentare.
Le riparazioni devono essere eseguite esclusivamente da personale autorizzato e competente.
Senonsièingradodirisolvereiproblemiconl’aiutodellapresentetabella,rivolgersialproprio
Rivenditore Autorizzato.
ANOMALIE E POSSIBILI SOLUZIONI
Eventuali riparazioni eseguite non rispettando i capitolati di produzione della
Casa costruttrice e/o utilizzando pezzi di ricambio non originali, possono
essere fonte di pericolo per l’utente. Se l’acqua nel serbatoio viene a mancare
si possono bruciare le pompe e, di conseguenza, la macchina può andare
in cortocircuito.

PROBLEMA POSSIBILE CAUSA SOLUZIONE
Erogazione del caè
insuciente o impossibile
Serbatoio dell’acqua vuoto Riempire il serbatoio (pag. 4).
Spostamento sonda livello
acqua
Vericarechelasonda,inserita
nel foro destro del serbatoio,
non tocchi le pareti interne del
serbatoio o altri oggetti (ad es. il
sacchetto anticalcare)
Macinaturatroppone Utilizzare una cialda nuova.
RivolgersialFornitoredelle
capsule
Le bevande erogate sono
fredde anche se la spia
(rif. E) è accesa
Tazze ceramiche fredde Preriscaldare le tazze con acqua
calda o utilizzare bicchierini
monouso.
Utilizzare il ripiano scalda-tazze
(pag. 6)
Erogazione troppo lenta Svitare il beccuccio in senso
orario (pag. 4)
Sistema di riscaldamento
difettoso
RivolgersialFornitore
Le pompe fanno troppo rumore
e non permettono l’uscita del
caè
Le pompe hanno aspirato aria Riempire il serbatoio (pag.
4) e premere a ripetizione gli
interruttoridierogazionecaè
(rif.D)noasentireilcorretto
innesco delle pompe
La “crema” è troppo poca o
manca del tutto
Macinatura troppo grossa Utilizzare una capsula nuova.
RivolgersialFornitoredelle
capsule
Caènonfresco Utilizzare una capsula nuova.
RivolgersialFornitoredelle
capsule
Acqua nel serbatoio presente da
molti giorni
Sostituire l’acqua del serbatoio
facendo attenzione al corretto
re-inserimento della sonda.
Erogazione troppo veloce o
troppo lenta
Ruotare il beccuccio (pag. 4)
La “crema” è troppo poca o
manca del tutto
Serbatoio dell’acqua vuoto Riempire il serbatoio (pag. 4)
Lancia vapore ostruita Pulire e disincrostare la lancia
vapore (pag. 7)
Sistema di riscaldamento
difettoso
Rivolgersi al Rivenditore
9

LaSocietàcostruttriceTecno Meccanica S.r.l. con sede amministrativa sita in Via Marlianese 43, 51034
Serravalle Pistoiese (PT) ITALY
Dichiarasottolapropriaresponsabilitàchelamacchinaperilcaèespressodescrittainquesto
manuale:
Modello: One Pro 2 Alimentazione: 220v 50/60hz Anno di costruzione: vedi targa CE
È conforme alle Direttive:
2006/42/CE relativa al ravvicinamento delle legislazioni degli Stati membri relative alle macchine,
chesostituiscelaDirettiva98/37/CE;
2014/35/UE relativa al materiale elettrico destinato ad essere adoperato entro taluni limiti
di tensione;
2014/30/UErelativaallacompatibilitàelettromagnetica(EMC),chesostituisce
laDirettiva2004/108/CEE.
L’Amministratore
L’apparecchioègarantitoper1annodalladatadiacquisto,salvoiterminidilegge.
Lagaranziaèlimitataadifettidifabbricazioneodimateriali,nonèestesaaipezzisoggettiadusurao
adanneggiamentiallepartidelicate(interruttori,cavodialimentazione,ecc...),eNONèaltresìestesa
a danni conseguenti incuria od uso errato dell’apparecchio medesimo (ad esempio utilizzo di acqua
condurezzasuperiorea12°Fe/omancatoutilizzoosostituzionediidoneosacchettoaddolcitore,che
possono causare incrostazioni di calcare). In caso di guasto coperto da garanzia, riportare l’apparecchio
pressoilRivenditoredovelostessoèstatoacquistato,munitidiscontrinoofatturasullaqualedeve
essere riportato il numero di matricola, che deve corrispondere a quello posto sull’apparecchio. Solo
inquestomodoègarantitoilripristinogratuitodellefunzionalitàdell’apparecchio,mentrelespesedi
trasporto rimangono ad esclusivo carico del Cliente. La garanzia decade in caso di impiego improprio
o manomissione, uso della forza e interventi non eseguiti da nostro personale specializzato. La nostra
garanzia non limita comunque i diritti legali del Cliente.
DICHIARAZIONE DI CONFORMITÀ
GARANZIA
10
ETICHETTACOLLAUDO-NUMERODIMATRICOLA


B
A
P
O1
O2
N
H
R
M
D1 D1
I
EQ
E
F
G1 G2
F
C1
L1
L2
C2
A. Steam delivery knob;
B. Steam boiler switching-on;
C. CoeegroupONlight;
D. CoeegroupONswitch;
E. Coeegrouptemperaturelight;
F. Coeepouringswitch;
G. Sliding door;
H. Water tank cover;
I. Steam boiler pressure gauge;
L. Coeepouringspout;
M. Generalpowerswitch;
N. Tank water running out light;
O. Coeegroundscollectiontray;
P. Steam wand;
Q. Generalpowersupplylight;
R. Cup-warmer tray.
Tecno Meccanica S.r.l.
All rights reserved
No part of this manual can be reproduced, copied or disclosed by any means without written
authorisation by Tecno Meccanica S.r.l.
Generalsafetyindications.................... pag 13
Disposal ....................................................... pag 13
Technical characteristics ...................... pag 13
Installation .................................................. pag 14
Fillingofthetank ...................................... pag 14
Connection to the electric network... pag 14
Coeepouringspout ............................. pag 14
Turning-on .................................................. pag 15
Howtomakecoee ................................ pag 15
Steam and hot
water device (optional) ........................... pag 16
Upper cup-warmer tray ......................... pag 16
Cleaningofthecoeegroups ............ pag 16
Cleaning of the steam wand ................. pag 17
Cleaning of the machine ........................ pag 17
Anomalies and possible solutions ..... pag 17
Warranty conditions ................................ pag 20
TABLE OF CONTENTS
ThankyouforpurchasingtheONEPRO2coeemachine,atop-qualityproductdesigned,
developed, manufactured and tested entirely in Italy. This product is a capsule coee machine
mainly for professional use.
ThemachineissuitableforalltheLavazzaEspressoPointcapsules(so-calledFAP).

Some general safety indications are summarised below:
• Carefully read the use instructions before operating the machine;
• Do not carry out any operation with humid or wet hands;
• Never cover the machine, not even partially, with cloths or protection cloths;
• Donotplacehandsnearthecoeepouringspouts(ref.L),steamdeliverywand(ref.P)andupper
cup-warmer tray (ref. R) during operation;
• Do not immerge the machine in water for cleaning;
• This machine can be used by children not under 8 years of age only if adequately supervised,
instructed regarding the safe use of the machine, and if they understand the relative risks. Cleaning
and/ormaintenanceoperationsmustneverbecarriedoutbychildren,unlesstheyareover8years
of age, and only if adequately supervised. Keep the machine and cable out of reach of children
under 8 years of age;
• This machine can be used by persons with reduced physical, sensorial, or mental capacities, or with
lack of experience and knowledge, only if adequately supervised and instructed regarding the safe
use of the machine, and understand the relative risks Children must never play with the machine;
• This machine is destined to be used in professional venues and similar ones, such as: bars,
restaurants, holiday farm houses, hotels, and other accommodation structures, trattorias and similar
places.
ThisproductiscompliantwithLegislativeDecree151/2005andEuropeanDirective
2002/96/EC.Attheendofitslife,themachinemustNOTbedisposedofasgeneric
domesticwaste.Itmustbebroughttooneofthedierentiatedwastecollection
centres for electrical and electronic waste prearranged by the Public Administration.
Appropriatedierentiatedwastecollectioncontributestopreventingpossible
negativeeectsonhealthandenvironment!
The damaging, removal or alteration of the identication plate must be
immediately reported to the Dealer. Interventions under warranty shall not be
possible if the identication plate is damaged, removed, or altered.
Onthebackofthemachine,nearthepowerconnector,thereisanidenticationplatethatreportsthe
technical data to be communicated to the Dealer if requesting information or technical assistance.
GENERAL SAFETY INDICATIONS
DISPOSAL
TECHNICAL CHARACTERISTICS
POWER SUPPLY: 220-230 V DIMENS. LxHxW: 520x360x390 mm
FREQUENCY: 50/60 Hz TANK CAPACITY: 4.9 l
MAX POWER: 3,100 W TRAYS CAPACITY: 80 caps
MAX PRESSURE: 20 bars MAIN MATERIAL: steel
WEIGHT: 17 Kg ca.
13

Remove the machine from the packaging and place it on a stable and horizontal surface, suitable to support
its weight, near a suitable socket. Keep the packaging and all its parts for possible future transport.
INSTALLATION
Remove the steel cover (ref. H) to access the water tank. WE RECOMMEND THE USE OF A WATER
SOFTENER FILTER OR ANTI-SCALE BAG that must be periodically replaced. If this is not done, scale
deposits may form inside the machine, these can prejudice the correct operation of the machine, apart
fromthevalidityofthewarranty.Afterhavinginsertedthewatersoftenerlterinsidethetank,llthelatter
withdrinkingwater,possiblywithlowcalciumcontent.Thetankcanbelledusingafunnelandabottle.
For all these operations remove only the round cap on the left (the one with the loading pipes) of the
tank. The round cap on the right (the one with only one pipe inserted) must not be touched.
The machine is equipped with a water level sensor in the tank. If the water inside the tank reaches a too
low level, the possible ongoing pouring is interrupted and the water running out light (ref. N) turns on,
signalthatitisnecessarytollthetankasexplainedabove.
FILLING OF THE TANK
CONNECTION TO THE ELECTRIC NETWORK
The power voltage of the machine is not modiable by the user. Before
connecting it to the electric network, check that the voltage of the network
corresponds to the power supply voltage of the machine indicated on the
identication plate.
Thecoeepouringspout,presentinbothgroups,servestoincreaseordecreasetheowofcoee.Ifthe
coeegrindinginsidethecapsuleisne,turnthespoutCLOCKWISEbutnotexcessivelysinceitcould
beunscrewedfromitsseat.Instead,ifthegrindingiscoarser,turnthespoutCOUNTERCLOCKWISE:this
waytheowofthecoeewilldecrease.Theseadjustmentscanbecarriedoutexclusivelywithmachine
stopped, that is, not during the pouring of the liquid.
COFFEE POURING SPOUT (ref. L)
During pouring do not touch the spout and do not approach your face to the
hot parts of the machine (burns hazard). The heating surfaces of the machine
are subject to residue heat even after use!
14

Makeoneofthetwodoors(ref.G)slidetowardsyou,andkeepitopen.
FOR THE FIRST POURING: insert a capsule in the proper seat and DELICATELY release the door,
accompanying it. Place a cup under the spout correspondent to the group used (left or right) and press
thepouringswitch(ref.F);afterabout5secondsthecoeewillstartpouring.Oncereachedthedesired
levelinthecuppressthepouringswitchagaintostopthepouringofthecoee.If,duringpouring,the
relativeheatinglight(ref.E)turnso,thissimplymeansthatthemachineisheatinguptobringthewater
to the optimal temperature; the pouring can then safely continue. However, it is recommended to wait for
theabove-mentionedlight(ref.E)tobeonbeforemakingthenextcoee.
FOR ALL THE FOLLOWING CUPS OF COFFEE: proceed exactly as above, however, keeping into account
thefactthatthecapsuleusedforthepreviouscupofcoeeisalreadyinsertedinsidethegroup!
Therefore, a new capsule must be inserted pushing it slightly downwards until reaching its seat (you will
heartheoldcapsulefallintothecoeegroundcollectiontray).
Itisimportanttoemptythecoeegroundcollectiontray(ref.O)afterthepouringofnotmorethan40cups
ofcoeepergroup.
HOW TO MAKE COFFEE
15
Use exclusively Point type Lavazza Espresso capsules (originals and/or
compatible). The use of capsules dierent from those for which the machine
was conceived may damage the machine.
If the trays are not emptied, the capsules may get stuck inside the machine
and block its operation!
Turn on the machine pressing the general switch (ref. M) located on the right side of the same; the
underlying light (ref. Q) turns on. To use the groups, it is necessary to press, on the front command panel,
the relative turning-on switches (ref. D); the correspondent blue lights (ref. C) will instantly turn on. The
two groups are independent one from another: therefore, it is possible to use them simultaneously, or
keep only one on (when for example the work load is reduced) thus obtaining considerable energy saving.
As soon as the groups are turned on, the rapid heating process of the relative thermal elements starts.
Wait for the correspondent lights (ref. E) to turn on: when this occurs, it means that the water has reached
the optimal working temperature and the groups are ready for use.
TURNING-ON

The machine is equipped with a comfortable and practical induction cup-warmer tray, which reaches the
idealtemperatureabout10minutesafterthegroupsareturnedon.Forenergysaving,thetrayisnotheated
byaproperresistance,butbythesamecoeegroups.Therefore,tohaveuniformheatdiusiononthe
entire tray, we recommend turning on both groups.
CUP-WARMER TRAY (REF. R)
OnePro2isequippedwithadevicefortheproductionofsteam;therefore,wekindlyaskyoutocarefully
readwhatfollows.Tousesuchdevice,itisnecessarytopress,ontheleftsideofthemachine,theON
switch(ref.B)ofthespecicboiler;theunderlyinglightwillturnon.Waitabout6minutes,duringwhichthe
boiler will reach the ideal operating pressure. Check through the pressure gauge (ref. I) that the pressure
reaches about 1.8 bars: when this occurs, the boiler is ready to deliver steam.
To deliver steam: insert the steam wand (ref. P) inside a cup or other container containing the liquid to be
heatedoremulsied(i.e.milk)Presstheknob(ref.A)andkeepitpressedinanydirection:thesteamwill
comeoutfromtheendofthewand(ref.P).Onceobtainedthedesiredresult,releasethesameknob(ref.A).
STEAM DEVICE
Do not touch the upper cup-warmer tray, and do not approach your face
to the hot parts of the machine (burns hazard). The heating surfaces of the
machine are subject to residue heat even after use!
16
Thecoeepouringgroupsandtherelativespoutsmustbecleanedweekly.Todothis,insertanEMPTY
capsule (previously emptied of its content and washed) in the appropriate seat and DELICATELY release
the door, accompanying it. Put a cup with suitable capacity under the correspondent spout and press
thepouringswitch(ref.F);afterabout5secondsthepouringofhotwaterstarts(notsuitableforthe
preparationofinfusions).Afterabouttwominutespressthepouringswitchagaintostoptheowof
water. Execute the above-mentioned operation for both groups.
CLEANING OF THE GROUPS AND RESPECTIVE SPOUTS
During delivery never touch the steam wand and/or hot water nozzle, and do
not approach your face to the hot parts of the machine (burns hazard). The
heating surfaces of the machine are subject to residue heat even after use!

17
The steam wand must be cleaned daily, if used. In this regard, insert the steam wand (ref. P) inside a cup
or other container containing exclusively clean water and press and keep pressed the knob (ref. A) in any
direction. After about a minute release the same knob (ref. A) to stop the steam. Wait for the steam wand
(ref.P)tobesucientlycool,afterwardsproceedwithitsexternalcleaningusingasoftclothwetwithhot
water. Remove all the deposits (of milk for example) to prevent the clogging of the steam outlet holes.
Anytypeofcleaning,exceptfortheoneofthecoeegroupsandsteamwand,mustbeexecutedwith
machineturnedo(generalpowerswitchonzero)andafterthemachinehascooled.Tocleanthe
externalsurfacesofthemachineonlyuseasoftwetcloth.Thecoeegroundcollectiontrays(ref.O)
must be removed and washed with hot water and soap using a nonabrasive sponge and must be properly
dried before reinserting them.
If the cleaning of the water tank is necessary, use hot water.
CLEANING OF THE STEAM WAND (REF. P)
CLEANING OF THE MACHINE
Do not use the dishwasher to clean the machine or its components. They
would be irremediably damaged! Also, do not use solvents and abrasive
products or materials.
If using detergents for the cleaning of the tank, make sure to scrupulously
rinse it, since possible chemical residues inside the tank may cause risk of
food poisoning,
Repairsmustbeexecutedexclusivelybyauthorisedandqualiedpersonnel.Ifyouarenotabletosolve
the problems with the help of the present table, contact your Authorised Dealer.
ANOMALIES AND POSSIBLE SOLUTIONS
Any repairs executed without observing the production specications of the
Manufacturer and/or using unoriginal spare parts, may represent a hazard
for the user. If the water in the tank nishes the pumps may burn and,
consequently, the machine may be subject to short-circuit.

ANOMALY POSSIBLE CAUSE SOLUTION
Insucient or impossible
pouring of the coee
Water tank empty Fillthetank(page4).
Water level probe has moved Check that the probe, inserted in
the right hole of the tank, does
not touch the internal walls of
the tank or other objects (for
example the anti-scale bag)
Grindingtoone Use a new pod.
Contact the Supplier of the pods
The liquids poured are cold
even if the light (ref. E) is on
Cold ceramic cups Preheat the cups with hot water
or use disposable cups.
Use the cup-warmer tray (page
6)
Pouring too slow Unscrew the spout clockwise
(page 4)
Faultyheatingsystem Contact the Supplier
The pumps make too much
noise and do not allow the
pouring of the coee
The pumps have sucked up air Fillthetank(page4)and
repeatedlypressthecoee
pouring switches (ref. D) until
hearing the priming of the
pumps
The “cream” is not enough or
completely lacking
Grindingtoocoarse Use a new capsule.
Contact the Supplier of the
capsules
Coeenotfresh Use a new capsule.
Contact the Supplier of the
capsules
Water has been in the tank for
many days
Replace the water in the tank
paying attention to the correct
reinsertion of the probe.
Pouring too fast or too slow Rotate the spout (page 4)
The “cream” is not enough or
completely lacking
Empty water tank Fillthetank(page4)
Clogged steam wand Clean and descale the steam
wand (page 7)
Faultyheatingsystem Contact the Dealer
18

The manufacturing Company Tecno Meccanica S.r.l.withregisteredocelocatedinViaMarlianese43,
51034 Serravalle Pistoiese (PT), ITALY.
Declaresunderitsownresponsibilitythattheespressocoeemachinedescribedinthismanual
Model: One Pro 2 Power supply: 220v 50/60hz Year of construction: see CE marking
Complies with the following Directives:
2006/42/CE on the approximation of the laws of the Member States relating to machinery,
repealsDirective98/37/EC;
2014/35/UE relative to electrical equipment designed for use within certain voltage limits;
2014/30/UErelatingtoelectromagneticcompatibility(EMC),repealsDirective2004/108/EEC.
The Administrator
DECLARATION OF CONFORMITY
19

The warranty is limited to the manufacturing or material defects, it is not valid for parts subject to wear or
damagestodelicateparts(switches,powersupplycable,etc.…),anditisNOTextendedtothedamages
deriving from negligence or incorrect use of the same machine (for example, use of water of hardness
exceeding8°F,and/ornon-useorreplacementofthesuitablewatersofteninglterthatcancausescale).
In case of failure covered under warranty, bring the machine back to the same Dealer where the machine
was bought, together with the receipt or invoice, on which the serial number, corresponding to the one
presentonthemachine,isreported.Onlythiswaythefreeofchargerestoreofthemachine’sfunctions
is guaranteed, while transport costs shall be at the Customer’s exclusive charge. The warranty does not
apply in case of improper use or tampering, excessive force, and interventions not carried out by our
qualiedpersonnel.However,ourwarrantydoesnotlimittheCustomer’slegalrights.
WARRANTY
TESTINGLABEL–SERIALNUMBER
20
Table of contents
Languages:


