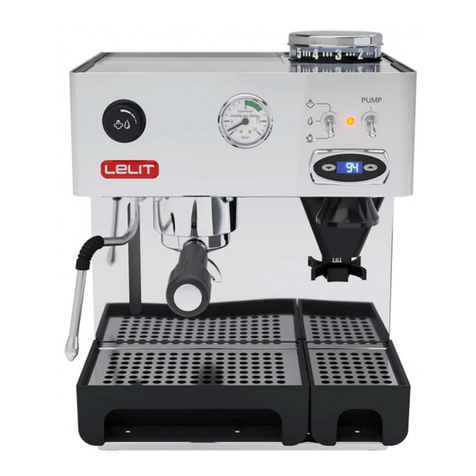
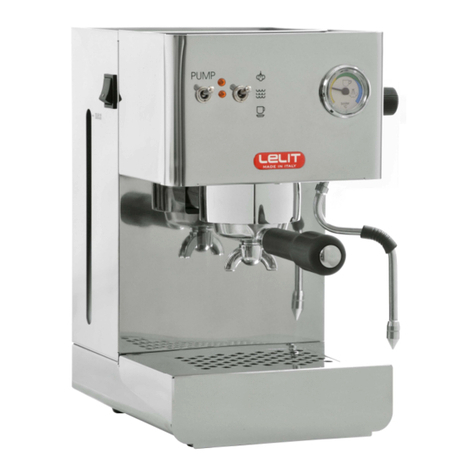
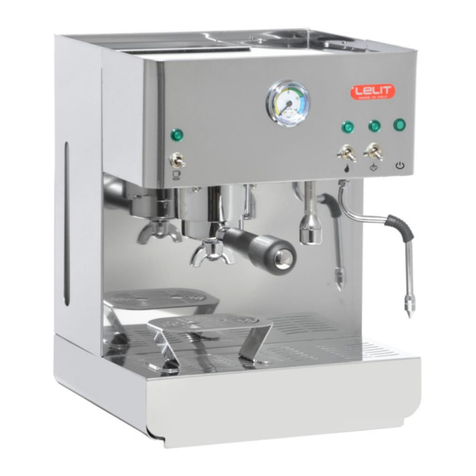
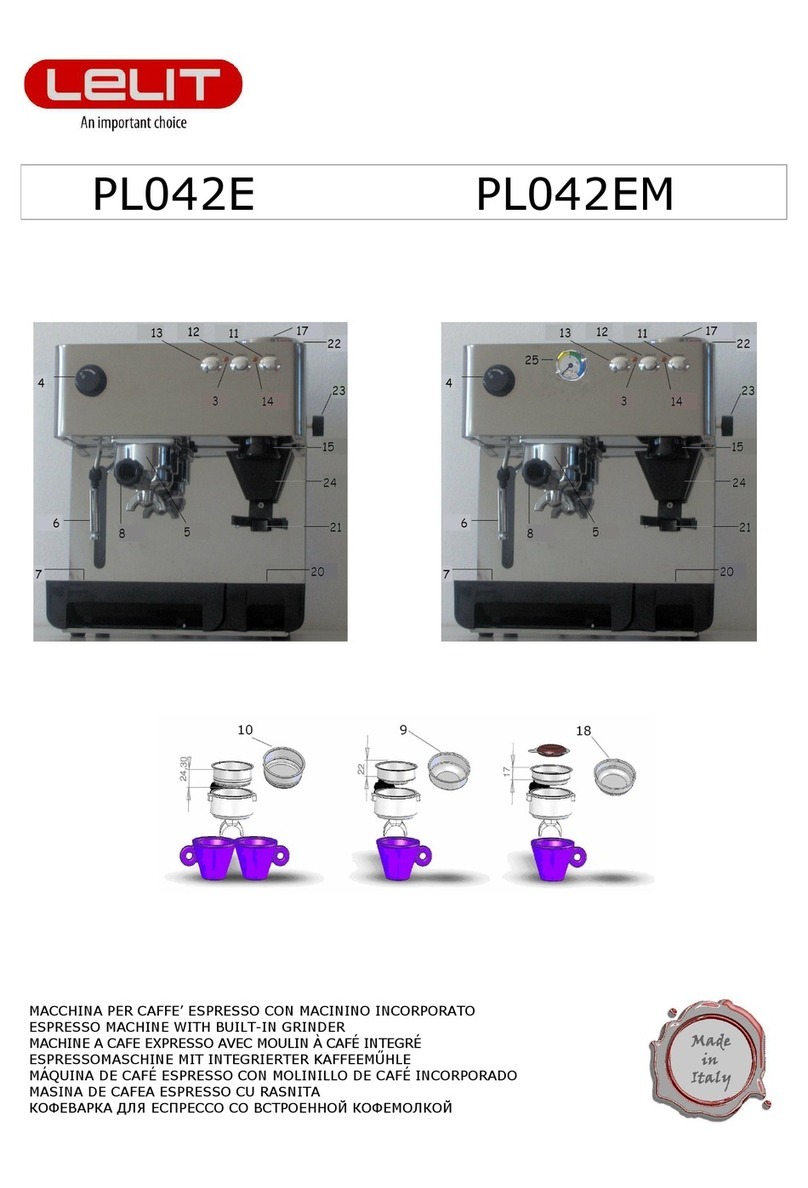
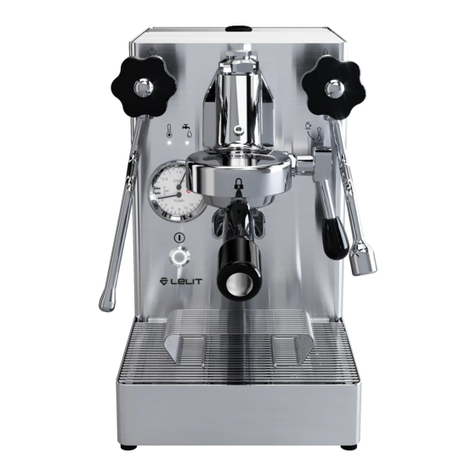
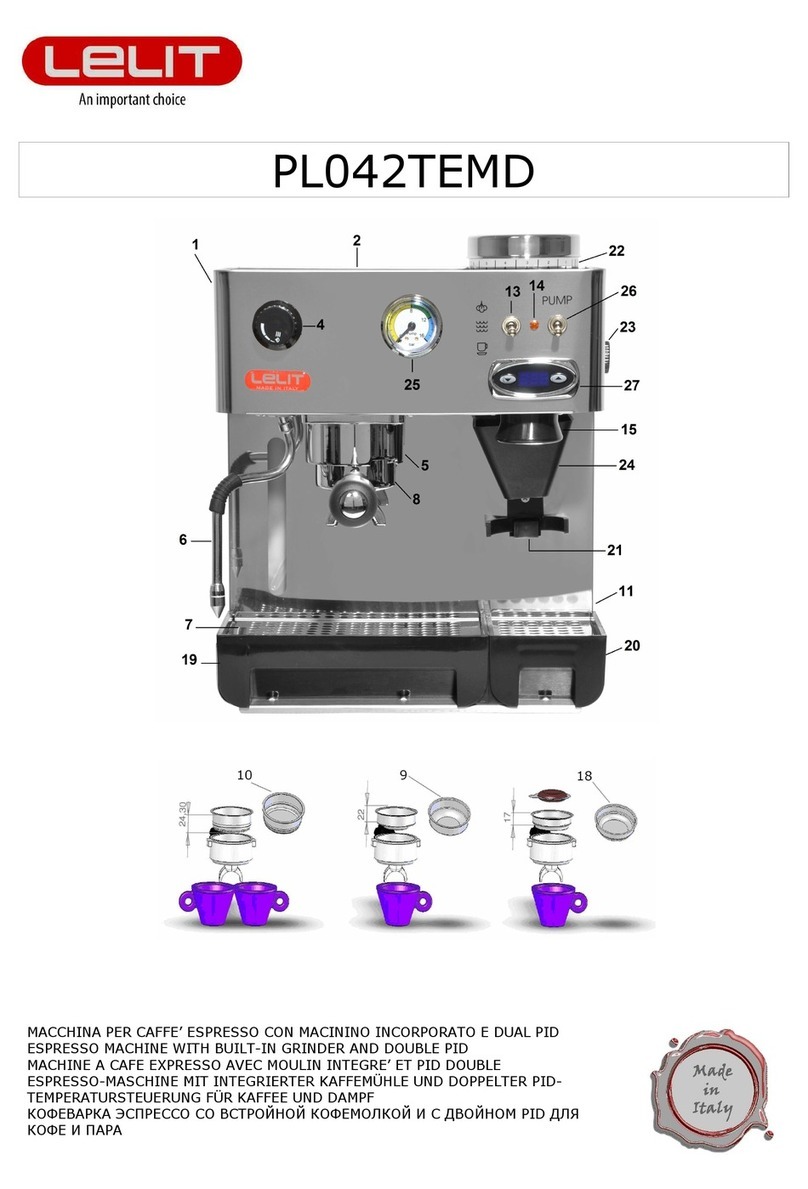
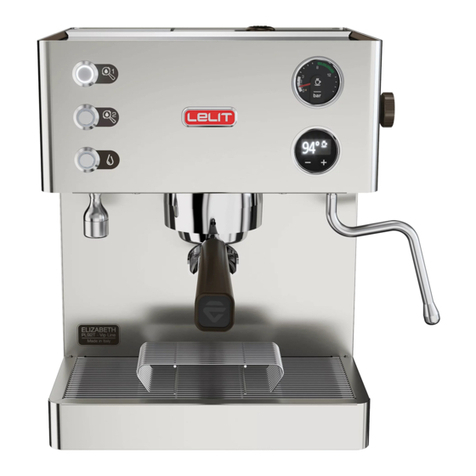
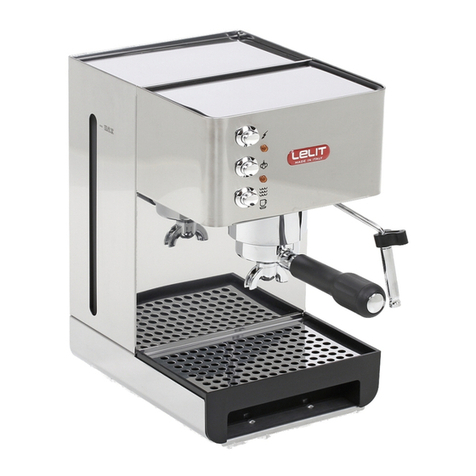
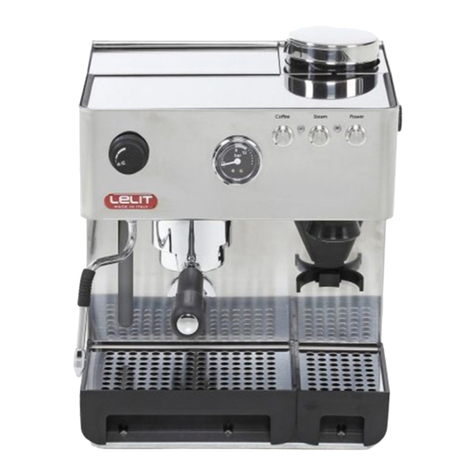
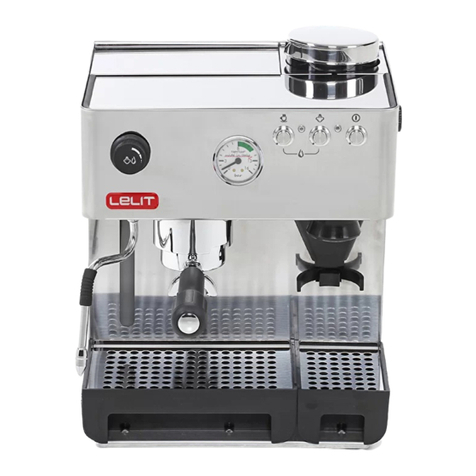
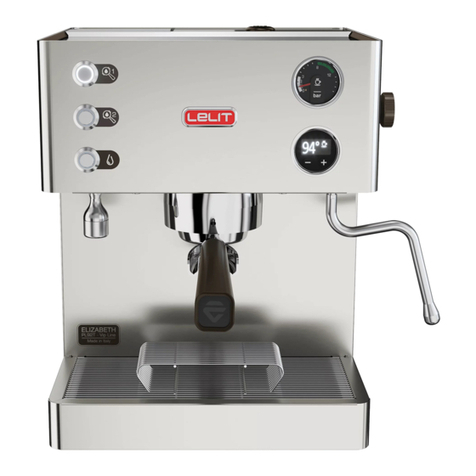
Lelit PL41PLUST User manual

PL41PLUST
MACCHINA PER CAFFE’ ESPRESSO CON GRUPPO PROFESSIONALE E PID
ESPRESSO MACHINE WITH PROFESSIONAL BREWING GROUP AND PID TO BE
USED WITH GROUND COFFEE
MACHINE A’ CAFÉ’ ESPRESSO AVEC GROUP PROFESSIONNEL ET PID
ESPRESSO KAFFEEMASCHINE MIT PROFESSIONELLER BRÜHGRUPPE UND PID
КОФЕВАРКА ЭСПРЕССО С ПРОФЕССИОНАЛЬНОЙ ГРУППОЙ и PID ДЛЯ
ИСПОЛЬЗОВАНИЯ С МОЛОТЫМ КОФЕ

Pagina 2

Pagina 3
ITALIANO
COMPONENTI:
1. Serbatoio
2. Scaldatazze
3. Lampada spia pronto vapore
4. Manopola vapore/acqua calda (sul lato destro)
5. Sede del portafiltro
6. Erogatore vapore/acqua calda
7. Grata removibile poggia tazza
8. Portafiltro
9. Filtro 1 tazza
10. Filtro 2 tazze
11. Interruttore generale on/off (sul lato sinistro)
12. \
13. Interruttore caffè/acqua calda/vapore
14. Lampada spia pronto caffè
15. Pressino
16. Paletta
17. \
18. \
19. Coperchio serbatoio
20. Visualizzatore livello acqua serbatoio
21. TermoPID
22. Interruttore pompa
AVVERTENZE GENERALI
Il presente manuale costituisce parte integrante ed essenziale del prodotto. Leggere attentamente le
avvertenze contenute all’interno in quanto forniscono importanti indicazioni riguardo la sicurezza di
installazione, d’uso e manutenzione. Conservare con cura queste istruzioni per ogni ulteriore
consultazione.
Conservare il materiale dell’imballaggio (sacchetti di plastica, poliuretano espanso, ecc.) fuori dalla portata dei
bambini.
L’apparecchio è progettato unicamente per la preparazione di caffè espresso e bevande calde mediante acqua calda o
vapore e per il preriscaldamento delle tazzine.
L’uso improprio dell’apparecchio potrebbe generare situazioni di pericolo per l’utilizzatore
Questo apparecchio è destinato ad essere utilizzato in applicazioni domestiche e similari come: aree di cucina in
negozi, uffici ed ambienti di lavoro, comunità, dai clienti in hotel, motel e altri ambienti di tipo residenziale, ambienti
di tipo bed and breakfast. Non è indicato per un funzionamento continuo di tipo professionale.
Tenere l'apparecchio e il cavo di alimentazione fuori dalla portata dei bambini.
Avvertimenti contro l’uso improprio
Non installare l’apparecchio in una zona dove potrebbe essere utilizzato un getto d’acqua.
L’apparecchio può essere utilizzato da bambini di età non inferiore a 8 anni e da persone con ridotte capacità fisiche,
sensoriali o mentali, o prive di esperienza o della necessaria conoscenza, purché sotto sorveglianza oppure dopo che
le stesse abbiano ricevuto istruzioni relative all’uso sicuro dell’apparecchio e alla comprensione dei pericoli ad esso
inerenti.
L’apparecchio deve essere installato in un luogo dove possa essere usato solo da personale che abbia conoscenza ed
esperienza dell’apparecchio, in particolare per quanto riguarda la sicurezza e l’igene.
Non si assumono responsabilità per manomissione di qualsiasi componente dell’apparecchio.
La pulizia e la manutenzione non deve essere eseguita da bambini senza sorveglianza.
Ogni utilizzo diverso da quello sopra descritto è improprio e può essere fonte di pericolo; il produttore non assume
responsabilità alcuna in caso di danni risultanti da un uso improprio dell’apparecchio.
Non si assumono responsabilità per l’impiego di pezzi di ricambio e/o accessori non originali.
Non si assumono responsabilità per riparazioni non eseguite presso centri di assistenza autorizzati.
L’apparecchio non può essere lasciato incustodito e utilizzato all’aperto.
Non lasciare l’apparecchio esposto ad agenti atmosferici (pioggia, sole, gelo).
Se l’apparecchio viene immagazzinato in locali in cui la temperatura può scendere sotto il punto di congelamento,
vuotare la caldaia e le tubazioni di circolazione acqua.
Non pulire con getti d’acqua o immergere l’apparecchio.
In tutti i casi succitati la garanzia viene a decadere.

Pagina 4
ITALIANO
AVVERTENZE FONDAMENTALI PER LA SICUREZZA
Poiché l’apparecchio funziona a corrente elettrica, non si può escludere che generi scosse elettriche,
quindi attenersi scrupolosamente alle seguenti avvertenze di sicurezza.
Prima dell’accensione accertarsi che il valore della tensione di rete corrisponda al voltaggio indicato sulla targhetta
applicata sul retro dell’apparecchio e l’impianto elettrico sia munito di messa a terra.
Non manomettere l’apparecchio. Per qualsiasi problema rivolgersi al personale tecnico autorizzato o al centro di
assistenza più vicino.
Non toccare l’apparecchio con le mani o i piedi bagnati.
Non toccare la spina elettrica con le mani bagnate.
Assicurarsi che la presa di corrente utilizzata sia sempre liberamente accessibile, perché solo così si potrà staccare la
spina elettrica all’occorrenza.
Se si vuole staccare la spina elettrica dalla presa, agire direttamente su di essa. Non tirare mai il cavo perché
potrebbe danneggiarsi.
Per scollegare completamente l’apparecchio, staccare la spina dalla presa di corrente.
In caso di guasti all’apparecchio, non tentare di ripararli. Spegnere l’apparecchio, staccare la spina elettrica dalla
presa e rivolgersi all’Assistenza Tecnica.
In caso di danni alla spina elettrica o al cavo di alimentazione, farli sostituire solo ed esclusivamente dall’Assistenza
Tecnica.
Non utilizzare adattatori, prese multiple e/o prolunghe. Qualora il loro uso si rendesse indispensabile è necessario
utilizzare solamente adattatori semplici o multipli e prolunghe conformi alle vigenti norme di sicurezza, facendo però
attenzione a non superare il limite di portata in valore di corrente marcato sull’adattatore semplice, sulle prolunghe e
quello di massima potenza marcato sull’adattatore multiplo.
Staccare l’apparecchio dalla rete se viene lasciato incustodito e prima del montaggio, smontaggio e pulizia.
Per ridurre il rischio di lesioni, evitare che il cavo di alimentazione cada liberamente dal tavolo e non lasciarlo vicino a
superfici calde, a spigoli o oggetti taglienti.
AVVERTENZE SUL PERICOLO DI SCOTTATURE
Questo apparecchio produce acqua calda e vapore, quindi attenersi scrupolosamente alle seguenti
avvertenze di sicurezza.
Prestare attenzione per non entrare in contatto con spruzzi di acqua o getti di vapore.
Quando l’apparecchio è in funzione non toccare il piano scaldatazze poiché caldo.
Mai dirigere il getto di vapore o dell’acqua calda verso parti del corpo.
Toccare con precauzione la lancia erogazione vapore/acqua calda (6).
Non togliere mai il portafiltro (8) durante l’erogazione del caffè.
Le parti contraddistinte dall’etichetta “CAUTION HOT” sono parti molto calde, quindi avvicinarsi ed operare con la
massima cautela.
Collocare sul piano scaldatazze (2) solo tazzine, tazze e bicchieri per il servizio della macchina per caffè espresso.
Non è ammesso il collocamento di altri oggetti sul piano scaldatazze.
Fare asciugare accuratamente le tazzine prima di collocarle sul piano scaldatazze (2).

Pagina 5
ITALIANO
ISTRUZIONI PER L’USO:
Prima accensione della macchina:
1. Estrarre la macchina per caffè espresso dalla scatola e rimuovere tutti i sacchetti ed il materiale da imballo.
2. Posizionare la macchina per caffè espresso su una superficie stabile e piana, lontano da fonti di calore e da
rubinetti della rete idrica.
3. Alzare il coperchio (19) del serbatoio posto sulla sommità posteriore della macchina ed estrarre il serbatoio (1)
facendo attenzione a non danneggiare i tubicini al suo interno.
4. Riempire il serbatoio (1) con acqua fredda.
5. Rimettere il serbatoio (1) nella sua sede, controllando che i tubicini non siano piegati e che il filtro posto
all’estremità di uno di essi sia ben saldo, richiudere il coperchio (19).
6. Inserire la spina del cavo di alimentazione elettrica nella presa della corrente (verificarne il voltaggio).
7. Inserire il portafiltro (8) nell’anello di aggancio della sede del portafiltro (5) ruotandolo da sinistra verso
destra, in modo che si scaldi e che sia facilmente pronto per l’uso.
8. Accendere la macchina premendo l’interruttore generale (11). L’accensione della lampada spia dell’interruttore
stesso conferma l’alimentazione elettrica.
9. Aprire la manopola vapore/acqua calda (4).
10. Posizionare l’interruttore erogazione vapore (13) nella posizione acqua calda e alzare l’interruttore pompa
(22).
11. Quando dal beccuccio del tubo erogatore vapore/acqua calda (6) esce l’acqua, abbassare l’interruttore (22) e
chiudere la manopola vapore/acqua calda (4) e posizionare interruttore (13) su modalità caffè.
12. Dopo aver fatto tutte queste operazioni la macchina si può anche lasciare accesa.
13. Il regolatore di temperatura Termopid (21) visualizzerà i gradi della caldaia stessa, controllando il
riscaldamento.
14. Il regolatore di temperatura e’ impostato dalla fabbrica a 95°C, temperatura ideale per la preparazione del
caffè. (Se si desidera cambiare la temperatura del Termopid, seguire le istruzioni del paragrafo Regolazione
della temperatura in caldaia tramite il controllo Termopid).
Preparazione del caffè espresso con caffè macinato:
15. Controllare che il serbatoio (1) contenga acqua, verificandone il livello dal visualizzatore livello acqua nel
serbatoio (20).
16. Premere l’interruttore generale (11): la lampada spia dell’interruttore stesso si accende (solo se la macchina è
spenta, altrimenti passare al punto successivo). Posizionare l’interruttore (13) nella posizione caffè.
17. Non appena il display del Termopid (21) visualizza la temperatura impostata e la lampada spia pronto caffè
(14) si spegne, la macchina è pronta per l’uso.
18. Inserire il filtro 1 tazza (9) o 2 tazze (10) nel portafiltro (8) preventivamente riscaldato come indicato al punto
7.
19. Tramite la paletta (16) in dotazione, riempire il filtro con il caffè macinato come indicato di seguito:
-1 “paletta” = 1 tazza
-2 “palette” = 2 tazze
ad ogni “paletta di caffè” pressare il contenuto del filtro con l’apposito pressino (15) in dotazione, assicurarsi
che il bordo del portafiltro sia pulito, senza residui di caffè, i quali possono impedire al portafitro di essere
chiuso correttamente, generando perdite.
20. Inserire il portafiltro (8) nell’anello di aggancio della sede del portafiltro (5) ruotandolo da sinistra verso destra
con forza e successivamente posizionare le tazzine sulla grata removibile poggia tazza (7).
21. Alzare l’interruttore pompa (22).
22. Una volta raggiunta la quantità desiderata del caffè abbassare di nuovo l’interruttore (22).
23. Togliere il portafiltro (8) e gettare i fondi di caffè, verificare che sia pulito e reinserirlo nell’anello di aggancio
della sede del porta filtro (5) per mantenere il portafiltro stesso alla giusta temperatura.
Vapore:
24. Controllare che il serbatoio (1) contenga acqua, verificandone il livello dal visualizzatore livello acqua nel
serbatoio (20).
25. Premere l’interruttore generale (11): la lampada spia dell’interruttore stesso si accende (solo se la macchina è
spenta, altrimenti passare al punto successivo).
26. Posizionare l’interruttore (13) nella posizione vapore.
27. La lampada spia (14) e la lampada spia (3) si accendono e non appena la lampada spia pronto vapore (3) si
spegne, la macchina è pronta per erogare vapore nel modo giusto. ATTENZIONE: se si attende troppo e si
spengono entrambe le lampade spie la quantità di vapore erogato sarà meno costante.
28. Aprire la manopola vapore/acqua calda (4). All’inizio uscirà un po’ d’acqua seguita dal vapore.
29. Mettere sotto il tubo vapore erogatore vapore/acqua calda (6) il recipiente con la bevanda desiderata e aprire
la manopola (4).
30. A fine operazione chiudere la manopola vapore/acqua calda (4).

Pagina 6
ITALIANO
31. IMPORTANTE: dopo ogni erogazione di vapore, soprattutto se si utilizza il vapore per montare il latte per fare
un cappuccino, riaprire la manopola vapore/acqua calda (4), posizionare l’interruttore (13) sulla posizione
acqua calda e alzare l’interruttore pompa (22). Quando dal tubo erogatore vapore/acqua calda (6) esce
l’acqua, richiudere la manopola vapore/acqua calda (4), contemporaneamente abbassare l’interruttore pompa
(22) e riportare l’interruttore (13) in posizione caffè; pulire accuratamente l’erogatore vapore/acqua calda (6).
Questa operazione è necessaria per mantenere puliti i condotti acqua/vapore e ripristinare il circuito dell’acqua
all’interno dei condotti.
Acqua calda:
32. Controllare che il serbatoio (1) contenga acqua, verificandone il livello dal visualizzatore livello acqua nel
serbatoio (20).
33. Premere l’interruttore generale (11): la lampada spia dell’interruttore stesso si accende (solo se la macchina è
spenta, altrimenti passare al punto successivo).
34. Posizionare l’interruttore (13) nella posizione acqua calda.
35. Non appena il display del Termopid (21) visualizza la temperatura impostata e la lampada spia (14) si spegne
la macchina è pronta per l’uso.
36. Aprire la manopola vapore/acqua calda (4) ed alzare l’interruttore pompa (22).
37. Si otterrà immediatamente l’uscita di acqua dal tubo erogatore vapore/acqua calda (6).
38. Raggiunta la quantità d’acqua desiderata, abbassare nuovamente l’interruttore pompa (22), quindi chiudere la
manopola vapore/acqua calda (4).
39. Dopo il prelievo di acqua calda si raccomanda di controllare che il serbatoio (1) contenga ancora acqua.
REGOLAZIONE DELLA TEMPERATURA IN CALDAIA TRAMITE IL CONTROLLO TERMOPID (21):
Il Termopid e’ stato impostato dalla fabbrica a 95°c. Per poter intervenire sulla regolazione procedere come segue:
-premere il tasto ; non appena sul display compare la scritta “PRG” premere il tasto ;
-quando il display visualizza la temperatura della caldaia , impostare con i tasti e il valore della
temperatura desiderata, da un minimo di 80C° ad un massimo di 130C°.
-dopo 3 secondi dalla pressione dell’ultimo tasto il dato è memorizzato ed il display visualizza la temperatura.
NB: se la temperatura viene impostata ad una soglia troppo elevata, sotto la richiesta di erogazione caffè il display
comincerà a lampeggiare.
PULIZIA E CURA:
La pulizia e la manutenzione della macchina sono essenziali sia per la qualità dell’erogazione del caffè sia per la durata
dell’apparecchio nel tempo.
La pulizia della macchina deve essere fatta almeno una volta alla settimana.
Prima di iniziare, stacca la spina dalla presa di corrente e aspetta che l’apparecchio sia freddo.
Utilizza un panno morbido, preferibilmente in microfibra come quello Lelit (cod. MC972 - non incluso), e inumidiscilo con
semplice acqua. Non usare detersivi abrasivi e non immergere la macchina in acqua.
Per una manutenzione accurata ti consigliamo di usare la spazzolina Lelit (cod. PL106 non incluso) che ti consente di pulire
perfettamente le doccette e gli spazi tra le guarnizioni, eliminando tutte le incrostazioni e i residui di polvere di caffè anche
dalle fessure più piccole.
Per pulire le parti smontabili della macchina puoi usare acqua corrente tiepida. Non lavare in nessun caso i filtri e il
portafiltro in lavastoviglie.
Non è necessario pulire i filtri dopo ogni utilizzo, basta che ti accerti che i fori non siano ostruiti.
Al contrario, per mantenere alte le prestazioni della tua macchina è indispensabile che il tubo vapore/acqua calda e il
portafiltro vengano puliti attentamente dopo ogni utilizzo.
Detergi il portafiltro per rimuovere i residui grassi del caffè che influiscono negativamente sul gusto dell’espresso.
Lava la parte esterna del tubo vapore/acqua calda con un panno umido e fai passare un po’ di vapore nel tubo per eliminare
tutti i residui interni di latte che potrebbero ostruire il passaggio del vapore rendendo più difficile montare la schiuma in
maniera ottimale.
BACKFLUSHING:
Si consiglia di effettuare questa pulizia almeno una volta alla settimana e/o almeno ogni 100 caffè erogati
Le seguenti istruzioni sono valide per tutti i tipi di gruppi montati sulle nostre macchine per caffè espresso.
Materiale occorrente:
•Filtro cieco (codice MC754/C per portafiltri diametro 58)
•Spazzolina (codice PL106)
•Detergente macchina espresso (codice PL103)

Pagina 7
ITALIANO
Pulizia del gruppo erogatore. Operazioni da seguire:
1. Inserire nel portafiltro il filtro cieco
2. Depositare all’interno del filtro cieco 1 cucchiaino (3-5 grammi) di polvere detergente
3. Agganciare il portafiltro al gruppo erogatore della macchina
4. Azionare l’erogazione di caffè per 10 secondi circa
5. Fermare l’erogazione di caffè per 10 secondi circa
6. Senza togliere il portafiltro dal gruppo ripetere l’operazione per 5 volte
7. Rimuovere il portafiltro, azionare l’erogazione e risciacquare il portafiltro con l’acqua calda che esce dal gruppo
erogatore, fermare l’erogazione.
8. Passare la spazzolina sotto il gruppo erogatore, sulla guarnizione sottocoppa e sulle alette di aggancio del gruppo
erogatore. Pulire con un panno umido, asportando i residui delle polveri di caffè.
9. Riagganciare il portafiltro al gruppo erogatore e per risciacquare ripetere i punti 4-5-6 senza polvere detergente
10. Successivamente eliminate il primo caffè che andrete ad erogare
Pulizia per immersione degli accessori. Operazioni da seguire:
1. Mettere in un recipiente i filtri ed il portafiltro con il manico rivolto verso l’alto
2. Versare nel recipiente 3 cucchiaini (10 grammi) di polvere detergente
3. Versare nel recipiente acqua molto calda fino a coprire tutta la coppa metallica del portafiltro
4. Attendere almeno 15 minuti
5. Togliere i particolari immersi e risciacquarli con abbondante acqua potabile calda
6. Successivamente eliminate il primo caffè che andrete ad erogare
DECALCIFICARE LA MACCHINA:
L’utilizzo della macchina genera la naturale formazione di calcare, più o meno rapida in base alla frequenza di utilizzo
dell’apparecchio e alla durezza dell’acqua.
I depositi di calcare intasano i condotti e diminuiscono la temperatura di erogazione influenzando la qualità dell’estrazione
del caffè e riducendo la vita del tuo apparecchio.
Per evitare il formarsi di questo calcare che si deposita anche nei circuiti interni, ti consigliamo di utilizzare e sostituire
periodicamente il filtro addolcitore a resine Lelit (cod. MC747 - MC747PLUS non incluso) che, inserito nel serbatoio, purifica
l’acqua dai sali di calcio e magnesio che precipitando formano le incrostazioni di calcare e compromettono il gusto del tuo
caffè.
Ricordati che il filtro perde la sua efficacia dopo un certo numero di litri trattati. Come usarlo e quando sostituirlo è riportato
sulla confezione del filtro stesso.
Per evitare possibili danni ai componenti della macchina, INTRODURRE NEL SERBATOIO DELL’ACQUA ESCLUSIVAMENTE
DECALCIFICANTI NATURALI.
DATI TECNICI:
Alimentazione elettrica: 230V - 50Hz
Potenza: 1250 W
Tempo di riscaldamento: 10 minuti circa
Pressione pompa: 15 bar
Regolazione Termopid: da min. 80°C fino a max. 130°C
Capacità serbatoio acqua: 2,7 litri
Dimensioni (HxLxD): 23x27x34 cm
Peso: 9 Kg
Funzionamento: caffè macinato
PL41PLUST/110 –120V 60 Hz
CONDIZIONI DI GARANZIA
GARANZIA LEGALE
Questo prodotto è soggetto alle norme di garanzia vigenti nello stato in cui viene venduto; informazioni specifiche in
merito verranno fornite dal rivenditore o dall’importatore dello stato in cui avete acquistato il prodotto, che ne è
completamente responsabile.
L’importatore è completamente responsabile anche degli adempimenti necessari a norma di legge dello stato in cui
l’importatore stesso distribuisce il prodotto, compreso la gestione dello smaltimento a fine vita del prodotto.
Nei paesi europei fanno riferimento le leggi nazionali di attuazione della Direttiva Comunitaria 44/99/CE.

Pagina 8
ITALIANO
RISOLUZIONE DEI PROBLEMI PIÙ FREQUENTI:
La ringraziamo per aver acquistato in nostro prodotto, costruito secondo le ultime innovazioni tecnologiche.
Seguendo scrupolosamente le semplici operazioni riguardanti l’uso corretto del nostro prodotto in conformità alle
prescrizioni essenziali di sicurezza indicate nel presente manuale, potrà ottenere il massimo delle prestazioni e
verificare la notevole affidabilità di questo prodotto nel corso degli anni. Di seguito forniamo una pratica tabella
riportante alcuni malfunzionamenti e le loro relative rapide soluzioni:
PROBLEMA
CAUSA
SOLUZIONE
Non si forma la
crema sul caffè
1. La miscela di caffè non è adatta per il
tipo di macchina
2. La macinatura non è corretta
3. La quantità di caffè è insufficiente.
4. Il portafiltro non è stato agganciato
bene
1. Sostituire il caffè
2. Regolare la macinatura del caffè
3. Aumentare la dose del caffè e pressarlo
adeguatamente
4. Stringere meglio il portafiltro
Il caffè esce troppo
freddo
1. La macchina non era alla giusta
temperatura
2. Mancato preriscaldamento del
portafiltro
3. Mancato preriscaldamento delle tazze
4. Il termoPID non lavora entro i valori
ottimali
1. Rispettare le indicazioni riportate nei paragrafi
“Messa in funzione della macchina” e “Preparazione
del caffè espresso”
2. Il portafiltro deve essere riscaldato
contemporaneamente all’acqua, vedi paragrafo
“Messa in funzione della macchina”
3. Scaldare adeguatamente le tazze
sull’apposito scadatazze (2)
4. Impostare i valori del PID.
Il caffè esce troppo
rapidamente
1. Il caffè è macinato troppo grosso
2. La quantità di caffè è insufficiente
3. Pressatura del caffè insufficiente
4. Caffè vecchio o inadatto
1. La regolazione della macinatura deve essere più
fine
2. Aumentare la dose di caffè
3. Premere maggiormente il caffè
4. Sostituire il caffè/cialda
Il caffè esce tra il
gruppo erogazione
ed il portafiltro
1. Il portafiltro non è inserito
correttamente
2. Eccessiva quantità di caffè nel filtro
3. Il bordo del portafiltro non è stato
pulito
4. La guarnizione sottocoppa è usurata
1. Inserirlo in modo corretto
2. Diminuire la quantità di caffè
3. Togliere i residui di caffè dal bordo del portafiltro
e pulire la guarnizione sottocoppa
4. Rivolgersi al CENTRO DI ASSISTENZA
Il caffè esce a gocce
1. Il caffè è macinato troppo fine
2. La quantità di caffè è eccessiva
3. Eccessiva pressatura del caffè
1. La regolazione della macinatura deve essere più
grossa
2. Diminuire la quantità di caffè
3. Pressare meno il caffè
La macchina non
eroga vapore
1. Il foro del terminale del tubo vapore
è ostruito
2. Manca acqua nel serbatoio
1. Pulire il foro con l’ausilio di un ago
2. Vedi paragrafo “Messa in funzione della
macchina”
Durante l’erogazione
non esce caffè
1. Manca acqua nel serbatoio
2. Interruttore (13) non è posizionato
correttamente
3. Il caffè è macinato troppo fine
4. La quantità di caffè è eccessiva
5. Il caffè è troppo pressato
6. Doccetta sporca
1. Introdurre acqua nel serbatoio
2. Posizionare l’interruttore (13) su caffè
3. Sostituire con una macinatura più grossa
4. Diminuire la quantità di caffè nel filtro
5. Pressare meno il caffè
6. Rivolgersi al CENTRO DI ASSISTENZA
La macchina non
funziona e la
lampada spia
tensione non si
accende
1. Manca la corrente
2. La spina del cavo di alimentazione
non è inserita correttamente
3. Il cavo di alimentazione è
danneggiato
1. Ripristinare la corrente
2. Inserire correttamente la spina del cavo di
alimentazione nella presa di corrente
3. Rivolgersi al CENTRO DI ASSISTENZA per la
sostituzione
La spia di accensione
è accesa e la spia
pronto vapore non si
accende entro 10
minuti
1. I termostati di servizio non
funzionano
2. La resistenza è interrotta oppure
bruciata
1. Rivolgersi al CENTRO DI ASSISTENZA
2. Rivolgersi al CENTRO DI ASSISTENZA
I dati e le immagini riportati potranno subire variazioni senza preavviso al fine del miglioramento delle prestazioni
della macchina.

Pagina 9
English
DESCRIPTION:
1. Cold water tank
2. Cup warmer
3. Indicator light: steam ready
4. Steam/hot water knob (on the right side)
5. Filter holder retaining ring
6. Steam/hot water arm
7. Removable water drainage tray
8. Filter holder
9. Single cup filter
10. Two cup filter
11. On/off switch (on the left side)
12. \
13. Coffee/hot water/steam lever switch
14. Indicator light: coffee ready
15. Coffee press/tamper
16. Measuring spoon
17. \
18. \
19. Removable water tank cover
20. Water level indicator
21. PID temperature controller
22. Pump lever switch
GENERAL WARNINGS
This manual is an integral and essential part of the product. Please read all these warnings carefully as they
provide important information on safe installation, use and maintenance. These instructions should be carefully
retained for future reference.
- This appliance can be used by children aged from 8 years and above and persons with reduced physical, sensory or mental
capabilities or lack of experience and knowledge if they have been given supervision or instruction concerning use of the ap-
pliance in a safe way and understand the hazards involved. Children shall not play with the appliance. Cleaning and user
maintenance shall not be made by children without supervision.
- This appliance can be used by children aged from 8 years and above if they have been given supervision or instruction
concerning use of the appliance in a safe way and if they understand the hazards involved. Cleaning and user maintenance
shall not be made by children unless they are older than 8 and supervised. Keep the appliance and its cord out of reach of
children aged less than 8 years.
- Appliances can be used by persons with reduced physical, sensory or mental capabilities or lack of experience and
knowledge if they have been given supervision or instruction concerning use of the appliance in a safe way and understand
the hazards involved. Children shall not play with the appliance.
- This appliance is intended to be used in household and similar applications such as: staff kitchen areas in shops, offices
and other working environments; farm houses; by clients in hotels, motels and other residential type environments; bed and
breakfast type environments.
- The appliance is only designed for making espresso coffee or hot drinks using the hot water or steam tubes and for pre-
heating cups.
- Store the packaging material (plastic bags, polystyrene, etc.) out of the reach of children.
- The appliance is only designed for making espresso coffee or hot drinks using the hot water or steam wands and for pre-
heating cups.
- Any use other than that described above is improper and could be ha-zardous; the manufacturer accepts no liability
whatsoever for any damage arising from improper use of the appliance.
- This appliance is not intended for use by persons (including children) with reduced physical, sensory or mental capabilities,
or lack of experience and knowledge, unless they have been given supervision or instruction concerning use of the appliance
by a person responsible for their safety.
- Children must not be allowed to play with the appliance.
- The appliance must not be left unattended or used outdoors.
- The appliance should not be immersed in water or cleaned by spraying
- The appliance must not be exposed to atmospheric agents (rain, sun, ice).
- If the appliance is stored in rooms where the temperature can go below freezing, the tank and the water pipes must be
emptied.
- All the packing material (plastic bags, polystyrene, etc.) should be keep out of the reach of children.
- No liability is accepted for the use of unauthorized spares and/or accessories.
- No liability is accepted for repairs not carried out by authorized service centres.
- The manufacturer accepts no liability for tampering with any of the appliance components.
In all the above cases the warranty will be void.

Pagina 10
English
ESSENTIAL SAFETY WARNINGS
As with all electrical appliances, the risk of electric shock cannot be excluded, therefore, the following safety
warnings should be carefully observed.
To avoid spilling the connector, never pull the power cord.
- Always attach plug to appliance first, then plug cord into the wall outlet.
- To disconnect the appliance, turn any control to “off”, then remove plug from wall outlet.
- In the event of any fault or malfunction, do not attempt to carry out repairs. Switch the appliance off, remove the plug and
contact the Service Centre.
- In the event of damage to the plug or the power cord, do not operate the appliance, these should be replaced only and
exclusively by the Service Centre.
- Unplug from outlet when not in use.
- Before cleaning the exterior surfaces of the appliance, putting on or taking off parts, switch it off, remove the plug from
the outlet and allow to cool.
- To reduce the risk of injury do not drape cord over the counter top or table top where it can be pulled on by children or
tripped over unintentionally.
- Do not let cord touch hot surfaces.
- Do not let cord hang over edge of table or counter.
- The use of accessory attachments not recommended by the appliance manufacturer may result in fire, electric shock or
injury to persons.
- Do not place on or near a hot gas or electric burner, or in a heated oven.
- Before switching on, ensure that the power supply voltage corresponds to that indicated on the plate on the base of the
appliance and that the power supply is properly earthed.
- Do not tamper with the appliance. Contact an authorized technician or the nearest service centre for any problem.
- Do not touch the appliance if your hands or feet are wet.
- Do not touch the plug with wet hands.
- Ensure that the electrical outlet is always freely accessible so that the plug can be easily removed when necessary.
- When removing the plug, always hold it directly. It should never be removed by pulling on the power cord, as this can
cause damage.
- To protect against fire, electric shock and injury to persons do not immerse cord, plugs in water or other liquid.
- Do not use adapters, multiple so-ckets or extension cords. If their use is unavoidable, use simple adapters or multiple
sockets and extension cords that conform to current safety standards, taking care not to exceed the current limit marked on
the simple adapter or extension cord, or the ma-ximum capacity of the multiple socket.
WARNING ABOUT BURN/SCALD RISKS
This appliance produces hot water and steam; therefore the following safety warnings should be strictly ob-
served
- Warning: hot surfaces remain hot for a certain time also after use.
- Take care to avoid contact with water spray or jets of steam.
- When the appliance is switched on, do not touch the cup warming plate as it is hot.
- Never direct the steam or water spray towards your body.
- Be careful when touching the steam/ hot water dispensing wand (6).
- Never remove the filter holder (8) during operation.
- The parts labelled “CAUTION HOT” are very hot, so approach and ope-rate them with maximum caution.
- Only place cups and glasses for use with the coffee machine on the cup warmer (2). Other objects should not be placed
there.
- Dry the cups thoroughly before pla-cing them on the cup warmer (2).

Pagina 11
English
USER INSTRUCTIONS:
Starting of the machine:
1. Remove the machine from its packing and make sure all packing parts have been taken off (including the
protection bags).
2. Lay the machine on a flat and steady surface far away from hot places and from the water taps.
3. Remove the water tank cover (19) on the top of the machine and take out the water tank (1) paying attention
not to damage the water tubes inside the tank.
4. Fill the tank (1) with cold water.
5. Replace the water tank back in the machine and check that the water tubes are not bent and that the filter is
well set on one of them; reposition the tank cover (19).
6. Plug in the machine in the mains. Make sure that the wall socket has the right voltage.
7. Place the filter holder (8) under the brewing group (5) and turn it from the left to the right. Leave it there so
that it can get warm and it gets ready for use.
8. Turn the machine on by pushing the on /off switch (11). The indicator light of the switch (11) comes on to
confirm the power supply.
9. Open the steam/hot water knob (4).
10. Position the lever switch (13) on hot water mode and lift the pump switch up (22).
11. Once water comes out of the steam nozzle (6), push the pump switch (22) down and close the steam/hot
water knob (4). Position the toggle switch (13) on coffee mode.
12. After completing all these operations, leave the machine on.
13. The PID (21) will visualize the degrees inside the boiler and will control the boiler’s heating.
14. The PID is already set from the producer on 95°C, i.e. the ideal temperature for a good cup of coffee. (If you
want to change the PID’s temperature, please follow the instructions written under How to set the
temperature inside the boiler by means of the PID).
Preparing an espresso:
15. Check that the water tank (1) has been filled in with water by looking at the water level indicator (20).
16. Press the on/off switch (11): the indicator light of the switch (11) will come on. Do this operation only if the
machine is off. If it’s on pass to the following point.
17. As soon as the PID’s display (21) shows the set temperature and the indicator light (14) goes off, the machine
is ready for use. Position the lever switch (13) on coffee mode.
18. Fit the single cup filter (9) or the two cup filter (10) into the filter holder (8) that has been warmed up by
leaving it attached to the brewing group as described in point 7.
19. Fill the filter with ground coffee by means of the supplied measure spoon (16): 1 measuring spoonful (16) = 1
coffee cup - 2 measuring spoonful (16) = 2 coffee cups. Every time you fill the filter with a spoonful of coffee,
press the coffee with the coffee press/tamper (15) before proceeding to fill it with the next spoonful and make
sure that there are no coffee rests on the filter border.
20. Insert the filter holder (8) in the brewing group ring (5), turn it from left to right with force, and then put the
cup on the removable water drainage tray (7).
21. Push the pump switch (22) up.
22. Once you get the desired quantity of coffee, push the pump switch (22) down.
23. Remove the filter holder (8) and throw away the coffee grounds. Make sure that the filter holder is clean and
reposition it in the brewing group to warm up again.
Steam:
24. Check that the water tank (1) has been filled in with water by looking at the water level indicator (20).
25. Press the on/off switch (11): the indicator light of the switch (11) will come on. Do this operation only if the
machine is off. If it’s on pass to the following point.
26. Position the lever switch (13) on steam mode.
27. The lights (14) and (3) will go on and once the indicator light (3) goes off the machine is ready for a good and
constant steam distribution. ATTENTION: if you’ll wait to much and both lights will go off, the steam quantity
will be less constant.
28. Open the steam/hot water knob (4). First some water will flow out and then the steam.
29. Put the cup with the desired infusion under the steam tube (6) and turn the knob (4).
30. Once the drink has been suitably frothed, close the steam/hot water knob (4).
31. IMPORTANT: after you have frothed your milk, reopen the steam/hot water knob (4), position the steam
switch (13) on hot water, and lift the pump switch (22) up. When the water flows out of the steam tube (6),
close the steam/hot water knob (4), at the same time push the switch (22) down and re-position the switch
(13) on coffee mode. Clean carefully the steam/hot water tube (6). This operation is needed in order to
restore the water circuit inside the machine’s tubes.
Hot water:
32. Check that the water tank (1) contains enough water by looking at the water level indicator (20).
33. Press the on/off switch (11): the indicator light of the switch (11) will come on. Do this operation only if the
machine is off. If it’s on pass to the following point.
34. Position the lever switch (13) on hot water.
35. As soon as the PID’s display (21) shows the set temperature and the indicator light (14) goes off, the machine
is ready for use.

Pagina 12
English
36. Open the steam/hot water knob (4) and lift the pump switch (22) up.
37. Hot water will flow out from the steam arm (6) immediately.
38. Once you have got the desired quantity of water, repress the switch (22) down and close the steam/water
knob (4).
39. After obtaining hot water from the arm (6), make sure that there is still water in the tank (1).
HOW TO SET THE BOILER’S TEMPERATURE BY MEANS OF THE PID:
The PID has been set by the producer of this machine on a temperature of 95°C. In order to change the temperature
please proceed as follows:
-press the button ; as soon as the display shows the writing “PRG” press the button ;
-as soon as the display shows the boiler’s temperature, help yourself with the buttons and in
order to set the desired temperature, starting from a min. of 80C° up to a max. of 130C°.
-after 3 sec. from pressing the last button, the inserted temperature is memorized and the display shows the
set temperature.
NB: if the temperature is set too high, once a coffee request is made, the display starts to flash.
USEFUL TIPS:
- The single cup filter basket (9) and the two cup filter basket (10) do not need to be washed after each use but
please check that the holes are not obstructed.
- For best results, we suggest warming the cups up on the cup warmer (2) which works only when the machine
is on.
- The PID (21) is already set by the producer on the right temperature for an excellent espresso. During heating
and coffee or water distribution, the temperature can oscillate (+/- 10/12°C). Also, a warning has been
inserted: after 108°C the PID’s display shows the temperature but intermittently; this is normal and it warns
the user that the coffee will not be good if made with such high temperature.
CLEANING AND MAINTENANCE
Cleaning and maintenance of the machine are essential for the quality of the coffee and the durability of the
appliance.
Cleaning
The machine must be cleaned at least once a week.
Before starting, remove the plug from the electrical outlet and allow the machine to cool.
Use a soft cloth, preferably microfiber, like the Lelit cloth (code MC972 - not included), and moisten
it with plain water. Do not use abrasive detergents and do not immerse the machine in water.
For thorough maintenance, we suggest you use the Lelit brush (code PL106 - not included), which will help you clean
the nozzles and the spaces between the gaskets more effectively, removing stains and coffee residues from even the
smallest cracks.
Warm running water can be used to clean the removable parts of the machine. The filters and filterholder should
never be washed in a dishwasher.
There is no need to clean the filters after each use, but just to ensure they are not clogged.
However, to ensure the best performance from your machine, it is essential to thoroughly clean the steam wand and
filterholder after each use.
The filterholder should be cleaned to remove the greasy coffee residues that can negatively affect the taste of your
espresso.
Wash the exterior part of the steam wand with a damp cloth and release a little steam to remove any milk residues
from inside the tube, as these could obstruct the steam output, making it more difficult to froth milk properly.

Pagina 13
English
BACKFLUSHING:
It is recommended to perform this cleaning at least once a week and / or at least every 100 brewed coffees
The following instructions apply to all types of groups fitted to our espresso machines.
Material needed:
•Blind filter (code MC754/C for portafilters with 58mm diameter)
•Brush (code PL106)
•Detergent powder for espresso machine (code PL103)
Group cleaning. Follow these steps:
1. Place the blind filter in the portafilter
2. Add 1 tea spoon of detergent powder (3-5 grams) in the blind filter
3. Insert the portafilter into the brewing group
4. Switch the espresso switch on for about 10 seconds
5. Stop the espresso brewing and wait for 10 seconds
6. Without removing the portafilter, repeat this operation 5 times
7. Remove the portafilter, switch the espresso switch on again and rinse the portafilter under the hot water that
comes out of the group. Turn the switch off
8. Clean the brew group and the brew gasket first with the brush and then with a damp cloth in order to
remove all coffee powder rests
9. Insert the portafilter into the brew group again and repeat points 4-5-6 without detergent powder
10. Throw away the first espresso you’ll brew
Cleaning of the accessories through immersion. Follow these steps:
1. Place the filters and portafilter in a jug with the portafilter handle upwards
2. Pour 3 tea spoons of detergent powder in the jug (10 grams)
3. Pour 1 liter of hot water in the jug until the metallic part of the portafilter is completely immerged
4. Wait at least 15 minutes
5. Remove the immerged parts and rinse them with plenty of warm tap water
6. Throw away the first espresso you’ll brew
DESCALING THE MACHINE
Use of the machine creates a natural formation of lime scale, over a time period depending on how frequently the
machine is used and on the hardness of the water.
Lime scale deposits can obstruct the tubes and decrease the brewing temperature, altering the quality of the coffee
and reducing the lifetime of your machine.
To avoid the formation of limescale, which can also deposit in the internal circuits, we recommend the use of our Lelit
resin filter (code MC747 - MC747PLUS - not included) to soften the water. Please insert the filter in the tank following
the instructions on the packaging. The filter purifies the water from the calcium and magnesium salts which are
deposited to form lime scale and affect the taste of your coffee. Remember that the filter loses its effectiveness after
a certain number of gallons treated, so replace it periodically. Instructions for the use and replacement of the filter
are given on the box.
To avoid any possibility of damaging the machine’s components, ADD ONLY NATURAL DESCALING PRODUCTS INTO
THE WATER TANK.
TECNICAL DATA:
Voltage: 230 V –50 Hz
Power: 1250 W
Heating time: ca. 10 min.
Pump pressure: 15 bar
PID’s regulation: from 80°C up to 130°C
Water tank: 2,7 litres
Dimensions (HxLxD): 23x27x34 cm
Weight: 9 kg
To be operated with ground coffee
PL41PLUST/110 –120V 60 Hz

Pagina 14
English
TROUBLESHOOTING:
We thank you for buying one of our products, projected and assembled in accordance with the most up-to date
technological innovations.
Following carefully the simple operations described in this manual, which respect all essential safety regulations, you
will get the best performances and will appreciate the remarkable reliability of this product in the years to come.
Please find below the description of the most frequent problems and of their solution:
PROBLEM
CAUSE
SOLUTION
Coffee is not creamy
1. Coffee blend not suitable for machine
2. Improper grinding
3. Insufficient coffee in filter basket
4. The filter holder has not be tightened
under the brewing group ring
1. Use a different coffee blend
2. Adjust coffee grinding
3. Put more coffee in the filter basket and press
it properly
4. Tighten better the filter holder
The coffee is too cold
1. The machine had not reached the
proper temperature
2. Filter-holder has not been preheated
3. Cups have not been preheated
4. ThermPID malfunctions.
1. See section “Starting the Machine” and
“Making an Espresso Coffee”
2. Filter-holder must be heated together with
the water –see section “Starting the Machine”
3. Properly heat the cups on the cup-warmer
(2)
4. Set the PID correctly.
The coffee comes out too
quickly
1. Coffee too coarsely ground
2. Insufficient coffee in the filter basket
3. Coffee has not been pressed enough
4. Old or unsuitable coffee
1. Use a finer grinding step
2. Put more coffee in the filter basket
3. Press the coffee more firmly
4. Use a different coffee blend
Coffee comes out
between the coffee group
and the filter-holder
1. Filter-holder not properly inserted
2. Too much coffee in the filter
3. Edge of the filter-holder not clean
4. The douche seal is worn or damaged
1. Insert the filter-holder correctly
2. Put less coffee in the filter
3. Clean the edge of the filter-holder and the
brewing group seal
4. Contact the nearest SERVICE CENTER
Coffee comes out in drops
1. Coffee too finely ground
2. Too much coffee in the filter
3. Coffee too firmly pressed
1. Use a coarser grinding
2. Put less coffee in the filter
3. Press the coffee more gently
The machine does not
produce steam
1. The water tube hole may be
obstructed
2. Lack of water in the tank
1. Clean the hole with a needle
2. See section “Starting the Machine”
No coffee produced during
the coffee cycle
1. Lack of water in the tank
2. Switch (13) not in right position
3. Coffee too finely ground
4. Too much coffee in the filter
5. Coffee too firmly pressed
6. The brewing group douche is dirty
1. Fill the tank
2. Position the switch (13) on coffee mode.
3. Use a coarser grinding
4. Put less coffee in the filter basket
5. Press the coffee more gently
6. Contact the nearest SERVICE CENTER
The machine does not
work and the ON light on
the main switch does not
come on
1. No electricity
2. The power cable is not properly
plugged in
3. The power cable is damaged
1. Restore electrical power
2. Plug in the power cable correctly
3. Contact the nearest SERVICE CENTER for a
replacement cable
The ON light on the main
switch is on but the ready
steam indicator does not
go on within 10 minutes
1. Thermostat malfunction
2. Heating element malfunction
1. Contact the nearest SERVICE CENTER
2. Contact the nearest SERVICE CENTER
The inserted data and pictures can be subject to changes without previous notice for the improvement of the machine’s
performances.
WARRANTY TERMS: LEGAL WARRANTY
This product is covered by the warranty laws valid in the country where the product has been sold; specific
information about the warranty terms can be given by the seller or by the importer in the country where the product
has been purchased. The seller or importer is completely responsible for the product. The importer is completely
responsible also for the fulfilment of the laws in force in the country where the importer distributes the product,
including the correct disposal of the product at the end of its working life.
Inside the European countries the laws in force are the national laws implementing the EC Directive 44/99/CE.

Pagina 15
Français
DESCRIPTION:
1. Réservoir
2. Chauffe tasses
3. Voyant lumineux vapeur prête
4. Bouton vapeur/eau chaude (sur la partie
droite)
5. Siège porte filtre
6. Distributeur vapeur/eau chaude
7. Grille amovible appuie tasse
8. Porte filtre
9. Filtre 1 tasse
10. Filtre 2 tasses
11. Interrupteur général on/off (sur la partie
gauche)
12. \
13. Interrupteur café/eau chaude/vapeur
14. Voyant lumineux café prêt
15. Tasseur à café/Tamper
16. Mesure à café
17. \
18. \
19. Couvercle amovible réservoir
20. Verre niveau de l’eau réservoir
21. PID
22. Interrupteur pompe
Avertissements généraux
Le présent manuel est une partie intégrante et essentielle du produit. Lisez attentivement les
instructions qu’il contient car elles donnent des indications importantes concernant la sécurité
d’installation, d’utilisation et l’entretien. Conservez soigneusement ces instructions pour les consulter
ultérieurement.
- Conservez tous les emballages (sacs en plastique, mousse de polystyrène, etc.) hors de la portée des enfants.
- Cet appareil est projeté uniquement pour la préparation de café expresso et boissons chauds, à travers l’eau
chaude ou la vapeur, et pour le pré-réchauffement des tasses.
- Cet appareil est conçu pour un usage domestique ou pour des applications semblables, telles que : cuisine du
personnel dans les commerces, les bureaux et les autres espaces de travail ; fermes ; par les clients dans les hôtels,
les motels et les autres types de logements ; bed & breakfast et équivalents. Cet appareil n’est pas indiqué pour le
fonctionnement continu de type professionnel.
- Gardez l’appareil et son cordon hors de la portée des enfants.
- Ces instructions mettent en garde contre l’usage impropre.
- Ne jamais installer l’appareil dans une zone où on pourrait utiliser le jet d’eau.
- Les appareils peuvent être utilisés par des enfants âgés de 8 ans et plus et par des personnes aux capacités
physiques, sensorielles ou mentales réduites, ou manquant d’expérience et de connaissance sous la surveillance d’un
tiers ou en suivant les indications sur la façon d’utiliser l’appareil en toute sécurité en toute conscience des dangers
potentiels.
- L’appareil doit être installé dans un endroit où il peut être utilisé seulement par des personnes informées et qui en
ont la connaissance, en particulier pour ce qui concerne les normes de sûreté et d’hygiène.
- Aucune responsabilité ne saurait être engagée en cas de manipulation de l’un des composants de l’appareil.
- Le nettoyage et l’entretien ne doivent pas être effectués par des enfants sans surveillance.
- Toute utilisation autre que celle indiquée précédemment est inappropriée et peut être source de danger ; le
producteur décline toute responsabilité en cas de dommages résultants d’une mauvaise utilisation de l’appareil.
- Aucune responsabilité ne saurait être engagée en cas d’utilisation de pièces de rechange et/ou d’accessoires qui ne
sont pas originaux.
- Aucune responsabilité ne saurait être engagée en cas de réparations effectuées ailleurs que dans les centres service
après-vente autorisés.
- L’appareil ne peut pas être laissé sans surveillance et utilisé à l’extérieur.
- Ne pas laisser l’appareil exposé aux agents atmosphériques (pluie, soleil, gel).
- Si l’appareil reste stocké dans des espaces où la température peut se baisser jusqu’au gel, vider la chaudière et les
circuits de l’eau.
- Ne pas nettoyer avec des jets d’eau, ni plonger l’appareil (entier ou parties de l’appareil) dans l’eau ou d’autres
liquides.
Dans tous les cas énoncés précédemment, la garantie n’est pas valable.

Pagina 16
Français
Consignes de sécurité essentielles
Étant donné que l’appareil est un appareil électrique, le risque de choc électrique ne peut pas être exclu.
Il faut donc respecter scrupuleusement les remarques de sécurité suivantes :
- Avant la mise sous tension, assurez-vous que la valeur de la tension du réseau correspond à la tension indiquée sur
l’étiquette appliquée sur la carrosserie de l’appareil et que l’installation électrique est dotée d’une mise à terre.
- Ne pas altérer l’appareil. En cas de problème, s’adresser au technicien autorisé ou au centre service après-vente
autorisé le plus voisin.
- Ne jamais toucher l’appareil si vos mains ou vos pieds sont mouillés.
- Ne pas toucher la prise avec les mains mouillées.
- S’assurer que la prise de courant utilisée reste librement accessible, pour permettre de débrancher la fiche élec-
trique si nécessaire.
- Pour débrancher la fiche électrique tirer directement sur celle-ci. Ne jamais tirer sur le câble d’alimentation car il
pourrait être endommagé.
- Pour débrancher complètement l’appareil, retirer la fiche de la prise de courant.
- Si l’appareil est défectueux, ne pas tenter de le réparer. Éteindre l’appareil, débrancher la fiche électrique de la
prise et s’adresser au service d’assistance technique.
- En cas de dommages à la fiche électrique ou au câble d’alimentation, les faire remplacer exclusivement par le
centre service après-vente.
- Ne pas utiliser adaptateurs, prises multiples ou rallonges. Si leur utilisation est indispensable, choisir uniquement
des adaptateurs simples ou multiples et des rallonges conformes aux normes de sécurité en vigueur, en prenant soin
de ne pas dépasser la valeur maximale de débit de courant indiquée sur l’adaptateur simple, sur les rallonges ainsi
que la puissance maximale indiquée sur l’adaptateur multiple.
- L’utilisation des adaptateurs non recommandés ou vendus par le producteur peut causer incendie, électro choque
ou blessure.
- Débrancher l’appareil lorsqu’il n’est pas surveillé et avant de le monter, démonter et nettoyer.
- Pour réduire le risque de blessure, éviter que le câble d’alimentation pende librement de la table et ne pas le laisser
en proximité de surfaces chaudes, y compris le four, angles ou objets tranchants.
Avertissements sur le risque de brûlure
Cet appareil produit de l’eau chaude et de la vapeur. Respecter donc scrupuleusement les remarques
suivantes concernant la sécurité.
- Eviter tout contact avec les projections d’eau ou les jets de vapeur.
- Lorsque l’appareil est sous tension ne pas toucher le plan chauffe-tasses car il est chaud.
- Ne jamais diriger le jet de vapeur ou d’eau chaude vers des parties du corps.
- Toucher avec précaution la buse vapeur / eau chaude (6).
- Ne jamais retirer le porte-filtre (8) pendant la préparation du café.
- Les pièces marquées par l’étiquette « CAUTION HOT » sont des pièces très chaudes, approchez-les et manipulez-les
avec un maximum de prudence.
- Placer sur le chauffe-tasses (2) seulement des petites tasses, des tasses et des verres pour le service de la machine
expresso. Il est interdit de placer d’autres objets sur le plan chauffe-tasses.
- Essuyer attentivement les tasses avant de les placer sur le plan chauffe-tasses (2).

Pagina 17
Français
MODE D’EMPLOI:
Mise en fonction de la machine:
1. Otez la machine de la boite et éloignez tous les sachets et le matériel d’emballage.
2. Positionnez la machine sur une surface stable et plane, loin de fontes de chaleur et de robinets du réseau
hydrique.
3. Enlevez le couvercle amovible (19) du réservoir et ôtez le réservoir (1) en faisant attention à ne pas
endommager les tubes à l’intérieur.
4. Remplissez le réservoir (1) avec de l’eau froide.
5. Remettez le réservoir (1) dans son siège, en contrôlant que les tubes ne soient pliés et que le filtre mis à
l’extrémité d’un des deux tubes soit bien fixé. Remettez le couvercle (19).
6. Insérez la fiche du câble d’alimentation dans la prise de courant (vérifiez le voltage).
7. Insérez le porte filtre (8) dans le siège filtre (5) en tournant de gauche à droite, de sorte qu’il se réchauffe et
qu’il soit prêt à l’emploi.
8. Allumez la machine en appuyant sur l’interrupteur général (11). Le voyant lumineux de l’interrupteur même
s’illuminera pour confirmer l’alimentation au réseau électrique.
9. Ouvrez le bouton vapeur/eau chaude (4).
10. Positionnez l’interrupteur à levier (13) sur eau chaude et levez l’interrupteur pompe (22).
11. Lorsque l’eau sort du bec de la buse de vapeur (6), abaissez l’interrupteur (22) et fermez le bouton
vapeur/eau chaude (4). Ensuite positionnez l’interrupteur (13) en position café.
12. Lorsque ces opérations sont terminées, la machine peut rester branchée.
13. Le PID (21) montre les degrés à l’intérieur de la chaudière, en contrôlant la réchauffement.
14. Le PID est déjà régulé par le producteur de cette machine à 95°C, c’est à dire la température optimale pour la
préparation d’un bon café. (Si vous désirez changer cette température, vous êtes prié de suivre les
instructions fournies dans le paragraphe Comment réguler la température dans la cuve avec l’aide du PID)
Préparation du café expresso avec du café moulu:
15. Contrôlez que le réservoir (1) contient de l’eau, en regardant le verre niveau de l’eau (20).
16. Appuyez sur l’interrupteur général (11). Le voyant de l’interrupteur (11) s’allume (faites ces opérations
seulement si la machine est éteinte, autrement passez au point suivant). Positionnez l’interrupteur (13) en
position café.
17. Dès que l’écran du PID (21) montre la température régulée et que le voyant café prêt (14) s’éteint, la machine
est prête à l’emploi.
18. Insérez le filtre (9) 1 tasse ou le filtre 2 tasses (10) dans le porte-filtre (8), après l’avoir fait réchauffer comme
décrit au point 7.
19. Avec l’aide de la mesure à café (16) en dotation, (1 mesure = 1 tasse; 2 mesures = 2 tasses), remplissez le
filtre avec le café moulu. Après chaque mesure mise dans le filtre utilisez le tamper (15) en dotation pour
presser le café. Assurez-vous que le bord du portefiltre soit propre, sans traces de café, qui pourraient
empêcher la fixation correcte du portefiltre, en causant des pertes.
20. Insérez le porte filtre (8) dans le siège du porte-filtre (5) en le tournant, avec force, de gauche vers la droite;
ensuite positionnez les tasses sur la grille appuie tasses (7).
21. Levez l’interrupteur pompe (22).
22. Lorsque la quantité de café souhaitée est atteinte, abaissez de nouveau l’interrupteur (22).
23. Enlevez le porte-filtre (8) et jetez le marc de café, vérifiez qu’il soit propre et insérez-le dans le support (5)
pour le maintenir à la juste température.
Vapeur:
24. Contrôlez que le réservoir (1) contient de l’eau, en regardant le verre niveau du réservoir (20).
25. Appuyez sur l’interrupteur général (11). Le voyant de l’interrupteur même s’allume (faites ces opérations
seulement si la machine est éteinte, autrement passez au point suivant).
26. Positionnez l’interrupteur (13) sur vapeur.
27. Les voyants (14) et (3) s’allument et dès que le voyant vapeur prête (3) s’éteint, la machine est prête à
distribuer une bonne quantité de vapeur. ATTENTION : si on attend trop de temps et les 2 voyants lumineux
s’éteignent la quantité de vapeur sera moins constante.
28. Ouvrez le bouton vapeur/eau chaude (4). Au début il y aura une perte d’eau et de la vapeur.
29. Mettez, sous la buse vapeur (6), le récipient contenant la boisson souhaitée et tournez complètement le
bouton (4).
30. A la fin de l’opération, refermez le bouton vapeur/eau chaude (4).
31. IMPORTANT: après chaque utilisation de la vapeur, surtout si cela a été utilisée pour faire la crème du lait
pour la préparation d’un cappuccino, ouvrez de nouveau le bouton vapeur/eau chaude (4), positionnez
l’interrupteur (13) sur eau chaude et levez l’interrupteur (22). Quand l’eau commence à sortir de la buse
vapeur/eau chaude (6), fermez le bouton vapeur/eau chaude (4), simultanément abaissez l’interrupteur (22)
et remettez l’interrupteur (13) en fonction café; nettoyez la buse vapeur/eau chaude (6). Cette opération est
nécessaire pour maintenir les conduits eau/vapeur propres et rétablir le circuit de l’eau dans les conduits.

Pagina 18
Français
Eau chaude:
32. Contrôlez que le réservoir (1) contient de l’eau, en regardant le verre niveau du réservoir (20).
33. Appuyez sur l’interrupteur général (11). Le voyant de l’interrupteur même s’allume (seulement si la machine
est éteinte, autrement passer au point suivant).
34. Positionnez l’interrupteur (13) sur eau chaude.
35. Lorsque l’écran du PID (21) montre la température régulée et le voyant (14) s’éteint, la machine est prête à
l’emploi.
36. Ouvrez le bouton de vapeur/eau chaude (4) et levez l’interrupteur pompe (22).
37. Il y aura immédiatement une sortie d’eau de la buse vapeur (6).
38. Lorsque la quantité d’eau souhaitée est atteinte, abbaissez de nouveau sur l’interrupteur (22) et refermez le
bouton de vapeur/eau chaude (4).
39. Après le prélèvement d’eau chaude, il est recommandé de contrôler que le réservoir (1) contient de l’eau.
COMMENT REGULER LA TEMPERATURE DANS LA CHAUDIERE AVEC L’AIDE DU PID (21):
Le PID a été régulé à 95°C. Pour changer la température vous êtes prié de suivre les points suivants:
-appuyez sur le bouton ; dès que l’écran du PID montre l’écriture “PRG” appuyez sur le bouton
-quand l’écran du PID montre la température de la chaudière, régulez avec les boutons et la
valeur de la température desirée, à partir de 80C° jusqu’à 130C°.
-3 sec. après avoir appuyé le dernier bouton, la température est dans la Mèmoire et l’écran montre la
température régulée.
NB: si la température est régulée trop haute, une fois demandé le café, l’écran du PID commencera à s’allumer avec
intermittance.
CONSEILS PRATIQUES:
- Les filtres 1 tasse (9) et 2 tasses (10) ne doivent pas être nécessairement lavés après chaque utilisation.
L’important est de s’assurer que les trous ne sont pas colmatés.
- Pour obtenir un excellent résultat, il est conseillé de réchauffer les tasses sur le chauffe-tasses (2) qui ne
fonctionne que si la machine est allumée.
- Le PID a été régulé avec des valeurs imposées par le producteur pour obtenir un café excellent. Pendant le
réchauffage et la distribution du café ou eau chaude la température peut osciller (+/- 10/12°C) par rapport à la
température régulée. Il est inclus aussi un avertissement: après 108°C l’écran du PID montre la température
mais avec intermittence; c’est normal, en s’agissant d’un avertissement pour l’utilisateur que le café ne sera
pas bon s’il sera fait en utilisant une température si haute.
NETTOYAGE ET ENTRETIEN :
Le nettoyage et l’entretien de la machine sont essentiels pour la qualité du café, mais aussi pour la longévité de
l’appareil.
Le nettoyage de la machine doit être effectué au moins une fois par semaine.
Avant de commencer, débranchez la fiche de la prise de courant et attendez que l’appareil soit froid.
Utilisez un chiffon doux, de préférence en microfibre comme le chiffon Lelit (référence MC972 non fourni) légèrement
imbibé d’eau propre. N’utilisez pas de détergents abrasifs et ne plongez jamais la machine dans l’eau.
Pour un entretien minutieux, nous vous recommandons d’utiliser la petite brosse Lelit (référence PL106 non fourni)
qui vous permet de nettoyer parfaitement les buses et les espaces entre les joints, en éliminant toutes les taches et
les résidus de poudre de café jusque dans les moindres fissures.
Pour nettoyer les parties amovibles de la machine, vous pouvez utiliser de l’eau courante tiède. En aucun cas, vous
ne devez mettre les filtres et les porte-filtres dans le lave-vaisselle.
Il n’est pas nécessaire de nettoyer les filtres après chaque utilisation, vous devez simplement vérifier que les orifices
ne soient pas obstrués. Au contraire, pour conserver une machine performante, il est indispensable que la buse
vapeur et le porte-filtre soient soigneusement nettoyés après chaque utilisation.
Nettoyez le porte-filtre pour éliminer les résidus gras du café qui altèrent le goût de l’expresso.
Lavez la partie extérieure de la buse vapeur avec un chiffon humide et faites circuler un peu de vapeur dans la buse
pour éliminer tous les résidus de lait restés à l’intérieur qui pourraient obstruer le passage de la vapeur, ce qui
rendrait plus difficile de monter la mousse de manière optimale.
BACKFLUSHING :
Il est conseillé d’effectuer la procédure de nettoyage une fois par semaine et/ou chaque 100 cafés préparés.
Les instructions suivantes sont valables pour tous les types de groupe montés sur nos machines à café expresso.
Matériel nécessaire :
Filtre aveugle (art. MC754/C pour porte-filtres diamètre 58)
Brosse (art. PL106)
Détergent machine espresso (art. PL103)

Pagina 19
Français
Nettoyage du groupe distributeur. Opérations à suivre :
1. Insérer le filtre aveugle dans le porte-filtre
2. Verser 1 cuillère (3-5 gr) de poudre détergente dans le filtre aveugle
3. Insérer le port-filtre dans le groupe de la machine
4. Faire commencer la préparation du café et laisser fonctionner pour environ 10 secondes
5. Arrêter la préparation et maintenir fermé pour environ 10 secondes
6. Sans enlever le porte-filtre répéter l’opération 5 fois
7. Enlever le porte-filtre, faire commencer la distribution et utiliser l’eau chaude qui coule du groupe pour rincer le
porte-filtre, ensuite arrêter la distribution.
8. Utiliser la brosse pour nettoyer sous le groupe, le joint du groupe et les ailes du groupe distribution. Nettoyer avec
l’aide d’un chiffon humide, en éliminant les résidus de la poudre de café
9. Insérer de nouveau le porte-filtre dans le groupe distribution et pour rincer le groupe répéter les points 4-5-6 sans
utiliser la poudre détergente
10. Ensuite jeter le premier café préparé.
Nettoyage des accessoires à travers immersion. Opérations à suivre :
1. Dans une carafe insérer les filtres et le porte-filtre avec la manche vers le haut
2. Verser 3 cuillères (10gr) de poudre détergente dans la carafe
3. Verser dans la carafe de l’eau très chaude jusqu’à couvrir toute la partie en métal du porte-filtre
4. Attendre au moins 15 minutes
5. Enlever les accessoires et rincer avec de l’abondante eau potable chaude
6. Ensuite jeter le premier café préparé avec les accessoires lavés.
Détartrage de la machine
L’utilisation de la machine génère une formation naturelle de calcaire, plus ou moins rapidement, selon la fréquence
d’utilisation de l’appareil et la dureté de l’eau.
Les dépôts calcaires bouchent les conduits et diminuent la température de l’eau en influençant la qualité de
l’extraction du café et en réduisant la durée de la vie de votre appareil.
Pour éviter la formation du calcaire qui se dépose également dans les circuits internes, nous vous recommandons de
toujours utiliser la cartouche filtrante à résine Lelit (référence MC747 - MC747PLUS non fourni). Une fois placée dans
le réservoir, cette cartouche filtrante purifie l’eau des sels de calcium et de magnésium qui forment par précipitation
les dépôts calcaires et altèrent le goût de votre café.
Ne pas oublier que la cartouche perd son efficacité après un certain nombre de litres traités. L’emballage de la
cartouche indique comment l’utiliser et quand la remplacer.
Afin d’éviter éventuels problèmes sur les composants de l’appareil, INTRODUIR DANS LE RESERVOIR D’EAU
SEULEMENT DES PRODUITS DETARTRANS NATURELS.
DONNEES TECHNIQUES
Alimentation électrique : 230V –50 Hz -- Puissance : 1250 W -- Pression de la pompe : 15 bar
Durée de réchauffage : environ 10 min
Régulation du PID: à partir de 80°C et jusqu’à 130°C
Capacité du réservoir d’eau : 2,7 litres
Dimensions: 23x27x34 cm -- Poids: 9 kg
Fonctionnement avec: café moulu
PL41PLUST/110 –120V 60 Hz
CONDITIONS DE GARANTIE: GARANTIE LEGALE
Ce produit est couvert par les normes de garantie en vigueur dans le pays où il a été vendu; informations plus
spécifiques peuvent être fournies par le revendeur ou par l'importateur dans le pays où le produit a été acheté; le
revendeur ou l'importateur est complètement responsable de ce produit. L'importateur est complètement
responsable même pour l'accomplissement des lois en vigueur dans le pays où l'importateur distribue le produit, y
compris la correcte élimination du produit au terme de son utilisation.
Dans les pays européens il faut prendre en considération les lois nationales relatives à l'application de la Directive EC
44/99/CE.

Pagina 20
Français
SOLUTIONS AUX PROBLEMES PLUS FREQUENTS
Nous Vous remercions pour avoir acheté notre produit, il est fait selon les nouvelles innovations technologiques.
Vous devez seulement suivre les indications relatives à l’usage correct en conformité des prescriptions de sûreté
indiquées sur ce manuel et Vous aurez les meilleurs prestations et pourrez vérifier la fiabilité de ce produit au cours
des années.
De suite Vous trouvez un tableau avec quelques-uns mal fonctionnements et leurs relatives solutions :
PROBLEMÈS
CAUSE
SOLUTION
Il n'y a pas de mousse
sur le café.
1. Le mélange de café n'est pas
approprié à ce type de machine.
2. La mouture n'est pas correcte.
3. La quantité de café n’est pas suffisante
4. Le porte filtre n’a pas été bien fixé
correctement.
1. Remplacez le café.
2. Réglez la mouture du café.
3. Augmentez la dose du café et presser-le bien.
4. Fixez bien le porte filtre.
Le café sort trop froid.
1. La machine n’était pas à la bonne
température.
2. Le porte-filtre n’a pas été préchauffé.
3. Les tasses n'ont pas été préchauffées.
4. Le thermostat ne fonctionne pas dans
de bonnes limites.
1. Respectez les indications présentées au
paragraphe « Mise en fonction de la machine »
et « Préparation du café espresso ».
2. Le porte-filtre doit être chauffé en même
temps que l’eau - Voir paragraphe « Mise en
fonction de la machine »
3. Chauffez les tasses sur le chauffe-tasse (2).
4. S’adresser au CENTRE D’ASSISTANCE
Le café sort trop
rapidement.
1. Le café est moulu trop grossièrement.
2. Il n'y a pas assez de café.
3. Le café n'est pas assez pressé.
4. Café vieux ou inapproprié.
1. Le réglage de la mouture doit être plus fin.
2. Augmentez la dose de café.
3. Pressez davantage le café.
4. Remplacez le café/la dosette.
Le café sort entre le
groupe de distribution
et le porte-filtre.
1. Le porte-filtre n'est pas inséré
correctement.
2. Il y a trop de café dans le filtre.
3. Le bord du porte-filtre n’a pas été
nettoyé.
4. Le joint sous la coupe est usé.
1. L’insérer correctement.
2. Diminuez la quantité de café.
3. Enlevez les résidus de café du bord du porte-
filtre.
4. S’adresser au CENTRE D’ASSISTANCE.
Le café sort goutte à
goutte.
1. Le café est moulu trop finement
2. Il y a trop de café.
3. Le café est trop pressé.
1. Le réglage de la mouture doit être plus gros.
2. Diminuez la quantité de café.
3. Pressez moins le café.
La machine ne fournit
pas de vapeur
1. L’orifice de la partie finale du tube de
vapeur est bouché.
2. Il n'y a pas d’eau dans le réservoir.
1. Nettoyez l’orifice à l'aide d'une aiguille.
2. Voir paragraphe «Mise en fonction de la
machine».
Pendant la distribution
le café ne sort pas
1. Il n'y a pas d’eau dans le réservoir.
2. L’interrupteur vapeur est appuyé.
3. Le café est moulu trop finement.
4. Il y a trop de café.
5. Le café est trop pressé.
6. Douchette sale.
1. Versez de l’eau dans le réservoir.
2. Relâchez l’interrupteur vapeur.
3.Le remplacer par du café moulu plus grossièrement.
4. Diminuez la quantité de café dans le filtre.
5. Pressez moins le café.
6. S’adresser au CENTRE D’ASSISTANCE.
La machine ne
fonctionne pas et le
voyant de tension sur
l’interrupteur ne
s’allume pas.
1. Absence de courant.
2. La fiche du câble d’alimentation n'est
pas bien branchée.
3. Le câble d’alimentation est
endommagé.
1. Vérifiez l’alimentation courant.
2. Branchez correctement la fiche du câble
d’alimentation dans la prise de courant.
3. S’adresser au CENTRE D’ASSISTANCE pour le
remplacement.
Le voyant tension est
allumé et le voyant
vapeur ne s’allume plus
1. Les thermostats de service ne
fonctionnent pas.
2. La résistance est interrompue ou
grillée.
1. S’adresser au CENTRE D’ASSISTANCE.
2. S’adresser au CENTRE D’ASSISTANCE .
Les données et les images indiquées peuvent etre changées afin d’améliorer les prestations du produit meme.
Other manuals for PL41PLUST
1
Table of contents
Languages:
Other Lelit Coffee Maker manuals

Lelit
Lelit PL41TEM User manual

Lelit
Lelit PL41LEM User manual

Lelit
Lelit PL41LEM User manual

Lelit
Lelit Pro Line - Mara PL62S User manual

Lelit
Lelit PL92T Service manual

Lelit
Lelit PRO Line MaraX PL62X Service manual

Lelit
Lelit Pro Line - Mara PL62S User manual

Lelit
Lelit PL60 User manual

Lelit
Lelit PL41PLUST User manual

Lelit
Lelit PL042E User manual