Focal Point BCD-85U User manual

©2017 Focal Point Fires plc.
All instructions must be handed to the user for
safekeeping.
Please note: Except where otherwise stated, all rights,
including copyright in the text, images and layout of this
booklet is owned by Focal Point Fires plc. You are not
permitted to copy or adapt any of the content without
the prior written permission of Focal Point Fires plc.
1
Revision A - 08/17
BCD-85U
Under Counter Fridge Freezer
wner’s Instructions GB IE
Focal Point Fires plc.
Christchurch, Dorset BH23 2BT
Tel: 01202 499330 ption 5
Fax: 01202 499326
www.focalpointfires.co.uk
e : sales@focalpointfires.co.uk
M DELS C VERED BY THESE INSTRUCTI NS
BCD-85U Under Counter Fridge Freezer
N TE: Before discarding an old appliance switch off and disconnect it from the power supply. Cut off and
render any plug useless. Cut the cable off directly behind the appliance to prevent misuse. This should be
undertaken by a competent person. Disable any door lock to make sure that children cannot get stuck inside
the appliance.
This appliance is marked according to the European directive 2002/96/EC on Waste Electrical and Electronic
Equipment (WEEE).
By ensuring this product is disposed of correctly, you will help prevent potential negative consequences for
the environment and human and health, which could otherwise be caused by inappropriate waste handling of
this appliance.
The symbol shown in figure 1 on the product or on the documents accompanying the product indicates that this appliance may not
be treated as household waste. Instead it shall be handed over to the applicable collection point for recycling of electrical and
electronic equipment.
Disposal must be carried out in accordance with the local environmental regulations for waste disposal.
For more detailed information about treatment, recovery and recycling of this product, please contact your local authority household
waste disposal service or the shop where you purchased the product.
Your safety is of the utmost important to F CAL P INT.
Please make sure that you read this instruction booklet before attempting to install or use the appliance. If you are unsure of any of
the information contained in this booklet, please phone the F CAL P INT advice line.
IMP RTANT: Any installation work must be carried out by a qualified electrician or competent person.
Use of the appliance
Your appliance is only designed to be used in the home. It is suitable for storing food that needs to be chilled and refrigerated. If it is
used for any other purpose or it is not used correctly, F CAL P INT will accept no liability for any damage that may be caused.
Altering the specifications of the appliance must not be attempted for reasons concerning your safety.
Before using the appliance
Check the appliance for any signs of transport damage. If you notice any damage then you should not connect the appliance to the
main power supply, also contact the manufacturer.
Transportation and Handing
For safe lifting, tilt the appliance backwards by no more than 45 degrees, hold the base and rear corners of cabinet. Lift the appliance
carefully.
Never use the door handles for lifting.
I N S T A L L A T I N I N S T R U C T I N S
2
1.0 ENVIR NMENTAL
Section
1.0
2.0
3.0
4.0
5.0
6.0
Contents
Environmental
Important Safety Information
Technical Specification
Using Your Appliance
Freezer Tips
Care & aintenance
Page No.
2
2
3
4
5
5
Section
7.0
8.0
9.0
9.1
9.2
10.0
Contents
Reversing the Doors
Cleaning & aintenance
Installation
Electrical Connection
Positioning
Troubleshooting
Page No.
5
8
8
9
9
10
2.0 IMP RTANT SAFETY INF RMATI N
Figure 1
©2017 Focal Point Fires plc.
Refrigeration
Your appliance contains R600a Refrigerant, which is a natural gas that does not contain CFC’s that can damage the environment.
However it is a flammable substance, therefore care should taken:
During the transportation and installation of the appliance make sure that the refrigeration pipework does not get damaged.
If it does become damaged then sources of ignition and open flames should be avoided, also the room that the appliance is situated in
should be thoroughly ventilated.
Do not place any objects on top of the appliance as this may damage the top and block up the required ventilation.
Child Safety
Packaging materials should be kept away from children.
Children should not be allowed to touch the controls or play with the appliance.
General Safety
Do not pull out or insert the plug with wet hands.
Do not attempt to use the appliance outdoors or any place where it is likely to come into contact with the elements.
Before cleaning the appliance or performing maintenance work, ensure that the appliance has been disconnected from the mains
supply.
Never allow the back coils of the appliance to come into contact with the wall surface.
Always ensure that the location where you are installing your appliance is free of stored items such as papers and other flammable
materials.
Do not place electrical devices inside of the appliance such as mixers.
Service
You should not attempt to repair the appliance yourself, as this could cause injury or a more serious malfunction. If you require a
service call then please contact the manufacturer.
Note: Figures in the user manual are only for reference. The actual product may differ slightly.
2.0 IMP RTANT SAFETY INF RMATI N - C NTINUED
3
GB IE
©2017 Focal Point Fires plc.
3.0 TECHNICAL SPECIFICATI N
Model BCD-85 U
Description of appliance Double Door
Type/appliance Refrigerator
Installation of Appliance Free Standing
Aesthetics
Door profile Rounded
Handle Integrated
Available colours White/Silver
Basic features
Energy efficiency class A+
Climate class (R600a:N=16~32°C, ST=18~38°C N,ST
Climate class (R134a ST=18~38°C, T=18~43°C)
Freezer compartment star rating 4
Gross capacity (L) 75
Net capacity (L) 71
Net capacity fridge compartment (L) 49
Net capacity freezer compartment (L) 22
Energy consumption (kWh/year) 161
Freezing capacity / 24 hours 2.5
ax noise level 42
ax storage time from no power (hours) 13
Kind of coolant R600a
Foaming components C-P
Certifications CE/GS
Key features
Cooling system: Compressor
Number of compressor(s) 1
Defrosting Fridge / Freezer anual
Control system echanical
NO FROST (Fridge/Freezer) No/No
Wind Air System No
Bacteria Proof System No
Energy efficiency class
Energy class: A+
*Please refer to the installation instructions for more specific information on the size of aperture that you will require.
Important: when you install the appliance it is important to bear in mind its climate class.
In order to find out the climate class of the appliance you should check the rating plate.
4
3.0 TECHNICAL SPECIFICATI N - C NTINUED GB IE
©2017 Focal Point Fires plc.
Before switching on. ake sure that it has been installed by a suitably qualified person, as per the information contained in
FOCAL POINT’s installation instructions.
After delivery, wait for four hours before connecting the appliance to the mains supply. This will allow any refrigerant gasses that may
have been disturbed during the transportation process to settle.
The outside of the appliance and the removable accessories contained within it should be cleaned with a solution of liquid detergent
and water.
The interior of the appliance should be cleaned with a solution of sodium bicarbonate dissolved in lukewarm water. The interior and
accessories should be thoroughly dried after the cleaning process has been completed.
There may be an odour when you first switch on the appliance. It will lessen as the appliance starts to cool.
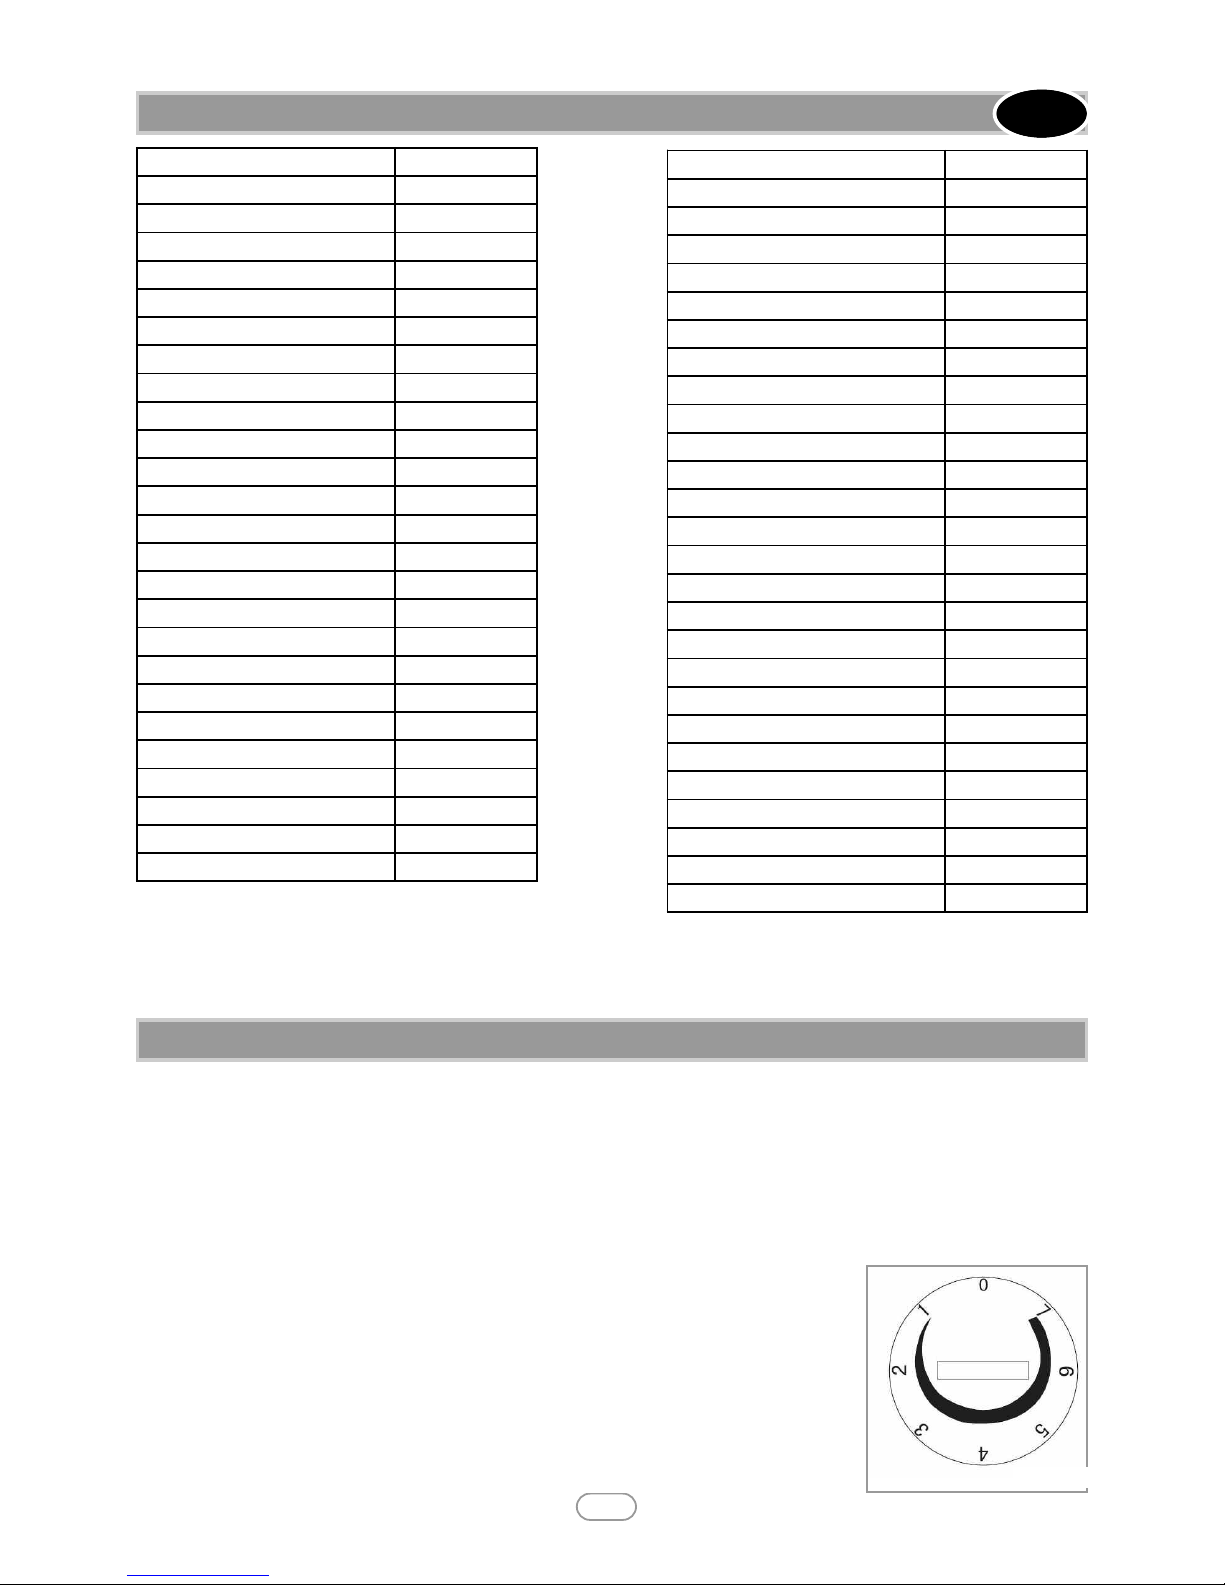
Setting the temperature
The temperature in the appliance is controlled by the temperature control knob located behind the
freezer drawers. Rotate the control knob left or right to regulate the temperature inside the freezer.
On the temperature control, 1 is the warmest setting and 7 is the coldest setting. Under normal
conditions the temperature control should be set between 3 and 4.
Once the temperature control has been set, close the door and plug in the appliance. We recommend
that the door is not opened for a minimum of 2.5 hours to allow the appliance to reach standard
operating temperature.
Note: The standard operating temperature for the freezer compartment should be between -18°C and
-25°C.
Figure 2
4.0 USING Y UR APPLIANCE
Control panel
External control display No
External control display with LCD No
Temperature range (from>to) R:0~8 F: <-18
Super Cooling (Fridge) No
Super Freezing (Freezer) No
Holidays function (Stand-by) No
ECO function No
Over temperature alarm No
Adjustable thermostat Yes
Control lamps No
Basics datas
Unit dimensions ( W / D / H ) 480x445x845
Depth with open door 90
Net weight 24.0
Voltage / frequency 220-240V/50Hz
mains fuse (intensity) 0.8
Input power R600a (A, A+, A++) 90
Input power R134a 120
Fridge compartment
Shelves:
Number/type 1/glass
Colour transparent
Shelf (on salad crisper) Yes/glass
Crisper(s):
Number / colour 1/ Transparent
Door:
Storage rack(s) (Total) 2
Butter and cheese compartment No
Inside colour White
Reversible door Yes
Lock Optional
Freezer compartment
Drawer(s) No
Shelve(s) No
Flap(s) No
Colour of drawer No
Shelf in the Freezer No
Door rack(s) No
Accessories
Defrost water outlet Optional
Interior light Yes
Special ice maker No
Ice cube tray(s) 1
Eggs tray(s) / Total number of eggs 1
Adjustable feet (front / rear) 2/0
Castors (front / rear) No
Wall spacer grid or distance holder Optional
Condensor Internal/ External
Lenght of cable/incl. plug (mm) 126
Packing dimensions
Packing dimensions ( W / D / H ) 500x465x870
Gross weight (kg) 26
Storage of Frozen food
• Fresh foods such as fish and meat can be frozen to maintain freshness, and keep the nutrients in the food.
• Wrap food to be frozen or place it in an airtight container.
• Do not allow already frozen food into direct contact with food to be frozen.
• Ready frozen food should be placed it in freezer as soon as possible.
• Do not re-freeze food once it has thawed.
Defrosting
We recommend this is done once or twice a year or when the ice formation is 3-4mm thick.
1. Switch the appliance off at the wall socket and remove the plug.
2. Wrap frozen food in layers of newspaper or blankets
3. Keep the freezer door open.
4. Place a suitable container to collect the defrost water.
5. Place a bowl of hot (not boiling) water in the freezer to speed defrosting.
6. Use a plastic or wooden implement to gently scrape ice.
7. After defrosting, clean and dry the interior.
8. Switch the appliance on and replace any frozen food.
Never use sharp metal tools, you will damage the appliance.
Never use an electric heater to raise the temperature.
The Freezer has the capability of opening the door from either the left or the right side. The unit is delivered to you with the door
opening from the left side.
We strongly recommend that this task is performed by 2 people to avoid any injury or damage.
Ensure the appliance is unplugged and all contents have been removed.
Tools required
• Phillips head screwdriver
• Flat head screwdriver
• Hexagonal spanner
5©2017 Focal Point Fires plc.
5.0 FREEZER TIPS
6.0 CARE AND MAINTENANCE
GB IE
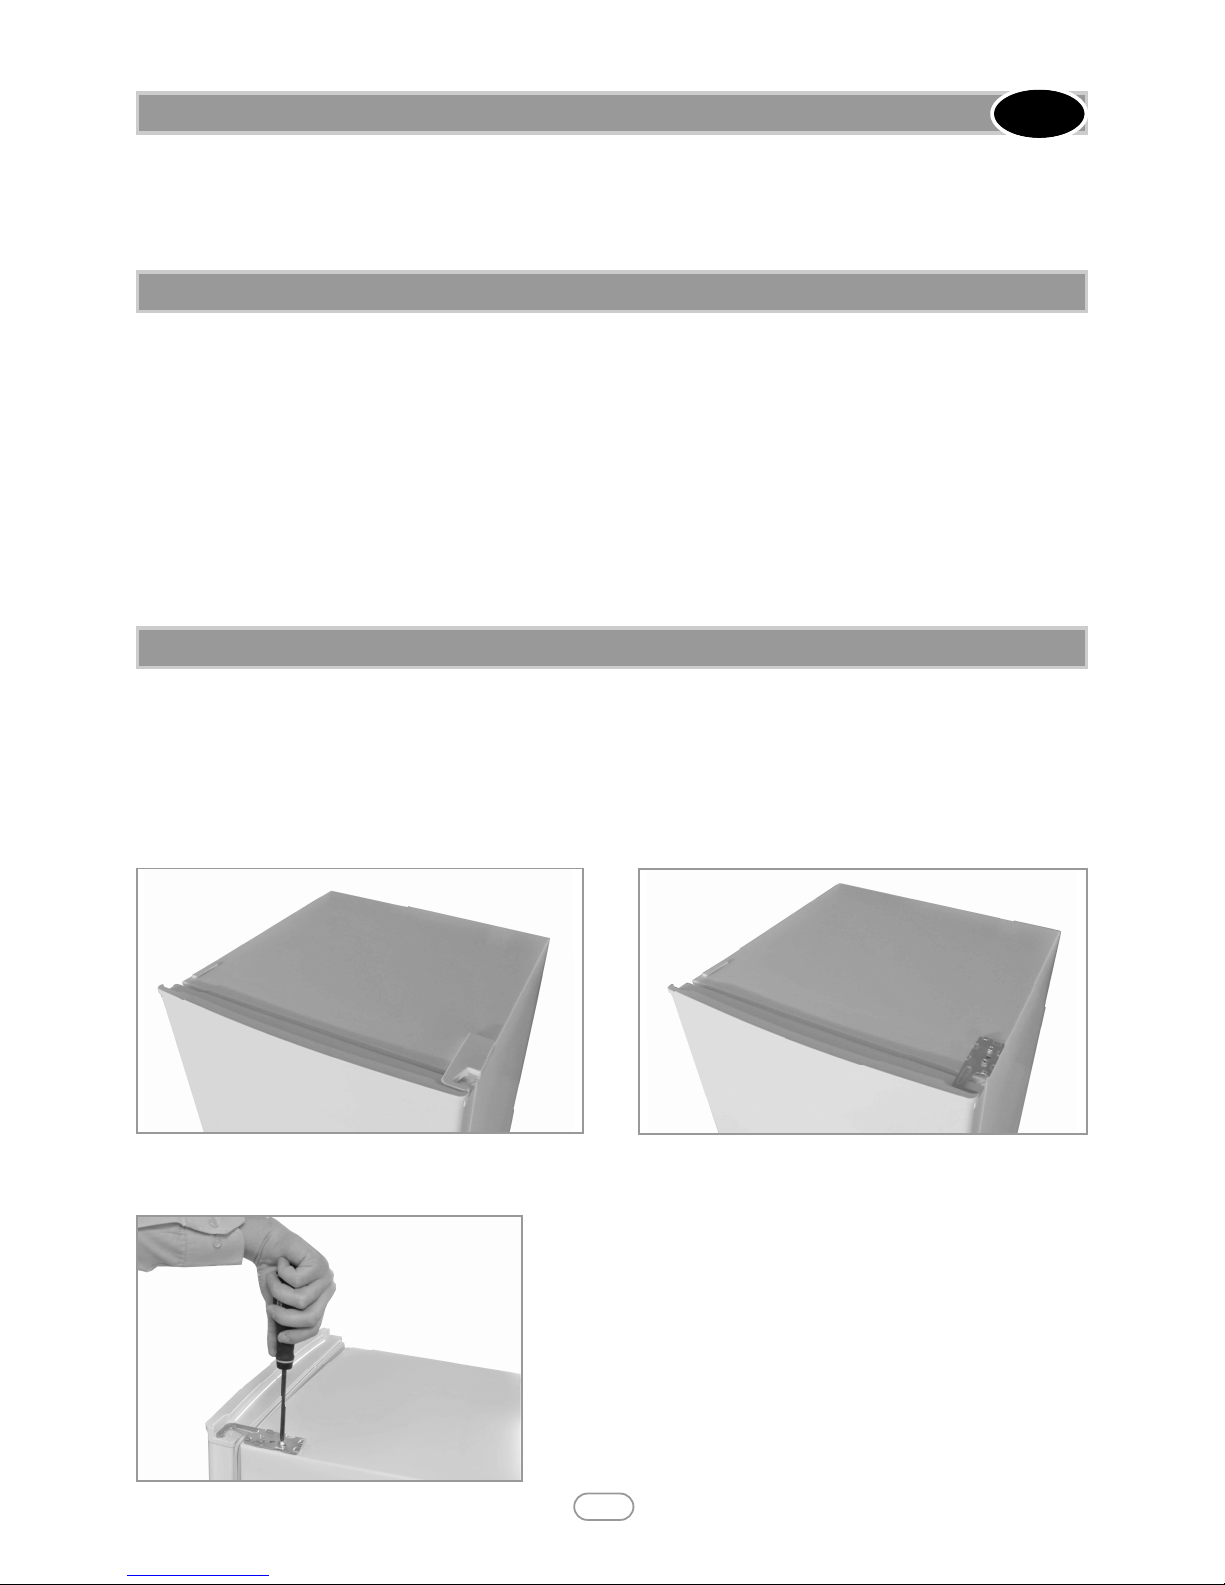
7.0 REVERSING THE D RS
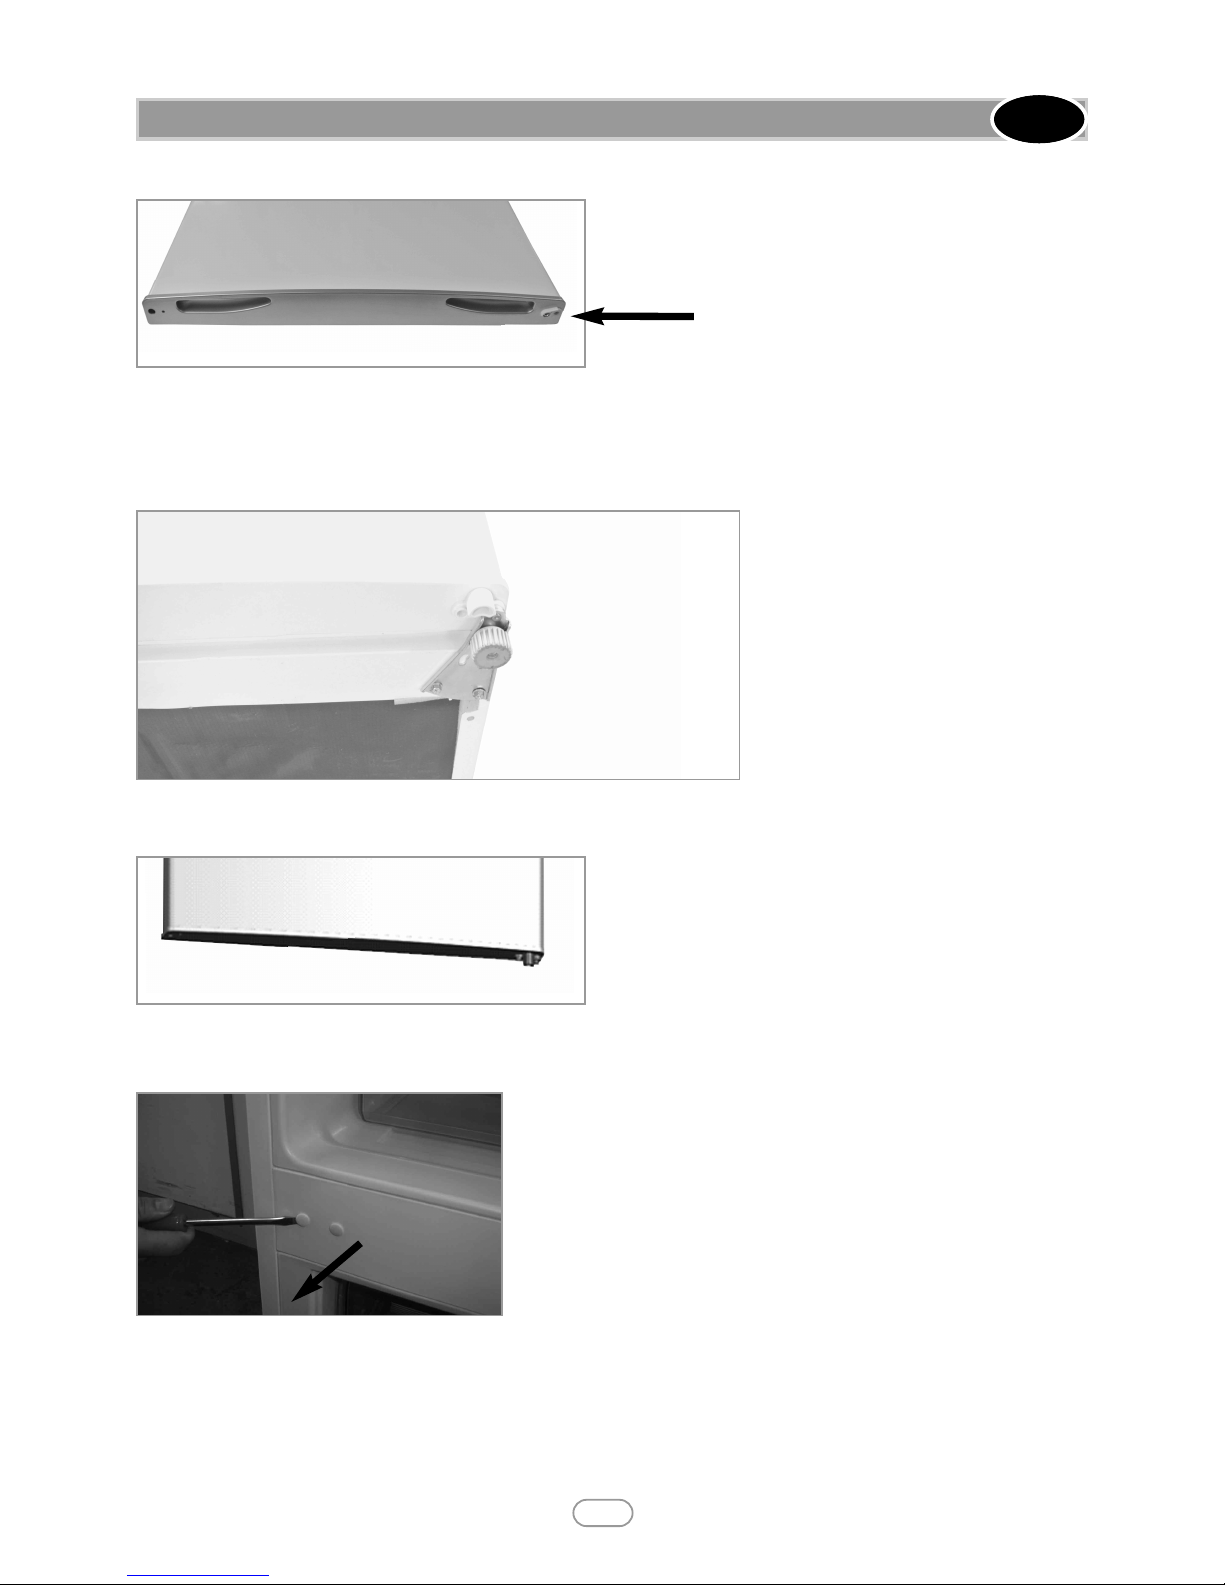
1.Remove the right top hinge cover.
2. Remove the top-hinge with a phillips screwdriver or a spanner.
6©2017 Focal Point Fires plc.
7.0 REVERSING THE D RS - C NTINUED GB IE
3. Remove the door limit block from the bottom for the door with a screwdriver and refit on the opposite side.
Limit block
4. Remove the bottom door hinge pin fixing bracket with a screwdriver or a spanner. After the fixing bracket is removed it
will need to be fitted on the opposite side of the appliance. The bottom hinge pin fixing bracket is located underneath the
appliance and you need to tilt the appliance backwards to remove the bracket.
5. Remove the bottom door bush bearing and the limit block and refit on the opposite side.
6. Remove the screw hole covers.
IMP RTANT: The screw cap and screw hole covers should be retained for use on the opposite side of the appliance.

7©2017 Focal Point Fires plc.
7.0 REVERSING THE D RS - C NTINUED GB IE
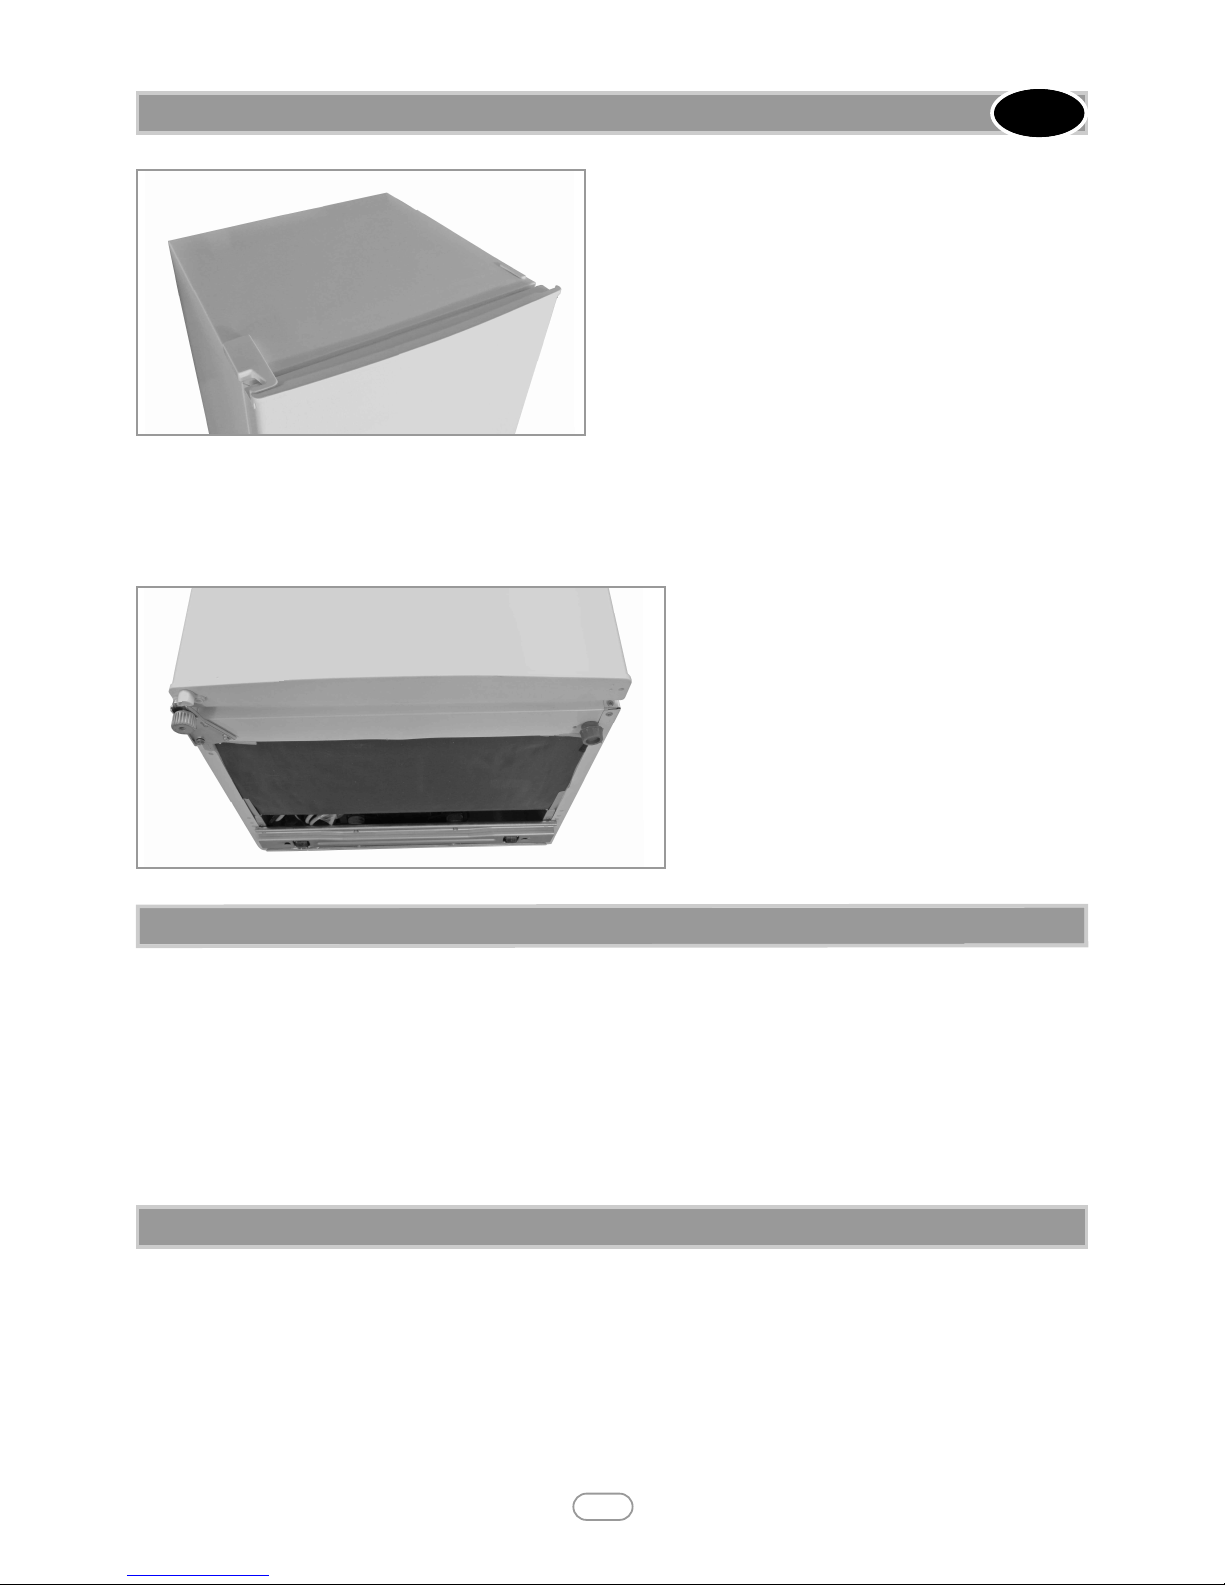
7. Remove the middle door hinge and refit on the opposite side.
8. Correctly position the bottom door and then secure the middle hinge. Note: Always put the bottom door on first.
10. Refit the top-hinge with a phillips screwdriver or a spanner on the opposite side from it’s original position.
9. Use a spanner to remove the pin from the top hinge pin fixing bracket. Then turn the hinge pin bracket over and refit the
hinge pin with a spanner.
Disconnect the appliance from the mains supply.
Leave the door to the freezer compartment open. You can place a bowl of warm water inside the freezer compartment to speed up
to defrost process.
Once all the ice that has built up has melted then inside of the freezer compartment should be dried thoroughly. Failure to do this
will result in immediate ice build-up when the appliance is turned back on.
With dry hands, reconnect the appliance to the mains supply. Set the temperature display to it’s maximum setting or switch on the
super frost setting for 24 hours.
You should not attempt to freeze fresh food inside the freezer compartment until this 24 hour time period has elapsed.
Once the 24 hour period has elapsed, you should set the temperature display to its normal operating temperature or switch off the
super frost setting.
Do not defrost the appliance with other electrical devices (e.g. hair dryers). Do not use sharp metal objects to
remove the ice on the freezer, as this could cause damage to the refrigeration system.
8©2017 Focal Point Fires plc.
7.0 REVERSING THE D RS - C NTINUED GB IE
8.0 CLEANING AND MAINTENANCE
9.0 INSTALLATI N
IMP RTANT: Before installation and usage read all the instructions and make sure that the voltage (V) and the
frequency (Hz) indicated on the rating plate are exactly the same as the voltage and frequency in your home. The
rating plate can be found on the front left edge of the inside edge of the refrigerator.
The manufacturer declines all responsibility in the event of the installer failing to observe all the accidental prevention regulations in
force, which are necessary for use and the regular operation of the electric system.
Electrical Connections
THE FRIDGE/FREEZER IS INTENDED F R FITTED AND PERMANENT INSTALLATI N.
We recommend that the appliance is connected by a qualified electrician who is a member of the N I C E I C and who will comply
with the I.E.E. and local regulations.
Your refrigerator comes supplied with a 13 amp plug fitted. If in future you need to change the fuse in the plug then a 13 amp ASTA
approved (BS 1362) fuse must be fitted. WARNING: THIS APPLIANCE MUST BE EARTHED!
11. Refit the top hinge cover.
12. Correctly position the top door and then secure the top hinge.
13. Install the four screw caps and two catches to corresponding position.
Ensure the Appliance is unplugged and empty.•
Adjust the two leveling feet to their highest position.•
We recommend you have someone to assist you.•
14. Replace the leveler to the other side and adjust it to make sure the cabinet is level.

The wiring in the mains lead is coloured as follows:
Brown Live
Blue Neutral
Green and yellow Earth
As the colours of the wires in the appliance’s mains lead may not correspond with coloured markings identifying the terminals in your
spur box, please proceed as following:
The Brown wire must be connected to the terminal marked “L” (Live) or coloured Red.
The Blue wire must be connected to the terminal marked “N” (Neutral) or coloured Black.
The Green and Yellow wire must be connected to the terminal marked “E” (Earth), or by the earth symbol or coloured Green
and Yellow.
When the connection is completed no stray strands or cut wire should be present. The cord clamp must be secured over the outer
sheath.
It is advised that the appliance is only installed in a location where the ambient temperature of the room, corresponds with the
climate classification that is stated on the rating plate of the appliance. The appliance may not function correctly if the ambient
temperature falls outside of the following ranges.
The appliance should not be located in direct sunlight or exposed to continuous heat or extremes of temperature (e.g. next to a
radiator or boiler).
The door should be able to open completely and freely.
The appliance should be situated so the food stored inside can be easily accessed.
Check whether there is an electrical socket available, which will be accessible after the appliance is installed.
Place the fridge in a location with a firm base. In order to prevent vibration and noise, the freezer must be levelled by adjusting the
front feet.
Choose a well ventilated location with no less than 10cm clearance around the freezer.
9
9.1 ELECTRICAL C NNECTI N GB IE
Climate Classification Appropriate Ambient Temperature
SN + 10 to + 32 degrees centigrade
N + 16 to + 32 degrees centigrade
ST + 18 to + 38 degrees centigrade
9.2 P SITI NING
©2017 Focal Point Fires plc.

IMP RTANT: If the fridge/freezer appears not to be operating properly, before contacting the manufacturers please
refer to the checklist below.
My fridge/freezer does not appear to be working/there is no power to my appliance.
Check that the plug is fully inserted into the power socket.•
Check that there is power to the mains supply (e.g. there hasn’t been a power cut or that the fuse hasn’t blown).•
Check that the display has not been turned to the off position.•
Check that your mains supply voltage corresponds to the voltage stated on the rating plate of the appliance.•
My Fridge/freezer appears to be performing poorly.
Check that the appliance isn’t overloaded and that food hasn’t been packed too tightly into it•
The thermostat setting is too high i.e. (9) degrees then you should turn the thermostat down i.e. (4) degrees.•
Ensure that there is adequate ventilation for your appliance.•
My Fridge/freezer is noisy
The refrigerant gas that circulates the pipework of the appliance may make a slight noise even if the compressor is not running.•
If the noise worsens or the appliance gets louder than normal; check that it is levelled off correctly, that nothing is touching the•
rear of the fridge freezer and that nothing placed inside the appliance is rattling.
Ice has formed on the inner back wall of my fridge
Please check that food has not been pushed too far back inside the appliance so that it is in contact with the inner back wall.•
Please check that food has not been pushed up against the thermostat. The thermostat is on the right hand side, having food too•
close to the thermostat will affect the temperature of the fridge.
IMP RTANT: if you run the appliance with the temperature controls on lower settings for prolonged periods, the defrost drain•
hole will freeze. It may also cause the appliance to overwork and the fridge and freezer sections to freeze over.
The seal must adhere properly all the way around the door
If either seal is not adhering to the cabinet properly then you should either.
1.Use a warm damp cloth and manipulate the seal until it does adhere to the cabinet properly all the way around the door.
Or
2.Use a hair dryer on its lowest heat setting and lightly heat the areas of the door seal that are not adhering correctly. The heat will
make the seal more pliable and this will allow you to manipulate the seal into the correct position.
IMP RTANT: nly use the lowest setting of the hair dryer and do not heat the seal for long periods of time
otherwise irreversible damage may be caused and this will not be covered by your guarantee.
IMP RTANT: It is normal to get some ice droplets forming on the back of the appliance. The formation of ice droplets does•
not indicate an appliance fault.
D N T ATTEMPT T REPAIR THE APPLIANCE Y URSELF.
Please note that if an engineer is asked to attend whilst the product is under guarantee and finds that the problem is not of an
appliance fault, then you may be liable for the cost of the call out charges.
The appliance must be accessible for the engineer to perform any necessary repair. If your appliance is installed in such a way that an
engineer is concerned that damage will be caused to the appliance or your kitchen then they will not complete a repair.
This includes situations where appliances have been tiled in, sealed in with sealant, have wooden obstructions placed in front of the
appliance like plinths or any installation other than the one specified by FOCAL POINT has been completed.
10
10.0 TR UBLESH TING GB IE
©2017 Focal Point Fires plc.
F861458
Table of contents
Other Focal Point Refrigerator manuals


