Focal Point HD-172W Assembly Instructions
INSTA ATION & USER INSTRUCTIONS
MODE S COVERED BY THESE INSTRUCTIONS
HD-172W - Fridge Freezer
HD-172SH - Fridge Freezer
FRIDGE FREEZER
1
Revision A - 09/14
©2014 Focal oint Fires plc.
GB IE
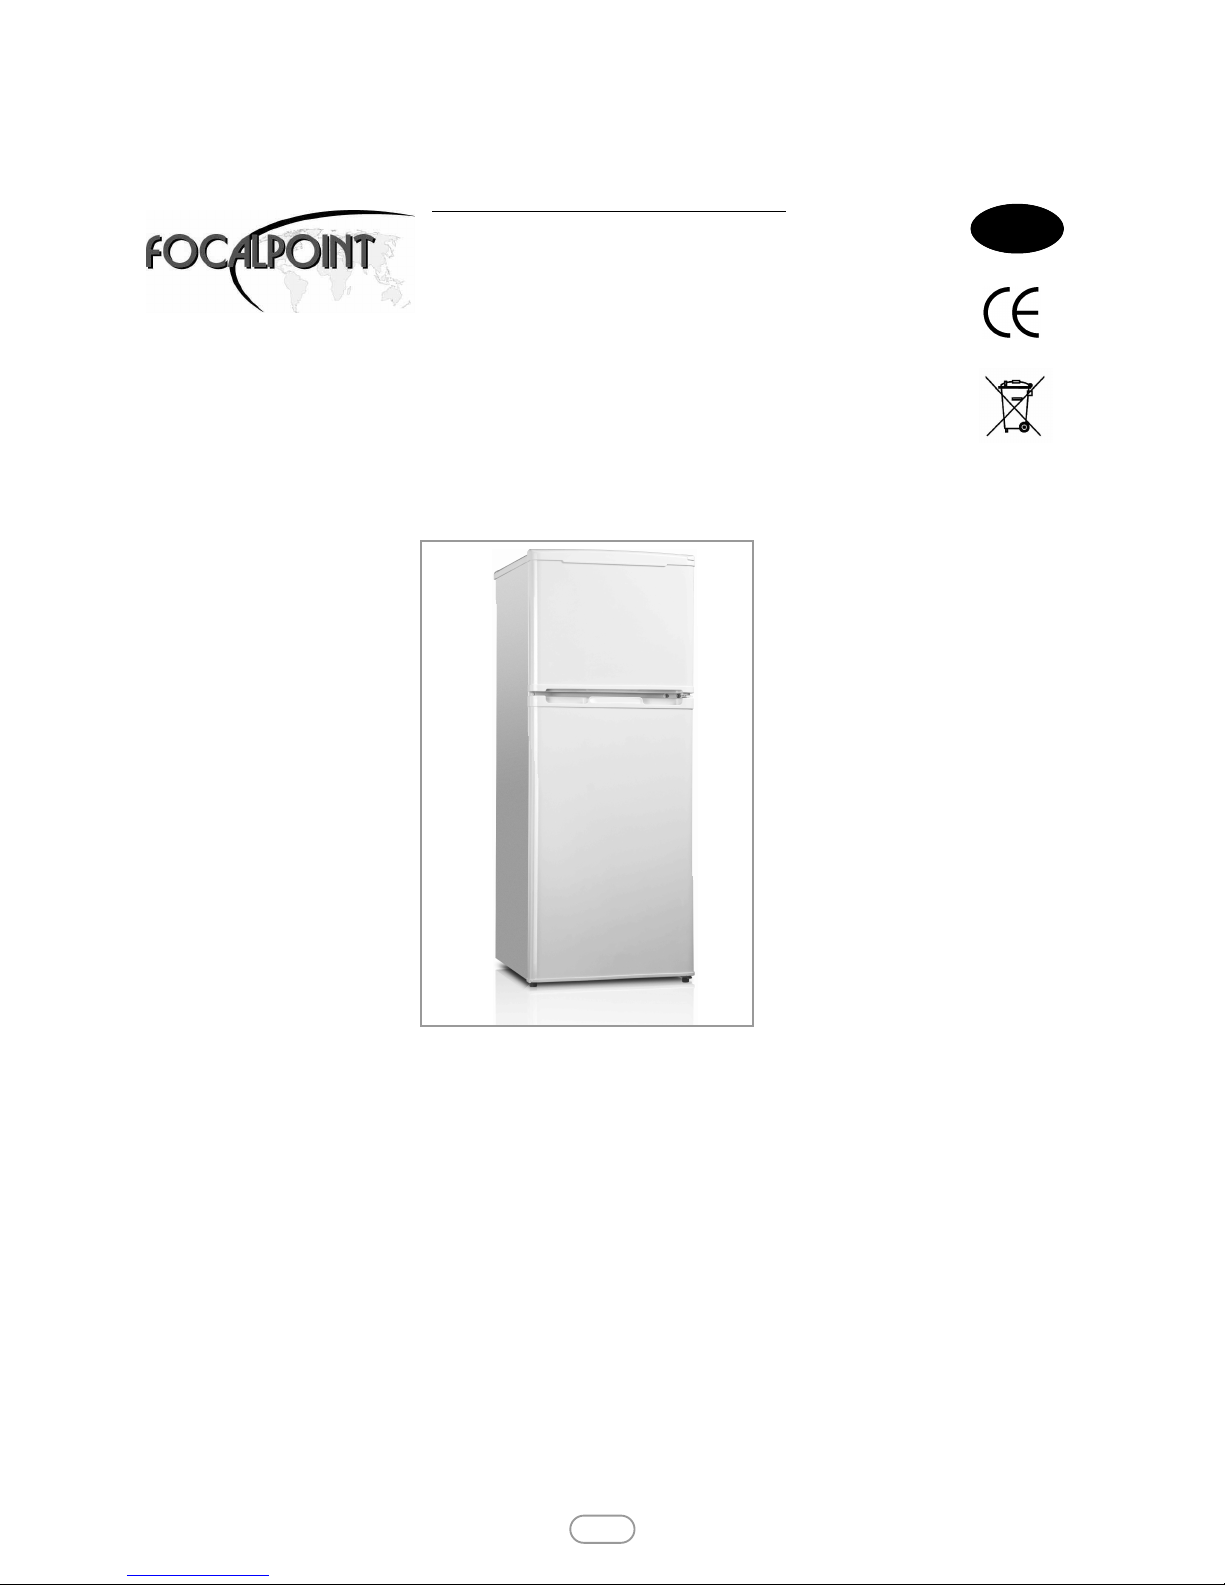
MODE SHOWN : HD-172W
All instructions must be handed to the user
for safekeeping.
lease note : Except where otherwise stated, all rights,
including copyright in the text, images and layout of this
booklet is owned by Focal oint Fires plc. You are not per-
mitted to copy or adapt any of the content without the
prior written permission of Focal oint Fires plc.
Focal Point Fires plc.
Christchurch, Dorset BH23 2BT
Tel: 01202 499330 Option 5
Fax: 01202 499326
www.focalpointfires.co.uk
e : sales@focalpointfires.co.uk

1.0 DESCRIPTION OF APP IANCE
I N S TA AT I O N & U S E R I N S T R U C T I O N S
©2014 Focal oint Fires plc.
2
GB IE
Section Contents Page No.
1.0 Description Of Appliance 2
2.0 Technical Information 2
3.0 Safety Information 3
4.0 Installation 3
5.0 Instructions For Use 3
6.0 Temperature Control 3
7.0 The Internal ight 3
8.0 Storage Of Food In The Refrigerator 4
Section Contents Page No.
9.0 Storage Of Frozen Food 4
10.0 Freezing Fresh Food 4
11.0 Making Ice Cubes 4
12.0 Refrigerator Defrost Process 4
13.0 Defrosting Your Frrezer 4
14.0 Cleaning And Maintenance 4
15.0 Changing The ight Bulb 5
16.0 Troubleshooting 5
1. Freezer shelf
2. Thermostat Housing
3. Fridge Shelf
4. Salad Drawer Cover
5. Fridge Shelf - Salad Drawer
6. lug
7. Adjustable Feet
8. Bottom Door Fridge Shelf (Bottom)
9. Bottom Door Fridge Shelf (Top)
2.0 TECHNICA INFORMATION
Model HD-172W, HD172SH
Climate class: ST
Energy class A+
Dimensions (mm) 475 W x 573 D x 1246 H
Net volume: 132 , Fridge 97 , Freezer 35

©2014 Focal oint Fires plc.
3
6.0 TEMPERATURE CONTRO
The refrigerator is designed to maintain an internal storage temperature in the refrigerator compartment between +2C to + 5C.
To enable adjustment of the temperature in the appliance it is fitted with an adjustable thermostat located in the fridge compartment, which
can be adjusted from setting 1 (warmest) to 6 (coldest). For normal working temperature it is recommended to adjust the thermostat con-
trol to the midway position, after a few hours readjust the thermostat to the desired temperature. There is also an off position “OFF”. Which
turns OFF/ON the refrigerator freezer compartment. lease Note this dose not disconnect the appliance from the mains supply. To do this
you must remove the mains plug from the socket.
To obtain a lower internal temperature turn the thermostat temperature control clockwise to a higher number. To obtain a higher internal
temperature turn the thermostat control anticlockwise to a lower number. However, the internal temperature and temperature control set-
ting is dependent on a number of factors:
1. Varying ambient temperatures.
2. The number of times the appliance doors is opened and how long the doors remain open.
3. The amount and temperature of the food and drink introduced into the appliance.
4. The weather conditions and time of year e.g. summer/winter.
5. The positioning of the appliance and an adequate air circulation to the sides and back of the cabinet.
Never place hot or warm foods into the cabinet or leave the doors open for longer than necessary as this will raise the temperature and
cause excessive amounts of moisture thus increasing the amount of ice in the refrigerator / freezer compartment.
7.0 THE INTERNA IGHT
4.0 INSTA ATION
osition the appliance and allow to stand for two to three hours before it is turned on for the first time to allow the system to settle. Do
not position next to any heat source e.g. cooker, boiler or in direct sunlight etc.
A clearance of 5 cm must be left between the sides of the appliance and any adjacent cabinets or walls to allow for adequate air circulation.
The appliance is not designed for recessed installation (“building in”).
Install on a good firm level surface, and any unevenness of the floor should be corrected prior to installation, slight unevenness can be over-
come by adjusting the front feet.
Please note: If the appliance is positioned on a carpet, soft floor covering you should re-adjust the front feet once the appliance has had
time to settle.
Please note: The doors on this appliance can not be reversed.
Remove all packing materials and wash the interior of the appliance using lukewarm water containing a little bicarbonate of soda in the pro-
portion of 1 teaspoon to 1.2 litres (2 pints) of water. Do not use detergents or soaps as they may taint the food. After cleaning, dry all parts
thoroughly.
The internal light will automatically switch ON and OFF whenever the refrigerator door is opened or closed. To change the light bulb, please
see section 15.0 Changing the light bulb on page 5.
5.0 INSTRUCTIONS FOR USE
3.0 SAFETY INFORMATION
This information is provided in the interest of your safety. lease read the following carefully before carrying out the installation or use of the
appliance.
As old refrigeration equipment may contain CFC’s which will damage the ozone layer, when disposing of any refrigeration equipment please
contact your local waste disposal department for advice on the correct method of disposal
This appliance must only be used for its intended purpose i.e. the freezing and storage of domestic edible foodstuffs and should not be used
for any other purpose
If the mains cable requires replacement, this must only be undertaken by a suitably qualified person, as special purpose tools are required.
GB IE

When using the freezer for the first time or after defrosting, turn the thermostat temperature control to setting 6 for at least two hours
before introducing the food to be stored, then adjust to your preferred setting.
All frozen food products you purchase should be placed in the freezer as soon as possible to avoid the frozen food from defrosting.
Storage recommendations printed on the packaging of frozen food by the manufactures should always be followed.
9.0 STORAGE OF FROZEN FOOD
10.0 FREEZING FRESH FOOD
Ensure that your freezing operations are carried out under the most hygienic conditions, as freezing alone does not sterilise the food. Never
put hot or even warm foodstuffs into the freezer. rior to storing the food, pack it in plastic bags, aluminium foil or freezer containers and
place into the freezer without putting them in contact with food that has already been frozen.
11.0 MAKING ICE CUBES
our water into the ice cube tray until it is two thirds full and place into the freezer.
Ice cubes will form in approximately 2 to 3 hours. The ice cube can be easily removed by twisting the ice cube tray or running under cold
water for a short time.
12.0 REFRIGERATOR DEFROST PROCESS
The refrigerator defrosting process is carried out automatically every time the compressor stops.
The defrost water drains from the cabinet into a tray placed on the top of the compressor to the rear of the unit where it evaporates.
13.0 DEFROSTING YOUR FREEZER
14.0 C EANING AND MAINTENANCE
Small amounts of frost will accumulate inside the freezer depending upon the length of time during which the door is left open or the
amount of moisture introduced. It is essential to ensure that no frost or ice is allowed to form at places where it will affect the close fitting
of the door seal. This might allow air to penetrate the cabinet, thus encouraging continuous running of the compressor. Thin frost formation is
quite soft and can be removed with a brush or plastic scraper. Do not use metal or sharp scrapers, mechanical devices or other means to
accelerate the defrosting process. Remove all dislodged frost from the cabinet floor. For the removal of thin frost it is not necessary to switch
off the appliance.
For the removal of heavy ice deposits disconnect the appliance from the mains supply and empty the contents and try and keep them cold.
Defrosting will be most effective if carried out when the freezer is nearly empty, and it should be carried out as quickly as possible to prevent
undue increase in temperature of the contents.
Do not use metal or sharp scrapers, mechanical devices or other means to accelerate the defrosting process. An increase in temperature of
frozen food packages during defrosting will shorten the storage life. rovided that the contents are well wrapped and placed in a cool area
they should keep for several hours. Examine the contents when replacing them in the freezer and if some of the packages have thawed out it
should be eaten within 24 hours or be cooked and re-frozen.
After defrosting has finished clean the inside with a solution of warm water with a little bicarbonate of soda and then dry thoroughly. Wash
all removable parts in the same way and reassemble. Reconnect the appliance to the mains supply and leave for 2 to 3 hours on setting num-
ber 6 before introducing the food back into the freezer.
WARNING! THE REFRIGERATING SYSTEM MUST NOT BE DAMAGED AT ANY TIME!
Before any cleaning or maintenance is carried out you must disconnect the appliance from the mains supply by removing the plug, never
remove the plug by pulling on the mains cord. Remove the plug by pulling on the plug itself.
It is recommended that when cleaning the appliance, both the inside and outside, can be cleaned using warm water and a little bicarbonate of
soda. Use 1 teaspoon to 1.2 litres of water.
If the appliance is not to be used for a long period of time then it is recommended to remove all the food stuff, clean the inside of the appli-
ance and leave the door open to allow the air to circulate thus avoiding unpleasant odours.
8.0 STORAGE OF FRESH FOOD IN THE REFRIGERATOR
Food should always be covered tightly with foil, plastic film, placed in bags or stored in airtight containers. This will prevent food from dehy-
drating and prevent the strong smell of some foods.
To store raw meat wrap in polythene bags or airtight containers and place on the lowest shelf.
Do not allow raw meat to come into contact with cooked foods. For safety, only store raw meat for two or three days. Fruit and vegetables
should be thoroughly cleaned and placed in the vegetable / salad bin.
Milk and other liquids should be sealed with lids and placed in the bottle shelf on the door.
GB IE
4©2014 Focal oint Fires plc.

5©2014 Focal oint Fires plc.
Note. Light bulbs are not covered by the warranty
Disconnect the appliance from the mains supply.
Slide the lamp cover downwards, to gain accesses to the lamp holder.
Unscrew the light bulb in an anticlockwise direction from the holder.
Replace the bulb with one of the correct type and size.
Replace the cover by sliding the cover upwards.
Reconnect the appliance to the mains supply.
16.0 TROUB ESHOOTING
15.0 CHANGING THE IGHT BU B GB IE
IMPORTANT: If the Fridge/freezer appears not to be operating properly, before contacting the manufacturers please refer
to the checklist below.
My fridge/freezer does not appear to be working/there is no power to my appliance.
Check that the plug is fully inserted into the power socket.•
Check that there is power to the mains supply (e.g. there hasn’t been a power cut or that the fuse hasn’t blown).•
Check that the display has not been turned to the off position.•
Check that your mains supply voltage corresponds to the voltage stated on the rating plate of the appliance.•
My Fridge/freezer appears to be performing poorly.
Check that the appliance isn’t overloaded and that food hasn’t been packed too tightly into it•
The thermostat setting is too low; you should turn the thermostat up higher.•
Ensure that there is adequate ventilation for your appliance.•
My Fridge/freezer is noisy
The refrigerant gas that circulates the pipework of the appliance may make a slight noise even if the compressor is not running.•
If the noise worsens or the appliance gets louder than normal; check that it is levelled off correctly, that nothing is touching the rear of•
the fridge freezer and that nothing placed inside the appliance is rattling.
Ice has formed on the inner back wall of my fridge
Check that food has not been pushed too far back inside the appliance so that it is in contact with the inner back wall.•
IMPORTANT: It is normal to get some ice droplets forming on the back appliance. The formation of ice droplets does not indicate an•
appliance fault.
DO NOT ATTEMPT TO REPAIR THE APP IANCE YOURSE F.
lease note that if an engineer is asked to attend whilst the product is under guarantee and finds that the problem is not of an appliance fault,
then you may be liable for the cost of the call out charges.
The appliance must be accessible for the engineer to perform any necessary repair. If your appliance is installed in such a way that an engi-
neer is concerned that damage will be caused to the appliance or your kitchen then they will not complete a repair.
This includes situations where appliances have been tiled in, sealed in with sealant, have wooden obstructions placed in front of the appliance
like plinths or any installation other than the one specified by FOCAL OINT has been completed
F861274
As our policy is one of continuous improvement and development, we therefore hope that you will understand we must retain the right to amend details and/or specifica-
tions without prior notice.
Waste electrical products should not be disposed of with household waste. lease recycle where facilities exist. Check with your local authority or retailer for recycling advice.
This manual suits for next models
1
Table of contents
Other Focal Point Refrigerator manuals

Popular Refrigerator manuals by other brands


GE
GE PSCF3RGXBB - Profile 23.4 cu. Ft. Refrirator Energy guide

Fisher & Paykel
Fisher & Paykel ActiveSmart E522B Installation instructions and user guide

Sub-Zero
Sub-Zero PRO3650 Use and care

Beko
Beko BTS 114200 user manual

Frigidaire
Frigidaire FFPT10F0KB l'utilisation et l'entretien

Kernau
Kernau KBC 08122 Instruction booklet


