fontastic FontaHome User manual

WLAN-Steckdose D
Improvement and changes of the technical specications and other data’s could be made without prior notice Fontastic, by D-Parts Mobilphon & Zubehör GmbH ● Birkenweiherstr, 16 ● 63505 Langenselbold, Germany / V1_08_18
Kurzanleitung
Vielen Dank dass Sie sich für Fontastic®Produkte entschieden haben.
Auf den folgenden Seiten werden die Bedienung und Funktionen der WLAN Funksteckdose erläutert.
Bitte nehmen Sie sich einen Moment Zeit, um diese Kurzanleitung zu lesen.
Bitte beachten Sie die Sicherheitshinweise.
Hinweis: Eine Bedienungsanleitung für das Produkt bieten wir unter www.d-parts.de an.
Übersicht
Die intelligente WLAN Funksteckdose für Ihr
Smart Home erlaubt es, angeschlossene
Verbraucher drahtlos per App oder über den
am Gerät bendlichen Taster ein- und
auszuschalten.
Mit der FontaHome App steuern Sie alle
kompatiblen Smart Home Geräte ohne
komplizierte Kongurationen weltweit über die
Cloud und können verbundene Geräte mit
Drittanbieterdiensten integrieren.
App-Funktionen wie Timer, Countdown und Szenen,
sowie das teilen der Geräte mit Familie und Freunden
vereinfachen die Bedienung der Geräte.
Erste Schritte
App Installation
Beziehen Sie die „FontaHome“-App aus Google Play, dem App Store oder folgen Sie dem
QR-Code bzw. Link (URL: www.d-parts.de/app/fontahome).
Registrierung
Vor Verwendung der FontaHome App müssen Sie sich registrieren.
Sie können hier über verschiedene Optionen der Registrierung wählen.
Hinweis: Zur Nutzung der App ist eine Internetverbindung, sowie die Registrierung notwendig. Bitte
beachten Sie die Datenschutzerklärung für die Verarbeitung Ihrer personenbezogener Daten in der
App oder unter www.d-parts.de/privacy_fontahome.
Konguration von Geräten (Einfacher-Modus)
1. Stecken Sie das Gerät in eine freie leicht zugängliche Steckdose
2. Sobald die Taste schnell rot blinkt (ca. 2-mal/Sekunde) kann das Gerät konguriert werden
(Einfacher-Modus). Falls die Taste nicht wie beschrieben blinkt, drücken und halten Sie die Taste
am Gerät so lange, bis sie schnell rot blinkt.
Hinweis: Sollte die Taste nur blau leuchten, so ist die Steckdose eingeschaltet.
Zum Ausschalten drücken Sie kurz auf die Taste.
3. Öffnen Sie die FontaHome App, melden Sie sich an und tippen Sie auf „Gerät Hinzufügen“ bzw.
das „+“-Symbol.
4. Erlauben Sie dem Gerät, sich mit dem WLAN-Netzwerk welches mit Ihrem Smartphone verbunden
ist, zu verbinden, indem Sie das Passwort des WLAN-Netzwerks eingeben und folgen Sie den
Anweisungen der App. Stellen Sie sicher, dass neue Geräte in das WLAN hinzugefügt werden
können.
5. Bei erfolgtem Hinzufügen des neuen Geräts, verbinden Sie den gewünschten Verbraucher mit
dem Gerät. Falls die Konguration im Einfachen-Modus nicht funktioniert, verwenden Sie den
AP-Modus. Das Gerät baut hierbei einen Access Point auf zu dem Sie Ihr Smartphone verbinden
müssen.
Konguration von Geräten (AP-Modus)
1. Stecken Sie das Gerät in eine freie leicht zugängliche Steckdose.
2. Sobald die Taste langsam rot blinkt (ca. 1-mal alle 2 Sekunden) kann das Gerät konguriert
werden (AP-Modus). Falls die Taste nicht wie beschrieben blinkt, drücken und halten Sie die Taste
am Gerät so lange, bis sie langsam rot blinkt.
Hinweis: Sollte die Taste nur blau leuchten, so ist die Steckdose eingeschaltet. Zum Ausschalten
drücken Sie kurz auf die Taste.
3. Öffnen Sie die FontaHome App, melden Sie sich an und tippen Sie auf „Gerät Hinzufügen“ bzw.
das „+“-Symbol.
4. Tippen Sie oben rechts auf „AP“.
5. Erlauben Sie dem Gerät, sich mit dem WLAN-Netzwerk welches mit Ihrem Smartphone verbunden
ist, zu verbinden, indem Sie das Passwort des WLAN-Netzwerks eingeben und folgen Sie den
Anweisungen der App.
6. Verbinden Sie Ihr Smartphone mit dem vom Gerät erstellten WLAN-Netzwerk „Smart Life-XXXX“,
wobei die letzten vier stellen variieren.
7. Bei erfolgtem Hinzufügen des neuen Geräts, verbinden Sie den gewünschten Verbraucher mit
dem Gerät.
Hinweis: Das Gerät und die App unterstützen nur 2.4GHz WLAN-Netzwerke. Sollte die Verbindung
fehlschlagen, schauen Sie bitte im Menü „FAQ“ in der App nach. Wir empfehlen Ihnen dem Gerät
einen eindeutigen Namen zu geben, z.B. „Nachttischlampe“.
Angeschlossene Verbraucher Ein-/Ausschalten
Sie können angeschlossene Verbraucher über die Taste am Gerät und per App ein- und ausschal-
ten. Über die App können Sie zudem noch Timer, Einen Countdown und verschiedene Szenen zur
Automation setzen.
Integration von Amazon Alexa
Sie können Ihre Geräte und Szenen aus der FontaHome App mit Amazon Alexa verknüpfen.
Gehen Sie hierzu folgendermaßen vor:
1. Stellen Sie sicher, dass Ihre Geräte in der FontaHome App hinzugefügt wurden und online sind.
2. Öffnen Sie die „Amazon Alexa“ App und navigieren Sie im Menü zu „Skills“ und suchen Sie
nach dem Skill „Smart Life“.
Hinweis: Falls Sie in der Amazon Alexa App noch nicht eingeloggt sind, verwenden Sie bitte Ihren
Amazon Account, der mit Ihrem Amazon Alexa fähigen Gerät (z.B. Amazon Echo) verbunden ist, um
Sich bei der Amazon Alexa App einzuloggen.
3. Sie werden zur Login Seite für den Skill „Smart Life“ weitergeleitet. Bitte melden Sie sich hier
mit den gleichen Daten an, die Sie bei der Anmeldung der FontaHome App verwendet haben.
Hinweis: Wenn eine Liste der Apps unter den Login Feldern erscheint, wählen Sie bitte
„FontaHome“ aus.
4. Klicken Sie nach erfolgter Anmeldung auf „autorisieren“, um Ihren FontaHome Account und
die darin verbundenen Geräte mit Amazon Alexa zu verknüpfen.
5. Rufen Sie erneut den Skill auf und wählen Sie „Einstellungen“ und „SMART HOME-GERÄTE
VERWALTEN“ aus.
6. Gehen Sie auf „GERÄTE“ oder „SZENEN“ und fügen Sie diese aus FontaHome hinzu. Amazon
Alexa sucht nach den kompatiblen Geräten in Ihrem FontaHome Account. Nach Abschluss des
Vorgangs werden diese aufgelistet.
7. Sie können nun über Amazon Alexa auf Ihre Geräte und Szenen von FontaHome zugreifen.
Über den Reiter „GRUPPEN“ in der „Amazon Alexa“ App können Sie noch Geräte-Gruppen
hinzufügen.
Hinweis: Die möglichen Sprachbefehle nden Sie in der „Amazon Alexa“ App unter dem
„Smart Life“ Skill.
Für die Integration von anderen Drittanbietern wie beispielsweise Google Assistant oder IFTTT
schauen Sie bitte in der FontaHome App im Bereich „Prol“ unter „Drittanbieter-Integration“
nach.
Gerät auf Werkseinstellungen zurücksetzen
Um das Gerät auf Werkseinstellungen zurückzusetzen und die WLAN-Einstellungen zu löschen,
gehen Sie in der App in das Menü vom Gerät und wählen Sie „Werkseinstellungen“, oder drücken
und halten Sie die Taste am Gerät so lange, bis sie rot blinkt.
Bei falscher Bedienung wird keine Haftung für eventuelle Schäden übernommen.
Falls Sie Technischen Support benötigen, kontaktieren Sie bitte unser Support-Team unter support.
fontastic.eu.
Sicherheitshinweise:
• Öffnen Sie niemals das Gerät.
• Tauchen Sie das Gerät nicht in Wasser und schützen Sie es vor Feuchtigkeit.
• Stecker nie mit Gewalt anschließen oder abziehen.
• Halten Sie Elektrogeräte fern von Kindern.
• Entfernen Sie elektronische Geräte vom Netz, wenn sie für einen längeren Zeitraum nicht
gebraucht werden.
• Die Steckdose in die das Gerät gesteckt wird muss leicht zugänglich sein.
• Benutzen Sie das Gerät nie, wenn es sichtbare Schäden aufweist.
• Schließen Sie keine Verbraucher an das Gerät an, wenn die Gebrauchsanleitung der Verbraucher
es verbietet ferngesteuert zu werden (z.B. Geräte die unter die Norm 60335-2-9 fallen wie
Grillgeräte und Kochplatten etc.)
• Schließen Sie keine Verbraucher an das Gerät an, die Wärme abstrahlen und Entzündung an
umliegende Materialien verursachen können (z.B. Strahlungsheizungen, tragbares Flutlicht etc.)
• Betreiben Sie das Gerät nicht im Freien oder in Räumen mit hoher Luftfeuchtigkeit.
• Schließen Sie keine Verbraucher an das Gerät an die eine höhere Leistungsaufnahme als
2300 Watt (10 Ampere) haben.
Technische Daten:
• Eingangsspannung: 100-230V~ 50/60Hz
• Schaltleistung: max. 10A 2300W
• Frequenzbereich: 2400-2483.5MHz
• Unterstützt WLAN Standards 802.11b/g/n (2.4GHz) mit WEP/WPA/WPA2 TKIP/AES
• Standby-Leistungsaufnahme: ≤0.3W
• Abmessungen: 83 x 52,5 mm
• Gewicht: 77g
Hiermit erklären wir, dass dieses Gerät die CE Kennzeichnung gemäß den Bestimmun-
gen und Vorgaben trägt. Es entspricht somit den grundlegenden Anforderungen der
RED-Richtlinie 2014/53EG.
Hinweis zum Umweltschutz:
Ab dem Zeitpunkt der Umsetzung der europäischen Richtlinie 2012/19
EU in nationales Recht gilt folgendes: Elektrische und elektronische
Geräte dürfen nicht mit dem Hausmüll entsorgt werden.
Der Verbraucher ist gesetzlich verpflichtet, elektrische und elektronische Geräte am Ende
ihrer Lebensdauer an den dafür eingerichteten, öffentlichen Sammelstellen oder an die Verkaufsstelle
zurückzugeben. Einzelheiten dazu regelt das jeweilige Landesrecht. Das Symbol auf dem Produkt,
der Gebrauchsanleitung oder der Verpackung weist auf diese Bestimmungen hin. Mit der Wieder-
verwertung, der stofflichen Verwertung oder anderer Formen der Verwertung von Altgeräten leisten
Sie einen wichtigen Beitrag zum Schutz unserer Umwelt. In Deutschland gelten oben genannte
Entsorgungsregeln, laut Batterieverordnung, für Batterien und Akkus entsprechend.
Amazon and Alexa are trademarks of Amazon.com, Inc. or its afliates.
App Store is a service mark of Apple Inc., registered in the U.S. and other countries.
©2017 Google LLC All rights reserved. Google, Google Play and Google Assistant are trademarks of
Google LLC.
IFTTT is a trademark of IFTTT Inc.
1. 230V-Buchse 3. Ein/Aus-Taste
2. 230V-Stecker
1
2
3
4
4. Status-LED

1. 230V-Socket 3. On/Off Switch
2. 230V-Plug 4. Status-LED
1
2
3
4
Improvement and changes of the technical specications and other data’s could be made without prior notice Fontastic, by D-Parts Mobilphon & Zubehör GmbH ● Birkenweiherstr, 16 ● 63505 Langenselbold, Germany / V1_08_18
WiFi Smart Socket GB
Quick Guide
Thank you for choosing Fontastic®products.
The following pages explain the operation and functions of the WiFi power socket.
Please take a moment to read this quick guide.
Please observe the safety instructions.
Note: Operating instructions for the product are available at www.d-parts.de
Overview
The WiFi smart socket allows you to control
plugged in appliances wirelessly via an app
or the button on the device.
With the FontaHome app, you can control
all compatible smart home devices worldwide
via the cloud without complicated congurations
and can integrate connected devices with
third-party services.
App functions such as timers, countdown and
scenes, as well as sharing the devices with family
and friends, simplify the operation of the devices.
Get Started
App installation
Get the „FontaHome“ app from Google Play, the App Store, or follow the QR code or link
(URL: www.d-parts.de/app/fontahome).
Registration
You must register before using the FontaHome app.
You can choose from various registration options.
Note: To use the app, an internet connection and registration is required. Please note the privacy
policy for the processing of your personal data in the app or at www.d-parts.de/privacy_fontahome.
Conguration of Devices (easy mode)
1. Plug the device into an easily accessible power outlet.
2. As soon as the button quickly ashes red (approx. 2 times/second), the device can be congured
(simple mode). If the button does not ash as described, press and hold the button on the device
until it quickly ashed red.
Note: If the button only lights up blue, the socket is switched on. To turn off, press the button briey.
3. Open the FontaHome app, log in and press the „Add Device“ or the „+“ symbol.
4. Allow the device to connect to the wireless network connected to your phone by entering the
wireless network password and follow the instructions in the app. Make sure that new devices can
be added to the wireless network.
5. After adding the new device, connect the desired appliance to the device.
Note: If conguration does not work in easy mode, use AP mode.
The device sets up an access point to which you must connect your phone.
Conguration of Devices (AP mode)
1. Plug the device into an easily accessible power outlet.
2. As soon as the button slowly ashes red (approx. once every 2 seconds), the device can be
congured (AP mode). If the button does not ash as described, press and hold the button on
the unit until it slowly ashes red.
Note: If the button only lights up blue, the socket is switched on. To turn off, press the button briey.
3. Open the FontaHome app, log in and press the „Add Device“ or the „+“ symbol.
4. Press „AP“ in the upper right corner.
5. Allow the device to connect to the wireless network connected to your phone by entering the
wireless network password and follow the instructions in the app.
6. Connect your phone to the „Smart Life-XXXX“ WiFi network created by the device, with the last
four digits varying.
7. After adding the new device, connect the desired appliance to the device.
Note: The device and app only support 2.4GHz WiFi networks. If the connection fails, please refer
to the „FAQ“ menu in the app. We recommend that you give the device a unique name, e.g. „Bedside
lamp“.
Switch on/off plugged in appliances
You can switch plugged in appliances on and off via the button on the device and via the app.
You can also use the app to set timers, a countdown and various automation scenes.
Integration of Amazon Alexa
You can link your devices and scenes from the FontaHome app to Amazon Alexa.
To do this, proceed as follows:
1. Make sure that your devices have been added to the FontaHome app and are online.
2. Open the „Amazon Alexa“ app and navigate to „Skills“ in the menu and search for the
„Smart Life“ skill.
Note: If you are not yet logged in to the Amazon Alexa App, please use your Amazon account,
which is connected to your Amazon Alexa enabled device (e.g. Amazon Echo), to log in to the
„Amazon Alexa“ App.
3. You will be forwarded to the login page for the „Smart Life“ skill. Please log in with the same
credentials that you used when you registered for the FontaHome app.
Note: If a list of apps appears below the login elds, please select „FontaHome“.
4. Once logged in, click „Authorize“ to link your FontaHome account and the devices connected to
it, to your Amazon Alexa.
5. Open the skill again and select „SETTINGS“ and „MANAGE SMART HOME DEVICES“.
6. Navigate to „DEVICES“ or „SCENES“ and add them from FontaHome. Amazon Alexa will search
for compatible devices in your FontaHome account. Once the process is complete, they will be
listed.
7. You can now access your FontaHome devices and scenes from Amazon Alexa. Using the
„GROUPS“ tab in the „Amazon Alexa“ app, you can add device groups.
Note: The available voice commands can be found in the „Amazon Alexa“ app under the
„Smart Life“ skill.
For the integration of other third-parties for example Google Assistant or IFTTT please look in the
FontaHome app in the „Prole“ section under „3rd party integration“.
Reset Device to Factory Settings
To reset the device to factory settings and delete WiFi settings, go to the devices menu in the app
and select „Factory settings“, or press and hold the button on the device until it ashes red.
No commitment for any damage at misuse.
In case you need technical support, please contact our support team under support.fontastic.eu.
Safety advice:
• Do not open the device.
• Do not immerse the device in water and protect it from humidity.
• Never use force to connect or disconnect the plug.
• Keep the device away from children.
• Disconnect electronic devices from the power when not using them for longer time.
• The power outlet which the device is to be used must be easily accessible.
• Never use the device if it is visibly damaged.
• Do not connect appliances to the device if the operating instruction of the appliance prohibits remote
control (e.g. appliances that fall under standard 60335-2-9 such as barbecues and hotplates etc.).
• Do not connect appliances that can radiate heat and cause ignition to surrounding materials (e.g.
radiant heaters, portable oodlight, etc.).
• Do not operate the unit outdoors or in rooms with high humidity.
• Do not connect any appliances with power consumption higher than 2300 watts (10 amps) to the
device.
Technical Data:
• Input Voltage: 100-230V~ 50/60Hz
• Switching Power: max. 10A 2300W
• Frequency Range: 2400-2483.5MHz
• Supports WiFi specication 802.11b/g/n (2.4GHz) with WEP/WPA/WPA2 TKIP/AES
• Standby Power Consumption: ≤0.3W
• Dimensions: 83 x 52,5 mm
• Weight: 77g
Registration and Safety
Certication/General Information
We hereby declare, that this device carries the CE mark in accordance with the
regulations and standards. It conforms with the fundamental requirements of the
(RED) 2014/53/EC directive.
Note on environmental protection:
After the implementation of the European Directive 2012/19/EC in the national legal
system, the following applies:
Electrical and electronic devices may not be disposed of with domestic waste.
Consumers are obliged by law to return electrical and electronic devices at the end of their
service lives to the public collecting points set up for this purpose or point of sale. Details of this are
dened by the national law of the respective coun-try. This symbol on the product, the instruction
manual or the package indicates that a product is subject to these regulations. By recycling, re-using
the materials or other forms of utilising old devices, you are making an important contribution to
protecting our environment.
Amazon and Alexa are trademarks of Amazon.com, Inc. or its afliates.
App Store is a service mark of Apple Inc., registered in the U.S. and other countries.
©2017 Google LLC All rights reserved. Google, Google Play and Google Assistant are trademarks of
Google LLC.
IFTTT is a trademark of IFTTT Inc.
Table of contents
Languages:
Other fontastic Accessories manuals

fontastic
fontastic Renz20 User manual

fontastic
fontastic Kari 10 User manual
fontastic
fontastic Atria20 User manual
fontastic
fontastic CRANK10 User manual
fontastic
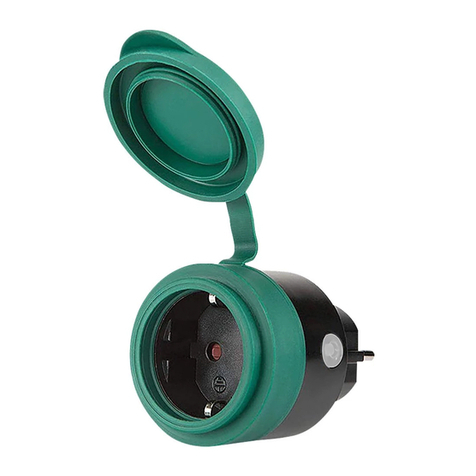
fontastic FontaHome User manual

fontastic
fontastic Renz10 User manual

fontastic
fontastic Cald User manual
fontastic
fontastic Loru User manual

fontastic
fontastic Kari 10 User manual
fontastic
fontastic Eta User manual
