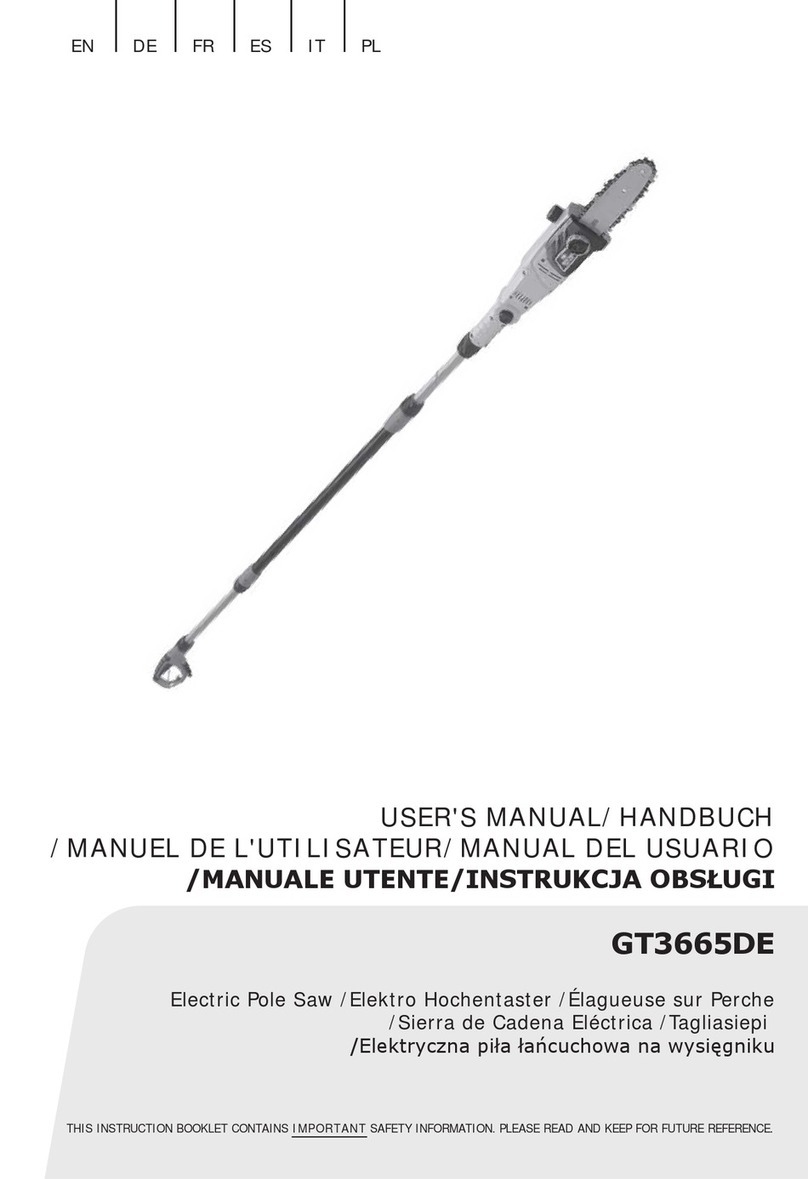
for_q FQ-AHE 4020 BASIC User manual

EN
1
Thank you!
We are convinced that this machine
will exceed your expectations and
wish you joy while using it.
Please read this user manual com-
pletely, observe the safety instruc-
tions and keep it for future reference.
Scope of delivery
1x Pole chain saw
1x Guide bar
1x Saw chain
1x Guide bar cover
1x Harness
1x Battery belt
If any parts are missing or damaged,
please contact your HORNBACH
Store.
Table of content
Scope of delivery 161
Symbols 162
Safety instructions 163
Technical data 169
Noise & vibration 169
Product overview 170
Intended use 170
Product operation 170
Lubricating the chain 172
Battery 172
Using the device 173
Basic working technique 174
Care & Maintenance 176
Storage 177
Replacement parts 177
Repairs 177
Declaration of conformity 178
Disposal 179

EN
2
Symbols
Warning of accident and in-
jury to persons and serious
damage to property.
Please read this user manual
carefully and keep it for fur-
ther reference.
Wear safety glasses for pro-
tection of your eyes.
Wear hearing protection for
protection of your ears.
Wear head protection.
Wear protection gloves.
Wear sturdy shoes.
Danger of falling limbs! Keep
bystanders away.
Protect the device from rain
and do not leave it outdoors
in the rain!
The guaranteed sound pow-
er level is 97 dB.
Direct current (DC)
v0 Chain speed (no load)
Danger to life by electric
shock! Never touch power
or telephone cables. Keep
at least a distance of 15 m.
Keep bystanders away.
Prescribed running direc-
tion of saw chain.
Please read this user man-
ual carefully and keep it for
further reference.
Lock/Unlock the chain
sprocket cover.

EN
3
Safety instructions
GENERAL POWER TOOL SAFETY
WARNINGS
WARNING Read all safety
warnings and all instructions.
Failure to follow the warnings
and instructions may result in electric
shock, fire and/or serious injury.
Save all warnings and instructions
for future reference.
The term „power tool“ in the warn-
ings refers to your mains-operated
(corded) power tool or battery-oper-
ated (cordless) power tool.
1 WORK AREA SAFETY
a) Keep work area clean and well lit.
Cluttered or dark areas invite acci-
dents.
b) Do not operate power tools in ex-
plosive atmospheres, such as in
the presence of flammable liquids,
gases or dust. Power tools create
sparks which may ignite the dust
or fumes.
c) Keep children and bystanders
away while operating a power
tool. Distractions can cause you to
lose control.
2 ELECTRICAL SAFETY
a) Power tool plugs must match the
outlet. Never modify the plug in
any way. Do not use any adapter
plugs with earthed (grounded)
power tools. Unmodified plugs
and matching outlets will reduce
risk of electric shock.
b) Avoid body contact with earthed
or grounded surfaces, such as
pipes, radiators, ranges and re-
frigerators. There is an increased
risk of electric shock if your body is
earthed or grounded.
c) Do not expose power tools to rain
or wet conditions. Water entering
a power tool will increase the risk
of electric shock.
d) Do not abuse the cord. Never use
the cord for carrying, pulling or
unplugging the power tool. Keep
cord away from heat, oil, sharp
edges or moving parts. Damaged
or entangled cords increase the
risk of electric shock.
e) When operating a power tool out-
doors, use an extension cord suit-
able for outdoor use. Use of a cord
suitable for outdoor use reduces
the risk of electric shock.
f) If operating a power tool in a
damp location is unavoidable, use
a residual current device (RCD)
protected supply. Use of an RCD
reduces the risk of electric shock.
3 PERSONAL SAFETY
a) Stay alert, watch what you are do-
ing and use common sense when
operating a power tool. Do not use
a power tool while you are tired or
under the influence of drugs, alco-
hol or medication. A moment of
inattention while operating power
tools may result in serious person-
al injury.
b) Use personal protective equip-
ment. Always wear eye protec-
tion. Protective equipment such as
dust mask, non-skid safety shoes,
hard hat, or hearing protection
used for appropriate conditions
will reduce personal injuries.
c) Prevent unintentional starting.
Ensure the switch is in the o-po-
sition before connecting to power
source and/or battery pack, pick-
ing up or carrying the tool. Carry-
ing power tools with your finger
on the switch or energising power
tools that have the switch on in-
vites accidents.
d) Remove any adjusting key or
wrench before turning the power

EN
4
tool on. A wrench or a key left at-
tached to a rotating part of the
power tool may result in personal
injury.
e) Do not overreach. Keep proper
footing and balance at all times.
This enables better control of the
power tool in unexpected situa-
tions.
f) Dress properly. Do not wear loose
clothing or jewellery. Keep your
hair, clothing and gloves away
from moving parts. Loose clothes,
jewellery or long hair can be
caught in moving parts.
g) If devices are provided for the con-
nection of dust extraction and col-
lection facilities, ensure these are
connected and properly used. Use
of dust collection can reduce dust-
related hazards.
h) Do not let familiarity gained from
frequent use of tools allow you to
become complacent and ignore
tool safety principles. A careless
action can cause severe injury
within a fraction of a second.
4 POWER TOOL USE AND CARE
a) Do not force the power tool. Use
the correct power tool for your ap-
plication. The correct power tool
will do the job better and safer at
the rate for which it was designed.
b) Do not use the power tool if the
switch does not turn it on and o.
Any power tool that cannot be con-
trolled with the switch is danger-
ous and must be repaired.
c) Disconnect the plug from the
power source and/or the battery
pack from the power tool before
making any adjustments, chang-
ing accessories, or storing pow-
er tools. Such preventive safety
measures reduce the risk of start-
ing the power tool accidentally.
d) Store idle power tools out of the
reach of children and do not al-
low persons unfamiliar with the
power tool or these instructions
to operate the power tool. Power
tools are dangerous in the hands
of untrained users.
e) Maintain power tools. Check for
misalignment or binding of mov-
ing parts, breakage of parts and
any other condition that may af-
fect the power tool’s operation. If
damaged, have the power tool re-
paired before use. Many accidents
are caused by poorly maintained
power tools.
f) Keep cutting tools sharp and
clean. Properly maintained cutting
tools with sharp cutting edges are
less likely to bind and are easier to
control.
g) Use the power tool, accessories
and tool bits etc. in accordance
with these instructions, taking
into account the working con-
ditions and the work to be per-
formed. Use of the power tool for
operations dierent from those in-
tended could result in a hazardous
situation.
h) Keep handles and grasping sur-
faces dry, clean and free from oil
and grease. Slippery handles and
grasping surfaces do not allow for
safe handling and control of the
tool in unexpected situations.
5 BATTERY TOOL USE AND CARE
a) Recharge only with the charger
specified by the manufacturer.
A charger that is suitable for one
type of battery pack may create a
risk of fire when used with another
battery pack.
b) Use power tools only with spe-
cifically designated battery packs.
Use of any other battery packs
may create a risk of injury and fire.
c) When battery pack is not in use,
keep it away from other metal ob-
jects, like paper clips, coins, keys,

EN
5
nails, screws or other small metal
objects, that can make a connec-
tion from one terminal to another.
Shorting the battery terminals to-
gether may cause burns or a fire.
d) Under abusive conditions, liquid
may be ejected from the battery;
avoid contact. If contact acciden-
tally occurs, flush with water. If
liquid contacts eyes, additionally
seek medical help. Liquid ejected
from the battery may cause irrita-
tion or burns.
e) Do not use a battery pack or tool
that is damaged or modified.
Damaged or modified batteries
may exhibit unpredictable behav-
iour resulting in fire, explosion or
risk of injury.
f) Do not expose a battery pack or
tool to fire or excessive tempera-
ture. Exposure to fire or tempera-
ture above 130 °C may cause ex-
plosion.
g) Follow all charging instructions
and do not charge the battery
pack or tool outside the tempera-
ture range specified in the instruc-
tions. Charging improperly or at
temperatures outside the specified
range may damage the battery
and increase ther isk of fire.
6 SERVICE
a) Have your power tool serviced
by a qualified repair person using
only identical replacement parts.
This will ensure that the safety of
the power tool is maintained.
b) Never service damaged battery
packs. Service of battery packs
should only be performed by the
manufacturer or authorized ser-
vice providers.
7 SAFETY INSTRUCTIONS FOR
POLE CHAIN SAWS
a) Keep all parts of the body away
from the saw chain when the
chain saw is operating. Before
you start the chain saw, make
sure the saw chain is not con-
tacting anything. A moment of
inattention while operating chain
saws may cause entanglement
of your clothing or body with the
saw chain.
b) Hold the electric power tool by
the insulated handle surfaces, as
the saw chain may contact hid-
den wiring. If the saw chain comes
into contact with a live line, metal-
lic parts of the unit may become
energised and cause an electric
shock.
c) Wear safety glasses and hear-
ing protection. Further protec-
tive equipment for head, hands,
legs and feet is recommended.
Adequate protective clothing will
reduce personal injury by flying
debris or accidental contact with
the saw chain.
d) Do not work with the chain saw
in a tree. When operating the
chain saw in a tree, there is a risk
of injury.
e) Always keep proper footing and
operate the chain saw only when
standing on fixed, secure and
level surface. Slippery or unsta-
ble surfaces such as ladders may
cause a loss of balance or control
of the chain saw.
f) When cutting a limb that is under
tension be alert for spring back.
When the tension in the wood fi-
bres is released the spring loaded
limb may strike the operator and/
or throw the chain saw out of con-
trol.
g) Use extreme caution when cut-
ting brush and saplings. The slen-
der material may catch the saw
chain and be whipped toward you
or pull you o balance.
h) Carry the chain saw by the
front handle with the chain saw

EN
6
switched o and away from your
body. When transporting or stor-
ing the chain saw always fit the
guide bar cover. Proper handling
of the chain saw will reduce the
likelihood of accidental contact
with the moving saw chain.
i) Follow instructions for lubri-
cating, chain tensioning and
changing accessories. Improp-
erly tensioned or lubricated chain
may either break or increase the
chance for kickback.
j) Keep the handles dry, clean and
free of oil and grease. Greasy and
oily handles are slippery and will
cause loss of control.
k) Saw wood only. Do not use the
chain saw for work for which it is
not designed.
Example: Do not use the chain
saw for sawing plastic, masonry
or non-wood building materials.
If the chain saw is not used as in-
tended, this may result in hazard-
ous situations.
8 CAUSES OF AND AVOIDING A
KICKBACK
Kickback may occur when the
nose or tip of the guide bar
touches an object, or when the
wood closes in and pinches the
saw chain in the cut.
Tip contact in some cases may
cause a sudden reverse reac-
tion, kicking the guide bar up
and back towards the operator.
Pinching the saw chain along the
top of the guide bar may push the
guide bar rapidly back towards the
operator.
Either of these reactions may
cause you to lose control of the
saw which could result in serious
personal injury. Do not rely ex-
clusively upon the safety devices
built into your saw. As a chain
saw user, you should take several
steps to keep your cutting jobs
free from accident or injury.
Kickback is the result of tool
misuse and/or incorrect operat-
ing procedures or conditions and
can be avoided by taking proper
precautions as given below:
a) Maintain a firm grip, with thumbs
and fingers encircling the chain
saw handles, with both hands on
the saw and position your body
and arm to allow you to resist
kickback forces. Kickback forces
can be controlled by the operator,
if proper precautions are taken. Do
not let go of the chain saw.
b) Do not overreach and do not cut
above shoulder height. This helps
prevent unintended tip contact and
enables better control of the chain
saw in unexpected situations.
c) Only use replacement bars and
chains specified by the manufac-
turer. Incorrect replacement bars
and chains may cause chain break-
age and/or kickback.
d) Follow the manufacturer’s sharp-
ening and maintenance instruc-
tions for the saw chain. Decreas-
ing the depth gauge height can
lead to increased kickback.
9 ADDITIONAL SAFETY INSTRUC-
TIONS
a) Before using the power tool, fa-
miliarise yourself thoroughly with
the sawing technique of chain
saws. Information can be found in
the specialist literature. We recom-
mend attending suitable training
courses.
b) This unit is not designed to be
used by persons (including chil-
dren) who have limited physical,
sensory or mental abilities or who
have inadequate experience and/
or knowledge of the unit, unless
they are supervised by a person
responsible for their safety or they

EN
7
have been instructed by the per-
son how to use the unit. Children
should be supervised to ensure
that they do not play with the unit.
c) Switch the unit o and remove
the battery under the following
conditions:
– if the unit is left unattended;
– before checking, cleaning or
performing other work on the
unit;
– if the unit starts vibrating exces-
sively.
d) While sawing, ensure that there
are no persons (particularly chil-
dren) or animals in the working
area. Ensure that children do not
play with the unit.
e) Check the terrain on which the
unit will be used and remove any
stones and pieces of wire which
could be picked up by the chain
saw to avoid endangering people
or wearing out the unit.
f) Ensure that the saw chain does
not touch the ground or other ob-
jects.
g) When interrupting work, never
leave the unit unattended and
keep it in a safe place.
h) Always switch the chain saw o
before transporting it to other
workplaces.
i) Ensure that all guards and han-
dles are fitted before using the
unit. Never attempt to switch on
an incompletely assembled unit
or a unit which has unauthorised
modifications.
j) Operate the unit only in the tech-
nical condition stipulated and
delivered by the manufacturer.
Unauthorised changes to the unit
exclude liability of the manufactur-
er for any resulting damage and/or
injury.
k) Spare parts must conform with
the requirements specified by the
manufacturer. Therefore use origi-
nal spare parts only or spare parts
authorised by the manufacturer.
When replacing parts, please fol-
low the supplied installation in-
structions and remove the battery
beforehand.
l) Have repairs carried out exclu-
sively by a qualified technician or
a service centre.
10ADDITIONAL SAFETY INSTRUC-
TIONS ON RISKS DUE TO VIBRA-
TION
a) The declared vibration data repre-
sents the main applications of the
tool, but dierent uses of the tool
or poor maintenance can result in
dierent vibration data. This may
significantly increase the vibration
level over the total working period.
b) Additional safety measure shall
be taken to protect the user from
eects of vibration. Maintain the
tool and its accessories, keep
hands warm and organize work
patterns and periods.
For safety instructions for the bat-
tery charger please refer to the man-
ual of the charger.
For safety instructions for Li-ion bat-
teries please refer to the manual of
the battery.

EN
8

EN
9
Technical data
Type FQ-AHE 4020 BASIC
Nominal voltage 40 V
Battery type and weight FQ-LIO 4020 / 2,0 Ah / 0,9 kg
FQ-LIO 4040 / 4,0 Ah / 1,3 kg
FQ-LIO 4060 / 6,0 Ah / 1,7 kg
Chain speed (no load) 6 m/s
Guide bar length 200 mm
Adjusting range 0 - 400 mm
Amount of drive links 33
Oil tank volume XYZ ml
Weight according to “EPTA Procedure
01/2003” (without battery, guide bar
and saw chain)
3,1 kg
Sound pressure level LpA XYZ dB(A), Uncertainty: 3 dB(A)
Sound power level LwA 97 dB(A), Uncertainty: 3 dB(A)
Vibration emission value ahXYZ m/s2, Uncertainty: 1,5 m/s2
Noise & Vibration
The values given in these instructions
have been measured in accordance
with a standardized measurement
procedure specified in EN 60745 and
can be used to compare tools.
It may be used for a preliminary as-
sessment of exposure.
Warning! The vibration emis-
sion during actual use can
dier from the declared total value
depending on the use of the ma-
chine.
Please observe the article number on the type plate of the appliance. The
trade names of the individual appliance may vary.

EN
10
1 2 Insert Battery
Press the charged battery into
the insertion slot9 until it clicks
into place.
To remove, press the release
button (1.) and pull out the bat-
tery (2.).
Attach harness
Attach the harness to the har-
ness connector 6of the ma-
chine and adjust the harness to
your height.
Product overview
1 Oil tank cover
2 Chain tensioning wheel
3 90° rotation lever
4 Front handle
5 Lower tube
6 Harness connector
7 Release switch
8 Main handle
9 Insertion slot
10 Saw chain
11 Guide bar
12 Sprocket cover wheel
13 Sprocket cover
14 Motor housing
15 Length adjustment coupling
16 On/O switch
Intended use
This garden tool is
– intended to take care of trees and
bushes in the private sector;
– not intended to cut trees;
– not suitable for sawing plastic, ma-
sonry or building materials which
are not made of wood;
– to use according to the descriptions
and safety instructions indicated in
this operating manual.
Any other use is not as intended. Im-
proper use is not covered by the war-
ranty and the manufacturer will reject
any liability. The user is liable for all
injuries to third parties and damage
to their property.

EN
11
Adjust length
Loosen the length adjustment
coupling 15 by turning it into
the indicated direction.
Fill in chain oil
(1.) Open the oil tank cover 1,
carefully.
(2.) Fill the oil tank to the MAX
mark and close the oil tank cov-
er1.
(1.) Put the saw chain10 into the
guide bar11 in the right running
direction.
(2.) Fit the guide bar11 into the
motor housing14. Place the saw
chain10 around the sprocket.
Install guide bar and chain
Unscrew the sprocket cover
wheel12.
(1.) Attach the sprocket cov-
er13 by tightening the sprocket
cover wheel12.
(2.) Straighten the saw chain10
with the chain tensioning
wheel 2until it can be pulled
2-3mm o at its middle.
Remove the sprocket cover13.
(1.) Set the motor housing14 to
the desired position.
(2.) Tighten the length adjust-
ment coupling 15 by turning it
into the indicated direction.
Switching on/o
(1.) Press and hold the release
switch7.
(2.) Press the On/O switch 16
to switch on the machine. Re-
lease the On/O switch 16 to
switch o.
Warning! The saw chain is
very sharp! Wear protective
gloves. Risk of injury!
Caution! When attaching the
chain, observe the running
direction!
1
1
1
1
2
2
2
2
3 4
Make sure the 90° rotation le-
ver3 has engaged and the ma-
chine housing cannot turn.
Rotate motor housing
(1.) Push the 90° rotation lever3
and keep it pushed.
(2.) Rotate the motor hous-
ing14 to the indicated direction.

EN
12
Battery
STATE OF CHARGE
Press the button to check the state of
charge on LED indicator. To charge
consult the user manual of the charg-
er.
≤ 25 %
≤ 100 %
≤ 75 %
≤ 50 %
Lubricating the chain
Caution! The unit may be op-
erated with adequate chain
lubricating oil only. Inadequate lu-
brication will reduce the service
life of the power tool.
1. Check the chain oil level at the oil
level indicator and top up with
chain oil if required.
2. Fill the unit only with an envi-
ronmentally compatible quality
chain and bar lubricant (accord-
ing to RAL-UZ48).
3. Do not use waste oil. Renewed
contact with waste oil can cause
skin cancer. Waste oil is environ-
mentally harmful. Waste oil does
not have the necessary lubricat-
ing properties and is unsuitable
for chain lubrication.
4. Any oil other than the one recom-
mended may damage the guide
bar, the chain and the lubricating
system.
5. Ensure that dirt does not get into
the oil tank.
6. Avoid spilling oil. Always wipe up
any spilled oil.
Checking the chain lubrication
1. Start the unit (see “Switching on/
o”).
2. Hold running pole saw chain for
some time approx. 15 cm above
a suitable surface. If there is ad-
equate chain lubrication, the oil
which is ejectedby the saw chain
will form a light trail.

EN
13
Using the device
Warning! Before using the
power tool, familiarise your-
self thoroughly with the sawing
technique of pole chain saws (see
section “Basic working tech-
nique”). Risk of injury! Never allow
children to operate the pole chain
saw. Allow no person to use this
pole chain saw who has not read
this user manual or received ade-
quate instructions for the safe and
proper use of this pole chain saw!
Warning! Hold the pole chain
saw firmly with both hands!
Ensure that the saw chain does not
touch any objects or the ground
and that there are no people or
animals in the vicinity before start-
ing! Risk of injury!
Before each use
• Check that all parts of the garden
tool are present, firmly attached
and undamaged.
• Check that the chain tension is cor-
rect.
• Check the chain lubrication.
• Check that there are no leaks.
• Ensure that you wear the adequate
personal protective equipment.
Correct posture
Warning!
• Never work on unstable ground!
• Never work while standing on a
ladder!
• Do not bend too far forwards
when working!
• Use the garden tool only when
the weather conditions and ter-
rain are favourable!
• Stand with both legs firmly on the
ground.
• Beware of obstructions in the
working area.
• Wear the harness for better weight
distribution of the garden tool.
• When working, always hold the
garden tool with both hands!
• Hold the garden tool:
– with the left hand on the front
handle4.
– with the right hand on the main
handle8.
Using the device correctly
• Look over the working area and re-
move any obstructions.
• Before starting work, check the
safety of the power tool (see “Be-
fore each use”).
• Pick up the power tool in both
hands as specified.
• Switch the pole chain saw on be-
fore starting the cut.
• Apply a uniform pressure to the
unit, however not excessive force.

EN
14
Basic working
technique
Warning! The information
given here does not replace
the extensive training and experi-
ence of a specialist.
Warning! Avoid any work for
which you are not adequate-
ly qualified! Imprudent handling
of the power tool may result in ex-
tremely serious to fatal injuries!
Danger! Stand on uphill side
when cutting! Log may roll.
Push stroke sawing
With this technique the upper side of
the guide bar saws from bottom to
top. The saw chain pushes the power
tool backwards towards the user.
Pull stroke sawing
With this technique the underside of
the guide bar saws from top to bot-
tom.
After use
• Stop the engine.
• Wait until all rotating parts have
come to a standstill.
• Remove the battery.
• Place guide bar cover on cutting
mechanism.
• Leave power tool to cool down.
Warning! The saw chain con-
tinues to operate briefly after
the On/O switch is released.
Caution! Always switch the
motor o before you put the
power tool down!

EN
15
The saw chain pushes the power tool
forwards away from the user. The
front edge of the power tool forms
a support which absorbs the forces
which occur when sawing on the
tree trunk. In pull stroke sawing the
user has much more control over the
power tool and can better avoid kick-
backs. Therefore this sawing tech-
nique should be used preferably.
Warning! If the guide bar
jams, the garden tool may
be thrown back towards the user
with great force. If the user does
not use his physical strength to
compensate for the force of the
saw chain pushing backwards,
there is a risk that only the tip of
the guide bar will make contact
with the wood and cause a kick-
back. Risk of death or extremely
severe injuries!
Removing branches
2.
1.
3.
• Always work on the side opposite
the branch in question.
• Start at the bottom of the trunk
and work upwards.
• 10–15 cm from the base of the
branch saw upwards into the
branch 1/3 of the branch diameter
(1.).
• A little further up the branch saw
through the branch from top to
bottom (2.).
• Make a cut close to the trunk (3.).
Make the cut from top to bottom.
• When limbing trunks lying flat on
the ground, first always saw o
the branches pointing upwards.
Do not cut through supporting
branches until the trunk has been
sawn into lengths.
Warning! Branches which
are supported or under ten-
sion may wedge the saw chain in
the wood!

EN
16
Care & Maintenance
Regular and proper cleaning will not
only ensure safe use, it also prolongs
the life time of the machine.
Warning! Before performing
any work on the tool, remove
the battery.
Warning! Risk of injury by
the saw chain! Wear protec-
tive gloves.
-Always:
∙clean the tool after use.
-Regularly:
∙tension the saw chain.
∙clean oil guide groove in the
guide bar.
∙regrind the saw chain.
∙check saw chain oil level and top
up if required.
Cleaning
-Clean the unit with a damp cloth
and a soft brush.
-Remove the chain sprocket cover,
and then use a soft brush to re-
move debris from the guide bar,
saw chain, sprocket and chain
sprocket cover.
-Keep the ventilation slots clean and
free of dust.
Caution! Do not use water or
liquid detergents.
Tensioning the saw chain
The saw chain must not sag, but it
should be possible to pull it 2-3 milli-
metres o the guide bar in the middle
of the guide bar.
-Slightly loosen the sprocket cover
wheel until the guide bar can be
moved by hand.
-Turn the chain tensioning wheel on
anticlockwise to tension the chain.
-Turn the saw chain by hand to
check that it runs perfectly. It must
slide freely in the guide bar.
-Tighten the sprocket cover wheel
to fix the guide bar and the chain
sprocket cover in place.
Note: Check and re-adjust the ten-
sion of a new chain after working for
a few minutes. Switch the motor o,
remove the battery and actuate the
chain brake.
Cleaning oil guide groove in the
guide bar
-Remove guide bar.
-Remove dirt from the oil guide
groove using a suitable tool. Use a
plastic spatula, not a steel tool!
-Re-attach guide bar.
Regrinding saw chain
Special tools are required to sharpen
the saw chain and guarantee that the
blades of the chain are sharpened at
the correct angle and to the correct
depth. We recommend having the
saw chain reground by a specialist.

EN
17
Storage
-Store the unit in a dry and frost-free
place (10-25 °C).
-Store the battery and the unit sepa-
rately.
-Charge the battery before storing
the unit in winter.
-For a prolonged period of non-use
always drain the chain lubricating
oil out the power tool.
-Place guide bar cover on cutting
mechanism.
-Keep the unit, in particular its plas-
tic components, away from brake
fluids, petrol, petroleum products,
penetrating oil, etc. They contain
chemical substances which may
damage, attack or destroy the plas-
tic components of the unit.
-Fertilisers and other garden chemi-
cals contain substances which may
have a highly corrosive eect on
the metal parts of the unit. There-
fore do not store your unit near
these substances.
Replacement parts
Please quote the following data when
ordering replacement parts:
-Type of machine
-Article number of the machine
-Identification number of the ma-
chine
-Replacement part number of the
part required
Guide bar Saw chain
200 mm
(8")
XYZ XYZ
On request in the market.
Repairs
Check the unit for damage. Repairs
may be carried out by an authorised
customer service centre only.

EN
18
Declaration of con-
formity
We declare, that the product
described in Technical Data:
Battery operated pole chain saw
FQ-AHE 4020 BASIC
manufactured for:
HORNBACH Baumarkt AG
Hornbachstraße 11
76879 Bornheim / Germany
is in conformity with the following di-
rectives:
Machinery Directive 2006/42/EC
Outdoor Directive 2000/14/EC
EMC Directive 2014/30/EU
and in accordance to the following
applicable harmonized standards:
EN 60745-1:2010
EN 60745-2-13:2010
EN 55014-1:2011
EN 55014-2:2008
ISO 11680 -1
The conformity with the Machinery
Directive is verified by the conform-
ity assessment procedure according
to the Directive 2006/42/EC.
The conformity with the Noise Emis-
sion of Outdoor Equipment Directive
is verified by the conformity assess-
ment procedure according to annex
V, and the Directive 2000/14/EC.
Measured sound power level:
XYZ dB(A)
Guaranteed sound power level:
97 dB(A)
Notified Body:
Intertek Deutschland GmbH
Stangenstraße 1
70771 Leinfelden-Echterdingen
Notified Body No.: 0905
Cert. No.: XYZ
Andreas Back
Head of Quality Management, envi-
ronment & CSR
Person authorised to compile the
technical file
Bornheim, 24.10.2016
HORNBACH Baumarkt AG
Hornbachstraße 11
76879 Bornheim / Germany

EN
19
Disposal
The crossed-out wheeled bin
logo requires the separate col-
lection of waste electric and
electronic equipment (WEEE).
Such equipment may contain dan-
gerous and hazardous substances.
These machines must be returned to
a designated collection point for the
recycling of WEEE and must not be
disposed as unsorted municipal
waste. By doing so, you will help to
conserve resources and protect the
environment. Contact your local au-
thorities for more information.
Children must not play with plastic
bags and packaging material, due to
possible injury or danger of suoca-
tion. Store such material safely or
dispose of environmentally friendly.
Used batteries must be disposed of
properly.
Battery selling stores and municipal
collection points oer special con-
tainers for battery disposal.

EN
20
Table of contents
