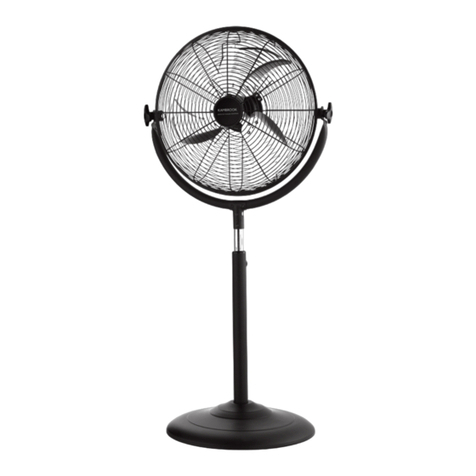
ForestAir 13-07009 User manual

OPERATING INSTRUCTIONS DESCRIPTION
16” OSCILLATING PEDESTAL FAN WITH REMOTE CONTROL
MODEL NO.: 13-07009
Thank you for purchasing this high quality fan.
00161-11/29/04 VERSO
READ AND SAVE THESE INSTRUCTIONS
• Use this fan only as described in this manual. Other use not recom-
mended may cause fire, electric shock or injury.
• This product is intended for household, industrial and commercial use
ONLY. It is not intended for outside use.
• High velocity fans are designed to create rapid air movement; there-
fore, make sure the fan is not placed near drapes, curtains, or any
objects that may be drawn into the fan inlet.
• This fan requires a grounded 120 volt power source (3 prong recep-
tacles). NEVER connect the fan to any power source other than a
120 volt alternating current polarized outlet.
• To protect against electric shock, do not immerse unit, plug or cord
in water or spray with liquids.
• This fan is equipped with a polarized alternating current line plug (a
plug having one blade wider than the other). This plug will fit into the
power outlet only one way. This is a safety feature. If you are
unable to insert the plug fully into the outlet, try reversing the plug. If
the plug should still fail to fit, contact an electrician to replace the
obsolete outlet. Do not defeat the safety purpose of the polarized plug.
• Close supervision is necessary when any appliance is used by or
near children.
• Unplug the fan from the outlet when not in use, when moving fan
from one location to another and before cleaning.
• Do not operate the fan in the presence of explosive and/or flammable
fumes.
• Do not place the fan or any parts near an open flame, cooking or
other heating appliance.
• Do not operate the fan with a damaged cord, plug, after a malfunc-
tion or if dropped or damaged in any manner. (See warranty).
• Avoid contact with moving fan parts.
• To disconnect, grip the plug and pull it from the wall outlet. Never
yank the cord.
• Always use on a dry, level surface.
• Do not hang or mount fan on a wall or ceiling.
• Do not operate if the fan housing is removed or damaged.
• Do not operate without fan grilles properly in place.
• A loose fit between the AC outlet and plug may cause overheating of
the plug. Have a qualified electrician replace the outlet.
• WARNING: To reduce the risk of fire or electric shock, do not use
this fan with any solid state speed control device.
PARTS DIAGRAM
Assemble correctly by the following orders before using.
1. The stand assembly
2. The whole assembly
1) Front guard
2) Guard clops screw
3) Guard clops
4) Guard ring
5) Blade fastening nut
6) Fan blade
7) Guard fastening nut
8) Rear guard
9) Motor central shaft
10) Grease shield
11) Front shell
12) Rear shell
13) Oscillate control knob
14) Timer
15) Control switch
16) Fastening screw
17) Adjustable electroplated shaft
18) Decorative pipe
19) Standing shaft
20) Standing rack
21) Standing plate
22) Remote control
23) Fixing screw
• Screw the iron plate (21) out of
the standing shaft in anti-clock-
wise direction.
• Put the standing shaft (19) into the
stand.
• Screw the iron plate (21) firmly
from the bottom of the stand in
clockwise direction and assemble
the standing shaft and the stand
well.
• Link the fan main body and the stan-
ding shaft (19) together with the
fixing screw (16) and then fix them.
• Loosen the fixing screw (16) and
pull the electroplated pipe (17) to the
height needed and then fix it firmly.
• Screw the blade fastening screw
(5) clockwise, then screw the guard
fastening screw (7) anti-clockwise.
• Fix the rear guard into the front shell
(11). Adjust pins from the shell into
the guard.
• Screw tightly the guard fastening
screw (7) clockwise.
Put in Completing
3. Rear guard assembly
ASSEMBLY METHODS
21
23

00161-11/29/04 VERSO
OPERATING INSTRUCTIONS DESCRIPTION
16” OSCILLATING PEDESTAL FAN WITH REMOTE CONTROL
MODEL NO.: 13-07009
4. Fan blade assembly • Put the fan blade (6) onto the electrical
axle centre (9) and insert completely
the blade fastening nut (5)
• Screw the screw into the electrical axle
centre in anti-clockwise direction and
then fix it.
5. Front guard assembly • Put the hook of the front guard ring on
the top of rear guard.
• Put the rear guard into the front guard
ring to make them fit togheter comple-
tely.
• Tighten the fastening screw of the
lower of the front guard ring.
USING INSTRUCTIONS
Operating instructions
Strong
Middle
Weak
OFF switch
Press the oscillate control knob, the fan
begins to wave.
Pull the button, the fan stops waving.
You can choose the up and down angle and
control the wind direction freely Height regulation
Loosen the fastening screw (16)
Regulate the electroplated pipe
To the needed height.
The operating instructions of the FS-35C, FS 40K
remote control standard fans.
SWING
STRONG
MIDDLE
WEAK
OFF
ON/Speed
OFF
TIMER
ON/Speed
Press the OFF key, all the wor-
king state will be cancel.
TIMER Press this key, you can
set the time needed. The follo-
wing diagram shows the order of
the time setting.
1 hour 2 hour 4 hour
Continue
Weak Middle Strong
Recycle
Press the key it will be in wind speed
state, the related indicator light will
be on. The following diagram shows
the order of the wind flow.
Press the oscillate control knob, the fan begins
to wave.
Pull the button, the fan stops waving.
The using instructions of the remote control
Open the cell cover, put in 2 AAA batteries and cover it
The remote control must face to the receiver
• The using range of the remote control must
be within 8 meters away from the receiver. If
the remote control isn’t faced to the receiver,
its using range will be narrowed.
• If this fan is used in the room with operating
high-power machines, the remote control will
be out of order.
• Don’t put any obstructions between the
receiver and the remote control
• Please take good care of the remote control
avoid knocking it.
• If you don’t use the remote control, please
take the cell out and keep it well.
Products characteristics
Quiet
Light and durable
Polish white colour
Maintenance and preservation
• Before tidying up the fan, it should be cleaned.
• This fan only needs general outside cleaning and maintenance.
Please wipe it with clean and soft cloth.
• Don’t wipe it with acid detergent, lamp oil, alcohol or chemical cloth in
case its colour be changed or go bad.
Simple breakdown clearing
Symptoms Checking points
The fan blade doesn’t work when
the fan starts.
There’s unusual sound when the
fan starts.
The remote control is out of order. If the cell is in short of supply. If
the cell is put in an opposite
direction.
Check if fan blade is assemble
properly.
Whether the plug is really put into
the outlet or not. Check fan blade.
cover 2 AAA batteries
Popular Fan manuals by other brands
Oceanic
Oceanic OCEAVP408B user manual
Optimum
Optimum WT-2630 instruction manual

Tommy Bahama
Tommy Bahama TB301MAB01 owner's manual
aldes
aldes Mono Assembly instructions
Envirovent
Envirovent POWER-170 Installation and wiring instructions
TJERNLUND
TJERNLUND SS1 SIDESHOT WITH UC1 UNIVERSAL CONTROL (VERSION X.06) 8504102 REV D... manual
LUCCI Air
LUCCI Air AIRFUSION CLIMATE III Installation, operation, maintenance & warranty information
Broan
Broan PM500 Series manual
mfh systems
mfh systems AIRUNIT GEMINI installation instructions

NuAire
NuAire OPUSDC-SA-60 Installation and Maintenance
Hunter
Hunter 23710 installation instructions

Savoy House
Savoy House M2010 Series owner's manual
