Forever Redwood ILLUMINATI PORCH PAVILION User manual

ASSEMBLY INSTRUCTIONS FOR THE
THE ILLUMINATI PORCH PAVILION
866.332.2403 (TOLL FREE); 7am –7pm Pacific Time, Monday-Saturday

P| 1
THE ILLUMINATI PORCH PAVILION
www.ForeverRedwood.com
CONTENT OF BOXES
No.
1
2
3
4
5
6
7
Drawing
Description
Posts
Single Supports
Supports with
In-Between Blocking
Triangles
Main Knee Braces
Secondary Knee Braces
Roof Beam
Qty.
Will
Vary
Note: Part numbers in the Content of Boxes Table are for reference only. These do not match to the numbers marked on the parts sent.

P| 2
THE ILLUMINATI PORCH PAVILION
www.ForeverRedwood.com
CONTENT OF BOXES
No.
8
9
10
11
12
13
14
15
16
Drawing
Hurricanes
Gale Wind
Standard
Description
Rafters
Polycarbonate Sheets
Cover Trims
Ceiling Fan Bases
If ordered.
Curtain Rods
If ordered.
Boots
If ordered.
Standard, Gale Wind or
Hurricane Anchors Bases.
If ordered.
Wall Mounted Anchors
Curtain Rod Bases
If ordered.
Qty.
Will
Vary
Note: Part numbers in the Content of Boxes Table are for reference only. These do not match to the numbers marked on the parts sent.
P| 3
THE ILLUMINATI PORCH PAVILION
www.ForeverRedwood.com
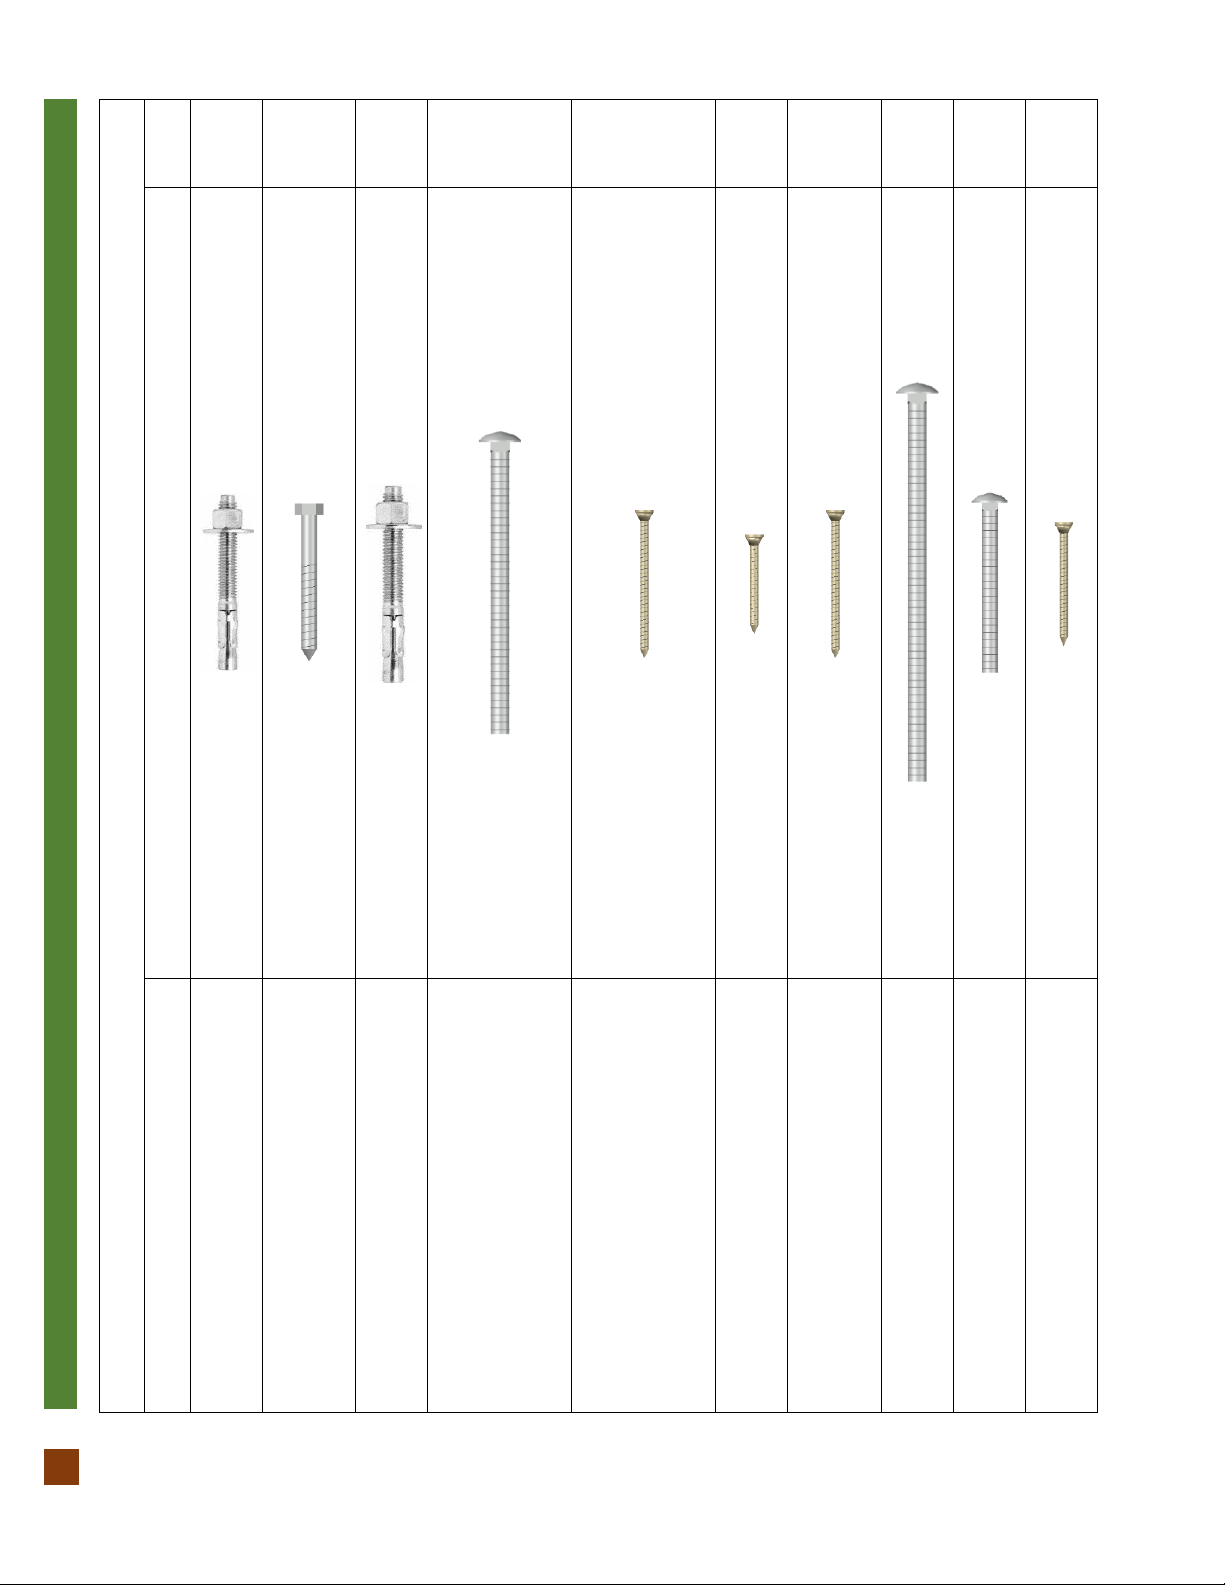
HARDWARE LIST
No.
A
B
C
D
E
F
G
H
I
J
Drawing
Description
½´´ X 3 ½´´ Anchor Bolts or Lag Bolts
(To attach the anchor bases to the ground).
5/16´´ X 3´´ Lag Bolts
(To attach the anchor bases to the posts. / To
attach the wall mounted anchor to the supports).
½´´ X 4 ´´ Anchor Bolts or Lag Bolts
(To attach the wall mounted anchors to the wall).
3/8´´ X 6´´ Bolts
(To attach the supports and the triangle to the
posts. / To attach the supports together. /To attach
the main knee braces to the supports. / To attach
the secondary knee braces to the triangle).
3´´ Deck screws +
(To attach the triangle to the supports and to the
roof beam. / To attach the rafters to the supports
and to the roof beam. / To attach the boots to the
posts).
2´´ Deck Screws with Neoprene Washer
(To attach the polycarbonate sheet).
3´´ Deck Screws with Neoprene Washer
(To attach the cover trims to the polycarbonate
sheets and to the rafters).
3/8´´ X 8´´ Bolts
(To attach the knee braces to the posts).
5/16´´ X 3 ½´´ Bolts
(To attach the ceiling fan base to the rafters).
2 ½´´ Deck Screws
(To attach the curtain rod bases to the posts).
Note: Dimensions of your hardware will vary depending on size.

P| 4
THE ILLUMINATI PORCH PAVILION
www.ForeverRedwood.com
No
1
2
3
4
5
6
7
8
9
10
11
12
13
14
15
16
DESCRIPTION
Posts
Single Supports
Supports with
In-Between Blocking
Triangles
Main Knee Braces
Secondary Knee Braces
Roof Beam
Rafters
Polycarbonate Sheets
Cover Trims
Ceiling Fan Bases
Curtain Rods
Boots
Anchors Bases
Wall Mounted Anchors
Curtain Rod Bases
Note: Part numbers in the Drawing are for reference only. These do not match to the numbers marked on the parts sent.

P| 5
THE ILLUMINATI PORCH PAVILION
www.ForeverRedwood.com
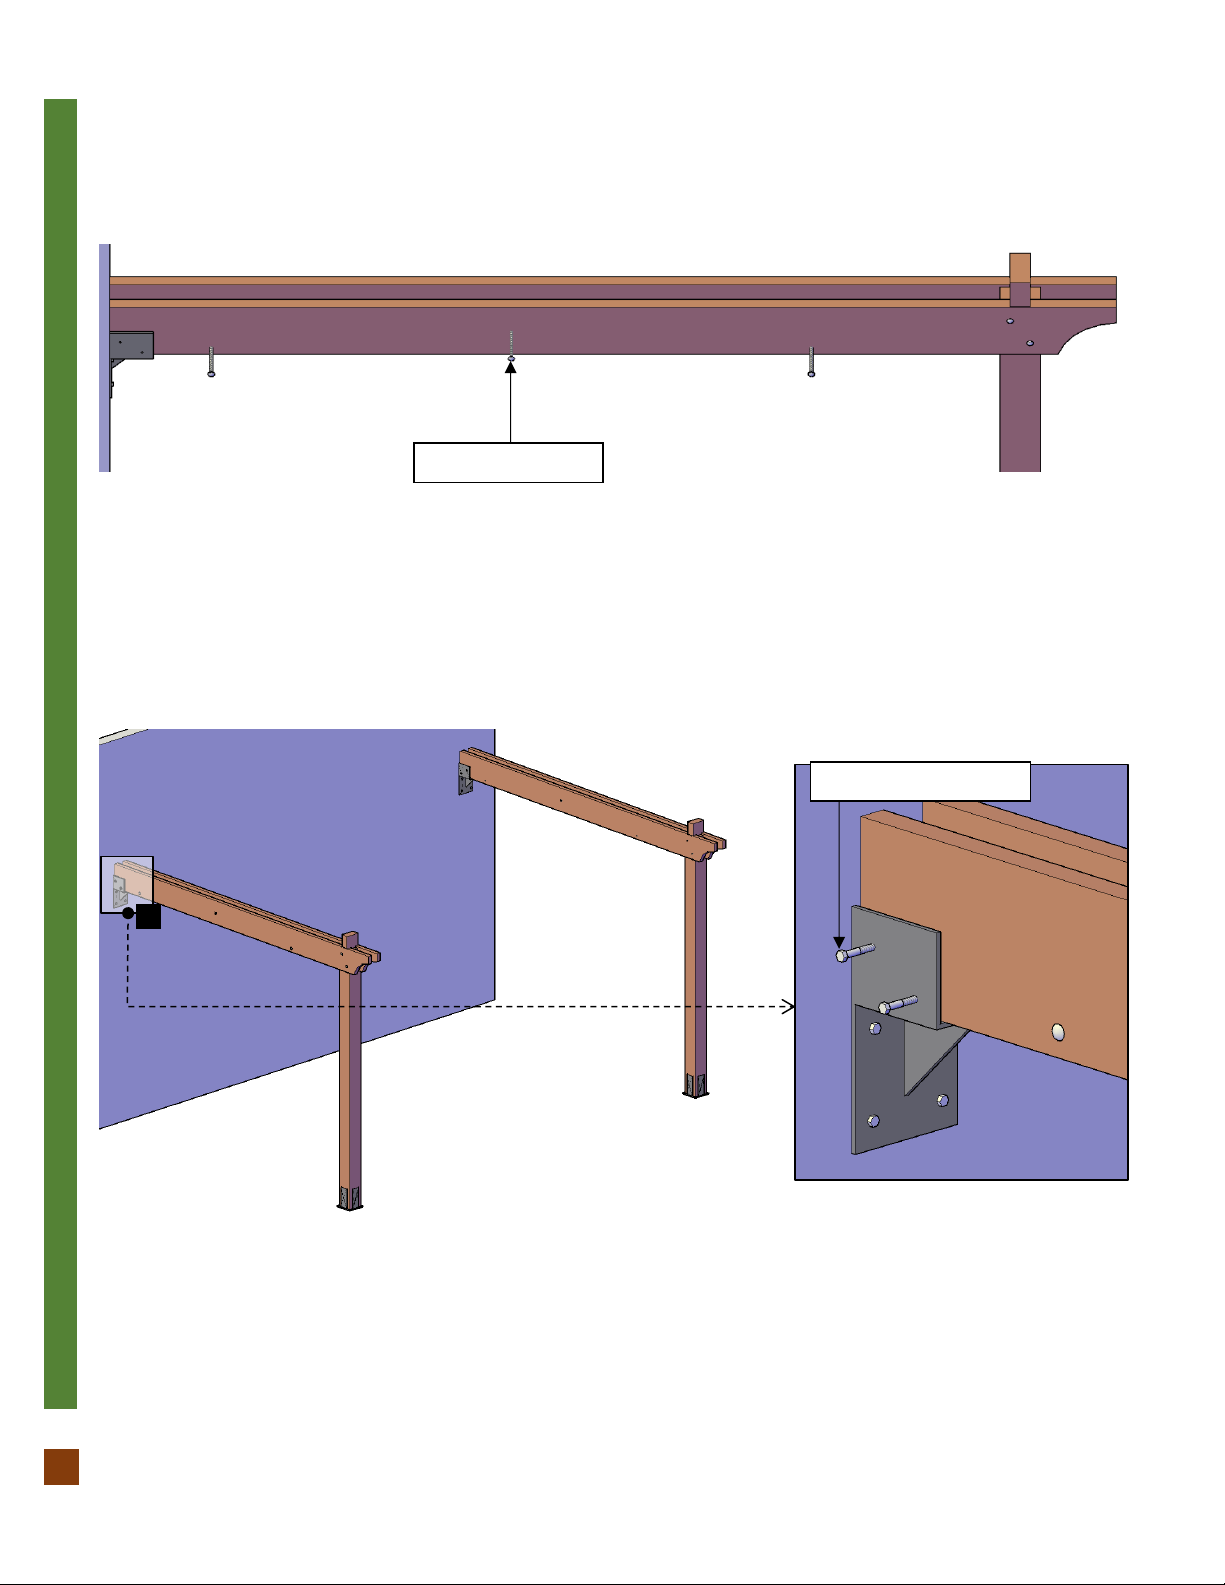
NOTE: In order to know where the post needs to be placed, check the numbers on them. If the post is not marked, then place
the single Supports on the ground to locate the markings for each post position and clearly set your bearings. (“Don´t attach yet,
only place them on the ground to begin with”).
Step 1: Install the anchor bases (14) with ½´´ X 3 ½´´ anchor bolts or lag bolts (A). Please see the “How to anchor your pergola
document” for all details. Set your post (1) in the saddle of the anchor bases. Drill a ø ¼´´ hole in the post prior to anchoring to
facilitate the ratcheting of the hardware. After that, use a 5/16´´ X 3´´ lag bolts (B) to attach each post to its respective anchor
base.
Step 2: Attach the wall mounted anchors (15) to the wall with ½´´ X 4 ´´ anchor bolts or lag bolts (C).
All options of posts (No posts decorative trim, vertical posts decorative trim and horizontal posts decorative trim)
will be installed in the same way.
5/16´´ X 3´´ Lag Bolts
1
1
14
15

P| 6
THE ILLUMINATI PORCH PAVILION
www.ForeverRedwood.com
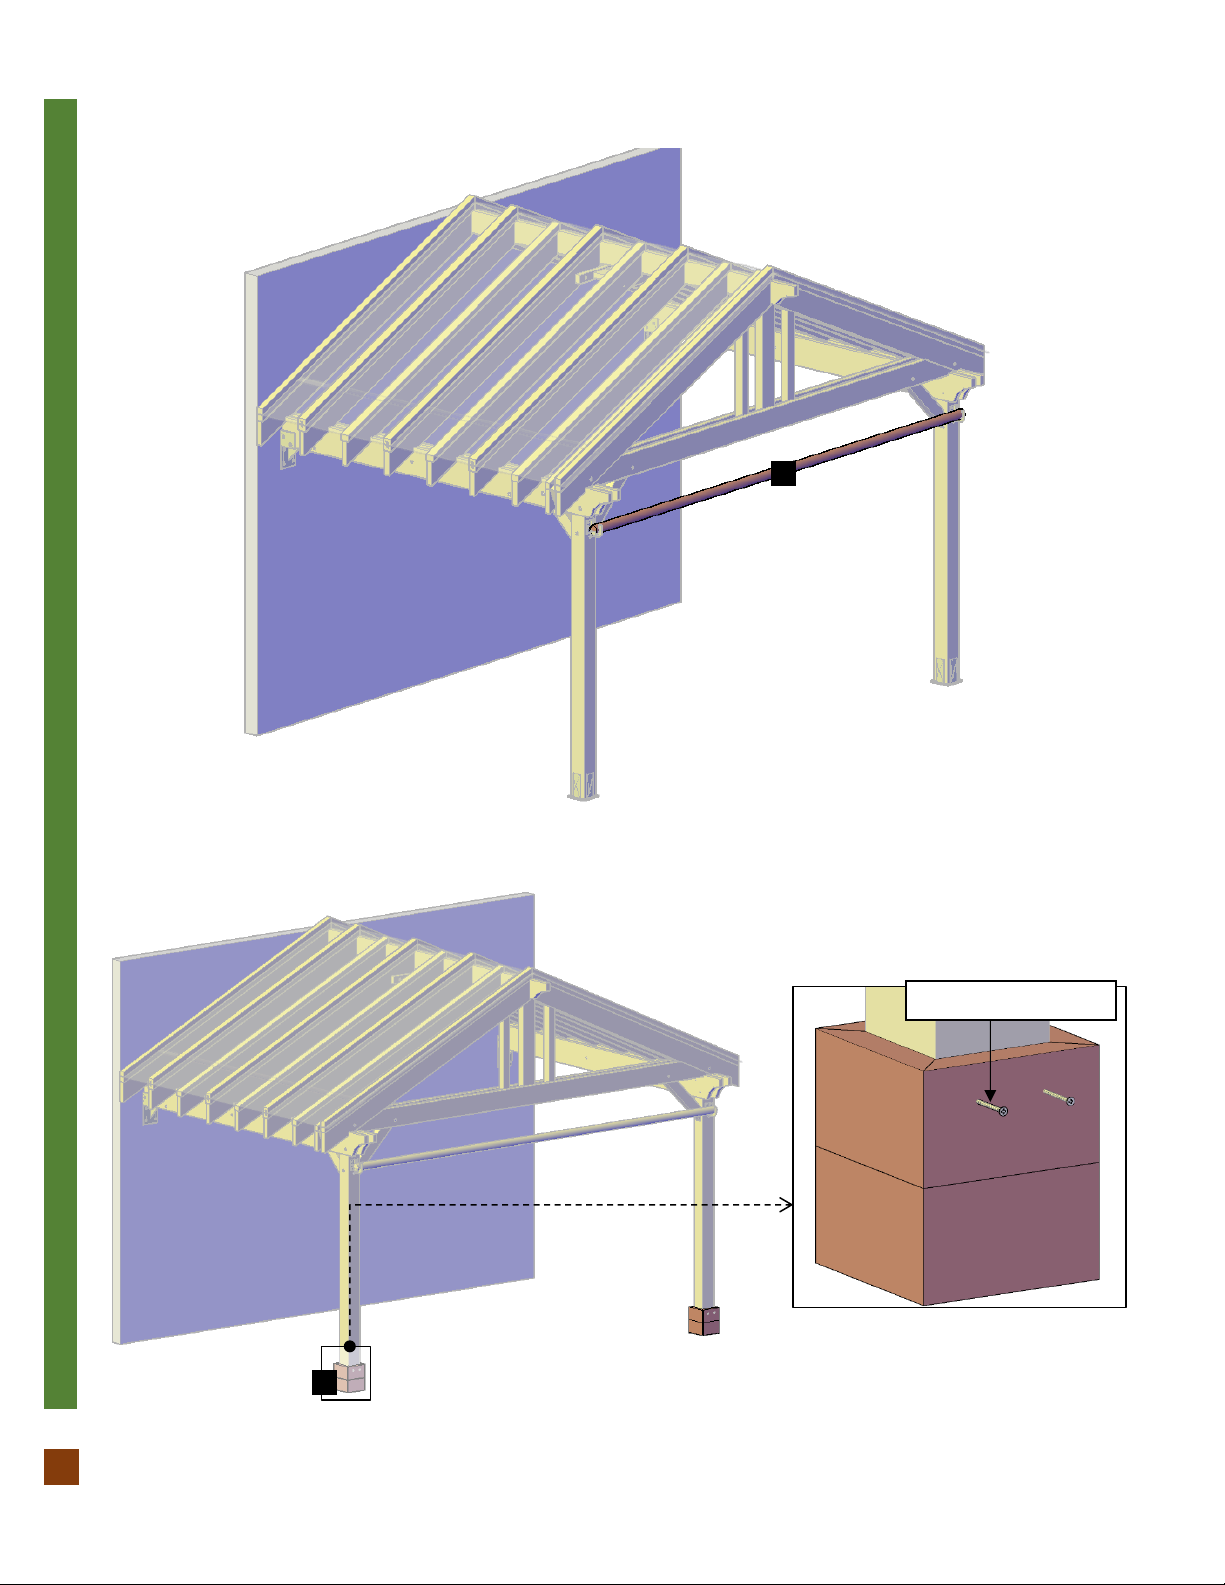
Step 3: Attach the single supports (2) to the posts with 3/8´´ x 6´´ bolts (D). Each part has a series of numbers that indicate where
to attach the part with the corresponding number.
Step 4: Put up the supports with in-between blocking (3), into the post notches as shown and attach to the posts with the single
support bolts. Each part has a series of numbers that indicate where to attach the part with the corresponding number.
3
3/8´´ X 6´´ Bolts
2
3
2
P| 7
THE ILLUMINATI PORCH PAVILION
www.ForeverRedwood.com
Step 5: Attach the single supports to the supports with in-between blocking, use 3/8´´ X 6´´ bolts (D). The quantity of bolts
depends on the length of the supports.
Step 6: Use 5/16´´ x 3´´ lag bolts (B) to attach the wall mounted anchors (15) to the supports.
3/8´´ X 6´´ Bolts
5/16´´ X 3´´ Lag Bolts
15

P| 8
THE ILLUMINATI PORCH PAVILION
www.ForeverRedwood.com
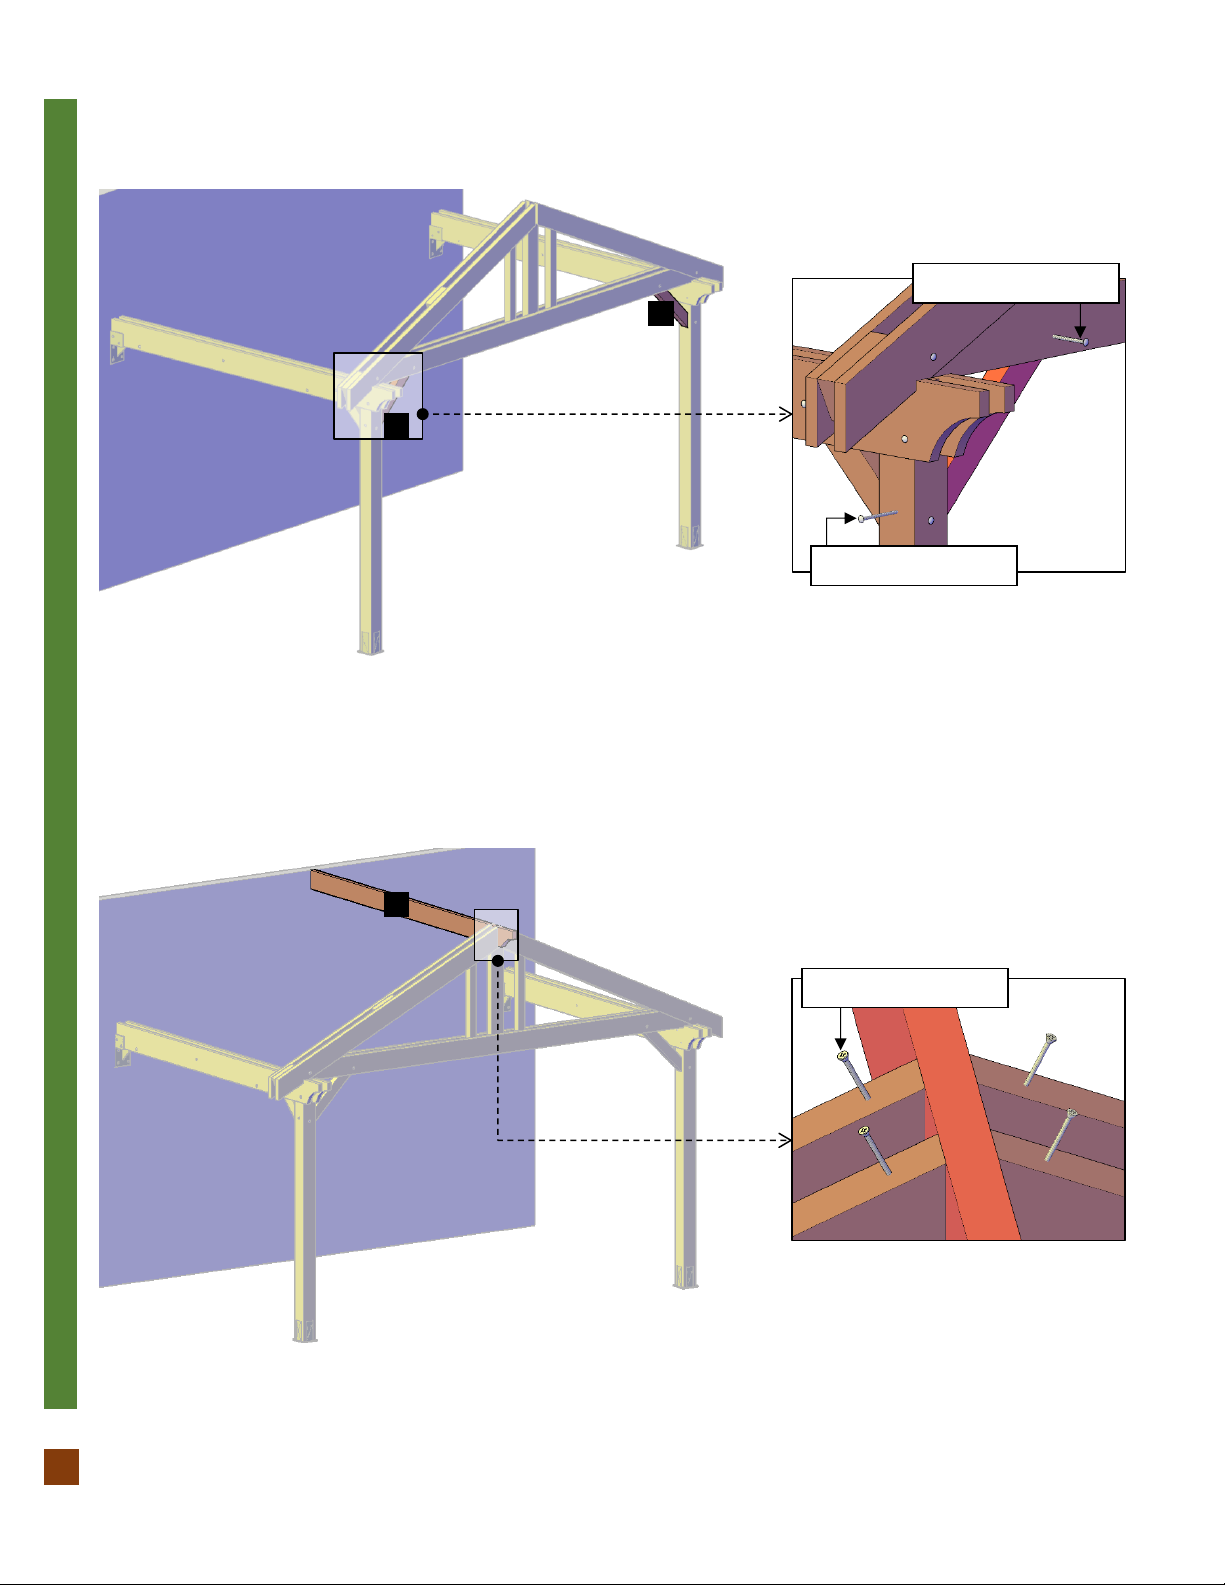
Step 7: Attach the triangle (4) to the posts with 3/8´´ x 6´´ bolts (D) and to the supports with 3´´ deck screws + (E). Each part has
a series of numbers that indicate where to attach the part with the corresponding number.
Step 8: Attach the main knee braces (5) to the posts with 3/8´´ x 8´´ bolts (H) and to the supports with 3/8´´ x 6´´ Bolts (D). Each
part has a series of numbers that indicate where to attach the part with the corresponding number.
4
3/8´´ X 6´´ Bolts
3´´ Deck screws +
3/8´´ X 6´´ Bolts
5
3/8´´ X 8´´ Bolts
5
P| 9
THE ILLUMINATI PORCH PAVILION
www.ForeverRedwood.com
Step 9: Attach the secondary knee braces (6) to the posts with 3/8´´ x 8´´ bolts (H) and to the triangle or the arched rafter with
3/8´´ x 6´´ Bolts (D). Each part has a series of numbers that indicate where to attach the part with the corresponding number.
Step 10: Put the roof beam (7) into the triangle notch, as shown. After that, use 3” deck screws + (E) to attach the triangle to the
roof beam. Each part has a series of numbers that indicate where to attach the part with the corresponding number.
3/8´´ X 6´´ Bolts
6
3´´ Deck Screws +
7
6
3/8´´ X 8´´ Bolts

P| 10
THE ILLUMINATI PORCH PAVILION
www.ForeverRedwood.com
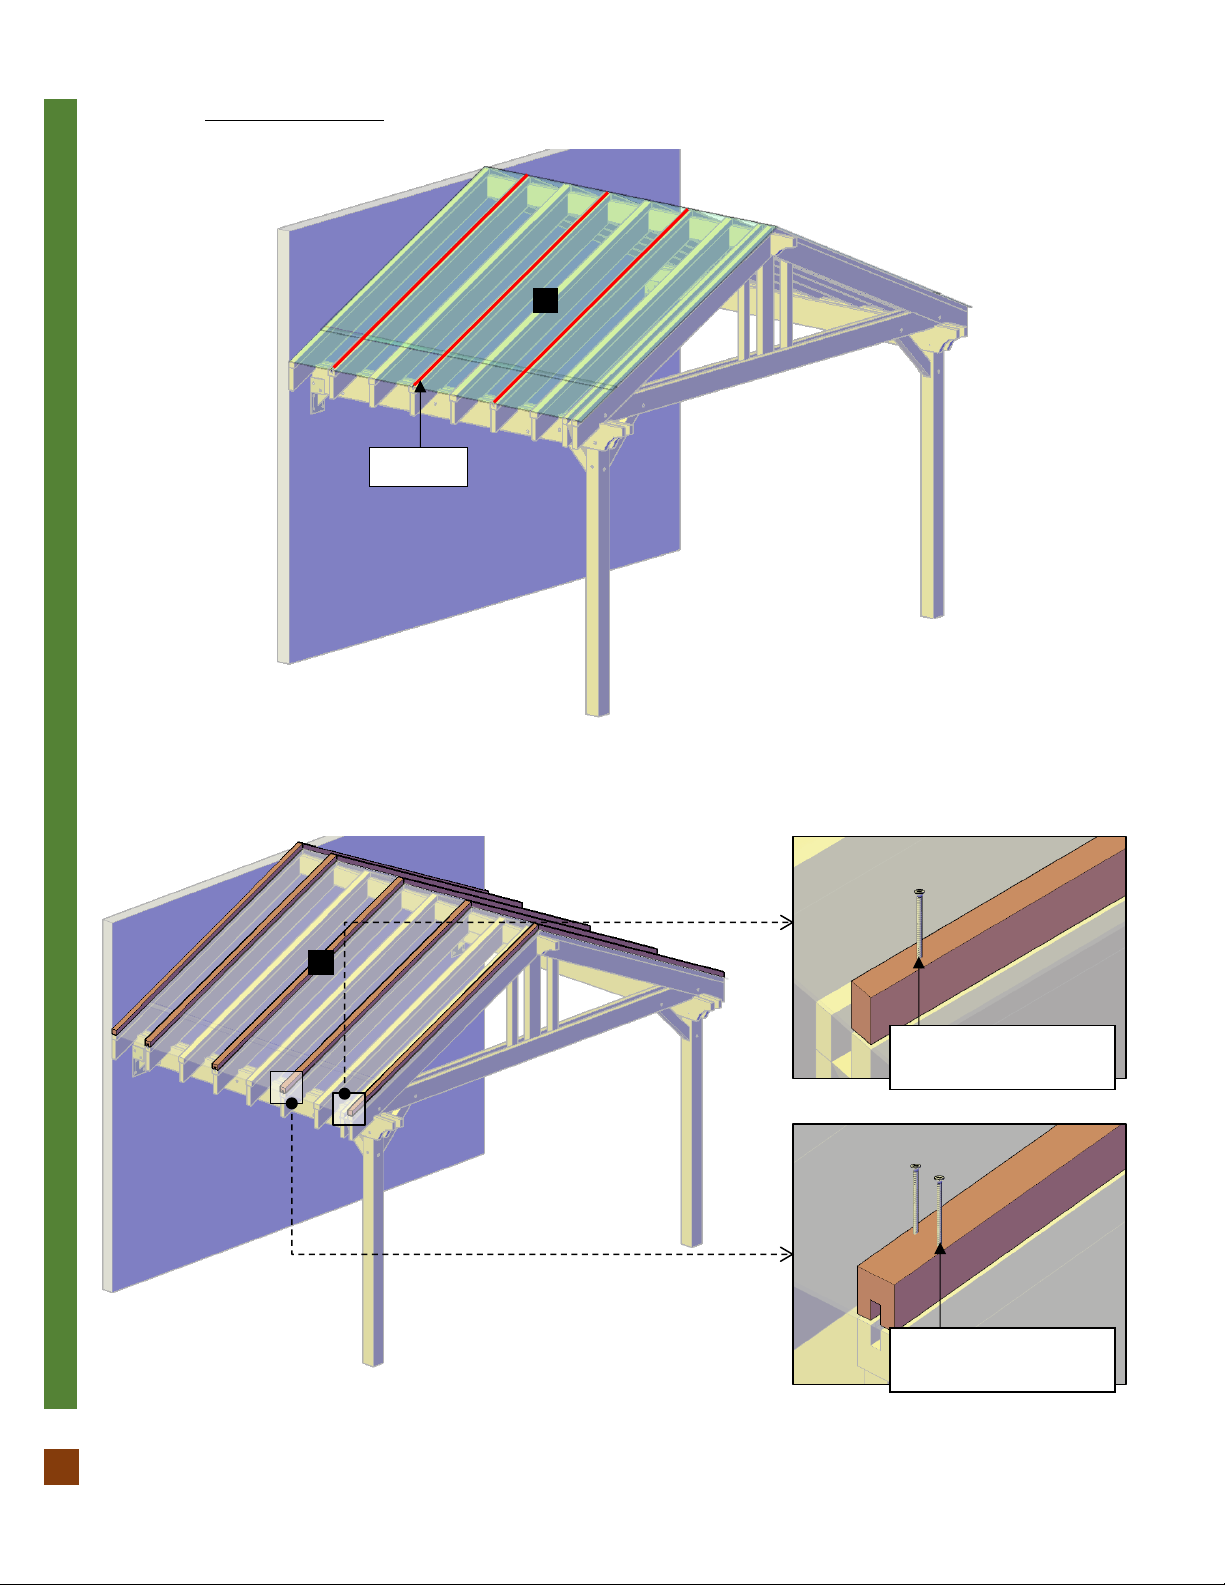
Step 11: Attach the rafters (8) to the supports and to the roof beam with 3´´ deck screws + (E). After that, put exterior clear
silicone on the rafters. Each part has a series of numbers that indicate where to attach the part with the corresponding number.
Step 12: Put the polycarbonate sheets (9) from the bottom to the top, the overlapping between these it will be of 2´´. Attach to
the center of the polycarbonate sheets, use 2´´ deck screws □with neoprene washers (F). Each part has a series of numbers that
indicate where to attach the part with the corresponding number.
7
3´´ Deck Screws +
3´´ Deck Screws +
8
Silicone
2´´ Overlapping
2´´ Deck Screws □
With Neoprene washers
9
P| 11
THE ILLUMINATI PORCH PAVILION
www.ForeverRedwood.com
Step 13: Put exterior clear silicone on the polycarbonate (9) joins.
Step 14: Attach the cover trims (10) to the polycarbonate sheets & rafters, use 3´´ deck screws □ with neoprene washers (G).
Each part has a series of numbers that indicate where to attach the part with the corresponding number.
Silicone
3´´ Deck Screws □
With Neoprene washers
3´´ Deck Screws □
With Neoprene washers
10
9

P| 12
THE ILLUMINATI PORCH PAVILION
www.ForeverRedwood.com
Step 15: Use 5/16´´ x 3 ½´´ bolts (I) to attach the ceiling fan base (11) to the rafters. Each part has a series of numbers that
indicate where to attach the part with the corresponding number.
Step 16: Attach the curtain rod bases (16) to the posts with 2 ½´´ deck screws (J).
5/16´´ X 3 ½´´ Bolts
2 ½´´ Deck Screws
11
16
P| 13
THE ILLUMINATI PORCH PAVILION
www.ForeverRedwood.com
Step 17: Place the curtain rod (12) on the curtain rod bases.
Step 18: Finally, attach the boots (13) to each post with 3’’ deck screws + (E).
12
13
3´´ Deck Screws +
P| 14
THE ILLUMINATI PORCH PAVILION
www.ForeverRedwood.com
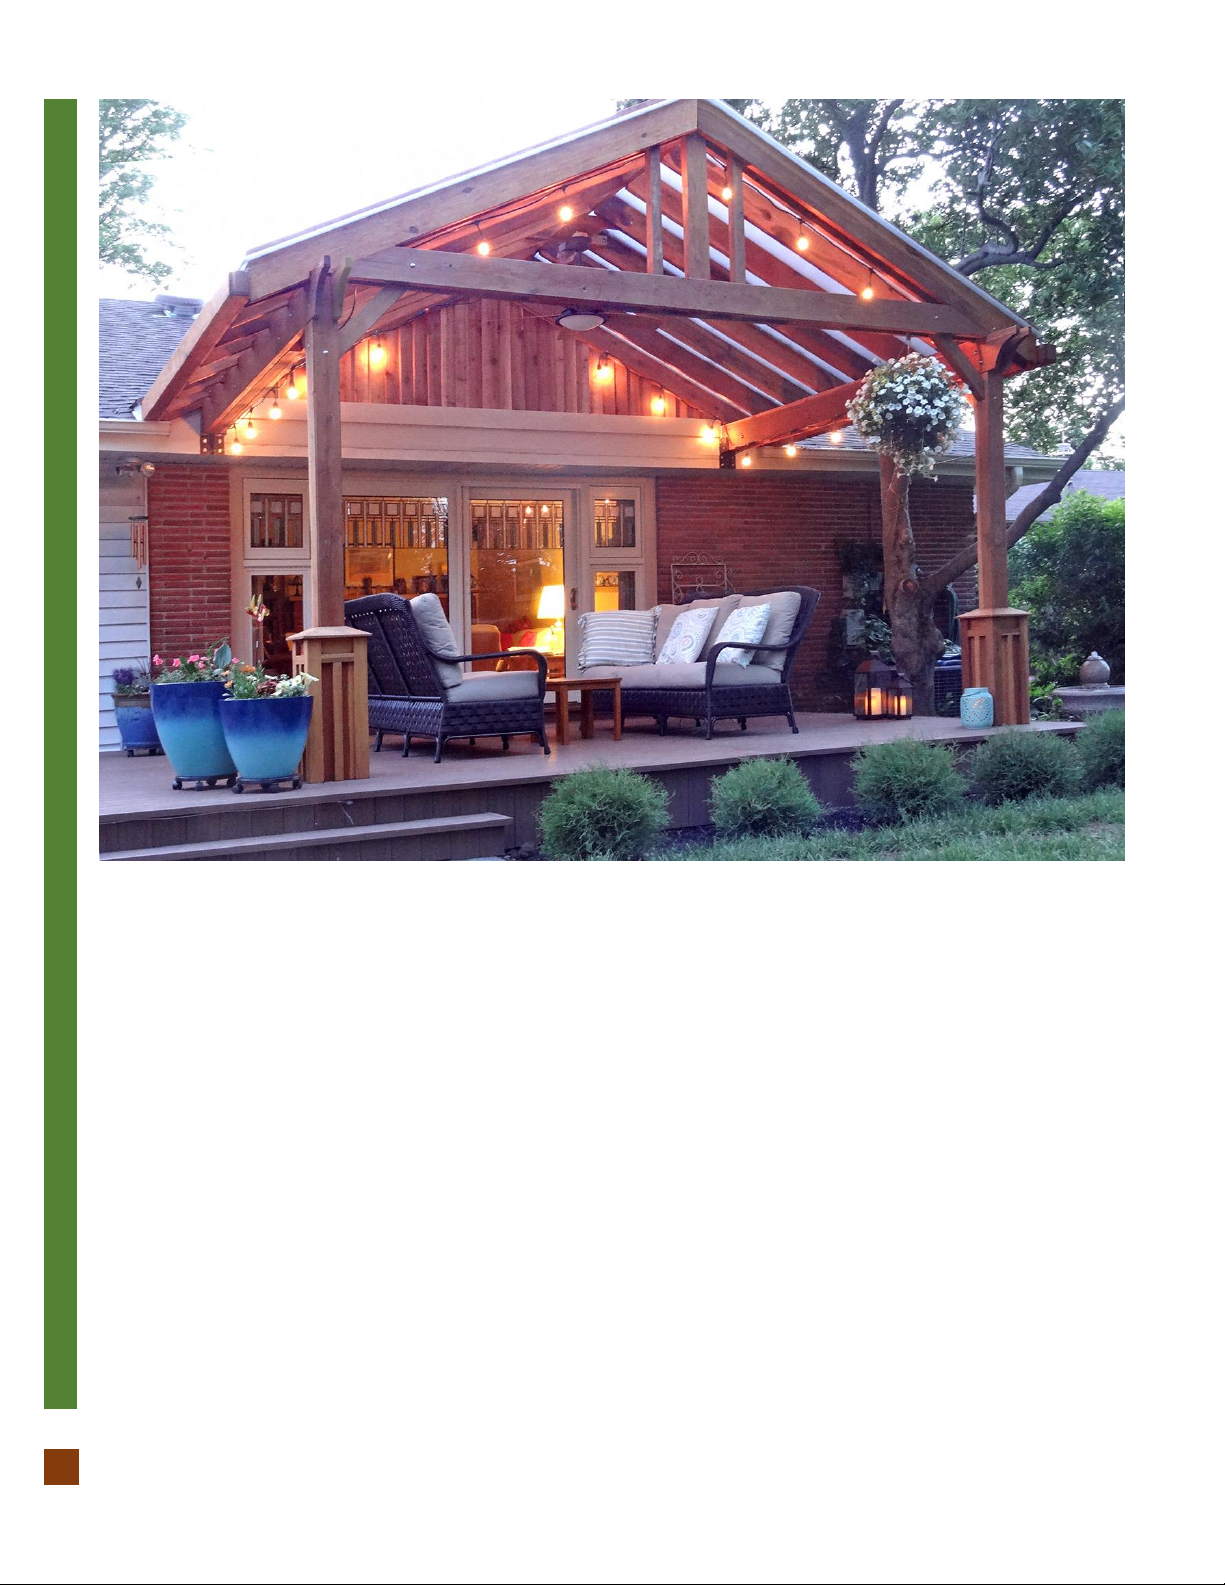
This completes the Pavilion assembly. Hope you enjoy your set for many decades. If you ever have a problem or a question,
don't hesitate to call us (866 332 2403) or email us. We are here to support you.
Other manuals for ILLUMINATI PORCH PAVILION
1
Other Forever Redwood Tent manuals


Popular Tent manuals by other brands


weinor
weinor VertiTex II Quick assembly guide

skandika outdoor
skandika outdoor SOLARIS II Assembly instructions

OZTENT
OZTENT RV-3 Lite owner's manual

Harbor Freight Tools
Harbor Freight Tools CoverPro 62860 owner's manual

Coleman
Coleman 2000007824 Setup instructions

Gorilla
Gorilla 3x3 Grow Tent instructions


