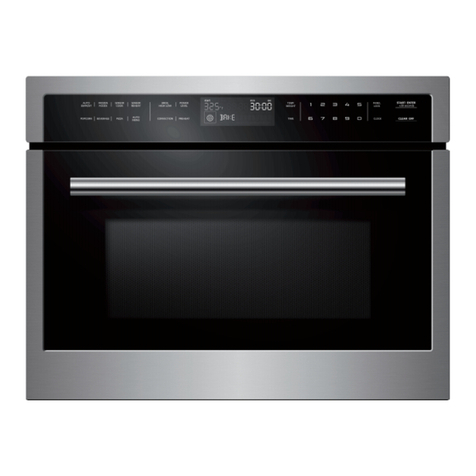
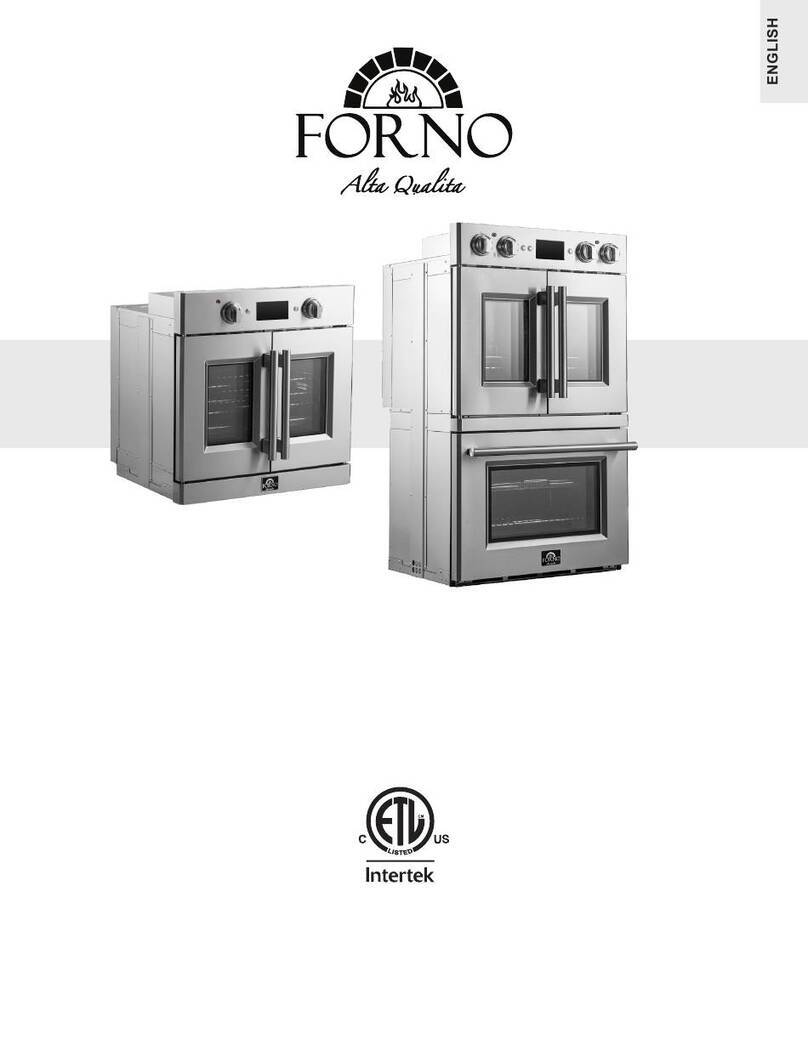
Forno FBOEL1358-30 User manual


1
TABLE OF CONTENTS
OVEN SAFETY............................................................................................................ 2
Warnings for Electric Installation.......................................................................................... 3
PARTS AND FEATURES .............................................................................................. 6
CONTROL PANEL....................................................................................................... 7
Oven Mode Controls ............................................................................................................. 7
Display.................................................................................................................................... 7
Start/Control Lockout........................................................................................................... 7
Cancel..................................................................................................................................... 8
Light ....................................................................................................................................... 8
Timer ...................................................................................................................................... 8
Cook Time.............................................................................................................................. 8
Start Time .............................................................................................................................. 9
Settings................................................................................................................................ 10
Self-Clean ............................................................................................................................ 12
OVEN USE................................................................................................................ 13
Before Using the Oven ........................................................................................................ 13
General................................................................................................................................. 13
Oven Temperature Control................................................................................................. 16
Oven Modes......................................................................................................................... 17
Bake Tips.............................................................................................................................. 22
Convection Bake Tips.......................................................................................................... 23
Convection Roast Tips ........................................................................................................ 26
Convection Broil Tips .......................................................................................................... 28
Dehydrate Tips .................................................................................................................... 29
Broil Tips............................................................................................................................... 30
Food Service Temperature Guidelines from FSIS.............................................................. 31
OVEN CARE ............................................................................................................. 32
General Cleaning ................................................................................................................. 32
Automatic Self-Cleaning..................................................................................................... 34
Oven Door Removal ............................................................................................................ 36
Replacing an Oven Light...................................................................................................... 37
TROUBLESHOOTING............................................................................................... 39
Baking and Roasting ............................................................................................................ 39
Operation............................................................................................................................. 40

2
OVEN SAFETY
Your safety and the safety of others are very important.
We have provided many important safety messages in this manual and
on your appliance. Always read and obey all safety messages.
DANGER
WARNING
CAUTION
This is the safety alert symbol.
This symbol alerts you to potential hazards that can
kill or hurt you and others. All safety messages will
follow the safety alert symbol and either the word
“DANGER,” “WARNING” or “CAUTION.”
These words mean:
An imminently hazardous situation. You
could be killed or seriously injured if you
don’t immediately follow instructions.
A potentially hazardous situation
which, if not avoided, could result in
death or serious bodily injury.
A potentially hazardous situation
which, if not avoided, may result in
moderate or minor injury.
All safety messages will tell you what the potential hazard is, tell you
how to reduce the chance of injury, and tell you what can happen if the
instructions are not followed.
State of California Proposition 65 Warnings:
WARNING: This product contains one or more chemicals known to the
State of California to cause cancer.
WARNING: This product contains one or more chemicals known to the
State of California to cause birth defects or other reproductive harm.

3
WARNINGS FOR ELECTRIC INSTALLATION
WARNING
Electrical Shock Hazard
Installation and service must be performed by a qualified installer or
service agency.
The models may be powered at 240V or 208V.
Always disconnect the power before servicing this unit.
This appliance must be properly grounded.
Failure to do so could result in death or serious injury.
IMPORTANT SAFETY
INSTRUCTIONS
WARNING: 7RUHGXFHWKHULVNRInjUHHOHFULFDOVKRFNLQMXU\WRSHUVRQV
or damage when using the oven, follow basic precautions, including the
following:
Proper Installation
•This appliance must be
properly installed and
electrically grounded by a
TXDOLnjHGWHFKQLFLDQ&RQQHFW
only to properly grounded
outlet. See “Grounding
Instructions” found in the
Installation Instructions.
•This appliance should
be serviced only by a
TXDOLnjHGVHUYLFHWHFKQLFLDQ
Contact the nearest
authorized service center
for examination, repair or
DGMXVWPHQW
•Do not repair or replace
any part of the oven unless
VSHFLnjFDOO\UHFRPPHQGHG
Refer service to an authorized
servicer.
•Do not operate this appliance
if it is not working properly or
if it has been damaged, until
an authorized servicer has
examined it.
•Install or locate this appliance
only in accordance with the
Installation Instructions.
•Use this oven only as intended
by the manufacturer. If you
have any questions, contact
the manufacturer.

4
IMPORTANT SAFETY
INSTRUCTIONS
•Do not cover or block any
openings on this appliance.
•Use this appliance only for
its intended use as described
in this manual. Do not use
corrosive chemicals, vapors,
or nonfood products in this
appliance. This type of oven is
VSHFLnjFDOO\GHVLJQHGWRKHDW
or cook. It is not designed
for industrial or laboratory
use. The use of corrosive
chemicals in heating or
cleaning will damage the
appliance.
7RUHGXFHWKHULVNRIƩUHLQWKH
oven cavity:
•'RQRWVWRUHǍDPPDEOH
materials in or near the oven.
•Do not use water on a grease
njUH6PRWKHUnjUHRUXVHD
dry chemical or foam-type
extinguisher.
•It is highly recommended that
DnjUHH[WLQJXLVKHUEHUHDGLO\
available and highly visible
next to any cooking appliance.
•Do not overcook food.
Carefully attend oven if paper,
plastic or other combustible
materials are placed inside
the oven.
•Do not use the cavity for
storage purposes. Do not
leave paper products, cooking
utensils or food in the cavity
when not being used.
•If materials inside the oven
should ignite, keep oven door
FORVHG7XUQRYHQRNjDQG
disconnect the circuit at the
circuit breaker box.
•Be sure the blower fan runs
whenever the oven is in
operation. If the fan does not
operate, do not use the oven.
Call an authorized service
center.
•Never use the oven to warm
or heat a room.
Personal Safety
•Do not allow children to use
this appliance unless closely
supervised by an adult.
Children and pets should not
be left alone or unattended in
the area where the appliance
is in use. Never allow children
to sit or stand on any part of
the oven.
•Do not store items of interest
to children above the oven.
If children should climb onto
the appliance to reach these
items, they could be seriously
LQMXUHG
•For personal safety, wear
SURSHUFORWKLQJ/RRVHnjWWLQJ
or garments with hanging
sleeves should never be worn
while using this appliance.
•Tie long hair so that it doesn’t
hang loose.
•Do not touch heating
elements or interior surfaces
of oven.
•The heating elements may be
hot even though they are dark
in color. Interior surfaces of
an oven become hot enough
to cause burns.

5
IMPORTANT SAFETY
INSTRUCTIONS
•During and after use, do not
touch or let clothing or other
ǍDPPDEOHPDWHULDOVFRQWDFW
the heating elements or the
interior surfaces of the oven
XQWLOWKH\KDYHKDGVXǎFLHQW
time to cool.
•The trim on the top and sides
of the oven door may become
hot enough to cause burns.
•Use care when opening the
door. Open the door slightly
to let hot air or steam escape
before removing or replacing
food.
•Do not heat unopened
food containers. Build-up
of pressure may cause the
container to burst and cause
LQMXU\
•Always place oven racks in
desired location while oven is
cool. If a rack must be moved
while oven is hot, do not let
potholder contact the hot
heating elements.
•Use only dry potholders.
Moist or damp potholders
on hot surfaces may result in
burns from steam. Do not let
potholder touch hot heating
elements. Do not use a towel
or other bulky cloth.
Safety for the Self-cleaning
Oven:
•Before self-cleaning the oven,
remove the broiler pan, oven
racks (only when not made of
porcelain), other utensils and
excess soft spillage.
•&RQnjUPWKDWWKHGRRUORFNV
and will not open once both
selectors are in CLEAN
position and the door lock
icon appears. If the door
does not lock, turn the cook
mode selector to OFF and
do not run Self-Clean. Call an
authorized servicer.
•Do not clean the door gasket.
It is essential for a good seal.
Care should be taken not to
rub, damage, move or remove
the door gasket.
•Do not use commercial
oven cleaners or oven liner
protective coatings of any
kind in or around any part of
the oven.
•Clean only oven parts listed in
this manual.
•Other surfaces of the
appliance may become hot
enough to cause burns -
among these surfaces are for
example: oven vent openings
and surfaces near these
openings, oven doors, and
windows of oven doors.
READ AND SAVE THESE
INSTRUCTIONS

6
PARTS AND FEATURES
h
d
d
g
a b c
f e
j
l
k
m
i
a Oven Vent
b Broil Element
c Control Panel
d Halogen Light
e Convection Fan and Element
f Bottom Element (not visible)
g Model and Serial # Plate
h Door Gasket
i Temperature Probe
j Oven Rack Back
k Oven Rack Front
l Broiler Pan Rack
m Broiler Pan

7
CONTROL PANEL

.H\DQGLFRQGHƪQLWLRQV
1) Start:
6WDUWEXWWRQVWDUWRSHUDWLRQRUVWDUW6HWWLQJVWRWDNHHƩHFW
6) Timer:
7LPHUV\PERO7KLVV\PEROLVGLVSOD\HGRQWKH/&'DIWHUWKHWLPHUIXQFWLRQLVVHW
&DQFHO
&DQFHOEXWWRQWRFDQFHOWKHFXUUHQWRSHUDWLRQ
3) Cook time:
%DNHWLPHEXWWRQXVHGWRVHWWKHEDNHWLPH
4) Delay start:
7KH$SSRLQWPHQWWLPHEXWWRQLVXVHGWRVHWWKHVWDUWWLPH
5) Settings:
6HOHFWV\VWHP6HWWLQJV3UHVVUHSHDWHGO\WRGLVSOD\GLƩHUHQW6HWWLQJV
6HOIFOHDQ
6HOIFOHDQLQJEXWWRQWRVWDUWWKHVHOIFOHDQLQJPRGH
:LƪV\PEROUHVHUYHGUHVHUYHG:LƪLQWHUIDFHRQWKHFRQWUROERDUGKROGGRZQWKH
6HWWLQJVEXWWRQIRUVHFRQGVWRHQWHUWKH:LƪFRQƪJXUDWLRQVHWWLQJVWDWHEOLQNLQJ
XQWLOLWLVVWDEO\GLVSOD\HGLQGLFDWLQJFRQQHFWLYLW\
&KLOGORFNV\PEROWKHVDPHDVORFNLQJDOONH\VWKHFKLOGORFNLVVHWWKHGLVSOD\
ZLOODSSHDUWKLVV\PERO
3LQV\PEROWKLVV\PERODSSHDUVRQWKHGLVSOD\VFUHHQZKHQWKHV\VWHPGHWHFWVDSLQ

2. Functional Operation
Operating Mode
Bake 350
100
140
325
450
325
350
420
/
//
140-210
170-500
300-450
Lo, Med, Hi
170-550
170-550
170-500
170-550
Hi Lo
80-120
HiBroil
Proof(Press for 3 seconds in
Warm Mode temp)
Warm
Conv
Air Fry
Warming Drawer
Self clean
Steam clean
Note: The preheating stage indicates whether real-time display of temperature is required.
There is a preheating stage: When the actual oven core temperature is less than 170°F, the interface
displays Lo.
When the actual core temperature of the oven is greater than or equal to 170℉, the interface displays
the temperature in real time.
When the actual oven core temperature reaches the set value, the interface always displays the set
temperature value.
Non-preheating stage: the set temperature value is always displayed on the heating interface of the
oven from the beginning.
No Core up to 806°F
Convect bake
Convect broil
Convect roast
1. Meats
2. Baked goods
3. Others
Easy
convect
Oven
Default temperature Adjustable
range
Preheat
phase
(°F)
(430°C)

3. Bake Settings
Self clean mode
1) Select the required baking function, touch the button on the display screen, the interface will light
up the function options, and the default temperature and default time will appear on the display panel.
After touch self clean button Self Clean, Self Clean icon lights up
1. 2:00 working time 2:00
2. 3:00 working time 3:00
3. 3:30 working time 3:00
2) Click Start to Start the operation. When the actual temperature of the furnace core is lower than
170°F, the temperature digital tube only displays Lo. When the actual temperature of the furnace
core is higher than 170°F, the interface needs to display the current temperature in real time. When
the core temperature has reached the set value, the interface will always show that the set value no
longer changes in real time.
3) To set the temperature, you can modify the temperature by touching the corresponding digital
button. The number changes from right to left in turn. If it exceeds the allowed setting range, an invalid
sound "didi" will be emitted when touching the Start button.
4) Set the working time, touch cook time, the time digital tube display --:--, and blink, touch the
number key, the displayed numbers change from right to left, run the setting range (0:00-11:59), if
you do not set this parameter, the oven default 2 hours; If the value exceeds the allowed setting
range, the next operation is not allowed, and the system makes two invalid beeps. After the Cook
time is set, the system prompts you to enter Delay Start or touch start to start the operation.
5) To set the appointment function, touch Delay start to set the appointment. The default time is the
current clock time. Delay start indicates when the oven starts to work. After setting, touch the Start
button, and the screen will start the countdown of reservation. If the countdown time exceeds 1 hour,
the screen will display in the form of hour/minute. If the countdown time is less than 1 hour, the display
is displayed in the form of minutes per second.
Touch the Self Clean button in the control panel to enable the Self clean mode.
Self clean mode Touch self clean key
Touch delay time
Touch start
Ending
Other situation When the self-cleaning is complete and the temperature
does not reach the unlock temperature, manually touch the
Start button at this time, and the buzzer prompt is invalid
End
The door lock motor began to turn
The door lock motor has touched
latchϭŝŶĚŝĐĂƟŽŶƚŚĂƚƚŚĞĚŽŽƌ
ŚĂƐďĞĞŶůŽĐŬĞĚĂŶĚƚŚĞĐŚŝůĚůŽĐŬŝĐŽŶŽŶƚŚĞƐĐƌĞĞŶůŝŐŚƚƐƵƉ
Set start time (optional)
Repeatedly touch the self Clean key to select Clean Time
2:00 3:00 3:30 (Default)
Open the heating

Setting funcation
To access the setting function, press the Settings button on the switch panel. There are seven Settings.
You can press the Settings button repeatedly to select the Settings
This parameter is set to facilitate users to enter the demonstration mode and perform operations on
the interface in any mode. However, heating components such as the electric heat pipe are not enabled.
The default value is OFF. Press the Settings key 5 times to enter the demo, then press the number key 1
WRVZLWFK7RXFKWKH6WDUWNH\WRFRQƪUPH[LW
Sound is used to control whether or not the buttons sound, but the work tone is always present. Press
the Settings button three times. The current sound status is displayed in the middle of the screen. On
LQGLFDWHVWKDWVRXQGLVHQDEOHGDQG2ƩLQGLFDWHVWKDWVRXQGLVGLVDEOHG<RXFDQVZLWFKE\WRXFKLQJ
WKHQXPEHUNH\7RXFKWKH6WDUWNH\WRFRQƪUPH[LW
Press the Settings button twice. The interface displays the default unit to set the temperature unit.
The default unit is Fahrenheit set sound
Set sound:
Setting Demo mode:
Setting temp unit:
Setting clock:
Sabbath
Clock
Temp unit
Sound
Calibration
Demo mode 7RXFKƪYH
Touch four
Press1:2Q2Ʃ
Press1 to change mode
Then Press3 to increase
Press6 to decrease
2Ʃ
00°F (-30°F - 30°F)
12/24 H 7RXFKVL[ Press1:12 H/24 H 12 H
Touch three Press1:2Q2Ʃ On
Touch twice Press1:Degree F/C F
Touch one Set clock 12:00PM
Parameter that can
be set
Touch Settings
repeatedly &RQƪJXUDEOHFRQWHQW Default
Touch seven Press1:2Q2Ʃ 2Ʃ
Touch the Settings once to enter the clock setting. By default, the current time is 12:00
$WWKLVWLPH\RXFDQHQWHUWKHUHTXLUHGWLPHIRUH[DPSOH\RXFDQWRXFKWKHRULJLQDO
WLPHQXPEHUƪUVW]HURDQGWKHQWKHQXPEHUFKDQJHVIURPULJKWWROHIWSUHVVWKHVWDUWNH\WR
VDYHWKHFXUUHQWGDWDDQGH[LWRUGLUHFWO\FDQFHOQRWVDYLQJWKHFXUUHQWGDWDDQGH[LW

4. Child key function
5. The alarm function
6. Error alarm message
1). When the oven is on standby, touch the "Start" button and hold for 3 seconds. The control panel is
locked.
1). Touch the timer button on the numeric keypad to enter the alarm Settings as shown below:
Abnormal Temperature sensor: Err1
In any state, if the temperature sensor is open or short, the oven will give an alarm
and display Err1. In this case, cancel can be performed
Alarm the longest allowed to set a time for 12 hours, the alarm with the countdown, display mode
(hours: minutes) and (minutes: seconds), if the setting time is less than 1 hour, then the system shown
in the form of (minutes: seconds), if the set time more than one hour, then the system shown in the
form of (hours: minutes). If you need to set the alarm after 30 minutes, you only need to touch 3 and 0
RQWKHQXPHULFNH\SDG$IWHUVHWWLQJ\RXQHHGWRWRXFKWKHDODUPLFRQNH\DJDLQWRFRQƪUPDQGWKH
alarm starts to count down.
Touch the number key3
Touch the number key0
7RXFKWLPHUNH\WREHFRQƪUPHG
2). Alarm cancellation: just touch the alarm setting button.
Degree, the program gives a rotation signal to the door lock motor, the CAM begins to turn
counterclockwise, when the CAM contact will be left door lock switch (LATch2) press the rear
door lock open, at this time the program gives the door lock motor stop signal.
After the lock is locked, the symbol appears on the screen, and after the lock is unlocked, the
symbol disappears.
Latch1 indicates the lock detection port, latch2 indicates the unlock detection port.
At the end of the countdown, the buzzer rings and the alarm symbol blinks with 00:00 at the same
time. At this time, you can touch any key to cancel the alarm. If there is no touch, the alarm will stop
after one minute, and the alarm icon and 00:00 will stop blinking and disappear
After setting the alarm, enter the alarm countdown. In standby state, the alarm clock is on the digital
tube of the screen. In the running state, the alarm time is not displayed, only the alarm symbol is
displayed
2). When the oven enters the working state, touch the "Start" button and hold it for 3 seconds, the
FRQWUROSDQHOZLOOEHORFNHGH[FHSWWKH6WDUWEXWWRQRWKHUNH\VDUHLQYDOLGWKHFKLOGORFNLFRQZLOOƫDVK
when touching other keys, if there is no unlock after 3 seconds, return to the current operating state,
touch the "Start" button and hold it for 3 seconds, the child lock will be released, At the same time, the
child lock symbol on the screen disappears
7KHFKLOGORFNIXQFWLRQLVRQO\HƩHFWLYHLQWKHLQWHUIDFHRIVWDQGE\DQGPRGHRSHUDWLRQDQGQRWLQ
other Settings interface.
$WWKLVWLPHRQO\WKH6WDUWNH\LVHƩHFWLYHLQWKHFRQWUROSDQHODQGRWKHUNH\VDUHLQYDOLG:KHQRWKHU
keys are touched, the child lock icon on the screen blinks and an invalid tone is heard concurrently.

7
CONTROL PANEL
OVEN MODE CONTROLS Bake Broil Convection Warm/
Proof
Select from Bake, Broil, Convection and Warm/Proof oven modes.
NOTE: The Warm/Proof control toggles between the two oven modes.
DISPLAY
appear on the display.
See “Clock,” later in this section, for instructions to set the time-of-day. When the
oven is not in use, the time-of-day appears in the display.
START/CONTROL LOCKOUT Start
START
The Start control begins any oven function. If Start is not pressed within 2 minutes
after pressing a keypad the function is canceled and the time-of- day is displayed.

8
CONTROL PANEL LOCKOUT
The control panel can be locked to avoid unintended use of the oven.
NOTES:
•The control cannot be locked if the oven is in use or if Cook Time is operating.
•The current time-of-day will remain in the display when the control is locked.
To Lock Control Panel:
•Press and hold START for 3 seconds or until “LOCKED” appears in the display.
“LOCKED” will remain lit in the display.
To Unlock Control Panel:
•Press and hold START for 3 seconds or until “LOCKED” scrolls in the display.
CANCEL Cancel
•Press the Cancel button to stop any function except Cook Time and Control
Panel Lockout.
LIGHT Light
7KHRYHQOLJKWVWXUQ2QDXWRPDWLFDOO\ZKHQWKHRYHQGRRULVRSHQHGDQGWXUQV2Nj
automatically when the oven door is closed.
•3UHVVWKH/LJKWEXWWRQWRWXUQ2Q2NjWKHRYHQOLJKWVZKHQWKHRYHQGRRULV
closed.
TIMER Timer
The Timer can be set in hours or minutes up to 11 hours and 59 minutes.
To Set the Timer:
1. Press TIMER.
2. Use the number keypad to enter the length of time in hours and minutes.
3. Press TIMER to begin the countdown. If enabled, timer tone(s) will sound at the
end of countdown.
4. Press TIMER to cancel the Timer and return to the time-of-day.
NOTE:'RQRWSUHVV&$1&(/EHFDXVHWKHRYHQZLOOWXUQRNj
COOK TIME Cook Time
The Cook Time feature allows the oven to be set to cook for a set length of time, and
WKHQWXUQRNjDXWRPDWLFDOO\
IMPORTANT: You must select an Oven Mode before you can set a Cook Time.

9
NOTES:
•Cook Time can be set in hours or minutes up to 11 hours and 59 minutes.
•To change the cook time during cooking, press CANCEL. Enter the new cook
time and press START.
•$WWKHHQGRIWKHVHWFRRNWLPHWKHRYHQZLOOWXUQRNjDXWRPDWLFDOO\WKHDOHUW
tone will sound, and “Cooking Complete” will appear in the text area.
To Set Cook Time:
1. Select cooking mode.
2. Select temperature.
3. Press COOK TIME. Enter the desired cook time by pressing the number keypad.
4. Press START. The oven will begin to preheat.
NOTES:
•The Cook Time format is HR:MIN, switching to MIN:SEC during the last
minute.
•An alert tone will sound until Cook Time is canceled.
START TIME Start Time
This feature allows you to set the oven to turn on at a later time.
IMPORTANT: The clock must be set to the correct time-of-day.
1. Select an Oven Mode.
2. Select temperature.
3. Set Cook Time.
4. Press START TIME.
5. Enter the desired Start Time by pressing the number keypad. “Press START” will
appear the display. If Cook Time was not set, the control will prompt you to “Set
Cook Time.”
Food Poisoning Hazard
Do not let food sit in oven more than one hour before or after cooking.
Doing so can result in food poisoning or sickness.
WARNING
6. Place the food in the oven and close the oven door.
7. Press START. Start Time will begin counting down until it reaches the set time-
of-day.
NOTE: $WWKHHQGRI&RRN7LPHWKHRYHQZLOOWXUQRNjDXWRPDWLFDOO\DQDOHUW
tone will sound and “Cooking Complete” will appear in the display.

10
SETTINGS Settings
The Settings control allows you to access the menu for additional functions and
features.
Press SETTINGS to show Menu Options 1 - 6. Then, press START to show Options
7 - 9.
CLOCK
The clock can be set to display time in a 12-hour or 24-hour format. The clock is
factory preset for the 12-hour format.
To Set the Clock:
NOTE:%HIRUHVHWWLQJWKHFORFNPDNHVXUHERWKWKH2YHQDQG7LPHUDUHWXUQHG2Nj
1. Press SETTINGS. The various Options will appear in the display.
2. Press 1 on the number keypad. “Clock” will appear in the display.
3. Press the number keypad to enter the time-of-day.
4. Press START to toggle between AM and PM.
5. 3UHVV6(77,1*6WRFRQnjUPWLPHRIGD\LVVHW
To Change the Clock to 24-Hour Format:
1. Press SETTINGS. The various Options will appear in the display.
2. Press “5” on the number keypad. “12/24 HOUR” and “12” will appear in the
display.
3. Press “1” on the number keypad to change the 12/24 Hour setting to 24-hour.
4. 3UHVV6(77,1*6WRFRQnjUP7KH+RXUVHWWLQJKDVEHHQFKDQJHG
TONES
Tones are audible signals, indicating the following:
Number of Tones
Indicates
1Valid Press Function has been
entered
Oven is Preheated
2Invalid Touch Pad
Press
4End of Cycle End of Timer
7R7XUQ2Q2Ƨ6RXQG
7KHRYHQVRXQGLVIDFWRU\SUHVHWIRU2QEXWFDQEHFKDQJHGWR2Nj
1. Press SETTINGS. The various Options will appear in the display.
2. Press “3” on the number keypad. “SOUND” and “ON” will appear in the display.
3. Press “1” on the number keypad. “ON/OFF” will appear in the display.
4. 3UHVVţŤRQWKHQXPEHUNH\SDGWRWXUQWKHVRXQG2Nj
5. 3UHVV6(77,1*6WRFRQnjUP7KHVRXQGKDVQRZEHHQWXUQHGRNj
6. Press SETTINGS, and then follow the display prompts to return the sound
setting to On.

11
To Adjust Sound Volume:
The oven sound is factory preset for High but can be changed to Low.
1. Press SETTINGS. The various Options will appear in the display.
2. Press “4” on the number keypad. “SOUND VOLUME” and “HIGH” will appear in
the display.
3. Press “1” on the number keypad. HIGH/LOW” will appear in the display.
4. Press “1” on the number keypad to turn the sound Low.
5. 3UHVV6(77,1*6WRFRQnjUP7KHVRXQGYROXPHKDVQRZEHHQFKDQJHG
6. Press SETTINGS, and then follow the display prompts to return the sound
volume setting to High.
DEGREES FAHRENHEIT AND CELSIUS
The temperature is factory preset to display in degrees Fahrenheit, but can be
changed to display in degrees Celsius.
To Change the Display from Degrees Fahrenheit to Degrees Celsius:
1. Press SETTINGS. The various Options will appear in the display.
2. Press “2” on the number keypad. “TEMP UNIT” and “FAHRENHEIT” will appear in
the display.
3. Press “1” on the number keypad. “DEGREE F/C” will appear in the display.
4. Press “1” on the number keypad to change the temperature unit setting to
degrees Celsius.
5. 3UHVV6(77,1*6WRFRQnjUP7KHWHPSHUDWXUHXQLWKDVEHHQFKDQJHG
6. Press SETTINGS, and then follow the display prompts to return to Fahrenheit.
SABBATH MODE
Sabbath mode is designed for those whose religious observances require disabling
certain oven features. By enabling Sabbath Mode, the oven will conform to Star-K
Jewish Sabbath requirements.
NOTE:7KHRYHQLVIDFWRU\SUHVHWZLWK6DEEDWK0RGH2Nj
7R7XUQ2Q2Ƨ6DEEDWK0RGH
1. 0DNHVXUHWKHRYHQLVWXUQHG2NjDQGWKHPHDWSUREHLVQRWSOXJJHGLQ
NOTE: Sabbath mode cannot be set when the oven is On. The oven will not
recognize the meat probe while in Sabbath mode.
2. Press SETTINGS > Press START > Press 7, and then press 1 to (toggle between
ON / OFF).
3. Press SETTINGS again to enable Sabbath mode. The only cooking function that
works while the oven is set to Sabbath mode is Bake.

12
To Bake While the Oven is in Sabbath Mode:
1. Press and hold BAKE for 3 seconds.
2. Enter the desired oven temperature by pressing the numbered keypad.
3. After selecting Bake and a Temperature, you have the option to set a Cook Time
and Start Time before pressing START. See “Cook Time” and “Start Time.”
4. Press START. Pressing Start activates Sabbath mode.
Only the Cancel control is functional.
•Press CANCEL twice to exit Sabbath mode, and resume normal oven operation.
The display will return to the time-of-day.
NOTE: If there is a power failure while the oven is in Sabbath mode, the oven will
exit Sabbath mode and resume in normal mode when power is restored.
LANGUAGE
The Language is preset to English but it can be changed to French.
To Change the Language from English to French:
1. Press SETTINGS. The various Options will appear in the display.
2. Press “6” on the number keypad. “LANGUAGE, ENGLISH1, and FRENCH 2” will
appear in the display.
3. Press “2” on the number keypad to select French.
4. Press SETTINGS, and then follow the display prompts to return the Language
setting to English.
SELF-CLEAN Self Clean
Operates the Automatic Self-cleaning feature. See “Oven Care.”
Table of contents
Other Forno Oven manuals
Popular Oven manuals by other brands

Siemens
Siemens HM656GB 1Y Series instruction manual

Ovention
Ovention Shuttle S1200 Installation and operating manual

Electrolux
Electrolux EOB53020 user manual

CONTINENTAL EDISON
CONTINENTAL EDISON CEMF38DIG Instruction booklet

EMPERO
EMPERO EMP.7FRG01 manual

EAS Electric
EAS Electric EMV56RC instruction manual