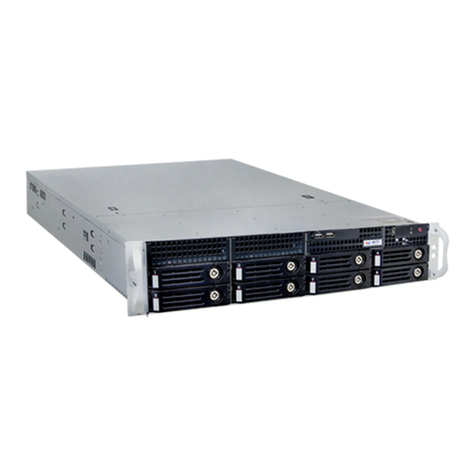
Fortune FPR-200 Quick start guide

Operational Manual of FPR-200 Drive Image Recorder System
FPR-200-A Must for Driving,
Faithfully recording your driving journey in image
Secure your rights & interests, Protect your safety around vehicle
Balance safety and leisure, View clearly day and night
~Love Your Car, Love yourself
With FPR-200 Traveler~

Catalog
Item No. Title Page
1. Brief Introduction
2. Product Component and Accessories
3. Appearance and Functions of Drive Image Recorder
3.1 Top View
3.2 Bottom
3.3 Left View
3.4 Right View
3.5 Front&Rear View
3.6 Appearance and Functions of Monitor
3.7 Appearance and Functions of Left and Right Lens
3.8 Appearance and Functions of Front and Back Lens
4. Wiring
4.1 Length and Quantity of Wires
4.2 Wiring Description
4.3WiringDiagram
5. Specification
6. Installation Steps
7. Operational Instruction of Image Display on Monitor
7.1 Key Diagram of Remote Controller Diagram
7.2 Key application and Functions Description
8. Main Image Screen
9.MonitorOperationInstruction
9.1MonitorOperation
9.1.1MainMenu
9.1.2 Operational Instruction of Main Menu of Monitor
9.1.3 Operational Message of SD Card in monitor
9.2 Operation of FPR-200 Player
9.2.1 Player Screen
9.2.2 Player Functions Description
9.2.3 Operational Procedures of Player
9.2..4BrowsingtheFiles
9.2.5 Four-Split Screen
9.2.6 Copy Dialogue Screen
9.2.7 Delete Dialogue Screen
9.2.8 Snapshot Dialogue Screen
9.2.9 Drive Route Displayed on Google Map Screen
10. Software Upgrade
11. Troubleshooting
11.1 Troubleshooting Methods
11.2 Usual Maintenance
11.3 Storage Notes

FPR-200 Page Total 18 Pages
1
1. Brief Introduction
FPR-200 Drive Image Recorder is used to completely record true state of driving in
real-time, including image, sound, date, time and location. In case accidents take place,
you can rapidly find images of accidents by using the remote control to play the
recording on the screen. You may also take out 8GB or 16GB SD card from the player
and insert it into your computer. Then using our MS player media system which is
developed by our company to copy or taking photos from the files. So that you can
clarify the responsibility from the accidents. In combination with four wide angles lens of
163° (Equipped with machine), this product can be placed in the front, back, right and
left of vehicles. For large vehicles, it can be also inserted inside of the vehicles for the
drivers and passengers’ security. Even though in low lightness at night, the images can
be still recorded well; the image and files both qualify with high resolution on the display.
The screen will present very clear images and play smoothly. In additional, it can record
not only your voice but also images at same time. Recording your trips and landscapes
by using externally microphone is another function. Images are recorded repeatedly
every 6 hours and12 hours respectively; support more than 20 languages; Pictures on
monitor will be varied with control and indication of direction lamps installed in the back,
left and right. Its power supply with stable voltage and streamlined appearance will be
suitable to configuration of large and small vehicles.
2. Product Component and Accessories
Item
No. Items Type Description
1 Car video recorder FPR-200 During driving, it records and displays recorded data
from the front, back, left and right side.
2 Monitor FPM-238 Display the four views from the front, back, left and
right side.
3 Monitor Fixing Stand Adhesive disk is used to fix front windshield that is
adjusted in 360 °horizontally and 120° up and down.
4 Camera FPCM-236
FPCB-266 Activating the 163° wide-angle cameras -- 4 sets
5 Wires Wires for connecting recorder, monitor and camera
and other devices.
6 IR Remote Control It is used in setup and operate recorder.
7 SD Card 8G or 16G memory cards are available with recording
time for 6 hours and 12 hours respectively (basic on
fps 7). Or it can be used for system software upgrade.
8 Manual (VCD)
Including- FPR-200 Drive Image Recorder System
operational manual and (FPR-200 Player) software.
Please download the software before playing your
recorded files.

FPR-200 Page Total 18 Pages
2
3. Appearance and Functions of Car Video Recorder.
3.1 Top View
Item No. Product Name Description
1 Ventilator For Cooling the electronic board
3.2 Bottom View
Item No. Product Name Description
1 Ventilator For Cooling the electronic board

FPR-200 Page Total 18 Pages
3
3.3 Left Side
Item
No. Product Name Marking Description
1 GPS Antenna GPS ANT GPS Antenna is communicated with satellite to
locate position and acquire time information.
2 Fuse Indication Lamp Fuse Lamp When fuse indication lamp appears light on, the
device’s power circuits is secured.
3 Video Input RJ 45
Socket for Vehicle Rear
and Left side L&B Video After videos are taken by left and rear lens, it
will be transmitted to the Main Device.
4 Video and Audio output
RJ 45 Socket AV Input Video and audio will be transmitted to monitor.
5 Control Display RJ 45
Socket CAR I/F The video displays on the monitor according to
the left, right or back lamp lights on.
6 Power Supply Input
Socket Power
Input 12V-28 V battery is required.
7 Video Input RJ 45
Socket for Vehicle Front
and Right side R&F Video After videos are taken by front and Right lens, it
will be transmitted to the Main Device.
8 Sound Capturing and
infrared transmission
input RJ 45 Socket. MISC Input
- For receiving sound signal.
- And connected with infrared receiver on the
monitor. It allows you to use remote control
to operate directly on monitor.
3.4 Right Side
Item No. Product Name Marking Description
1 Power Indicator
Power
Lamp When it lights on, it means that the power has been
transmitted into the Main Device.
2 Infrared
Receiving
Window
IR
Window It receives signal from the remote control.
12 3
4

FPR-200 Page Total 18 Pages
4
3 Reset Key Reset It resets the system.
4 SD Card Slot SD It is used for 8G or 12G SD card inserting. Please do
NOT take out the memory card during your
recording.
3.5 Front&Rear View
Item No. Product Name Description
1 GPS Antenna
GPS Antenna is communicated with satellite to locate
position and acquire time information.
2 Ventilator For Cooling the electronic board.
3.6 Appearance and Functions of Monitor
Item No. Marking Description
1 VOL+ key for Volume
Increase Increase volume
2 VOL+ key for Volume
Decrease Reduce volume
3 Infrared Receiving Window Control infrared receiving window by using the
remote control
4 Sound Play Vent Vent for playing the recorded sound
5 Video and Audio Socket is
named for AV-IN Socket for video and audio Input
6 Control Socket is named for
CONTROL Receive infrared signals from controller
7 Power Input Socket is
named for DC-IN 12V power input

FPR-200 Page Total 18 Pages
5
3.7 Appearance and Functions of Left and Right Lens
Item No. Marking Description
1 Sponge Cushion
It is anti-sliding and protects outer Casing of rearview
mirror and suitable to different curved surfaces.
2 Metal Support It fixes and supports mirror module.
3 Locking Screw with
Rubber Pad It is locked and fixes in left and right side of rearview
mirror.
4 Outer Casing of
Camera Lens Streamlined metal casing. It is rigid and durable.
3.8 Appearance and Functions of Front and Back Lens
Item No. Marking Description
1 Locking Thread It is easy for inserting lens into the drilled holes which
are located in the front and back bumpers.
2 Lens Casing Streamlined metal Casing. Rigid and durable.

FPR-200 Page Total 18 Pages
6
4. Wiring
4.1 Length and Quantity of Wires
Item
No. Front-End Marking Description Protective
casing color Length Quantity
1 FPL-01 GPS ANT GPS Antenna Blue 300cm 1
2 FPL -02 B&L Video Back&Left lens cables Yellow 550cm 1
3 FPL -03 F&R Video Front&Right lens cables Yellow 550cm 1
4 FPL -04 AV Output Video&Audio cables Blue 300cm 1
5 FPL -05 MISC Input Infrared Control&Receiving cables Red 400cm 1
6 FPL -06 CAR I/F Left&Right&Front lamp signal
control for display cables Grey 500cm 1
7 FPL -07 Power Input Car power supply input cables White 300cm 1
4.2 Wiring Description
Front-End
Marking Back-End
Marking Combination Description
FPL-01
GPS ANT GPS Antenna FPR-200 Device→GPS antenna
FPL-02
L&B Video
Back Len FPR-200 Device→Back Len in vehicle
Left Len FPR-200 Device→Left Len in vehicle
FPL-03
R&F Video Front Len FPR-200 Device→Front Len in vehicle
Right Len FPR-200 Device→Right Len in vehicle
FPL-04
AV Output AV-IN FPR-200 Device→Video Monitor AV-IN Socket
DC-IN FPR-200 Device→Video Monitor DC-IN Socket
FPL-05
MISC Input
ControlFPR-200 Device→Video Monitor Control Socket
Sound FPR-200 Device→Microphone(Driver Seat nearby)
FPL-06
CAR I/F
Right Lamp FPR-200 Device→Right turn lamp
Left Lamp FPR-200 Device→Left turn lamp
Back Lamp FPR-200 Device→Back Direction Lamp
FPL-07
Power Input Power FPR-200 Device→Car Used Power
Remarks →:It means the direction of connect to where.

FPR-200 Page Total 18 Pages
7
4-3 Wiring Diagram
Wiring diagram only provides reference for wiring. Different types of vehicles content
with different space which should be also considerate in the real situation. General
Speaking, we suggest the left and right turn signal cables are connected to the
vehicle back’s left and right turn signal lamp.
5. Specification
Ite
m
No
.
Marking Description
1 Processor GM8181 Processor, speed rate 533MHz, ARM 9
2 Working System Linux System
3 Memory 16 MB flash memory and 256 MB DDR-SDRAM memory
4 Shown Video Resolution 5’Thin Film Transistor-Liquid Crystal Display (TFT-LCD)
with resolution of 800x480 p.
5 Shown Video Broadcasting
Standard NTSC(720X480P)/PAL(768X576p)
6 Shown Video Signal Pattern Composite Video
7 Recorded Video Resolution 720x480p
8 Recorded Video Format ITU-R BT.656
9 Video Compression Format H-264
10 Sound Format PCM
11 Video Signal Pattern Composite Video

FPR-200 Page Total 18 Pages
8
12 Storage Device 8GB or 16 GB SD card and support SDHC Class 6.
13 File Format of Storage
Device FAT32
14 Storage Manner and
Storage Time
(basic on fps 7) Each files contents with 30 minutes
recording videos. 8GB SD can be recorded and stored
video for 6 hours. 16GB SD can be recorded and stored
video for 12 hours. Over-write if memory is full.
15 Picture File JPEG
16 Supported Languages
English, Germany, French, Spain, Italian, Japanese,
Dutch, Russian, Portuguese, Traditional Chinese,
Simplified Chinese, Poland, Polish, Czech, Turkish,
Croatian, Greek, Danish, Swedish, Finnish, Korean,
Malaysian, Vietnamese and Indonesian.
17 PC Play Software Windows XP SP4, Vista
18 GPS Receiver 50 channels
19 GPS First Positioning Time Warming machine: 32 sec, Start Machine under Cooling
State: 32 sec, Start Machine under Hot State: Less than 1
sec.
20 GPS Positioning Antenna receiving is in good condition with accuracy of
2.5 meter.
21 GPS Antenna Build in active antenna.
22 GPS and System Time GPS will automatically upgrade system time; If GPS
doesn’t work, manual setting will be allowed.
23 IR Remote Control 18 Keys
24 FPR-200 Dimension Approximate 182 mm(Length)x 112 mm (width)x38 mm
(Height )
25 FPR-200 Weight Approximate 200 g.
26 Connection Port and key Right: Reset, IR Receiver, SD
Left: GPS Ant., B&L Video, AV Input, Car I/F, Power Input,
F&R Video, MISC Input
27 LED Green LED (Power) in Right Side: Display Power Status
Red LED(Fuse) in Left Side: Display built-in fuse Status
28 Video &Audio Output Video & Audio Output on the Left Side
29 Power Supply 9Vdc-28Vdc Vehicle-Use Power
30 Working Environment
Temperature -10C-65C
31 Storage Environment
Temperature -20 C-75C
32 Warranty Period 1 Year

FPR-200 Page Total 18 Pages
9
6. Installation Steps
Item
No. Installation
Item Step Description
1 FPR-200 Main Device
1-1 Take out the Main Device from package box.
1-2 According to this manual, item 4.2 wire marking and 3.3, 3.4, 3.6 diagram
number, insert plugs into FPR-200 Main Device sockets separately.
1-3 Insert SD card into SD card slot in right side of the Main Device.
2 Lens
1.1 Use 30mmΦdrill to drill holes in the center of front and rear bumper.
Then, fasten front and rear lens by using nuts.
1.2 Lock left and right Lens below rearview mirror separately by fastening
clamp plates.
3 Video Monitor
1.1 Install Ceiling-mount and fasten video monitor by using clamp plates.
1.2 Video monitor is fixed on the front window of vehicles by pressing spring
of fixing seat.
4 Wiring (According Diagram 4-3 to take procedure)
Number Name Marking
Color Wiring Descriptions
4.1 FPL-01
GPS ANT GPS
Antenna Orange
FPR-200 Main Device→right side of vehicle mat
→rear carriage→lower part of rear vehicle
window→attaching the antenna to corners of rear
vehicle window
4.2 FPL-02
B&L
Video
Back
Len
Wires Yellow FPR-200 Main Device→vehicle mat→trunk→rear
bumper→insert four-wire plug into socket of lens
Left Len
Wires Yellow FPR-200 Main Device→vehicle mat→harness of
left guard→bottom of left rearview mirror→insert
four-wire plug into socket of lens

FPR-200 Page Total 18 Pages
10
4.3 FPL-03
R&F
Video
Front Lens
Wires Yellow
FPR-200 Main Device→vehicle mat→partition
board among engines and the interior of vehicle →
front bumper→insert four-wire plug into socket of
lens
Right Len
Wires Yellow FPR-200 Main Device→vehicle mat→harness of
left guard→bottom of right rearview mirror→insert
four-wire plug into socket of lens
4.4 FPL-04
AV Output
Video
&Audio
Output
Wires
Red
FPR-200 Main Device→vehicle mat→AV I N
Socket of monitor
FPR-200 Main Device→vehicle mat→DC-IN
Socket of monitor
4.5 FPL-05
MISC
Input
Sound
Receiving &
IR Control
Wires
Blue
FPR-200 Main Device→vehicle mat→the whole
with protection cover below steering wheel
FPR-200 Main Device→vehicle mat→Control
Socket of monitor
4.6 FPL-06
CAR I/F
Control
Indication
Wires Purple
FPR-200 Main Device→vehicle mat→ignition
lines behind of vehicle key slot
FPR-200 Main Device→vehicle mat→trunk or
partition board among engines and the interior of
vehicle→right turn lamp in rear or front of vehicle
FPR-200 Main Device→vehicle mat→trunk or
partition board among engines and the interior of
vehicle→left turn lamp in rear or front of vehicle
FPR-200 Main Device →vehicle mat →trunk →
backward lamp
4.7 FPL-07
Power
Input
Power
Wires Green FPR-200 Main Device →vehicle mat →trunk →car
power supply
Remarks:
Step 4 is limited only to be implemented by technicians from Modification Factory. End users are
suggested NOT to process this step.
Notes:
Don’t make power line and ground line short circuit. Make sure that you have connected
to each wire before you turn on the power. Otherwise, any voltage even 12 volts would
damage to your body or electric equipment.

FPR-200 Page Total 18 Pages
11
7. The Instruction of Image on Monitor
Four fold split picture switch, video & audio playback, real-time and playback snapshot,
file deletion, support multi-language, per sec how many pictures can be taken and audio
play and record, those functions will be shown on the screen and operate by using
infrared remote control. The remote control instruction will be show as below.
7.1 Key Diagram of Remote Controller Diagram
7.2 Key application and Functions Description
Item No. Key Functions
1 Menu key is used to adjust date, time, time zone, play video,
delete file and multi-language.
2 Video snapshot key is used to take a real-time snapshot.
3
Up and down key is used to adjust volume or move up and
down on menu list, including adjust date & time and daylight
Saving time, select time zone, select play file or images, delete
file and select specific language.
4
Left and right key that is used to move left and right on menu
columns, including adjust date & time, select particular time
zone and specific language.
5
OK or pause key is used to :
1. Confirm one input or option has selected as input date &
time, Daylight Saving Time, and, select time zone, video file,
images, delete file or specific language.
2. Switch from pause or continue playing
6 Exit key is used to exit menu, current setting or play.
7 No.0-No.9
Key No. 0-No. 9 digital key is used to adjust date& time.
8 No.0- No.1
Key No. 0-No. 1 digital key is used to adjust Daylight Saving time. If
set as 0, no set. If set as 1, set.
9 No.2, 4, 6, 8
and No.5 Key
No. 2, No. 4, No. 6, No. 8 and No. 5 switch video keys are used
to switch video into front video, left video, right video, rear video
and four fold splitting videos.

FPR-200 Page Total 18 Pages
12
8. Main Image Screen
Item No. Message Content Location
1 ●Time Zone Name It is located on top left side in first row. Red mark means
that the process is under recording. It is followed by
time zone name.
2 YYYY/MM/DD
HH:MM:SS It is located on top right side in first row.
3 E180:60:60
N 90:60:60 Date and time are below the red mark and time zone.
4 Setting of Time Zone 148 time zones are provided.
5 Manual and Auto to
select one or four-split
image from the display
After Main screen is displayed, according to remote
control operation or direction signal power on, it will be
manually or automatically shown one or four-split image
on the display.
9. Operational Instruction of Monitor
9.1 Operation of Monitor
9.1.1 Main Menu Screen
Enter the following screen by pressing Menu key on the remote control:
Menu
Set Date and Time
Set Time Zone
Delete
Play
Set Recording Slides
Language
9.1.2 Operational Instruction of Main Menu of Monitor
Item
No. Option Operation or Setting Description
1 Set Date and
Time
When GPS is operated, the system time cannot be adjusted. Only
daylight saving time can be adjusted. When GPS is off, system
time can be set. Press to confirm. Then Press to exit.

FPR-200 Page Total 18 Pages
13
2
Set Time Zone
148 time zones in five continents are provided for option. Press
、、、 to select time zone properly. Press
to confirm. Then Press to exit.
3 Delete
After select one file, select one from front file, right file, left file and
back files or all files. Then, press to delete. Then Press
to exit.
4 Play
After select one file, select one from front file, right file, left file and
back files or all files. Press to play. Press again to
pause. Then press again to continue play. Then Press
to exit.
5
Setting of
taken image
per second
(fps)
Default is set as 10. If you want to change, you can select any
number from 1 to 15. After it is properly selected, press to
confirm. Then Press to exit. ※Note that SD full recording
time is written as 6 or 12 hours basic on fps 7.
6 Language Use left, right, top and bottom key to select language, press
to confirm. Then press to exit.
9.1.3 Operational Message of SD Card in monitor
Item
No.
Description of
Hardware
Signals
Messages
Display Sound Effect Assumption
1
1. SD card pops
up.
2. SD can’t be
written or read.
No SD X
1. SD is not used.
2. If SD is not functional or could not
be stored, FPR-200 would send
warning message to remind the
users to try again. If it still can’t be
stored, a new SD card should be
replaced.
2 SD card
write-protection SD Write
Protector X If SD resident program was intruded,
this message would be shown.
3 Space of SD card
is lower than
10%.
SD Low
Space
A long sound
and sound/
per minute
The warning beep is reminding you
that your SD card space is below
10%. The old video files will be
automatically overlapped.

FPR-200 Page Total 18 Pages
14
9.2 Operation of FPR-200 Player
Any video and audio recorded in FPR-200 can be played by FPR-200 Media Player.
Firstly, insert the disc which has FPR-200 played software inside and start Windows
XP system. Initial installation access is C: \FPR-200. User can change it if they
prefer to store to other place. After installation is finished, click “Player.exe” file. If
the screen is shown up picture as below, it means you may have entered FPR-200
player operation.
9.2.1 Player Screen
9.2.2 Player Functions Description
Main functions are corresponded to above diagram and illustrated on table as
below:
Item
No. Operation
Key Description
1 Brower Click Brower key, the diagram 9-2.4. will be appeared. After press
confirmation, list inside the red frame of picture will be shown as
diagram 9.2.1.
2 Video or
Picture
It is necessary to select Watching Video or Picture before browse.
Default is set video. Video and picture display zone inside the blue
frame is shown as diagram 9.2.1. Video frame is four-split screen and
picture is single screen.
3 Select File Files are in time order from the earlier to the lately. Click and select
one file, the video or picture of this file will be shown on blue frame
of diagram 9.2.1.

FPR-200 Page Total 18 Pages
15
4 Video Drag
Bar
During playing video, drag bar can be adjusted from front to back to
new location where video continues to be played. Right side of drag
bar shows current play time and total recording time.
5 Video
Selection
(All, 1-4)
Press ALL key play four fold split picture. Or press 1-4 key to play the
front, back, left and right videos in order.
6 Play/Pause
During playing video, time or coordinate will be shown on green flame
of diagram 9.2.1. It can be switched into pause or continue.
7 Stop Press key to stop playing. Return to original location of file to replay.
8 Volume Use Volume drag bar to increase or decrease volume.
9 Map Select one video file to use GPS Antenna effectively. Then press M
key, all drive routes of this video file will be shown on Google map.
10 Snapshot As one video is in pause state, the picture will be stored by pressing
this Snapshot key.
11 Copy As press Copy key, a dialogue flame is shown on diagram 9.2.6. 1
to 4 video files which are front, left, right and back video files will be
copied. And name of each file can be modified.
12 Delete Delete one file or delete multiple video files at the same time.
9.2.3 Operational Procedures of Player
FPR-200 player in FPR-200 folder are implemented. Video files and picture
files recorded in SD card of FPR-200 recorder will be played. Suppose SD
device is placed in F: \, operation procedures are illustrated as below table:
Item
No. Description
1 Refer to diagram 9.2.4. Press Browser button on top right. Enter Windows
directory dialogue flame to select F: \. Press OK button. All video and picture files
which are named by recording time are displayed as diagram 9-2.5.
2 Refer to diagram 9.2.5. Press All button to play four-split video file. Press 1-4
button to play the front, right, back, left video file.
3 Refer to diagram 9.2.5. During video playing, drag Drag-Bar to any position of
video file content to quickly look for video part which is really desired to watch.
4 Refer to diagram 9.2.6. Press Copy button, click and select video file or picture
file. Then press OK button. Copy is already finished. Suffix of file name is set as 1
to 4 that represent front, right, left and back video respectively.
5 Refer to diagram 9.2.6. Press Delete button, click and select video file or picture
file. Then press OK button. Delete is already finished.
6 Refer to diagram 9.2.8. During video playing, press Pause button. As video stops
playing, press Snapshot button to change video into picture. Press OK button to
be finished.
7 Refer to diagram 9.2.8. Press all drive routes of this video file will be shown on
Google map.

FPR-200 Page Total 18 Pages
16
9.2.4 Browsing Files Screen
9.2.5 Four-Split Screen
9.2.6 Copy Dialogue Screen
9.2.7 Delete Dialogue Screen
9.2.8 Snapshot Dialogue Screen

FPR-200 Page Total 18 Pages
17
9.2.9 Drive Route Displayed on Google Map Screen
10. Software Upgrade
If software needs to be upgraded, please insert SD card of new version of Mobile.kit into
the Main Device. Then FPR-200 will operate automatically. After seeing “INSTALL NEW
VERSION” on the top of left side screen and “PREPARING…” is shown on the middle of
screen, please press to upgrade software. When the screen appears percentage
gradually increasing from 0% to 100% which means installation is finished. FPR-200 will
automatically restart. If system is using the same version as Mobile.kit of SD card,
“SAME SOFTWARE VERSION, STILL INSTALL?” would be shown on the screen.
Press to cancel installation and restart original software.
11. Troubleshooting
11.1 Troubleshooting Methods
Item
No. Item Reason Methods
1 The front Green
lamp-
Power On
Indicator
Not lights on-
Power fail Restart.
2 Flash-Out of
battery
Restart. If it doesn’t work by restarting
machine for several times, please send to
department for repairing.
3
Screen
No image is
displayed on
screen.
Restart. If no image is displayed, check
whether the video and power cord of
monitor is fixed well or not.
4 Display is too slow. Restart.
5 Screen doesn’t
work. Restart.
6 GPS Positioning
GPS coordinate
location can’t
display on monitor.
Make sure where you stay no obstacles of
buildings or other interruptions. If yes, it will
impact receiving signal of GPS.
7
The back Red
lamp-
Fuse Fail
Indicator
On-Fail to Start Protection device starts. Please restart. If it
doesn’t work by pressing several times,
please send to department for repairing.

FPR-200 Page Total 18 Pages
18
11.2 Usual Maintenance
To ensure operation normally and keep product’s life longer, the following tips
should be noted when you are use this product and storage it:
Item
No. Item Description
1 Keep Dry FPR-200 Main Device is NOT waterproof. Spare parts inside of
this product could be seriously damaged if it is sprayed or
soaked by water and leading to non-repairable damages.
2 Prevent Dropping
down or Collision Don’t drop or collide. The Main Device may be Serious
damaged that is caused from strong impact and shake.
3 Keep away from
Strong Magnetic
Field
Please keep it away from equipments producing strong
magnetic radiation or having strong magnetic field during use
or storage of this product.
4 Suitable
Operation
Temperature
This product is suitable to be operated within -10 C-65C.
Please don’t use it in extreme temperatures.
5 Avoid Exposure
Please avoid this product exposing under the sun for a long
time and in high temperature environment.
6 Clean Screen The screen should be cleaned with soft cleaning cloth.
Please don’t scrub it with ordinary tissue.
7 No Disassembly.
Please don’t assembly and repair this product by yourself.
The warranty would not take this responsibility and damage
this product.
11.3 Storage Notes
If this product is not going to be used for a long while, please store it in the cool and
dry place. For long-term storage, it is recommended to store in dried box. Don’t
store this product in the following environments:
Item No. Description
1 Badly ventilated and moist place.
2 Below vehicle window exposed to the sun.
3 Environment with humidity exceeding 90%.
Table of contents

