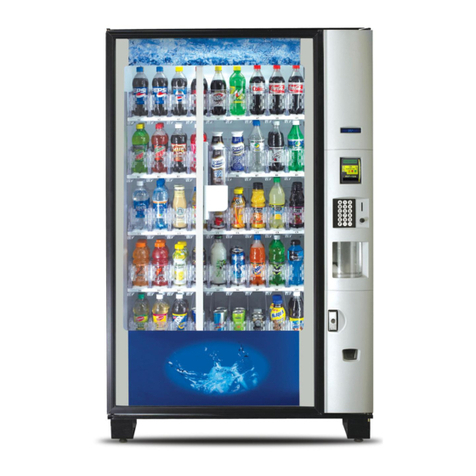
Foster FMPRO900RF User manual

1
By Appointment to
Her Majesty Queen Elizabeth II
Suppliers of Commercial Refrigeration
Foster Refrigerator, King’s Lynn
www.fosterrefrigerator.co.uk
A Division of ITW Ltd
Foster Refrigerator
Oldmedow Road
King’s Lynn
Norfolk, PE30 4JU
United Kingdom
ISO 9001 ISO 14001
Original Operation Instructions
Multideck Display Chillers
Slim 700, 900, 1200, 1500 & 1800 NG & RF models,
Pro 900, 1200, 1500 & 1800 NG & RF models
AD2-28 Controller & RU33 Display
00-556423 Aug 2012 Issue 4
English
Français
Nederlands
Magyar
Pусский
Česky
Deutsch
Español
0772

GB
General Electrical Safety
Foster Refrigerator recommends that the equipment is electrically connected via a Residual Current
Device; such as a Residual Current Circuit Breaker (RCCB) type socket, or through a Residual Current
Circuit Breaker with Overload Protection (RCBO) supplied circuit.
Disposal Requirements
If not disposed of properly all refrigerators have components that can be harmful to the environment. All old
refrigerators must be disposed of by appropriately registered and licensed waste contractors, and in
accordance with national laws and regulations.
Start-Up and Operation
After unpacking leave to stand for 60 minutes and clean before turning on (cleaning directions are
supplied within this manual). Position the Multideck with care on a level, flat, solid surface area.
Avoid cold air from air conditioning units & direct sunlight as these factors will affect the units’performance.
Warm air is produced from the rear of the unit & for this reason please leave a breathing area around the
unit as follows:
Gap Position
Gap Measurement
Relevant Models
Each Side of the Unit to Wall or next Unit.
10mm
Slim & Pro
Top of Unit to Ceiling (No Rear Ventilation)*
80mm
Slim & Pro
Top of Unit to Ceiling (With Rear Ventilation)
10mm
Slim & Pro
Rear of Units Wall Spacer to Wall
60mm
Slim
Rear of Units Wall Spacer to Wall
20mm
Pro
*When positioned into a recess or similar small area.
Insert the mains plug into the wall socket and switch on. Please do not plug or unplug the unit with wet
hands. The Multideck will start automatically, displaying the actual internal temperature of the unit (area
where product is displayed). All models are pre-set at +3° C to +5°C, so no adjustments are required.
Allow the Multideck to reach its normal operating temperature before loading.
With an interruption to the main power supply, the Multideck will re-start automatically after power is
restored. The vaporiser tray (at the base of the unit) may overflow during a power cut but this is dependent
on the length of time the power is off.
Standby
Pressing this button for 3 seconds will allow the unit to be turned on or put into standby.
Display Icons and Switches
Functions Icons
Temperature Display Buttons/Switches
Important Note to the Installer:
If you are not the user please pass this document on to them as it contains
important guidelines on operation, loading, cleaning and general
maintenance and should be kept for reference.

GB
Function Icons and Buttons/Switches
Info/Set point Button
Increase Button/ Lights On/Off
Manual defrost /Decrease Button
Exit/Stand-by Button
Compressor Output
Alarm
Fan Output
Defrost Output
Light Output
Set Point Display
Press button briefly (at least half a second) to display the set point.
Keypad Security Settings
Press & release then select to show ‘LOC’. Press and hold to change from ‘YES’ to ‘NO’. Leave
for 10 seconds or briefly press to resume to normal operation.
Internal Light
When pressed and released this button will switch on and off the display lights, with the unit running or in
standby mode. If the lights do not come on this may be due to a fault warning, please see the
troubleshooting section for more details.
Shelves and Supports
On delivery of the Multideck these parts are supplied wrapped
inside the unit on the base shelf. These will require cleaning and
fitting at first install.
Supports can be fitted at three different angles, allowing the shelf to
be tilted or level. Each shelf requires two supports (unless on a 1500
or 1800 model then a third centre support is also required).
Slot the first support into one side of the ladderacking at the height
and angle the shelf will be required. Repeat this on the opposite side
at the same position and angle (do the same for the centre support if applicable).
Always remember that you will need to allow for breathing space around, not only the shelves, but the
product. Remember to leave enough space between the supports when positioning on the ladderack.
Shelves are fitted once the supports are in place. Hold the shelf level and above the supports making sure
the flat surface is facing upwards. Position the supports so that they sit in the recess between the edge of
the shelf and central moulding. When positioned correctly the shelf will drop down onto the supports and be
secure.
The base shelf will already be fitted but can be removed by lifting straight up and away. This does not have
any supports and should not be removed when the unit is energised.
Ticket Strips can be fitted when shelves are in situ or before fitting.
These plastic mouldings are placed on the front of each shelf by firstly
hooking underneath then once gripped pushing onto the shelf facet in
an upwards motion. Make sure that all of the strip has secured itself
to the shelf and is secure.
All these parts are removable by carrying out the above instructions in
reverse. This should be carried out at regular intervals for cleaning
purposes.

GB
Loading and Airflow
Distribute the load evenly and make sure that it doesn’t exceed the maximum amounts stated below.
(Calculated as a single stack of cans per shelf)
Make sure air can circulate around & through the product do not cover the base shelf’s front grill. Maintain
space between the top of the product and the shelf above. Product must be cold before loading -
Multidecks are designed to maintain the merchandise temperature and not chill product from room
temperature.
Shutters & Nightblinds
Shutters are slatted solid covers that roll down in a single motion and then retract by being pushed
upwards. To avoid damage, do not let go of the shutter when opening or closing. To lock insert the key &
turn through 180° until you hear the lock click into place (keys should be kept out of the reach of the
general public & especially children).
Nightblinds are fabric covers without locks and pull down in a single, smooth motion; a mechanism in the
roller and a securing latch on the front of the unit then stops the blind from retracting.
To retract, simply unhook the blind from the front securing latch and pull down gently on the blind, which in
turn triggers the mechanism to retract back up towards the top of the unit. To avoid damage, guide the blind
when retracting by gently holding onto the blind handle.
When the Multideck is not required to display product, the shutter or blind should be closed fully.
This will conserve energy used by the unit, maintain product temperature and hide merchandise from view.
Defrost
The Multideck automatically defrosts at regular time intervals, lasting a maximum of 20 minutes during
which will show. Defrost can be manually activated by pressing and holding .
Cleaning and Maintenance
Important: Before cleaning the power supply should be turned off at the mains, please do not plug
or unplug the unit with wet hands. Only when cleaning has been completed and the unit is dry may
the Multideck be turned back on at the mains.
Regular Maintenance:
Air circulating in the unit should feel noticably cooler than the ambient temperature.
As and when required, remove all product and shelving from the unit (including the base shelf –
beware of cold and or sharp components) . Clean exterior and interior surfaces with mild liquid
detergent, following the directions on the pack at all times. Clean surfaces with a damp cloth and
clean water. Never use wire wool or scouring pads/powders as these may cause damage.
Clean the condenser at least once a month (it is located behind the front grille). Remove the 3
screws at the base of the panel and drop it downwards (beware of hot and possible sharp
components behind the grille). DO NOT use a wire brush to clean the condenser only use a soft
brush or vacuum cleaner to remove dirt/dust. If there are any stubborn grease deposits left on or
through the condenser, call your supplier to carry out a full service (this is normally a chargeable
service). Re-fit the front grille after cleaning.
Failure to maintain the condenser will cause premature failure of the motor/compressor and in turn
cause premature failure of the unit. This will invalidate the warranty of the unit and its parts.
Slimline NG & RF Models
700
900
1200
1500
1800
330ml Drink Can Capacity
216
(54 per shelf)
288
(72 per shelf)
384
(96 per shelf)
504
(126 per shelf)
624
(156 per shelf)
Pro NG & RF Models
900
1200
1500
1800
330ml Drink Can Capacity
420
(84 per shelf)
560
(112 per shelf)
735
(147 per shelf)
910
(182 per shelf)

GB
Troubleshooting
Before calling your supplier please make sure that:
The plug is in the socket and the mains power supply is switched on i.e. are the lights and fans
working?
The fuse for the unit has not blown
Are the lights working or able to be turned on? If not this may be due to high pressure
The unit is positioned correctly –cold air from air conditioning units & direct sunlight can affect
performance
The condenser is clean and not blocked
The products are placed in the unit correctly
The units’ air curtain is not obstructed
Defrost is not in progress
Check at regular intervals that the operating noise of the unit is normal and the condenser is clean
If the reason for the malfunction cannot be identified, disconnect the electrical supply to the unit and contact
your supplier.
When requesting a service call quote the model and serial number which can be found on the silver label
located on the ceiling of the unit (starts E5…….).
Alarms/Warnings
Unit Low Temperature Alarm
T1 Air probe failure
Unit High Temperature Alarm
T2 Evaporator probe failure
High pressure alarm
(Mains lights will go off).
T3 Product probe failure
Controller in Standy-by
Defrost in progress
Keypad Locked

FOSTER REFRIGERATOR (a division of ITW Ltd.)
Oldmedow Road, King’s Lynn, Norfolk. PE30 4JU United Kingdom
GB DECLARATION OF CONFORMITY
DÜBEREINSTIMMUNGSERKLÄRUNG
DK OVERENSSTEMMELSES - ERKLÆRING
EDECLARACIÓN DE CONFORMIDAD
FDECLARATION DE CONFORMITE
FIN VAATIMUSTENMUKAISUUSVAKUUTUS
GR ΔΗΛΩΣΗ ΙΙΡΟΔΙΑΓΡΑΦΗΣ
IDICHIARAZIONE DI CONFORMITA’
NL CONFORMITEIT’S VERKLARING
PDECLARAÇÃO DE CONFORMIDADE
PL DEKLARACJA ZGODNOŚCI CE
SGARANTI
GB We declare the following equipment:
DMan erklärt, daß folgendes Gerät mit den nachstehend aufgefürten Europäischen
DK Man erklærer, at det følgende apparatur:
ESe declara que el siguiente equipo:
FNous déclarons que les appareils suivants:
FIN Täten vakuutamme, että seuraava laite:
GR Δηλωνεται οτι η παρεβουσα συσκευη:
ISi dichiara che la seguente apparecchiatura:
NL De volgende machines:
PSe declara que a seguente maquina:
PL Deklarujemy że następujące urządzenie:
SHärmed udertygas att följande apparatur:
GB comply with the following European Directives:
Drichtlinien übereinstimmt:
DK er I overensstemmelse med de følgende europæiske direktivers forskrifter:
Ees en conformidad a cuanto establecen las siguientes Normas Europeas:
Fsont conformes aux Directives Européennes:
FIN vastaa seuraavien Euroopan yhteisön direktiivien vaatimuksia:
GR τηρει τις προδιαγραφες των εξης Ευροπαϊκων Оδηγων:
Iè conforme a quanto prescritto dale seguenti Direttive Europee:
NL conform met de Europeese Wetgeving:
Pè feita siguendo as prescrições das siguentes diretinas eu:
PL Spelnia wymogi następujących Dyrektyw Europejskich:
Sä normriktig och utformad enligt fölande Europeiska direktiv:
GB and have been designed, realised and controlled according to the following regulations:
Ddas Gerät ist folgenden Normen gemäß entworfen, angfertigt und geprüft worden:
DK er blevet projekteret, realiseret og kontrolleret i følge neden for beskrevne normer:
Ey estuvo proyectado, realizado y controdado segùn las siguentes normas:
Fet ont été conçus, réalisés et contrôlés suivant les norms:
FIN ja että se on suunniteltu, valmistettu ja tarkistettu seuraavien säännösten mukaisesti:
GR και σχεδιαστηκε, καταστευαστηκε και ελεγχτηκε:
Ied è stata progettata, realizzatta e controllata second le seguenti norme:
NL die volgens de volgende normen warden gecontrueerd, uitgevoerd en gecontroleerd:
Pe foi projectada, realizada e controlada Segundo as siguentes normas:
PL Oraz że zostala zaprojektowana, wyprodukowana I skontrolowana zgodnie
z nastęepującymi przepisami:
Sprojekerad, realiserad och kontrollerad enligt föliande normregler:
On behalf of Foster Refrigerator:
C.M. Playford
(Market & Development Director)
FMPRO900RF, FMPRO1200RF,
FMPRO1500RF, FMPRO1800RF,
FMPRO900NG, FMPRO1200NG,
FMPRO1500NG, FMPRO1800NG
FMSLIM700RF, FMSLIM900RF,
FMSLIM1200RF, FMSLIM1500RF,
FMSLIM1800RF, FMSLIM 700NG,
FMSLIM900NG, FMSLIM1200NG,
FMSLIM1500NG, FMSLIM1800NG
UNI EN ISO 12100-1
UNI EN ISO 12100-2
UNI EN ISO 13857
UNI EN 378-1
CEI EN 60204-1
CEI EN 60335-1 / 2-89
CEI EN 60204-1
CEI EN 60204-1
August 2011
2006/42 EC
2004/108 EC
REG.1935/2004 EC
2006/95 EC
2002/95 EC
97/23 EC
CEI EN 61000-1 … 4
Models:
This manual suits for next models
21
