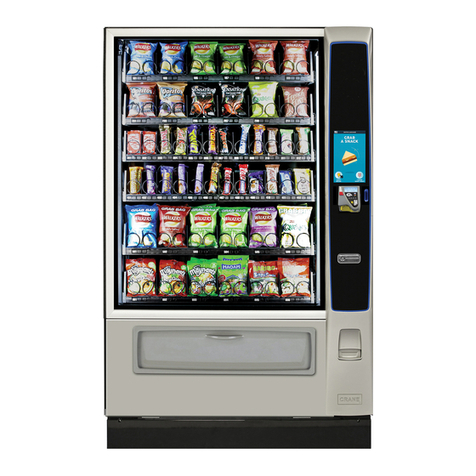
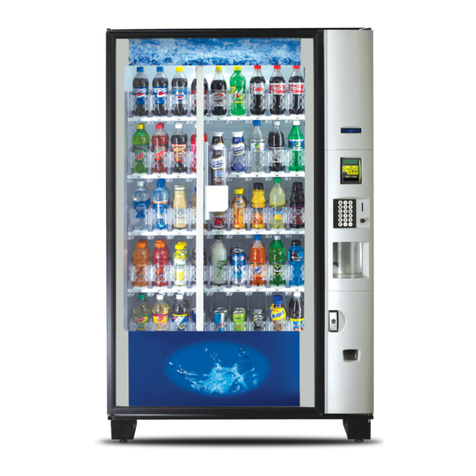
Crane Coca-Cola BevMAX Refresh Operating instructions


Page 2of 29
Table of Contents
CAUTIONS & WARNINGS…………………………………………………………………………………………….2
PROGRAMMING................................................................................................................. 3
General......................................................................................................................3
Normal Mode………………………………………………………………………………………………………………3
Service Mode……………………………………………………………………………………………………………...3
External Display Items................................................................................................3
Quick Reference Menu Items .......................................................................4, 5, and 6
Programming Menu...................................................................................................7
Dixie-Narco Factory Setup Menu/BevMax Setup.......................................................23
Cautions & Warnings
High Voltage Warning / Electrical Warning Danger electricity, electric shock.
A Generic Warning.
Hazard Warning: Beware of moving machinery –Entanglement hazard.
Keep hands, loose clothing, and long hair away from moving parts.

Page 3of 29
COCA-COLA PROGRAMMING
GENERAL INFORMATION
In order to fully utilize the many features of your Vender it is important that you first understand the options
available and procedures for programming the VMC (Vending Machine Controller).
All programming, testing, and service functions are accomplished by using the Keypad in an easy to follow, Display
prompted format. In standalone operation there are three modes of operation for Normal Mode for operating
Vender, Service Mode for servicing, testing, and setting up your Vender, and External Menu Mode to access
available information with the Service Door closed.
NORMAL MODE
At initial power-up with Service Door closed, the program will start and the Display will briefly show the VMC
software version in use as “Software ###.,r## CRC OK”(i.e. 006r00), followed by Model 5800-4 (or model that is
set) followed by the POS idle message, “ICE COLD COCA COLA”.Note: With Service Door closed, if the VMC has
detected certain errors, the display will show “No Sales available”. With the Service Door Open, the display will
show Error Codes or a List of Error Codes. “Unavailable” is a Comms error issue with one or more of the following
Cabinet Control Boards; X Motor Board, Y Motor Board, Cup Board, and/or Port Board.
SERVICE MODE:
In programming if Configuration Switch 4 is set to “Config 4 0”, when the Service Door is opened, “No Error
Codes” or a list of Error Codes will show on the Display. If Configuration Switch 4 is set to “Config 4 1”, when the
Service Door is opened, “Cash - ####-##.##”, “Card - ######.##”, “Sale - ####-####”, “ Error Codes”, or “No
Errors” will show on the Display. NOTE: Card is only shown if a Card Reader is present. The Service Mode is
entered when the Service Door is open and the Service Switch on the VMC is pressed. The operator can now
use the Keypad to move through the Main Routine Menu.
Key number 1: Abort/Cancel - will return to previous Menu prompt.
Key number 2: Scroll Up - forward in Menu.
Key number 3: Scroll Down - backward in Menu.
Key number 4: Enter/Save/Clear - Allows you to enter a specific routine, save what you have programmed, or
clear the Error prompts.
Note: Routines with “”are password protected. They can only be viewed and entered after the password is
entered at the “Password Entry” prompt.
EXTERNAL MENU MODE:
The information available in this Mode is obtainable with the Service Door closed or open as long as the Vender
is in Normal Mode, by entering the password which is set at 4, 2, 3, 1. Note: 4231 is the factory default and can
be programmed to any four digit combination. Information available is Historical Cash counted, Interval Cash
counted for each selection, Historical Sale (total number of vends), Interval Vends counted for each selection,
Error Codes, and Return. Refer to the “Cash Counters”, “Sales Counters”, and “Error Codes” routines for
instructions to move through the Menus.

Page 4of 29
Error Codes Cab Control Cont. PReset Coin Payout 5¢, 10 ¢, 25¢, etc
X Reset Tube Fill 5¢, 10 ¢, 25¢, etc
Y Reset Test Modes Test Vend Colums A1,etc.
CCPower Test Sel Switch Selections 4, etc.
Changer Changer Comm
Test Display a thru t & A thru T
Tube Sense
Test Relays Compressor #
Changer Inlet
Fan #
Tube Jam
Light #
Changer ROM
Password Entry 4,2,3,1,4
Excessive Escrow
Cash Counters Cash Tot/###.##
X LOST Coin Jam Card Tot/###.##
Y LOST Low Acceptance Cash Sel A1 ###.##
X SWITCH Acceptor Disconnected Sales Counters Sales Tot/###
Y SWITCH Coin Routing Err Drink Sales # (if Snack Vender used)
Bill Val Comm
Snack Sales # (if Snack Vender used)
Bill Stack Full
Bill Motor Error
*Price Program All Selections ##.##
Bill Jam
Bill Stack Open
Bill Sense Err
FCTRY TST Card Reader Card Reader Comm
Card Reader #
ETest OLM(On line module) On line network
PTest On line internal
X Test Remote Vend Mech Remote Vend Comm#
Y Test Remote Vend #
CComms Select/Display Select/Display Comm
EComms Refrigeration Temp Sense Err
Pcomms Temp Too Cold
X Comms Temp Too Hot
Y Comms Not Cooling
CReset Health Code
EReset Recheck Failed
Errors con’t.
Continuted on next Page
Bill Validator
Cab Control
CTest
RTC
Low Battery
XHOME
YHOME
PWROUT
Scale Factor
FRAM
RAMChecksum
MOTOR
PICKRS
Basic Programming
PORT
VS
PICKI
PICKO
Vend Mechanism
HORZ
VERT
Control System
Door Switch
Coca-Cola BevMax 4 Programming Method Quick Reference Prompts
Select Button 1: Abort/Cancel (will return to previous menu prompt or to normal door open mode).
Select Button 2: Scroll Up (forward in menu).
Select Button 3: Scroll down (backward in menu).
Select Button 4: Enter/Save/Clear (allows you to enter a specific prompt,save what you have programmed, or clear the error).

Page 5of 29
Dr Sw Reset
Auto View Counts
POS Message
Optional features
Multi Price
Select Button 2: Scroll Up (forward in menu).
Select Button 1: Abort/Cancel (will return to previous menu prompt or to normal door open mode).
Coca-Cola BevMax 4 Programming Method Quick Reference Prompts Continued
Half Tray
Select Button 4: Enter/Save/Clear (allows you to enter a specific prompt,save what you have programmed, or clear the error).
Select Button 3: Scroll down (backward in menu).
Config 4
Config 5
Not Used
##.##
##.##
1,2,3; 4,5; 6,7; 8,9
1,2; 3,4; 5,6; 7,8,9
Bill Escrow
Multi Vend
Force Vend
Save Credit
* require password to enter
Return to Sales
Remote Vend Mech
Health Safety
Over-ride Switch
*Select Block 2
*Select Discount
*Refrigeration
*Select Block 1
*Time Programming
*Lighting Control
*Preview Password
*Language Select
Corr Chg Value
Uncond Accept
Config 10
*Correct Change
Consumer Overpay #
Config 8
Config 9
Config 6
Config 7
Config 2
Config 3
CustomStS
*Config Switches
Config 1
Option 5
Option 6
Option 3
Option 4
Basic Programming
Sts Programming
Option 1
1 to 1
NOTES:
Option 2
Tray
Groups of 3

Page 6of 29
Coca-Cola BevMax 4 (xxx.xx Software)
BevMax Setup Programming Method Quick Reference Menu Prompts
BevMax Setup
Coke Factory Setup
Coke Factory Setup
$ Enable
Set Model Number
Coke Factory Setup
Product Recovery
Coke Factory Setup
Set Prc/Tmpr 4 Test
Factory Testing Only
Coke Factory Setup
Light Timer
Coke Factory Setup
Set Prc/Tmpr Dfault
Factory Testing Only
Coke Factory Setup
Bottle Drop Test
Coke Factory Setup
Set Shelf Offset
Coke Factory Setup
Hide Cashless Credit
Coke Factory Setup
Position Test
Coke Factory Setup
Auto Cal Hook Swipe
Coke Factory Setup
Set Hook Offset
Coke Factory Setup
Find Hook Swipe
Coke Factory Setup
Cup Sensor On/Off?
Coke Factory Setup
Mixed Credit
Coke Factory Setup
Cup Test
Coke Factory Setup
Port Test
Coke Factory Setup
Set Shelf Config
Coke Factory Setup
Master Reset
Test Modes
Test Vend
Coke Factory Setup
Update Software
Test Sel Switch
Coke Factory Setup
Double Talk
Test Display
Coke Factory Setup
Build Number ###
Test Relay
Coke Factory Setup
Port Sensor Enable
Return To Sales

Page 7of 29
PROGRAMMING MENU
“Error Codes” - ERROR ROUTINE
This function allows you to enter the error readout routine. “Error Codes” will appear when you press the service
button on the control board. Press key number 4, if there have been no Error Codes since the last reset, the
display will read “No Errors”. If one or more Error Codes have occurred, the display will show the first error code
that occurred. The following are error codes that may be displayed and detailed information accessed: “No
Errors”, “Vend Mechanism”, “Control System”, “Cab Control”, “Selection Switch”, “Changer”, “Bill Validator”,
“Card Reader”, “Remote Vend Mech”, “Selection/Display”, “Refrigeration”, “Health Timer”.
Press key number 2 or 3 to scroll through any error codes that are present.
Important: If there is only one problem, it will be the only error code shown when you enter the error code
submenus.
With an error code showing on the display, press key number 4 to access detailed information.
After making repairs with an error code showing on the display, press and hold key number 4 for 2 seconds will
clear the error.
Press key number 1 to return to “Error Codes”.
“Vend Mechanism” - Vend Mechanism Summary Error Codes
Press key number 4 and the display will show the following:
- “HORIZ”, X (horizontal) motor issue.
- “VERT”, Y (vertical) motor issue.
- “PICKI”, picker home switch issue.
- “PICKO”, picker out switch issue.
- “PICKRS”, picker return spring issue.
- “PORT”, port door switch/board issue.
- “VS”, port vend sensor board issue.
- “XHOME”, X (horizontal), can’t go home.
- “YHOME”, Y (vertical), can’t go home.
- “MOTOR”, port/delivery cup motor issue, can’t go home.
- “X LOST” , X (horizontal) needs to go home
- “Y LOST” , Y (vertical) needs to go home
- “X SWITCH” , indicates a possible problem with the X home switch
- “Y SWITCH” , Indicates a possible problem with the Y home switch
Press key number 1 will return to “Vend Mechanism” if all vend mech Error Codes have not been cleared. If all
vend mech Error Codes have been cleared the next error mode will be displayed, or “No Error Codes” if there are
no Error Codes. Press key number 1 will return to “Error Codes”.
“Control System” - Control System Summary Error Codes
Press key number 4 and the display will show one of the following:
- “Door Switch”, indicating a door switch in the open position for more than 1 hour.
- “RAM Checksum”, indicating the check sum for service mode settings memory has been corrupted.
-“Scale Factor”, indicating a peripheral has introduced a scaling factor that is incompatible with current setting.
- “FRAM”, memory module read/write error.
- “RTC”, RTC read/write error, real time clock issue.
- ‘Low Battery”, low battery issue.
- “PWROUT”, power lost.
- “FCTRY TST”, VMC was not tested at the manufacturer

Page 8of 29
“Cab Control” – Cabinet Controller Summary Error Codes
Press key number 4 and the display will show one of the following:
- C Test –Cup Board factory test not completed.
- E Test –Environmental Board factory test not completed
- P Test –Port Board factory test not completed.
- X Test –X Motor Board factory test not completed.
- Y Test –Y Motor Board factory test not completed.
- C Comms –Cup Board Communication issue.
- E Comms –Environmental Board Communication issue.
- P Comms –Port Board Communication issue.
- X Comms –X Motor Board Communication issue.
- Y Comms –Y Motor Board Communication issue.
- C Reset –Cup Board reset unexpectedly
- E Reset –Environmental Board reset unexpectedly.
- P Reset –Port Board reset unexpectedly.
- X Reset –X Motor Board reset unexpectedly.
-Y Reset –Y Motor Board reset unexpectedly
-CC Power –Cabinet Controller Power issues. –Usually means none of the cabinet controllers have power.
Press key number 1 will return to “Control System” if all control system Error Codes have not been cleared. If all control
system Error Codes have been cleared the next error code will be displayed, or “No Error Codes” if there are no Error
Codes. Press key number 1 will return to “Error Codes”.
“CHANGER” - Changer Summary Error Codes
Press key number 4 and the display will show one of the following:
- “Changer Comm”, indicating a changer communication error (No communication for more than 2 seconds).
- “Tube Sense”, indicating a tube sensor error.
- “Changer Inlet”, indicating an inlet chute blocked error (no coins sensed in acceptor for 96 hours).
- “Tube Jam #”, indicating a tube jam error.
- “Changer ROM”, indicating a changer ROM check sum error (failed changer).
- “Excessive Escrow”, indicating excessive escrow attempts (more than 255 since last coin sensed).
- “Coin Jam”, indicating a coin jam reported by coin mech.
- “Low Acceptance”, indicating a low coin acceptance rate (less than 80%).
- “Acceptor Disconnected”, indicating an acceptor is unplugged.
- “Coin Routing Err”, indicating a coin was miss-routed.
Press key number 1 will return to “CHANGER” if all changer Error Codes have not been cleared.
If all changer Error Codes have been cleared the next error code will be displayed or “No Error Codes” if there are no
Error Codes. Press key number 1 will return to “Error Codes”.
“Bill Validator” - Bill Validator Summary Error Codes
Press key number 4 and the display will show one of the following:
- “Bill Val Comm” indicating a bill validator communication error (No communication for more than 5 seconds).
- “Bill Stack Full” indicating the bill stacker is full.
- “Bill Motor Error” indicating a defective motor in the validator.
- “Bill Jam ” indicating a bill jam in the validator.
- “Bill Val ROM” indicating a check sum error.
- “Bill Stack Open” indicating an open stacker.
- “Bill Sense Err” indicating a bill validator sensor error.
Press key number 1 will return to “Bill Validator” if all changer Error Codes have not been cleared.
If all validator Error Codes have been cleared the next error code will be displayed or “No Error Codes” if there are
no Error Codes.
Press key number 1 will return to “Error Codes”.

Page 9of 29
“Card Reader” - Card Reader Summary Error Codes
Press key number 4 and the display will show one of the following:
- “Card Reader Comm”, indicating no card reader communication for 5 seconds.
- “Card Reader #”, indicating the most recent “non-transient error” from the card reader (failed card reader).
Press key number 1 will return to “Card Reader” if all changer Error have not been cleared. If all card reader Error Codes
have been cleared the next error code will be displayed or “No Error Codes” if there are no Error Codes. Press key
number 1 will return to “Error Codes”. Press key number 2 will scroll to the next routine.
“OLM” – On Line Module Summary Error Codes
Press key number 4 and the display will show one of the following:
- “On Line Network”, error reported by the OLM.
- “On Line Internal”, error reported by the OLM.
Press key number 1 will return to “OLM” if all OLM Errors have not been cleared. If all OLM Error Codes have been
cleared the next error code will be displayed or “No Error Codes” if there are no Error Codes. Press key number 1 will
return to “Error Codes”. Press key number 2 will scroll to the next routine.
“Remote Vend Mech” - Remote Vend Mechanism (USD) Error.
Press key number 4 and the display shows one of the following.
- “Remote Vend Comm #”, indicates no communication for 5 seconds with remote vend mech at address “#”.
- “Remote Vend #”, indicates error code number “#” from the remote vend mech at address “a”.
Press key number 1 will return to “Remote Vend Mech” if all remote vend mechanism Error Codes have not beencleared.
If all remote vend mechanism Error Codes have been cleared the next error code will be displayed, or “No Error Codes”
if there are no Error Codes. Press key number 1 will return to “Error Codes”. Press key number 2 will scroll to the next
routine.
“Select/Display” - Selection / Display Device (ASD) Error
Press key number 4 and the display shows:
- “Select/Display Comm”, indicating no communication to selection / display device for five seconds.
Press key number 1 will return to “Select/Display” if all selection / display device Error Codes have not been cleared. If
all selection / display device error have been cleared the next error code will be displayed or “No Error Codes” if there
are no Error Codes.
Press key number 1 will return to “Error Codes”.
Press key number 2 will scroll to the next routine.
“Refrigeration” - Refrigeration Summary Error Codes
Press key number 4 and the display shows one of the following:
- “Temp Sense Err”, indicating the temperature sensor is defective or unplugged.
- “Temp Too Cold”, indicating the cabinet temperature is 30 F below lower limit.
- “Temp Too Hot”, indicating the cabinet temperature is 30 F above upper limit.
-“Not Cooling”, indicating the cooling system has failed to decrease temperature 10 F perhour while the compressor
is running.
- “Health Timer” – Health Timer Error
The initial pull down time has not met the health timer constraints. Refer to “Health Timer” section for
details. Press and hold key number 4 for 2 seconds will clear the error and the display will show “No Error
Codes”.
- “Health Code” – Health Code Error
The health code cooling constraints have not been met. Refer to “Health Timer” section for details. Press
and hold key number 4 for 2 seconds will clear the error and the display will show “No Error Codes”.
Press key number 1 will return to “Refrigeration” if all refrigeration summary errors have not been cleared.

Page 10 of 29
If all refrigeration summary Error Codes have been cleared the next error code will be displayed, or “No Error Codes” if
there are no Error Codes. Press key number 1 will return to “Error Codes”. Press key number 2 will scroll to the next
routine.
“Coin Pay Out” - COIN PAYOUT ROUTINE
This function allows you to dump coins from the coin mechanism. Note: If a coin mech is not installed, you will not be
able to enter the program to display information. Press key number 4 to enter mode and the lowest coin value
dispensable will show on the display. Press key number 2 or 3 to scroll through the different coin values available. Press
and hold key number 4 to dump the coins whose value is shown on the display. Press key number 1 will return to “Coin
Pay Out”. Press key number 2 to scroll to the next routine.
“Tube Fill” - TUBE FILL ROUTINE
This function allows you to count the coins loaded in the top (separator) of the coin mech that will be routed to an
inventory tube. Note: If a coin mech is not installed, you will not be able to enter the program to display information.
Press key number 4 to enter mode and the total number of the coin type being loaded will be displayed and counted in
the vender controller as they are accepted. The controller will inhibit the acceptance of any coin which does not go to a
tube during this procedure. If a tube full status is detected, that coin type will be inhibited. When you finish loading all
coins press key number 1 to return to “Tube Fill”. Press key number 2 to scroll to the next routine.
“Test Modes” - TEST ROUTINE
This function allows you to diagnose different functions of the vender. Press key number 4 and the display will show
“Test vend”. For additional Dixie-Narco Factory Diagnostics refer to page 23. Press key number 2 or 3 to scroll through
the test routines available. Press key number 1 to return to “Test Modes”.
“Test Vend” - Vend Testing
This function allows you to test vend each column.
Press key number 4 and the display will show “Column A1”. Press key numbers 2 or 3 to scroll through the columns
available to run in motor test. Press and hold the Power Interrupt (PI) switch. Press key number 4 to vend from the
column displayed. Press key number 1 will return to “Test Vend”. Press key number 2 to scroll to next test mode.
“Test Sel Switch” - Select Switch Test
This function allows you to test each selection.
Press key number 4 and the display will show “Selection 4”. Then press any key and the display will show the last
key number pressed.
Press and hold key number 1 for approximately 5 seconds will return to “Test Sel Switch”. Press key number 2 to
scroll to the next test mode.
“Test Display” - Display Test
This function allows you to test all segments in the display. Press key number 4 and a lower case alphabet will
display, then turn off , then an upper case alphabet will display alternating until key number 1 has been pressed to
return to “Test Display”. Press key number 2 to scroll to next test mode.
“Test Relays” - RELAY TEST
This function allows you to test the relay electronic control of the compressor (“Compressor #”), the evaporator
fan(s) (“Fan #”), and the sign front light (“Light#”).
CAUTION: Disconnectpowertothecompressorbeforetestingthecompressorrelay. Failuretodisconnect power
to the compressor before testing the relay could result in damaging the compressor.
Press key number 4 and the display will show “Compressor #”, where # is the state of the relay - 0 = not activated or
off; 1 = activated or on. Press key number 4 to toggle the relay on and off. Press key number 2 to scroll to “Fan #”,
where # is the state of the relay - 0 = not activated or off, 1 = activated or on.Press key number 4 to toggle the fan(s)
on and off. Press key number 2 to scroll to “Light #”, where # is the state of the relay - 0 = not activated or off; 1 =
activated or on. Press key number 4 to toggle the lights on and off. Press key number 1 to return to “Test Modes”.

Page 11 of 29
Press key number 2 to scroll to “Password Entry”.
* “Password Entry” - PASSWORD ROUTINE
This function allows you to enter the following routines which are not accessible until the operator enters a password,
which is set as 4-2-3-1. To enter the password, press key number 4 until the display goes blank. Then press key number
2, then 3, then 1, and then 4, and “Cash Counters” should appear on the display. If not entered properly, the display will
return to “Password Entry” after approximately 16 seconds. If entered correctly, the display will go to the next function
“Cash”.
* “Cash Counters” - CASH COUNTER ROUTINE
This function will show the user the vender historical total cash counted and the interval cash counted for each selection
for the vender. Press key number 4 and “Cash Tot”/”######.##” will show on the display where the 8"#” characters are
the historical total cash counters that have been recorded. Note: Leading zeros are not displayed. Example: Display
flashes “Cash Tot”, then “262500”. This is $2625.00 historical total cash. Press key number 2 to scroll to “Card
Tot”/######.##”, where the 8# characters are the historical card reader cash counters. Note: Leading zeros are not
displayed.
Press key number 2 or 3 to display “Cash Sel A1”/”######.##” where the 8"#” characters are the interval cash counters
for that selection. Note: Leading zeros are not displayed. Pressing key number 2 or 3 at this time will scroll through the
available selection cash counters. Example: Display flashes “Cash Sel A1”, then “520.50”. This is $520.50 interval cash
for selection A1. Press key number 1 to return to “Cash Tot”/”######.##”. Press key number 1 to return to “Cash
Counters”. Press key number 2 to scroll to the next routine.
* “Sales Counters” - SALES COUNTER ROUTINE
This function will show the user the vender historical total number of vends and the interval vends counted for each
selection for the vender. Press key number 4 and “Sales Tot”/”########” will show on the display where the 8"#”
characters are the historical total vend counters that have been recorded. Note: Leading zeros are not displayed.
Example: Display flashes “Sales Tot”, then “1325”. This is 1325 historical vends. If in a BevMax 4 with a Snack Vender
attached you will also have available Drink Sales # & Snack Sales #. Press key number 2 to display Drink Sales # (if Snack
Vender attached). Press key number 2 to display Snack Sales # (if Snack Vender attached).
Press key number 2 to display “Sales Sel A2”/”########”, where the 8"#” characters are the interval vend counters for
that selection. Note: Leading zeros are not displayed. Pressing key number 2 or 3 at this time will scroll through the
available selection vend counters. Example: Display flashes “Sales Sel A1” then “145”. This is 145 interval vends counted
for selection A1. Pressing key number 1 will return to “Sales Tot”/”########”. Press key number 1 to return to “Sales
Counter”. Press key number 2 to scroll to the next routine.
“Price Program” - PRICE SETTING ROUTINE
This function allows the user to set pricing. When Configuration Code 1 is programmed to “Config 1 0” the vender is set
for single price vending. When Configure Code 1 is set to “Config 1 1”, the vender is set for multi-pricing (or a price for
each selection needs to be set). Note: This routine is lockable when using a data collection device.
Single Price setting:
Press key number 4 “Single Price” will show on display. Press the ”4” key and “Price Sel #.## will show on display.
Press key “2” to increase the vend price or key “3” to decrease the vend price. With the display showing the vend
price you require, press key “4” to save. All selections will be set to vend at the saved vend price.
Multiprice price setting:
Press key 4 and display will show “All Selections”. Press key 2 to scroll from “All Selections” to individual tray
selections “A, B, C, D, E”. With the display showing the All settings of the tray you wish to set price in press the key
4 to enter. At “All Selections” when you press 4 and enter the display will show “#.##” or current price set. Press
key “2” to increase the vend price or key “3” to decrease the vend price. With the display showing the vend price
you require, press key “4” to save. If you select an individual tray letter to set price in, when you press 4 and enter
the display will show “All Selections (for tray A only)”. Press key 2 to scroll to A1 thru A9 then back to All Selections
(for A tray only)”. At the position you wish to set price when you press 4 and enter the display will show “#.##” or
current price set. Press key “2” to increase the vend price or key “3” to decrease the vend price. With the display
showing the vend price you require, press key “4” to save.
Factory default setting is “Single Price”. Press key number 1 to return to “Price Program”. Press key number 2 to scroll
to the next routine.

Page 12 of 29
“StS Programming” – SPACE TO SALES ROUTINE
This function allows you to change the space to sale settings. Press key number 4 and “Option #” or “Custom StS” will
show on the display, which indicates the current space to sales option. For the 7 options available, see list below. Press
key number 2 to scroll through the options. Press key number 4 with the desired option showing on the display to save
that option and return to “StS Programming”.
Space to Sales Options:
“Option 1” 1 to 1 = Columns are assigned to selections with the same number.
“Option 2” Tray = Full tray assigned. Example: selections A1 thru A9 vend from columns A1 thru A9
sequentially.
“Option 3” Half Tray = Half tray assigned. Example: selections A1 thru A5 vend from columns A1 thru A5
sequentially and selections A6 thru A9 vend from columns A6 thru A9 sequentially.
“Option 4” Groups of 3 = Groups of 3 columns are assigned sequentially to work with associated selections.
Example: selections A1 thru A3 vend from columns A1 thru A3 sequentially.
“Option 5” Combined groups of 2 & 3 = Selection grouping per tray will be assigned columns 1 & 2; 3 & 4; 5 & 6;
7, 8, & 9 working with associated selections.
“Option 6” Combined groups of 3 = Selection grouping per tray will be assigned columns 1, 2, & 3; 4 & 5; 6 & 7;
8 & 9 working with associated selections.
“Custom StS” Custom space to sales = Allows you to assign columns in blocks working with associated selections.
With “Custom StS” showing, press key number 4 and “Clear Settings?” will show on display. Press key number 4 and
wait a few seconds will clear the current space to sale settings. Press key number 1 will return to “Custom StS”.
Press key number 4 and wait a few seconds will show “Selection A1” alternating with columns assigned to blocks.
Press key number 4 will show “First?A1” or the individual selection to start a block. Press key number 3 to scroll to
“First?E9” or the largest selection available.
Press key number 4 will show “Last?A1” or the last column for custom space to sales blocks. Press key number 2 will
show “Last?A1” or the largest column for custom space to sales blocks available. Press key number 4 will show “Save
Setting?” Press key number 4 will save the new settings.
* “Config Switches” - MACHINE CONFIGURATION
This function allows the user to access and change the programming of the following machine configuration settings.
Note: This routine is lockable when using a data collection device. If you press key number 4 and the display shows
“Locked Menu”, this means configuration setting changes will not be allowed. If “Config 1” is displayed, then
configuration setting changes will be allowed. “Locked Menu” can only be enabled or disabled through DEX
interrogation. If “Config 1” is displayed, the listed settings are available. Note: You must press key number 4 with the
configuration code displayed if you wish to enter the edit mode. The “0” or “1” will be flashing to acknowledge you are
in the edit mode.
IMPORTANT: All machine configuration codes are disabled coming from the factory (Config # 0).
Config 1 - Configuration Switch 1 - Multi-Price Setting Mode
This code is used to enable the single price mode “Config 1 0” or multi-price mode “Config 1 1”. Press key number
4 and “Config 1 #” will be displayed, with the “#” flashing. Press key numbers 2 or 3 to scroll between “Config 1
0” and “Config 1 1”. Press key number 4 with the display flashing the setting you wish to use. Press key number
1 to return to “Config 1”. Press key number 2 to scroll to “Config 2”.
Config 2 - Configuration Switch 2 - Optional Features Enable
This code is used to allow (Config 2 1) the following optional features to be displayed and enabled: “Lighting
Control”, “Select Discount”, “Over-ride Switch”, “Select Block 1”, and “Select Block 2”. Press key number 4 and
“Config 2 #” will be displayed with the # flashing. Press key numbers 2 or 3 to scroll between “Config 2 0” and
“Config 2 1”. Press key number 4 with the display flashing the setting you wish to use. Press key number 1 to
return to “Config 2”. Press key number 2 to scroll to “Config 3”.

Page 13 of 29
Config 3 - Configuration Switch 3 - POS Message
This code is used to disable the point of sale message. Config 3 0 = enabled, Config 3 1 = disabled. Press key
number 4 and “Config 3 #” will be displayed, with the “#” flashing. Press key numbers 2 or 3 to scroll between
“Config 3 0” and “Config 3 1”. Press key number 4 with the display flashing the setting you wish to use. Press
key number 1 to return to “Config 3”. Press key number 2 to scroll to “Config 4”.
Config 4 - Configuration Switch 4 - Automatic Viewing of Historical Sales and Cash Accounting, Error Codes or
No Error Codes
This code is used to enable viewing of historical sales, historical cash, Error Codes or No Errors automatically
when the door is opened. To enable automatic viewing option enter “Config 1”; to disable enter “Config 4 At
“Config 4 0” Error Codes or No Errors automatically displays when the door is open. Press key number 4 and
“Config 4 #” will be displayed, with the “#” flashing. Press key number 2 or 3 to scroll between “Config 4 0” and
“Config 4 1”. Press key number 4 with the display flashing the setting you wish to use. Press key number 1 to
return to “Config 4”. Press key number 2 to scroll to “Config 5”.
Config 5 - Configuration Switch 5 –Door
Switch Reset Status
This code is used to reset all interval data when the door switch is cycled and at least one data register is read
via the display when set at “Config 5 1” or to reset all interval data only when the “RESET” command is received
via handheld or portable computer when set at “Config 5 0”. Press key number 4 and “Config 5 #” will be
displayed, with the “#” flashing. Press key numbers 2 or 3 to scroll between “Config 5 0” and “Config 5 1”. Press
key number 4 with the display flashing the setting you wish to use. Press key number 1 to return to “Config 5”.
Press key number 2 to scroll to “Config 6”.
Config 6 - Configuration Switch 6 –Reserved, this code is reserved for future use. Press key number 2 to scroll
to “Config 7”.
Config 7 - Configuration Switch 7 - Save Credit
This code is used to determine how long a credit will be saved. C7 0 will save the credit for five minutes. Config
7 1 will save the credit indefinitely. Press key number 4 and “Config 7 #” will be displayed, with the “#” flashing.
Press key number 2 or 3 to scroll between Config 7 0 and Config 7 1. Press key number 4 with the display flashing
the setting you wish to use. Press key number 1 to return to “Config 7”. Press key number 2 to scroll to “Config
8”.
Config 8 - Configuration Switch 8 - Force Vend
Thiscode is used to determineescrow to select or escrow to price. Config 8 0 will set vender to escrow to select
and Config 8 1 will set vender to escrow to price. Press key number 4 and “Config 8 #” will be displayed, with
the “#” flashing. Press key number 2 or 3 to scroll between Config 8 0 and Config 8 1. Press key number 4 with
the display flashing the setting you wish to use. Press key number 1 to return to “Config 8”. Press key number
2 to scroll to “Config 9”.
Config 9 - Configuration Switch 9 - Multi Vend
This code is used to allow multiple vends without re-depositing funds. Config 9 0 will not allow multiple vends
and Config 9 1 will allow multiple vends. Press key number 4 and “Config 9 #” will be displayed, with the “#”
flashing. Press key number 2 or 3 to scroll between Config 9 0 and Config 9 1. Press key number 4 with the
display flashing the setting you wish to use. Press key number 1 to return to “Config 9”. Press key number 2 to
scroll to “Config 10”.
Config 10 - Configuration Switch 10 - Bill Escrow Inhibit
This code is used to allow last bill that meets or exceeds maximum vend price to be held in escrow. Config 10 0
will escrow bill and Config 10 1 will not escrow bill (or stack the bill). Press key number 4 and “Config 10 #” will
be displayed, with the “#” flashing. Press key number 2 or 3 to scroll between Config 10 0 and Config 10 1.

Page 14 of 29
Press key number 4 with the display flashing the setting you wish to use. Press key number 1 to return to “Config
1 0”. Press key number 2 to scroll to the next configuration code. Press key number 1 to return to “Config
Switches”. Press key number 2 will scroll to next routine.
*”Correct Change” - CORRECT CHANGE ONLY CONTROL ROUTINE
This function is used to allow consumer overpay, set a correct change value, and set an unconditional acceptance value.
Press key number 4 will enter “ConsumerOverpay#”.
“ConsumerOverpay #” - Allow Consumer Overpay
This function allows the vender to vend with the risk of not being able to return the full amount of change. This
function has to be turned on to be able to allow consumer overpay. Press key number 4 and display will show
“ConsumerOverpay #”, where “#” is flashing. “ConsumerOverpay1” will allow consumer overpay (customer
could potentially be shortchanged) and “ConsumerOverpay0” will not allow consumer overpay (will not allow
customer to be shortchanged). Press key number 2 or 3 to scroll between ” ConsumerOverpay0” and
“ConsumerOverpay1”. Press key number 4 with the display blinking the setting you wish to use. Display will
return to “ConsumerOverpay#”.
Press key number 2 to scroll to “Corr Chg value”.
“Corr Chg Value” - Correct Change Value
This is the function that the control board will use to set a value which will turn on the correct change
indicator. Note: If “Uncond Accept” is set, the “Corr Chg Value” should be equal to or less than the “Uncond
Accept”. Note: If the value set is 00.00, the correct change indicator will never come on.
If the controller determines that it cannot return the exact amount of the correct change value or any value less
than it, then the indicator will be turned on. Press key number 4 and the display will show “##.##’. Press key
number 2 or 3 to scroll from 00.00 to 99.99. Press key number 4 with the display showing the value you wish to
use. Display will return to “Corr Chg Value”. Press key number 2 to scroll to “Uncond Accept”.
“Uncond Accept” - Unconditional Acceptance Value
This is the function that the control board will use to set the largest value of any single form or currency (coin or
bill) that can be accepted without having enough change to pay back the full amount. Press key number 4 and
the display will show “##.##”. Press key number 2 or 3 to scroll from 00.00 to 99.95. Press key number 4 with
the display showing the value you wish to use. Display will return to “Uncond Accept”. Press key number 1 to
return to “CorrectChange”. Press key number 2 to scroll to next routine.
*”Preview Password” - PREVIEW DATA PASSWORD ROUTINE
This function is used to enable viewing of cash collected, product sales, and error codes without opening the door. To
view the data the 4 digit password (4-2-3-1) must be entered. Once entered the “Cash Counters”, “Sales Counters”,
“Error Codes”, and “Return to Sales” menus are available from the front of the vender. To view, follow instructions for
cash counter routine, sales counter routines, error routine and return.
To change “Preview Password” password:
At “Preview Password” press key number 4, “####” (representing current four digit password) will show on display with
the far left digit blinking. Press key number 2 to scroll to number desired for password. Press key number 4. The next
digit will start blinking, press key number 2 to scroll to number desired for password. Press key number 4. Continue this
process until all 4 digits are set. Then press key number 4 and the display will return to “Preview Password” and the new
password has been saved. Pressing key number 1 at any time during this routine will return to “Preview Password” with
no changes to password occurring. Press key number 2 to scroll to next routine.

Page 15 of 29
*”Language Select” - LANGUAGE ROUTINE
This function is used to set the language that will be used for display messages. Note: This does not change the menu
prompts. Press key number 4 and the display will show the language currently set in the controller. Press key number 2
or 3 to scroll through the languages available.
English
Spanish
Indonesia
Slovensky
French
Italian
Turkce
Portugues
German
Pycckий (Russian )
Cesky jazyk
With the language you wish to enter showing on the display, press key number 4. The display will return to “Language
Select”. Press key number 2 to scroll to next routine.
*”Time Programming” – TIME AND DATE ROUTINE
This function is used to set the year, month, date, and hour (military 24 hour clock). Press key number 4 and “Enable #”
will show on display.
“Enable #” - Time and Date Enable Routine
Press key number 4 and Enable 0 = disabled or Enable1 = enabled will show on display. Press key number 2 to
scroll between Enable 0 and Enable 1. Press key number 4 withthe display showing the setting you wish to use
and display will return to “Enable #”. Press key number 2 to scroll to “Year”.
“Year” - Year Setting (00 to 99)
Press key number 4 and the current year setting will show on display. Press key number 2 or 3 to change the
last 2 digits of the year (00 to 99). Press key number 4 with the display showing the year you wish to use and
display will return to “Year”. Press key number 2 to scroll to “Month”.
“Month” - Month Setting (01 to 12)
Press key number 4 and the current 2 digit month setting will show on display. Press key number 2 or 3 to
change the month (01 to 12).
Press key number 4 with the display showing the month you wish to use and display will return to “Month”.
Press key number 2 to scroll to “Day”.
“Day” - Day of Month Setting (1 to 31)
Press key number 4 and the current 2 digit day of month setting will show on display. Press key number 2 or 3
to change the day of month (1 to 31). Press key number 4 with the display showing the day you wish to use
and display will return to “Day”. Press key number 2 to scroll to “Hour”.
“Hour” - Hour and Minute Setting (0000 to 2359)
Press key number 4 and the current 4 digit hour and minute setting will be displayed (24 hour). The hour
setting will be blinking to indicate it can be changed. Press key number 2 or 3 to change the hour setting.
Press key number 4 to save and the minute setting will start blinking to indicate it can be changed. Press
key number 2 or 3 to change the minute setting. Press key number 4 will save and return display to “Hour”.
Press key number 2 to scroll to “Daylight Savings”.
“Daylight Savings” - Daylight Saving Time Setting
This function is used to set the preferred daylight savings time setting. Press key number 4 will display the
current setting. Press key number 2 or 3 to scroll through the “Daylight savings” options listed:
- “OFF”, no daylight savings time changes made.
- “Australia”, Australian rules - Set forward 1 hour at 1:00 am on the first Sunday in October; Set backward
1 hour at 1:00 am on the last Sunday in March.
- “Europe”, European rules - Set forward 1 hour at 1:00 am on the last Sunday in March; Set backward 1
hour at 1:00 am on the last Sunday in October.
- “North America”, North American rules - Set forward 1 hour at 2:00 am on the second Sunday in March;
Set backward 1 hour at 2:00 am on the first Sunday in November.
Press key number 4 with the display showing the setting you wish to use and display will return to “Daylight
Savings”. Press key number 1 to return to “Time Programming”. Press key number 2 to scroll to next routine.

Page 16 of 29
*”Lighting Control” - LIGHTING CONSERVATION CONTROL ROUTINE (Config 2 Must Be Enabled –
Config 2 1)
This function is used to turn the lights off and on during certain periods of the day. Press key number 4 will
enter “Enable #”.
“Enable #” - Lighting Conservation Control Enable Routine
This function is used to disable Lighting Conservation Control “Enable 0” (lights will be on at all times) or enable
Lighting Conservation Control “Enable 1” (lights can be set to turn off). Press key number 4 and the current “Enable
#” setting will be displayed. Press key number 2 or 3 to scroll between “Enable 0” and “Enable 1”. Press key number
4 with the display showing the setting you wish to use. Press key number 2 to scroll to “Start Time”.
“Start Time” - Start Lighting Conservation Setting (lights off)
This function is used to set the days and time to start light conservation when “Enable 1” is selected. Press key
number 4 and “Start Day” will show on the display.
“Start Day” - Day to Start Setting
This function is used to set the days of the week to start light conservation. Press key number 4 and “XXXXXX#”
will show on the display, where XXXXXX will be the day of the week (i.e. Monday, Tuesday, Wednesday,
Thursday, Friday, Saturday, Sunday, Every day) and # is 0 = disable, 1 = enable. Withthe display showing the day
you wish to set press key number 4. The # will start blinking. Press key number 2 or 3 to scroll between
“XXXXXX0” and “XXXXXX1”. Press key number 4 with the display showing the setting you wish to use. Display
will return to “XXXXXX#”. Press key number 2 to scroll to the next day to set or press key number 1 to return to
“Start Day”. Press key number 2 to scroll to “Start Hour”.
“Start Hour” - Start Hour and Minute Setting
This function is used to set the hours to start light conservation (lamps off). Press key number 4 and “hhmm”
will show on the display, where “hh” is the hour (military time) and “mm” is the minute. “hh” will be blinking,
indicating the hour setting may be changed. Press keynumber 2 to scrollfrom 00 to 23. With the display showing
the hour you wish to start light conservation, press key number 4. “mm” will start blinking, indicating the minute
setting may be changed. Press key number 2 to scroll from 00 to 59. With the display showing the minute you
wish to start light conservation, press key number 4. The display will return to “Start Hour”. Press key number 1
to return to “Start Time”. Press key number 2 to scroll to “Stop Time”.
“Stop Time” - Stop Light Conservation Setting (lights on)
This function is used to set the days and time to stop light conservation. Press key number 4 and “Stop Day” will
show on the display.
“Stop Day” - Day to Stop Setting
This function is used to set the days of the week to stop light conservation and can be set in the same manner
as Day to Start Setting.
“Stop Hour” - Stop Hour and Minute Setting
This function is used to set the hours and minutes to stop light conservation and can be set in the same manner
as Start Hour and Minute Setting. Press key number 1 to return to “Stop Time”. Press key number 1 to return to
“Lighting Control”. Press key number 2 to scroll to next routine.
*”Refrigeration” - REFRIGERATION ROUTINE
This function is used to electronically control the refrigeration operations of the vender. Press key number 4 will enter
“Enable #”.
“Enable #” - Energy Conservation Enable Routine
This function is used to disable Energy Conservation “Enable 0” or enable Energy Conservation “Enable 1”. When
enabled the cabinet temperature will be allowed to rise to the programmed storage level (“Storage”) during the
following programmed time blocks. Press key number 4 and the current “Enable X” setting will be displayed. Press
key number 2 or 3 to scroll between “Enable 0” and “Enable 1”. Press key number 4 with the display showing the
setting you wish to use. Press key number 2 to scroll to “Start”.

Page 17 of 29
“Start Time” - Start Energy Conservation
This function is used to set the days and time to start Energy Conservation when “Enable 1” is selected. Press key
number 4 and “Start Day” will show on the display.
“Start Day” - Day to Start Setting
This function is used to set the days of the week to start Energy Conservation.
Press key number 4 and “XXXXXX#: will show on the display, where XXXXXX will be the day of the week (i.e.
Monday, Tuesday, Wednesday, Thursday, Friday, Saturday, Sunday, Every day) and # is 0 = disable, 1 =
enable. With the display showing the day you wish to set press key number 4. The # will start blinking. Press
key number 2 or 3 to scroll between “XXXXXX0” and “XXXXXX1”. Press key number 4 with the display
showing the setting you wish to use. Display will return to “XXXXXX#”. Press key number 2 to scroll to the
next day to set or press key number 1 to return to “Start Day”. Press key number 2 to scroll to “Start Hour”.
“Start Hour” - Start Hour and Minute Setting
This function is used to set the hours to start Energy Conservation. Press key number 4
and “hhmm” will show on the display, where “hh” is the hour (military time) and “mm” is the minute. “hh”
will be you wish to start Energy Conservation, press key number 4. The display will return to “Start Hour”.
Press key number 1 to return to “Start Time”. Press key number 2 to scroll to “Stop Time”.
“Stop Time” - Stop Energy Conservation
This function is used to set the days and time to stop energy conservation when “Enable 1” is selected. Press key
number 4 and “Stop Day” will show on the display.
“Stop Day” - Day to Stop Setting
This function is used to set the days of the week to stop energy conservation and can be set in the same
manner as “Start Day” and “Start Hour”.
“Start Hour” - Stop Hour and Minute Settings
This function is used to set the hours and minutes to stop energy conservation and can be set in the same
manner as “Start Hour”.
Press key number 1 to return to “Stop Time”.
Press key number 2 to scroll to “Degrees”.
“Degrees F(C)” - Degree Fahrenheit / Celsius Setting Routine
Thisfunctionis usedto setthe degreereading to Fahrenheit(Degrees F) or Celsius(Degrees C). Presskey number
4 and “Degrees X”, where the current setting (X) will be blinking. Press key number 2 or 3 to scroll between
Degrees F and Degrees C. Press key number 4 with the display blinking the setting you wish to use. Press key
number 1 to return to “Degrees”.
Press key number 2 to scroll to “Setpoint”.
“Setpoint” - Set Point Control Routine (Default Temperature 35.00F)
This function is used to set the average product temperature for initial pull down and reload recovery. Press
key number 4 and “tt.tx” will show on the display where x is F (Fahrenheit) or C (Celsius) and tt.t is the degrees.
Press key number 2 to increase or 3 to decrease the number by 10 F or 0.50C. With the display showing the set
point temperature you wish to use, press key number 4.
Press key number 2 to scroll to “Storage”.
“Storage” - Storage Setting Routine (Default Temperature 60.00F / 15.50C)
This function is used to set the temperature for product storage and is used when Energy Conservation is
enabled. Press key number 4 and “tt.tx” will show on display when X is F (Fahrenheit) or C (Celsius) and tt.t is
the degrees. Press key number 2 to increase and 3 to decrease the number by 10 F or 0.50C. With the display
showing the storage setting you wish to use, press key number 4. Press key number 2 to scroll to “Display X”.
“Display #”- POS Temperature Display Enable Routine
This function is used to enable the POS Temperature to be displayed following the “Ice Cold COCA-COLA”
POS message.
Press key number 4 and “ Display X” will show on the display where x is the current setting. With “X” blinking,
press key number 2 or 3 to scroll between “Display 0” disabled or not displayed and “ Display 1” enabled or
displayed. With the display showing the setting you wish to use, press key number 4. Press key number 1 to
return to “Refrigeration”. Press key number 2 to scroll to next routine.

Page 18 of 29
*”Select Block 1" - BLOCK SELECTION BANK 1 ROUTINE (Config 2 must be enabled –Config 2 1)
This function is used to set selections which will be blocked during certain periods of the day. Press key number 4 will
enter “Enable X”.
“Enable X” - Blocking Enable Routine
This function is used to disable blocking “Enable 0” or enable blocking “Enable 1”. When enabled, active selections
will not be allowed to vend on the days andtimes programmed. Press key number 4 and the current “Enable” setting
will be displayed. Press key number 2 or 3 to scroll between “Enable 0” and “Enable 1”. Press key number 4 with the
display blinking the setting you wish to use. Display will return to “Enable X”. Press key number 2 to scroll to “Start
Time”.
“Start Time” - Start Selection Blocking Routine
This function is used to set the day(s) and time to start selection blocking. Press key number 4 and “Start Day” will show
on the display.
“Start Day” - Day of Week Start Setting
This function is used to set the day(s) of the week to start selection blocking. Press key number 4 and “XXXXXX#”
will show on the display, where XXXXXX will be the day of the week (i.e. Monday, Tuesday, Wednesday, Thursday,
Friday, Saturday, Sunday, Every day) and # is 0 = disable, 1 = enable. With the display showing the day you wish to
set press key number 4. The # will start blinking. Press key number 2 or 3 to scroll between “XXXXXX0” and
“XXXXXX1.” Press key number 4 with the display showing the setting you wish to use. Display will return to
“XXXXXX#’. Press key number 2 to scroll to the next day to set or press key number 1 to return to “Start Day”. Press
key number 2 to scroll to “Start Hour”.
“Start Hour” - Start Hour and Minute Setting
This function is used to set the hours and minutes to start selection blocking. Press key number 4 and “hhmm” will
show on the display, where hh is the hour (military time) and mm is the minute. “hh” will be blinking, indicating the
hour setting may be changed. Press key number 2 to scroll from 00 to 23. With the display showing the hour you
wish to start selection blocking, press key number 4. “mm” will then start blinking, indicating the minute setting may
be changed. Press key number 2 to scroll from 00 to 59. With the display showing the minute you wish to start
selection blocking, press key number 4. The display will return to “Hour”. Press key number 1 to return to “Start
Time”. Press key number 2 to scroll to “Stop Time”.
“Stop Time” - Stop Selection Blocking Routine
This function is used to set the day(s) and times to stop selection blocking. Press key number 4 and “Stop Day” will show
on the display.
“Stop Day” - Day of Week Stop Setting
This function is used to set the days of the week to stop selection blocking and can be set in the same manner
as Day of Week Start Setting.
“Stop Hour” - Stop Hour and Minute Setting
This function is used to set the hours and minutes to stop selection blocking and can be set in the same manner
as Start Hour and Minute Setting.
Press key number 1 to return to “Stop Time”.
Press key number 2 to scroll to “Selection”.
“Selection” - Selection to Be Affected By Blocking
This function is used to set selection(s) which will be blocked during certain periods of the day. Press key number
4 and “Select A1 #” will be displayed, where # is the current setting for the selection number displayed. 0 = disabled;
1 = enabled. Press key number 2 to scroll to the key number setting you desire to change. Press key number 4
with the key number showing you wish to change (i.e. Select A1 #) and the # will start blinking. Press key number
2 or 3 to scroll between Select A1 0 and Select A1 1. Press key number 4 with the display showing the setting you
wish to use. Display will return to Select A1 #. Press key number 1 to return to “Selection”. Press key number 2 to
scroll to “Lighting #”.

Page 19 of 29
“Lighting #” - Lighting / P.O.S. Display Control
This function is used to turn the lights (if supported) and P.O.S. Display Message off during selection blocking period 1. 0
= disable or on; 1 = enable or off.
Press key number 4 and the “#” will start flashing.
Press key number 2 or 3 to scroll between “Lighting 0” and “Lighting 1”. Press key number 4 with the display showing
the setting you wish to use. Display will return to “Lighting X”. Press key number 1 to return to “Select Block 1”. Press
key number 2 to scroll to “Select Block 2”.
*”Select Block 2" - BLOCK SELECTION BANK 2 ROUTINE
This function is a second set used to set selection(s) which will be blocked during certain periods of the day. Press key
number 4 will enter “Enable X”.
“Enable X” - Blocking Enable Routine.
Set this function using instruction for “Enable X” in “Select Block 1”.
“Start Time” - Start Selection Blocking Routine
This function is used to set the day(s) and times to start selection blocking. Press selection button 4 and “Start Day”
will show on the display.
“Start Day” - Day of Week Start Setting
Set this feature using instructions for “Select Block 1”, “Start Time”, “Start Day”.
“Start Hour” - Start Hour and Minute Setting
Set this function using instructions for “Select Block 1”, “Start Time”, “Start Hour”.
“Stop Time” - Stop Selection Blocking Routine.
This function is used to set the day(s) and times to stop selection blocking. Press key number 4 and “Day” will show
on the display.
“Day” - Day of Week Stop Setting
Set this function using instructions for “Select Block 1”, “Stop Time”, “Stop Day”.
“Hour” - Stop Hour and Minute Setting
Set this function using instructions for “Select Block 1”,“Stop Time”, “Stop Hour”. Press key number 1 to return
to “Stop Time”.
Press key number 2 to scroll to “Selection”.
“Selection” - Selection to Be Affected By Blocking
This function is used to set selection(s) which will be blocked during certain periods of the day. Set this function
using instructions for “Select Block 1”, “Selection”. Press key number 1 to return to “Selection”.
Press key number 2 to scroll to “Lighting #”.
“Lighting #” - Lighting / P.O.S. Display Control
This function is used to turn the lights (if supported) and P.O.S. Display Message off during selection blocking period
2. Set this function using instructions for “Select Block 1”, “Lighting”. Press key number 1 to return to “Select Block
2”. Press key number 2 to scroll to “Select Discount”.
*”Select Discount” - DISCOUNT SETTING ROUTINE
This function is used to set the day(s) and times to allow discount prices. Press key number 4 and Enable # will show on
the display.
“Enable #” - Discount Setting Enable Routine
This function is used to disable discounting “Enable 0” or enable discounting “Enable 1”. Press key number 4
and the current “Enable X” setting will be displayed. Press key number 2 or 3 to scroll between “Enable 0” and
“Enable 1”. Press key number 4 with the display blinking the setting you wish to use. Display will return to
“Enable X”. Press key number 2 to scroll to “Start Time”.
“Start Time” - Start Discount Pricing
This function is used to set the day(s) and
times to start discount prices. Press key number 4 and “Start Day” will show on the display.
“Start Day” - Day of the Week Start Setting
Set this feature using instructions for “Select Block 1”, “Start Time”, “Start Day”.
“Start Hour” - Start Hour and Minute Settings
Set this feature using instructions for “Select Block 1, “Start” Time, “Start Hour”.

Page 20 of 29
“Stop Time” - Stop Discount Pricing
This function is used to set the day(s) and times to stop discount prices. Press key number 4 and “Stop Day” will
show on the display.
“Stop Day” - Day to Stop Setting
Set this feature using instructions for “Select Block 1”, “Stop Time”, “Stop Day”.
“Hour” - Stop Hour and Minute Setting
Set this function using instructions for “Select Block 1”, “Stop Time”, “Stop Hour”.
“Selection” - Selection Affected by Discount Pricing
This function is used to set selection(s) which will be affected by discount prices. Press key number 4 and “Select A1
#” will be displayed, where # is the current setting for the selection number displayed. 0 = disabled, 1 = enabled.
Press key number 2 to scroll to the key number you desire to change.
Press key number 4 with the key number showing you wish to change (i.e. Select A1 #) and the # will start blinking.
Press key number 2 or 3 to scroll between “Select A1 0” and “Select A1 1”. Press key number 4 with the display
showing the setting you wish to use. Display will return to “Select A1 1”. Press key number 1 to return to
“Selection”. Press key number 2 to scroll to “Less Amount”.
“Less Amount” - Discount Amount (Price)
Thisfunctionis usedto setthe discount amount (price) for selection(s) and times set. Press key number 4 and “##.##”
will be displayed, where “##.##” is the current discount price that is set. Press key number 2 or 3 to change the price
(00.00 to 99.99). Press key number 4 with the display showing the price setting you wish to use. Display will show
price. Press key number 1 to return to “Less Amount”. Press key number 1 to return to “Select Discount”. Press key
number 2 to scroll to “Health Setting”.
Health Safety” – HEALTH SETTING ROUTINE
This function is used to enable the health protection feature for product when needed. When enabled it operates as
follows:
1. Cabinet temperature must be maintained at 41º F (5º C) or below for product to be vended while in normal
operation. If the cabinet temperature exceeds 41º F, and fails to return to 41º F or below for 15 minutes the
controller will issue a “Health Code” error and disable vending of health protected products.
2. After door closure, (refill or service) the machine has 30 minutes to pull down to 45º F (7º C). If the machine has
not reached 45º F (7º C) after 30 minutes the controller will issue a “Health Timer” error. Once a health time error
is activated the controller will not allow product to be delivered. After 30 minutes if the temperature is 45º F or
less, but not 41º F the controller will set a 15 minute timer. During this time, if the cabinet temperature falls below
41º F (5º C) the controller will allow health guarded product to be delivered. If the temperature doesn’t fall below
41º F (5º C) the controller will issue a “Health Code” error and disable vending of health protected products.
3. Power loss for 30 minutes or longer will result in automatic “Health Code” error activation and disable vending
of health protected products upon power up.
4. Powerloss less than 30 minutes. Once the machine regains power, if the cabinet temperature is 45º F (7º C) or less
the controller will allow product to be dispensed. The controller will allow an additional 15 minutes for the
temperature to pull down to 41º F (5º C). If the temperature doesn’t reach 41º F (5º C) or less after the 15 minute
period the controller will issue a “Health Code” error and disable vending of health protected products. If the
temperature is greater than 45º F (7º C) on power up the controller will automatically set a “Health Code” error
and disable vending of health protected products.
5. Power loss less than 15 minutes. On power up the controller will allow vending. If the cabinet temperature
doesn’t reach 41º F (5º C) or less in 15 minutes the controller will issue a “Health Code” error and disable
vending of health protected products.
To enable, with “Health Setting” on display press key number 4 will enter “Enable #”.
“Enable #” –Health Enable Routine
This function is used to enable the Health Protection feature. When enabled, protected selections will only be
allowed to vend if health constraints listed above are met. Press key number 4 and the current “Enable” setting will
be displayed. Press key number 2 or 3 to scroll between “Enable 0” and “Enable 1”. Press key number 4 with the
display blinking the setting you wish to use. Display will return to “Enable #”. Press key number 2 to scroll to
“SELECT”.
This manual suits for next models
2
Table of contents
Other Crane Merchandiser manuals

Crane
Crane DN5800 Operating and installation instructions

Crane
Crane Dixie Narco Glassfront BevMax 3 User manual

Crane
Crane BevMax 4 User manual

Crane
Crane BevMax 3 Operating and installation instructions

Crane
Crane BevMAX Refresh 6 Media User manual

Crane
Crane 787E Manual

Crane
Crane BEVMAX 6 User manual

Crane
Crane Snack Center 1 User manual
Popular Merchandiser manuals by other brands

Hussmann
Hussmann Impact Excel M3X-GEP Technical data sheet

Hussmann
Hussmann Impact Excel P2X-EP Technical data sheet

Hussmann
Hussmann P2NX-E Technical data sheet

Hussmann
Hussmann IMPACT LWEGH install guide

Hussmann
Hussmann impact Excel C2X-XLE Technical data sheet

Hussmann
Hussmann IMPACT Elite E1 Technical data sheet