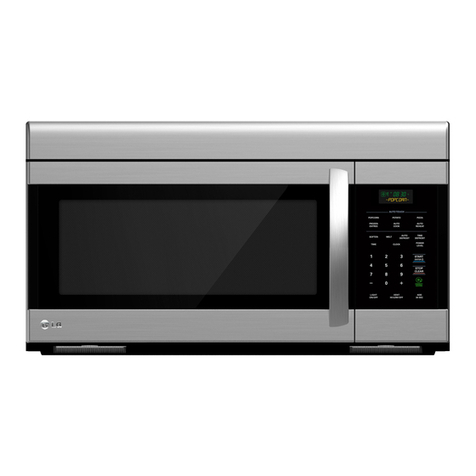
Foster KS 7151 010 User manual

Indice:
Italiano p. 2
p. 23
p. 45
p. 87
English
Français
Deutsch p. 66
Español
Nederlan ds
p. 108

SAVE THESE INSTRUCTIONS CAREFULLY
Read these instructions carefully before using your
microwave oven,and keep it carefully.
If you follow the instructions, your oven will provide you with
many years of good service.
MODEL:AG928B8Z
Forno a microonde
MANUALE D’ISTRUZIONI
MODELLO: 7151010
Leggere attentamente queste istruzioni prima di usare il
vostro microonde, conservarle con cura. Se le seguenti
istruzioni verranno seguite, il vostro forno vi garantirà molti
anni di ottimo servizio.
CONSERVARE CON CURA QUESTE ISTRUZIONI
IT
2

Specifications
(a) Do not attempt to operate this oven with the door
open since this can result in harmful exposure to
microwave energy. It is important not to break or tamper
with the safety interlocks.
(b) Do not place any object between the oven front face
and the door or allow soil or cleaner residue to accumulate
on sealing surfaces.
(c) WARNING: If the door or door seals are damaged, the
oven must not be operated until it has been repaired by
a competent person.
ADDENDUM
If the apparatus is not maintained in a good state of
cleanliness, its surface could be degraded and affect the
lifespan of the apparatus and lead to a dangerous situation.
PRECAUTIONS TO AVOID POSSIBLE EXPOSURE
TO EXCESSIVE MICROWAVE ENERGY
Model:
Rated Voltage:
Rated Input Power(Microwave):
Rated Output Power(Microwave):
Rated Input Power(Grill):
Oven Capacity:
Turntable Diameter:
External Dimensions:
Net Weight:
AG928B8Z
230V~50Hz
900W
2
Approx. 18.5kg
1450W
1100W
315mm
595x400x388mm
8L
PRECAUZIONI PER EVITARE LA POSSIBILE ESPOSIZIONE
A UNA QUANTITÀ ECCESSIVA DI ENERGIA A MICROONDE
(a) Non provare a usare questo forno con lo sportello
aperto, dato che potrebbe provocare delle esposizioni
leggere ad energia a microonde. È importante non rompere
o comprimere il dispositivo di blocco di sicurezza.
(b) Non mettere alcun oggetto tra la parte frontale del forno
e lo sportello, non permettere l’accumulo di sporcizia o
residui di detersivi sulle superci di chiusura.
(c) ATTENZIONE: se lo sportello o le guarnizioni dello
sportello sono danneggiate, non è possibile usare il forno
no alla riparazione da parte di una persona competente.
NOTA AGGIUNTIVA
Se l’apparecchiatura non è mantenuta in un buono stato di pulizia,
la sua supercie potrebbe degradarsi e incidere sulla longevità del
prodotto, no ad arrivare a situazioni potenzialmente pericolose.
Speciche
Modello: 7151010
Voltaggio nominale: 230V~50 Hz
Potenza nominale ingresso
(Microonde): 1450 W
Potenza nominale uscita
(Microonde): 900 W
Potenza nominale ingresso (Grill): 1000 W
Capienza forno: 25 L
Diametro piatto girevole: 315 mm
Dimensioni esterne: 595x400x388 mm
Peso netto: 18,5 kg circa
IT
3

IMPORTANT SAFETY INSTRUCTIONS
WARNING
oven must not be operated until it has been repaired by
a competent person.
2. Warning: It is hazardous for anyone other than a
competent person to carry out any service or repair
operation that involves the removal of a cover which
gives protection against exposure to microwave energy.
in sealed containers since they are liable to explode.
1. WARNING: If the door or door seals are damaged, the
3. Warning: Liquids and other foods must not be heated
and similar applications such as:
-staff kitchen areas in shops, offices and other working
environments;
-by clients in hotels, motels and other residential type
environments;
-farm houses;
-bed and breakfast type environments.
5. Only use utensils that are suitable for use in microwave
ovens.
keep an eye on the oven due to the possibility of ignition.
beverages.Drying of food or clothing and heating of
warming pads,slippers,sponges,damp cloth and similar
may lead to risk of injury,ignition or fire.
and keep the door closed in order to stifle any flames.
4.This appliance is intended to be used in household
6. When heating food in plastic or paper containers,
7. The microwave oven is intended for heating food and
8. If smoke is observed, switch off or unplug the appliance
ISTRUZIONI IMPORTANTI DI SICUREZZA
ATTENZIONE
1. ATTENZIONE: se lo sportello o le guarnizioni dello sportello
sono danneggiate, non è possibile usare il forno no alla
riparazione da parte di una persona competente.
2. Attenzione: È pericoloso per chiunque altro oltre ad una
persona qualicata, l’esecuzione di qualsiasi operazione di
servizio o riparazione che implichi la rimozione della copertura
di servizio che protegge dall’esposizione alle microonde.
3. Attenzione: Liquidi e altri tipi di cibo non devono essere
scaldati in contenitori sigillati, poiché rischiano di esplodere.
4. Questo prodotto è destinato a un uso domestico o similare,
come ad esempio:
- in angoli cottura riservati al personale di negozi, uci o altri
ambienti di lavoro;
- dai clienti di alberghi, motel e altre strutture ricettive
residenziali;
- in seconde case;
- in bed and breakfast.
5. Usare esclusivamente utensili adatti all’uso con forni a
microonde.
6. Mentre si scalda del cibo in contenitori di plastica o carta,
tenere d’occhio il forno, data la possibilità di combustione.
7. Il forno a microonde è destinato a riscaldare cibi e bevande.
Essiccare cibi o asciugare vestiti, oppure riscaldare cuscini,
pantofole, spugne, panni umidi e altri oggetti simili può
causare lesioni, combustione o incendio.
8. Se si nota del fumo, spegnere o togliere l’alimentazione
all’apparecchio e tenere chiuso lo sportello, in maniera da
soocare eventuali amme.
9. Il riscaldamento tramite microonde di alcune bevande può
IT
4

delayed eruptive boiling, therefore care must be taken
when handling the container.
shall be stirred or shaken and the temperature checked
before consumption, in order to avoid burns.
11. Eggs in their shell and whole hard-boiled eggs should
not be heated in microwave ovens since they may
explode, even after microwave heating has ended.
deposits removed.
9. Microwave heating of beverages can result in
10.The contents of feeding bottles and baby food jars
12. The oven should be cleaned regularly and any food
could lead to deterioration of the surface that could
adversely affect the life of the appliance and possibly
result in a hazardous situation.
this oven.(for ovens provided with a facility to use a
temperature-sensing probe.)
13. Failure to maintain the oven in a clean condition
14.Only use the temperature probe recommended for
15.The microwave oven must be operated with any cabinet
door open.
16.The microwave oven must be operated with the
?decorative door open.
1 .WARNING: When the appliance is operated in the
combination mode,children should only ues the oven
under adult supervision due to the temperatures
generated.
READ CAREFULLY AND KEEP FOR FUTURE
REFERENCE
7
risultare in un processo di ebollizione eruttiva ritardata, prestare
quindi attenzione nel maneggiare il contenitore.
10.Il contenuto di biberon e cibi per neonati in barattoli di vetro
dovrebbe essere mescolato o agitato, oltre a controllare la
temperatura prima del consumo, in modo da evitare ustioni.
11. Uova complete di guscio e uova cotte completamente non
dovrebbero essere riscaldate nel forno a microonde, dato
che potrebbero esplodere, anche dopo che il riscaldamento a
microonde è ultimato.
12.Il forno necessita di una pulizia regolare, i residui di cibo
dovrebbero essere rimossi.
13.Il non mantenimento del forno in un buono stato di pulizia
può portare a un degrado della supercie che può inuire
negativamente sulla durata del prodotto e può causare
situazioni di rischio.
14. Usare esclusivamente la sonda di temperatura consigliata
per questo forno. (per forni dotati di sonda di rilevamento della
temperatura.)
15.Il forno a microonde non deve essere utilizzato all’interno di
un mobile chiuso.
16.Il forno a microonde deve essere utilizzato con lo sportello
decorativo aperto.
17.ATTENZIONE: Durante l’uso della modalità combinata, i
bambini dovrebbero usare il forno solamente sotto sorveglianza
di un adulto, data l’alta temperature prodotta dal forno.
LEGGERE ATTENTAMENTE E CONSERVARE PER
CONSULTAZIONI SUCCESSIVE
IT
5

To Reduce the Risk of Injury to Persons
Grounding Installation
DANGER
Electric Shock Hazard
Touching some of the
internal components can
cause serious personal
injury or death. Do not
disassemble this appliance.
WARNING
Electric Shock Hazard Improper
use of the grounding can
result in electric shock.
Do not plug into an outlet
until appliance is properly
installed and grounded.
This appliance must be
grounded. In the event of
an electrical short circuit,
grounding reduces the
risk of electric shock by
providing an escape wire
for the electric current.
This appliance is equipped
with a cord having a
grounding wire with
a grounding plug. The
plug must be plugged into
an outlet that is properly
installed and grounded.
Consult a qualified
electrician or serviceman
if the grounding instructions
are not completely
understood or if doubt exists
as to whether the appliance
is properly grounded.
If it is necessary to use an
extension cord, use only
a 3-wire
1. A short power-supply cord
is provided to reduce the risks
resulting from becoming
entangled in or tripping over a
longer cord.
cord is used:
1)The marked electrical rating
of the cord set or extension cord
should be at least as great as
the electrical rating of the
appliance.
2)The extension cord must be
a grounding-type 3-wire cord.
3)The long cord should be
arranged so that it will not drape
over the counter top or tabletop
where it can be pulled on
by children or tripped over
unintentionally.
cord.extension
2. If a long cord set or extension
Per ridurre il rischio di incidenti per persone
Installazione messa a terra
PERICOLO
Rischio di scosse elettriche.
Toccare alcune delle parti
interne può provocare seri
danni alla persona o morte. Non
disassemblare questo prodotto.
ATTENZIONE
Rischio di scosse elettriche.
Un uso improprio della
messa a terra può risultare in
scosse elettriche.
Non inserire la spina in
una presa che non è stata
installata correttamente e
messa a terra.
Questa applicazione deve
essere provvista di messa a
terra. Nel caso si vericasse
un cortocircuito, la messa a
terra riduce il pericolo di scosse
elettriche, attraverso un cavo di
fuga per la corrente elettrica.
Questo prodotto è corredato
con un cavo che dispone
di una messa a terra con
relativa spina. La spina deve
essere inserita in una presa
propriamente installata e
messa a terra.
Consultare un elettricista
qualicato o un membro del
personale di servizio se le
istruzioni per la messa a terra
non sono state comprese a
fondo o se ci sono dubbi sul fatto
che l’applicazione sia messa a
terra in modo appropriato.
Se si necessita di una
prolunga, usarne solo una
con cavo a tre vie.
1.L’uso di una prolunga ridotta
è consigliato per evitare il
rischio di caduta o d’inciampo.
2.Se si usa un cavo lungo o
una prolunga:
1)La potenza nominale indicata
del cavo o della prolunga deve
essere, al massimo, dello
stesso voltaggio nominale
dell’applicazione.
2)La prolunga deve essere un
cavo a tre vie da messa a terra.
3)La prolunga dovrebbe
essere installata in modo da
non sporgere oltre al bordo
del piano d’appoggio o del
tavolo, dove può essere
facilmente raggiungibile da
bambini e creare pericoli.
IT
6

CLEANING
Be sure to unplug the
appliance from thepower
supply.
1. Clean the cavity of the oven after using with a slightly damp
cloth.
2. Clean the accessories in the usual way in soapy water.
3. The door frame and seal and neighbouring parts must be
cleaned carefully with a damp cloth when they are dirty.
4. Do not use harsh abrasive cleaners or sharp metal scrapers
to clean the oven door glass since they can scratch the surface,
which may result in shattering of the glass.
5. Cleaning Tip---For easier cleaning of the cavity walls that the
food cooked can touch: Place half a lemon in a bowl, add 300ml
(1/2 pint) water and heat on 100% microwave power for 10
minutes. Wipe the oven clean using a soft, dry cloth.
UTENSILS
CAUTION
Personal Injury Hazard
It is hazardous for
anyone other than a
competent personto
carry out any service
or repair operation that
involves the removalof
a cover which gives
protection against
exposure to microwave
energy.
Utensil Test:
1. Fill a microwave-safe container with 1 cup of cold
water (250ml) along with the utensil in question.
2. Cook on maximum power for 1 minute.
3. Carefully feel the utensil. If the empty utensil is
warm, do not use it for microwave cooking.
4. Do not exceed 1 minute cooking time.
See the instructions on "Materials you can use in
microwave oven or to be avoided in microwave oven."
There may be certain non-metallic utensils that are not
safe to use for microwaving. If in doubt, you can test the
utensil in question following the procedure below.
PULIZIA
Assicurarsi che l’applicazione sia
staccata dalla fonte di alimentazione.
1. Pulire l’interno del forno, dopo l’uso, con un panno
leggermente umido.
2. Pulire gli accessori nel modo tradizionale, usando acqua e sapone.
3. Lo sportello, le guarnizioni e le parti in prossimità di questi,
devono essere puliti con cautela, con un panno leggermente umido.
4. Per la pulizia del vetro della porta del forno, non usare
detergenti abrasivi o raschietti metallici alati, poiché
potrebbero graare la superce, causando la rottura del vetro.
5. Consigli di pulizia--Per facilitare la pulizia delle pareti
interne che possono venire a contatto con i cibi: Posizionare
mezzo limone in una ciotola, aggiungere 300 ml di acqua
e riscaldare ad una potenza del microonde al 100% per 10
minuti. Pulire il forno con un panno morbido e asciutto.
UTENSILI
ATTENZIONE
Pericolo di incidenti per
le persone
È pericoloso per chiunque
altro oltre ad una persona
qualicata, l’esecuzione
di qualsiasi operazione di
servizio o riparazione che
implichi la rimozione della
copertura di servizio che
protegge dall’esposizione
alle microonde.
Osservare le istruzioni relative a “Materiali che si possono
usare nel forno a microonde o che devono essere evitati
nel contesto del microonde”. Ci sono alcuni oggetti non
metallici che non sono sicuri per l’uso in combinazione
con il microonde. Se non si è sicuri, seguire le procedure
elencate sotto per testare gli utensili in questione.
Test degli utensili:
1. Riempire un contenitore adatto al microonde con un
bicchiere di acqua fredda (250 ml), insieme all’utensile in
questione.
2. Cuocere a potenza massima per un minuto.
3. Tastare attentamente l’utensile. Se l’utensile vuoto è
caldo, non usarlo per cuocere con il microonde.
4. Non superare il minuto di cottura.
IT
7

Materials you can use in microwave oven
Utensils Remarks
Follow manufacturer’s instructions. The bottom of browning dish must be
at least 3/16 inch (5mm) above the turntable. Incorrect usage may cause
the turntable to break.
Microwave-safe only. Follow manufacturer's instructions. Do not use
cracked or chipped dishes.
Always remove lid. Use only to heat food until just warm. Most glass jars
are not heat resistant and may break.
Heat-resistant oven glassware only. Make sure there is no metallic trim.
Do not use cracked or chipped dishes.
Follow manufacturer’s instructions. Do not close with metal tie. Make
slits to allow steam to escape.
Use for short–term cooking/warming only. Do not leave oven unattended
while cooking.
Use to cover food for reheating and absorbing fat. Use with supervision
for a short-term cooking only.
Use as a cover to prevent splattering or a wrap for steaming.
Microwave-safe only. Follow the manufacturer’s instructions. Should be
labeled "Microwave Safe". Some plastic containers soften, as the food
inside gets hot. "Boiling bags" and tightly closed plastic bags should be
slit, pierced or vented as directed by package.
Microwave-safe only. Use to cover food during cooking to retain
moisture. Do not allow plastic wrap to touch food.
Thermometers Microwave-safe only (meat and candy thermometers).
Wax paper Use as a cover to prevent splattering and retain moisture.
Browning dish
Glass jars
Glassware
Oven cooking
bags
Paper plates
and cups
Paper towels
Parchment
paper
Plastic
Plastic wrap
Dinnerware
Materials to be avoided in microwave oven
Utensils Remarks
Aluminum tray
Food carton with
metal handle
Metal or metal-
trimmed utensils
Metal twist ties
Paper bags
Plastic foam
Wood
Metal shields the food from microwave energy. Metal trim may
cause arcing.
May cause a fire in the oven.
Plastic foam may melt or contaminate the liquid inside when exposed
to high temperature.
Wood will dry out when used in the microwave oven and may split
or crack.
May cause arcing. Transfer food into microwave-safe dish.
May cause arcing. Transfer food into microwave-safe dish.
May cause arcing and could cause a fire in the oven.
Materiali che si possono usare nel forno a microonde
Utensili Osservazioni
Piatto per rosolare
Seguire le istruzioni del produttore. Il fondo del piatto deve rimanere almeno 5 mm al di
sopra del sostegno girevole. Un uso improprio può causare la rottura del sostegno girevole.
Stoviglie Usare solo accessori sicuri per il microonde. Seguire le istruzioni del produttore. Non
usare stoviglie danneggiate o scheggiate.
Contenitori in vetro
Rimuovere sempre il coperchio. Usare solamente per scaldare cibo nché questo è
tiepido. Molti tipi di vetro non sono resistenti alle alte temperature e potrebbero rompersi.
Oggetti in vetro Usare solo oggetti in vetro resistenti al calore da forno. Assicurarsi che non ci siano
delle parti metalliche. Non usare stoviglie danneggiate o scheggiate.
Sacchetti per
cottura a microonde
Seguire le istruzioni del produttore. Non chiudere con elementi in metallo. Fare delle
piccole fenditure nei sacchetti per consentire al vapore di uscire.
Piatti e bicchieri di
carta
Sono previsti solo per cotture/riscaldamenti brevi. Non lasciare il forno inosservato
mentre è in opera nella fase di cottura.
Tovaglioli di carta Usare per coprire cibi da riscaldare o per assorbire il grasso. Usare solo sotto
osservazione e per brevi periodi.
Carta pergamena Usare come copertura per evitare schizzi o deformazioni a causa del vapore.
Plastica Usare solo accessori sicuri per il microonde. Seguire le istruzioni del produttore.
Dovrebbe essere contrassegnata come “Sicuro per il Microonde”. Alcuni contenitori
di plastica si ammorbidiscono quando il cibo all’interno si scalda. “Sacchetti per
la bollitura” e buste di plastica chiuse in maniera molto stretta dovrebbero essere
perforati come indicato sulla confezione.
Involucri di plastica Usare solo accessori sicuri per il microonde. Usare per coprire cibi durante la cottura
per evitare la formazione di umidità. Non far toccare l’involucro di plastica e il cibo.
Termometri Usare solo termometri adatti al microonde (termometri per carne e dolci).
Carta incerata Usare come copertura per evitare schizzi e umidità.
Materiali da evitare nell’uso del microonde
Utensili Osservazioni
Vaschetta in
alluminio Potrebbe causare delle scintille. Trasferire il cibo in un contenitore a prova di
microonde.
Cartoni per cibo con
maniglia di metallo
Potrebbe causare delle scintille. Trasferire il cibo in un contenitore a prova di
microonde.
Utensili di metallo o
rivestiti in metallo
Il metallo scherma il cibo dall'energia a microonde. I bordi metallici potrebbero
causare delle scintille.
Laccio metallico Può essere causa di scintilla e provocare del fuoco all’interno del forno.
Buste di carta Potrebbero provocare del fuoco all’interno del forno.
Schiuma di plastica La schiuma di plastica potrebbe sciogliersi o contaminare i liquidi all’interno se
esposta a temperature troppo elevate.
Legno Il legno si potrebbe seccare se usato in microonde e dunque spaccarsi o rompersi.
IT
8

A) Control panel
B) Turntable shaft
C) Turntable ring assembly
D) Glass tray
E) Observation window
F) Door assembly
G) Safety interlock system
F
G
A
CB
ED
SETTING UP YOUR OVEN
Names of Oven Parts and Accessories
Remove the oven and all materials from the carton and oven cavity.
Your oven comes with the following accessories:
Glass tray 1
Turntable ring assembly 1
Instruction Manual 1
Grill Rack( Only be used in grill function
and be placed on the glass tray )
Hub (underside)
Glass tray
Turntable ring assembly
a. Never place the
glass tray
upside down. The glass
tray should never be restricted.
b. Both
glass tray
and
turntable ring assembly
must
always be used during cooking.
c. All food and containers of food are always placed
on the
glass tray
for cooking.
d. If
glass tray
or
turntable ring assembly
cracks or
breaks, contact your nearest authorized service
center.
Turntable Installation
Turntable shaft
IMPOSTARE IL VOSTRO FORNO
Nomi delle parti del forno e accessori
Rimuovere il forno e tutti i materiali dal cartone e dalla cavità del forno.
Il vostro forno vi sarà consegnato con i seguenti accessori:
Vassoio di vetro 1
Elementi del piatto girevole 1
Manuale d’istruzioni 1
Griglia (Da utilizzare solo in funzione grill; da
posizionare sul vassoio di vetro)
A) Pannello di controllo
B) Foro per il piatto girevole
C) Elementi del piatto girevole
D) Vassoio di vetro
E) Finestra di osservazione
F) Elementi dello sportello
G) Sistema blocco di sicurezza
Installazione del piatto girevole
Fulcro (parte inferiore) a. Non mettere mai il vassoio di vetro sottosopra. Il vassoio
di vetro dovrebbe sempre girare liberamente.
b. Sia il vassoio di vetro sia il piatto girevole devono essere
sempre usati durante la cottura.
c. Tutti i cibi e relativi contenitori devono essere sempre
posizionati sul vassoio di vetro per essere cucinati.
d. Se il vassoio di vetro o un elemento del piatto girevole
dovesse rompersi o danneggiarsi, contattare il servizio
d’assistenza autorizzato più vicino.
Vassoio di
vetro
Foro per il piatto
girevole
Elementi del piatto girevole
IT
9

Installation and connection
1.This appliance is only intended for domestic use.
2.This oven is intended for built-in use only. It is not intended
for counter-top use or for use inside a cupboard.
3. Please observe the special installation instructions.
4.The appliance can be installed in a 60cm wide wall-
mounted cupboard.
5.The appliance is fitted with a plug and must only be
connected to a properly installed earthed socket.
6.The mains voltage must correspond to the voltage
specified on the rating plate.
7.The socket must be installed and connecting cable must
only be replaced by a qualified electrician. If the plug is no
longer to accessible following installation, an all-pole
disconnecting device must be present on the installation
side with a contact gap of at least 3mm.
8.Adapters, multi-way strips and extension leads must not
be used. Overloading can result in a risk of fire.
The accessible surface may
be hot during operation.
Installazione e connessione
1.Questo prodotto è destinato esclusivamente a un uso domestico.
2.Questo prodotto è destinato esclusivamente a
un’installazione da incasso. Non deve essere utilizzato su
un piano d’appoggio o all’interno di un mobile.
3. Rispettare le speciche istruzioni di installazione.
4.Il prodotto può essere installato in un mobile a parete largo 60 cm.
5. Il forno è dotato di una spina e deve essere connesso
esclusivamente a una presa correttamente installata e messa a terra.
6.La tensione di rete deve corrispondere a quella specicata
sulla targhetta dei dati di funzionamento.
7.La presa deve essere installata e il cavo connettore deve essere
sostituito esclusivamente da un elettricista qualicato. Se, a
seguito dell’installazione, la spina non risulta più accessibile,
nel lato dell’installazione deve essere presente un sezionatore
onnipolare con distanza tra i contatti di almeno 3 mm.
8.È vietato utilizzare adattatori, ciabatte elettriche e prolunghe.
Un sovraccarico può comportare il rischio di incendio.
Durante il funzionamento, la
supercie accessibile può
essere calda.
IT
10

380+2
Installation Instructions
Please Read the Manual Carefully Before Installation
A. Built-in furniture
A gap must be maintained betweenthe wall and the base of the unit above.
Specific gap size could be referenced by the diagrams.
Istruzioni per l’installazione
Leggere attentamente il presente manuale prima di procedere
con l’installazione
Nota
Connessione elettrica
Il forno è dotato di una spina e deve essere connesso esclusivamente a una presa correttamente
installata e messa a terra. In accordo alle norme vigenti, la presa deve essere installata e il cavo
connettore deve essere sostituito esclusivamente da un elettricista qualicato.
Se, a seguito dell’installazione, la spina non risulta più accessibile, nel lato dell’installazione
deve essere presente un sezionatore onnipolare con distanza tra i contatti di almeno 3 mm.
Il vano di incasso non dovrebbe essere chiuso posteriormente.
Mantenere una distanza tra il muro e il pavimento del mobile soprastante.
Qualora sia necessario mantenere una distanza specica, tale valore verrà riportato negli schemi.
L’altezza minima di installazione è 85 cm.
Non coprire gli slot di ventilazione e le prese d’aria.
Nota:
Non incastrare o piegare il cavo di potenza.
A. Mobile da incasso
IT
11

Bracket
Screw
Vite
Staffa
IT
12

B. Preparare il vano di incasso
1. Leggere le istruzioni riportate sulla SAGOMA PER IL FONDO DEL VANO e
appoggiare la sagoma sul piano inferiore del vano.
2. Riportare i segni sul piano inferiore del vano conformemente ai segni “a” della
sagoma.
SAGOMA PER IL FONDO DEL VANO
NOTA:È ESTREMAMENTE IMPORTANTE LEGGERE
ESEGUIRE LE ISTRUZIONI PER L’INSTALLAZIONE
PRIMADI PROCEDERE.
Questasagoma viene utilizzata per tracciare i fori “a” della
staffasul fondo del vano.
BORDOSINISTRO
PARTEANTERIORE
BORDODESTRO
BORDOANTERIORE
LINEAMEDIANA
3. Rimuovere la sagoma per il fondo del vano e ssare la staa per mezzo della vite.
Vite
Staffa
Linea mediana
1. Vericare che il vano abbia un fondo liscio e in piano e che
sia delle dimensioni corrette, quindi ssare la sagoma sul piano
inferioredel vano con del nastro adesivo.
- Assicurarsi che la LINEA MEDIANA della
sagomasia al centro del vano
- Assicurarsi che il BORDO ANTERIORE della sagoma sia in
linea con il bordo anteriore del vano.
2.In corrispondenza del foro “a” della sagoma, tracciare un
segnosul fondo del vano.
- Non praticare fori con il trapano sul fondo del vano.
3.Dopo aver tracciato tali segni conformemente alle istruzioni,
rimuoverela sagoma per il fondo del vano.
4.Dopo aver tracciato i fori “a”, procedere con l’installazione
conformementealle istruzioni relative.
IT
13

5. Open the door, fix the oven to the cabinet with Screw , at the installation hole.
Installation Hole
Screw
bracket
C. Installare il forno
4. Installare il forno nel vano
- Assicurarsi che la parte posteriore del forno sia ssata tramite staa.
- Non incastrare o piegare il cavo di potenza.
staa
5. Aprire lo sportello, ssare il forno nel vano con una vite sul foro di installazione.
Vite
Foro di installazione
IT
14

Control panel
Pannello di controllo
IT
15

Operation Instructions
1) Press " " once, the screen display "P100".
2) Turn " " to adjust the hour figures, the input time should be within 0--23.
3) Press " ", the minute figures will flash.
3) Press " " to confirm, and the screen displays "P 80".
4) Turn " " to adjust the cooking time until the oven displays "20:00".
5) Press " " to start cooking .
1. Clock Setting
When the microwave oven is electrified, the screen will display "0:00", buzzer will ring once.
1) Press " " twice to select clock function, the hour figures will flash.
4) Turn " " to adjust the minute figures, the input time should be within 0--59.
5) Press " " to finish clock setting. ":" will flash, and the time will light.
2) Press " " once again or turn " " to choose 80%
microwave power.
Note: 1) If the clock is not set, it would not function when powered.
2) During the process of clock setting, if you press " ", the oven
will go back to the previous status automatically.
2. Microwave Cooking
Press " " once, the screen will display "P100". Press
" "
"
confirm, and turn
"
" to set
0:05 to 95:00. Press " " again to
Example: If you want to use 80% microwave power to cook for 20 minutes, you can
operate the oven as the following steps.
Microwave/Grill/Combi.
Start/+30Sec./Confirm
Start/+30Sec./Confirm
Start/+30Sec./Confirm
Stop/Clear
Start/+30Sec./Confirm
"
to
choose
the
power
you want, and
"P100", "P 80", "P 50", "P 30
press " " to
s
Kitchen Timer/Clock
Kitchen Timer/Clock
Kitchen Timer/Clock
cooking time from
start cooking.
,"P 10" ,"G" ,"C-1" or "C-2" will display for each
added press.Then
repeatedly or turn "
Microwave/Grill/Combi.
Microwave/Grill/Combi.
Microwave/Grill/Combi.
Istruzioni di utilizzo
1. Impostazione dell’orologio
Quando il microonde è fornito di corrente elettrica, sullo schermo apparirà “0:00”, il segnale
acustico suonerà una volta.
1) Premere "Kitchen Timer/Clock" due volte per selezionare la funzione orologio; le cifre
delle ore si illumineranno.
2) Girare
Operation Instructions
1) Press " " once, the screen display "P100".
2) Turn " " to adjust the hour figures, the input time should be within 0--23.
3) Press " ", the minute figures will flash.
3) Press " " to confirm, and the screen displays "P 80".
4) Turn " " to adjust the cooking time until the oven displays "20:00".
5) Press " " to start cooking .
1. Clock Setting
When the microwave oven is electrified, the screen will display "0:00", buzzer will ring once.
1) Press " " twice to select clock function, the hour figures will flash.
4) Turn " " to adjust the minute figures, the input time should be within 0--59.
5) Press " " to finish clock setting. ":" will flash, and the time will light.
2) Press " " once again or turn " " to choose 80%
microwave power.
Note: 1) If the clock is not set, it would not function when powered.
2) During the process of clock setting, if you press " ", the oven
will go back to the previous status automatically.
2. Microwave Cooking
Press " " once, the screen will display "P100". Press
" "
"
confirm, and turn
"
" to set
0:05 to 95:00. Press " " again to
Example: If you want to use 80% microwave power to cook for 20 minutes, you can
operate the oven as the following steps.
Microwave/Grill/Combi.
Start/+30Sec./Confirm
Start/+30Sec./Confirm
Start/+30Sec./Confirm
Stop/Clear
Start/+30Sec./Confirm
"
to
choose
the
power
you want, and
"P100", "P 80", "P 50", "P 30
press " " to
s
Kitchen Timer/Clock
Kitchen Timer/Clock
Kitchen Timer/Clock
cooking time from
start cooking.
,"P 10" ,"G" ,"C-1" or "C-2" will display for each
added press.Then
repeatedly or turn "
Microwave/Grill/Combi.
Microwave/Grill/Combi.
Microwave/Grill/Combi.
15
per impostare le cifre delle ore; il tempo di input dovrebbe essere compreso tra 0--23.
3) Premere “Kitchen Timer/Clock“, le cifre dei minuti si illumineranno.
4) Girare
Operation Instructions
1) Press " " once, the screen display "P100".
2) Turn " " to adjust the hour figures, the input time should be within 0--23.
3) Press " ", the minute figures will flash.
3) Press " " to confirm, and the screen displays "P 80".
4) Turn " " to adjust the cooking time until the oven displays "20:00".
5) Press " " to start cooking .
1. Clock Setting
When the microwave oven is electrified, the screen will display "0:00", buzzer will ring once.
1) Press " " twice to select clock function, the hour figures will flash.
4) Turn " " to adjust the minute figures, the input time should be within 0--59.
5) Press " " to finish clock setting. ":" will flash, and the time will light.
2) Press " " once again or turn " " to choose 80%
microwave power.
Note: 1) If the clock is not set, it would not function when powered.
2) During the process of clock setting, if you press " ", the oven
will go back to the previous status automatically.
2. Microwave Cooking
Press " " once, the screen will display "P100". Press
" "
"
confirm, and turn
"
" to set
0:05 to 95:00. Press " " again to
Example: If you want to use 80% microwave power to cook for 20 minutes, you can
operate the oven as the following steps.
Microwave/Grill/Combi.
Start/+30Sec./Confirm
Start/+30Sec./Confirm
Start/+30Sec./Confirm
Stop/Clear
Start/+30Sec./Confirm
"
to
choose
the
power
you want, and
"P100", "P 80", "P 50", "P 30
press " " to
s
Kitchen Timer/Clock
Kitchen Timer/Clock
Kitchen Timer/Clock
cooking time from
start cooking.
,"P 10" ,"G" ,"C-1" or "C-2" will display for each
added press.Then
repeatedly or turn "
Microwave/Grill/Combi.
Microwave/Grill/Combi.
Microwave/Grill/Combi.
15
per impostare le cifre dei minuti; il tempo di input dovrebbe essere compreso tra 0--59.
5) Premere "Kitchen Timer/Clock" per ultimare l’impostazione dell’orologio. “:” si illuminerà e
l’orario si illuminerà.
Nota: 1) Se l’orologio non è impostato, non funzionerà quando il forno è connesso alla rete
elettrica.
2) Durante l’impostazione dell’orologio, se si preme "Stop/Clear”, il forno tornerà
automaticamente allo stato precedente.
2. Cucinare con il microonde
Premere “Micro./Grill/Combi.” una volta, sullo schermo apparirà “P100”. Premere “Micro./
Grill/ Combi.” ripetutamente o girare
Operation Instructions
1) Press " " once, the screen display "P100".
2) Turn " " to adjust the hour figures, the input time should be within 0--23.
3) Press " ", the minute figures will flash.
3) Press " " to confirm, and the screen displays "P 80".
4) Turn " " to adjust the cooking time until the oven displays "20:00".
5) Press " " to start cooking .
1. Clock Setting
When the microwave oven is electrified, the screen will display "0:00", buzzer will ring once.
1) Press " " twice to select clock function, the hour figures will flash.
4) Turn " " to adjust the minute figures, the input time should be within 0--59.
5) Press " " to finish clock setting. ":" will flash, and the time will light.
2) Press " " once again or turn " " to choose 80%
microwave power.
Note: 1) If the clock is not set, it would not function when powered.
2) During the process of clock setting, if you press " ", the oven
will go back to the previous status automatically.
2. Microwave Cooking
Press " " once, the screen will display "P100". Press
" "
"
confirm, and turn
"
" to set
0:05 to 95:00. Press " " again to
Example: If you want to use 80% microwave power to cook for 20 minutes, you can
operate the oven as the following steps.
Microwave/Grill/Combi.
Start/+30Sec./Confirm
Start/+30Sec./Confirm
Start/+30Sec./Confirm
Stop/Clear
Start/+30Sec./Confirm
"
to
choose
the
power
you want, and
"P100", "P 80", "P 50", "P 30
press " " to
s
Kitchen Timer/Clock
Kitchen Timer/Clock
Kitchen Timer/Clock
cooking time from
start cooking.
,"P 10" ,"G" ,"C-1" or "C-2" will display for each
added press.Then
repeatedly or turn "
Microwave/Grill/Combi.
Microwave/Grill/Combi.
Microwave/Grill/Combi.
15
per scegliere la potenza desiderata e “P100”,
“P80” “P50”, “P30”, “P10”, "G", "C-1" o "C-2" appariranno sullo schermo per ogni volta che si
preme. Poi premere “Start/+30Sec./Conrm" per confermare, e girare
Operation Instructions
1) Press " " once, the screen display "P100".
2) Turn " " to adjust the hour figures, the input time should be within 0--23.
3) Press " ", the minute figures will flash.
3) Press " " to confirm, and the screen displays "P 80".
4) Turn " " to adjust the cooking time until the oven displays "20:00".
5) Press " " to start cooking .
1. Clock Setting
When the microwave oven is electrified, the screen will display "0:00", buzzer will ring once.
1) Press " " twice to select clock function, the hour figures will flash.
4) Turn " " to adjust the minute figures, the input time should be within 0--59.
5) Press " " to finish clock setting. ":" will flash, and the time will light.
2) Press " " once again or turn " " to choose 80%
microwave power.
Note: 1) If the clock is not set, it would not function when powered.
2) During the process of clock setting, if you press " ", the oven
will go back to the previous status automatically.
2. Microwave Cooking
Press " " once, the screen will display "P100". Press
" "
"
confirm, and turn
"
" to set
0:05 to 95:00. Press " " again to
Example: If you want to use 80% microwave power to cook for 20 minutes, you can
operate the oven as the following steps.
Microwave/Grill/Combi.
Start/+30Sec./Confirm
Start/+30Sec./Confirm
Start/+30Sec./Confirm
Stop/Clear
"
to
choose
the
power
you want, and
"P100", "P 80", "P 50", "P 30
press " " to
s
Kitchen Timer/Clock
Kitchen Timer/Clock
Kitchen Timer/Clock
cooking time from
start cooking.
,"P 10" ,"G" ,"C-1" or "C-2" will display for each
added press.Then
repeatedly or turn "
Microwave/Grill/Combi.
Microwave/Grill/Combi.
Microwave/Grill/Combi.
15
per impostare il
tempo di cottura da 0:05 a 95:00. Premere “ Start/+30Sec./Conrm“ nuovamente per iniziare
la cottura.
Esempio: Se si desidera cuocere ad una potenza del microonde all’80% per 20 minuti,
impostare il forno come indicato di seguito.
1) Premere “Micro./Grill/Combi.” una volta, sullo schermo apparirà “P100”.
2) Premere “Micro./Grill/Combi.” ancora una volta o girare
Operation Instructions
1) Press " " once, the screen display "P100".
2) Turn " " to adjust the hour figures, the input time should be within 0--23.
3) Press " ", the minute figures will flash.
3) Press " " to confirm, and the screen displays "P 80".
4) Turn " " to adjust the cooking time until the oven displays "20:00".
5) Press " " to start cooking .
1. Clock Setting
When the microwave oven is electrified, the screen will display "0:00", buzzer will ring once.
1) Press " " twice to select clock function, the hour figures will flash.
4) Turn " " to adjust the minute figures, the input time should be within 0--59.
5) Press " " to finish clock setting. ":" will flash, and the time will light.
2) Press " " once again or turn " " to choose 80%
microwave power.
Note: 1) If the clock is not set, it would not function when powered.
2) During the process of clock setting, if you press " ", the oven
will go back to the previous status automatically.
2. Microwave Cooking
Press " " once, the screen will display "P100". Press
" "
"
confirm, and turn
"
" to set
0:05 to 95:00. Press " " again to
Example: If you want to use 80% microwave power to cook for 20 minutes, you can
operate the oven as the following steps.
Microwave/Grill/Combi.
Start/+30Sec./Confirm
Start/+30Sec./Confirm
Start/+30Sec./Confirm
Stop/Clear
Start/+30Sec./Confirm
"
to
choose
the
power
you want, and
"P100", "P 80", "P 50", "P 30
press " " to
s
Kitchen Timer/Clock
Kitchen Timer/Clock
Kitchen Timer/Clock
cooking time from
start cooking.
,"P 10" ,"G" ,"C-1" or "C-2" will display for each
added press.Then
repeatedly or turn "
Microwave/Grill/Combi.
Microwave/Grill/Combi.
15
per selezionare 80% di
potenza del microonde.
3) Premere “Start/+30Sec./Conrm" per confermare, sullo schermo apparirà “P80”.
4) Girare
Operation Instructions
1) Press " " once, the screen display "P100".
2) Turn " " to adjust the hour figures, the input time should be within 0--23.
3) Press " ", the minute figures will flash.
3) Press " " to confirm, and the screen displays "P 80".
4) Turn " " to adjust the cooking time until the oven displays "20:00".
5) Press " " to start cooking .
1. Clock Setting
When the microwave oven is electrified, the screen will display "0:00", buzzer will ring once.
1) Press " " twice to select clock function, the hour figures will flash.
4) Turn " " to adjust the minute figures, the input time should be within 0--59.
5) Press " " to finish clock setting. ":" will flash, and the time will light.
2) Press " " once again or turn " " to choose 80%
microwave power.
Note: 1) If the clock is not set, it would not function when powered.
2) During the process of clock setting, if you press " ", the oven
will go back to the previous status automatically.
2. Microwave Cooking
Press " " once, the screen will display "P100". Press
" "
"
confirm, and turn
"
" to set
0:05 to 95:00. Press " " again to
Example: If you want to use 80% microwave power to cook for 20 minutes, you can
operate the oven as the following steps.
Microwave/Grill/Combi.
Start/+30Sec./Confirm
Start/+30Sec./Confirm
Start/+30Sec./Confirm
Stop/Clear
Start/+30Sec./Confirm
"
to
choose
the
power
you want, and
"P100", "P 80", "P 50", "P 30
press " " to
s
Kitchen Timer/Clock
Kitchen Timer/Clock
Kitchen Timer/Clock
cooking time from
start cooking.
,"P 10" ,"G" ,"C-1" or "C-2" will display for each
added press.Then
repeatedly or turn "
Microwave/Grill/Combi.
Microwave/Grill/Combi.
Microwave/Grill/Combi.
15
per regolare il tempo di cottura nché lo schermo indicherà “20:00”.
5) Premere “Start/+30Sec./Conrm“ per iniziare la cottura.
IT
16

3. Grill or Combi. Cooking
Note: the step quantities for the adjustment time of the coding switch are as follow:
0---1 min : 5 seconds
1---5 min : 10 seconds
5---10 min : 30 seconds
10---30 min : 1 minute
30---95 min : 5 minutes
Order Microwave
Power
Display
1
2
3
4
5
6
7
8
100%
80%
50%
30%
10%
Grill
Power
100%
45%
64%
0%
55%
36%
"Micro./Grill/Combi." Pad instructions
P100
P80
P50
P30
P10
G
C-1
C-2
Example: If you want to use 55% microwave power and 45% grill power(C-1) to cook
for 10 minutes, you can operate the oven as the following steps.
Press " " once, the screen will display "P100". Press
" "
"
confirm, and turn
"
" to set
0:05 to 95:00. Press " " again to
Start/+30Sec./Confirm
Start/+30Sec./Confirm
"
to
choose
the
power
you want, and
"P100", "P 80", "P 50", "P 30
press " " to
cooking time from
start cooking.
,"P 10" ,"G" ,"C-1" or "C-2" will display for each
added press.Then
repeatedly or turn "
Microwave/Grill/Combi.
Microwave/Grill/Combi.
Nota: la quantità di passi per la regolazione del tempo del cambio di codice è come
descritta di seguito:
0---1 min : 5 secondi
1---5 min : 10 secondi
5---10 min : 30 secondi
10---30 min : 1 minuto
30---95 min : 5 minuti
"Micro./Grill/Combi."
Ordine
Visualizzazione sul
display Potenza Microonde Potenza Grill
1 P100 100%
2 P80 80%
3 P50 50%
4 P30 30%
5 P10 10%
6 G 0% 100%
7 C-1 55% 45%
8 C-2 36% 64%
3. Cottura con grill o combinata
Premere “Micro./Grill/Combi.” una volta, sullo schermo apparirà “P100”. Premere “Micro./
Grill/ Combi.” ripetutamente o girare
Operation Instructions
1) Press " " once, the screen display "P100".
2) Turn " " to adjust the hour figures, the input time should be within 0--23.
3) Press " ", the minute figures will flash.
3) Press " " to confirm, and the screen displays "P 80".
4) Turn " " to adjust the cooking time until the oven displays "20:00".
5) Press " " to start cooking .
1. Clock Setting
When the microwave oven is electrified, the screen will display "0:00", buzzer will ring once.
1) Press " " twice to select clock function, the hour figures will flash.
4) Turn " " to adjust the minute figures, the input time should be within 0--59.
5) Press " " to finish clock setting. ":" will flash, and the time will light.
2) Press " " once again or turn " " to choose 80%
microwave power.
Note: 1) If the clock is not set, it would not function when powered.
2) During the process of clock setting, if you press " ", the oven
will go back to the previous status automatically.
2. Microwave Cooking
Press " " once, the screen will display "P100". Press
" "
"
confirm, and turn
"
" to set
0:05 to 95:00. Press " " again to
Example: If you want to use 80% microwave power to cook for 20 minutes, you can
operate the oven as the following steps.
Microwave/Grill/Combi.
Start/+30Sec./Confirm
Start/+30Sec./Confirm
Start/+30Sec./Confirm
Stop/Clear
Start/+30Sec./Confirm
"
to
choose
the
power
you want, and
"P100", "P 80", "P 50", "P 30
press " " to
s
Kitchen Timer/Clock
Kitchen Timer/Clock
Kitchen Timer/Clock
cooking time from
start cooking.
,"P 10" ,"G" ,"C-1" or "C-2" will display for each
added press.Then
repeatedly or turn "
Microwave/Grill/Combi.
Microwave/Grill/Combi.
Microwave/Grill/Combi.
15
per scegliere la potenza desiderata e “P100”,
“P80” , “P50”, “P30”, “P10”, "G", "C-1" o "C-2" appariranno sullo schermo per ogni volta
che si preme. Poi premere "Start/+30Sec./Conrm"per confermare, e girare
Operation Instructions
1) Press " " once, the screen display "P100".
2) Turn " " to adjust the hour figures, the input time should be within 0--23.
3) Press " ", the minute figures will flash.
3) Press " " to confirm, and the screen displays "P 80".
4) Turn " " to adjust the cooking time until the oven displays "20:00".
5) Press " " to start cooking .
1. Clock Setting
When the microwave oven is electrified, the screen will display "0:00", buzzer will ring once.
1) Press " " twice to select clock function, the hour figures will flash.
4) Turn " " to adjust the minute figures, the input time should be within 0--59.
5) Press " " to finish clock setting. ":" will flash, and the time will light.
2) Press " " once again or turn " " to choose 80%
microwave power.
Note: 1) If the clock is not set, it would not function when powered.
2) During the process of clock setting, if you press " ", the oven
will go back to the previous status automatically.
2. Microwave Cooking
Press " " once, the screen will display "P100". Press
" "
"
confirm, and turn
"
" to set
0:05 to 95:00. Press " " again to
Example: If you want to use 80% microwave power to cook for 20 minutes, you can
operate the oven as the following steps.
Microwave/Grill/Combi.
Start/+30Sec./Confirm
Start/+30Sec./Confirm
Start/+30Sec./Confirm
Stop/Clear
Start/+30Sec./Confirm
"
to
choose
the
power
you want, and
"P100", "P 80", "P 50", "P 30
press " " to
s
Kitchen Timer/Clock
Kitchen Timer/Clock
Kitchen Timer/Clock
cooking time from
start cooking.
,"P 10" ,"G" ,"C-1" or "C-2" will display for each
added press.Then
repeatedly or turn "
Microwave/Grill/Combi.
Microwave/Grill/Combi.
15
per impostare il tempo di cottura da 0:05 a 95:00. Premere "Start/+ 30Sec/Conim"
nuovamente per iniziare la cottura.
Esempio: se si desidera usare il 55% della potenza del microonde e il 45% del grill (C-1)
per cucinare per 10 minuti, operare con il forno secondo i passi seguenti.
IT
17

1) Press " " twice, and the oven will display "dEF2".
2) Turn " " to select the defrost time. The MAX time is 95 minutes.
1) Press " " once, and the oven will display "dEF1".
2) Turn " " to select the weight of food from 100 to 2000 g.
3) Press " " to start defrosting.
1) In waiting state, Press " " to start 30 seconds cooking with
100% power, each added press will increase 30 seconds cooking time up to 95
2) In microwave, grill, combination cooking or time defrost state, each press of
" " can increase 30 seconds of cooking time.
3) In waiting state, turn " " left to set cooking time with 100%
microwave power, then press " " to start cooking.
4. Quick Start
6. Defrost By Time
5. Defrost By Weight
Weight/Time Defrost
Start/+30Sec./Confirm
Start/+30Sec./Confirm
Start/+30Sec./Confirm
Start/+30Sec./Confirm
3) Press " " to start defrosting. The defrost power is P 30, and
it cannot be changed.
Start/+30Sec./Confirm
minutes.
Weight/Time Defrost
Note:If half the grill time passes, the oven sounds twice, and this is normal. In order
to have a better effect of grilling food, you should turn the food over,
close the door, and then press" " to continue cooking.
If no operation, the oven will continue working.
1) Press " " once, the screen display " ".
3) Press " " to confirm, and the screen displays "C-1".
4) Turn " " to adjust the cooking time until the oven displays "10:00".
5) Press " " to start cooking.
2) Press " " for times or turn " " to choose combi. 1 mode.
Start/+30Sec./Confirm
Start/+30Sec./Confirm
s P100
Start/+30Sec./Confirm
Microwave/Grill/Combi.
Microwave/Grill/Combi.
1) Premere “Micro./Grill/Combi.” una volta, sullo schermo apparirà “P100”.
2) Premere “Micro./Grill/Combi.” quattro volte o girare
Operation Instructions
1) Press " " once, the screen display "P100".
2) Turn " " to adjust the hour figures, the input time should be within 0--23.
3) Press " ", the minute figures will flash.
3) Press " " to confirm, and the screen displays "P 80".
4) Turn " " to adjust the cooking time until the oven displays "20:00".
5) Press " " to start cooking .
1. Clock Setting
When the microwave oven is electrified, the screen will display "0:00", buzzer will ring once.
1) Press " " twice to select clock function, the hour figures will flash.
4) Turn " " to adjust the minute figures, the input time should be within 0--59.
5) Press " " to finish clock setting. ":" will flash, and the time will light.
2) Press " " once again or turn " " to choose 80%
microwave power.
Note: 1) If the clock is not set, it would not function when powered.
2) During the process of clock setting, if you press " ", the oven
will go back to the previous status automatically.
2. Microwave Cooking
Press " " once, the screen will display "P100". Press
" "
"
confirm, and turn
"
" to set
0:05 to 95:00. Press " " again to
Example: If you want to use 80% microwave power to cook for 20 minutes, you can
operate the oven as the following steps.
Microwave/Grill/Combi.
Start/+30Sec./Confirm
Start/+30Sec./Confirm
Start/+30Sec./Confirm
Stop/Clear
Start/+30Sec./Confirm
"
to
choose
the
power
you want, and
"P100", "P 80", "P 50", "P 30
press " " to
s
Kitchen Timer/Clock
Kitchen Timer/Clock
Kitchen Timer/Clock
cooking time from
start cooking.
,"P 10" ,"G" ,"C-1" or "C-2" will display for each
added press.Then
repeatedly or turn "
Microwave/Grill/Combi.
Microwave/Grill/Combi.
Microwave/Grill/Combi.
15
per scegliere la modalità combinata 1.
3) Premere “Start/+30Sec./Conrm" per confermare, sullo schermo apparirà “C-1”.
4) Girare
Operation Instructions
1) Press " " once, the screen display "P100".
2) Turn " " to adjust the hour figures, the input time should be within 0--23.
3) Press " ", the minute figures will flash.
3) Press " " to confirm, and the screen displays "P 80".
4) Turn " " to adjust the cooking time until the oven displays "20:00".
5) Press " " to start cooking .
1. Clock Setting
When the microwave oven is electrified, the screen will display "0:00", buzzer will ring once.
1) Press " " twice to select clock function, the hour figures will flash.
4) Turn " " to adjust the minute figures, the input time should be within 0--59.
5) Press " " to finish clock setting. ":" will flash, and the time will light.
2) Press " " once again or turn " " to choose 80%
microwave power.
Note: 1) If the clock is not set, it would not function when powered.
2) During the process of clock setting, if you press " ", the oven
will go back to the previous status automatically.
2. Microwave Cooking
Press " " once, the screen will display "P100". Press
" "
"
confirm, and turn
"
" to set
0:05 to 95:00. Press " " again to
Example: If you want to use 80% microwave power to cook for 20 minutes, you can
operate the oven as the following steps.
Microwave/Grill/Combi.
Start/+30Sec./Confirm
Start/+30Sec./Confirm
Start/+30Sec./Confirm
Stop/Clear
Start/+30Sec./Confirm
"
to
choose
the
power
you want, and
"P100", "P 80", "P 50", "P 30
press " " to
s
Kitchen Timer/Clock
Kitchen Timer/Clock
Kitchen Timer/Clock
cooking time from
start cooking.
,"P 10" ,"G" ,"C-1" or "C-2" will display for each
added press.Then
repeatedly or turn "
Microwave/Grill/Combi.
Microwave/Grill/Combi.
Microwave/Grill/Combi.
15
per regolare il tempo di cottura nché lo schermo indicherà “10:00”.
5) Premere “Start/+30Sec./Conrm“ per iniziare la cottura.
Nota: se a metà del tempo impostato, il forno suona due volte, questo rientra nella
normalità. Per avere un migliore eetto grill sul cibo, suggeriamo di girare il cibo,
chiudere lo sportello, e premere "Start/+30Sec./Conrm" per continuare la cottura.
Se non ci sono altre operazioni, il forno continuerà la cottura.
4. Cottura veloce
1) In stato di attesa, premere "Start/+30Sec./Conrm" per iniziare la cottura al 100% della
potenza per 30 secondi, ogni volta che si ripete questa operazione il tempo di cottura
aumenterà di 30 secondi, no a un limite di 95 minuti.
2) In modalità cottura a microonde, grill, combinata o stato di scongelamento, ogni volta
che si preme "Start/+30Sec./Conrm" si
incrementa di 30 secondi il tempo di cottura.
3) In stato di attesa, girare
Operation Instructions
1) Press " " once, the screen display "P100".
2) Turn " " to adjust the hour figures, the input time should be within 0--23.
3) Press " ", the minute figures will flash.
3) Press " " to confirm, and the screen displays "P 80".
4) Turn " " to adjust the cooking time until the oven displays "20:00".
5) Press " " to start cooking .
1. Clock Setting
When the microwave oven is electrified, the screen will display "0:00", buzzer will ring once.
1) Press " " twice to select clock function, the hour figures will flash.
4) Turn " " to adjust the minute figures, the input time should be within 0--59.
5) Press " " to finish clock setting. ":" will flash, and the time will light.
2) Press " " once again or turn " " to choose 80%
microwave power.
Note: 1) If the clock is not set, it would not function when powered.
2) During the process of clock setting, if you press " ", the oven
will go back to the previous status automatically.
2. Microwave Cooking
Press " " once, the screen will display "P100". Press
" "
"
confirm, and turn
"
" to set
0:05 to 95:00. Press " " again to
Example: If you want to use 80% microwave power to cook for 20 minutes, you can
operate the oven as the following steps.
Microwave/Grill/Combi.
Start/+30Sec./Confirm
Start/+30Sec./Confirm
Start/+30Sec./Confirm
Stop/Clear
Start/+30Sec./Confirm
"
to
choose
the
power
you want, and
"P100", "P 80", "P 50", "P 30
press " " to
s
Kitchen Timer/Clock
Kitchen Timer/Clock
Kitchen Timer/Clock
cooking time from
start cooking.
,"P 10" ,"G" ,"C-1" or "C-2" will display for each
added press.Then
repeatedly or turn "
Microwave/Grill/Combi.
Microwave/Grill/Combi.
Microwave/Grill/Combi.
15
verso sinistra per impostare il tempo di cottura con una
potenza del microonde al 100%, quindi premere "Start/+30Sec./Conrm" per iniziare la cottura.
5. Scongelamento basato sul peso
1) Premere "Weight/Time Defrost" una volta, sullo schermo del forno apparirà “dEF1”.
2) Girare “
Operation Instructions
1) Press " " once, the screen display "P100".
2) Turn " " to adjust the hour figures, the input time should be within 0--23.
3) Press " ", the minute figures will flash.
3) Press " " to confirm, and the screen displays "P 80".
4) Turn " " to adjust the cooking time until the oven displays "20:00".
5) Press " " to start cooking .
1. Clock Setting
When the microwave oven is electrified, the screen will display "0:00", buzzer will ring once.
1) Press " " twice to select clock function, the hour figures will flash.
4) Turn " " to adjust the minute figures, the input time should be within 0--59.
5) Press " " to finish clock setting. ":" will flash, and the time will light.
2) Press " " once again or turn " " to choose 80%
microwave power.
Note: 1) If the clock is not set, it would not function when powered.
2) During the process of clock setting, if you press " ", the oven
will go back to the previous status automatically.
2. Microwave Cooking
Press " " once, the screen will display "P100". Press
" "
"
confirm, and turn
"
" to set
0:05 to 95:00. Press " " again to
Example: If you want to use 80% microwave power to cook for 20 minutes, you can
operate the oven as the following steps.
Microwave/Grill/Combi.
Start/+30Sec./Confirm
Start/+30Sec./Confirm
Start/+30Sec./Confirm
Stop/Clear
Start/+30Sec./Confirm
"
to
choose
the
power
you want, and
"P100", "P 80", "P 50", "P 30
press " " to
s
Kitchen Timer/Clock
Kitchen Timer/Clock
Kitchen Timer/Clock
cooking time from
start cooking.
,"P 10" ,"G" ,"C-1" or "C-2" will display for each
added press.Then
repeatedly or turn "
Microwave/Grill/Combi.
Microwave/Grill/Combi.
Microwave/Grill/Combi.
15
” per selezionare il peso del prodotto da 100 a 2000 g.
3) Premere “Start/+30Sec./Conrm“ per iniziare lo scongelamento.
6. Scongelamento basato sul tempo
1) Premere "Weight/Time Defrost" due volte, sullo schermo del forno apparirà “dEF2”.
2) Girare
Operation Instructions
1) Press " " once, the screen display "P100".
2) Turn " " to adjust the hour figures, the input time should be within 0--23.
3) Press " ", the minute figures will flash.
3) Press " " to confirm, and the screen displays "P 80".
4) Turn " " to adjust the cooking time until the oven displays "20:00".
5) Press " " to start cooking .
1. Clock Setting
When the microwave oven is electrified, the screen will display "0:00", buzzer will ring once.
1) Press " " twice to select clock function, the hour figures will flash.
4) Turn " " to adjust the minute figures, the input time should be within 0--59.
5) Press " " to finish clock setting. ":" will flash, and the time will light.
2) Press " " once again or turn " " to choose 80%
microwave power.
Note: 1) If the clock is not set, it would not function when powered.
2) During the process of clock setting, if you press " ", the oven
will go back to the previous status automatically.
2. Microwave Cooking
Press " " once, the screen will display "P100". Press
" "
"
confirm, and turn
"
" to set
0:05 to 95:00. Press " " again to
Example: If you want to use 80% microwave power to
operate the oven as the following steps.
Microwave/Grill/Combi.
Start/+30Sec./Confirm
Start/+30Sec./Confirm
Start/+30Sec./Confirm
Stop/Clear
Start/+30Sec./Confirm
"
to
choose
the
power
you want, and
"P100", "P 80", "P 50", "P 30
press " " to
s
Kitchen Timer/Clock
Kitchen Timer/Clock
Kitchen Timer/Clock
cooking time from
start cooking.
,"P 10" ,"G" ,"C-1" or "C-2" will display for each
added press.Then
repeatedly or turn "
Microwave/Grill/Combi.
Microwave/Grill/Combi.
Microwave/Grill/Combi.
15
per selezionare la durata dello scongelamento. Il tempo MAX è di 95 minuti.
3) Premere “Start/+30Sec./Conrm“ per iniziare lo scongelamento. La potenza di
scongelamento è P30. Non può essere modicata.
IT
18

1) Turn " " clockwise till "A-6" display .
Example: If you want to use "Auto Menu" to cook fish for 350g.
2) Press " " to confirm.
1) Turn " " right to choose the menu, and "A-1" to "A-8" will display, which
means pizza, meat, vegetable, pasta, popcorn
2) Press " " to confirm.
3) Turn " " to choose the default weight as the menu chart.
4) Press " " to start cooking.
3) Turn " " to select the weight of fish till "350" display .
4) Press " " to start cooking.
8. Auto Menu
Start/+30Sec./Confirm
Start/+30Sec./Confirm
Start/+30Sec./Confirm
Start/+30Sec./Confirm
s
s
7. Kitchen Timer
(1) Press " " , the screen will display 00:00.
(2) Turn " " to enter the correct time. (The maximum cooking time is 95 minutes.)
(3) Press " " to confirm setting.
(4) When the kitchen time is reached, the buzzer will ring 5 times.
If the clock has been set (24-hour system), will display the current time.
Note: The kitchen Time is different from 24-hour system. Kitchen Timer is a timer.
Start/+30Sec./Confirm
potato,fish,beverage and .
Kitchen Timer/Clock once
the screen
7. Kitchen Timer (Timer)
(1) Premere "Kitchen Timer/Clock" una volta, sullo schermo apparirà 00:00.
(2) Girare
Operation Instructions
1) Press " " once, the screen display "P100".
2) Turn " " to adjust the hour figures, the input time should be within 0--23.
3) Press " ", the minute figures will flash.
3) Press " " to confirm, and the screen displays "P 80".
4) Turn " " to adjust the cooking time until the oven displays "20:00".
5) Press " " to start cooking .
1. Clock Setting
When the microwave oven is electrified, the screen will display "0:00", buzzer will ring once.
1) Press " " twice to select clock function, the hour figures will flash.
4) Turn " " to adjust the minute figures, the input time should be within 0--59.
5) Press " " to finish clock setting. ":" will flash, and the time will light.
2) Press " " once again or turn " " to choose 80%
microwave power.
Note: 1) If the clock is not set, it would not function when powered.
2) During the process of clock setting, if you press " ", the oven
will go back to the previous status automatically.
2. Microwave Cooking
Press " " once, the screen will display "P100". Press
" "
"
confirm, and turn
"
" to set
0:05 to 95:00. Press " " again to
Example: If you want to use 80% microwave power to cook for 20 minutes, you can
operate the oven as the following steps.
Microwave/Grill/Combi.
Start/+30Sec./Confirm
Start/+30Sec./Confirm
Start/+30Sec./Confirm
Stop/Clear
Start/+30Sec./Confirm
"
to
choose
the
power
you want, and
"P100", "P 80", "P 50", "P 30
press " " to
s
Kitchen Timer/Clock
Kitchen Timer/Clock
Kitchen Timer/Clock
cooking time from
start cooking.
,"P 10" ,"G" ,"C-1" or "C-2" will display for each
added press.Then
repeatedly or turn "
Microwave/Grill/Combi.
Microwave/Grill/Combi.
Microwave/Grill/Combi.
15
per inserire il tempo corretto. (Il tempo massimo di cottura è 95 minuti).
(3) Premere “Start/+30Sec./Conrm“ per confermare le impostazioni.
(4) Al raggiungimento del tempo impostato, il segnale acustico suonerà 5 volte.
Se è stato impostato l’orologio (sistema orario a 24 ore), sullo schermo apparirà l’ora corrente.
Nota: Il tempo del Kitchen Timer è diverso dal sistema orario a 24 ore. Il Kitchen Timer è
un timer.
8. Menu automatico
1) Girare
Operation Instructions
1) Press " " once, the screen display "P100".
2) Turn " " to adjust the hour figures, the input time should be within 0--23.
3) Press " ", the minute figures will flash.
3) Press " " to confirm, and the screen displays "P 80".
4) Turn " " to adjust the cooking time until the oven displays "20:00".
5) Press " " to start cooking .
1. Clock Setting
When the microwave oven is electrified, the screen will display "0:00", buzzer will ring once.
1) Press " " twice to select clock function, the hour figures will flash.
4) Turn " " to adjust the minute figures, the input time should be within 0--59.
5) Press " " to finish clock setting. ":" will flash, and the time will light.
2) Press " " once again or turn " " to choose 80%
microwave power.
Note: 1) If the clock is not set, it would not function when powered.
2) During the process of clock setting, if you press " ", the oven
will go back to the previous status automatically.
2. Microwave Cooking
Press " " once, the screen will display "P100". Press
" "
"
confirm, and turn
"
" to set
0:05 to 95:00. Press " " again to
Example: If you want to use 80% microwave power to cook for 20 minutes, you can
operate the oven as the following steps.
Microwave/Grill/Combi.
Start/+30Sec./Confirm
Start/+30Sec./Confirm
Start/+30Sec./Confirm
Stop/Clear
Start/+30Sec./Confirm
"
to
choose
the
power
you want, and
"P100", "P 80", "P 50", "P 30
press " " to
s
Kitchen Timer/Clock
Kitchen Timer/Clock
Kitchen Timer/Clock
cooking time from
start cooking.
,"P 10" ,"G" ,"C-1" or "C-2" will display for each
added press.Then
repeatedly or turn "
Microwave/Grill/Combi.
Microwave/Grill/Combi.
Microwave/Grill/Combi.
15
verso destra per scegliere il menu, e "A-1" no a "A-8" apparirà sullo
schermo, il quale signica pizza, carne, vegetali, pasta, patate, pesce, bevande e pop-corn.
2) Premere "Start/+30Sec./Conrm" per confermare.
3) Girare
Operation Instructions
1) Press " " once, the screen display "P100".
2) Turn " " to adjust the hour figures, the input time should be within 0--23.
3) Press " ", the minute figures will flash.
3) Press " " to confirm, and the screen displays "P 80".
4) Turn " " to adjust the cooking time until the oven displays "20:00".
5) Press " " to start cooking .
1. Clock Setting
When the microwave oven is electrified, the screen will display "0:00", buzzer will ring once.
1) Press " " twice to select clock function, the hour figures will flash.
4) Turn " " to adjust the minute figures, the input time should be within 0--59.
5) Press " " to finish clock setting. ":" will flash, and the time will light.
2) Press " " once again or turn " " to choose 80%
microwave power.
Note: 1) If the clock is not set, it would not function when powered.
2) During the process of clock setting, if you press " ", the oven
will go back to the previous status automatically.
2. Microwave Cooking
Press " " once, the screen will display "P100". Press
" "
"
confirm, and turn
"
" to set
0:05 to 95:00. Press " " again to
Example: If you want to use 80% microwave power to cook for 20 minutes, you can
operate the oven as the following steps.
Microwave/Grill/Combi.
Start/+30Sec./Confirm
Start/+30Sec./Confirm
Start/+30Sec./Confirm
Stop/Clear
Start/+30Sec./Confirm
"
to
choose
the
power
you want, and
"P100", "P 80", "P 50", "P 30
press " " to
s
Kitchen Timer/Clock
Kitchen Timer/Clock
Kitchen Timer/Clock
cooking time from
start cooking.
,"P 10" ,"G" ,"C-1" or "C-2" will display for each
added press.Then
repeatedly or turn "
Microwave/Grill/Combi.
Microwave/Grill/Combi.
Microwave/Grill/Combi.
15
per scegliere il peso prestabilito secondo la lista dei menu.
4) Premere "Start/+30Sec./Conrm" per iniziare la cottura.
Esempio: se si vuole usare "Auto Menu" per cucinare 350 g di pesce.
1) Girare
Operation Instructions
1) Press " " once, the screen display "P100".
2) Turn " " to adjust the hour figures, the input time should be within 0--23.
3) Press " ", the minute figures will flash.
3) Press " " to confirm, and the screen displays "P 80".
4) Turn " " to adjust the cooking time until the oven displays "20:00".
5) Press " " to start cooking .
1. Clock Setting
When the microwave oven is electrified, the screen will display "0:00", buzzer will ring once.
1) Press " " twice to select clock function, the hour figures will flash.
4) Turn " " to adjust the minute figures, the input time should be within 0--59.
5) Press " " to finish clock setting. ":" will flash, and the time will light.
2) Press " " once again or turn " " to choose 80%
microwave power.
Note: 1) If the clock is not set, it would not function when powered.
2) During the process of clock setting, if you press " ", the oven
will go back to the previous status automatically.
2. Microwave Cooking
Press " " once, the screen will display "P100". Press
" "
"
confirm, and turn
"
" to set
0:05 to 95:00. Press " " again to
Example: If you want to use 80% microwave power to cook for 20 minutes, you can
operate the oven as the following steps.
Microwave/Grill/Combi.
Start/+30Sec./Confirm
Start/+30Sec./Confirm
Start/+30Sec./Confirm
Stop/Clear
Start/+30Sec./Confirm
"
to
choose
the
power
you want, and
"P100", "P 80", "P 50", "P 30
press " " to
s
Kitchen Timer/Clock
Kitchen Timer/Clock
Kitchen Timer/Clock
cooking time from
start cooking.
,"P 10" ,"G" ,"C-1" or "C-2" will display for each
added press.Then
repeatedly or turn "
Microwave/Grill/Combi.
Microwave/Grill/Combi.
Microwave/Grill/Combi.
15
in senso orario nché appare "A-6".
2) Premere "Start/+30Sec./Conrm" per confermare.
3) Girare
Operation Instructions
1) Press " " once, the screen display "P100".
2) Turn " " to adjust the hour figures, the input time should be within 0--23.
3) Press " ", the minute figures will flash.
3) Press " " to confirm, and the screen displays "P 80".
4) Turn " " to adjust the cooking time until the oven displays
5) Press " " to start cooking .
1. Clock Setting
When the microwave oven is electrified, the screen will display "0:00", buzzer will ring once.
1) Press " " twice to select clock function, the hour figures will flash.
4) Turn " " to adjust the minute figures, the input time should be within 0--59.
5) Press " " to finish clock setting. ":" will flash, and the time will light.
2) Press " " once again or turn " " to choose 80%
microwave power.
Note: 1) If the clock is not set, it would not function when powered.
2) During the process of clock setting, if you press " ", the oven
will go back to the previous status automatically.
2. Microwave Cooking
Press " " once, the screen will display "P100". Press
" "
"
confirm, and turn
"
" to set
0:05 to 95:00. Press " " again to
Example: If you want to use 80% microwave power to cook for 20 minutes, you can
operate the oven as the following steps.
Microwave/Grill/Combi.
Start/+30Sec./Confirm
Start/+30Sec./Confirm
Start/+30Sec./Confirm
Stop/Clear
Start/+30Sec./Confirm
"
to
choose
the
power
you want, and
"P100", "P 80", "P 50", "P 30
press " " to
s
Kitchen Timer/Clock
Kitchen Timer/Clock
Kitchen Timer/Clock
cooking time from
start cooking.
,"P 10" ,"G" ,"C-1" or "C-2" will display for each
added press.Then
repeatedly or turn "
Microwave/Grill/Combi.
Microwave/Grill/Combi.
Microwave/Grill/Combi.
15
per selezionare il peso di pesce no a che non appare “350”.
4) Premere "Start/+30Sec./Conrm" per iniziare la cottura.
IT
19
This manual suits for next models
1
Table of contents
Other Foster Microwave Oven manuals

