Framus AK 1974 User manual

Manual for all Framus
Custom Shop Guitars
Gebrausanleitung für
alle Framus
Custom Shop Gitarren
ENGLISH / DEUTSCH
Manual_FR_CS_2015_E_D.indd 1 02.06.15 12:25

Markneukirchen in May 2015
Dear Customer,
“Made in Germany” stands for quality, and that, along with more than 60 years of tradition and experience
in guitar manufacturing, is what the Framus brand stands for.
As a pioneer, and one of the oldest electric guitar manufacturers in Europe, Framus is committed to the
tradition of guitar manufacturing. Here in Markneukirchen we continue to develop our own ideas and de-
signs with this awareness in mind.
Technical innovation, the best selected woods and one of the most modern instrument manufacturing pro-
cesses in the world are the foundations of our success. But there is still plenty of manual work necessary
for building our instruments and so we also provide our workers with cutting-edge in-house training. This
symbiosis of tradition, state-of-the-art technology and attention to detail helps us create instruments daily
that then nd their way to acionados all over the world.
Our claim is to make the individual wishes of musicians a reality. Unusual wood, pickup and color combi-
nations - as well as different type of nishes - have the power to make each guitar lover’s heart beat that
much stronger. Each satised customer, and our continued success worldwide, shows that Framus is on
the right path into the future.
Framus, a family-owned company, is very proud of its history. In this regard we founded the Framus Muse-
um, which is unrivaled worldwide. Please come visit us here in Markneukirchen.
We wish you lots of fun and enjoyment with your new Framus guitar.
Yours truly,
Hans Peter Wilfer
ENGLISH
Manual_FR_CS_2015_E_D.indd 2-3 02.06.15 12:25

Index
1) Tuners / Stringing and Tuning 5
2) Frets and the Plek®-Technology 5
3) String Action Setup and Gauges 6
4) Adjustmenrt of the Trussrod 6
5) Nuts 7
6) Pickup Setup 7
7) Bridges and Vibratos 8
8) Electronics Layout for all Models 11
AK1974 / AK 1974 S 13
AZ10 1PU 13
AZ10 2 PU 11
Diablo 11
Diablo Progressive 11
Diablo Progressive X 11
Diablo Supreme 11
Diablo Supreme X 11
Diablo 7-string 11
ES Humbucker 12
ES P90 11
Idolmaker 12
Idolmaker Stevie Salas Signature 13
Idolmaker 5’R 13
Mayeld Custom 11
Mayeld Legacy 11
Mayeld Pro 11
Panthera 12
Panthera Legacy 12
Panthera Supreme 12
Panthera Studio 12
Panthera Studio Supreme 12
Panthera 7-string 11
Panthera 8-string 11
Phil XG Signature Humbucker 13
Phil XG Signature P90 13
Wolf Hoffmann Signature 12
9) Tips for Body, Neck and Fingerboard Care 14
10) Electronics Compartment 15
11) Security Locks 15
12) User Kit 16
13) Warranty / Customer Service 16
Stringing your guitar is simple. First, make sure that the knurled head screw located at the back of the
tuner is loosened all the way. Next, insert the string through the hole in the tuning post, while tightening
it by pulling on it gently with one hand. Then lock the string in position by turning the knurled head screw
clockwise as far as it will go. Subsequently, tune the string to pitch as normal. If you would like to remo-
ve it again, loosen the string tension and turn the knurled head screw counter-clockwise until the string
comes loose.
See P. 10 for a description of the stringing/tuning-process with the Floyd Rose Vibrato.
Graph Tech Machine Heads Framus Vintage Machine Head
5
1) Tuners - Stringing/Tuning
Locking Tuners:
2) Frets and Plek®-Technology
All of our Framus guitars made in Germany with the exception of the ES model come standard with Graph
Tech Ratio Locking Machine Heads which are famous for their tuning stability, smooth movement, and
ease of use.
Stringing/tuning:
The Plek®technology guarantees 100% perfect fret dressings on all Framus guitars. An optimal guitar
setup is provided thanks to this technology. The neck measuring procedure, accurate down to 1/100th of
a millimeter (10 µ), scans the ngerboard on all relevant points (basically every possible playing position on
the guitar). Measuring is done with the machine concurrently simulating string tension. Fret dressing is not
done with the usual manual sanding and fret crowning procedures, because the Plek®machine dresses
every fret individually according to the previous measurements with a custom-shaped wheel cutter. This
preserves the radius and shape of the fret even after the dressing is done. Tolerances that would normally
occur with manual fret dressing are thus eliminated.
The end result is a perfectly seated, dened string action along the ngerboard and optimal playability.
Plek®Technology means:
- Computer-driven fret dressing
- Dressing is done while simulating string tension
- Cutting procedure with an accuracy down to 1/100th of a mm (10 µ)
- Exact fret crowning
- Dened string action
- Optimal playability
For further information please visit: http://www.plek.de
Manual_FR_CS_2015_E_D.indd 4-5 02.06.15 12:25

6-String 25,5” Scale
Cleartone EMP 009“, 011“, 016“, 026“, 036“, 046“
6-String 24,75” String
Cleartone EMP 010“, 013“, 017“, 026“, 036“, 046“
7-String 25,5” String
Cleartone EMP 009“, 011“, 016“, 026“, 036“, 046“, 056“
AZ10 /LP10/MM10 Jazz Archtop 24,75” String
Cleartone EMP 013“, .017“, .026“, .034“, .044“, .054“
Wolf Hoffmann Signature 25,5”
Cleartone EMP 010“, 013“, 017“, 026“, 036“, 046“
8-String 27” String
Cleartone EMP 009“, 011“, 016“, 026“, 036“, 046“,056“,064“
How often should I change strings?
Changing strings is a matter of individual preference. It also depends on many different factors. Hand
sweat and inappropriate room conditions can attack the strings and negatively inuence the sound of the
guitar and its playability. We recommend changing the strings once or twice a month to ensure brilliant
tone and playability.
Turning the truss rod wrench clockwise will tighten the truss rod and give the neck a back bow; turning
the wrench counterclockwise will loosen the truss rod and give the neck a forward bow. These adjust-
ments should be done in small steps of 1/4 to 1/2 turn because the neck’s reaction is not instantaneous.
You should check the results after approximately one hour and probably check again the following day.
Readjust the truss rod if needed. Particularly during the changing of seasons or during strong weather
uctuations you should pay attention to the neck’s setup and the corresponding truss rod adjustment, as
changes in humidity and temperature can affect the neck.
clockwise = back bow, fretboard straitens
counter clockwise = forward bow
6 7
3) String Action Setup and Gauges
String Action Setup:
Thanks to our collaboration with Plek®, optimal string action setup is predetermined, which in turn should
be perceived as comfortable by the majority of players.
Due to the physical characteristics of wood and strings in conjunction with the vibration process please
keep in mind that with a very low string action setup, string buzzing is quite possible. The guitar has an
optimal setup when your individual requirements are met. String gauge, playing techniques, pick gauge,
string attack, are all variables that cannot be considered when performing a factory setup.
Standard String Gauges (Framus Strings):
4) Truss Rod Adjustment
The neck is setup correctly if it has a slight forward bow. You can verify the neck’s relief by pressing the
lowest string at the rst and last fret (simultaneously). The gap between fret and string should be appro-
ximately between 0.1 and 0.3 mm (100µ-300µ) at the 9th fret. This value is independent from the actual
string action setup of the instrument.
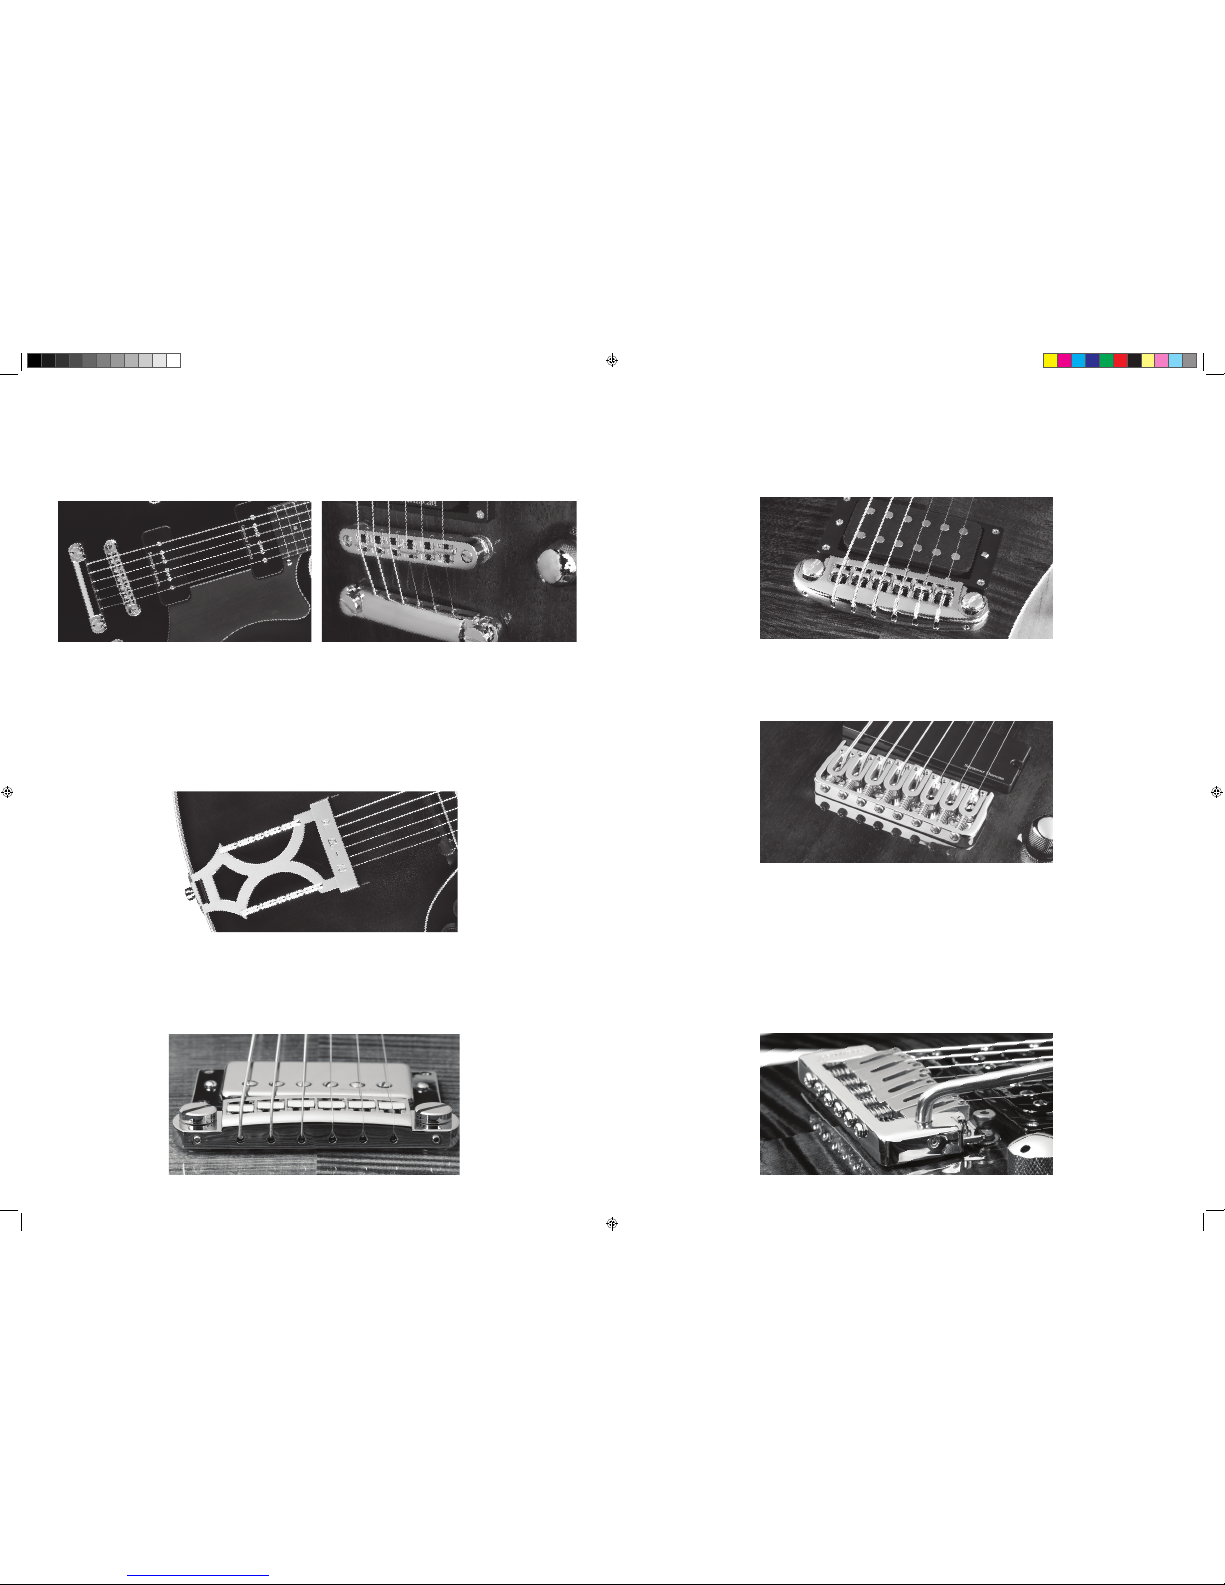
5) Nuts
Since June 2010 all Framus electric guitars are equipped with GraphTech BLACK TUSQ XL™ nuts. Graph-
Tech BLACK TUSQ XL nuts have a Teon lubrication impregnated all the way through the material, which
improves the tuning performance of the guitar signicantly, especially when using a vibrato or bendings.
The highly resonant BLACK TUSQ XL material also brings out hidden harmonics in the guitar.
Locking Nut:
GraphTech BLACK TUSQ XLTM:
Guitars that come with a Floyd Rose Vibrato System feature our specially designed locking nut. This nut
locks the strings and guarantees tuning stability even during extreme use of the Floyd Rose Vibrato Sys-
tem.
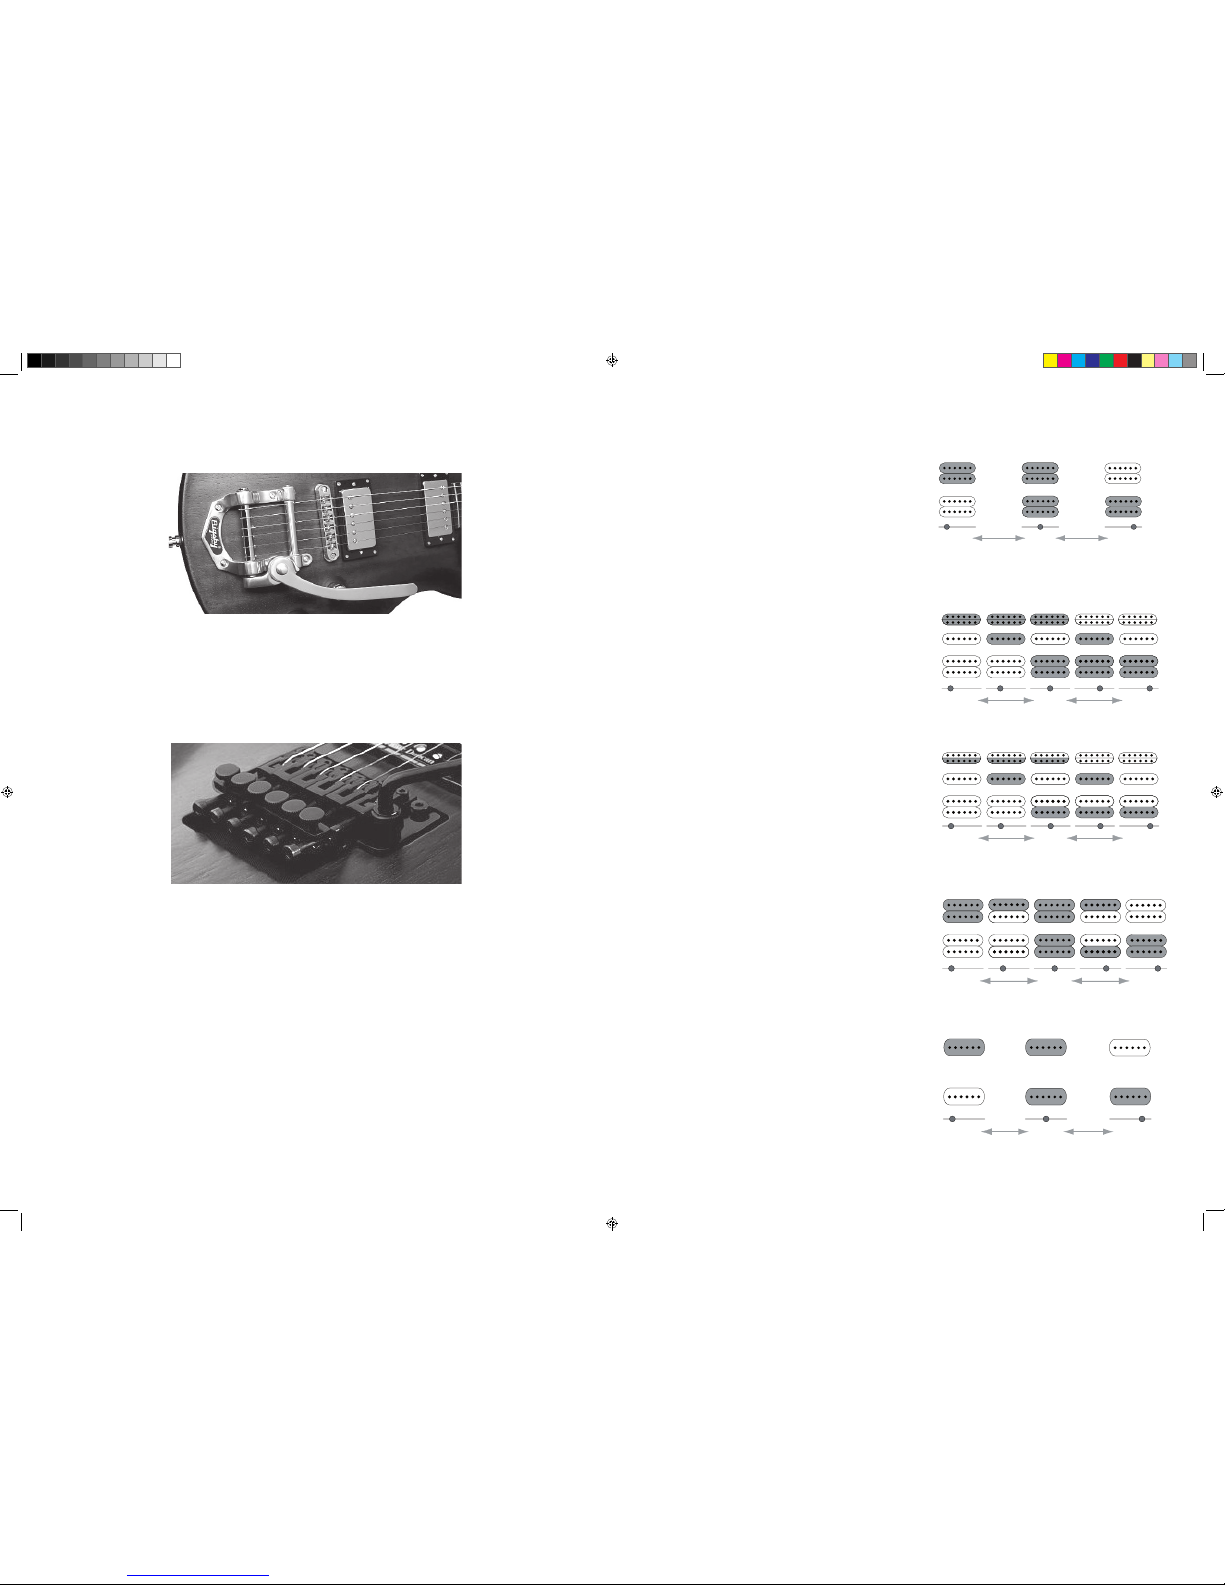
The factory setup for the pickups is such that pressing the lowest and highest string at the highest fret will
create a distance of 2 mm (0.08“) between strings and pickup. Use a Philips head screwdriver to adjust
the pickup height.
The closer the pickup is to the strings, the higher the output and the sustain decreases. Normally the
bridge pickup should be closer to the strings then the neck pickup.
6) Pickup Setup
Manual_FR_CS_2015_E_D.indd 6-7 02.06.15 12:25

Ebony Bridge & Framus AZ-10 Stringholder
8 9
7) Bridges and Vibratos
Fixed Bridges:
TonePros Tune-O-Matic & Stop Tailpiece
Models: Mayeld Pro, Mayeld Custom, Mayeld, AK 1974, Panthera, Panthera Supreme, Panthera Stu-
dio, Panthera Stuido Supreme, Panthera 7-String, Diablo 7-String or Custom Shop, ES 90/Humbucker,
Idolmaker, Idolmaker Stevie Salas, Phil XG P90 / Humbucker
The Tune-o-Matic Bridge and the Stop-Tailpiece are lockable with screws.
Models: AZ-10
TonePros Wraparound Bridge
Models: Diablo Progressive, Diablo Supreme oder Custom Shop
With the wraparound bridges the strings are threaded through the bridge from the pickup side.
Graph Tech Wraparound Bridge
Models: Idolmaker 5’R
The strings are threaded through the bridge from the pickup side.
Hipshot Fixed Bridge
The strings are threaded from the back of the instrument through the bridge.
Models: Panthera 8-Saiter
Vibratos:
Models: Diablo / Diablo Supreme X
The strings are threaded from the back of the instrument through the vibrato block.
Framus by Wilkinson
Manual_FR_CS_2015_E_D.indd 8-9 02.06.15 12:25

Models: Diablo Progressive X / Wolf Hoffmann Signature oder Custom Shop
The Floyd Rose vibrato is mounted together with a locking nut (see P. 7).
Bigsby B5 vibrato with Roller Bridge
10 11
Guitars that come with a Floyd Rose Vibrato System feature our specially designed locking nut. This nut
locks the strings and guarantees tuning stability even during extreme use of the Floyd Rose Vibrato Sys-
tem.
When stringing and / or tuning a guitar with a Floyd Rose Vibrato System keep the following steps in mind:
1. Cut off the string’s ball end and insert the string between the saddle and the string holder block of the
Floyd Rose Vibrato System and tighten the string stopper screw.
2. Feed the strings through the nut and under the loosened pressure pads.
3. Tune the guitar with the nut still unlocked. Keep in mind that the overall tuning with an unlocked nut
should be below the correct pitch. When the pressure pad screws are tightened the strings will tune up
slightly due to the additional pressure.
4. Once the guitar is tuned, tighten the screws on the locking nut pressure pads with the supplied Allen
wrench.
5. Fine tuning is done with the ne tuning screws of the Floyd Rose Vibrato.
Original Floyd Rose vibrato
Models: Panthera Legacy, ES P90/Humbucker oder Custom Shop
Neck Center Bridge
Tone Pot Push (Split off)
Neck Center Bridge
Tone Pot Pull (Split on)
Neck
Bridge
Neck
Bridge
Neck Center Bridge
Neck
Bridge
Neck Center Bridge
Neck
Bridge
8) Electronics Layout for all models
Diablo Progressive / Diablo 7-String /
AZ-10 Custom 2 PU / Mayeld Pro /
Mayeld Custom / Panthera 7-String /
Panthera 8-String
Diablo / Diablo Supreme X
Diablo Progressive X / Diablo Supreme
ES P 90 / Mayeld Legacy
Neck
Neck
Bridge
Center Bridge
Manual_FR_CS_2015_E_D.indd 10-11 02.06.15 12:25

ES Humbucker / Panthera / Panthera Legacy /
Panthera Supreme / Idolmaker
Both models have a so called “Lead Free” switch.
If activated, the signal will be routed directly from
the bridge pickup (humbucker mode) to the output
jack. All settings of the pots and the 5-way switch
are deactivated.
Neck Center Bridge
Neck
Bridge
The electronics compartment contains a switch
wich enables the single coil boost feature, wich
boosts the single coil’s volume level. It also inclu-
des a trim potentiometer in the electric compart-
ment wich controls the amount of the boost, and
can be adjusted using a screwdriver.
12 13
Panthera Studio / Panthera Studio Supreme
Wolf Hoffmann Signature
In position 1 both humbuckers are swit-
ched in parallel.
In position 6 both humbuckers are
switched in parallel, too. But the bridge
humbucker has a reverse polarity.
AZ-10 1 PU / Phil XG Signature P90
Volume and Tone Control.
Neck
Bridge
Idolmaker 5‘R
Idolmaker Stevie Salas Signature
AK 1974 / AK 1974 S
Phil XG Signature Humbucker
Rotary 6-Way Selector Switch
Position 1 2 3 4 5 6
Switch positions:
3: Bridge Pickup out of phase
4: Bridge Pickup parallel
5: Bridge Pickup serial
The Toggleswitch mutes the signal.
Manual_FR_CS_2015_E_D.indd 12-13 02.06.15 12:26

A matte and transparent surface with visible wood structure and accentuated grain are the essential cha-
racteristic of the Colored Oil / Satin Finish. Here the surface is either color stained (Colored Oil Finish) or
the wood stays natural and sealed with a thin layer of clear satin matte lacquer (Satin Finish). This sealed
nish does not need special care.
If the surface gets dirty it should be wiped with a damp cloth or with one of the many non-abrasive spray
cleaners available in selected stores or specialist shops.
High Polish Finish:
A High Polish Finish is produced with the use of a high polish lacquer. The wood is completely sealed
under the nish; the surface is as smooth as glass and without noticeable wood grain structure. As with
Colored Oil Finish, care is limited to the visual aspects. Wipe the surface clean with a damp cloth or with
the correspondingly suited spray cleaners, or you can use polish that reinstates the full shine of the nish,
removing small scratches and typical traces of playing.
Tips for Neck Care:
Use our Warwick Beeswax for all necks treated with Natural Oil Finish. Apply the beeswax with a polishing
cloth using circular movements. After applying wait 2 to 3 minutes and then remove the excess with a
dry polishing cloth. The beeswax should be applied a minimum of two times per year. If the instrument is
played frequently, shorter waxing periods may be necessary. A more frequent application of beeswax will
keep your instrument looking great, as it ages over time. After playing clean the neck surface and nger-
board regularly with a dry polishing cloth.
Tips for Fingerboard Care:
All ngerboards that come standard with Warwick basses are not lacquered and thus require a little main-
tenance once in a while to avoid getting rough or dull. To clean and protect the ngerboard use products
specially made for this purpose and that are available at selected stores or specialist shops. Please refer
to the manufacturer’s product information to achieve the desired result. You can use the Warwick Beeswax
for your ngerboard’s maintenance, too.
Visit the support section of our web page for more information and instructional videos:
www.framus.de
www.framus.com
14 15
9) Tips for Body, Neck and Fingerboard Care
Polishing Cloth
(SP W 50017)
Bees Wax
(SP W 50015)
Natural Oil Finish (custom shop option only):
Use the included beeswax. Apply the beeswax
with a polishing cloth using circular movements.
After applying wait 2 to 3 minutes and then
remove the excess with a dry polishing cloth.
The beeswax should be applied a minimum of
two times per year, more depending on how
frequently the instrument is played. A more
frequent application of beeswax will keep your
instrument looking great, as it ages over time.
Unscrew the electronic compartment screws using a Philips head screwdriver. The electronic compart-
ment cover lifts automatically with spring pressure.
Use your thumbs and push on one side. The cover comes up at one side and can be removed easily.
10) Electronics compartment
11) Installtion and application of the Security Locks
Colored Oil Finish / Satin Finish (body & neck):
Insert the piece with the outside thread into the
strap hole.
Place the ring on the thread from the other side
of the strap.
Screw the nut on the thread. Tighten it with a
wrench.
Press the button of the Security Lock to unlatch
it and attatch or remove the strap.
Manual_FR_CS_2015_E_D.indd 14-15 02.06.15 12:26

16
12) User-Kit
13) Warranty / Customer Service
Framus‘ warranty for all musical instruments is limited to 2 years.
Please take the time and register as a Warwick User. You nd the Product Registration on our website
under ‚Support‘.
In case of a defective product please refer to your musical instruments dealer.
If you have further questions about your instrument feel free to contact us.
The manufacturer reserves the right to any technical modications.
Visit our website:
www.framus.de
For information about historic models visit our Framus Vintage Webseite:
www.framus-vintage.de/
Visit our distributor page:
www.warwick-distribution.de
Please direct your custom shop requests to:
Sign up for the Warwick Newsletter:
www.warwick.de/modules/support/newsletter_register.php?katID=17116&cl=DE
For replacements, spare parts and cleaning products please visit our Webshop:
shop.warwick.de/
Follow us on:
www.facebook.com/warwickframus plus.google.com/113728338790527653581/posts
www.youtube.com/user/warwickofcial instagram.com/framuswarwickofcial/
twitter.com/WarwickFramus www.framuswarwickartist.blogspot.de/
A Framus user-kit is included with your bass.
It contains useful supplies like:
• Bees wax (included in delivery for Natural
Oil Finish only)
• Trussrod Tool
• Framus Polish Cloth
• 1,5 mm Allen Wrench
• 2,5 mm Allen Wrench
• Warranty Card
Manual_FR_CS_2015_E_D.indd 16-17 02.06.15 12:26

Markneukirchen im Mai 2015
Sehr geehrter Kunde,
Qualität „Made in Germany“ und über 60 Jahre Tradition und Erfahrung im Gitarrenbau, dafür steht die
Marke Framus.
Als Vorreiter und einer der ältesten Hersteller von E-Gitarren in Europa sind wir der Tradition des Gitarren-
baus verpichtet. Mit diesem Bewusstsein entstehen in Markneukirchen eigene Konzepte und Designs, die
wir durch technische Innovationen, bestes, selektiertes Tonholz und eine der modernsten Fertigungen in
der Welt stetig weiterentwickeln. Dennoch gehört viel Handarbeit zum Instrumentenbau. Hierzu wird unser
Fachpersonal eigens im Hause ausgebildet. Diese Symbiose aus Tradition, modernster Technik und der
Aufmerksamkeit für jedes Detail lässt täglich Instrumente entstehen, die weltweit ihre Liebhaber nden.
Unser Anspruch ist es auch, die individuellen Wünsche eines Musikers umzusetzen. Ausgefallene Holz-,
Pickup- und Farbvariationen, sowie unterschiedliche Finishes lassen jedes Gitarristenherz auf der ganzen
Welt höher schlagen. Jeder zufriedene Kunde und der weltweit stetig wachsende Erfolg zeigen, dass sich
Framus auf dem richtigen Weg in die Zukunft bendet.
Framus ist ein Familienunternehmen, das auch stolz auf seine Geschichte ist. Eigens gründeten wir hierzu
das Framus Museum, das weltweit seinesgleichen sucht. Besuchen Sie uns doch einfach hier in Markneu-
kirchen.
Wir wünschen Ihnen viel Freude mit Ihrer Framus Gitarre.
Ihr
Hans Peter Wilfer
DEUTSCH
Manual_FR_CS_2015_D_attatch.indd 2-3 02.06.15 12:10

Index
1) Mechanlken / Saiten aufziehen und stimmen 21
2) Bünde und Plek®-Technologie 21
3) Einstellung der Saitenhöhe und Saitenstärken 22
4) Einstellung des Halsstabes 22
5) Sättel 23
6) Einstellung der Tonabnehmer 23
7) Brücken und Vibratosysteme 24
8) Ausführung der Elektronik für alle Modelle 27
AK1974 / AK 1974 S 29
AZ10 1PU 29
AZ10 2 PU 27
Diablo 27
Diablo Progressive 27
Diablo Progressive X 27
Diablo Supreme 27
Diablo Supreme X 27
Diablo 7-string 27
ES Humbucker 28
ES P90 27
Idolmaker 28
Idolmaker Stevie Salas Signature 29
Idolmaker 5’R 29
Mayeld Custom 27
Mayeld Legacy 27
Mayeld Pro 27
Panthera 28
Panthera Legacy 28
Panthera Supreme 28
Panthera Studio 28
Panthera Studio Supreme 27
Panthera 7-string 27
Panthera 8-string 27
Phil XG Signature Humbucker 29
Phil XG Signature P90 29
Wolf Hoffmann Signature 28
9) Tipps für die Korpus-, Hals- und Griffbrettpege 30
10) Elektronikfach 31
11) Security Locks 31
12) User Kit 32
13) Garantie / Service 32
Das Aufziehen der Saite ist denkbar einfach. Stellen Sie zuerst sicher, dass die Rändelschraube auf der
Rückseite der Stimmmechanik vollständig gelockert ist. Führen Sie als nächstes die aufzuziehende Saite
durch die Bohrung im Schaft der Stimmmechanik, während Sie sie mit einer Hand straff ziehen. Arretieren
Sie die Saite als nächstes, indem Sie die Rändelschraube auf der Rückseite der Mechanik anziehen, bis
die Saite fest sitzt. Stimmen Sie als nächstes die Saite wie gewohnt. Wenn Sie die Saite wieder entfernen
möchten, lockern Sie die Saitenspannung und drehen die Rändelschraube entgegen dem Uhrzeigersinn,
bis sich die Saite aus der Stimmmechanik entnehmen lässt.
Eine genaue Beschreibung des Besaitungs- und Stimmvorgangs beim Floyd Rose Vibratosystem ndet
sich auf S. 10.
Graph Tech Machine Heads Framus Vintage Machine Head
21
1) Mechaniken / Saiten aufziehen und stimmen
Locking Mechaniken:
2) Bünde und Plek®-Technologie
Für alle unsere Framus Gitarren made in Germany mit Ausnahme des ES Modells kommen standardmäßig
die innovativen Graph Tech Ratio Locking Stimmechaniken zum Einsatz, die sich durch ihre Stimmstabili-
tät, Leichtgängigkeit und ihr einfaches Handling auszeichnen.
Saiten aufziehen/stimmen:
Die Plek®-Technologie garantiert 100% perfekt abgerichtete Bünde bei allen Framus Gitarren. Ein optima-
les Set-up der Gitarre wird mit dieser Technik gewährleistet.
Die auf den 1/100 mm genaue Messtechnik vermisst den Hals an allen relevanten Punkten, also jeder
möglichen Spielposition einer Gitarre. Das Vermessen erfolgt unter dem exakt simulierten Zug der Gi-
tarrensaiten. Der Abrichtvorgang als solches wird nicht wie gewöhnlich durch manuelles Schleifen und
Verrunden der Bünde erreicht, beim Plek®-Verfahren wird anhand der Vermessung jeder Bund einzeln
bearbeitet, Korrekturen werden mit einem Bundfräser gefräst, der den exakten Radius des Bunddrahtes
besitzt. Somit bleibt der Radius des Bundes auch nach der Fräsabrichtung erhalten. Toleranzen, die durch
manuelles Verrunden entstehen würden, sind ausgeschlossen. Resultat ist eine denierte Saitenauage,
ache Saitenlage und ein optimaler Spielkomfort.
Plek®-Technologie bedeutet:
• Computergesteuerte Abrichtung der Bünde
• Abrichtvorgang unter Simulation des Saitenzuges
• Auf 1/100 mm genauer Fräsvorgang
• exakte Rundung der Bundkrone
• denierte Saitenauage
• optimaler Spielkomfort
Für weitere Informationen besuchen Sie bitte: http://www.plek.de
Manual_FR_CS_2015_D_attatch.indd 4-21 02.06.15 12:10

6-Saiter 25,5” Mensur
Cleartone EMP 009“, 011“, 016“, 026“, 036“, 046“
6-Saiter 24,75” Mensur
Cleartone EMP 010“, 013“, 017“, 026“, 036“, 046“
7-Saiter 25,5” Mensur
Cleartone EMP 009“, 011“, 016“, 026“, 036“, 046“, 056“
AZ10 /LP10/MM10 Jazz archtop 24,75” Mensur
Cleartone EMP 013“, .017“, .026“, .034“, .044“, .054“
Wolf Hoffmann Signature 25,5”
Cleartone EMP 010“, 013“, 017“, 026“, 036“, 046“
8-Saiter 27” Mensur
Cleartone EMP 009“, 011“, 016“, 026“, 036“, 046“,056“,064“
Wie oft sollten die Saiten gewechselt werden?
Das Wechseln der Saiten ist individuell bedingt. Dies hängt von verschiedenen Faktoren ab. Handschweiß
und ein ungünstiges Raumklima können die Saiten angreifen, und so die Gitarre klanglich und im Spiel-
komfort negativ beeinussen. Wir empfehlen die Saiten ein- bis zweimal im Monat zu wechseln, um einen
brillanten Ton und den bestmöglichen Spielkomfort zu erhalten.
Drehen Sie den Halsstabschlüssel im Uhrzeigersinn, erhalten Sie eine Halskrümmung nach hinten, dre-
hen Sie gegen den Uhrzeigersinn, erhalten Sie eine Halskrümmung nach vorne. Sie sollten im Falle einer
Nachjustierung in kleinen Schritten vorgehen (1/4 bis 1/2 Umdrehung). Die Reaktion des Halses auf die
veränderte Einstellung erfolgt nicht sofort. Sie sollten nach ca. 1 Stunde das Ergebnis erneut begutachten
und dieses auch am nächsten Tag wiederholen. Gegebenenfalls erneut justieren. Besonders beim Jahres-
zeitenwechsel und starken klimatischen Schwankungen und der damit veränderten Luftfeuchte ist eine
besondere Aufmerksamkeit auf die Einstellung des Halses zu legen.
im Uhrzeigersinn = Halskrümmung nach hinten
gegen den Uhrzeigersinn = Halskrümmung nach vome
22 23
3) Einstellung der Saitenhöhe und Saitenstärken
Einstellung der Saitenhöhe:
In Zusammenarbeit mit Plek®wurde eine optimale Saitenlage ermittelt, die für die meisten Spieler als an-
genehm empfunden wird.
Bitte beachten Sie, dass bei einer zu ach eingestellten Saitenlage aus Gründen physikalischer Eigen-
schaften des Holzes und der Saiten sowie deren Schwingungen Nebengeräusche entstehen können. Op-
timal ist Ihre Gitarre dann eingestellt, wenn sie Ihren individuellen Bedürfnissen gerecht wird. Saitenstär-
ken, Spielweisen, Plektrenstärken, Stärke des Anschlags sind Variablen, die nicht in einem Werks-Set-Up
berücksichtigt werden können.
Serienmäßige Saitenstärken (Framus Saiten):
4) Einstellung des Halsstabes
Optimal ist der Hals eingestellt, wenn er eine leichte Krümmung nach vorne hat. Diese können Sie am ein-
fachsten überprüfen, wenn Sie die tiefste Saite am ersten und am letzten Bund drücken. Am 9. Bund sollte
der Abstand vom Bundstäbchen zur Saite ca. 0,1 – 0,3mm betragen. Dieser Wert ist unabhängig von der
eingestellten individuellen Saitenlage.
5) Sättel
Seit Juni 2010 werden alle Framus E-Gitarren mit GraphTech BLACK TUSQ XL™ Sätteln ausgerüstet.
GraphTech BLACK TUSQ XL™ Sättel besitzen eine Teon-Schmierung, mit der das gesamte Material
imprägniert ist, was die Stimmstabilität der Gitarre erheblich verbessert, insbesondere bei Vibrato-Einsatz
oder Bendings. Darüber hinaus bringt das hochresonante BLACK TUSQ XL™ Material die Obertöne der
Gitarre optimal zur Geltung.
Klemmsattel:
GraphTech BLACK TUSQ XLTM:
Bei Gitarren, die mit einem Floyd Rose Vibrato-System ausgerüstet sind, verwenden wir einen speziell da-
für entwickelten Locking-Sattel. Dieser xiert die Saiten und garantiert Stimmstabilität auch bei extremer
Anwendung des Floyd Rose Vibrato-Systems.
Werkseitig sind die Tonabnehmer so eingestellt, dass bei gedrückter höchster und tiefster Saite am letzten
Bund ein Abstand von 2mm zwischen Saiten und Tonabnehmer entsteht. Benutzen Sie einen passenden
Schraubenzieher, um die Höhe von Pickups zu justieren.
Je näher sich die Tonabnehmer an den Saiten benden, desto lauter wird der Output, und das Sustain
verringert sich. Normalerweise sollten die Tonabnehmer an der Steg Position näher an den Saiten liegen,
als in der Halsposition, um einen ausgewogenen Pegel aller Tonabnehmer zu gewährleisten.
6) Einstellung der Tonabnehmer
Manual_FR_CS_2015_D_attatch.indd 22-23 02.06.15 12:10

Ebenholz-Brücke & Framus AZ-10 Saitenhalter
24 25
7) Brücken und Vibratosysteme
Feste Brücken:
TonePros Tune-O-Matic & Stop Tailpiece
Modelle: Mayeld Pro, Mayeld Custom, Mayeld, AK 1974, Panthera, Panthera Supreme, Panthera
Studio, Panthera Stuido Supreme, Panthera 7-String, Diablo 7-String or Custom Shop, ES 90/Humbucker,
Idolmaker, Idolmaker Stevie Salas, Phil XG Humbucker / P90
Sowohl die Tune-o-Matic Brücke als auch das Stop-Tailpiece sind mit Madenschrauben arretierbar.
Modelle: AZ-10
TonePros Wraparound Bridges
Modelle: Diablo Progressive, Diablo Supreme oder Custom Shop
Bei der Wraparound Brücke werden die Saiten von der Pickup-Seite der Brücke eingefädelt.
Graph Tech Wraparound Bridges
Modelle: Idolmaker 5’R
Bei der Wraparound Brücke werden die Saiten von der Pickup-Seite der Brücke eingefädelt
Hipshot Fixed Bridge
Bei der Hipshot Fixed Bridge werden die Saiten von der Rückseite des Bodys eingefädelt.
Modelle: Panthera 8-Saiter
Vibratosysteme:
Modelle: Diablo / Diablo Supreme X
Beim Framus by Wilkinson Vibrato werden die Saiten von der Rückseite des Bodys eingefädelt.
Framus by Wilkinson
Manual_FR_CS_2015_D_attatch.indd 24-25 02.06.15 12:10

Modelle: Diablo Progressive X / Wolf Hoffmann Signature oder Custom Shop
Zu einem Floyd Rose Vibrato wird ein entsprechender Klemmsattel (s. S. 7) montiert.
Bigsby B5 vibrato with roller bridge
26 27
Bei Gitarren, die mit einem Floyd Rose Vibrato-System ausgerüstet sind, verwenden wir einen speziell da-
für entwickelten Locking-Sattel. Dieser xiert die Saiten und garantiert Stimmstabilität auch bei extremer
Anwendung des Floyd Rose Vibrato-Systems.
Um Ihre Gitarre mit einem Floyd Rose Vibrato-System zu besaiten, bzw. zu stimmen, sind folgende Schrit-
te zu beachten:
1. Das Ball-End der Saite abkneifen und im Floyd Rose Vibrato-System fest klemmen.
2. Saiten unter den geöffneten Locking-Böckchen des Sattels durchführen.
3. Gitarre mit geöffnetem Locking-Sattel stimmen. Achten Sie darauf, dass die Stimmung bei nicht ange-
zogenen Schrauben einige Cent unter der exakten Stimmung liegt. Durch das Anziehen der Schrauben
und dem Druck der Böckchen auf die Saite verlagert sich die Stimmung leicht nach oben.
4. Wenn die Gitarre gestimmt ist, Locking-Schrauben am Sattel mit dem mitgelieferten Inbus-Schlüssel
arretieren.
5. Fine-Tuning erfolgt nun über Stimmschräubchen am Floyd Rose Vibrato.
Original Floyd Rose vibrato
Modelle: Panthera Legacy, ES P90/Humbucker oder Custom Shop
Neck Center Bridge
Tone Pot Push (Split off)
Neck Center Bridge
Tone Pot Pull (Split on)
Neck
Bridge
Neck
Bridge
Neck Center Bridge
Neck
Bridge
Neck Center Bridge
Neck
Bridge
8) Electronics Layout for all models
Diablo Progressive / Diablo 7-String /
AZ-10 Custom 2 PU / Mayeld Pro /
Mayeld Custom / Panthera 7-String /
Panthera 8-String
Diablo / Diablo Supreme X
Diablo Progressive X / Diablo Supreme
ES P 90 / Mayeld Legacy
Neck
Neck
Bridge
Center Bridge
Manual_FR_CS_2015_D_attatch.indd 26-27 02.06.15 12:10

ES Humbucker / Panthera / Panthera Legacy /
Panthera Supreme / Idolmaker
Beide Modelle besitzen einen sogenannten „Lead
Free“ toggle switch. Ist dieser aktiviert, wird das
Signal direkt vom Bridge Pickup im Humbucker-
Modus zur Ausgangsbuchse geleitet. Alle Einstel-
lungen der Potis und des 5-Wege Schalters sind
deaktiviert.
Neck Center Bridge
Neck
Bridge
Im Elektronikfach bendet sich ein Schalter mit
Trimpoti, welcher einen Volumeboost des Single-
coils aktiviert bzw deaktiviert. Mit einem Schrau-
benzieher lässt sich die Lautstärke des Booster
am Trimpoti justieren.
28 29
Panthera Studio / Panthera Studio Supreme
Wolf Hoffmann Signature
Bei der Position 1 sind die 2 Humbu-
cker parallel geschaltet.
Bei der Position 6 sind die 2 Humbu-
cker ebenfalls parallel geschaltet, aber
der Steg Humbucker hat eine umge-
kehrte Polarität.
AZ-10 1 PU / Phil XG Signature P90
Volume und Tone Control.
Neck
Bridge
Schalterpositionen:
3: Bridge Pickup Phasenverdreht
4: Bridge Pickup parallel verschaltet
5: Bridge Pickup seriell verschaltet
Toggleswitch schaltet das Signal an/aus.
Idolmaker 5‘R
Idolmaker Stevie Salas Signature
AK 1974 / AK 1974 S
Phil XG Signature Humbucker
Rotary 6-Way Selector Switch
Position 1 2 3 4 5 6
Manual_FR_CS_2015_D_attatch.indd 28-29 02.06.15 12:10

Colored Oil Finish / Satin Finish (Korpus & Hals):
Eine matte aber transparente Oberäche mit sichtbarer Holzstruktur und betonter Maserung sind die
wesentlichen Eigenschaften des Coloured Oil / Satin Finishs. Hierzu wird die Oberäche entweder in ei-
nem Farbton gebeizt (Coloured Oil Finish), oder das Holz wird Natur belassen (Satin Finish), und mit einer
dünnen Schicht satinmattem Klarlack versiegelt. Dieses geschlossene und nicht färbende Finish verlangt
selbst nach keiner besonderen Pege. Jedoch sollte es je nach einer Verschmutzung mit einem leicht
feuchten Tuch oder einem der zahlreich erhältlichen geeigneten Sprühreiniger aus dem Fachhandel gerei-
nigt werden.
High Polish Finish (Korpus & Hals):
Das High Polish Finish wird durch die Verwendung eines hochglanzpolierten Lackes erreicht. Das Holz
wird gänzlich unter diesem Finish eingeschlossen, die Oberäche ist spiegelglatt und ohne fühlbare Holz-
struktur. Wie auch beim Coloured Oil / Satin Finish beschränkt sich die Pege hier auf optische Aspekte.
Sie können eine Grundreinigung mit einem feuchten Tuch oder entsprechenden geeigneten Sprühreinigern
vornehmen oder auch eine Politur anwenden, die den vollen Glanz des Finishs herausstellt und in der Lage
ist, kleinere Kratzer und Spielspuren zu beseitigen.
Tipps zur Halspege (Natural Oil nish, nur Bolt-in Modelle):
Sie können für alle Hälse, die mit Natural Oil Finish versiegelt sind, unser Warwick Bienenwachs (SP W
50015) verwenden, das in unserem Webshop erhältlich ist. Tragen Sie hierfür das Wachs mit einem Po-
liertuch in kreisenden Bewegungen auf. Warten Sie im Anschluss zwei bis drei Minuten und entfernen Sie
dann den Überschuss mit einem trockenen Poliertuch. Bei Gitarren mit eingeleimten Hälsen verwenden wir
für die Halsrückseite das gleiche Finish wie für den Gitarrenbody. Reinigung und Pege sind identisch.
Tipps für Griffbrettpege:
Alle Griffbretter der Gitarren aus dem Framus Standardprogramm sind unlackiert und benötigen hin und
wieder etwas Pege, um nicht spröde oder stumpf zu werden. Pegen und schützen Sie das Griffbrett mit
speziell für diesen Zweck hergestellten Pegemitteln, diese können Sie über den Fachhandel beziehen.
Bitte halten Sie sich für ein optimales Ergebnis an die Herstellerinformation. Sie können auch unser Bie-
nenwachs für die Pege des Griffbretts verwenden.
Besuchen Sie den Support-Bereich unserer Website für mehr Informationen und Videoanleitungen:
www.framus.de
www.framus.com
30 31
9) Tipps für die Korpus-, Hals- und Griffprettpege
Poliertuch (SP W 50017) Bienenwachs (SP W 50015)
Natural Oil Finish (nur als Custom Shop Opti-
on verfügbar):
Hier können Sie das mitgelieferte Bienenwachs
verwenden. Tragen Sie das Wachs mit einem
Poliertuch in kreisenden Bewegungen auf.
Warten Sie im Anschluss zwei bis drei Minuten
und entfernen Sie dann den Überschuss mit
einem trockenen Poliertuch. Das Wachs soll-
te mindestens zwei Mal pro Jahr aufgetragen
werden, je nachdem wie regelmäßig das Instru-
ment gespielt wird. Häugere Anwendung dient
vornehmlich optischen Zwecken, das Holz wird
so vor Spuren durch Schweiß oder Schmutz
geschützt und über die Jahre glänzender.
Zum öffnen der Abdeckung die Schrauben mit Hilfe eines Schraubenziehers lösen. Die Abdeckung öffnet
sich durch Federdruck automatisch.
Üben Sie mit ihren Daumen leichten Druck aus und die Abdeckung kann leicht entfernt werden.
Das Teil mit Außengewinde in das Gurtloch
stecken.
Beilagscheibe von der anderen Gurtseite über
das Gewinde stecken.
Die Mutter auf das Gewinde schrauben und
mit dem Schraubenschlüssel anziehen.
Drücken Sie den Druckknopf des Security-
locks. Dadurch geben Sie die Arretierung frei
und können den Gurt vom Instrument lösen
oder ihn befestigen.
10) Elektronikfach
11) Security Locks
Alle Framus Gitarren werden mit Warwick Security Locks geliefert.
Montage:
Manual_FR_CS_2015_D_attatch.indd 30-31 02.06.15 12:10

32
12) User-Kit
Mit Ihrer Gitarre erhalten Sie auch das Framus
User-Kit, das nützliches Zubehör beinhaltet:
• Halsstabwerkzeug
• Poliertuch
• 1,5 mm Inbusschlüssel (Modellabhängig)
• 2,5 mm Inbusschlüssel (Modellabhängig)
• 3,0 mm Inbusschlüssel (Modellabhängig)
• Garantiekarte
13) Garantie / Service
Framus gewährt eine 2-jährige Garantie auf alle Musikinstrumente.
Bitte lassen Sie sich zusätzlich als Framus-Nutzer registrieren. Besuchen Sie hierzu unsere Webseite. Un-
ter der Rubrik „Support“ nden Sie den Punkt Produktregistrierung.
Bei defekten Instrumenten wenden Sie sich bitte an Ihren Musikalienhändler.
Technische Änderungen behält sich der Hersteller vor.
Wenn Sie noch weitere Fragen zu Ihrem Instrument haben, können Sie sich jederzeit an uns wenden.
Besuchen Sie unsere Webseite:
www.framus.de
Besuchen Sie unsere Framus Vintage Webseite
www.framus-vintage.de/
Besuchen Sie unsere Distributionsseite:
www.warwick-distribution.de
Custom Shop Anfragen richten Sie bitte an:
Abonnieren Sie unseren Warwick-Newsletter:
www.warwick.de/modules/support/newsletter_register.php?katID=17116&cl=DE
Ersatz- und Austauschteile sowie Pegemittel nden Sie in unserem Webshop:
shop.warwick.de/
Folgen Sie uns auf:
www.facebook.com/warwickframus plus.google.com/113728338790527653581/posts
www.youtube.com/user/warwickofcial instagram.com/framuswarwickofcial/
twitter.com/WarwickFramus www.framuswarwickartist.blogspot.de/
Do not trash.
Dispose of accordingly.
Nicht in den Restmüll entsorgen.
Entsorgen Sie defekte Teile gemäß
den geltenden Bestimmungen.
Weee-Nr.: DE93670540
Family Owned • Solar Powered • Sustainably Manufactured in a Green Environment
Distribution: Warwick GmbH & Co. Music Equipment KG
Gewerbepark 46, D-08258 Markneukirchen / Germany
Phone: +49 (0) 37422 555 0 • Fax: +49 (0) 37422 555 99
Branches: Shanghai/FR China • Dübendorf/Swizerland
Praha/Czech Republic & Slovakia Republic
Warshaw/Poland • Halsham/Great Britain •Nashville/USA
ISO 50001
DIN 14001
DIN 18001
Manual_FR_CS_2015_D_attatch.indd 32-33 02.06.15 12:10
Other manuals for AK 1974
2
This manual suits for next models
13
Table of contents
Languages:
Other Framus Musical Instrument manuals
Popular Musical Instrument manuals by other brands

Allen Organ Company LLC
Allen Organ Company LLC MDS-5 owner's manual

SONIC COUTURE
SONIC COUTURE pan drum user guide

Generalmusic
Generalmusic RealPiano pRP 7 owner's manual

Bigben
Bigben Idance My Piano 1000 user manual

BYO Guitar
BYO Guitar Lunatic Assembly instructions

Allen Organ Company LLC
Allen Organ Company LLC ADC Three user manual