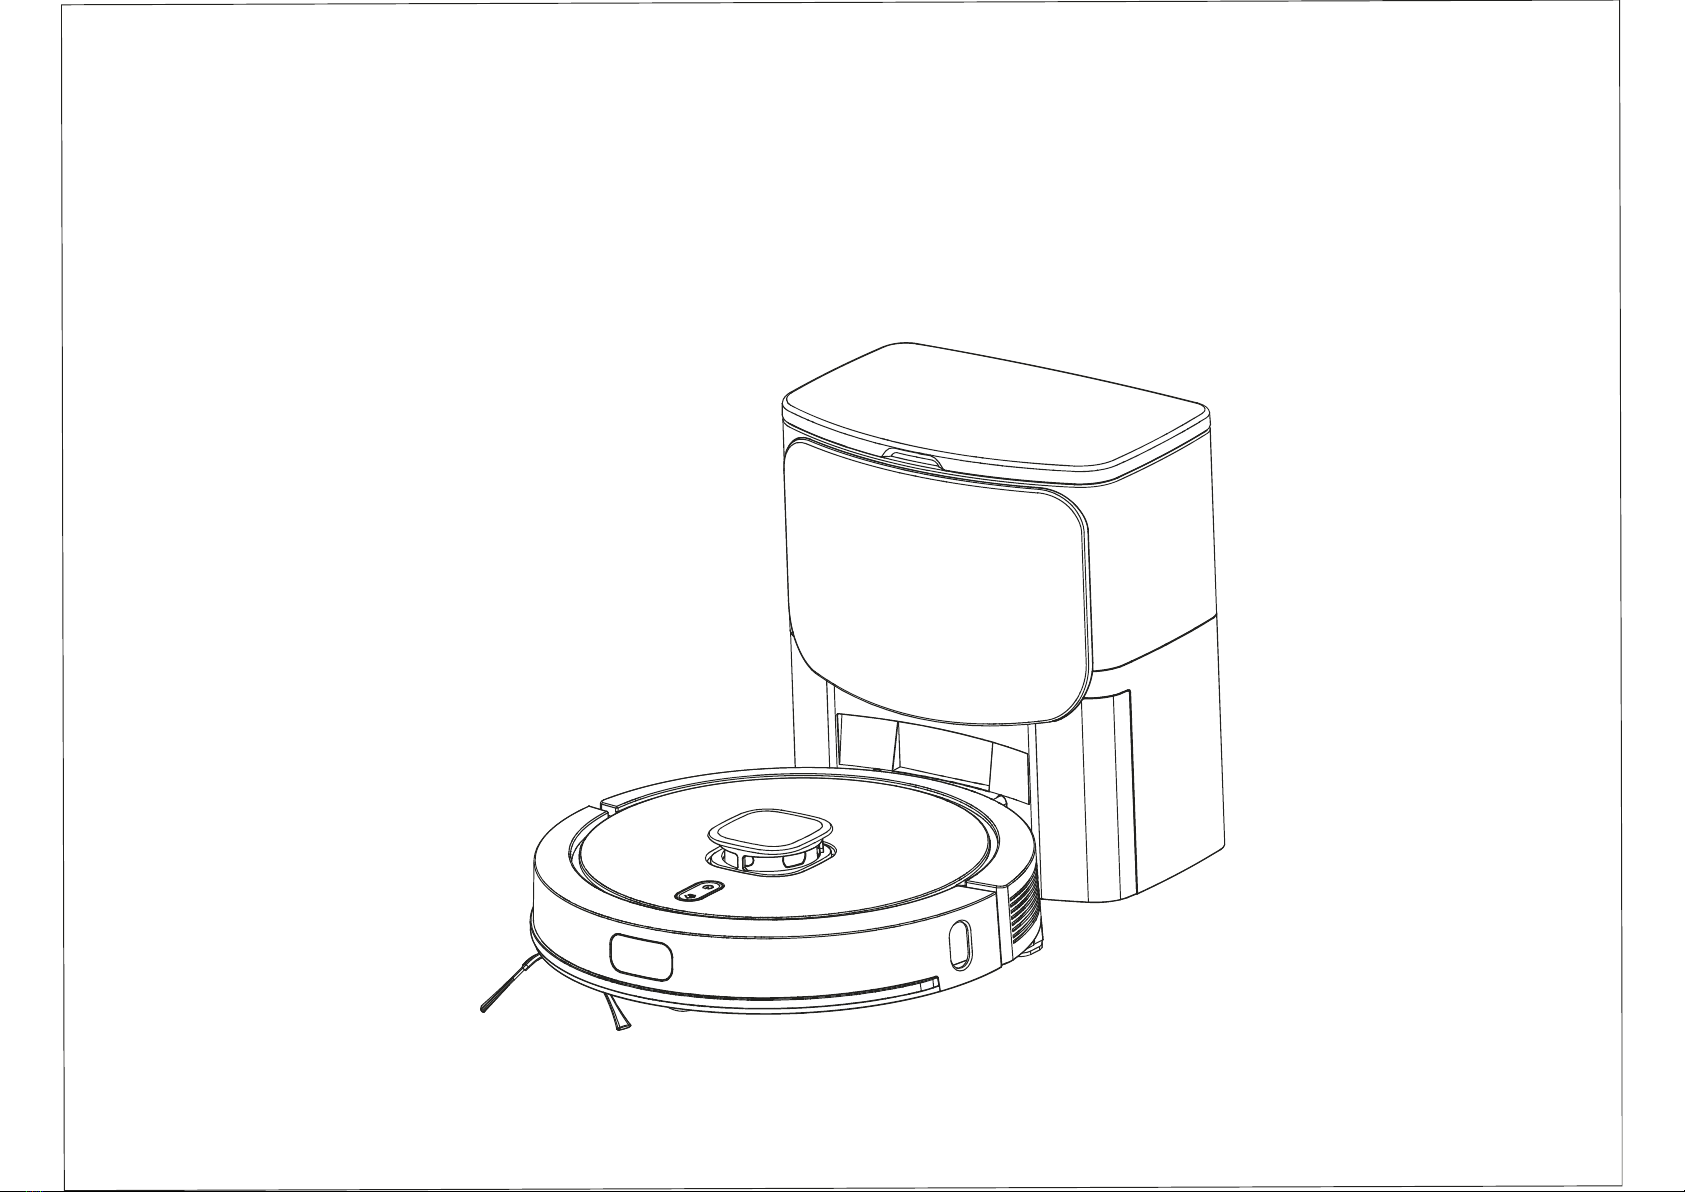
Product Composition/Packaging Contents
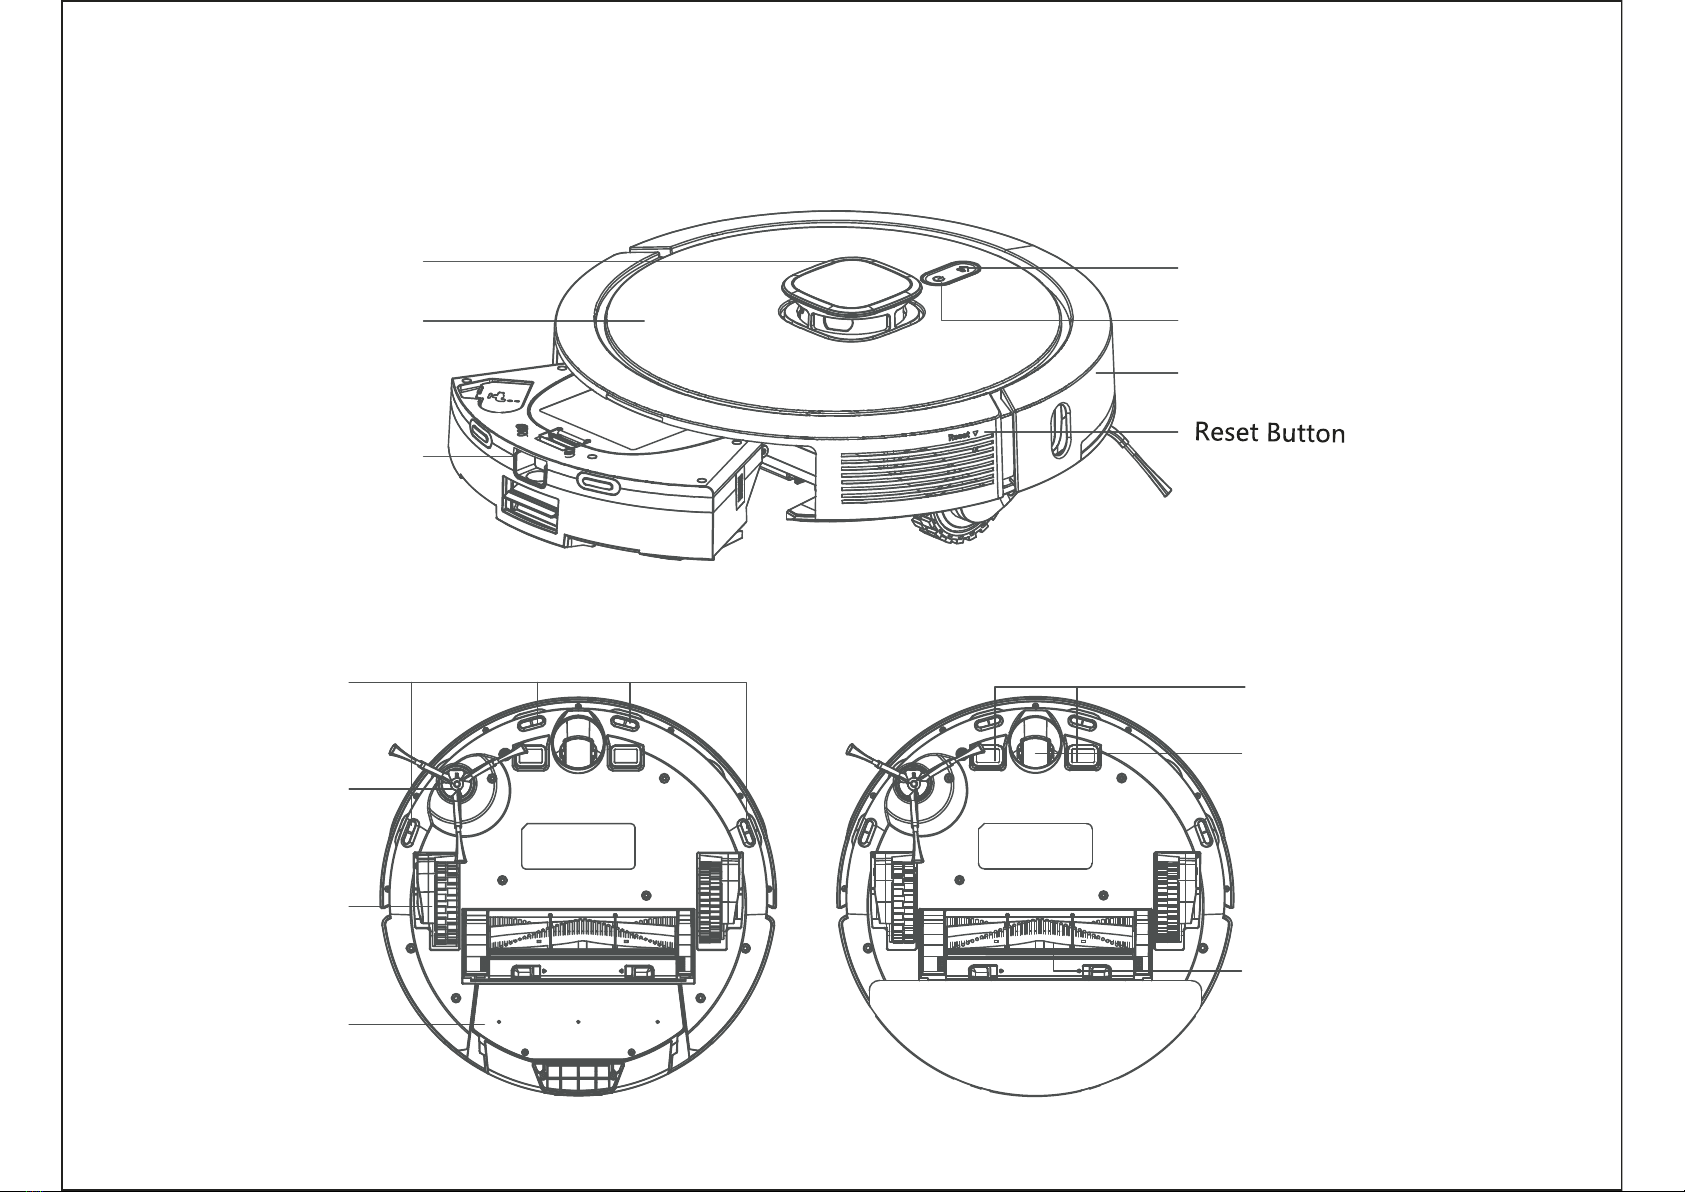
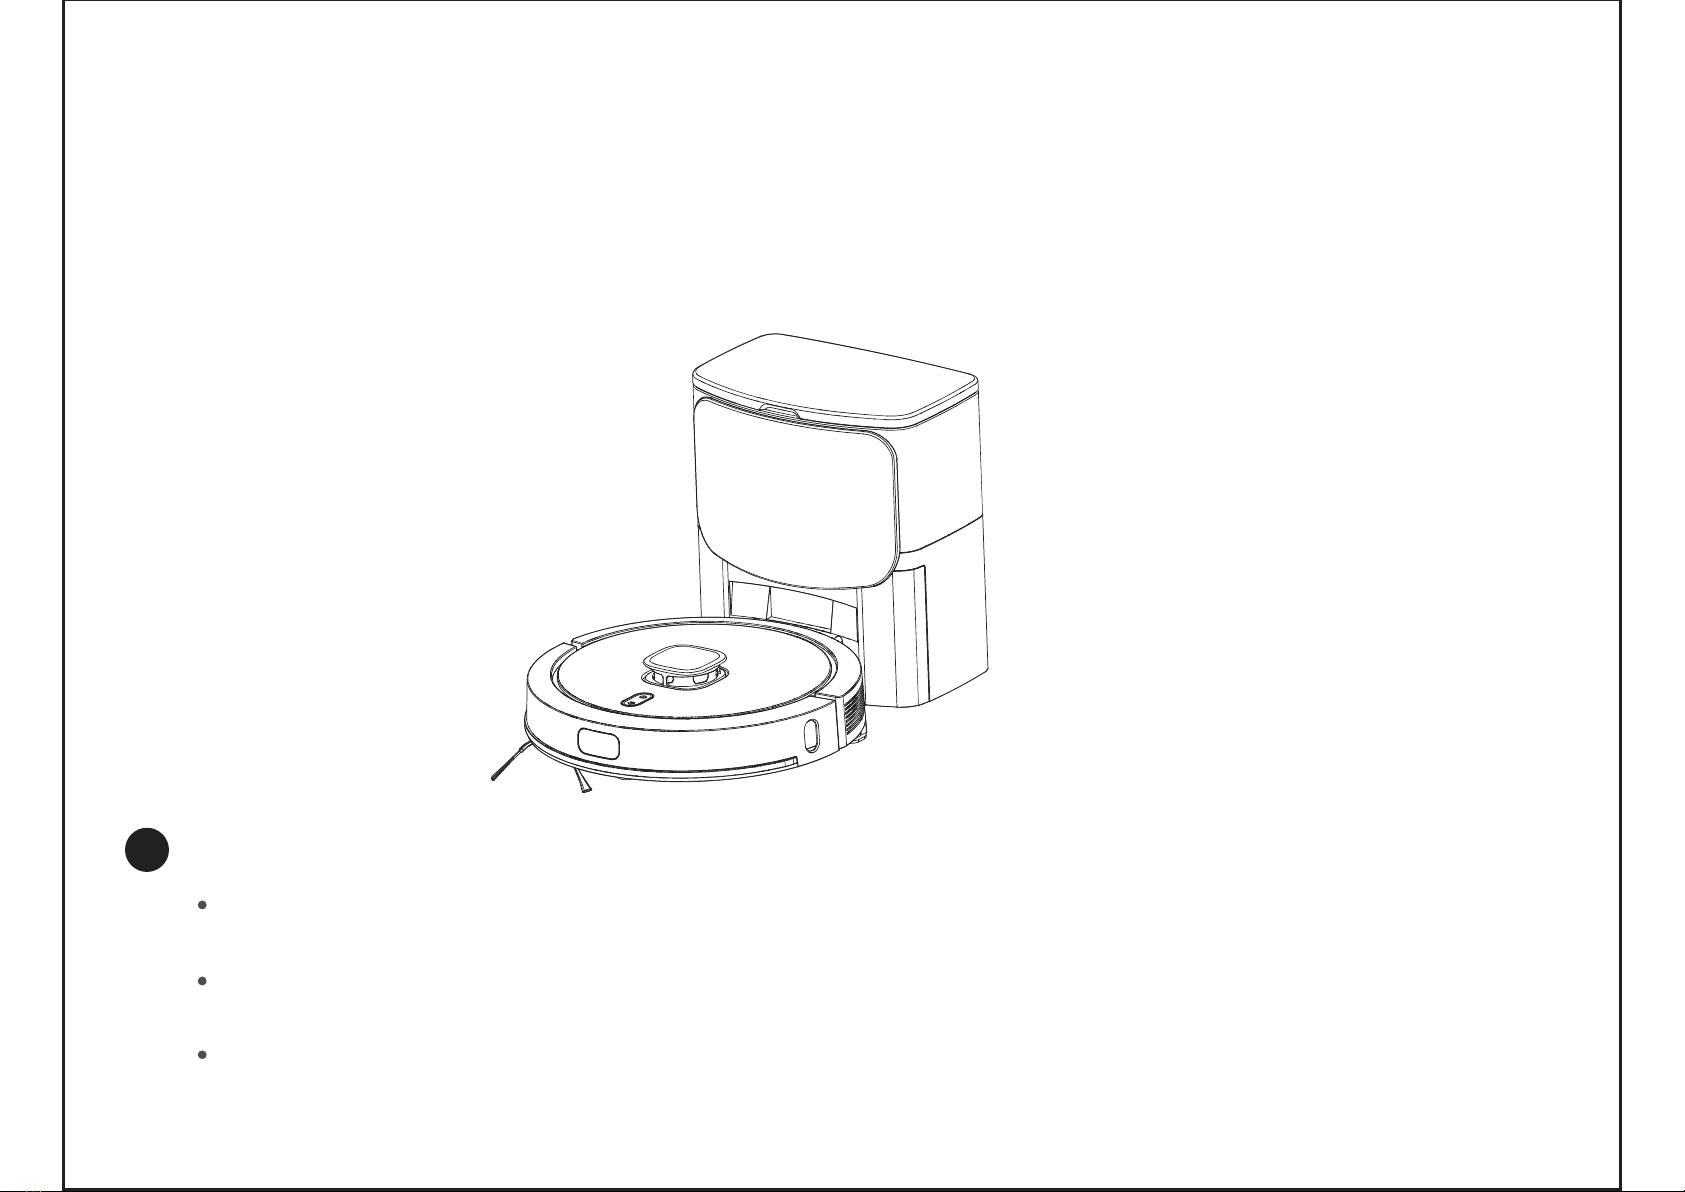
Product Composition/Parts Name
Product Composition/watertank/dustbin and mop assembly
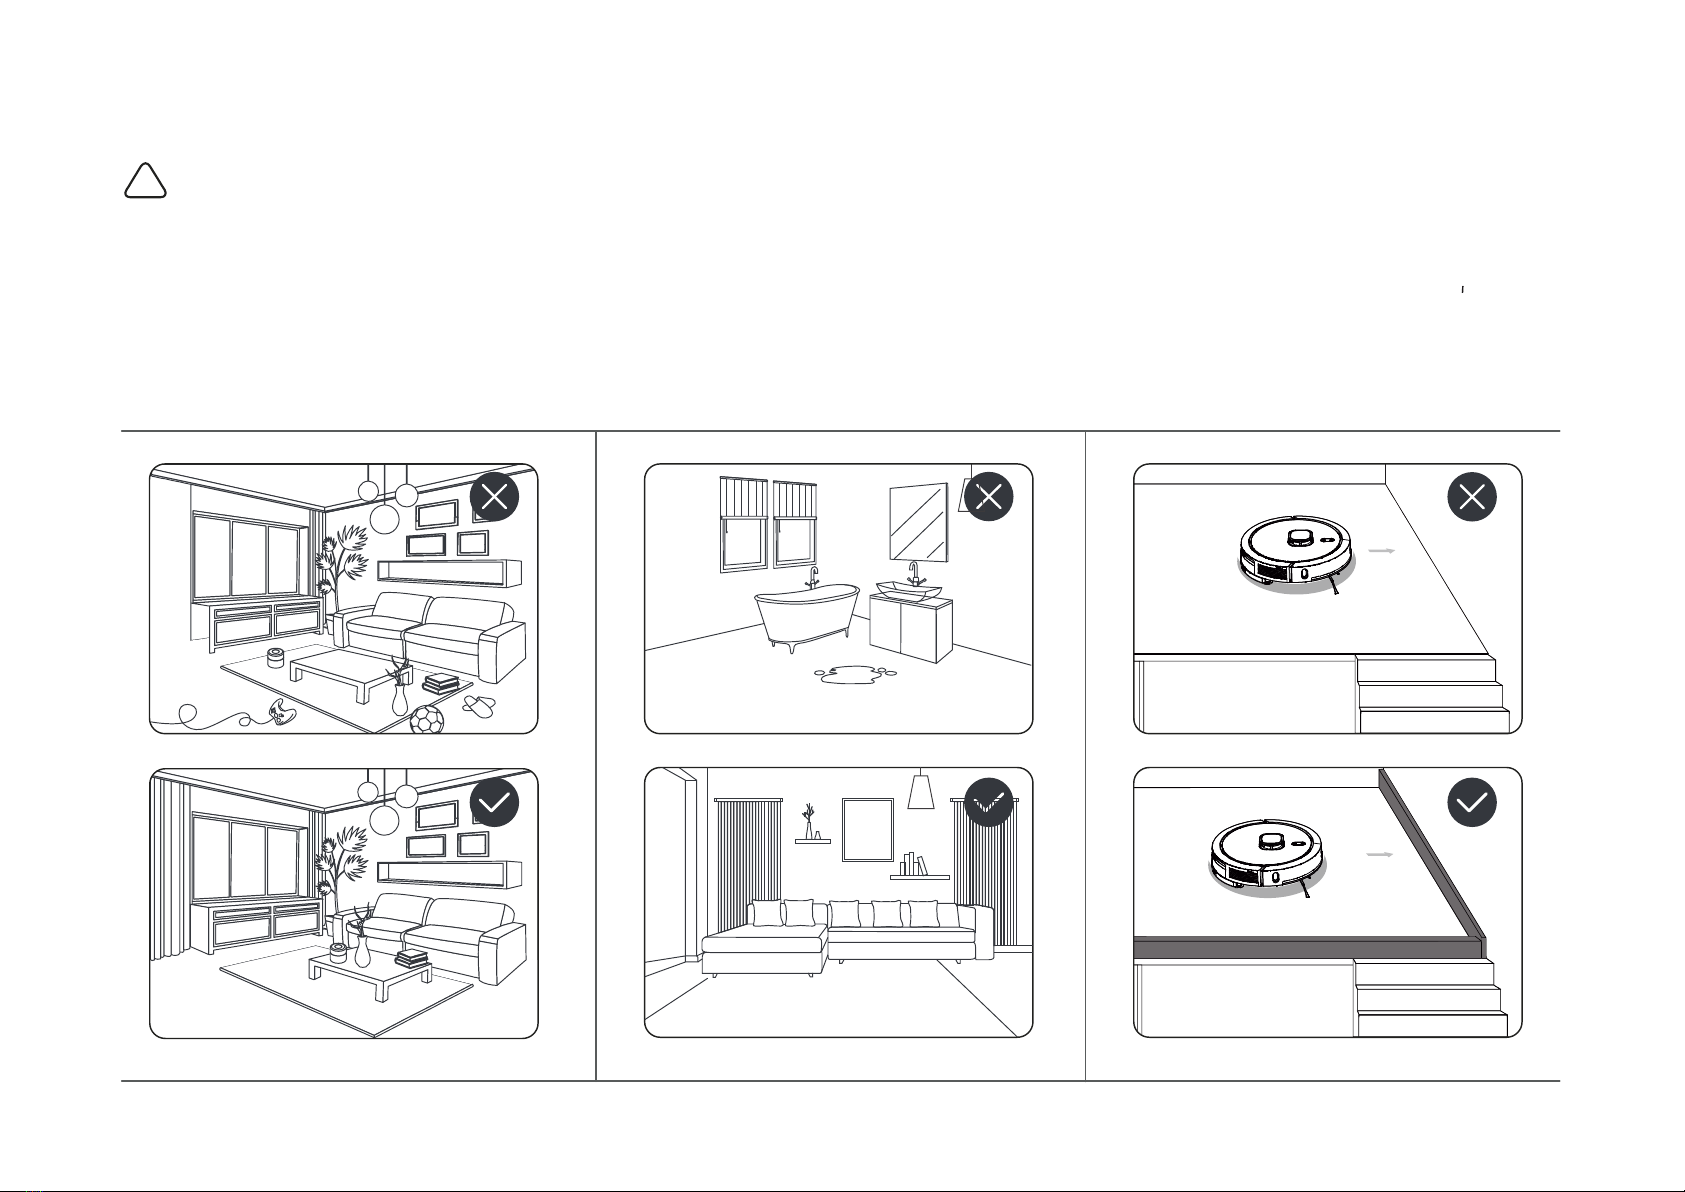
Product Usage/Preparation
Product Usage/Robot Charging
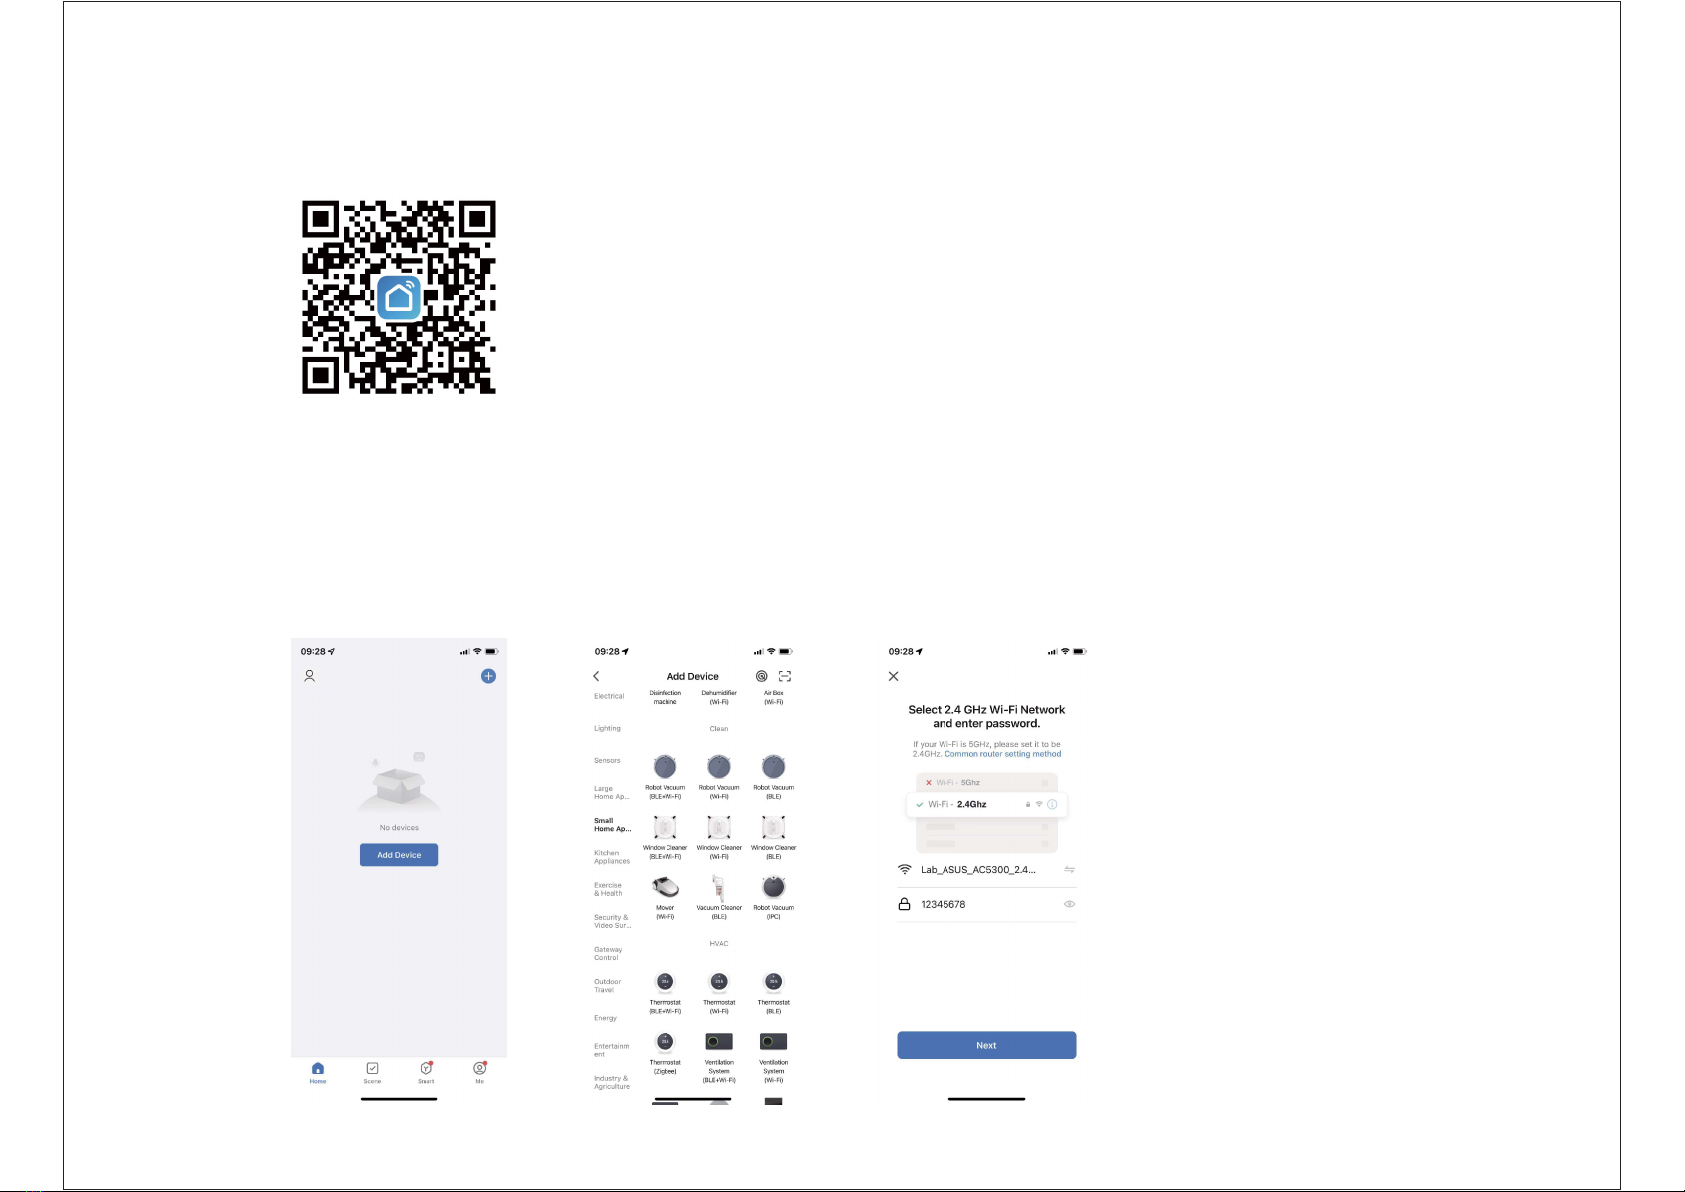
Product Usage/Installation And Network Connection
Product usage/Use instruction
Produt Usage/Mopping
Component Maintenance/Regular Maintenance
Component Maintenance/2 in1 Watertank
Component Maintenance/Main Brush and Side Brush
Component Maintenance/Charging Electrode,Cliff Sensor, Drive Wheel And Universal Wheel
Troubleshooting
Parameters
Contents
2
................................................
......................................................
...........................................................
........................................................
.......................................................
.................................................
.................................
..........................................
...........................................
.......................................
2
3
4
5
7
8
10
...............................................................
14
15
16
17
. .. . . . . .
18
.....................................................................
20
........................................................................
23