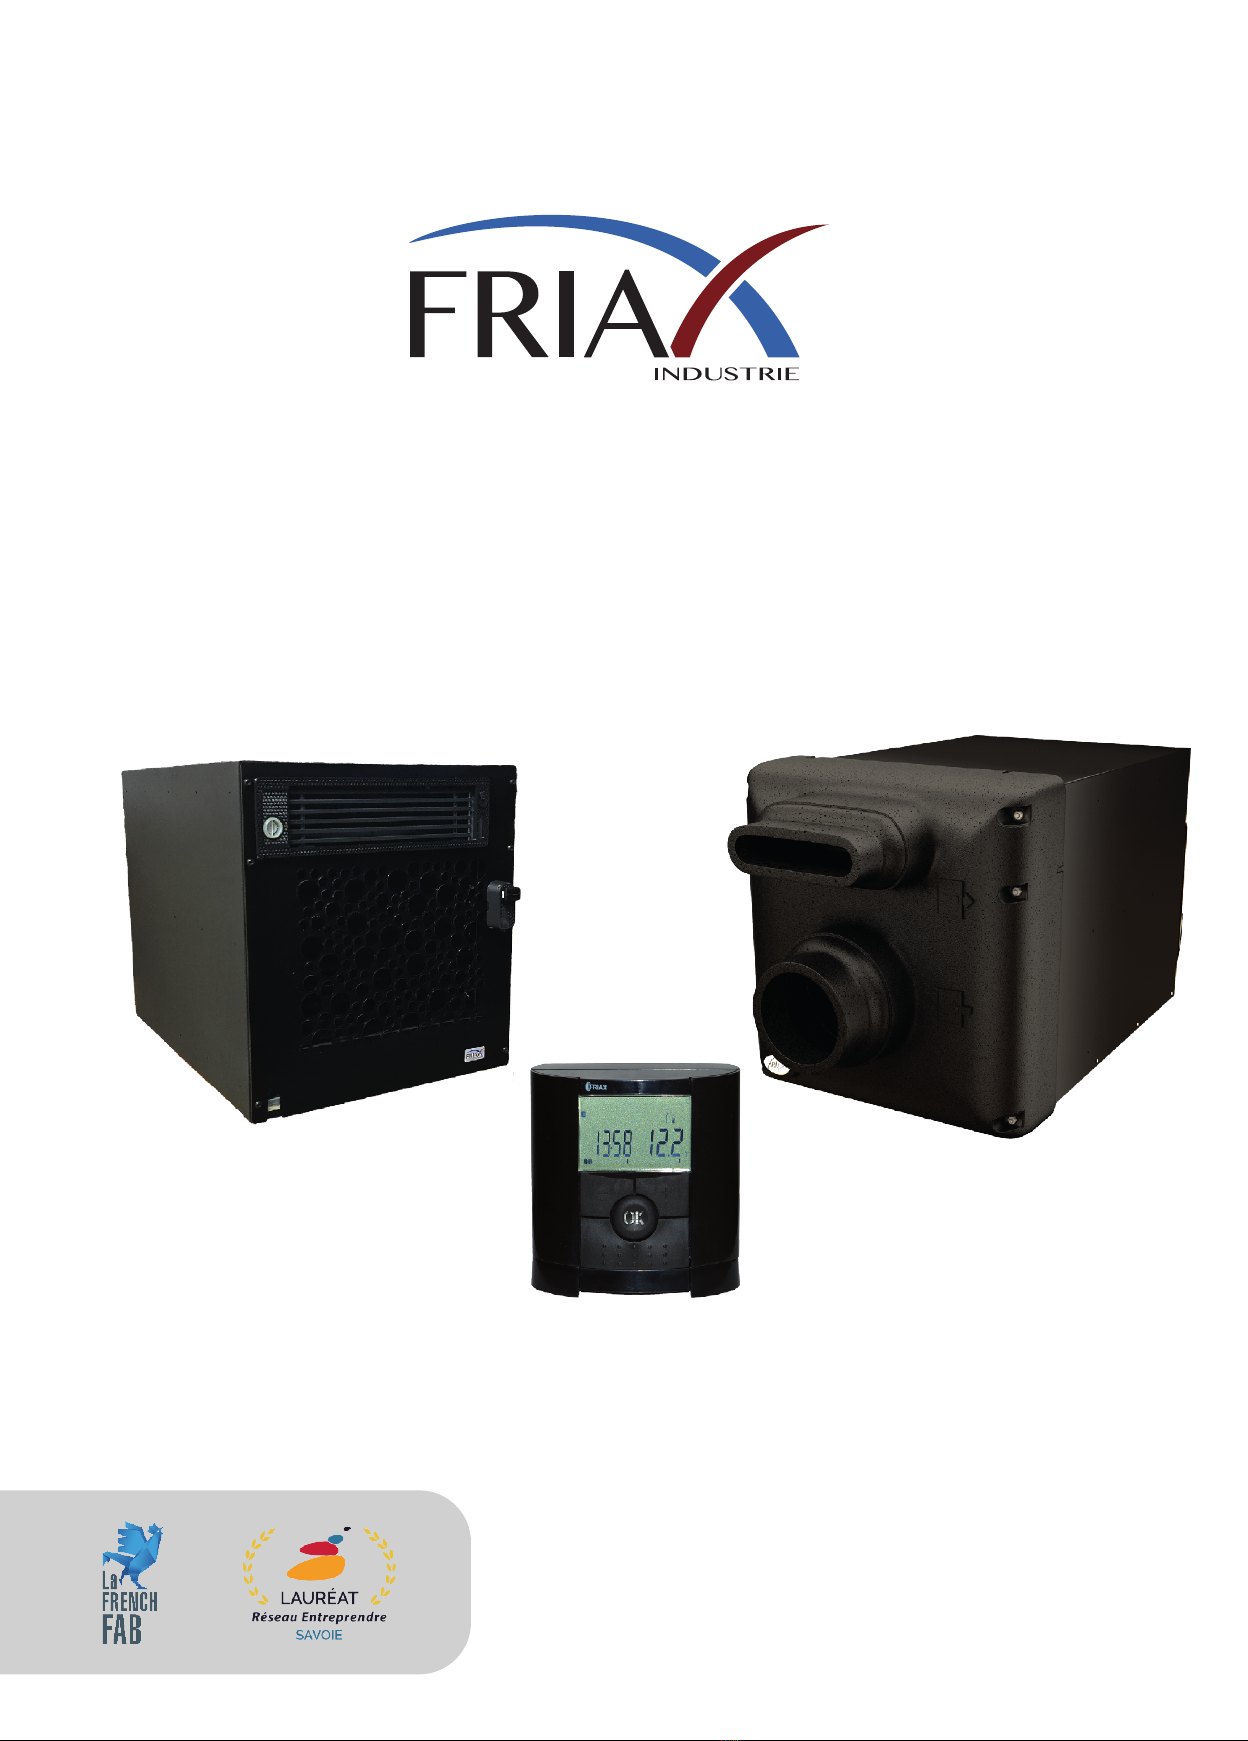
Friax MPCG Genesis Plus User manual
The FRIAX INDUSTRIE ranges are constantly evolving to always
better protect the wine. The information in this document may
change without prior notice to follow our quality commitment.
EN-NT-MPCG-0222
Installation Manual
MPCG
Genesis Plus & Vintage

MPCG
Genesis-Vintage
2
Avertissement Warning
Improper installation or use may result in injury to persons,
property damage, and voiding of the manufacturer's warranty. Non-compliance with instructions
safety and local standards in force during installation or use
manufacturer from any liability.
- Be sure to install the device in a place that is sheltered from bad weather and frost-free.
- Be aware that some refrigerant gases may be odorless.
- Any intervention on a refrigeration circuit must be carried out by an authorized professional
by an accredited organization certifying the competence to handle refrigerant uids.
-- The R290 refrigerant gas complies with European environmental directives.
- This appliance contains approximately 120 to 150 g of R290 refrigerant gas - make sure to install it in a
suciently ventilated room.
- The equipment must be installed in a room with no permanent source of re, such as
for example an open ame, a combustion appliance, an electric heater, etc.
- The stagnation of possible refrigerant gas leaks in unventilated rooms may
result in a risk of re or explosion if the refrigerant comes into contact with a
source of ignition.
- The device must be permanently free of any obstruction to ensure proper operation.
operation and reduce safety risks.
- Do not puncture any component of the refrigerant circuit.
- Exercise caution when handling the equipment to avoid malfunction.
- The device must be installed in accordance with local wiring regulations.
- Make sure that the characteristics of the appliance are compatible with those of the electrical installation.
- Make sure the power outlet is grounded.
- Do not use the device if it is damaged
- Do not connect the power supply until all installation is complete.
- Always switch o the appliance and disconnect it from the mains for cleaning and maintenance.
- Do not put your hands or objects in the air inlets and outlets.
- Do not attempt to repair the device yourself.
- Any use and/or modication not approved by the manufacturer may be dangerous for your
safety and your health.
- This appliance should not be used by children.
- The user must understand and be aware of the potential dangers associated with the use of the device.
- Only use the means and/or tools recommended by the manufacturer for defrosting or cleaning.
- Interventions on a refrigeration circuit operating with R290 must be the subject of a
prior safety check to minimize the risk of an accident.
This product contains hermecally sealed flammable R290 gas
Fire risk / flammable materials
Read the manual carrefully before using the device and keep it for futur reference.
This symbol indicates that the installation manual should be read carrefully.
This symbol indicates that a technician must handle this equipment in referring
to the installation manual.
This symbol indicates that information are available, such as the manual operating
instructions or installation manual.
MPCG
Genesis-Vintage
Your Friax air condioner
MPCG
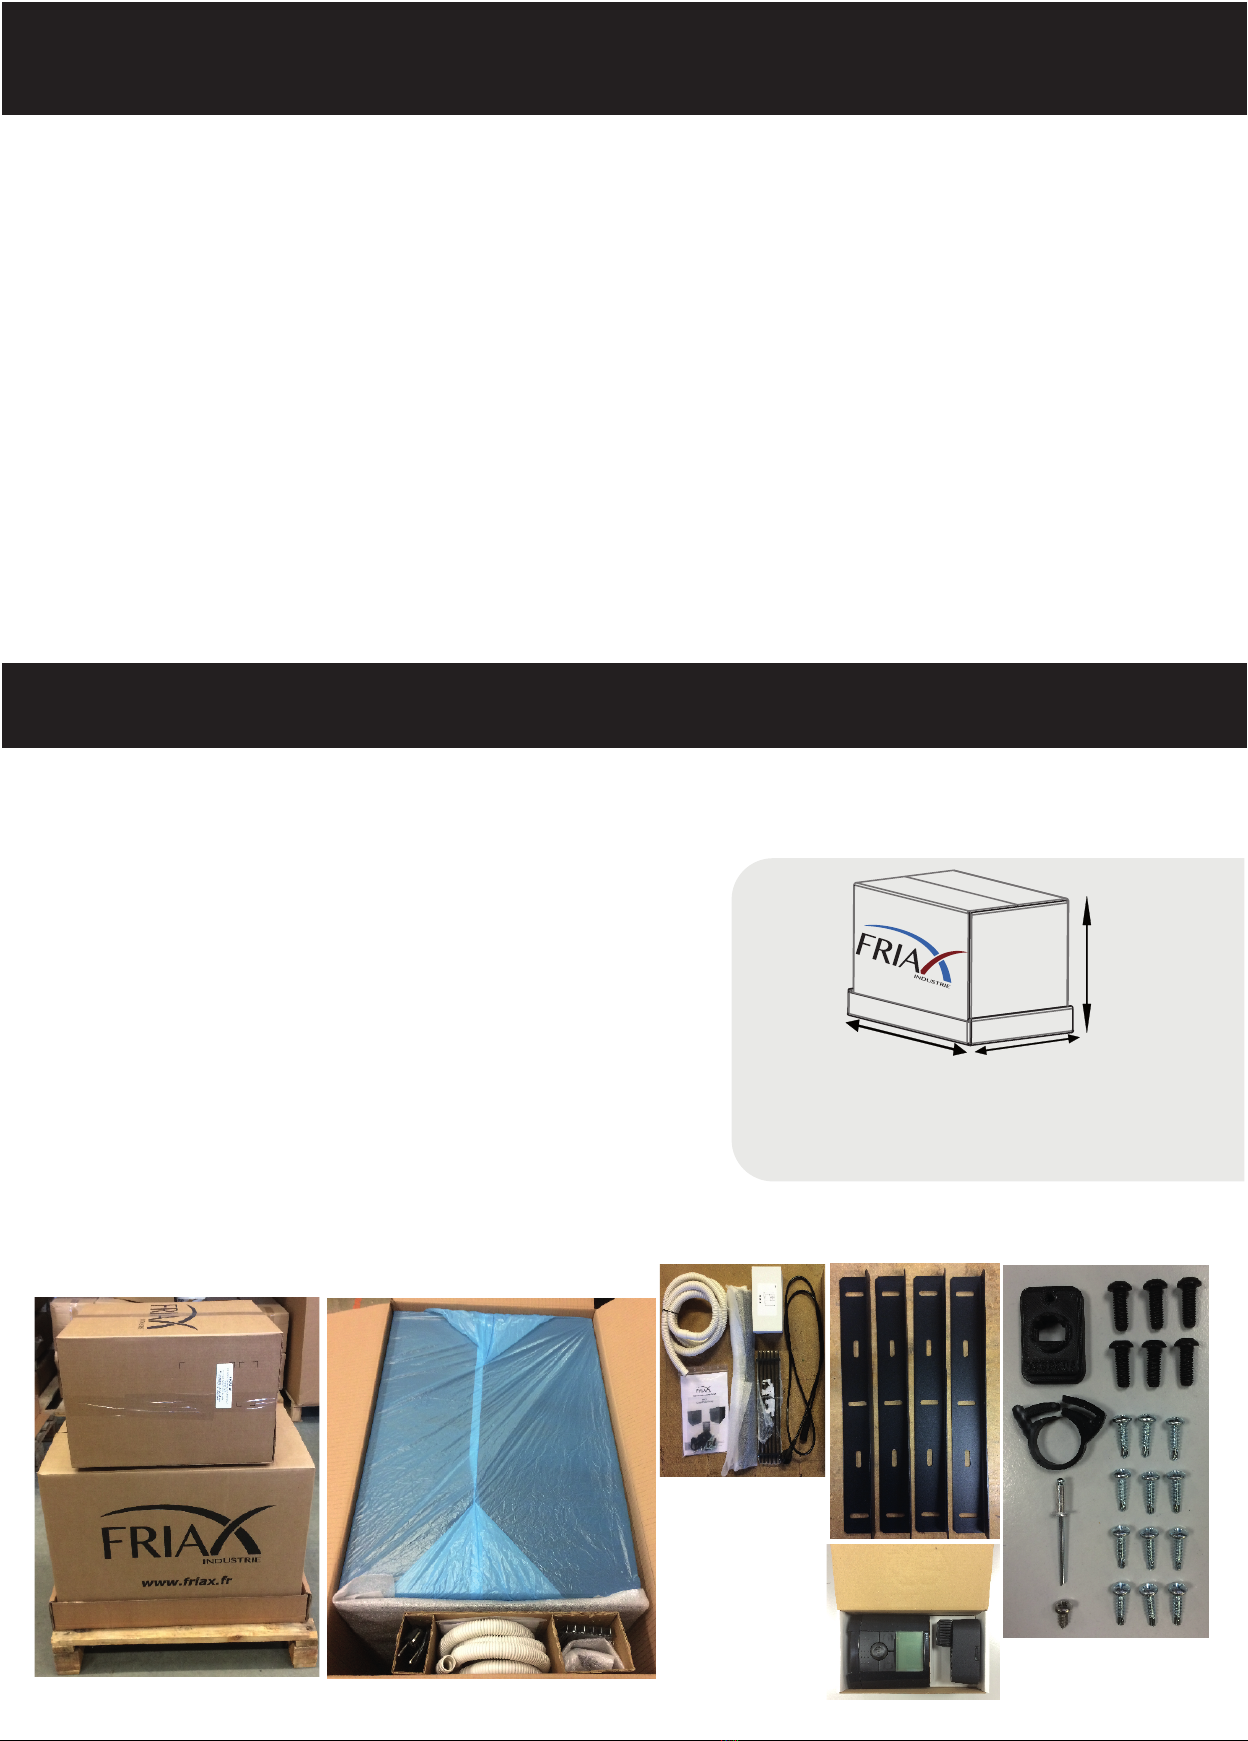
Material recepon
3
We invite you to examine the package upon receipt to detect any damage to the box or missing items. It is
essenal to note your remarks concerning the condion of the package on the carrier's delivery note: they
will be used in the event of damage observed during unpacking.
You will find 2 packages composed as below.
1 package consisng of:
- 1 x Monobloc.
- 1 x Black plexiglass front.
- 1 x remote control box with its probe.
- 4 fixing brackets.
- 1 Protecve grille for ducted facade.
- 1 x power cords.
- 1 x drain tube.
- 1 x bag of accessories.
1 package consisng of:
- 1 x ducted facade.
- 1 bag of accessories.
Dimensions hors palette:
800mm x 600mm x 1000mm ( P x L x H)
60kg
Chill’ loop
P
H
L
THANK YOU for trusng Friax Industrie for the preservaon of your wines. Our air condioners are designed
above all for the comfort of wine, but do not overlook your comfort. Once installed in the cellar, you will
forget it... It is much later, while tasng a good bole, that you will appreciate the perfect mastery of the
aging condions that it took to allow your wine to express itself fully. … aer all this me !
Please read this user manual carefully. It will allow you to understand and master the operaons to install and
configure your air condioner.
Sudden changes in temperature affect wine by causing random aging and irreversible degradaon of aromas.
Cellars that are too humid degrade the labels, parally reducing the value of the precious boles. Cellars that
are too dry deteriorate the corks, allowing air to enter the boles.
Air condioning to control the atmosphere of your cellar is an essenal element in preserving the investment
that wine represents. Your Monobloc Friax is an assurance of the longevity of boles over me.
Genesis-Vintage
Add 300mm to the Height for
the addition of a 2nd facade

* Insulation of the ceiling and the walls between 60 and 80 mm of PU for a device installed in the wall of the
cellar
** under the following conditions: 12°C in the cellar / 32°C outside.
Genesis-Vintage
Genesis-Vintage
Summary
Power Informaon
In order to select the right power for the Friax wine cellar air condioner, it is essenal to
take into account the thermal balance of the room to be air-condioned to avoid undersizing
the device and air-condioning a cellar which will be energy-intensive.
4
MPCG
MPCG
Good insulation
Medium insulation
No insulation
2302001224810 20 40 60
VOLUME (m3) 30 82 100 140 170
90
Modèle 30 Modèle 48
*Wall and ceiling insulation between
60 and 80 mm of polyurethane
12°C
32°C ext.
More details : www.friax.fr/selecon/
Technical data / Principle of operaon
Dimensions
Installaon
6
7-11
Installaon Ducted facade - Fan speed adjustment 12-18
5
wireless remote control
Commissioning - setpoint adjustments
User menu sengs
21-22
24-25
Code Alarms 26
19-20
Pairing and regulator reset 27
28-29
30
31
Manufacturer's declaraon
Air condioner maintenance
Electrical diagram and warning
Technical data
5
Genesis-Vintage
MPCG
kg
45 49
Weight
SPC EVX2 30 48
W
780** 1100**
W
Heang capacity
Cooling capacity
800 800
R290
Cellar side airflow
W / A
365W / 2.3A 508W / 3.2A
510
T cellar= +12°C - Text= 32°C
Intensité Max Mode Froid / Chaud A
4 / 4.4 5 / 4.4
m3
30* 48*
Indicave volume to be condioned
V
230V / 50Hz 230V / 50Hz
Power supply
Power absorbed / Intensity compressor
Outdoor side airflow
Power cable length
Outdoor operating temperature
Setting the cellar temperature °C
°C
m3/h
m3/h
m
400 400
405
2
2
32 32
8 - 18 8 - 18
MPCG
Genesis - Vintage
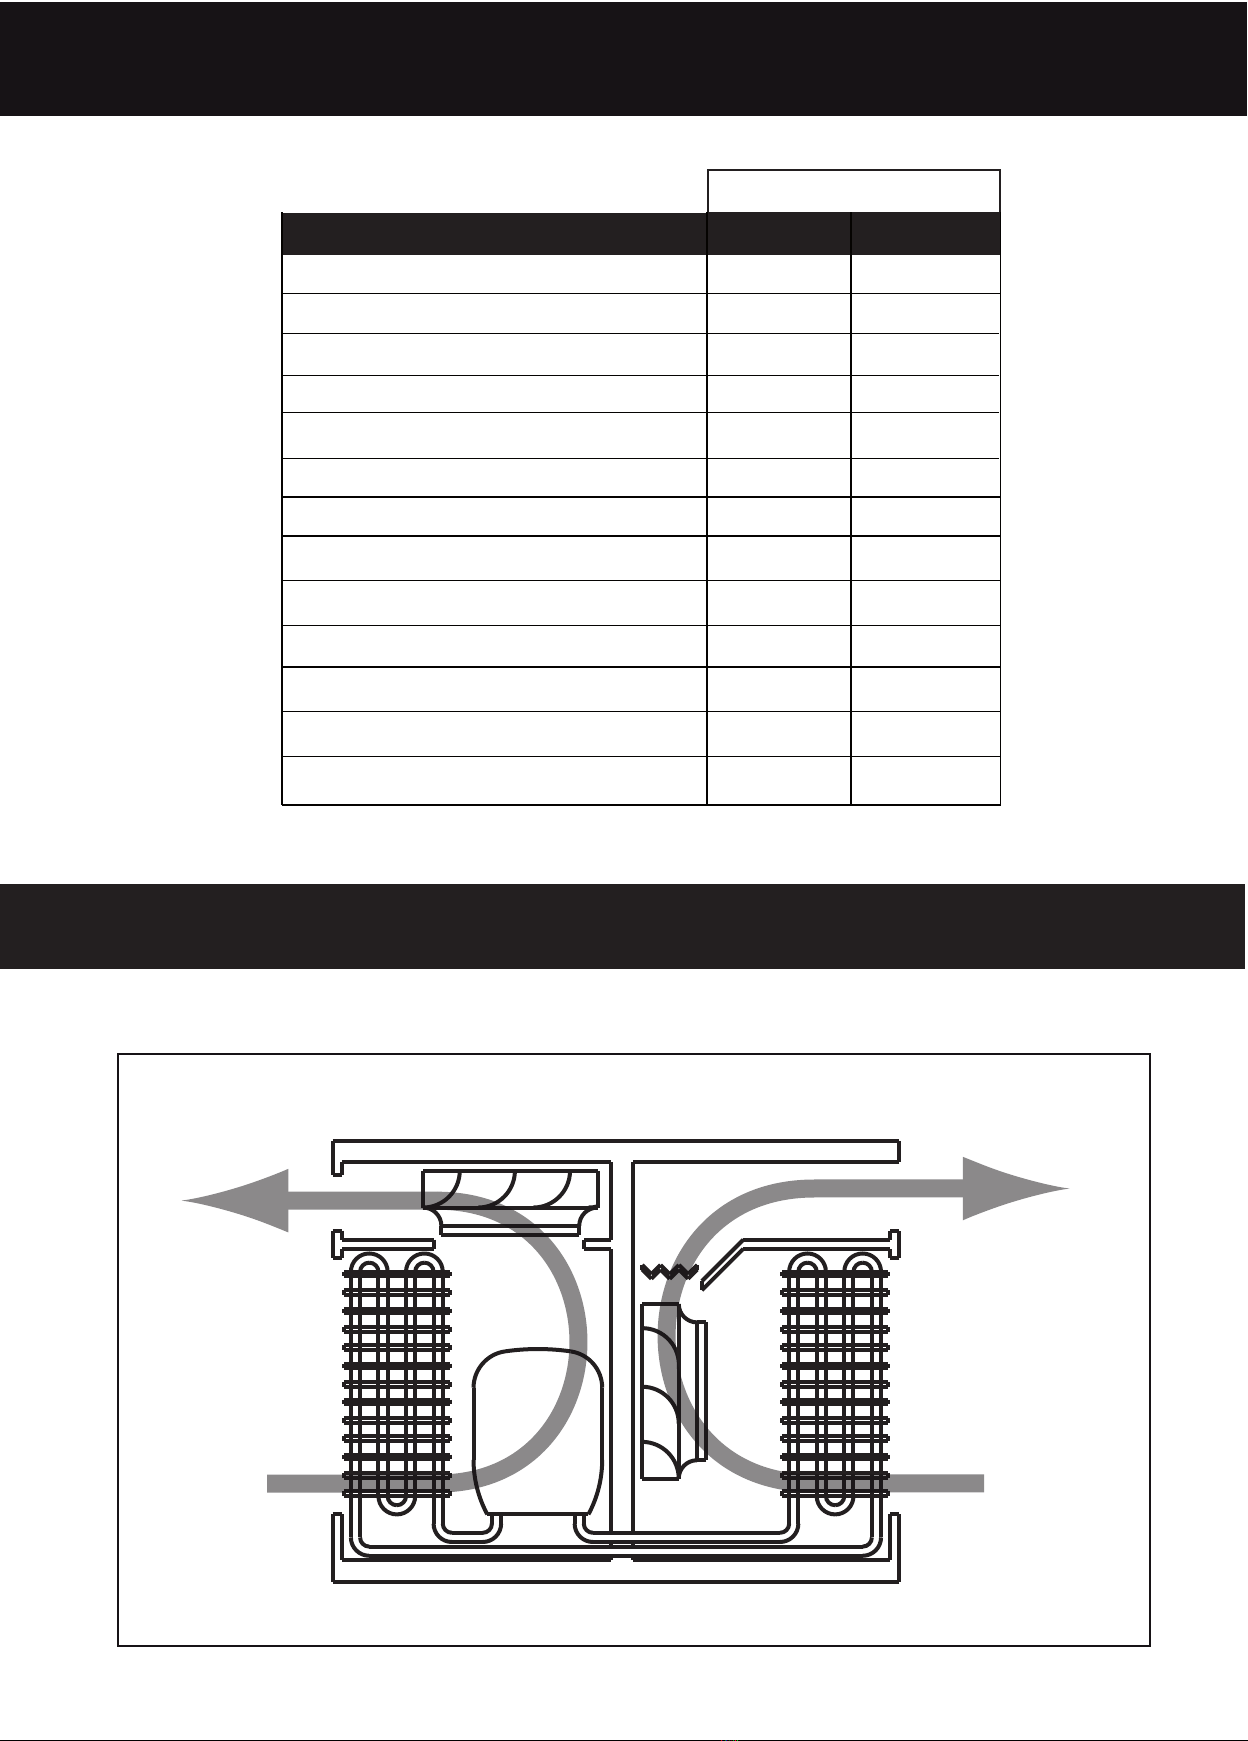
Principle of Operation
Outside
32°C
Cellar
12°C
Condenser Evaporator
KCH
Compressor
gr
Gas charge
120 150

6
Genesis-Vintage
Dimensions
MPCG
Drain
connecon Ø 16
Power supply / fuse holder /
on-off switch
Cellar interior
Evaporator
cellar exterior
Condenser
Water supply for
humidifier on Vintage
models
Connecon: 20/27
480
865
939
83.5
39.5
449
824
898
470
500
581
1170
470
502
1021
IN mounting
OUT mounting
IN/OUT mounting
293
293

7
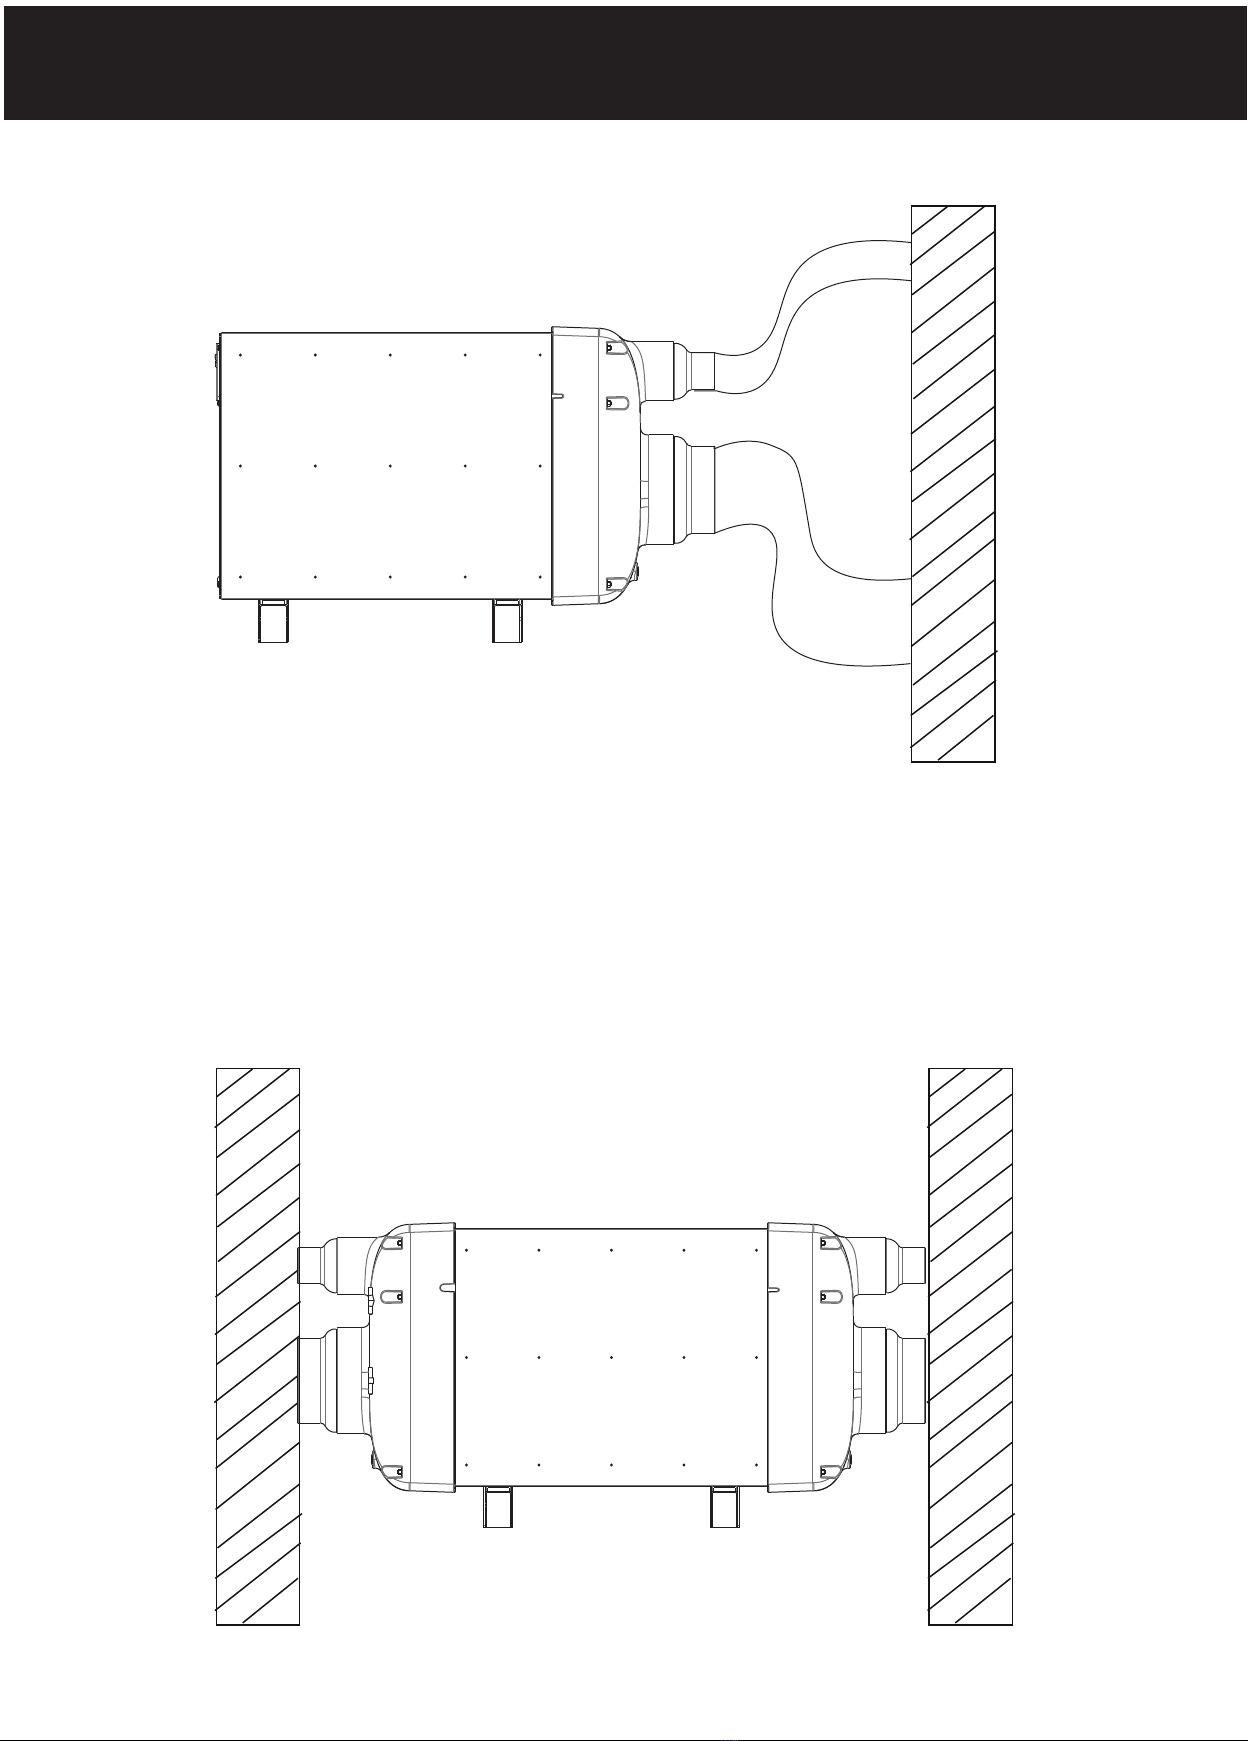
Installaon
Installaon through the wall
- The air condioner must be installed in
an open place.
- In order to have a perfect diffusion of
the air, it is advised to install the air
condioner in height.
- Any natural and mechanical venlaon
is to be avoided in the cellar.
- Ensure that the hot air is expelled into a
venlated and sheltered room.
- Check the solidity of the wall on which
the appliance will be fixed.
485 mm
454 mm
Côtes de réservaon
570mm Maximum
Genesis-Vintage
Installaon
MPCG
The body of the monobloc is designed to
be fixed at 5 different recess depths.
Setup 1,
Angle inside the cellar
Setup 3,
Angle outside the cellar
Setup 2,
Angle outside the cellar
Conguration Mounting IN duct side condenser

8
Genesis-Vintage
Installaon
MPCG
Conguration Mounting IN duct side condenser
Setup 5,
Angle outside the cellar
Setup 4,
Angle outside the cellar
In some posions and depending on the support, it
may be necessary to add reinforcements to prevent
the device from pping
Conguration Mounting IN duct side condenser
Installaon on KS2M support inside the cellar.
Side
Outside
9
Genesis-Vintage
Installaon
MPCG
Conguration Mounting OUT duct side evaporator
Conguration Mounting IN - OUT ducting on the evaporator / condenser
side
Côté Cave
Cellar side
Side
Outside
Installaon on KS2M support outside the cellar.
Installaon on KS2M support outside the cellar.
L’appareil est fourni avec un gabarit
mural sous forme d’emballage. Ce
gabarit a pour objecf de vous aider à
posionner le frigorifère.
L’orifice de Ø75 est indiqué ainsi que
l’emplacement des quatres vis. Les
cotaons sont également indiqués afin
de préparer au mieux votre façade à
accueillir le frigorifère.
10
Genesis-Vintage
Installaon
MPCG
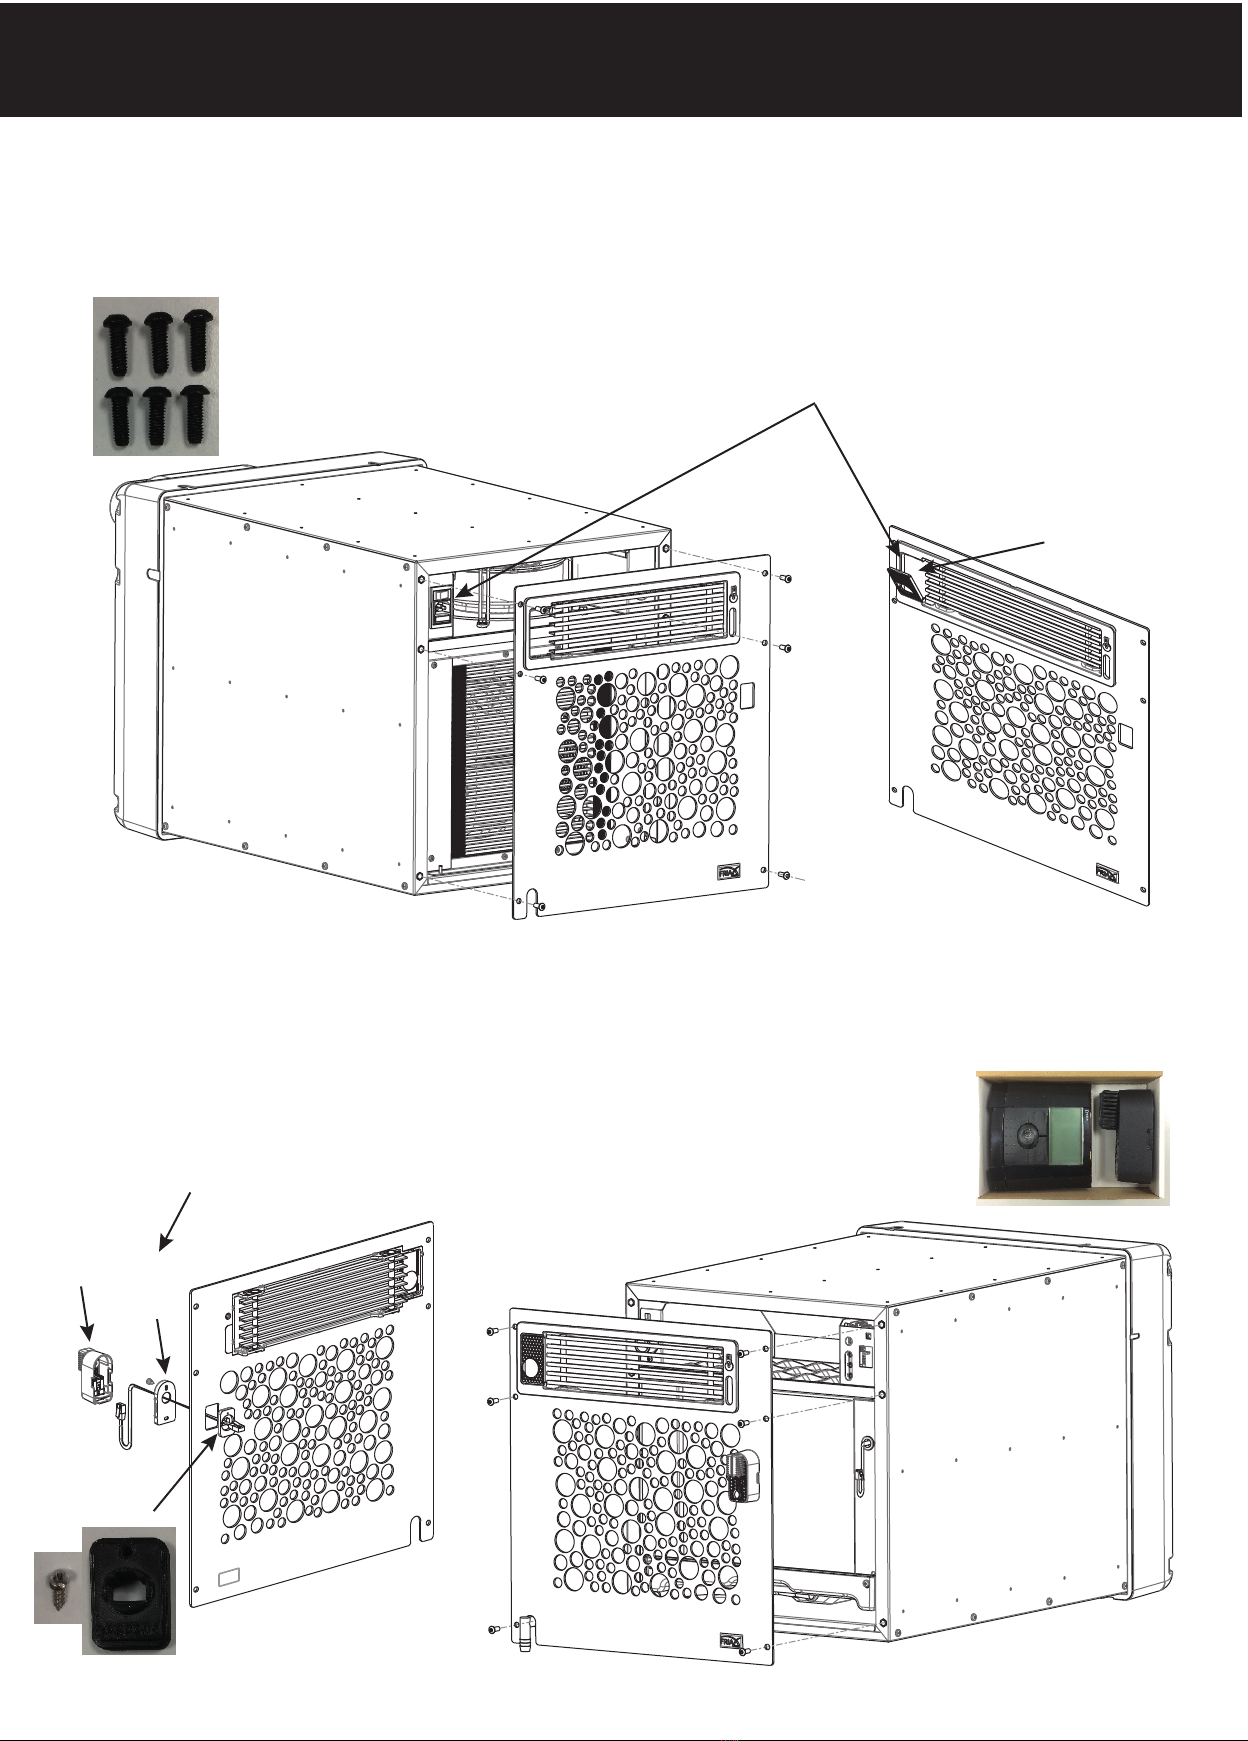
After having chosen the installation conguration of your monobloc, you will need to install the front panel
in black plexiglass according to your conguration, in IN - OUT conguration it will be of no use to you, in this case
keep it aside.
1-Installation on the condenser side in OUT mounting.
2-Installation on the condenser side in IN mounting.
In this conguration unclip the cache
passage of the solenoid valve, to let the
passage of the switch.
Unclipping
rear
In this conguration it will rst be necessary to x the probe located in the box of the remote control
and connect it to the RJ12 coming out of the device before xing the front panel to the device.
Unclip the base of the probe by pulling it backwards and x it
using the screw provided on the probe blocker.
Probe
support
Probe
Probe blocker
screws to use
This manual suits for next models
1


