Fritz Wilhelm Hub & Spoke Round Pavilon Manual

Fritz Wilhelm, LLC
welldressedtent.com
Setup Instructions – Hub & Spoke Round Pavilon
Introduction
This article will guide you through the steps for setting up one of my round pavilions. It will likely
work well, though with some variation in details, on any hub & spoke round pavilion with detachable
walls. If your walls are attached, this article may be of some use, but the technique presented will
probably require some modification.
Preparation
1. Choose wher you want the center of your tent and set the
baseplate there.
. Lay the out set-up ropes.
1. Pace out about 13 feet from the base plate.
. Drive a spike most of the way into the ground. (angled away
from the baseplate).
3. Tie one of the set-up ropes to it using a tautline hitch.
4. Repeat for the rest of the set-up ropes.
3. Lay the roof fabric on the ground with the peak at the
baseplate.
4. Assemble the center pole.
Slide the hub on the upper section, add the disk and spike to the top, and assemble the two halves.
5. Assemble the roof
1. Slide the center-pole up inside the roof.
. Put the top spike up through the hole in the center of the
roof.
3. Add the standoff nipple to the spike. (this helps keep the
set-up ropes from rubbing on the tent roof)
4. Slip the eyes of the set-up ropes over the spike.
© 01 Gene Eisele pg 1 of 5

Fritz Wilhelm, LLC
welldressedtent.com
Setup Instructions – Hub & Spoke Round Pavilon
Raising the Roof
1. Stand the center pole up. You can do this in stages by planting the bottom on the ground and
leaning the pole on the set-up ropes.
. Put the base of the pole into the base plate.
3. Adjust the tension on the guy-ropes to get the pole vertical. Don't go crazy on this, the ground
probably isn't perfectly level anyway.
4. Insert the first spoke.
1. There is a round end and an angled end to each spoke. Holding the
spoke vertically with the round end up, slide the spoke up along the
center pole, inside the canvas.
. Set the angled end into a pocket in the eaves of the roof.
3. Push the roof out with the spoke until the spoke is horizontal.
4. Put the round end into a hole in the hub.
5. Double check that the spoke is seated in the hub and that the angled
end slopes the same way as the roof.
5. Insert the rest of the spokes.
1. Start by skipping every other spoke.
. You can skip two or three spokes each time but...
3. Make sure you skip the same number of eave pockets as hub holes.
Note for short people: (a friend of mine claims to be "fun-sized"): You can
put a step-stool next to the pole. Getting a spoke into a pocket isn't too tough
and the step-stool will let you reach the hub. As you work, don't move your
step-stool. Instead, turn the tent using the spokes as handles.
© 01 Gene Eisele pg of 5

Fritz Wilhelm, LLC
welldressedtent.com
Setup Instructions – Hub & Spoke Round Pavilon
Hanging the Walls
1. Loop the wall loops over the toggles in the roof.
(“fun-sized” people, set your step-stool in one
spot and rotate the tent)
. Close the doors. If you don't toggle the doors
closed now, you will probably stake the walls
down such that you can't close the doors later.
3. Stake down the walls.
1. Start by skipping every other stake (skipping three works even better).
. Only drive the stakes in part way. (you may want to adjust them later)
3. Step back and take a look.
1. Is the tent pulled out evenly all around?
. Is the pole more or less vertical and the
walls the same distance from the ground
all around?
4. Adjust stakes as necessary.
5. Add remaining stakes. You want a moderate
amount of tension along the bottom edge of
the wall; not floppy, but not taut either.
6. Drive all the wall stakes down to the ground.
7. Drop any set-up lines that might be a trip hazard. (The walls will hold the tent up.)
8. Open the doors, move in, and enjoy.
© 01 Gene Eisele pg 3 of 5

Fritz Wilhelm, LLC
welldressedtent.com
Setup Instructions – Hub & Spoke Round Pavilon
Strike
1. Make sure that all four set-up lines are set.
If you forget to do this, you my drop your tent and damage the hub
and/or some of the spokes.
. Go inside and take out the spokes.
I find it easiest to take out every other one first and then pull the rest.
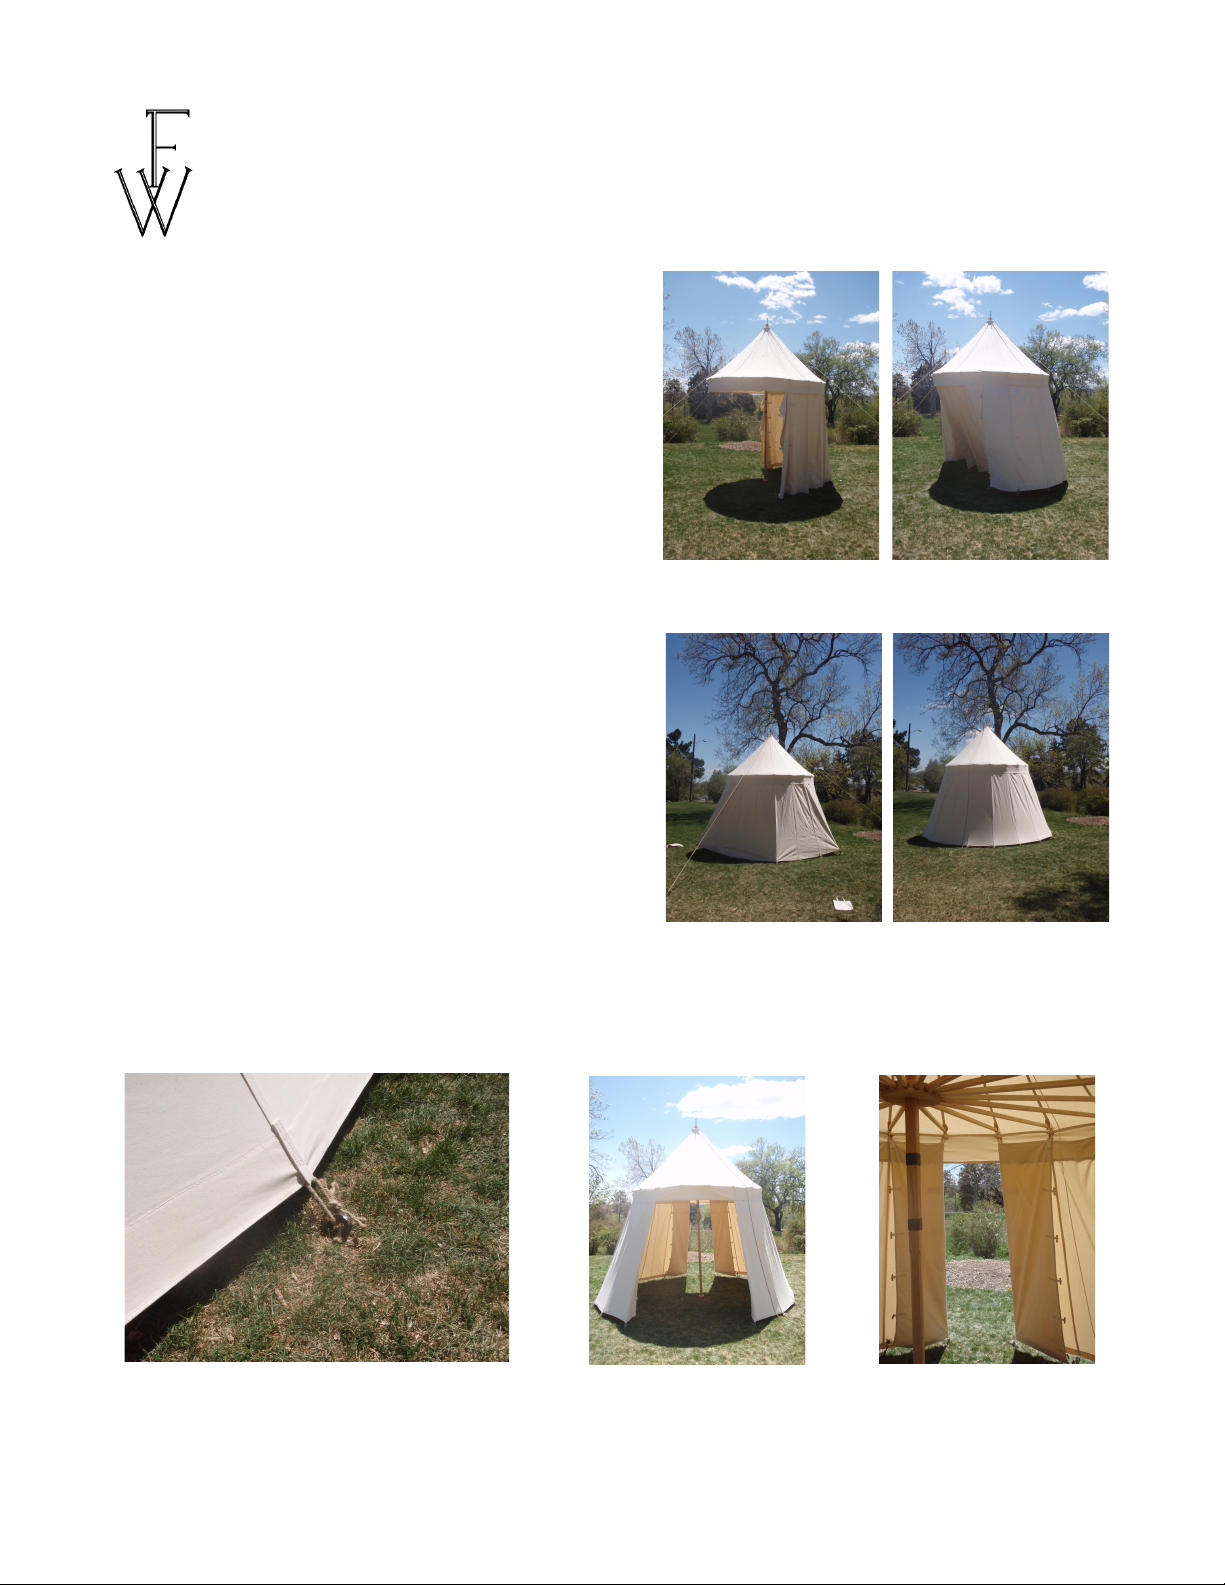
3. Pull all the wall stakes and put them in the stake bag.
4. Remove and fold the walls.
1. Fold them accordian style, not rolled. It's much easier to set-up next
time this way.
. If you have two people, have one undo the toggles and hold the top edge of the wall, while
the other one gathers the stake loops. Stay in sync with each other and you can fold the walls
without them ever touching the ground (nice in mud or dry grass areas)
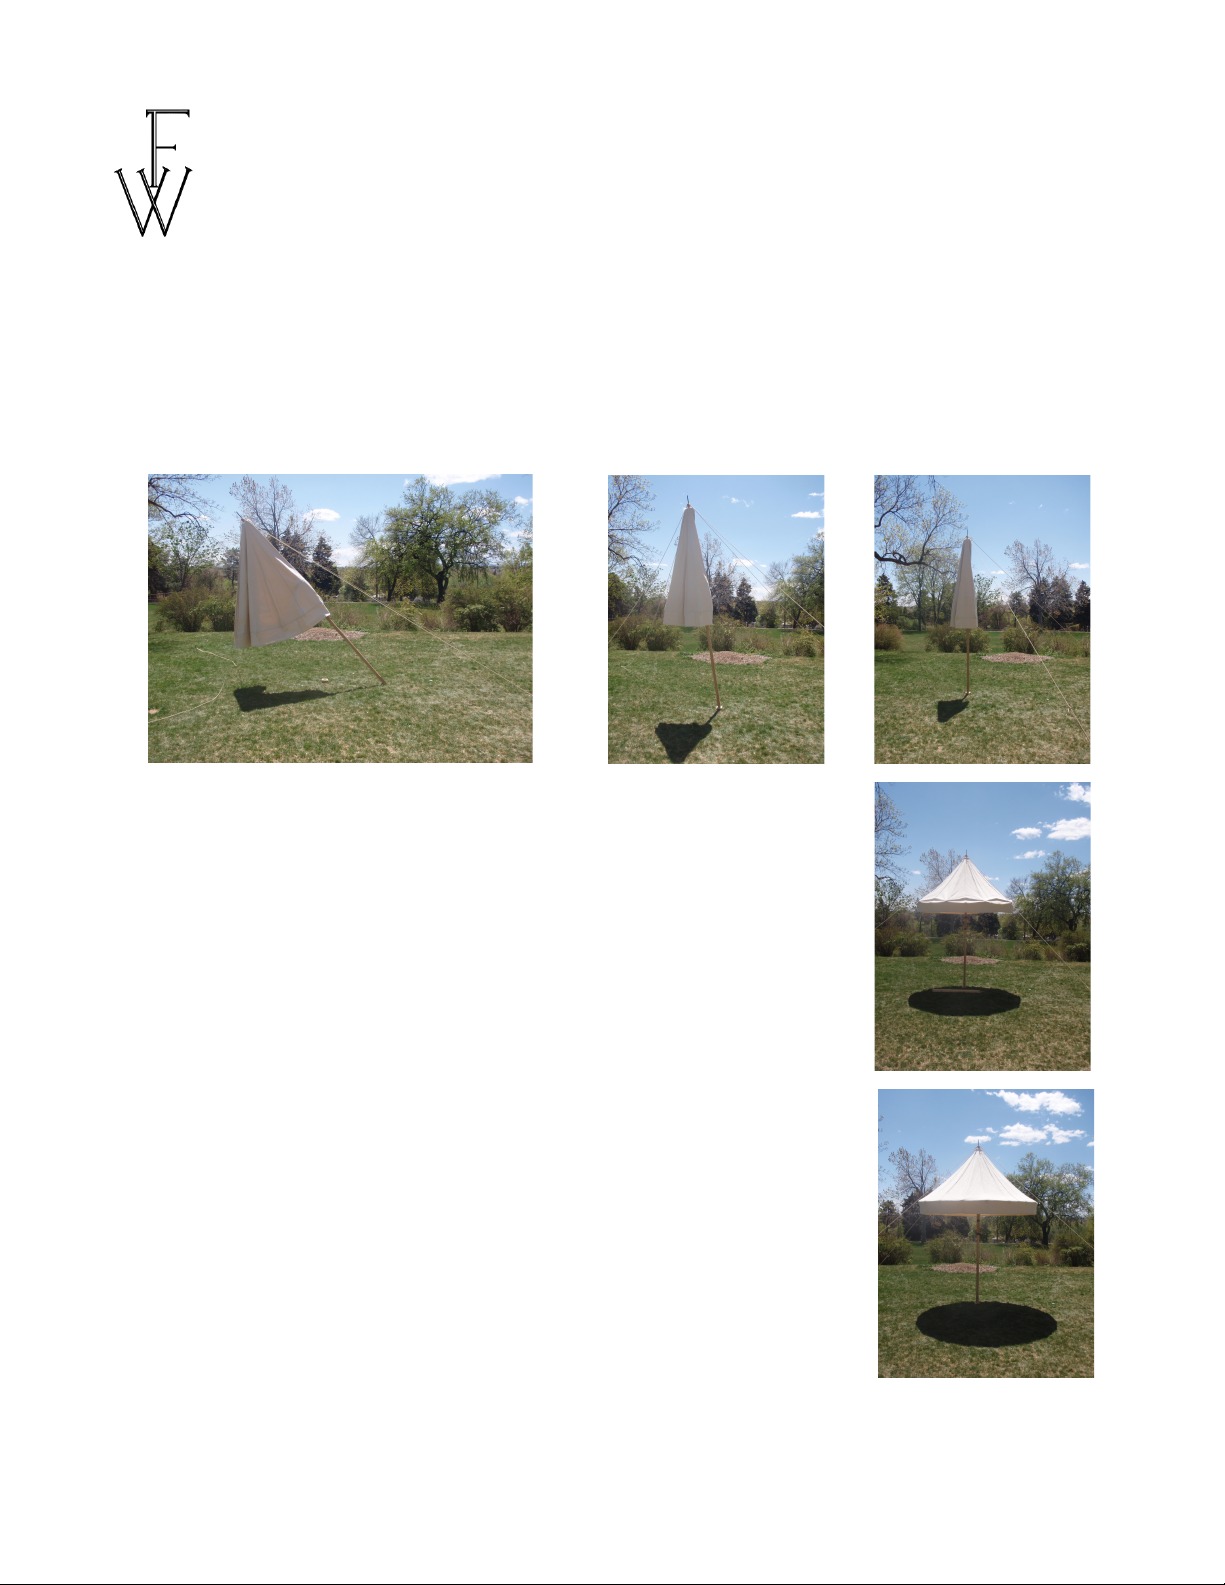
5. Set down the center pole
1. With one hand, grab the pole as high up as you can comfortably manage.
. With the other hand, grab the pole at waist height.
3. Lift the pole out of the baseplate and walk to one side, allowing the center-pole and roof
canvas to fall to the ground.
4. Set it down gentlyish, but don't strain your back trying to stop its fall.
5. It's nice to have a rug or canvas floor laid out where it falls to keep the roof cleaner, but it's
not critical.
6. Finish up
1. Pull out the center pole and disassemble it.
. Fold the roof accordian style. (again, with a helper, you can do this in the air by having
them pull on the peak while you fold on the seams at the valance.
3. Coil up the set-up lines neatly. Put the ropes and the small wood bits in the “stuff” bag.
4. Have a sip of beer (or refreshing beverage of your choice) Yum!
5. Load up the carriage. Mope about having to go home. Then think about how nice a long,
hot shower will feel.
© 01 Gene Eisele pg 4 of 5

Fritz Wilhelm, LLC
welldressedtent.com
Setup Instructions – Hub & Spoke Round Pavilon
At Home
1. Dry the tent.
1. If the canvas or ropes are even a little bit damp, hang them out to dry when you get home.
. It's not necessary to set the tent up to dry. Because it comes in sections, you shouldn't have
much trouble finding enough room. I just lay the parts out over my living room sofa and
chairs. (luckily, my wife is also a medievalist and is understanding of such things)
3. If you store your tent damp, mildew will eat it. Then you will cry. Then you will have to
come buy another one from me... On second thought, go ahead and put your tent away
wet :~) (But seriously folks, Sunforger is mildew RESISTANT, not mildew proof. Do your
best to avoid finding out exactly what the difference is.)
. Store it somewhere safe.
Mildew and critters are probably the two biggest concerns in storage. Some people like to put
everything in a big plastic tote to keep critters out. I just put the stack of canvas on a shelf in the
garage. (but be sure not to store a case of motor oil on the shelf above)
Good Luck and Happy Campaigning,
Gene “Fritz” isele
Proprietor
© 01 Gene Eisele pg 5 of 5
Table of contents
Popular Tent manuals by other brands

Rightline Gear
Rightline Gear Truck Tent quick start guide

Boutique Camping
Boutique Camping ADVENTURE ATTACHING YOUR TENT PROTECTOR instruction manual

KING CANOPY
KING CANOPY Hercules HC1020PCSL manual

SunnCamp
SunnCamp Lodge 200 Motor quick start guide

Palram
Palram Feria 3x5.4 Assembly instructions

Letos
Letos YC0004 user manual