manuals.online logo
Brands
  1. Home
  2. •
  3. Brands
  4. •
  5. FujiFilm
  6. •
  7. Digital Camera
  8. •
  9. FujiFilm FinePix S5000 User manual

FujiFilm FinePix S5000 User manual

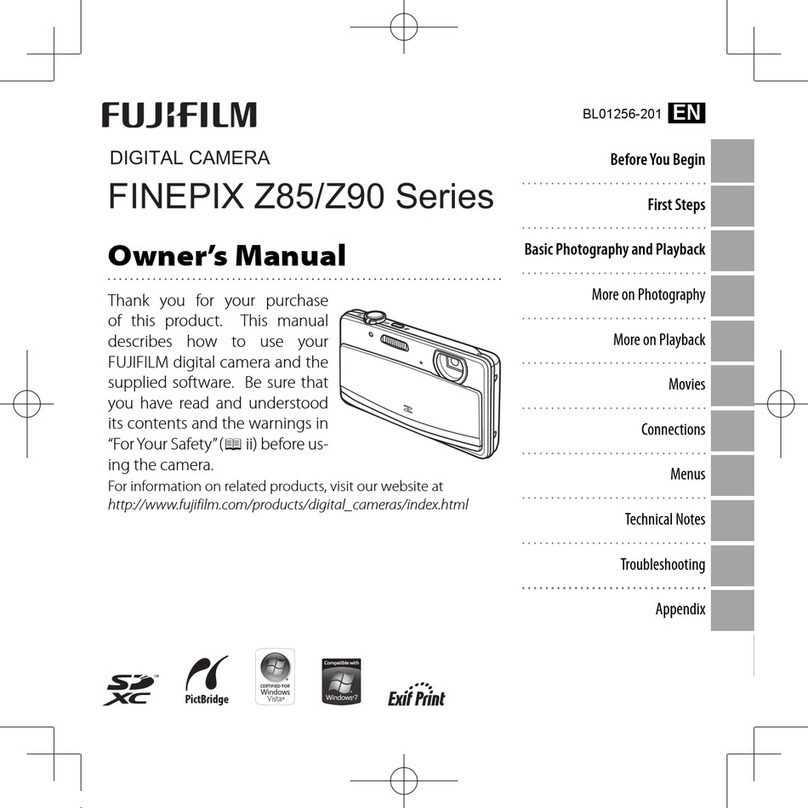
FUJIFILM ,opEo!ota
xD_rd _ _
DIGITAL CAMERA
IOWNER'SMANUAL1
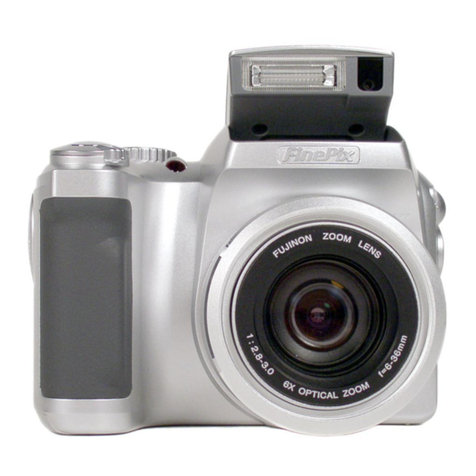
This manual will show you how to use your FUJIFILM
DIGITAL CAMERA FinePix SS000 correctly.
Please follow the instructions carefully. <
iI-' i
f_
,Bo_
ExifPdnt BL00260-200(1) []
Warning ECDeclaration of Conformity
To prevent fire or shock hazard, do not expose the
ForcustomersintheU.S.A.
Tested To Comply
With FCC Standards
FOR HOME OR OFFICE USE
FCCStatement
This device complies witb part 15 of tbe FCC Rules. Operation
is subject to tbe following two conditions : (1) Tbis device may
not cause harmful interference, and (2) this device must
accept any interference received, including interference that
may cause undesired operation.
CAUTION
This equipment has been tested and found to comply with tbe
limits for a Class B digital device, pursuant to Part 15 of tbe
FCC Rules. These limits are designed to provide reasonable
protection against harmful interference in a residential
installation. This equipment generates, uses, and can radiate
radio frequency energy and, if not installed and used in
accordance with tbe instructions, may cause barmful
interference to radio communications. However, tbere is no
guarantee that interference will not occur in a particular
installation. If this equipment does cause harmful interference
to radio or television reception, which can be determined by
turning the equipment off and on, the user is encouraged to try
unit to rain or moisture.
to correct the interference by one or more of the following
measures :
-- Reorient or relocate tbe receiving antenna.
-- Increase the separation between the equipment and receiver.
-- Connect the equipment into an outlet on a circuit different from
that to which the receiver is connected.
-- Consult the dealer or an experienced radio/TV technician for
help.
You are cautioned that any changes or modifications not
expressly approved in this manual could void the user's authority
to operate the equipment.
Notes on the Grant :
To comply with Part 15 of the FCC rules, this product must be
used with a Fujifilm-specified ferrite-core A/V cable, USB cable
and DC supply cord.
ForcustomersinCanada
CAUTION
Tbis Class B digital apparatus complies witb Canadian ICES- 003.
'Please read the Safety Notes (=P.108) and make sure
you understand them before using the camera.
IMPORTANT Be sure to read this page before using the Software.
I_[a]ll[d:l
BEFORE OPENING THE PACKAGE OF CD-ROM
PROVIDED BY FUJI PHOTO FILM CO,, LTD,, PLEASE
READ THIS END USER LICENSE AGREEMENT
CAREFULLY. ONLY IF YOU DO AGREE TO THIS
AGREEMENT, YOU WILL BE ABLE TO USE THE
SOFTWARE RECORDED ON THE CD-ROM. BY OPENING
THE PACKAGE, YOU ACCEPT AND AGREE TO BE
BOUND BY THIS AGREEMENT.
_1 iI,_,_r_I i H;iit,! _l.ql i i;t ;i i t i;i i
This End User Ucense Agleement ("Agreement') is an agleement between
Fuii Photo Film Co., Ltd. ("FUJIFILM") and you, which sets foqh the reims
aed coedi_ions of the license glaofed fol yot_to use the software provided by
FUJIFILM.
The CD_ROM contains thed palty software. In case a sepalate agleement is
provided by a third pal_y supplier fol its softwale, the plovisions of such
separate agreement shall apply to the use of st_ch third party softwale,
plevailing over those of this Agreemeof.
1. Definitions,
{a) "Media" means the OD-ROM titled _Sopwale for FinePlx SX_which ls
provided to you togethel with this Agreemeof.
{b) "Softwale" means the softwale which is iecorded on Media.
{c) _Doct_meofatbn" means the epe_aban manuals of So,ware aed ofbar
ielated writ_n mofebals whichale plovided toyou togethel with Media.
{d)"Product _means Media (including Software) and Documentation
coflecti_ly.
2. Use of Software,
FUJIFILM grants to you a nontlansferople, nonexdusive license :
{a) to install one copy of Sdtware onto one computel in binary machine
executable fo_rr :
{b) to use Sof_va_e on the compofel onto which Softwale is in,ailed ; aed
{c) to make one backup copy of Softwale.
3. Restrictions.
3.1 You shall not dkelibt_te, rent, lease or otherwise transfel all ol any
part of Software, Media or Documentation _oany third party withou_
FUJIFILM's pliol wlitten consent. You also shall not sublicense,
assign ol otbalwise t_ans_er all ol any part of the iights gla_ed to
you by FUJIFILM under this Agreement without FUJIFILM's prior
w_itte_ conseof.
3.2 ExcePt as explessly granted by FUJIFILM baleueder, you shall not
copy ol reploduce all ol any pair of Softwale ol Documeofaban.
3.3 You shall not med_y, adept or _lanslate Software ol Documeofa_ion.
Yot_ also shall not abal or remove copyright and other plopli_ary
notices tha_ appear on or in Software o[ Documeofaban.
3.4 You shall not, ol shall not have any thild pal_y, reverse-engineel,
decompile, or disassemble Sopwale.
4. Ownership.
All copyrights and other proprietary rights to Software and
Docum_ntatbn are owned and retainedby FUJIFILM ol the thirdparty
st_ppbalsas ledica_edon or in Softwale ol Documentedom Nothing
contained helein shallbe constlued, expressly or lmpkeitly,as
tran_erbagorgrantingany fight,license,or _i_leto yot_otherthantbase
eeplicklyglaofedunder thisAgreement.
5, LimitedWarranty,
FUJIFILM walraofsto you that Media lsflee_om any defectinma_edal
and workmanship unbal nolmal use folninety(90)days_om thedateof
youllecei_of Media. Should Media not me_ the foregofngwarranty,
FUJIFILM shallreplacesuch defecti_ Media withotbalMedia beepng
no defect.FUJIFILM'seofilekebili[yand yot_rsoleand _dusive lemedy
withlegaldtoany defectin Media shallbe expresslylimited_osuch
FUJIFILM'sioplacementofMedia asplovibadherein
6. DISCLAIMER OF WARRANTY.
EXCEPT AS PROVIDED IN SECTION 5 HEREIN, FUJIFILM
PROVIDES PRODUCT "AS IS" AND WITHOUT WARRANTIES OF
ANY KIND, EXPRESS OR IMPLIED. FUJIFILM SHALL MAKE NO
WARRANTY, EXPRESS, IMPLIED OR STATUTORY, AS TO ANY
OTHER MATTERS, INCLUDING, BUT NOT LIMITED TO NON-
INFRINGEMENT OF ANY COPYRIGHT, PATENT, TRADE SECRET,
OR ANY OTHER PROPRIETARY RIGHTS OF ANY THIRD PARTY,
MARCHANTASILITY, OR FITNESS FOR ANY PARTICULAR
PURPOSE.
7. LIMITATION OF LIABILITY.
IN NO EVENT SHALL FUJIFILM HAVE ANY LIABILITY FOR ANY
GENERAL, SPECIAL, DIRECT, INDIRECT, CONSEQUENTIAL,
INCIDENTAL, OR OTHER DAMAGES dNCLUDING DAMAGES FOR
LOSS OF PROFITS OR LOST SAVINGS) INCURRED FROM THE USE
OF OR INABILITYTO USE PRODUCT EVEN IFFUJIFILM HAS BEEN
ADVISED OF THE POSSIBILITYOF SUCH DAMAGES.
8. No export.
You acknowledge tba_ nedbal Softwale nol any part theleof,win be
t_ansferred,o_ exported _o any country o_ used inany man_er in
violationof any exportcontloflaws and legulabansto which Softwareis
subj_t.
9. Termination,
Incase you bleach any of the terms and condibans hereof,FUJIFILM
may kernediatelyterminatethisAgreement withoutany notice.
10. Term,
ThisAgreemen_ ls effectivetm_ilthe date when you cease to use
Software,unlesseailiel_ermina_edinaccoldancewithSection9 baleof.
11. Obligationupon termination.
Upon te_kena_ionol expii_ionofthisAgleement, yot_shall,atyoul own
lesponsibilbyand expense, dekee ol destroyimmediatelyallSoftwale
lindudlngke copies),Media and Doct_meofation.
12. Governing Law.
ThisAgreemeof shallbe go_med by and con_lued inaccordance with
lawsofJapan
We
Name :
Address : Fuji Photo Film (Europe) G.m.b.H.
Heesenstrasse 31
40549 Dusseldorf Germany
declare that the product
Product Name : FUJIFILM DIGITAL CAMERA FinePix S5000
Manufacture's Name : Fuji Photo Film Co., Ltd.
Manufacture's Address : 26-30, Nishiazabu 2-chome, Minato-ku,
Tokyo 106-8620, Japan
is in conformity with the following Standards
Safety : EN60065
EMC : EN55022 : 1998 Classe B
EN55024 : 1998
EN61000-3-2 : 1995 + A1:1998 + A2:1998
following the provision of the EMC Directive (89/336/EEC, 92/31/EEC and
93/69/EEC) and Low Voltage Directive (73/23/EEC).
Dusseldorf, Germany July 1,2003
Place Date Signature/Managing Director
Bij dit produkt zijn batterijen geleverd. Wanneer deze leeg zijn, moet u
ze niet weggooien maar inleveren als KCA
2 3
Contents
Warning ......................................................................... 2 Nomenclature ................................................................ 8
IMPORTANT ................................................................. 2 Example of Monitor Text Display .......................... 9
EC Declaration of Conformity ........................................ 3 • Still photography mode ..................................... 9
Preface .......................................................................... 6 • Playback mode ................................................. 9
..................,:7.......................................................................................................................................................................................
!i
ATTACH THE LENS CAP/STRAP/ADAPTER RING ......................................................................................................... 10
LOADING THE BATTERIES .............................................................................................................................................. 11
LOADING THE MEDIA ....................................................................................................................................................... 12
SWITCHING ON AND OFF/SETTING THE DATE AND TIME .......................................................................................... 14
CORRECTING THE DATE AND TIME/CHANGING THE DATE ORDER ......................................................................... 18
Changing the date and tbne ........................................................................................................................................ 15
To change the date order ............................................................................................................................................ 18
SELECTING THE LANGUAGE .......................................................................................................................................... 16
BASIC OPERATION GUIDE .............................................................................................................................................. 17
[STILLPHOTOGRAPHYMODEI
TAKING PICTURES (AUTO MODE) .................................................................................................................................. 20
•Indicator lamp display .......................................................................................................................................... 23
NUMBER OF AVAILABLE FRAMES ........................................................................................................................... 23
• Standard nurnber of frames per xD-Plcture Card .............................................................................................. 23
USING AFiAE LOCK ................................................................................................................................................... 24
AF=ASSIST ILLUMINATOR ......................................................................................................................................... 28
USING THE ZOOM (OPTICAL ZOOM/DIGITAL ZOOM) ............................................................................................ 25
BEST FRAMING .......................................................................................................................................................... 26
VIEWING YOUR IMAGES (PLAYBACK) ........................................................................................................................... 27
Single=frame playback/Fast=forwarding through your [magesiMultbframe playback ................................................... 27
Single=frame playback/Playback zoom/Panning/Trimming ......................................................................................... 28
ERASING IMAGES (ERASE FRAME) ............................................................................................................................... 29
[] STILL IMAGE
[f PHOTOMODE STILLIMAGE]
_s. QUALITY MODE (NUMBER OF RECORDED PIXELS) ............................................................................................. 30
Quality settings in Still photography mode .................................................................................................................. 31
SENSITIVITY ............................................................................................................................................................... 32
High=sensitivity photography (800) .............................................................................................................................. 32
mr FinePix COLOR ........................................................................................................................................................... 33
[STILLPHOTOGRAPHYFUNCTIONS]
FOCUSING (DISTANCE) ................................................................................................................................................... 34
EXPOSURE (SHUTTER SPEED AND APERTURE) ......................................................................................................... 35
TAKING PICTURES - SELECTING THE CAMERA SETTINGS ...................................................................................... 38
• List of functions available in each mode .............................................................................................................. 37
• List of menu options available in each mode ....................................................................................................... 37
AUTO ...................................................................................................................................................................... 38
SP SCENE POSITION ...................................................................................................................................................... 38
I_1Portraiti,ll Landscapei_& Sports/," Night scene ...................................................................................................... 38
P PROGRAMMED AUTO ............................................................................................................................................... 39
Program shift ............................................................................................................................................................... 39
S SHUTTER-PRIORITY AUTO ...................................................................................................................................... 40
A APERTURE-PRIORITY AUTO .................................................................................................................................... 41
M MANUAL ...................................................................................................................................................................... 42
MACRO (CLOSE-UP) PHOTOGRAPHY .................................................................................................................... 43
FLASH ......................................................................................................................................................................... 44
t,f_Auto flash mode ................................................................................................................................................ 48
Red-eye reduction ............................................................................................................................................. 48
_. Forced flash ....................................................................................................................................................... 48
S_ Slow synchro ..................................................................................................................................................... 48
Red-eye reduction + Slow synchro ................................................................................................................... 48
Increasing the monitor brightness ..................................................................................................................... 46
_J_CONTINUOUS SHOOTING ........................................................................................................................................ 47
O._Top 5-frame continuous shooting ...................................................................................................................... 48
Auto bracketing ................................................................................................................................................. 48
_n Final 5-frame continuous shooting .................................................................................................................... 48
Long-period continuous shooting with 1280 x 960-pixel mode ......................................................................... 49
5il EXPOSURE COMPENSATION .................................................................................................................................. 50
CONTINUOUS AF .............................................................................................................................................................. 81
SETTING THE MANUAL FOCUS ...................................................................................................................................... 52
[STILLIMAGEMENUI
PHOTOGRAPHY MENU .................................................................................................................................................... 53
PHOTOGRAPHY MENU OPERATION ....................................................................................................................... 53
© SELF-TIMER PHOTOGRAPHY ......................................................................................................................... 54
[ ]AF MODE ........................................................................................................................................................... 55
SETTING THE WHITE BALANCE ..................................................................................................................... 56
[o] PHOTOMETRY .................................................................................................................................................. 56
BRACKETING .................................................................................................................................................... 57
_IISHARPNESS ..................................................................................................................................................... 57
•f-+ FLASH BRIGHTNESS ADJUSTMENT .............................................................................................................. 57
[] MOVIE
SHOOTING MOVIES .................................................................................................................................................. 58
PLAYING BACK MOVIES ........................................................................................................................................... 60
• Playing back movies ............................................................................................................................................ 60
[] PLAYBACK
ERASING SINGLE/ALL FRAMES ............................................................................................................................... 61
ALL FRAMES/FRAME/BACK ...................................................................................................................................... 61
o_ PROTECTING IMAGES : FRAME/SET ALL/RESET ALL .......................................................................................... 63
FRAME SET ................................................................................................................................................................ 63
FRAME RESET ........................................................................................................................................................... 64
SET ALL ...................................................................................................................................................................... 64
RESET ALL ................................................................................................................................................................. 64
AUTO PLAY (AUTOMATIC PLAYBACK) .................................................................................................................... 65
RECORDING VOICE MEMOS .................................................................................................................................... 66
PLAYING BACK VOICE MEMOS ............................................................................................................................... 68
• Playing back voice memos .................................................................................................................................. 68
[F PHOTOMODE PLAYBACK]
J_ HOW TO SPECIFY PRINT OPTIONS (DPOF) ........................................................................................................... 69
•-_ DPOF ALL RESET ...................................................................................................................................................... 71
!'_ ADJUSTING THE MONITOR BRIGHTNESS/ADJUSTING THE VOLUME ................................................................ 72
SET-UP ............................................................................................................................................................................ 73
• SET-UP menu options ........................................................................................................................................ 73
USING THE SET-UP SCREEN .............................................................................................................................. 73
IMAGE DISPLAY ......................................................................................................................................................... 74
Preview zoom .......................................................................................................................................................... 74
Continuous shooting preview (image checking) ...................................................................................................... 74
POWER SAVE SETTING (low power setting) ............................................................................................................. 78
FORMAT ..................................................................................................................................................................... 75
FRAME NO. •................................................................................................................................................................ 76
CCD-RAW ................................................................................................................................................................... 76
_i THESOFTWAREEOMPONENTS=============================================================================================================================_7
5.2 INSTALLATION ON A Windows PC ............................................................................................................................ 78
5.3 INSTALLATION ON A Mac OS 8.6 TO 9.2 ................................................................................................................. 80
5.4 INSTALLATION ON A Mac OS X ................................................................................................................................ 83
6.1 CAMERA CONNECTION ............................................................................................................................................ 86
6.1.1 Using the optional AC Power Adapter (sold separately) .................................................................................... 86
6.1.2 Connecting to a TV ............................................................................................................................................. 86
6.1.3 Connecting to a computer .................................................................................................................................. 87
6.1.4 Disconnecting the camera .................................................................................................................................. 91
6.2 USING FinePixViewer ................................................................................................................................................. 92
6.2.1 Mastering FinePixViewer .................................................................................................................................... 92
6.2.2 Uninstalling the software .................................................................................................................................... 92
Accessories Guide .................................................. 95 Procedure for discharging rechargeable Ni-MH batteries -,- 99
Conversion Lens Guide (sold separately) ............... 96 Notes on the xD-Plcture Card TM ............................ 100
Notes on Using Your Camera Correctly .................... 97 Warning Displays .................................................. 101
Notes on the Power Supply ...................................... 97 Troubleshooting .................................................... 103
Applicable Batteries ............................................. 97 Specifications ....................................................... 105
Notes on the Batteries ......................................... 97 Explanation of Terms ............................................. 107
Notes on using the AA-size NbMH batteries correctly ... 98 Safety Notes ......................................................... 108
iiiiii_l_i'_ii!iiiiiii!iiiii!!iHHi!iii;
iiiiiiii !iiiii!ii!iiHiii!!iiiiiii
ii!i! i!!iiiiiiiiiiiiii!iiiiiiiiiiiiiiii i
iiii_iiiiii_iiiii!iiiiiiiii!!iiii
iiiii iH i!iiiiiHiii!iiii!iii!!ii
m
4 5
Preface Accessories included
•Test Shots Prior to Photography
For particularly important photographs (such as
weddings and overseas trips), always take a test
photograph and view the image to make sure that the
camera is functioning normally.
• Fuji Photo Film Co,, Ltd. cannot accept liability for
any incidental losses (such as the costs of
photography or the loss of income from
photography) incurred as a result of faults with this
product.
• Notes on Copyright
Images recorded using your digital camera system
cannot be used in ways that infringe copyright laws
without the consent of the owner, unless intended only
for personal use. Note that some restrictions apply to
the photographing of stage performances,
entertainments and exhibits, even when intended
purely for personal use. Users are also asked to note
that the transfer of xD-Picture Card containing
images or data protected under copyright laws is only
permissible within the restrictions imposed by those
copyright laws.
• Liquid Crystal
If the LCD monitor is damaged, take particular care
with the liquid crystal in the monitor, If any of the
following situations arise, take the urgent action
indicated,
• If liquid crystal comes in contact with your skin
Wipe the area with a cloth and then wash thoroughly
with soap and running water.
• If liquid crystal gets into your eye
Flush the affected eye with clean water for at least
15 minutes and then seek medical assistance.
• If liquid crystal is swallowed
Flush your mouth thoroughly with water. Drink large
quantities of water and induce vomiting, Then seek
medical assistance,
•Notes on Electrical Interference
If the camera is to be used in hospitals or aircrafts,
please note that this camera may cause interference
to other equipment in the hospital or aircraft. For
details, please check with the applicable regulations,
• Handling Your Digital Camera
This camera contains precision electronic
components. To ensure that images are recorded
correctly, do not subject the camera to impact or
shock while an image is being recorded.
•Trademark Information
•.._. and xD-Picture Card TM are trademarks of
Fuji Photo Film Co., Ltd.
• IBM PC/AT is a registered trademark of International
Business Machines Corp. of the U.S,A.
• Macintosh, Power Macintosh, iMac, PowreBook, iBook
and Mac OS are trademarks of Apple Computer, Inc.,
registered in the U.S. and other countries,
• QuickTime and the QuickTime logo are trademarks
used under license, The QuickTime logo is
registered in the U,S, and other countries,
• Adobe Acrobat _' Reader _' is a trademark of Adobe
Systems Incorporated of the U.S.
• Microsoft, Windows, and the Windows logo are
trademarks, or registered trademarks of Microsoft
Corporation in the United States and/or other
countries, Windows is an abbreviated term referring
to the Microsoft EWindows "' Operating System.
The "Designed for MicrosofP, Windows _ XP" logo
refers to the camera and the driver only,
• Other company or product names are trademarks or
registered trademarks of the respective companies,
•Explanation of Color Television System
NTSC : National Television System Committee, color
television telecasting specifications adopted
mainly in the U.S,A., Canada and Japan,
PAL : Phase Alternation by Line, a color television
system adopted mainly by European countries
and China.
•Exif Print (Exif ver. 2.2)
Exif Print Format is a newly revised digital camera file
format that contains a variety of shooting information
for optimal printing.
• LR6 AA-size alkaline batteries (4)
• 16 MB, xD-Picture Card TM (1)
included with : Anti-static case (1)
• Shoulder strap (1)
•Adapter Ring : AR-FX5 (1)
• Lens Cap (1)
• A/V Cable for FinePix S5OOO
(approx. 1.5 m (4.9 ft.), plug (2.5 mm dia.)
to pin-plug cable ×2) (1)
•USB cable (Mini-B) (1)
• CD-ROM :Software for FinePix SX (1)
• Owner's Manual (this manual) (1)
6 7
Nomenclature _- Refer to the pages in parenth .... for hlformafl ........ ingth ....... feat .....
Focus mode
selector lock
switch
Shutter button Power switch ]
I_ Continuous shooting
button (E47)
[] Exposure compen-
sation button (R50)
selector button P
[ Mode dial ] il 8
A
Still photography mode: ...................... M
SP
...........................Movie mode:
Auto mode (R38)
Programmed Auto (R39)
Shutter-priority Auto (R40)
Aperture-priority Auto (R41)
Manual (R42)
Scene Position (R38)
;_The dial cannot be turned to
Movie (R58)
Viewfinder
dial
EVF/LCD
(monitor se_ctor)
button (P.18)
Photo mode
(f) button (P.18)
Indicator lam
(P.22, 23)
W (Wide zoom) button (P.19, 25)
T (Tele zoom) button (P.19, 25)
p mount (P.10)
BACK button (P.19)
MENU/OK button
(P.19)
DISP (Display) button
(P.19)
4-direction (&Y_I I_) button (P.19)
(4) Macro button (P.43)
'_- (1_) Flash button (P.45)
Tripod mount
-- Battery cover (P. 11)
Flash (P.44)
Flash control
pop-up button (P.18, 44)
Self-timer lamp
AF-Assist
Illuminator (P,25)
Microphone
Strap mount
(P.12)
Lens xD-Picture Card slot
"_ USB socket (Mini-B) (P,88)
DC IN 5V
A/V OUT (Audio visual output)
•Still photography mode
Self-Timer
Macro (close-up)
L_ Flash.
Zoom bar
Sensitivity
AF frame
Photography mode
Shutter speed
Aperture setting display
Continuous shooting
II ,,6,,Whte baance
' oua,itymode
II " 5_,_i_;__* i _ Number of remaining shots
I " ' 'F_'_'_"_:__F,neP,xCOLOn
r.i.'l ,,' l!AF C3Batterylevel warning
I _,' I Ii AF warning
1/1/100) I I._!dl"Camera shake warning
_1_ Date
Expo_:t iomnind:cato r
J F:_ Exposure compensation
•Playback mode
£_ DPOF
[] Protection
Voice memo
I ,_:_ _I Playback frame number
[_'l _ i_ C3 Battery level warning
I _ ' I Date
8 Playback mode 9
!
2
3
4
ATTACH RING
Attach the strap to the strap mounts on the camera.
Once you have attached both ends of the strap,
check carefully to ensure that the strap is firmly
secured.
Failure to attach the strap correctly can result in the camera
being dropped.
Pull the lens cap cord through the strap.
;:_ Attachthe lens cap cord to avoid losing the lens cap.
Screw the adapter ring in the direction of the arrow
to mount it on the camera.
Mounting the adapter ring on the camera not 0hi"""y °_/
blocks unwanted external light but also protects the
lens and al!£w s the optional €0nversi0n ens to be
attached
Mount the adapter nng on the camera at all times
To prevent the lens cap from appearing in the shot
when you take pictures, attach the lens cap to the
strap.
Attach the lens cap to the lens by pressing in on
each side of the cap.
• AA-size alkaline batteries (4), or optional AA-size Ni-MH batteries (4).
_t Please use the same brand andgrade AA-size alkaline batteries as those supplied with the camera.
.............@ HOW to use the battery @
eNever use the following types of battery, as this could cause serious Outer casing
problems such as battery fluid leakage or overheating : I
1. Batteries with split or peeling outer casings _,
2. Combinations of different types of batteries or new and used batteries
together
• Do not use manganese or Ni-Od batteries.
• Soil, such as fingermarks on the poles of the batteries can significantly reduce the amount of time
for which the batteries can be used.
• The time for which AA-size alkaline batteries (referred to hereafter simply as alkaline batteries)
can be used varies depending on the brand, and some alkaline batteries may stop providing
power more quickly than those supplied with the camera. Note also that due to their nature, the
time for which alkaline batteries can be used decreases in cold conditions (0°C to +10°C). The
use of AA-size Ni-MH batteries is recommended for this reason.
• Use Fujifilm Battery charger (sold separately) to charge AA-size Ni-MH batteries.
• See P.97-99 for other notes on using batteries,
•When first purchased or if left unused for a log period, the time for which AA-size Ni-MH
batteries or rechargeable Battery NH-10 can be used may be shorter. See P.98 for details,
!Check that the camera is switched off (indicator
lamp switches off) before opening the battery
cover.
If you open the battery cover while the camerais switchedon,
the camerais switched off.
_;!Do not apply excessive force to the battery cover.
DO not open the battery cover whde the camera is
still switched 0nl This could damage the X D.-
Picture Card or corrupt the image files on the xD:
Picture Card.
2Load the batteries correctly as shown.
Press the batteries down with the battery cover
while sliding the battery cover closed.
10 11
12
!
2
3
Indicator
Indicator
Set the Power switch to "OFF", check that the
indicator lamp is off and then open the slot cover.
;;:t If you open the slot cover while the camera is still switched
on, the camera is switched off as a safety measure.
Align the indicators on the xD-Picture Card slot and
xD-Picture Card and then push the card firmly all
the way into the slot.
;;:fThe xD-Plcture Card will not slide fully into the slot if it is
inserted facing the wrong way. Be careful not to apply undue
force to the xD-Plcture Card.
Close the slot cover.
@When you want to replace the xD-Picture Card @ ,,,,,,,,,,,,,,,,,,,,,
Ensure that the camera is switched off before
opening the slot cover. When the xD-Picture Card is
pushed into the slot and then slowly released, the
card lock releases and the xD-Picture Card is
pushed out.
!,
J*------®_ Checking the remaining battery charge @
Switch the camera on and check that no battery level warning (_:_ or _) is displayed on the screen.
If no icon is displayed, there is ample charge left in the batteries.
_) There is ample remaining battery charge.
(_ No icon
@ EE_ Lit red
(_) _ Blinking red
_ The battery charge is low. Have a new set of
batteries ready.
The batteries are exhausted. The display will
shortly go blank and the camera will stop working.
Replace or recharge the batteries.
"_E::_" is displayed as a small icon on the right-hand
side of the screen. "cE::_" appears as a large icon in
the center of the screen.
r'1
i. "Jl"j
[]
_ The information above is an approximate guide for photography mode. Depending on the camera mode and the type
of batteries used, the transition from "(:1_" to "C::]" may occur more quickly.
_;:[When the batteries runs flat, "C::]" is displayed and camera operation automatically stops. When this occurs, the
camera may work if you switch it on again even without loading new or fully charged batteries. However, this may
cause camera faults such as the camera switching itself off without retracting the lens. Always load new or fully
charged batteries.
_t Due to the nature of the battery, the battery low warning may appear early when the camera is used in cold locations.
This is normal and does not indicate a fault. Try warming the batteries in your pocket or a similar location before use.
F,_ _ Power save function @
When this function is active, it also switches off the LCD monitor to reduce power consumption if the
camera is not used for 30 seconds (See P.75 for details). If the camera is then left unused for a further
period (2 minutes or 5 minutes), the Power save function automatically switches the camera off. To
switch the camera back on, turn the Power switch to turn the camera off briefly and then turn it back on.
13
14
!
2
3
4
Turn the Power switch to turn the camera on and
off. When you switch the camera on, the indicator
lamp lights (green).
(_i'n':_'°[*'mo'cl°'e, the lens extends. Because this "_
operation involves precision mechanisms take care
not to obstruct the lens with your hand or fingers
Obstruct ng the ens w cause ama funct on or
fault and the _RR(JR-°I " or !l FOOUSERROR]!
message wdl appear. Take care also not to get
fmgerpnnts on the camera lens as thts will result in
impaired image quality in your shots.
When you first switch the camera on, the date is
cleared. Press the "MENU/OK" button to set the
date and time.
,:t To set the date and time later, press the "BACK" button.
If you do not set the date and time, this confirmation message
will appear each time you switch the camera on.
Press "_11" or "1,." to select Year, Month, Day,
Hour or Minute.
@ Press "&" or "T" to correct the setting.
,:tr If you hold down "A" or "T", the numbers change continuously.
When the time displayed passes "12:00", the AM/PM setting
automatically switches.
Once you have set the date and time, press the
'MENU/OK" button. Pressing the "MENU/OK"
button switches the camera to Photography or
Playback mode.
Camera settings such the date and time are cleared when
you first purchase the camera and if you leave the camera for
a long period with the battery removed. Once the AC power
adapter has been connected or the batteries has been fitted
for 2 hours or more, the camera settings will be retained for
roughly 6 hours even if both sources of camera power are
removed.
!
2
3
(!) Press the "MENU/OK" button.
@ Press "_11" or "1_" to select ",_-e" OPTION and
then press "&" or "T" to select "SET-UP".
(3} Press the "MENU/OK" button.
(!) Press "&" or "T" to select "DATE/TIME".
@ Press "1_".
-(!)Press "_11" or "1,." to select Year, Month, Day,
Hour or Minute.
(_ Press "&" or "T" to correct the setting.
(3)Always press the "MENU/OK" button after you
complete the settings.
_t If you hold down "A" or "T", the numbers change continuously.
- :;'_When the time displayed passes "12:00", the AM/PM setting
automatically switches.
(!) Press "_11"or "1,." to select the date order.
(_ Press "&" or "T" to set the format. Refer to the
table below for details of the settings.
(_ Always press the "MENU/OK" button after you
complete the settings.
Setting L Explanation
Displays the date in the "year. month,day'nm®_t_ day" I
YYYY.MM.DD format.
MM/DDiYYYY Displays the date in the "monthiday/year"_ay._ai"l
format.
Displays the date in the "day. month, year"
DD.MM.YYYY format. 15
!_Press the "MENU/OK" button to display the
menu screen.
Press "&", "T", "_11"or "11,." to select "SET-UP"
from the "_--e"OPTION menu.
Press the "MENU/OK" button. This section describes the camera's functions.
iJ_,l
2The "SET-UP" screen appears. Press "A" or "V"
to select "_/LANG.".
@ Press "D,." to select "ENGLISH", "FRANCAIS",
"DEUTSCH", "ESPAI_IOL", "r#_" or "R_".
You can cycle through the language settings by
pressing "1_".
(_Always press the "MENU/OK" button after you
complete the settings.
The screens in this manual are shown in English.
See P.73 for more information on the "_" OPTION menu.
ON/OFF and "1_ "Photography model
" []" Playback mode selector switch
Youcan usethe Powerswitchto selectthe mode.
16
You can select the shooting mode by turning the Mode dial.
| Auto mode PProgrammed Auto
I SP Scene Position I S Shutter-priority Auto
LI _ A Aperture-priority Auto
Portrait M Manual
Landscape
Sports ]
Night scene I_ Movie
#,
Stillphotographymode_ _ _,
Moviemode J
I17
Photography: Allows you to select the resolution
(Number of recorded pixels),
sensitivity and FinePix COLOR
settings.
Playback: Allows you to specify the print order
(DPOF) settings.
Pressing the "EVF/LCD" button toggles between
the viewfinder and the LCD monitor. Use whichever
mode is best suited to your shot.
_Display the menu.
Press the "MENU/OK" button.
@Select a menu option.
Press the left or right arrow on the 4-
direction button.
_Select a setting.
Press the up or down arrow on the
4-direction button.
÷
_PConfirm the setting. __]
Press the "MENU/OK" button.
_i" @ Displaying the On-screen help @
nstructions for the next step in the procedure are
displayed at the bottom of the screen. Press the
button indicated.
For example, to crop the image as shown in the
figure at right, press the "MENU/OK" button.
"[11 the Owner's Manual the up down ]eft and right directions on the 4-direction'bu'it'o'n a"rei""nd;cat_ed'''
by black triangles. Up or down is shown as "&" or '!T !', and left or right is shown as "ql" or ' II_'L
18 19
!
2
Fr1
L'l-,i
3
4
_Set the Power switch to '1_1" @ and set the
Mode dial to -IB]i_r'.
• Focal range
Wide-angle : Approx 09 m (30 ft.) to infinity
Telephoto : Approx, 2.0 m (6.6 ft.) to infinity
If the subject is closer than approximately 90 cm (3.0 ft.), set
the camera to Macro mode (_P.43).
If a "_", "_", "_" or
" _RD OT_NTAbTF'_ "message appears, see P.I 01_102.
Unlock the Focus mode selector lock switch,
Press the Focus mode selector button to set the
Focus mode to 'S-AF'.
See P.51-52 for information on the manual focus "MF" and
the continuous AF "C-AF".
Lock the Focus mode selector lock switch to
prevent inadvertent mode changes.
Press the Flash pop-up button to pop up the flash.
;_fWhen the flash is popped up or you are using the flash to
take pictures, you may see the image disappear and the
screen go dark as the flash charges. The indicator lamp
blinks orange while the flash ischarging.
If you use the flash in very dusty conditions or when it is
snowing, white dots may appear in the image due to the flash
reflecting off the dust particles or snowflakes. Try taking the
shot using Suppressed flash mode.
Diopter adiustment dial
6
7
8
Zoom bar r
L"l-d
Lo
Each time you press the "EVF/LCD" button display
switches between the viewfinder (EVF) and the
monitor (LCD). If the AF frame in the viewfinder
(EVF) is difficult to see, adjust the viewfinder using
the Diopter adjustment dial.
you change the mode or switch the camera off.
%__y
Brace your elbows against your sides and hold the
camera with both hands. Position the thumb of your
right hand so that it is handy for using the zoom.
:Z The image will be blurred if the camera moves when taking
the picture (camera shake). Use a tripod to avoid camera
shake, particularly for shots in dark locations when the flash
is set to Suppressed Flash mode.
_Z There may be some unevenness in the brightness at the
lower edge of the LCD monitor. This is normal and does not
indicate a fault. This does not affect the photographed image.
Take care to hold the camera so that your fingers
or the strap do not cover the lens, flash AF-Assist
Illuminator or flash control sensor. If the lens, flash
or flash control sensor is obscured by your fingers
or the camera strap you may not be able to obtain
the correct brightness (exposure) for your shot.
_'_Check that the lens is clean. If it is dirty, clean the lens as
described on P.97.
If you want to zoom in on your subject, press "T"
(telephoto). To widen the angle of your shot, press
"W" (wide-angle). When you do this, the "zoom bar"
is displayed on the screen.
• Optical zoom focal length
(35 mm camera equivalent)
Approx. 37 mm to 370 mm
Max. zoom scale : 10x
_Z Zooming pauses briefly when it switches between optical
zoom and digital zoom (--P.25). Press the same zoom button
again to switch zoom modes.
_ZThe zoom setting is retained even when the camera is
switched off.
20 21
22
9
10
11
Frame the shot so that the subject fills the entire AF
(Auto Focus) frame.
If the subject is not in the AF frame, use AFiAE lock to take
the picture (raP.24).
When you press the Shutter button down halfway,
the camera emits a short double-beep and focuses
on your subject. At that point the AF frame on the
screen becomes smaller and the camera sets the
shutter speed and aperture (the indicator lamp
(green) changes from blinking to steady).
_tThe image shown on the screen before you take the shot
may differ in its brightness, color, etc. from the image actually
recorded. If necessary, play back the recorded image to
check it (-P.27).
For subjects with no clear contrast between dark and light,
the camera may not give a short double-beep when the AF
frame becomes smaller. However, the shot is still in focus.
_t If the camera does not emit a short double-beep and ".IAF"
appears on the screen, tile camera cannot focus.
_When you press the Shutter button down halfway, the image
on the screen freezes temporarily. However, this image is not
the recorded image.
If "!AF" is displayed on the screen, try standing about 2 m
(6.6 ft.) from your subject to take the picture.
If you press the Shutter button down fully without
releasing it, the camera makes a clicking noise and
takes the picture. The camera then records the
photographed image.
;:f There is a slight delay between the Shutter button being
pressed and the shot being taken. If necessary, playback the
shot to check the image.
If you press the Shutter button down fully in one motion, the
shot is taken without the AF frame changing.
When you take the shot, the indicator lamp lights orange
(shooting disabled). The indicator lamp then changes to
green to indicate that the next picture can be taken.
_* The indicator lamp blinks orange while the flash is charging.
The monitor may go dark briefly. This is normal and does not
indicate a fault.
See P.101-102 for information on the warning displays.
•Indicator lamp display
Display ' Status
Lit green Ready to shoot.
Blinking green AFiAE in progress, camera shake warning or AF warning (Ready to shoot).
Blinking green and Recording to xD-Pleture Card (Ready to shoot).
orange alternately
Lit orange Recording to xD-Pleture Card (Not ready).
Blinking orange Charging the flash (flash will not fire).
Flashing green Camera in Power save mode (_P.75).
1-second intervals)
Blinking red • xD-Plcture Card Warnings
No card loaded, card not formatted, incorrect format, card full, xD-Plcture Card error.
• Lens operation error.
_- Detailed warning messages are displayed on the monitor (mP.1Ol-lO2).
_""" _? Subjects not suitable for autofocus @ ..........................
Though the FinePix $5000 uses an accurate autofocus mechanism, it may have difficulty focusing or
not be able to focus at all on the types of subjects and situations listed below. In such cases, the image
may be out of focus.
eVery shiny subjects such as a mirror or car
body.
• Subjects photographed through glass.
• Subjects that do not reflect well, such as hair or
fur.
• Subjects with no substance, such as smoke or
flames.
• When the subject is dark.
• When there is very little contrast between the
subject and the background (such as white
walls or subjects dressed in the same color as
the background).
• Subjects moving at high speed.
• When there is a high-contrast subject other than
the main subject at or near the center of the
image and that subject is closer to or further
from the camera than the main subject (as when
you photograph someone against a background
with strongly contrasting elements).
For subjects of this type, use AF/AE lock (_'P.24).
II _Lll _V_l:] =1:lie] ;ir_,lv/_,lilit_,1:] ii =11;i-it_,1_V_l:f_
Q_ The number of available frames is displayed on the
_[ screen.
i" '1
L'I'_
[] _.; See P.3O for information on changing the Quality mode.
:_t The default Qualky mode "4_'"set at shipment is Ilm.
•Standard number of frames per xD-Picture Card
The table below shows the standard number of available frames for a new xD-Plcture Card forr'natted oll the caPnera. The
larger the xD-Plcture Card capacity, the greater the divergence between the aclual number of available frames and the
number shown here. Also, because the amount of data recorded varies depending oll the subject, the number of available
frames may not decrease or may decrease by 2 when a frame is taken. Consequently, the actual number of available frames
may be more or less than what is displayed.
Quality mode _ _ _ _ CCD-RAW
Number of recorded pixels 2816 x 2120 2048 × 1536 1600 × 1200 1280 × 960 2816 × 2120
DPC-16 (16 MB) 10 19 25 33 2
DPC-32 (32 MB) 21 40 50 68 4
DPC-64 (64 MB) 43 81 101 137 9
DPC-128 (128 MB) 86 162 204 275 18
DP0-256 (256 MB) 173 325 409 550 37
DPC-512 (512 MB) 347 651 818 1101 75 23
24
II _."]I_[€']r;1;fl;1 ::i ReIe,]:
!In a shot with this type of composition, the subjects
(two people in this case) are not in the AF frame. If
the shot is taken at this point, the subjects will not
be in focus.
2Move the camera slightly so that one of the
subjects is in the AF frame.
3When you press the Shutter button down halfway,
the camera emits a short double-beep and focuses
on your subject. At that point the AF frame on the
screen becomes smaller and the camera sets the
shutter speed and aperture (the indicator lamp
(green) changes from blinking to lit.).
4Continue to hold the Shutter button down halfway
(AF/AE lock). Move the camera back to the original
image and then fully press down on the Shutter
button.
You can reapply the AFiAE lock as many times as you like
before releasing the shutter.
The AFiAE lock operates in all Photography modes and can
be used to ensure excellent results.
y"" @ AF/AE Lock _;_ --"""""""
On the FinePix $5000, when you press the Shutter button down half way, the focus and exposure
settings are fixed (AF/AE lock). If you want to focus on a subject that is off to one side of the image or if
you want to set the exposure before you compose the final shot, lock the AF and AE settings and then
compose and shoot your picture to get the best results.
1_4 ;C7_,_.',_-]_.-,]1iII II llll _v41_r_41lie] -
When the Shutter button is pressed down halfway
in dimly lit conditions, the camera fires the AF-
Assist Illuminator (green) to allow easier focusing at
shooting distances of up to roughly 2 m depending
on subject.
However the AF-Assist Illuminator is not effective
when the zoom is set to telephoto (high
magnification : 6x or more). Wherever possible,
pictures should be taken using a wide-angle zoom
setting (low magnification).
:;'_When "I.AF"is displayed even with the AF_AssistIlluminator
used, the camera cannot focus, When this occurs, take the
picture ata distance of around 2 m fromthe subject,
I1[,,,'11#[€"l i -"I:l',d[eIo] _v_![*] M i [l_r;1!',d[O[*] _v_BD][{'] i_1 !_eIe] _[I
Press the "T" or "W" button to zoom in and out.
The digital zoom can be used with the "_", ,,_:t_,,
and ,,rim,, quality mode setting.
When zooming switches between optical and digital,
the "i" indicator stops. Pressing the same zoom
button again starts the "i" indicator moving again.
_.;The digital zoom cannot be used with the "E_" setting.
;'_See P.30-31 for information on changing the Quality mode
setting.
1'_If the shot goes out of focus during zooming, hold the Shutter
button down halfway to refocus the shot.
Zoom bar display
w T
=wToptica,zoom
= w T
®W IToigito,zoom
The position of the _" indicator on the
zoom bar shows the zooming status.
The area to the right of the separator
indicates digital zooming, while the area
to the left indicates optical zooming.
•Optical zoom focal lengths (35 mm camera
equivalent)
Approx. 37 mm to 370 mm, max. zoom scale : 10x
eDigital zoom focal lengths (35 mm camera
equivalent)
_r_ : Approx. 370 mm to 509 mm,
max. zoom scale : Approx. 1.4x
F:m: Approx. 370 mm to 651 mm,
max. zoom scale : Approx. 1.8x
: Approx. 370 mm to 814 mm,
max. zoom scale : Approx. 2.2x
25
You can select the Framing guideline function in
the Still photography mode. The screen display
changes each time you press the "DISP" button.
Press the "DISP" button until "Framing guideline"
appears.
...........@ mportant _
Always use AF/AE lock when composmg a shot.
The image may not be focused correctly if you do
not use AE/AF ock. 9
Scene
Use this frame with the main subject positioned at
the intersection of two lines or align one of the
horizontal lines with the horizon.
This frame allows you to compose your own
shots while remaining aware of the subject's size
and the balance of the shot.
:tThe framing guideline is not recorded on the image.
;_fThe lines in the scene frame divide the recorded pixels into
3 roughly equal parts horizontally and vertically. When the
image is printed, the resulting print may be shifted slightly
from the scene frame.
Q) Set the Power switch to "[_]".
@ Press "1_" to scan forward through your images
and "_11"to scan backwards.
_ When you set the Power switch to "[iEJ", your last shot is
played back.
_Z If the lens is extended during playback, the lens automatically
retracts as a protective measure if the camera is not used for
approx. 6 seconds.
You can scan quickly through your images by
holding down "_1" or "1_" for approx. 1 second
during playback.
Playback frame number]
_ZA bar is displayed as a rough guide to the location of the
current image on the xD-Plcture Card.
ra_
In Playback mode, the display shown on the screen
switches each time you press the "DISP" button.
Press the "DISP" button until the multi-frame
playback screen (9 frames) appears.
Q)Press "&", "T", "_11" or "1_." to move the cursor
(orange frame) to the frame you want to select.
Pressing "&" or "T" repeatedly switches to the
next page.
@You can enlarge the current image displayer by
pressing the "DISP" button again.
®_ Still images that can be viewed _ ...................................................
You can use this camera to view still images recorded on the FinePix S5OOOor still images (excluding
some uncempressed images) recorded on a FUJIFILM digital camera that supports ×D-Picture Cards.
.... /
26 27
28
A
Press the "BACK" button
to cancel playback zoom.
Pressing the "T" or "W" button during single-
frame playback zooms (enlarges) the still image.
When you do this, a zoom bar is displayed.
•Zoom scales
2816 x2120 pixel images : Max. 18x
la_ 2048 x 1536 pixel images : Max. 13x
1600 x 1200 pixel images : Max. 10x
1280 x 960 pixel images : Max. 8x
You cannot use multi-frame playback during playback
zoom.
You can view another area by pressing "&",
"V", "_1" or "1_".
'The size of the saved
on the zoom ratio. If the image see is _ or
less the _'_TRIMMING" display disappears
and you cannot save the image trimmed. For
COD-RAW filesl 't_TRIMMING '_ is not
displayed and trimmed images cannot be saved.
I
Press the "MENU/OK" button
to crop the image.
Check the size of the saved image and press the
"MENU/OK" button. The cropped image is added
as a separate file in the final frame.
•Image Sizes
!
2
3
4[]
FRAME
Set the Power switch to "[]E]".
(!) Press the "MENU/OK" button during playback to
display the menu.
(_ Press "_lr' or "1,." to select "_" ERASE.
Note that mistakenly erased frames files cal_noi"_
be recovered: you should back up important
frames files) that you do not want tO be erased
(!) Press "&" or "_I'" to select "FRAME".
(_Press the "MENU/OK" button to confirm the
selection.
See P.61 for information on "ALL FRAMES".
:_'_Press "&" or "T" to select "_ BACK" and press "MENU/OK"
button to return to single-frame playback.
_Z Press the "BACK" button to cancel erasing single frame.
(!) Press "_11"or "1,'" to select the frame (file) to be
erased.
(_Press the "MENU/OK" button to erase the
displayed frame (file).
To erase another image, repeat steps _ and (_.
:;'_Pressing the "MENU/OK" button repeatedly erases
consecutive images. Take care not to erase an image by
mistake.
29
]
2
QUALITYMODE(NUMBEROFRECORDEDPIXELS)
Set the Power switch to "1_".
@ Set the Mode dial to Still photography mode.
@ Press the Photo mode "F" button.
,iiiiii i i! iiii ! i,il,i iiiii !i!!iiiiii i , i i iiiiiiii i ii iii ii; i; i; iii iiiiiiiiiii! iii i i ii iii ii ii ii ii iiiii i i iiii i i i iiiiii iii i iiiiiiiiiiiiiiiii iiiiiii ii ii! i! i ii ! ! ! iiiiiii iii ii :i ii]
You can choose from 4 settings. Using the table
below as a guide, select the setting that best suits
your aims.
_[The numbers 1o the right of each setting show the number of
available frames.
:_'_When you change the quality, the number of available frames
also changes (-,P.23).
Quality mode 'Sample uses
_:_ 6 MB (2816 × 2120) Printing at A4 size or pdnting part of the image cropped at A5 or A6 size.
3 MB (2048 x 1536) Printing at A4 or A5 size or printing part of the image cropped at A6 size.
_ 2 MB (1600 x 1200) Pdnting at A5 or A6 size.
n_ 1 MB(1280× 960) PdntingatA6size.
/''" @ Quality setting in High-sensitivity mode ÷
If you try to select a quality setting other than ,,_m" when the camera is set to High-sensitivity mode
"_IE isdisplayed blinking and the quality cannot be changed.
3@ Press "_i" or "D,'" to select the "{_-" QUALITY
setting and then press "&" or "T" to change the
setting.
@Press the "MENU/OK" button to confirm the
setting.
30 31
!@ Set the Power switch to "1_1".
@ Set the Mode dial to Still photography mode.
Press the Photo mode "F" button.
(_'l'he ISO setting remains at high-sensitivity even ii'/
using the Power swttch or Mode dtal.
2
@
rl
@ Press "_1" or "1_." to select the "I_]" setting and
then press "&" or "V" to change the setting.
@Press the "MENU/OK" button to confirm the
setting.
(_ The selected sensitivity is displayed on the screen
(except when the AUTO setting is selected).
• Settings
!:AUTO, 400, 800
P, S, A, M, SP : 200,400,800
When setting CCD-RAW (-P.76), only the "200" and "400"
sensitivity settings can be selected.
;_tWhile selecting a higher sensitivity setting will allow you to
take pictures in darker locations, it will also increase the
amount of speckling in your images. Streaking may also be
visible in shots of scenes such as the night sky.
Choose the sensitivity setting that best suits the conditions.
Selecting AUTO as the ISO setting the camera
automattcally selects the appropnate ISO setting
for the subject brightness.
The AUTO ISO setting can be selected in the
"1_ '_photography modes.
When a high-sensitivity (800) is selected, the
quality is automatically set to ,,rm,,.
;;_tThe high-sensitivity photography cannot be selected when
setting COD-RAW (-P.76).
;t,When you specify a high sensitivity, the amount of noise
(interference) in the image shown on the screen before the
shotis taken increases. However, this is normal and does not
indicate a fault.
;;_tThe digitalzoom cannot be usedinhigh-sensitivityphotography.
@Quality setting in High-sensitivity mode _
If you try to select a quality setting (--P.30-31) other than "1_" when the camera is set to High-
sensitivity mode, "_" is displayed blinking and the quality cannot be changed.
IF" PHOTOMODE STiLLIMAGE1 iF FinePix COLOR
!(!) Set the Power switch to "1_1".
@Set the Mode dial to Still photography mode.
@ Press the Photo mode "F' button.
2
2
The FinePix COLOR setting is retained even if you
switch the camera 0f! a rchange the Made dial
/ setting.
(!)Press "_1" or "_-" to select the "|r' FinePix
COLOR setting and then press "&" or "T" to
change the setting.
@Press the "MENU/OK" button to confirm the
setting.
:_'_/:-CHROME may have little visible effect with some subjects,
such as close-up shots of people (portraits).
_! Because the effects on the image differ depending on the
scene being shot in F-CHROME mode, take pictures in
standard mode as well as this mode. Note that you may not
be able to see any difference on the screen.
;'_ For shots taken in /-CHROME mode, automatic quality
adjustment will be suppressed on Exif print compliant
printers.
fornormal photography.4
_,_ ..... ttoh_h. |
_1 ck ond white. /
When setting F-STANDARD or F-CHROME, the
icon appears on the screen.
F-CHROME : _lw
F-B&W : I_R,
32 33
•:[oI_l_'tl_ B
The distance from the subject to the camera is referred to as the shooting distance.
The image is said to be focused when the image appears sharp at the correct shooting distance.
•Three focusing methods
The FinePix $5000 now offers a choice of 3 focusing mechanisms : Auto focus (S-AF),
Continuous AF (C-AF) and Manual focus (M-AF).
S-AF : Allows the camera to focus on the subject automatically. The camera focuses when the
Shutter button is pressed down halfway.
C-AF : The camera focuses continuously on the main subject in the AF frame. Use this mode to
photograph moving subjects. See P.51 for details.
MF :With the '5t" button held down, press the "T" or "W" button to focus the shot. See P.52 for
details.
•Causes of focusing errors and the solutions
Cause ' Solution
The subject is not suited to AF. Use AF lock (Focus mode :AF (CENTER)) _-1or MF.
The subject is outside the shooting range. Switch Macro mode on or off _-2.
The subject is moving too quickly. Use MF(pre-setting the shooting distance for a shot (lock phi))
¢1 Taking pictures using AF lock Press the Shutter button down
haiNvay to focus.
I Main Capture the subject
subject
• 2 Switching Macro mode ON/OFF
_ Or.9m (3.0 ft.) to infinity,4
Macro OFF
Recompose the shot and take the picture.
0.1 m to 2.0 m (0.3 ft. to 6.6 ft.)
Macro ON
_o--- @ Subjects Not suitable for Auto focus _®
•Very shiny subjects such as a mirror or car body. walls or subjects dressed in the same color as
• Subjects photographed through glass, the background).
Subjects that do not reflect well, such as hair or • Subjects moving at high speed.
fur. • When there is a high-contrast subject other
Subjects with no substance, such as smoke or than the main subject at or near the center of
flames, the image and that subject is closer to or further
• When the subject is dark. from the camera than the main subject (as
• When there is very little contrast between the when you photograph someone against a
subject and the background (such as white background with strongly contrasting elements.
Exposure refers to the light that hits the CCD or the total amount of captured light and determines
the brightness of the image.
The exposure is determined by the combination of aperture and shutter speed. In AE (automatic
exposure), the camera automatically determines the correct exposure, allowing for factors such as
the brightness of the subject and the ISO setting.
The graph at left shows the way the aperture and shutter speed setthlgs can
be changed while maintaining the same exposure level.
• When the exposure is decreased by one step, the shutter speed also
decreases by one step (the dot moves up and left).
• When the exposure is increased by one step, the shutter speed also
increases by one step (the dot moves down and right).
• Combinations that result in the shutter speed or aperture being outside the
available range of settings cannot be selected (white dots).
• In the "P", "S" and "A" photography modes, it is easy to select different
settings along this line.
• Selecting settings that run parallel to this line by adjusting the brightness of
the photographed image is referred to as exposure compensation.
oi,
Slow (Shutter speed) Fast
(-"" @When you cannot get the correct exposure _ ---------------------_
iExposure compensation :
IfIThisfunctienusestheexpesurelevelsetbytheAE
function as a reference (0) and then brightens (+) or
darkens (-) the image. By selecting Auto bracketing,
you can shoot 3 frames, one underexposed (-), one
at the reference exposure (0) and one overexposed
(+),
0 +
:i :i ::
When you are shooting a moving subject, you can either "freeze the motion" or 'capture the sense
of movement" by adjusting the shutter speed.
Freezes the motion of the Photographsthe traces left
subject, by the subject's movement.
ii 'i i ii11iii i iii! !iii;iiii i ii i iiiiiiii i i i iii ii ii iiiiiiW i iii ii i iii ii! i!; ! ii ii i i iii i:i;i iiiiiiiiiiiiiii!i ii i i i i iiiiiiii Hi i iii1iii!iii i; i i i i i i ii ii ii iiiiiii ii: ii iii; iiiiiii i!i i i i i ii i i
By adjusting the aperture, you can change the depth of focus (depth of field).
The area in front of and The background is out of
behindthe subjectis also in focus.
focus inthe shot.
34 [Main subject] 35
Consider the scene you are photographing and the sort of image you want to
achieve when you specify the camera settings. A general guide to the procedure
is given below.
Select the Photography mode (=oP.38-42, 58-59).
| All settings other than the Quality, IS© sensitivity and FinePix COLOR
are specified on the camera.
SP Select the best Scene position setting ('I_PQRTRAIT, Ak,SCENE,
_?,,SPORT or £t NIGHT) for the scene being shot.
P/S/A Allows you to change the aperture or shutter speed setting so that the
action is frozen, so that the flow of the motion is conveyed, or so that
the background is out of focus.
MAllows you to adjust all the camera settings yourself.
Shoots a movie.
Specify the required photography function settings (-_P.43-52).
Macro
Flash
Continuous shooting
[] Exposurecompensation
Use these functions for close-up shots.
Use the flash for shots in dark locations or for backlit
subjects, etc.
Allows you to take a series of continuous shots or to
use auto bracketing (with exposure compensation).
Using the AE exposure as a reference value of O, this
function brightens (+) or darkens (-) the shot.
Take the photograph (check the exposure and focus ,,, adjust
the shot composition -, press the Shutter button down fully).
"_You can use the menus for more detailed settings (-oP.30-33, 53-57).
The table below provides a number of sample settings. You can achieve any number of other effects
by using the settings effectively. Try changing different settings to see what kind of shots you can take.
To achieve this result 'Sample settings
To express tile motion of tile subject (the flow of time) Set the Mode dial to "S" and select a slow shutter speed. (Use a
tripod to avoid camera shake.)
To freeze the subject's movement Set the Mode dial to "S" and select a fast shutter speed.
To make the subject stand out by having the background Set the Mode dial to "A" and select a wide aperture setting.
out of focus
To get a very large depth of focus Set the Mode dial to "A" and select a narrow aperture setting.
To prevent the image having a red or blue cast due to Change the "White balance" setting in the photography menu.
the light source
To avoid missing snapshot opportunities Take pictures in AUTO mode (see "Using the Camera").
To prevent the subject from being overexposed or Use exposure compensation.
underexposed and to show the substance and textures Select (+) if the background is pale and (-) if the background is
of the subject dearly, dark.
•List of functions available in each mode
.... Ph0t°gr°0hym°del' sP I I Ill
_ © ::I2
--I z X1 _
Macro YES NO NO NO NO YES YES YES YES NO
At Auto flash YES YES NO YES NO NO NO NO NO NO
Red-eye reduction YES YES NO NO NO YES YES YES YES NO
_- Flash _- Forced flash YES YES NO YES NO YES YES YES YES NO
S_ Slow synchro NO YES NO NO YES YES NO YES NO NO
Red-eye + slow NO YES NO NO YES YES NO YES NO NO
_ Top 5-frame YES YES YES YES YES YES NO
@
Continuous _ Auto bracketing NO NO YES YES YES YES NO
shooting Frt] FinalS-frame YES YES YES YES YES YES NO
selections Long=period (up to 40 frames) YES NO NO NO NO NO NO
Focus mode (S-AFiMFiC-AF) YES YES YES YES YES YES NO
[] Exposure compensation NO NO YES YES YES NO NO
;_ The flash cannot be used for continuous shooting.
;_ MEGA continuous shooting and high=sensitivity photography cannot be used together.
•List of menu options available
Factory
Defaults
{z" Quality 1M
FinePix _ IS() AUTO _
_hoto mode Ir FinePix COLOR F-STANBAR[
in each mode
SP P S A M J,_
YES YES YES YES YES YES NO
Menu
options
G Self-timer
White balance
[] MULTI
[] CENTER
AF MODE _] AREA
[_] MULTI
[0] [,] SPOT
Photometry [ ] AVERAGE
Bracketing
I_1 Sharpness
5-+ Flash
(brightness adjustment)
OFF YES YES YES YES YES YES NO
AUTO NO NO YES YES YES YES NO
NO NO YES YES YES YES NO
CENTER NO NO YES YES YES YES NO
NO NO YES YES YES YES NO
MULTI NO NO YES YES YES YES NO
NO NO YES YES YES YES NO
±I/3EV NO NO YES YES YES YES NO
NORMAL NO NO YES YES YES YES NO
O NO NO YES YES YES YES NO
;_1 AUTO can only be set in "1_1" mode.
;_ High=sensitivity photography cannot be used together with Long=period continuous shooting.
;_ AREA cannot be used together with continuous AF (C-AF).
36 37
AUTO W._IJl lie
Set the Mode dial to "lB]_l".
This is the easiest mode to use and can be used
for most types of shot.
_,,"] U.."[o.]:1_14 "-loI,-"]i i [o] _
!Set the Mode dial to "SP".
This mode provides options tailored to different
types of scene.
lThe dial cannot be turned to "'1_, A, _ or _: ".
2Four types of scene (_, _., *-& and L*) appear on
the left side of the screen. Press "&" or "V" to
select the desired scene.
_r._tl
L J
'Explanation Available Flash modes
This is the best mode for shooting portraits. Skin tones are A_/(_)/._/S_./_
'_ Portrait shown beautifully and the overall tone is soft.
This is the best mode for shooting scenery in daylight and
_, Landscape provides crisp, clear shots of scenery such as buildings and Flash not available _
mountains.
This is the best mode for shooting sporting events. This mode A_/_-
t,K Sports lives priority to faster shutter speeds.
This is the best mode for evening and night scenes. This mode
allows you to take shots where priority is given to slow shutter S._/_
L÷ Night scene speeds of up to 2 seconds. To prevent camera shake, always
use a tripod.
¢-When the flash is popped up, "@" appears.
Set the Mode dial to "P".
This is an automatic mode that allows you to
specify any of the settings other than the shutter
speed and aperture.
This allows you to take shots relatively simply in the
same way as the Shutter-priority auto and
Aperture-priority auto modes (program shift).
P
This function allows you to change the combination
of shutter speed and aperture without changing the
exposure setting, simply by pressing the "&" or "V".
The shutter speed and aperture setting are
displayed in yellow when the camera is in Program
shift mode.
_Z Program shift is automatically cancelled in the following
situations :
• When the Photography mode is changed
• When you switch to Playback mode
• When the camera is switched off.
38 39

Other manuals for FinePix S5000

3

Other FujiFilm Digital Camera manuals

FujiFilm FinePix F410 User manual

FujiFilm

FujiFilm FinePix F410 User manual

FujiFilm FinePix F460 User manual

FujiFilm

FujiFilm FinePix F460 User manual

FujiFilm FinePix S6000fd User manual

FujiFilm

FujiFilm FinePix S6000fd User manual

FujiFilm FinePix AX300 User manual

FujiFilm

FujiFilm FinePix AX300 User manual

FujiFilm FinePix JX665 User manual

FujiFilm

FujiFilm FinePix JX665 User manual

FujiFilm GFX100 Owner's manual

FujiFilm

FujiFilm GFX100 Owner's manual

FujiFilm FINEPIX Z33 WP User manual

FujiFilm

FujiFilm FINEPIX Z33 WP User manual

FujiFilm A470 User manual

FujiFilm

FujiFilm A470 User manual

FujiFilm FinePix F550EXR User manual

FujiFilm

FujiFilm FinePix F550EXR User manual

FujiFilm Finepix S100FS User manual

FujiFilm

FujiFilm Finepix S100FS User manual

FujiFilm FINEPIX XP30 XP30 User manual

FujiFilm

FujiFilm FINEPIX XP30 XP30 User manual

FujiFilm FinePix F470 User manual

FujiFilm

FujiFilm FinePix F470 User manual

FujiFilm X-Pr01 Owner's manual

FujiFilm

FujiFilm X-Pr01 Owner's manual

FujiFilm FINEPIX S7000 User manual

FujiFilm

FujiFilm FINEPIX S7000 User manual

FujiFilm FinePix S8100fd User manual

FujiFilm

FujiFilm FinePix S8100fd User manual

FujiFilm FinePix S5000 User manual

FujiFilm

FujiFilm FinePix S5000 User manual

FujiFilm instax mini 8+ User manual

FujiFilm

FujiFilm instax mini 8+ User manual

FujiFilm FINEPIX JZ100 series User manual

FujiFilm

FujiFilm FINEPIX JZ100 series User manual

FujiFilm FINEPIX F40fd User manual

FujiFilm

FujiFilm FINEPIX F40fd User manual

FujiFilm FinePix F11 User manual

FujiFilm

FujiFilm FinePix F11 User manual

FujiFilm FinePix S1500 User manual

FujiFilm

FujiFilm FinePix S1500 User manual

FujiFilm X-T20 User manual

FujiFilm

FujiFilm X-T20 User manual

FujiFilm X-T2 Owner's manual

FujiFilm

FujiFilm X-T2 Owner's manual

FujiFilm FF210001 User manual

FujiFilm

FujiFilm FF210001 User manual

Popular Digital Camera manuals by other brands

Sanyo Xacti VPC-E760 user manual

Sanyo

Sanyo Xacti VPC-E760 user manual

CasaCam VS2104 user manual

CasaCam

CasaCam VS2104 user manual

Einstein LUMICA user guide

Einstein

Einstein LUMICA user guide

Sinar p3 brochure

Sinar

Sinar p3 brochure

Canon POWERSHOT PRO 1 user guide

Canon

Canon POWERSHOT PRO 1 user guide

Panasonic Lumix DMC-F3 Basic operating instructions

Panasonic

Panasonic Lumix DMC-F3 Basic operating instructions

Schäfter+Kirchhoff SK12240VKOC-4LB instruction manual

Schäfter+Kirchhoff

Schäfter+Kirchhoff SK12240VKOC-4LB instruction manual

Panasonic DMC-G7SINGLE operating instructions

Panasonic

Panasonic DMC-G7SINGLE operating instructions

Olympus CAMEDIA C-1400L instructions

Olympus

Olympus CAMEDIA C-1400L instructions

Sony Cyber-shot DSC-HX300 instruction manual

Sony

Sony Cyber-shot DSC-HX300 instruction manual

e-con Systems See3CAM CU51 Application User's Manual

e-con Systems

e-con Systems See3CAM CU51 Application User's Manual

Lytro Illum user manual

Lytro

Lytro Illum user manual

Pentax OPTIO L50 operating manual

Pentax

Pentax OPTIO L50 operating manual

Nikon COOLPIX S01 user manual

Nikon

Nikon COOLPIX S01 user manual

Samsung L77 - Digital Camera - Compact user manual

Samsung

Samsung L77 - Digital Camera - Compact user manual

Canon EOS 10D Digital parts catalog

Canon

Canon EOS 10D Digital parts catalog

Sony Cyber-shot DSC-W5 Specifications

Sony

Sony Cyber-shot DSC-W5 Specifications

Conrad Electronic 751533 operating instructions

Conrad Electronic

Conrad Electronic 751533 operating instructions

manuals.online logo
manuals.online logoBrands
  • About & Mission
  • Contact us
  • Privacy Policy
  • Terms and Conditions

Copyright 2025 Manuals.Online. All Rights Reserved.