Fujitec VIS SETTER MK-3020 User manual

INSTRUCTION MANUAL
AUTO SCREW FEEDER Unit
Model MK-3020 (NEW)
VIS SETTER Feeder
FUDOC-060410

At this time our sincere thanks for your purchase of the Fujitec ”HANDEY”
Screw Feeder ( MK-3020(NEW)).
To ensure safe operation, please read this instruction manual carefully before use.
Also be sure to always read the "Safety Precautions" before attempting use.
Keep this instruction manual in a secure location and consult if unclear about machine
handling, operation or maintenance.
Table of Contents
1.Safety precautions --------------
P2
2.Part names and functions -------------- P4
2-1. Power switch -------------- P4
2-2. Control board -------------- P4
2-3. Main unit internal section
-------------- P5
2-4. Data entry pad ----------------- P6
3.Accessories
----------------- P8
4.Points to check before using
----------------- P8
5.Pre-operating setup ----------------- P9
5-1. How to install ----------------- P9
----------------- P9
----------------- P10
6.How to use ----------------- P11
7.Maintenance and storage
----------------- P12
7-1. Maintenance after daily work ----------------- P12
7-2. Once a week maintenance -----------------
P12
7-3. Adjustments -----------------
P13
8. Air tubing diagram -----------------
P17
9. Electrical wiring diagram -----------------
P17
10. Operation timing daigram
-----------------
P18
-----------------
P18
12. Troubleshooting
-----------------
P19
13. Specifications
-----------------
P21
14. Service
-----------------
P21
11. Screw-feed external
input signal selector
5-2. Installing the wiring and piping
5-3. Setup prior to installation work
- 2 -

To ensure correct operation, always read these "Safety precautions" before
attempting to use the machine.
The following cautionary points are "Warnings" and "Cautions" intended to
prevent unforeseen accidents that are a hazard to the operator and others
around him as well as causes of material damage or loss.
These contain important information for maintaining safety, so comply with
them at all times.
■
The following cautionary notes are grouped according to the hazard level
in terms of injury and material damage that may occur if not used correctly.
■Points you should comply with are grouped according to the following symbols.
(The following are examples.)
This symbol indicates a prohibited action.
This symbol indicates a mandatory action
WARNING
CAUTION
This symbol indicates a caution or warning you must heed.
必ずお守りください
Safety precautions
Always follow the instructions below
indicates a potentially hazardous situation which, if not avoided, could
result in death or serious injury.
indicates a potentially hazardous situation which, if not avoided, could
result in minor or moderate injury or damage to the equipment.
- 3 -

CAUTION
WARNING
●Do not alter or modify any part of this unit.
Only authorized repair personnel are allowed to disassemble or repair this unit.
Attempting this on your own may cause fire, electrical shock, or injury.
Note: Consult your dealer if repairs are needed.
●Do not damage the power cord or plug. Do not forcefully bend, pull, twist, or bundle
the cord. Do not lay heavy objects on it or allow pinching or crushing. Neglecting this
may cause injury, fire or electrical shock.
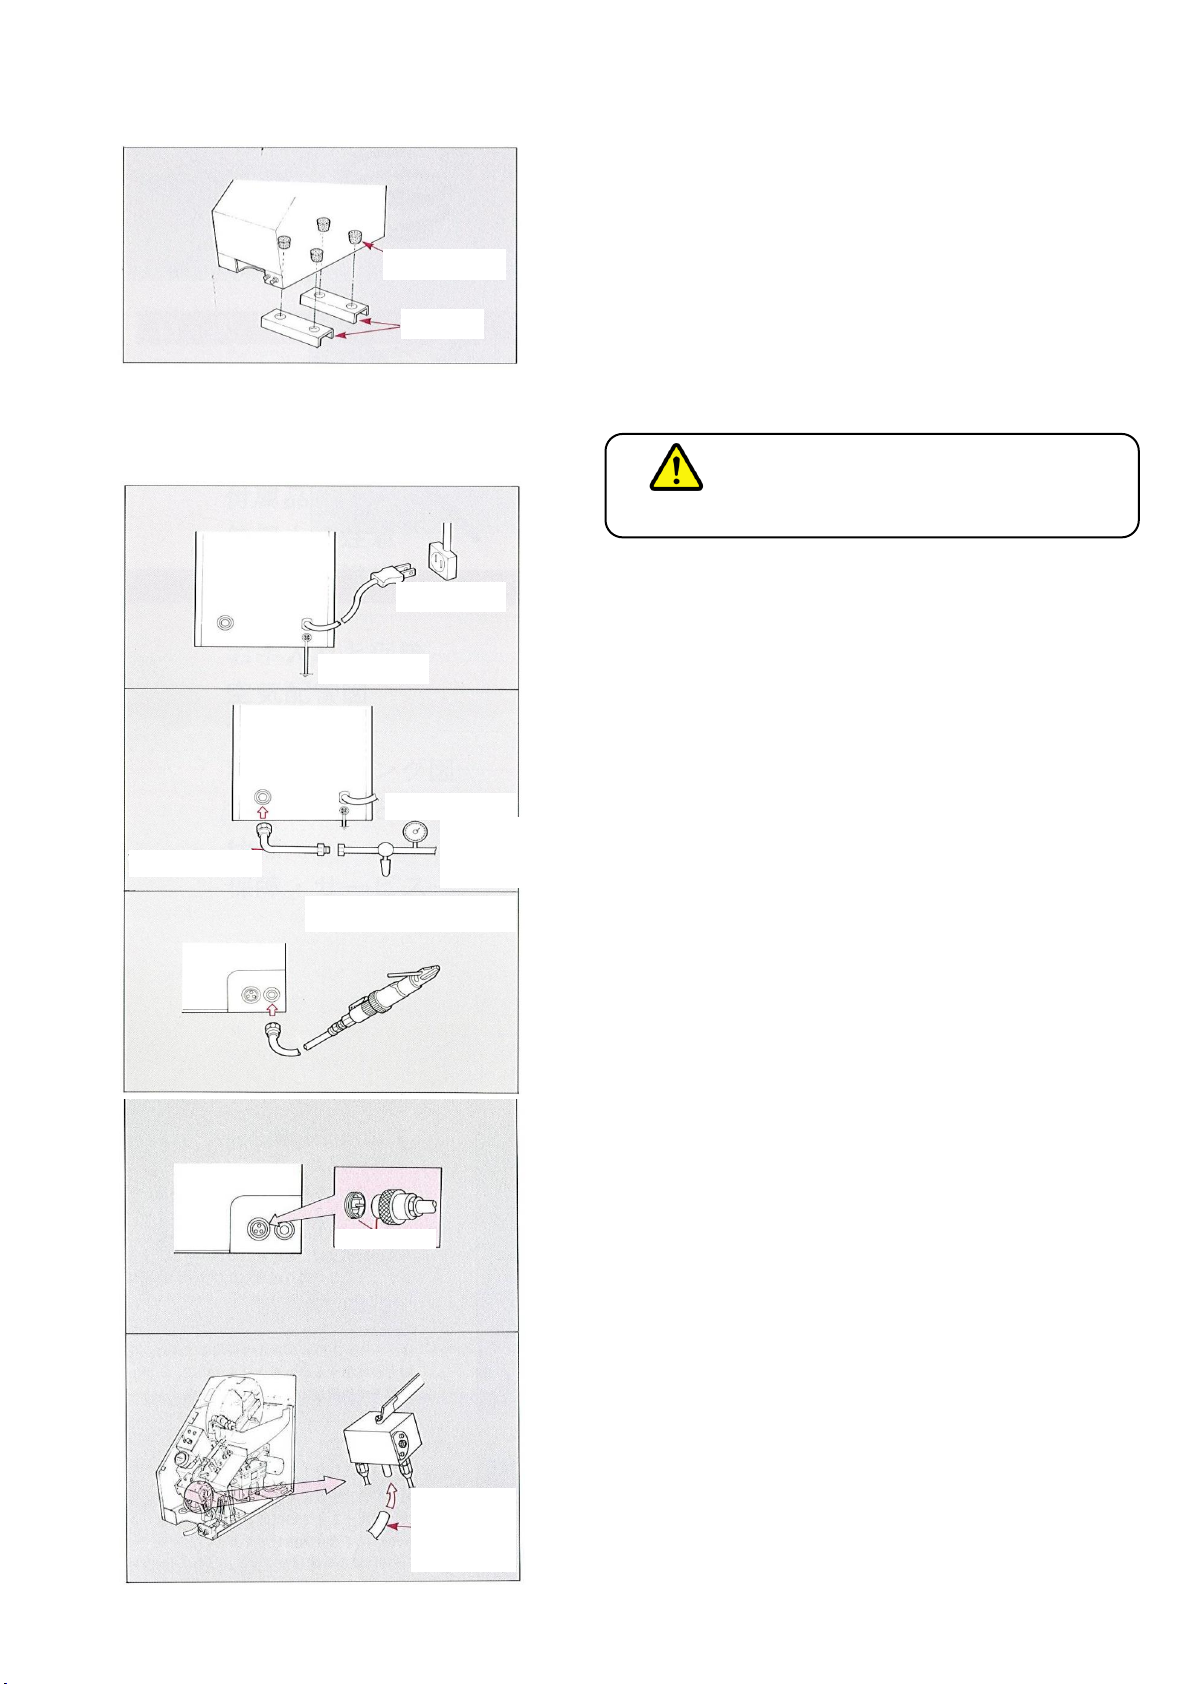
●Do not operate with the side cover open.
Never attempt to operate this unit with the side cover still open.
Always turn off the power before opening the cover.
Neglecting this may cause electrical shocks, short, or spark.
●Do not use if the power cord or plug is worn or damaged or the plug is loosely inserted
in the socket.
Neglecting this point may cause electrical shock or fire.
●Do not use a power source that is not 100 V AC.
Neglecting this may cause electrical shock or fire.
●Do not handle the power cord roughly.
Do not carry the electric screwdriver while holding the power cord or pull on the power
cord to extract the plug from the socket.
Keep the power cord away from locations with heat, oil or sharp corners.
●Do not connect the output connector to an AC voltage.
Connecting the LOW screw supply (insufficient quantity) output connector (CN4) to an
AC voltage may cause fire or breakdown.
●Do not point the screwdriver tip at other persons.
Feeding screws while the screwdriver is aimed at other persons may be hazardous if the
screws fly outwards.
●Ground the power supply securely.
Electrical shock may result if not properly grounded.
●Turn off the power before replacing fuses.
Always be sure to turn off the power (supply) switch or unplug the power cord from the
socket when replacing fuses. Failure to do so may cause electrical shock.
●Do not use near watery or water spray locations.
Equipment breakdowns may occur if used in locations exposed to water/water spray,
extremely low or high temperatures, or high humidity.
●Do not use under abnormal conditions.
If the unit heats up or you notice an abnormal condition, then immediately stop
operating the unit and send it out for inspection and repair. Failure to do so could
cause breakdown or injury.
●Do not install in locations where vibrations occur.
Installing the unit in a location subject to vibrations may damage the control board.
It might also cause smoke emission or fire
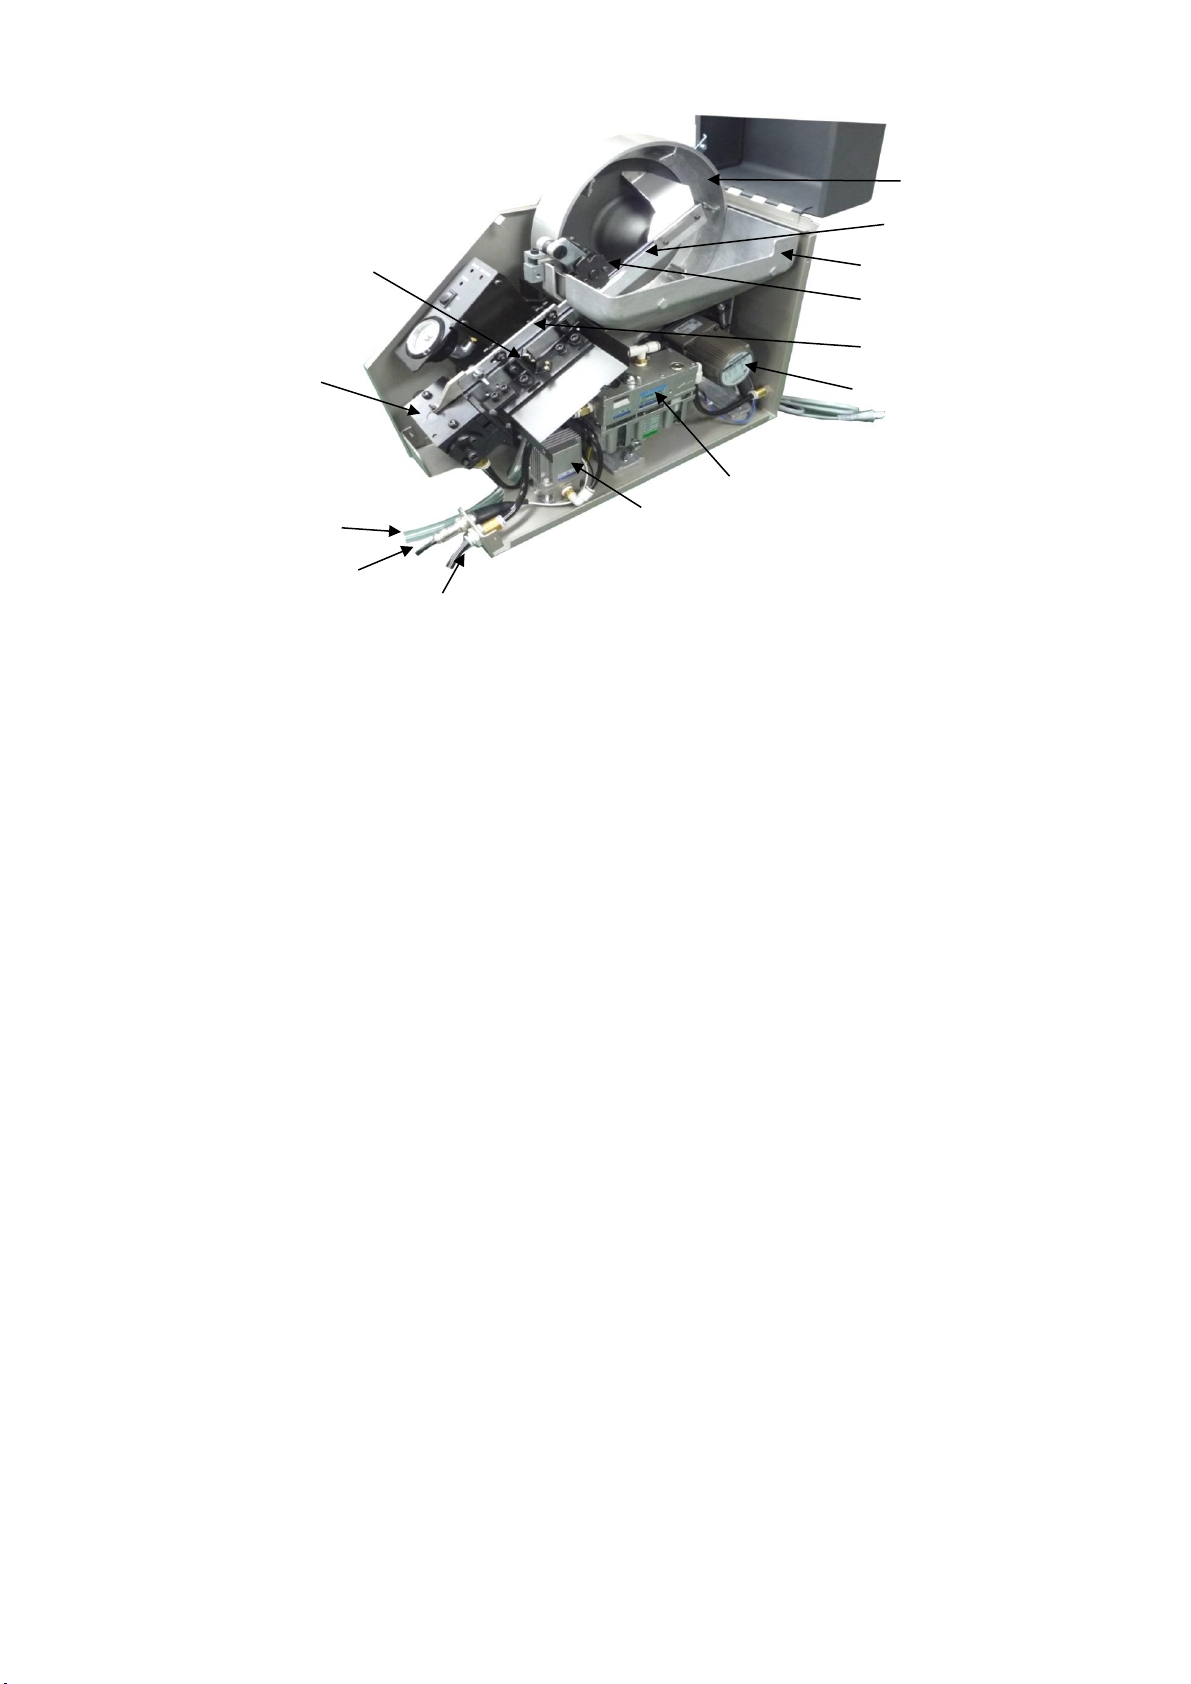
●Inspect and service the feeder periodically
Failure to inspect and service the feeder will prevent it from delivering full performance.
This may also cause feeder breakdowns.
- 4 -

2. Part names and functions
2-1. Power switch
①
Power switch
②
PB1
②
PB2
②
PB3
②
PB4
③
Screw feed pressure gauge
This is an air pressure gauge to indicate the air pressure at which screws are fed from
the screw feed hose.
2-2. Control board
④ Control board
This board contains electrical circuits for controlling the screw feed and for
stopping after feeding a fixed quantity of screws.
③Screw feed
pressure gauge
②PB3
②PB4
②PB1
②PB2
①Power switch
See page 6.
④Control board
- 5 -

2-3. Main unit internal section
⑤Rotating drum
The hopper side of the drum rotates,pick up the separate screws and supplies them to the chute.
⑥Chute
The chute supplies screws from the hopper to the escapement where they are aligned.
⑦Hopper
Screws are separately dumped and stored here.
⑧Impeller
This gear rotates on the chute to prevent non-aligned screws from entering.
⑨Screw head guide
This plate prevents screws on the chute from jumping outwards or falling.
⑩
Motor gear head
The motor gear head turns the rotating drum.
⑪Air unit
This unit includes the filter, pressure-relief valve and oiler.
⑫Solenoid valve
Switches the air path to the escapement and operates in synchronization with the screw feed signal.
⑬Optical sensor switch
This sensor temporarily stops the rotating drum when a specified quantity of screws is aligned.
⑭Escapement
This sorts one screw at a time on the chute, and pressure-feeds them along the screw feed hose to
a specified position.
⑰Screw feed hose
This hose feed the screws from the escapement to a specific location.
Screw Fastener.
⑯Receptacle
This is a metal outlet (3P socket) for the screw-feed external input signal.
⑰Bulhead union connector
This is an air source fitting (KQ2E08-00) for the air driver.
⑬Optical sensor switch
⑭Escapement
⑮Screw feed hose
⑯Receptacle
⑰Bulkhead union connector
⑫Solenoid valve
⑪Air unit
⑩Motor gear head
⑨Screw head guide
⑧Impeller
⑦Hopper
⑥Chute
⑤Rotating drum
- 6 -

2-4.Date entry pad
①MODE LED
②DATA LED
Mode 「A」~「E」 and 「J」 extends in the case of the handy series.
But the setting of mode 「C」 and 「E」 is effective for only MK-3150V.
The setting of 「F」~「M」 is effective for only adsorption type handy 「J」 remove.
L
Simple counter
on
Count-up value
Not used
Used (counter not connectable)
0~99
0.0~9.9
.00~.99
Time until motor (for screw feed)sops after ”screw full”
sensor turns ON
0~99
M
off
Screw feed time simultaneous with escapement
operation time (seconds)
(for ”Handy” operation)
Solenoid valve opens and closes in synchronization with
external screw feed signal
Timer is reset by input signal
G
J
Standby time from start signal OFF to operation start
Screw feed time
H
Forward time
on
0:MAX 18:Minimum
Valve setter switch
Time in which the Y-pipe (cylinder) advances
Time in which the Y-pipe (cylinder) retracts
0~99
on
Count-up
MODE
DATA
Time until vibrator stops
Motor stop time
LOW screw alarm time
Vibrator stop time
0~99
Time until alarm sounds after ”screw full” sensor turns OFF
Cylinder advances during count-up, and pickup turns OFF
off
Stabilizing time
0.0~9.9
0.0~9.9
off
0.0~9.9
Time the Y-pipe (cylinder) is in standby during adavance
Does not count-up
(for automatic operation)
D
C
Retract time
K
Mode selector
I
B
Escapement operation time (seconds) simultaneous with
screw feed time
0~18
A
F
E
Standby time
Screw feed time
Vibrator intensity
D.
0~9
①MODE LED
②DATA LED
③ △ button
④ ▽ button ⑤SEL button
⑥ENT button
- 7 -

③ △button (PB1)
Use this button to increase the mode date value on the display.
Data values differ depending on the selected mode.
④ ▼button (PB2)
Use this button to decrease the mode data value on the display.
⑤SEL button (PB3)
Use this button to select a mode and load the data from the ROM.
⑥ENT button (PB4)
Press this button to save the mode data on the display to the ROM. Data is not stored
if you change the mode by the SEL button.
Note: Mode ”C” and ”E” settings only work on the MK-3150V (horizontal
vibrator chute type.)
Simple Counter (Mode:”L”)
The simple counter can be selected by ON/OFF during MODE ”L”display.
Set MODE ”L”to ON to use the simple counter.
Use Mode ”M” to set the number of pieces you want to count up to.
Set Mode ”K”ON or OFF to select the count-up operation.
MODE ”L”ON:Displays the counter when the torque-up signal is input from
the screwdriver.
Press the ENT button to switch the display.
(The counter counts down. The MODE display LED is OFF while the counter value is displayed.)
A buzzer sounds (0.5 seconds) when the counter reaches 0.
Ignores the OK input when an external counter is connected.
MODE ”K”ON : When the simple counter is ON, the pickup turns off when the count-up is reached
and the screw feed advances and stands by.
When the escape input is ON (short circuit),the pickup turns ON, and screw
feed is in retract.
Escape input serves as a reset signal when Mode ”K” is ON.
The escape opens or closes when Mode ”K” is OFF.
- 8 -

3.Accessories
4.Point to check before using
●Do not use screws not matching the mechanical specifications.
●Do not use screws that were picked up by magnets or that are coated with oil.
●Do not point the screw feed hose tip at other persons.
The screws may fly outwards creating a hazardous situation.
送り
Part No.
N250M16P3FA
Part No. N23102
Screw feed hose Fuse
(125V 3A φ5.2×20)
Screw feed signal plug
(only for feeder section)
- 9 -

5.Pre-operating setup
5-1.How to install
1) Install at a position 200 to 250 mm higher than the
location where the screws are supplied and
be careful not to twist or forcibly bend
the feed hose.
2) Prepare a stand block for use during installation
and set so that the rubber feet of the feeder unit
are on the stand block.
Installing directly without using a stand block will
cause a drastic bend in the screw feed hose.
5-2.Installing the wiring and piping
Always connect to ground line. Failure to connect
to ground may cause elecrical shocks.
1) Connect the ground terminal on the rear panel to
ground by using a ground wire.
2) Then connect power supply cord to a powers supply.
3)Connect the air hose to the factory air source.
(or air compressor.)
The air hose fitting is the φ8
The source air pressure cannot be adjusted on this
unit,so adjust the factory source air pressure to a
range wihtin 0.4 to 0.5 MPa.
4) If using the air screwdriver,connect the air
screwdriver hose to the φ8 fitting
on the front panel of the feeder.
5) Connect the screw feed signal plug (from external
section) to the receptacle (3P) on the front panel of
the feeder.
6) Install the screw feed hose on to the escapement.
CAUTION
Rubber feet
Stand
Ground
AC outlet
Factory
air
0.4~0.5MPa
When using air driver
screw
screw feed
hose
0.4~0.5MPa
Factory air
source
When using air driver
AC outlet
Ground
- 10 -

5-3.Setup prior to installation work
① Setting the screw feed pressure
Open the factory air source (or air compressor) knob
and use the pressure-relief valve on the air unit to
adjust the pressure as needed while checking the
pressure gauge on the front panel.
Raising the air pressure higher than necessary will
damage the screw feed hose,or the solenoid valve.
Setting the pressure too low on the other hand will
cause poor screw feed. Normally use a pressure
within 0.15 to 0.25 MPa.
② Setting the screw feed timer
Set a suitable time on the front side of the screw
feed timer (FEEDTIMER), form feeding
the screw through the hose unitl reaching
the specified location.
See ② DATA LED MODES ”D”and”D.”on page 6 for
detailed information.
③ Adjust the empty screw warning time
A buzzer sounds and an error signal is sent when the
rotating drum has run longer than a preset time.
Note:The buzzer and error signal are optional features.
See ② DATA LED MODES ”A”on page 6 for
detailed information.
Adjuster
handle
High
Low
- 11 -

6.How to use
① Fill screws up to or below the referende line
in the hopper.
Refill after finished using up the last loaded screws.
Do not let malformed,different type screws or metal
scrap get mixed in with the screws you are loading.
Do not use screws that were picked up by magnets
or that are coated with oil.
② Turn on the power switch
The three digit LED lamp then light up
and the rotating drum starts turning.
Screws are then fed along the chute and the unit
rotates for a fixed quantity of screws. The rotating
drum automatically stops when the screws are
aligned and the motor lamp turns off.
Do not point the screw feed hose tip at other persons. The screws
may fly outwards creating a hazardous situation.
③
Send a screw feed signal from external source.
Sending a first signal causes the escapement to
move back and forth one time, sorts out one screw
on the chute,and sends it by compressed air
along the screw feed hose to a specified location.
Never point the tip of the screw feed hose
at someone since the screw may fly outwards
causing injuries or hazardous situations.
If using the VIS SETTER Handy as the screwdriver,
you can send a feed screw signal from the
screwdriver switch to the VIS SETTER by
retracting-extending the Y-pipe on the driver
one time by hand as shown in the figure.
CAUTION
Reference
line
When using screwdriver
Retract or extrnd
- 12 -

7.Maintenance and storage
7-1.Maintenance after daily work
Always turn off the power switch before cleaning or
servicing the unit. Unplug the power cord from the outlet
(socket) if not planning to use it for a long time.
① Cleaning the chute
Use a brush or similar tool to clean dust or
metal powder that is sticking to the screw
sliding surfaces of the chute.
Gently wipe away oil using new cloth moistened with
alcohol.Take care not to scratch or dent the sliding
surfaces during cleaning.
② Supplying oil and draining water from
the filter
If using the VIS SETTER Handy as an air screwdriver,
loosen the needle valve on the oiler and check
from the droplet window that 3 to 5 drops of oil
fall while operating the air screwdriver under no load
(run with no load on the tip).
Then tighten the needle valve. Finally operate the air
screwdriver under no load for 1 to 2 minutes.
Loosen the drain cock and let water from inside
the tank drain off. Do not let water accumulate
above the upper limit line in the drain window.
7-2.Once a week maintenance
① Cleaning the inside of the hopper
Take out the screws from inside the hopper and
remove debris.
If extremely dirty or oil is adhering, wipe away gently
with a fresh cloth moistened with alcohol.
Do not use anything other than alcohol.
② Checking the oil level in the oiler.
If using the VIS SETTER Handy as an air screwdriver,
check whether the oil level in the oiler is within
the upper and lower limits. If the oil level is low,
shut off the air source (compressor, etc.),
remove the oil fill plug,and fill with oil.
You should use turbine oil (class 1) ISO-VG32.
Note:Do not use spindle oil or machine oil.
Brush
New cloth
Oil supply plug
Top
mark
Bottom
mark
Oiler
上限
Droplet window
Top
mark
Drain
cock
Tighten
Loosen
Open
Needle valve
Close
- 13 -

7-3.Adjustments
① Adjusting the impeller vane height
Adjust so that the gap between the chute and the inner
impeller of the impeller is approximately 0.2 to 0.3 mm
higher than the screw heads being used.
1) Loosen the two bolts ① and remove the outer
くさだい。
impeller(nearest you).
2) Loosen the bolt ②
3) Adjust the gap between the inner impeller and
chute by turning the bolt ③ so that the inner
impeller is about 0.2 to 0.3 mm higher than
the screw heads (see figure at left).
Turning the bolt ③ to the right narrows
the gap,while turning it to the left widens the gap.
4) When finished adjusting the gap, tighten the bolt ②.
② Adjusting the head guide plate height
Adjust the head limiter to a height 0.2 to 0.5mm higher
the screw heads you will be using.
Loosen the two screws on the left side of the head guide
plate as viewed from the front of the VIS SETTER.
Adjust so the plate is parallel with the chute,
and 0.2 to 0.5 mm higher than the screw heads.
When finished, tighten the nuts.(Differs according to
screws being used).
Outer impeller
Inner impeller
Outer impeller
Bolts
①
Bolts ③
Bolts ②
Nut
Gap
- 14 -

③Head guide plate forward-back adjustment
Bring the head impellerplate as close to the impeller
vane as possible without letting the screws become
jammed between the impeller vane and head
guide plate.
1) Loosen the bolts and remove the colser outer
impeller.
2) Loosen the two nuts on the right side of the head
ナット2個を緩めてください。
impeller plate as viewed from the front of the
VIS SETTER.
3) Bring the head guide plate as close to the inner
gear as possible.
(about 0 to 1 mm from the inner impeller center
line).
4) Tighten the nuts, and tighten the bolts ① to
ください。
secure the outer gear.
④ Adjusting the drive roller transmission force
Adjust the transmission force by the drive roller to
prevent the motor gear head from seizing up
when the rotating drum makes an emergency stop.
1)Remove the screws from inside the hopper and chute.
2)Turn on the power and after loosening the setscrew,
adjust the spring holder nut so that the roller shaft still
turns even if the rotating drum is stopped by hand.
Turn to the right to increase the transmission force
or turn to the left to reduce the transmission force.
⑤ Adjusting the optical axis of the optical switch
The optical sensor switch temporarily stops the drive
motor for the rotating drum in order to prevent
damage to the specified number of screws aligned
on the chute and to reduce power consumption.
However,if the optical axis deviates from the proper
position,this function is disabled, so adjust the optical
axis as follows:
1)Remove the screws from inside the hopper and chute.
2)Turn on the power and if the motor lamp lights up,
then the optical axis is in the roughly correct range.
3)Loosen the screw ① on the right side bracket,swing it
along the direction of arrow A and tighten the screw ①
at the middle position in the range where the motor
lamp lights up.
4)If just adjusting the right side bracket is insufficient, then also loosen the left side bracket,swing it
along the direction of arrow B and adjust the left and right brackets at the mid-position
where the motor lamp lights up.
5)If the adjustment is still unsatisfactory, then loosen the setscrew ③ for the optical sensor and
slide the optical sensor along the direction of arrow C, to adjust it to a mid-position where the
motor lamp lights up.
6)After finishing the adjustment,tighten all the screws ①to ③ securely.
Outer
impelle
Bolt
Nut
Setscrew
Strong
Setscrew
Screw①
Screw②
Screw③
Screw③
- 15 -

Always turn off the power or unplug the power cord from
the outlet before attempting to replace the fuse.
Failing to turn off the power may lead to electrical shocks.
⑥ Replacing the fuse
If the ON lamp does not light up when the POWER
(power switch) is turned on,and the VIS SETTER
does not operate, then the fuse is probably blown.
Replace it as follows:
1) Open the upper cover and remove the front cover.
2)Remove the screws on the left side cover and
ください。
take off the cover.
3) Replace the fuse (3A) that is on the main board.
※ Note: Fuse is 125V / 3A (5.2 dia × 20)
⑦When escapement is clogged with debris
【When screws are clogged in escape body
through hole】
1) Turn off the power switch, and adjust the air
pressure to 0 MPa with the adjuster handle on the
air unit while checking the pressure
gauge on the front panel.
2) Poke a narrow rod or pin through the pipe fitting
取付ボルトをゆるめてパイプ接手を取り外し、
into the debris or loosen the installation bolt(1),
異物を除去してください。
remove the pipe fitting , and remove the debris.
【When the R-L finger is clogged】
1)Turn off the power switch, and set the air pressure
to 0 MPa with the adjuster handle on the air unit
while checking the pressure gauge on the
front panel.
2)Loosen the screws (1) and remove the Es cover.
Loosen the screw (2) and remove the R finger.
3)Grip the Es plate and move right and left to remove
the debris.(Using tweezers may be helpful.)
4)When reassembling, be sure the front and rear of the
Es cover faces in the correct direction.The side
with the engraved mark is the front side.
WARNING
<Main board>
F1 fuse(3A)
Adjuster
handle
Increase
Decrease
Bolt
Pipe fitting
Engraved mark
Screw②
Screw①
Es cover
R finger
Es plate
- 16 -

⑧ Adjusting the screw feed air flow rate
If operation is still unsatisfactory after adjusting the
screw feed air pressure and time, then try adjusting
the feed air flow rate. Adjust this by using the
switch rod adjuster screw on the left side of the
escapement of the feeder unit. To make the
screw feed speed faster, increase the air flow in the
screw feed hose by first loosening the nut and
then turning the switch rod adjuster screw
counterclockwise. To lower the screw feed speed
on the other hand , turn the adjuster screw clockwise
to lower the air intake flow. Setting too high an air flow
rate will speed up the screw feed speed but
also damage the screw feed hose's internal surfaces.
Use caution here because the screw feed will
also use more compressed air so that the escapement
Note:In the auto feeder unit, screws are operation will worsen somewhat.
pressured-fed from the hose fitting
air-blow unit (pressure feed block)
of the ES unit, so the switch rod
adjuster screw is tightened in the clockwise
direction.(see page 17 clause 8)
⑨ Changing the screw specifications
Screw specifications on the MK-3020 can be changed by
replacing the cartridge type escape attachment.
(You must also change the screwdriver if using the
VIS SETTER Handy as the screwdriver.) In that case,
consult your dealer for information.
1) Remove the screws from inside the hopper and chute.
2) Open the upper cover, pull the nylon latch on the
front cover and remove it.
3) Remove the left side cover.
4) Loosen impeller bolt ①, turn the bolt ② to the right,
and raise the impeller up all the way.
5) Loosen the impeller setscrews ① (two screws),
and pull off (remove) the raised impeller.
6) Pull off (remove) the gate.
7) Remove the tube from the air pipe quick-release
fitting on the escapement.
8) Loosen the escape attachment bolts, and remove them.
9)Install the new escape attachment(for new screw
specifications).
10) To reassemble, reinstall the parts in the reverse
of the above sequence or other words from ⑨
through ①. Now align the impeller with the chute
center, adjust the impeller height (see page 13),
and make the head guide forward-back adjustment
(see page 14).
11) Replace the screw feed hose with one that matches
the new screw specifications.(If using the
(ビスセッターハンディとして、ドライバーをお使い
VIS SETTER Handy as the screwdriver, you must
also replace the screwdriver with one that matches
the new screw specifications.)
③ 取付けねじ
Nut
More
air
Less air
Switch rod adjuster
screw
Mounting
screws
Mounting
screws
Bolt
②
Bolt
①
Setscrews
Escapement
attachment
bolt
Escapement
attachment bolt
- 17 -

8.Air tubing diagram
9.Electrical wiring diagram
AUTO Feeder
HANDY
(OPTION)
Spool
Escapement
Switch rod
Screw feed hose
(to screwdriver)
Solenoid valve
Screw feed
pressure gauge
Air unit
Air hose set ( to screwdriver )
Factory air
source
User side
From pressure-feed valve
The hose connector unit below
the escapement functions as an
air blow unit for the auto
feeder, and so can do screw
sorting and pressure feeding.
When using HANDY as the screwdriver
Buzzer and error
signal connectors
are optional
specifications
Screwdriver
ACN
ACL
RTN
SIG
RTN
SIG2
SIG
SIG1
RTN
COM
ON
GND
V12
V12
SIG
SIG
CN7
AC100-SW
CN6
SOLENOID
CN5
MOTOR
CN3
BUZZ
CN4
ER-OUT
CN2
SENS
CN1
DV-SW
CN11A
PANEL-CN
CN15
Brow
Orange
Gray
Yellow
Blue
Brown
White
Red
Red
Yellow
White
Blue
Brown
Black
White
Black
POWER
1
2
3
4
SW
AC100V
53/60Hz
Air solenoid valve
SL
MOTOR
黒
灰
茶
白
Buzzer
B
Nylon connector (1545R)
Pin terminal (1381TL)
Lignt
sensor
Light
emitte
Part detection
3P socket
Screw-feed external input signal
Flat cable
Panel board
Feed Time ・Vibration VR
Power Motor
2.5uF
ANC
ANL
E
※When an electric driver is used, air is not supplied by OUT.
- 18 -

10.Operation timing diragram
:Operates linked to the optical swicth
:Operates linked to the screw-feed external input signal
:
Motor gear-head stop delay time
:Used to adjust the screw feed time (solenoid valve)
Note:Selector switch should be ON for Handy, and OFF for Auto Feeder.
11.Screw-feed external input signal selector
Set MODE (J) to ”1” with the SEL button.
Output relay (X2)
Timer (T1)
Output relay (X1)
Timer (T2)
Power
Optical switch light sensor
Output relay (X1)
Motor
External input signal for
screw feed(1P-3P)
(during selector SW ON)
Output relay (X2)
Solenoid valve
(during selector SW OFF)
Output relay (X2)
Solenoid valve
Within 7ms
T1 = fixed at 1 second
T2:0.1~
Within T1
- 19 -

12.Troubleshooting
If problems should occur, then use the following chart to find and eliminate it.Consult your dealer
if the following troubleshooting chart does not correct the problem. (Always consult the dealer in
cases where a ※ mark appears below.) Inadequate or incomplete troubleshooting will not only
hurt machine performance but may also create hazardous situation.
Symptom Cause
Action
Page
Rotary drum fails
torotate or stops
abnormally
Power switch not
turned on Turn on power switch.
Fuse(3A)on control board is
blown. Replace it.
The optical axis of the optical
switch has deviated. Adjust the
optical axis.
Clean the screw sliding sections
along the chute
Remove the screws and clean
the interior of the hopper,
reverse the rotating drum back
slightly by hand, and remove the
screws
Adjust the driver roller
transmission force
Consult your dealer, and request
assistance
The optical axis of the optical
switch has deviated.Adjust the
optical axis
Adjust the impeller vane height
Clean the interior of the hopper.
Drive ( transmitting) force is low
because the torsion spring has
weakened. ※Replace the
torsion spring
Power lamp won't light
up
Motor lamp won't light
up
Screws have stopped
along sliding surfaces
of chute
Screws are binding
between rotating
drum's scoop pawl and
the hopper
Driver roller
transmission force is
weak,causing slipping
Motor won't turn
Motor lamp won't light
up
Impeller vane is
binding on head plate
Impeller is slipping
Rotating drum won't
stop even if screws are
lined up in chute
Impeller vane won't rotate
11
15
14
12
12
13
14
※
14
Remove the screws that are
binding, recheck the impeller
height, and readjust it
Screw are binding on
impeller vane 13
12
- 20 -
Table of contents
Popular Industrial Electrical manuals by other brands

Murata
Murata GRM011R60G103KE01 Series Reference sheet

Murata
Murata GRT31CC81E106KE01 Series Reference sheet

Murata
Murata GQM2195C1H820GB01 Series Reference sheet

Murata
Murata GRM188R71C473KA01 Series Reference sheet

Eaton
Eaton C30C-P Series Instruction leaflet

Protekt
Protekt CR 200 Series instruction manual

Murata
Murata GRM0335C1E3R2BA01 Series Reference sheet

Murata
Murata GJM1555C1H2R1WB01 Series Reference sheet

Murata
Murata GRM2165C1H471JA01 Series Reference sheet

Murata
Murata GRM1555C2A8R7CA01 Series Reference sheet

Eaton
Eaton FAZ/FIP-XDWM Instruction leaflet

Murata
Murata GQM1875C2E1R2WB12 Series Reference sheet