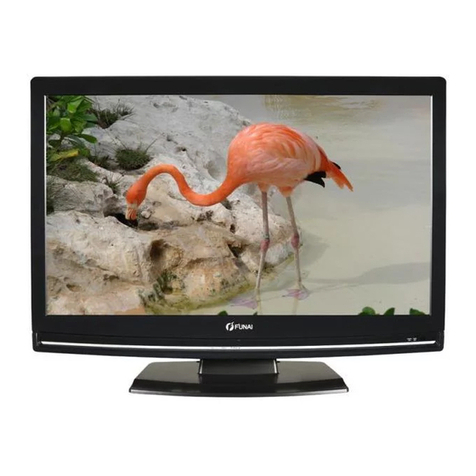
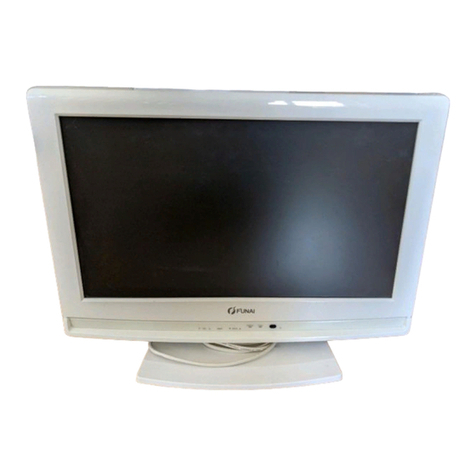
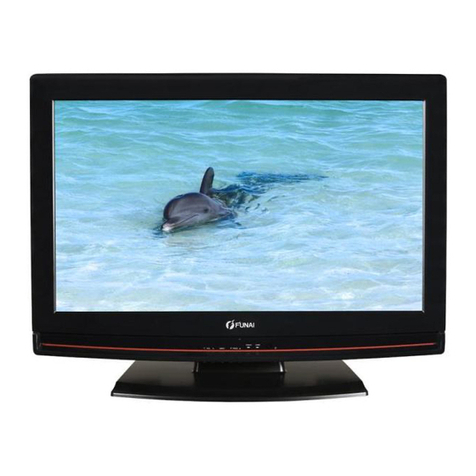
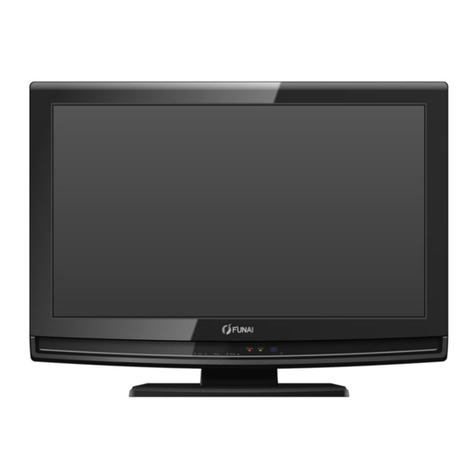
FUNAI LT840-M22 User manual

LT840-M22 / LT850-M22 / LT851-M22
LT840-M19 / LT850-M19 / LT851-M19
Manuel du propriétaire
Télévision LCD
Français
Manuale del proprietario
Manual do proprietário
Gebruikershandleiding
Televisione LCD
Italiano
Televisão LCD
Português
Lcd-televisie
Nederlands
Εγχειρίδιο οδηγιών
LCD Τηλεόραση
Ελληνικά
Användarhandbok
LCD-TV
Svenska
Owner’s manual
LCD Television
English
Instrukcja obsługi
Telewizor LCD
Polski
Bedienungsanleitung
LCD-TV-Gerät
Deutsch
Manual del propietario
Televisión de LCD
Español

EN
2
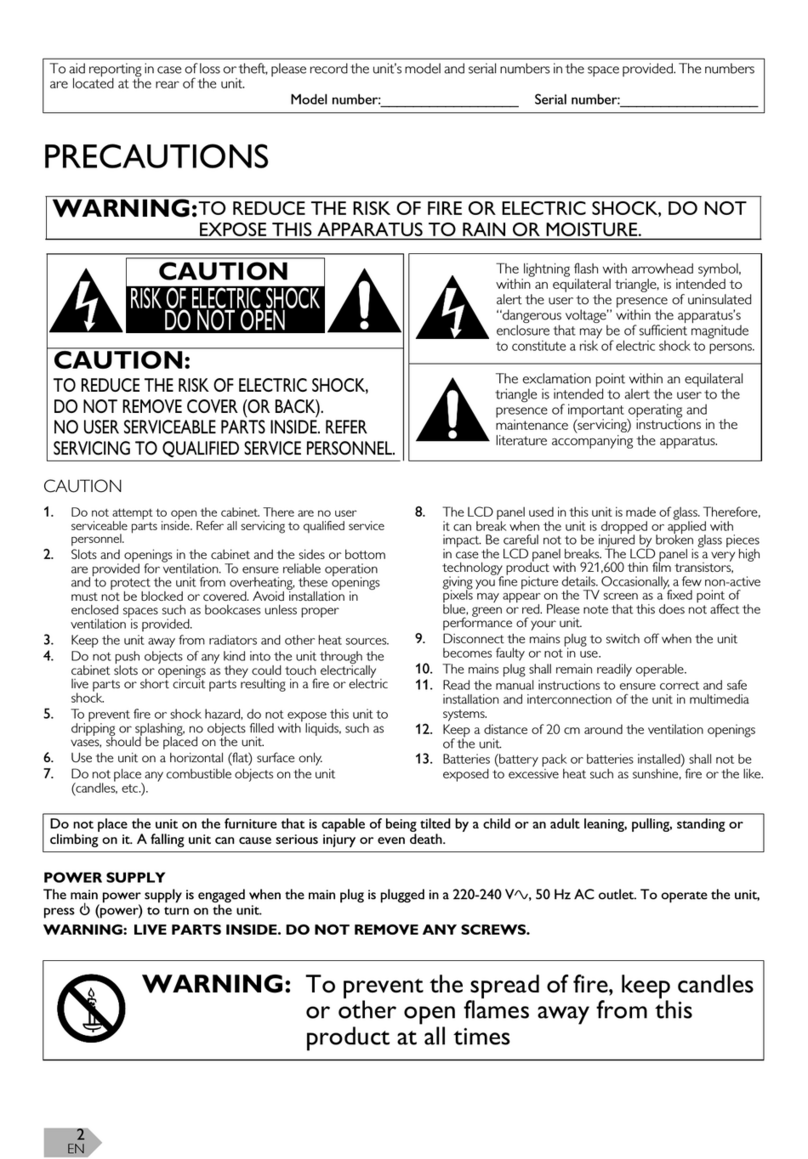
PRECAUTIONS
CAUTION
1. Do not attempt to open the cabinet. There are no user
serviceable parts inside. Refer all servicing to qualified service
personnel.
2. Slots and openings in the cabinet and the sides or bottom
are provided for ventilation. To ensure reliable operation
and to protect the unit from overheating, these openings
must not be blocked or covered. Avoid installation in
enclosed spaces such as bookcases unless proper
ventilation is provided.
3. Keep the unit away from radiators and other heat sources.
4. Do not push objects of any kind into the unit through the
cabinet slots or openings as they could touch electrically
live parts or short circuit parts resulting in a fire or electric
shock.
5. To prevent fire or shock hazard, do not expose this unit to
dripping or splashing, no objects filled with liquids, such as
vases, should be placed on the unit.
6. Use the unit on a horizontal (flat) surface only.
7. Do not place any combustible objects on the unit
(candles, etc.).
8. The LCD panel used in this unit is made of glass. Therefore,
it can break when the unit is dropped or applied with
impact. Be careful not to be injured by broken glass pieces
in case the LCD panel breaks. The LCD panel is a very high
technology product with 921,600 thin film transistors,
giving you fine picture details. Occasionally, a few non-active
pixels may appear on the TV screen as a fixed point of
blue, green or red. Please note that this does not affect the
performance of your unit.
9. Disconnect the mains plug to switch off when the unit
becomes faulty or not in use.
10. The mains plug shall remain readily operable.
11. Read the manual instructions to ensure correct and safe
installation and interconnection of the unit in multimedia
systems.
12. Keep a distance of 20 cm around the ventilation openings
of the unit.
13. Batteries (battery pack or batteries installed) shall not be
exposed to excessive heat such as sunshine, fire or the like.
POWER SUPPLY
The main power supply is engaged when the main plug is plugged in a 220-240 V~, 50 Hz AC outlet. To operate the unit,
press Q(power) to turn on the unit.
WARNING: LIVE PARTS INSIDE. DO NOT REMOVE ANY SCREWS.
To aid reporting in case of loss or theft, please record the unit’s model and serial numbers in the space provided. The numbers
are located at the rear of the unit.
Model number:_________________ Serial number:_________________
WARNING: TO REDUCE THE RISK OF FIRE OR ELECTRIC SHOCK, DO NOT EXPOSE THIS
APPARATUS TO RAIN OR MOISTURE.
CAUTION:
TO REDUCE THE RISK OF ELECTRIC SHOCK,
DO NOT REMOVE COVER (OR BACK).
NO USER SERVICEABLE PARTS INSIDE. REFER
SERVICING TO QUALIFIED SERVICE PERSONNEL.
CAUTION
RISK OF ELECTRIC SHOCK
DO NOT OPEN
The lightning flash with arrowhead symbol,
within an equilateral triangle, is intended to
alert the user to the presence of uninsulated
“dangerous voltage” within the apparatus’s
enclosure that may be of sufficient magnitude
to constitute a risk of electric shock to persons.
The exclamation point within an equilateral
triangle is intended to alert the user to the
presence of important operating and
maintenance (servicing) instructions in the
literature accompanying the apparatus.
Do not place the unit on the furniture that is capable of being tilted by a child or an adult leaning, pulling, standing or
climbing on it. A falling unit can cause serious injury or even death.
WARNING: To prevent the spread of fire, keep candles or other open
flames away from this product at all times
EN
3
Contents
PRECAUTIONS ...................................................... 2
INTRODUCTION
Features..................................................................................4
Supplied Accessories ......................................................4
Trademark Information .................................................4
Symbols Used in this Manual .....................................4
Attaching the Base ...........................................................5
Installing the Batteries.....................................................5
Fixing the Unit on Your Furniture...........................5
Control Panel......................................................................6
Remote Control................................................................6
Rear Panel.............................................................................7
PREPARATION FOR USE
Antenna Connection......................................................8
External Connection.......................................................8
SETUP FOR USE
Initial Setup......................................................................... 11
OPERATIONS
Watching a TV Programme...................................... 12
Channel List ....................................................................... 12
Sleep Timer........................................................................ 12
Switching the Input Mode.......................................... 12
Colour System.................................................................. 12
ECO Mode......................................................................... 13
Sound Select...................................................................... 13
TV Screen Information ................................................ 13
EPG (Electronic Programme Guide) ................... 14
Changing the TV Screen Display Mode ............ 14
OTHER SETTINGS
Picture Adjustment.........................................................16
Advanced Picture Adjustment.................................17
Sound Adjustment..........................................................18
Channel Settings ..............................................................19
Auto Scan ............................................................................20
Manual Scan........................................................................20
Lock Settings ......................................................................21
Audio Settings ...................................................................21
Subtitle Settings ................................................................22
Teletext.................................................................................23
C.I. (Common Interface).............................................24
PC Settings..........................................................................24
FUN-LINK............................................................................25
Country Setting ................................................................26
Time Setup..........................................................................26
Software Download.......................................................26
Factory Reset.....................................................................27
Menu Language Selection...........................................27
MAINTENANCE
Panel Cleaning...................................................................27
Servicing................................................................................27
Cabinet Cleaning .............................................................27
TROUBLESHOOTING GUIDE .........................28
SPECIFICATIONS..................................................29
DECLARATION OF CONFORMITY ..............29

EN
4
INTRODUCTION
A Note about Recycling
Following information is only for EU-member
states:
Following information is only valid EU-member
States: Disposal of batteries and/or
accumulators
• Integrated Digital Terrestrial Tuner (DVB-T)
• EPG (Electronic Programme Guide)
•StereoSoundSystem
• On-Screen Display
• Sleep Timer
• Teletext
• TV Screen Mode Selection
• Auto Shut Off
•ParentalLock
• HDMI Input x 2
• Scart x 1
• Component Input
• S-Video Input
• PC Input
•ECOMode
• Remote control
• Battery (R03/AAA 1.5V) x 2
•Owner's manual
• Phillips pan screw for attaching the base x 3
• HDMI, the HDMI Logo, and High-Definition Multimedia
Interface are trademarks or registered trademarks of HDMI
Licensing LLC in the United States and other countries.
• DVB is a registered trademark of the DVB Project.
• The “HD ready” Logo is a trademark of DIGITALEUROPE.
The followings are the description for the symbols used in this
manual.
O
ff
This unit's packaging materials are recyclable
and can be reused. Please dispose of any
materials in accordance with your local
recycling regulations.
This product consists of materials which can
be recycled and reused if disassembled by a
specialised company.
The use of the symbol indicates that this product may not
be treated as household waste.
By ensuring this product is disposed of
correctly, you will help prevent potential
negative consequences for the environment
and human health, which could otherwise
be caused by inappropriate waste handling
of this product.
For more detailed information about
recycling of this product, please contact
your local city office, your household waste
disposal service or the shop where you
purchased the product.
Pb, Hg, Cd
The crossed out wheeled dust bin symbol indicates that
batteries and/or accumulators must be collected and disposed
of separately from household waste.
If the battery or accumulator contains more than the specified
values of lead (Pb), mercury (Hg), and/or cadmium (Cd)
defined in the Battery Directive (2006/66/EC), then the
chemical symbols for lead (Pb), mercury (Hg) and/or
cadmium (Cd) will appear below the crossed out wheeled
dust bin symbol.
By participating in separate collection of
batteries, you will help to assure the proper
disposal of products and batteries and thus
help to prevent potential negative conse-
quences for the environment and human
health.
For more detailed information about the
collection and recycling programmes available
in your country, please contact your local city
office or the shop where you purchased the
product.
Features
Supplied Accessories
Trademark Information
Symbols Used in this Manual
Digital TV operation
Analogue TV operation
DTV
ATV

EN
5
You must attach the base to the unit to have it as a table top
unit. Be sure the front and rear of the base match the proper
direction.
To remove the base from this unit
Unscrew the Phillips pan screws on step 3. After the screws
are removed, pull the base up toward the rear of the unit. Be
careful not to drop the base when you remove it.
1Open the battery compartment cover.
2Insert R03/AAA 1.5V penlight batteries into battery
compartment in the direction as indicated by the
polarity (+/–) markings. Batteries installed with
incorrect polarity may damage the remote unit.
3Close the cover.
4Push the cover on its top side until it clicks in order to fit
the cover completely to the compartment.
Screw this unit on your furniture tightly using wood screws
(not supplied) in the 2 holes at the back of the base as shown.
Recommended screw dimension : 5.1 x 20 mm
Attaching the Base
1Spread a thick and
soft cloth over a
table as shown. Place
the main unit face
down onto it. Make
sure not to damage
the screen.
2Align the 2 base
hooks with the
hooks under the
bottom of the main
unit (shown by
arrow A), then slide
the base in the
direction as shown
by arrow Buntil it
stops and the 3
mounting holes are
aligned.
Make sure not to put
the AC power cord
between the base
and the unit.
3Drive Phillips pan
screws into the 3
threaded holes at
the bottom of the
base until they are
tight.
Note: • When attaching the base, ensure that all screws are tightly
fastened. If the base is not properly attached, it could cause the unit
to fall, resulting in injuries as well as damage to the unit.
• Make sure to use the table which can support the weight of this
unit and is larger than this unit.
• Make sure the table is in a stable location.
B
A
Installing the Batteries
Fixing the Unit on Your
Furniture
Note: When you remove this unit make sure to unscrew the wood screws
from your Wood Stand, Furniture and other wood item.
screw holes
Rear of this unit

EN
6
1. Q(power) (p. 8)
Press to turn on or off (standby) the unit.
2. SLEEP (p. 12)
Press to set the sleep timer.
Press to hide the teletext.
3. Number buttons (p. 12)
Press to select the desired channel in TV mode.
Press to enter the password in the password input
field.
4. SOUND (p. 13 / p. 18)
Press to change the sound modes.
5. BACK (p. 11)
Press to return to the previous display.
6. K/ L/ 0/ 1(cursor) (p. 11)
Press to select the setting on the menu.
Press to select item you want to adjust in the picture
control mode.
Press to go to the next page or the previous page of
teletext.
7. OK
Press to determine the setting on the menu.
Press to select or adjust from a particular menu.
Press to display the channel list while watching a
programme.
8. MENU (p. 16)
Press to display the menu.
MENU (control panel)
Same function as OK (remote control) on the menu.
9. VOL. X/Y(control panel) /
+/– (remote control) (p. 12)
Press to control the volume level.
VOL. X(control panel)
Same function as 1(cursor) (remote control) on the
menu.
VOL. Y(control panel)
Same function as 0(cursor) (remote control) on the
menu.
10. (mute) (p. 12)
Press to mute the sound.
11. RED/GREEN/YELLOW/BLUE (p. 23)
Press to directly select the page numbers of teletext.
12. COLOUR SYSTEM (p. 12)
Press to select the colour input signal from external
devices.
13. FUN-LINK (p. 25)
B/C/H/G/F/E/D(play / stop / skip
backward / skip forward / pause / reverse / forward):
You can operate your connected FUN-LINK device.
FUN-LINK: Press to call up various menu from
your FUN-LINK device connected through an HDMI
cable.
14. (expand) (p. 23)
Press to enlarge fonts of teletext.
15. (text) (p. 23)
Press to display the teletext information.
16. (reveal) (p. 23)
Press to call up the hidden information of teletext.
17. SOURCE (p. 12)
Press to switch TV or external input mode.
18. MODE (DTV/ATV)
Press to select digital or analogue mode.
19. ASPECT (p. 14)
Press to switch the aspect ratio available for the TV
screen.
20. GUIDE (p. 14)
Press to display EPG (Electronic Programme Guide) in
digital mode.
Control Panel
Remote Control
VOL. MENU PROG.
STAND BY POWER
Q
9 24 298 130
117
2
3
4
5
6
7
8
9
10
12
13
14
15
19
20
21
22
23
25
27
28
24
18
11
26
16

EN
7
21. ECO (p. 13)
Press to set the picture brightness for power saving.
22. I(information) (p. 13)
Press to display the TV screen information.
23. DTV / RADIO
Press to select DTV or radio mode.
24. PROG. K/L(control panel) /
/ (remote control)
Press to select memorised channel or other modes.
PROG. K/L(control panel) (p. 12)
Same function as K/L(cursor) (remote control) on
the menu.
25. (subtitle) (p. 22)
Press to change the available subtitle languages.
26. (subpage) (p. 23)
Press to select subpages of teletext.
27. (hold) (p. 23)
Press to hold the current page of teletext.
28. (index) (p. 23)
Press to go back to the start page of teletext.
29. STAND BY / POWER indicator
Lights up green when power is on.
Lights up red when power is off (standby).
30. Infrared sensor window
Receives the infrared rays transmitted from the remote
control.
1. (aerial) Input jack (p. 8)
2. PC Input jack (p. 10)
3. HDMI (HDMI 1 / HDMI 2) Input jack (p. 8)
4. C.I. (Common Interface) slot (p. 24)
5. Headphone jack
Connect a headphone.
6. Main power switch
Turns this unit’s main power on and off.
7. AC power cord
Connect to a standard AC outlet to supply power to
this unit.
8. S-Video Input jack (p. 9)
9. Composite video Input jack (p. 9)
10. Audio Input jack for PC connection (p. 10)
11. Audio (L/R) Input jacks (p. 9)
12. Scart jack (p. 8)
13. Component video and Audio (L/R) Input jacks (p. 9)
Rear Panel
9
12
8
10
810
11
911
1
2
3
4
5
13
12
6
*
4
*
1
2
3
6
5
19”
22”
77
Note: The Audio (L) jack is for monaural input. The
sound is heard from both speakers. Use this jack
for a monaural audio device.
Note: *service terminal (service use only)
• Use this terminal only when a software update is
necessary.
• User should not connect any devices to the
service terminal such as digital camera, keyboard,
mouse, etc. (because these will not work).
• The software update is, in most cases, handled by
an authorized service person or in some
circumstances the user may be asked to do the
software update themselves.

EN
8
PREPARATION FOR USE
Before you connect...
Be sure your antenna or other device is connected properly
before plugging in the AC power cord.
1Connect an RF cable to (aerial) Input jack at the
rear of this unit.
2Plug this unit into an AC outlet.
3Turns on the main power switch.
4When the STAND BY /POWER indicator on the front
panel lights red, then press Qto turn on the unit.
HDMI connection
HDMI connection offers the highest picture quality. HDMI
(High-Definition Multimedia Interface) transports high
definition video and multi-channel digital audio through a
single cable.
Connect the HDMI output jack of your video device and the
HDMI (HDMI 1 / HDMI 2) Input jack of this unit. Use an
HDMI cable.
Scart connection
Scart connection offers better picture quality.
Connect the scart jack of your video device and the Scart jack
of this unit. Use a scart cable.
No supplied cables are used with these connections:
Please purchase the necessary cables at your local store.
High Speed HDMI cable (also known as HDMI category 2 cable) is recommended for the better compatibility.
Antenna Connection
Note: If you like to connect an active DVB-T antenna, the antenna must
have its own power supply.
It is not possible to power the antenna from the TV.
Your T V
VHF/UHF
MIXER
VHFUHF
External Connection
Dear Customer,
By connecting an HDMI cable to your Funai LCD TV, you
have to use only a certified HDMI cable to guarantee a
sufficient immunity against parasitic frequency radiation.
A certified HDMI cable can be identified by the HDMI logo
on the cable or the cable package.
Note: • This unit accepts 480i / 480p / 576i / 576p / 720p / 1080i / 1080p
video signals and 32 kHz / 44.1 kHz / 48 kHz audio signals for
HDMI connection.
• This unit accepts only 2 channel audio signals (LPCM).
• You need to select “PCM” for the digital audio output of the
device you connect. Make sure the device outputs the digital
audio. Audio sometimes makes no sound if you select
“Bitstream”, etc.
INPUT OUTPUT
S-Video Audio
(L/R) CVBS RGB Video and Audio (L/R)
Yes Yes Yes Yes only ATV or DTV output
is available.
Your T V
Your device
Your TV
Your device

EN
9
Component connection
Component video connection offers better picture quality.
1Connect the component video output jacks of your
video device and the Component video Input jacks of
this unit. Use component video cables.
2Connect the audio output jacks of your device and the
Audio (L/R) Input jacks of this unit. Use audio cables.
S-Video connection
S-Video connection offers good picture quality.
1Connect the S-Video output jack of your video device
and the S-Video Input jack of this unit. Use an S-Video
cable.
2Connect the audio output jacks of your device and the
Audio (L/R) Input jacks of this unit. Use audio cables.
Composite video connection
Composite video connection offers standard picture quality.
1Connect the composite video output jack of your video
device and the Composite video Input jack of this unit.
Use composite video cable.
2Connect the audio output jacks of your video device
and the Audio (L/R) Input jacks of this unit. Use audio
cables.
No supplied cables are used with these connections:
Please purchase the necessary cables at your local store.
Note: This unit accepts 480i / 480p / 576i / 576p / 720p / 1080i video
signals for component connection.
AUDIO IN COMPONENT VIDEO IN
Y
L
R
Pb Pr
AUDIO OUT
COMPONENT VIDEO OUT
L
R
YPbPr
Your device Your T V
S-VIDEO IN
AUDIO IN
L
R
AUDIO OUT
L
R
S-VIDEO OUT
Your device Your T V
Note: If you connect to the S-Video jack and the Composite video jack at
the same time, S-Video connection will have priority.
AUDIO IN
VIDEO IN
L
R
AUDIO OUT
VIDEO OUT
L
R
Your device Your T V

EN
10
PC connection
If you connect this unit and your PC, you can use this unit as
a computer monitor.
Precautions for the connection to other devices:
Please use the VGA cable that has a ferrite core.
1Connect the monitor jack of your PC and the PC Input
jack of this unit. Use a VGA cable with ferrite core.
2Connect the audio line out jack of your PC and the
Audio Input jack for PC of this unit. Use a mini-plug
audio cable.
The following signals can be displayed:
No supplied cables are used with these connections:
Please purchase the necessary cables at your local store.
Format Resolution Refresh rate
VGA 640 x 480
60 Hz
SVGA 800 x 600
XGA 1,024 x 768
WXGA 1,280 x 768
1,360 x 768
Note: Other formats or non-standard signals will not be displayed
correctly.
PC-IN
AUDIO
LINE OUT
PC-IN
AUDIO
Your T V
Your device

EN
11
SETUP FOR USE
You need to set the followings to use the unit appropriately
for the first time you turn on the unit.
1Press Qto turn on the unit.
2Press K/ Lrepeatedly to select the menu language you
want, then press OK.
3Press K/ Lto select the country you want, then press
OK.
4Press K/ Lto select the region you want, then press
OK.
• Scan confirmation menu will appear.
5Press OK to start scanning.
6Press 0/ 1to select the location, then press OK.
Initial Setup
Note: If you select the country except [Spain], you can skip Step 4.
DTV ATV
OK
Initial Setup
Initial Setup
Please select your language.
English
Español
Deutsch
Dansk
Česky
Български
Ελληνικά
Select OK Skip
MENU
OK
MENUBACK
Initial Setup
Please select your country. Austria
Belgium
Bulgaria
Czech Republic
France
Germany
Greece
Select OK Back Skip
Initial Setup
Note: • If you press MENU, you can skip to step 6.
• If you press MENU during DTV channel scanning, this operation
will be stopped and ATV channel scanning will start automatically.
• If you press MENU during ATV channel scanning, this operation
will be stopped and the lowest memorised channel will be
displayed.
• When no channel is registered, retry confirmation menu will
appear.
Note: • Selecting [at Home] reduces the backlight brightness for power
saving. When “Initial Setup” is completed, you cannot change the
location setting unless you restore this unit to “Factory Reset”
(p. 27) and that restarts all over again such as channel scanning.
• If you select [Retailstore], the settings of picture and sound quality
you adjusted will not be memorized after you turn off the unit.
OK
Initial Setup
Please select your location.
Retailstore at Home
Select OK
Initial Setup

EN
12
OPERATIONS
To select a channel
Press PROG. K/L(control panel) or / (remote
control) repeatedly to select your desired channel.
or
Press the Number buttons to enter a channel number then
OK for quicker access.
To adjust the volume
Press VOL. X/Y(control panel) or +/– (remote
control) to adjust the audio volume.
Press to turn on or off the sound right away.
You can easily find a channel you want.
1Press OK while watching a programme.
2Press K/ Lto select the channel you want to watch,
then press OK.
3Press BACK to exit.
You can set the unit to be turned off automatically after a set
time period.
1Press SLEEP.
2Press SLEEP repeatedly to change the sleep time
period.
• Each time you press SLEEP, the timer increases by 30
minutes up to 120 minutes.
You can switch the input mode to TV mode or external input
mode.
1Press SOURCE .
2Press K/ Lto select the input mode you want, then
press OK.
You can change the TV colour system in video or scart mode.
Press COLOUR SYSTEM repeatedly to select the colour
system you want, then press OK.
([Auto], [PAL], [PAL 60], [SECAM], [NTSC], or
[NTSC 4.43])
Watching a TV Programme
(e.g.) If you want to select the channel 24 without pressing
OK, press 2first, then press 4within 3 seconds.
Note: You can recover the original volume by pressing again or
+/– (remote control).
Channel List
Locked Channel
Decoded Channel
Note: Press 0/ 1to move to the previous or next page.
Note: You can edit the channel list at “Channel Settings” (p. 19).
DTV ATV
20
Volume
Stumm
DTV ATV
Channel List -DTV-
18. ETV
19. Euro CH
20. Drama Now!
21. WNS
22. BCT
23. 24 Movies
1. EUT1
2. EUT2
3. EUT3
4. CCT
5. K7
6. CBN
1. EUT1 Radio
710. Hot music
711. Kids station
713. WA World
715. ASA1
716. KAR weather
Channel List -DTV- Channel List -ATV- Channel List -Radio-
Channel List -ATV- Channel List -Radio-
<DTV> <Radio><ATV>
Sleep Timer
Note: •PressSLEEP repeatedly until [Off] appears to cancel the sleep
timer.
• If you disconnect the unit from the AC outlet or if a power failure
occurs, the sleep timer will be cancelled.
Switching the Input Mode
Colour System
Note: When you select [Auto] by pressing COLOUR SYSTEM, this unit
will distinguish the system automatically according to the input signal
from the external devices.
DTV ATV
120
Sleep min.
DTV ATV
Select Input
DTV
AT V
SCART
VIDEO
COMPONENT
1HDMI
2HDMI
PC
Select Input

EN
13
When you set [ECO Mode] to [On], backlight brightness will
be reduced automatically which may save on power
consumption.
Press ECO repeatedly to select [On] or [Off], then press
OK.
1Press SOUND to display the currently selected audio
language and the number of available languages.
2Press SOUND repeatedly to cycle through the available
audio languages.
1Press SOUND to display the currently selected audio
mode.
2Press SOUND repeatedly to cycle through the available
audio mode.
You can see the broadcasting information.
1Press I.
• Fewer information menu will appear.
2Press Iagain to display more informations.
1. Channel name
2. Current time
3. ATV broadcast
• is displayed when it receives analogue TV
broadcast.
DTV broadcast
• is displayed when it receives digital TV broadcast.
Radio service
• is displayed when it receives digital audio broadcast.
4. Channel number
5. Present programme name / time
6. Programme information
7. Resolution / Format / TV aspect ratio
8. Audio language (DTV) / Audio Mode(ATV)
9. Audio mode (DTV)
10. Subtitle (p. 22)
• is displayed if the subtitle of the TV programme is
available.
11. Lock status (p. 19 / p. 21)
• is displayed when you are watching the TV
programme which you set the parental lock or channel
lock.
12. Parental rating (p. 21)
• is displayed if the parental rating of TV programme
is available.
* The icon may differ depending on the ratings.
13. Pay TV
• is displayed, when you are watching the pay TV.
14. Teletext (p. 23)
• is displayed if the teletext of TV programme is
available.
15. Audio Description (p. 22)
• is displayed when the TV programme provides
additional audio description for visually impaired.
3Press BACK to exit.
• TV Screen information menu will automatically
disappear in a few seconds.
ECO Mode
On : The backlight is the lowest level.
Off :Youcanadjustthebacklight level at “Advanced
Picture Adjustment” (p. 17).
Sound Select
1. Nicam Stereo Mono
2.
3. Nicam Mono Mono
4. Stereo Mono
5.
6. Mono
TV Screen Information
DTV
ATV
Nicam
Dual1
Nicam
Dual2
Nicam
Stereo Mono
Dual1 Dual2 Stereo
DTV ATV
576i SD 16:9
ETV
07:00-09:59
1/3
09:37 18
1/3
Hit Music
You're turned to the Sounds, keep it here for the biggest
sounds around, it doesn't get fresher than this! Call
09012 345 678 now to select a video
Now:
English
Dual1
English
Note: Press 0/ 1to switch the present and next programme.
(if available)
Note: When the programme information consists of more than
3 lines, press K/ Lto scroll.

EN
14
You can easily find a channel or see the detailed channel
information. EPG gives you scheduled information of the TV
programmes.
1Press GUIDE.
2Press K/ Lto select a channel, then press 1(cursor).
3Press K/ Lto select a programme.
4Press Ito display more detailed programme
information.
5Press GUIDE to exit.
You can select your favourite TV screen size.
Press ASPECT repeatedly to switch the TV screen display
mode.
For 16:9 video signal
Auto
Selects the TV screen display mode automatically.
This is the default.
4:3
Displays a16:9 picture at a 4:3 size; the picture is reduced
horizontally to fill the TV screen. Sidebars appear on both
edge of the TV screen.
Full
Displays a 16:9 picture at its original size.
Zoom
Displays a 16:9 picture at its maximum size without changing
its horizontal and vertical ratio.
Cinema
Displays a 16:9 picture that is vertically stretched to fill the
screen. This only crops out the top of the picture.
Expand
Displays a horizontally stretched picture.
This crops out the left and right sides of the picture.
EPG
(Electronic Programme Guide)
Note: • Press RED or GREEN to move the channel list to the previous or
next page.
• Press OK to watch the selected channel.
Note: • Press RED or GREEN to move the programme list to the
previous or next day.
• Press OK to watch the selected programme if it is currently
available.
Note: When the programme information consists of more than 2 pages,
press K/ Lto move to the previous or next page.
DTV
OK
Thu
Thu
Programme Guide
, 11/02/2010
, 11/02/2010 11:01
, 11/02/2010 11:01
ETV18.
19. Euro CH
21. WNS
20. Drama Now!
22. BCT
23. 24 Movies
KHN News24.
19:00 Hit Music
20:00 Special
22:00 Our Home
22:50 Pick Up Number
23:00 The Flying Women
BACK
Programme Guide Thu
DTV
Prev Page Next Page Watch Exit
Changing the TV Screen
Display Mode
DTV ATV
Full
Zoom
Expand
Cinema
Auto
4:3

EN
15
For 4:3 video signal
Auto
Selects the TV screen display mode automatically.
This is the default.
4:3
Displays a 4:3 picture at its original size. Sidebars appear on
both edge of the TV screen.
14:9
Displays a 4:3 picture at a 14:9 size. Sidebars will be displayed
on both edge of the TV screen. This crops out the top and
bottom of the picture.
Full
Displays a 4:3 picture at a 16:9 size; the picture is stretched
horizontally to fill the TV screen.
Zoom
Displays a 4:3 picture at a 16:9 size; at its maximum size that
is more vertically stretched to fill the screen. This crops out
the top and bottom of the picture.
Cinema
Displays a 4:3 picture at a 16:9 size; the picture is stretched
more vertically at the top of the TV screen. This crops out the
top of the picture.
Wide
Displays the picture with its centre at the original size and the
edges stretched horizontally to fill the screen.
For PC input signal
Normal
Displays a proportionally stretched picture. Mainly sidebars
appear on both edges of the TV screen.
Full
Displays a picture that is stretched out of proportion
horizontally to fill the TV screen.
Dot by Dot
Displays a picture at its original size.
4:3
Full
14:9
Zoom
Wide
Auto
Cinema
Normal Full
Dot by Dot

EN
16
OTHER SETTINGS
You can adjust the picture settings according to your personal
preference. These settings are automatically stored after
exiting the picture menu.
1Press MENU to display the menu.
2Press K/ Lto select [PICTURE], then press OK.
Picture Mode
3Press K/ Lto select [Picture Mode], then press OK.
4Press K/ Lto select the setting you want, then press
OK.
([Standard], [Dynamic], [Movie], [News], or
[Personal])
5Press MENU to exit.
Brightness / Contrast / Colour / Hue / Sharpness
3Press K/ Lto select the item you want, then press
OK.
4Press 0/ 1to adjust, then press OK.
5Press MENU to exit.
Colour Temperature
3Press K/ Lto select [Colour Temperature], then
press OK.
4Press K/ Lto select the setting you want, then press
OK. ([Warm], [Normal], or [Cool])
5Press MENU to exit.
Picture Adjustment
DTV ATV
Picture
30
42
30
0
0
Picture
PICTURE
SOUND
CHANNEL
OTHERS
LANGUAGE
Picture Mode
Brightness
Contrast
Colour
Hue
Sharpness
Colour Temperature
Features
Standard
Normal
Note: Press K/ Lto change the items.
Note: If you adjust the settings in other than [Personal] mode, [Picture
Mode] will be changed to [Personal].
0(cursor) 1(cursor)
Brightness decrease
brightness
increase
brightness
Contrast decrease
contrast
increase
contrast
Colour decrease
colour
increase
colour
Hue
add red add green
Sharpness
make soft make clear
OK
30
Brightness
Adjust Move OK
OK
42
Contrast
Adjust Move OK
OK
30
Colour
Adjust Move OK
OK
0
Hue
Adjust Move OK
OK
0
Sharpness
Adjust Move OK

EN
17
You can adjust the detailed picture settings according to your
personal preference.
1Press MENU to display the menu.
2Press K/ Lto select [PICTURE], then press OK.
3Press K/ Lto select [Features], then press OK.
DNR (Digital Noise Reduction)
You can adjust to reduce the appearance of digitizing error
caused by the compression.
4Press K/ Lto select [DNR], then press OK.
5Press K/ Lto select the setting you want, then press
OK. ([High], [Mid], or [Low])
6Press MENU to exit.
CTI (Colour Transient Intensity)
You can adjust the picture for colour errors.
4Press K/ Lto select [CTI], then press OK.
5Press K/ Lto select the setting you want, then press
OK. ([High], [Mid], or [Low])
6Press MENU to exit.
Adaptive Luma Control
You can adjust changes in the luminance of the picture.
4Press K/ Lto select [Adaptive Luma Control].
5Press K/ Lto select the setting you want, then press
OK. ([On] or [Off])
6Press MENU to exit.
Backlight
You can adjust backlight brightness.
4Press K/ Lto select [Backlight], then press OK.
5Press 0/ 1to adjust, then press OK.
6Press MENU to exit.
Advanced Picture Adjustment
DTV ATV
5
Features
PICTURE
SOUND
CHANNEL
OTHERS
LANGUAGE
DNR
CTI
Adaptive Luma Control
Backlight
Features
Mid
On
Mid
0(cursor) 1(cursor)
dim brighten
Note: If you adjust the brightness except 1, [ECO Mode] will be set to
[Off].
OK
5
Backlight
Adjust OK

EN
18
You can adjust the sound settings according to your personal
preferences.
1Press MENU to display the menu.
2Press K/ Lto select [SOUND], then press OK.
Sound Mode
3Press K/ Lto select [Sound Mode], then press OK.
4Press K/ Lto select the setting you want, then press
OK.
([Standard], [Movie], [Music], [News], or [Personal])
5Press MENU to exit.
Equalizer
You can adjust tonal quality for each frequencies.
3Press K/ Lto select [Equalizer], then press OK.
4Press 0/ 1to select the specific frequencies you want.
5Press K/ Lto adjust the Level, then press OK.
6Press MENU to exit.
Balance
You can set the balance of the left and right speakers.
3Press K/ Lto select [Balance], then press OK.
4Press 0/ 1to adjust, then press OK.
5Press MENU to exit.
Auto Volume Control
You can set to keep a constant loudness differential between
the TV commercials and the programmes.
3Press K/ Lto select [Auto Volume Control], then
press OK.
4Press K/ Lto select the setting you want, then press
OK. ([On] or [Off])
5Press MENU to exit.
TV Speakers
If your amplifier is HDMI link function compatible and
connected by an HDMI cable to this unit, some sound
operations such as volume up can be changed by using this
unit’s remote control.
3Press K/ Lto select [TV Speakers], then press OK.
4Press K/ Lto select the setting you want, then press
OK. ([On], [Off], or [Ext. Amp])
5Press MENU to exit.
Sound Adjustment
Note: If you adjust the setting in other than [Personal] mode, [Sound
Mode] will be changed to [Personal].
DTV ATV
0
Sound
PICTURE
SOUND
CHANNEL
OTHERS
LANGUAGE
Sound Mode
Equalizer
Balance
Auto Volume Control
TV Speakers
Standard
Off
On
Sound
0(cursor) 1(cursor)
decrease
right speaker
volume level
d e c r e a s e
left speaker
volume level
On : The sound will be output from the unit’s
speakers.
Off : The sound will not be output from the unit’s
speakers.
Ext. Amp : You can control audio output from your
connected HDMI link devices by using this unit's
remote control.
OK
L
0
R
Balance
Adjust OK

EN
19
You can edit the channels.
1Press MENU to display the menu.
2Press K/ Lto select [CHANNEL], then press OK.
3Press K/ Lto select [Channel List], then press OK.
4Press K/ Lto select the channel you want to edit, then
press OK.
Channel Skip
When using / , the channel you selected will be
skipped.
5Press K/ Lto select [Skip], then press OK.
• will appear on the right of the channel.
6Press MENU to exit.
Channel Delete
The channel you selected will be deleted from the channel
list.
5Press K/ Lto select [Delete], then press OK.
• Delete Confirmation message will appear.
6Press K/ Lto select [Delete], then press OK.
7Press MENU to exit.
Channel Lock
You can set particular channels to be invisible.
5Press K/ Lto select [Lock], then press OK.
6Press the Number buttons to enter the 4-digit
PIN Code you set.
• will appear on the right of the channel.
7Press MENU to exit.
If you want to unlock
5Press K/ Lto select the channel you want to unlock,
then press OK.
6Press K/ Lto select [Lock], then press OK.
• will disappear.
7Press MENU to exit.
Channel Move Up / Move Down
You can change the channel order.
5Press K/ Lto select [Move Up] or [Move Down],
then press OK.
6Press MENU to exit.
Channel Decode
Some TV stations transmit encoded TV signals which can only
be viewed with a purchased or hired decoder. You can
connect such a decoder to SCART jack of the unit. This
function will automatically activate the connected decoder for
the channel.
5Press K/ Lto select [Decoder], then press OK.
• will appear on the right of the channel.
6Press MENU to exit.
Channel Settings
Note: Press OK again to cancel, and will disappear.
DTV ATV
DTV
OK
18. ETV
19. Euro CH
20. Drama Now!
21. WNS
22. BCT
23. 24 Movies
BACK
Channel List -DTV-
PICTURE
SOUND
CHANNEL
OTHERS
LANGUAGE
Skip
Delete
Lock
Move Up
Move Down
Select Edit Back
Channel List -DTV-
ATV
OK
1. EUT1
2. EUT2
3. EUT3
4. CCT
5. K7
6.
CBN
BACK
Channel List -ATV-
PICTURE
SOUND
CHANNEL
OTHERS
LANGUAGE
Skip
Delete
Lock
Move Up
Move Down
Decoder
Select Edit Back
Channel List -ATV-
Note: When you select the locked channel, you need to enter the
password to watch.
Note: When you selected DTV channel and set to [France] or [Italy] at
“Country Setting” (p. 26), the channel order will be changed. If ATV
channels or any other countries, the channel number will be
switched.
Note: Press OK again to cancel, and will disappear.
ATV

EN
20
You can scan the channels receivable in your area
automatically.
1Press MENU to display the menu.
2Press K/ Lto select [CHANNEL], then press OK.
3Press K/ Lto select [Auto Scan], then press OK.
• Auto Scan Confirmation message will appear.
4Press K/ Lto select [Start], then press OK.
• Channel scanning will start.
You can search and store channels manually.
1Press MENU to display the menu.
2Press K/ Lto select [CHANNEL], then press OK.
3Press K/ Lto select [Manual Scan], then press OK.
4Press K/ Lor the Number buttons to select the
channel number you want to scan, then press OK.
• Channel scanning will start.
4Press K/ Lto select [Channel], then press OK.
5Press K/ Lor the Number buttons to select the
channel number you want, then press OK.
6Press K/ Lto [Frequency], then press OK.
7Press the Number buttons to select the 3-digit
frequency, then press K/ Lto start scanning.
8After channel scanning is completed, press OK to select
the following settings.
([Colour System], [Sound System], and [Fine Tune])
Colour System / Sound System
9Follow Steps 1 to 8. Press K/ Lto select
[Colour System] or [Sound System], then press OK.
10 Press K/ Lto select the settings you want, then press
OK.
11 Press MENU to exit.
Fine Tune
9Follow Steps 1 to 8. Press K/ Lto select [Fine Tune],
then press OK.
10 Press 0/ 1to select the settings you want, then press
OK.
11 Press MENU to exit.
Auto Scan
Note: • Digital or analogue channels will be scanned depending on the TV
mode (ATV mode or DTV mode) you selected.
• When the scanning is completed, the lowest memorised digital or
analogue channel will be displayed.
• If you press MENU during the scanning, this operation will be
stopped and the lowest memorised digital channel will be
displayed.
• Please note that after tuning, the analogue channels will be stored
in the order that they are broadcast by your local transmitter.
This may not be in the same order in which you would like them
to be stored. If this is the case, you can change the order according
to your preference at “Channel Settings” (p. 19).
Manual Scan
Note: Digital or analogue channels will be scanned depending on the TV
mode (ATV mode or DTV mode) you selected.
DTV ATV
DTV ATV
DTV
ATV
445
1
BACK
Manual Scan
PICTURE
SOUND
CHANNEL
OTHERS
LANGUAGE
Channel
Frequency
Colour System
Sound System
Fine Tune
MHz
SECAM
Search Back
Manual Scan
L
Frequency
OK
+
-
Fine Tune
Adjust OK
This manual suits for next models
5
Table of contents
Other FUNAI LCD TV manuals

FUNAI
FUNAI LED32-H9323M User manual

FUNAI
FUNAI LED22-H820M User manual

FUNAI
FUNAI LT5-S20BB User manual

FUNAI
FUNAI LC320SLX User manual

FUNAI
FUNAI LC5-D20BB User manual

FUNAI
FUNAI LH840-M32 User manual

FUNAI
FUNAI LT6-M22BB User manual

FUNAI
FUNAI LT7-M22BB User manual

FUNAI
FUNAI LH850-M19 User manual

FUNAI
FUNAI LC195SLX User manual

FUNAI
FUNAI LCD-B1504 User manual

FUNAI
FUNAI 39FW702 User manual

FUNAI
FUNAI 32ME303V/F7 A User manual

FUNAI
FUNAI 32ME303V/F8 User manual

FUNAI
FUNAI 32FL552/10 User manual

FUNAI
FUNAI LCD-A2706 User manual

FUNAI
FUNAI LH8-M26BB User manual

FUNAI
FUNAI LH7-M32BB User manual

FUNAI
FUNAI LT6-M19WB User manual

FUNAI
FUNAI LH840-M22 User manual