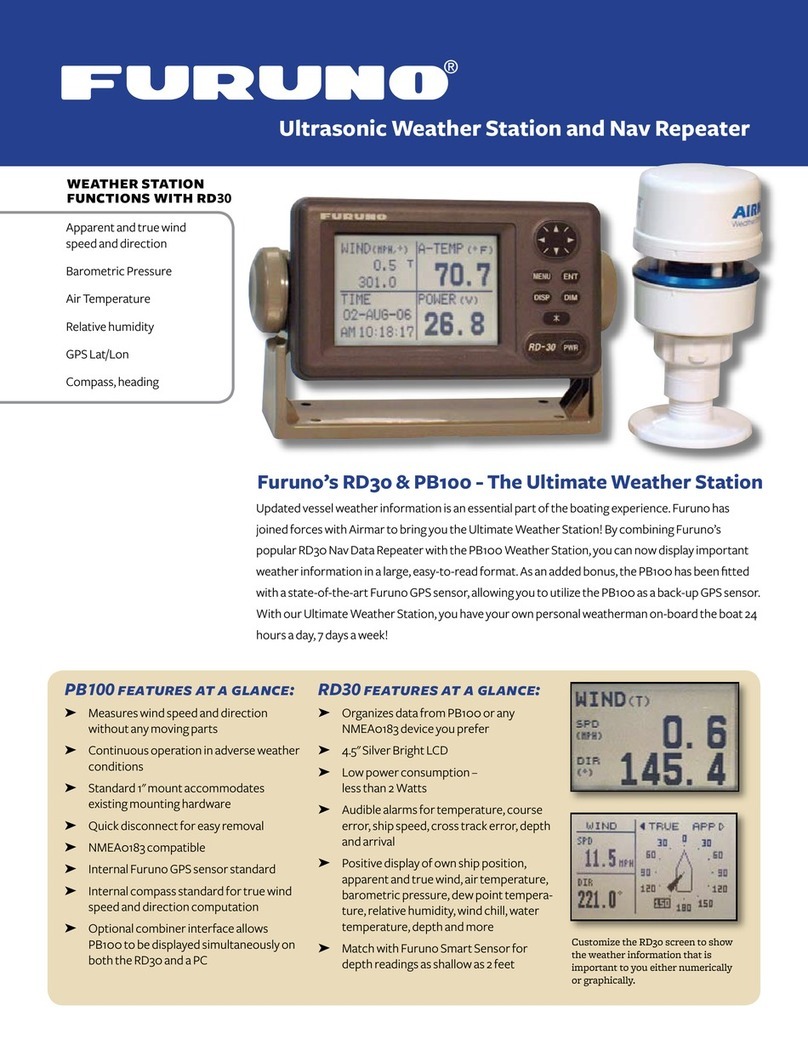
Furuno WS-200 User manual

WEATHER STATION
WS-200
OPERATOR'S MANUAL
www.furuno.co.jp
MODEL

i
IMPORTANT NOTICES
• The descriptions in this manual are intended for readers with a solid knowledge
of English.
• No part of this manual may be copied or reproduced without written permission.
• If this manual is lost or worn, contact your dealer about replacement.
• The contents of this manual and equipment specifications are subject to change
without notice.
• Store this manual in a convenient place for future reference.
• FURUNO will assume no responsibility for the damage caused by improper use
or modification of the equipment (including software) by an unauthorized agent
or a third party.
• When it is time to discard this product it must be done according to local regula-
tions for disposal of industrial waste. For disposal in the USA, refer to the Elec-
tronics Industries Alliance (http://www.eiae.org/).

ii
The input voltage must be 12 VDC.
Any other input voltage will damage the
equipment.
Always wear safety goggles and a
dust mask when installing to avoid
personal injury.
WARNING
Indicates a potentially hazardous situation which, if not avoided,
could result in death or serious injury.
CAUTION
Indicates a potentially hazardous situation which, if not avoided,
may result in minor or moderate injury.
Warning, Caution Mandatory Action
Prohibitive Action
WARNING
CAUTION
GPS position and velocity accuracies
are controlled by the U.S. Department
of Defense. Therefore, the position
accuracy described in the specifi-
cations cannot be guaranteed.
No one navigation device should ever
be solely relied upon for the navi-
gation of a vessel.
Always confirm position against all
available aids to navigation, for safety of
vessel and crew.
The compass safe distance for
standard and steering compasses is
0.30 m.
Observe this distance to prevent
inteference to a magnetic compass.
Do not disassemble the unit.
Disasembling the unit will damage
the waterproof seal. Further, there are
no user-serviceable parts inside.
SAFETY INSTRUCTIONS
The operator of this equipment must read these safety instructions before attempting to
operate the equipment.

iii
TABLE OF CONTENTS
FOREWORD...............................................................................................iv
SYSTEM CONFIGURATION.......................................................................v
1. INSTALLATION.......................................................................................1
1.1 Equipment Lists ...........................................................................................1
1.2 Parts, Tools & Materials...............................................................................1
1.2.1 Cable...................................................................................................2
1.2.2 Antenna Mount....................................................................................2
1.3 Choosing the Mounting Location .................................................................2
1.4 Installing the Weather Station Instrument....................................................4
2. WIRING, SETTINGS................................................................................6
2.1 NMEA 2000® Connection............................................................................6
2.1.1 Direct Connection................................................................................6
2.1.2 Network Connection............................................................................7
2.1.3 Routing and Connecting the Cable Assembly.....................................8
2.2 NMEA 0183 Connection ..............................................................................9
2.3 Settings for NavNet vx2.............................................................................10
3. MAINTENANCE.....................................................................................11
3.1 Maintenance ..............................................................................................11
3.2 Troubleshooting.........................................................................................12
4. HOW THE WEATHER STATION INSTRUMENT WORKS...................13
5. TECHNICAL INFORMATION................................................................17
SPECIFICATIONS.................................................................................SP-1
PACKING LIST........................................................................................A-1
OUTLINE DRAWING...............................................................................D-1
INTERCONNECTION DIAGRAM............................................................ S-1

iv
FOREWORD
A Word to the Owner of the WS-200
Congratulations on your choice of the FURUNO WS-200 Weather Station. We are
confident you will see why the FURUNO name has become synonymous with qual-
ity and reliability.
For 60 years FURUNO Electric Company has enjoyed an enviable reputation for
quality marine electronics equipment. This dedication to excellence is furthered by
our extensive global network of agents and dealers.
This equipment is designed and constructed to meet the rigorous demands of the
marine environment. However, no machine can perform its intended function un-
less installed, operated and maintained properly. Please carefully read and follow
the recommended procedures for installation, operation and maintenance.
Thank you for considering and purchasing FURUNO equipment.
Features
The WS-200 Weather Station provides round the clock, up-to-the-minute compre-
hensive weather, position information, all in one remarkably small unit. Know what
weather lies ahead before departing, by checking wind speed and direction, tem-
perature and barometric pressure. And find minute changes in weather while un-
derway.
The WS-200 outputs
• Air temperature
• Angle of vessel pitch
• Angle of vessel roll
• Apparent wind speed
• Apparent wind direction
• Barometric pressure
• GPS position
• Rate of Turn
• True wind chill temperature
• True wind speed*
• True wind direction*
• Vessel speed over ground (SOG)
• Vessel course over ground (COG)
• Wind chill temperature
Other features
• Built-in GPS receiver with 12-channel par-
allel reception of 12 satellites
• Position accuracy within 3 m (WAAS)
• Position updated every second
• Built-in rate gyro
• Output in NMEA 0183 or NMEA 2000®
format
• Space saving installation
• No moving parts for virtually maintenance
free operation
* "Relative to water" information available
with water-referenced speed in NMEA 0183
or NMEA 2000®format.

v
SYSTEM CONFIGURATION
: Standard supply
: Optional supply
: Local supply
NMEA 2000
NMEA 0183
WS-200
NavNet 3D Series
FI-50 Series Instruments
Remote Display Unit
NavNet vx2 Series
R

1
1. INSTALLATION
1.1 Equipment Lists
1.2 Parts, Tools & Materials
• Pencil
•Level
• Safety goggles
•Dustmask
• Electric drill
• Drill bits
• Phillips screwdrivers
• Plumber’s tape (optional)
• Cutting pliers (some installations)
• Wire strippers (some installations)
• Electrical tape (some installations)
• Cable ties (some installations)
Name Type Code No. Qty Remarks
Standard Supply
Weather
Station WS-200 1
Installation
Materials CP20-03100
000-012-576
1 set,
choose
one
With NMEA
2000
®
cable (6m)
See packing
list at back of
manual
CP20-03110
000-012-577
No cable
Optional Supply
Cable Assy. 22-1025-02
000-168-883-10
16 m, for NMEA 2000®
Cable Assy. 22-1025-06
000-168-884-10
110 m, for NMEA 2000®
Cable Assy. 22-910-03
000-168-885-10
1 10 m, for NMEA 0183
Cable Assy. MJ-A7SPF/
SRMD-100
000-144-534
1 10 m, straight, MJ7P(P)-
MJ7P(J), for NMEA 0183

2
1.2.1 Cable
The Weather Station instrument can be connected to a device and/or network in
several ways. You must have the correct cable before beginning the installation.
Additional cable lengths are available.
• NMEA 0183 10m cable (option)
• NMEA 2000® 6m cable
• NMEA 2000® 10m cable (option)
1.2.2 Antenna Mount
The Weather Station instrument has standard1-14" UNS threads. Attach the instru-
ment to a marine extension pole.
1.3 Choosing the Mounting Location
For accurate readings and a reliable GPS signal, selecting the best location for the
Weather Stationinstrumentisveryimportant.Easyaccessandappearanceshould
be secondary considerations. Since each installation is unique, the bestseparation
distances from other equipment on the boat will vary depending on the particular
equipment and how it is configured. Choose a location that balances the require-
ments below (see the figure on the next page).
• The Weather Station instrument must be mounted in “clear air”—away from
obstructions in any direction that will interfere with air flowing through the unit. If
there is an obstruction, be sure to mount the Weather Station instrument at least
2m (6') away. On land, avoid roof tops, chimneys, trees, etc.
• If possible, mount the Weather Station instrument higher than any other object.
Mount it a minimum of 500mm (20") above the surrounding surfaces.
Note: The higher the Weather Station instrument is mounted, the less accurate
the pitch and roll readings.
• Because the Weather Station instrument has an electronic compass, it should be
at least 0.30 m away from any on-board radar equipment or other strong mag-
netic fields from equipment such as radio transmitters, boat engines, generators,
etc.
• Because the Weather Station instrument has a GPS, it must be lower than any
on-board INMARSAT communications antenna.
• Because the Weather Station instrument has a GPS, be sure it is as far as possi-
ble from high-powered transmitting antennas to avoid mutual interference.
• Because the Weather Station instrument has a GPS, check for any electromag-
netic shading. That is, any obstructions from other vessels or shoreline buildings
that will interfere with the GPS signals that the Weather Station instrument must
receive.

3
not within
INMARSAT beam
VHF antenna
or RX MF/HF
whip antenna Loop
antenna
Weather station instrument
TX whip
antenna
(MF/HF)
INMARSAT
antenna
Long-wire
TX MF/HF
antenna
Min. 3 m
not within
radar beam
Min. 1 m Min. 4 m
Min. 1 m
Min. 5 m
Min. 1.5 m
Min. 5 m
Radar
Min. 4 m
B-, F-type: 25°
C-type: 15°
Antenna
insulator

4
1.4 Installing the Weather Station Instrument
Before beginning the installation, note the following points:
• The blue metal plate and the blue film found in the wind channel of the Weather
Station instrument are essential to its operation (see the figure below). Be care-
ful not to scratch the plate, puncture the film, or damage them in any way.
• Do not remove the waterproof connector(s) to ease cable routing. If the cable
must be cut and spliced use a suitable splash-proof junction box. Cutting the
cable or removing the waterproof connector(s), except when using a junction
box, will void the sensor warranty.
• The Weather Station instrument must be installed vertically—NOT tilted to one
side.
Installation overview
1. Fasten the marine extension pole (local supply) to the chosen location. Be sure
the pole is vertical.
2. Screw the bottom of the nut assembly onto the marine extension pole.
Hand-tighten only. Do not over tighten.
.
Waterproof film
Wind channel
Metal plate
Wind channel
where air travels
through the sensor
Nut assembly
Marine extension pipe
(local supply)
Alignment tabs
face forward
and parallel to
the keel (centerline)
of the vessel
WeatherStation
Cable exit
(some installations)

5
3. With the nut assembly on the cable near the Weather Station connector, thread
the cable through the pipe. Be sure to leave several inches of cable extending
beyond the nut assembly.
CAUTION: If you use a thread lock, use plumber’s tape. Do not use a liquid
thread lock as it may weaken the plastic, causing it to swell and crack.
4. Screw the nut assembly onto the top of the pipe. Hand-tighten only. Do not
over tighten.
5. Remove the warning label from the Weather Station instrument’s socket. (The
label may be discarded.) Remove the protective cover from the connector.
(Save the cap to protect the connector, when the Weather Station instrument is
removed.) Plug the 9-pin connector into the Weather Station instrument. The
alignment key on the connector fits into a notch in the base of the Weather Sta-
tion instrument.
CAUTION: Be sure the alignment tabs on the Weather Station instrument point
forward toward the bow and parallel to the centerline of the boat. This is neces-
sary to accurately measure wind direction and vessel heading.
6. Be sure the alignment tabs on the Weather Station instrument are facing for-
ward and parallel to the keel (centerline) of the boat (see the figure on previous
page). Slide the captive nut upward and screw it onto the base of the Weather
Station instrument (see the figure on previous page). Hand-tighten only. Do
not over tighten. Be careful NOT to rotate the Weather Station instrument or
loosen the nut assembly from the antenna mount. Double check to be sure the
alignment tabs are still facing forward.
Do not hand tighten or align the Weather Station instrument by holding
the upper cap. Grasp the unit by hand below the wind channel to tighten
and align.
Weather Station
connector
Nut
assembly
A
lignment
key
Captive
nut

6
2. WIRING, SETTINGS
The Weather Station instrument can be connected using the NMEA 0183 interface
or the NMEA 2000® network standard.
Before doing the wiring, please note the following points:
• To reduce electrical interference, separate the cables from other electrical wiring
and the engine.
• Be careful not to tear the cable jackets when passing them through bulkheads
and other parts of the boat.
• Coil any excess cable(s) and secure it with a zip-tie to prevent damage.
• The LEN (Load Equivalency Number) for this equipment is 13. (LEN is the
amount of current a device draws from the NMEA 2000 network.1 LEN = 50mA.)
2.1 NMEA 2000®Connection
2.1.1 Direct Connection
Insertthecontactpin(supplied)intothe#5socketoftheWeatherStationconnector
to activate the termination resistor. (See page 8 for location of #5 socket.) Route
the cable assembly to the NMEA 2000® device. Coil any excess cable and secure
it with a cable tie to prevent damage. Connect the cable assembly to the NMEA
2000® device.
- Radar Sensor*
- FI-50 Series Instrument
* Cut plug from cable and connect
wires to terminal/connector.
Cable Assembly
22-1025-02 (6 m)
22-1025-06 (10 m, option)
WS-200
Termination
Resistor: ON

7
2.1.2 Network Connection
Drop cable connection
A drop cable is connected to a backbone cable with T-type connectors*. The back-
bone cable is of the “light” type. Attach a terminator at the ends of the backbone
cable. Only two termination resistors are required on an NMEA 2000®network.
More than two will degrade performance.
* Recommended type: LTWSS-050505-FMF-TS001 (LTW Technology, Inc.), or
equivalent.
Backbone cable
Terminator 1 Terminator 2
T-connector T-connector
- NavNet 3D Series
- FI-50 Instrument
Cable Assembly
22-1025-02 (6 m)
Power
(12 VDC)
T-connector
Power
(12 V)
WS-200
Termination
Resistor: OFF

8
Backbone cable connection
Use this connection method to connect the WS-200 at the final node in the back-
bone cable. Use T-type connectors to connect equipment to the backbone cable.
Connect the Weather Station at the last node in the network. Insert the contact pin
(supplied) into the #5 socket of the Weather Station connector to activate the ter-
mination resistor.
2.1.3 Routing and Connecting the Cable Assembly
Route the cable assembly to the NMEA 2000®device. Coil any excess cable and
secure it with a cable to prevent damage. Connect the cable assembly to the
NMEA 2000®device.
WS-200
Termination
Resistor: ON
Backbone cable (max. 25 m)
T-connector T-connector
Cable Assembly
22-1025-02 (6 m)
22-1025-06 (10 m, option)
- NavNet 3D Series
- FI-50 Instrument
Power
(12 VDC)
Power
(12 V)
T-connector
Contact pin inserted
in #5 socket
Tab

9
2.2 NMEA 0183 Connection
Wiring outline
Wiring procedure
Route the cable assembly to the display. Coil any excess cable and secure it with
a cable tie to prevent damage. Connect the Weather Station to your NMEA 0183
display.
Extension cable (MJ-A7SPF/SRMD-100, option)
max. length: 50 m Remote Display
Unit (RD-30)
NavNet vx2
Series
Waterproof connectors by wrapping them with vulcanizing tape
and then vinyl tape. Bind tape ends with suitable cable ties.
NMEA 0183 Cable Assembly
(22-910-03, 10 m, option)
Female
Female

10
2.3 Settings for NavNet vx2
The following items in the NavNet vx2 menu are applicable to the
WS-200. For details and operating procedure, see the Installation Manual for your
NavNet vx2 model.
NAV SETUP menu
Set POSITION SOURCE to GPS or ALL.
GPS SETUP menu
• GEODETIC DATUM
Select your chart type. WGS-84 is the GPS standard.
• ANTENNA HEIGHT
Set the height of the Weather Station above the sea surface.
• FIX MODE
Select position fixing mode from 2D (three satellites in view) or 2D/3D (three or
four satellites in view).
• COLD START
Clear the Almanac currently stored in the built-in GPS receiver to receive the
latest Almanac.
WAAS SETUP menu
• WAAS MODE
Select ON to use the WAAS mode.
• WAAS SEARCH
Select WAAS satellite search method, automatic or manual.
• CORRECTIONS DATA
Select the type of message for WAAS connection, 00 for North America, 02 for
elsewhere.
WAAS settings effective from the program version numbers shown below.
C-MAP specifications NAVIO specifications
Program No. Model Program No. Model
1950026-03.02 Model 1804C-BB 1950025-03.02 Model 1804C-BB
1950024-03.02 Model 1804C 1950023-03.02 Model 1804C
1950028-03.02 Model 1704C 1950027-03.02 Model 1704C

11
3. MAINTENANCE
3.1 Maintenance
Since the Weather Station instrument has no moving parts, it requires minimal
maintenance. It is calibrated at the factory and does not require any calibration
after purchase.
The blue metal plate and the blue waterproof film found in the wind channel of the
Weather Station instrument are essential to its operation (see the figure below).
The blue waterproof film protects the transducers, so be careful to keep it intact.
Do not to scratch the metal plate or damage it in any way.
Keep the wind channel free of SPIDER WEBS, insects, dirt, and other debris.
WS-200
NOTICE
Do not apply paint, anti-corrosive
sealant or contact spray to coating
or plastic parts of the equipment.
Those items contain organic
solvents that can damage coating
and plastic parts, especially
plastic connectors.
CAUTION
CAUTION
Do not disassemble the unit.
Disassembling the unit will damage
the waterproof seal. Further, there
are no user-serviceable parts inside.
Waterproof film
Wind channel
Metal plate

12
3.2 Troubleshooting
No Readings or Inaccurate Readings
• Is there power to the Weather Station instrument?
• Are all the connections tight?
• Is the cable-run free of kinks?
• Is the wiring correct?
• Are there any obstructions in the wind channel of the Weather Station instru-
ment?
Keep it free of spider webs, insects, dirt, and other debris. Be careful not to
puncture the blue waterproof film or scratch the blue plate.
• Is there ice on the Weather Station instrument?
No GPS Fix
• Does the Weather Station instrument have a clear view of the sky?
Wind Readings Are Too Low
• Is the Weather Station instrument mounted forward and low on the boat’s hard-
top in dead air?
Move the instrument farther back and higher as in the figure below.
Mounting location
Wind
Wind
Weather Station mounted in clean air - proper wind readings
Dead air zone
Side view
of vessel
Windshield

13
4. HOW THE WEATHER STATION
INSTRUMENT WORKS
About the Ultrasonic Wind Sensor
The ultrasonic wind sensor (an ultrasonic anemometer) measures apparent wind
speed and direction. The Weather Station instrument contains four ultrasonic
transducers, visible through the four holes in the top of the sensor’s wind channel
(see the figure below). These transducers operate in pairs—one transducer injects
a pulse into the air, and the other (directly opposite to it) listens for the arrival of that
pulse. Each pulse bounces off the metal plate at the bottom of the wind channel
and is carried by the wind to arrive at the opposing transducer a short time later.
Weather Station ultrasonic wind sensor
When there is no wind, the pulse travels at the speed of sound from the sender to
the receiver. Whenever the wind is blowing, the pulse will arrive sooner than if the
air is still. Similarly, whenever the wind is blowing in the opposite direction, the
pulsewillarrivelaterthaniftheair isstill.Thefourtransducerstaketurnsin sending
and receiving pulses to cover all eventualities of wind direction.
A microprocessor within the Weather Station instrument then combines the mea-
surements from all four transducers to calculate the resultant wind speed and di-
rection. Throughout this process, the sensor monitors the air temperature, to
compensate for the fact that the speed of sound in air changes with temperature.
Note: Do not use wind data in the WIND mode of an autopilot, because the data is
not sufficiently accurate.
True and Apparent Wind
The Weather Station instrument has the unique ability to display both true and ap-
parent wind. True wind is the actual motion of the air relative to the earth. Apparent
wind is the wind which an observer experiences while moving or on board a boat.
It is the result of two motions—the actual motion of the air (the true wind) and the
motion of the boat. If the vessel is not moving, then the true and apparent wind will
be the same.
Waterproof film
Wind channel
Metal plate

14
There are two components to any wind measurement: speed and direction. By con-
vention, the wind direction is an angle representing the direction from which the
wind is blowing. Sometimes this angle is referenced to true or magnetic north, and
sometimes it is referenced to the bow of the vessel. Both true and apparent wind
use these same references.
Consider the case of a vessel proceeding at a speed of 15 knots in calm air. An
observer on board would experience a wind of 15 knots from dead ahead. This ap-
parent wind would be due solely to the motion of the boat. If a true wind of 15 knots
was blowing from the stern, an observer would experience dead calm—no appar-
ent wind. That is because the boat is moving at the same speed and in the same
direction as the surrounding air.
Now, consider the more complicated situ-
ation of a vessel proceeding at 15 knots
with a true wind of 15 knots blowing from
the side (see the figure at right). To an ob-
server on board, the apparent wind would
be 21.2 knots blowing from an angle 45º
off the bow.
In order to calculate the true wind speed
and direction when on board a moving
vessel, it is necessary to know the appar-
ent wind speed and direction, the speed and course over ground of the vessel, the
compass heading, and the local magnetic variation. Note that heading and course
are not the same thing: heading is the direction the bow of the vessel is pointing,
while course is the direction the vessel is traveling. Heading and course may differ
due to the effects of wind and current.
Because true wind is calculated using the data from several sensors, its accuracy
depends on the accuracy of all the raw data used in the calculation. For instance,
if the electronic compass is located near iron or a similar magnetic disturbance, the
heading will be incorrect, and the true wind calculation will therefore be in error,
perhaps by quite a bit. In another example, the speed and course over ground pro-
vided by the GPS receiver are averaged over time. If the boat is performing ma-
neuvers, changing speed and/or direction, then it will take a few seconds for the
SOG and COG values to "catch up". The reported true wind values will therefore
also be incorrect until the vessel reaches a steady-state condition, traveling in a
straight line at a constant speed.
Air Temperature Sensor
The Weather Station instrument includes a built-in negative-temperature-coeffi-
cient thermistor that measures the ambient air temperature. This NTC thermistor is
located in a thermally isolated region of the Weather Station housing that is open
to the outside air.
15 knots
COG
21.2 knots
apparent wind
15 knots
true wind
Table of contents
Other Furuno Weather Station manuals