6
10 Avertissements
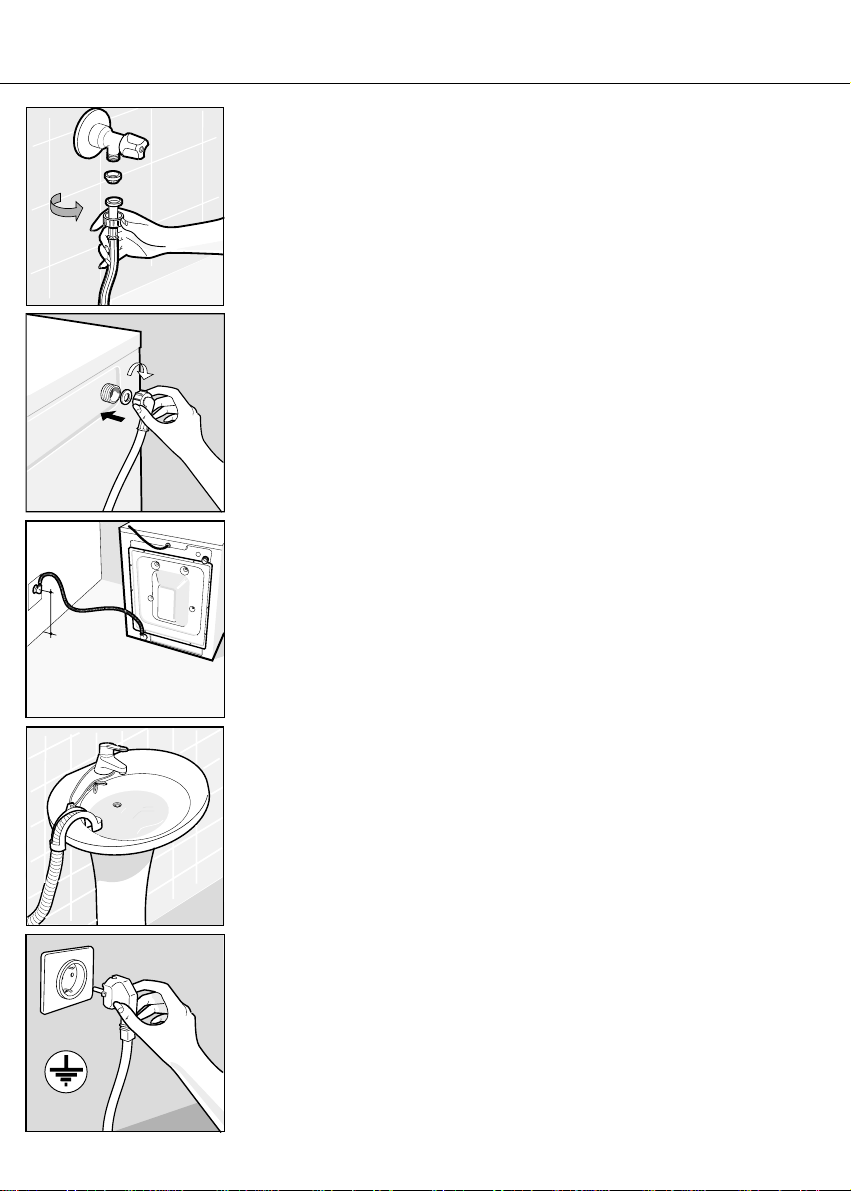
S’assurer que les valeurs de la tension
et de la fréquence disponibile
correspondent aux valeurs indiquées sur
la plaquette situées sur le dos de la
machine. L’installation électrique de
l’usager doit être prévue pour supporter
le courant maximum indiquésur la
plaquette.
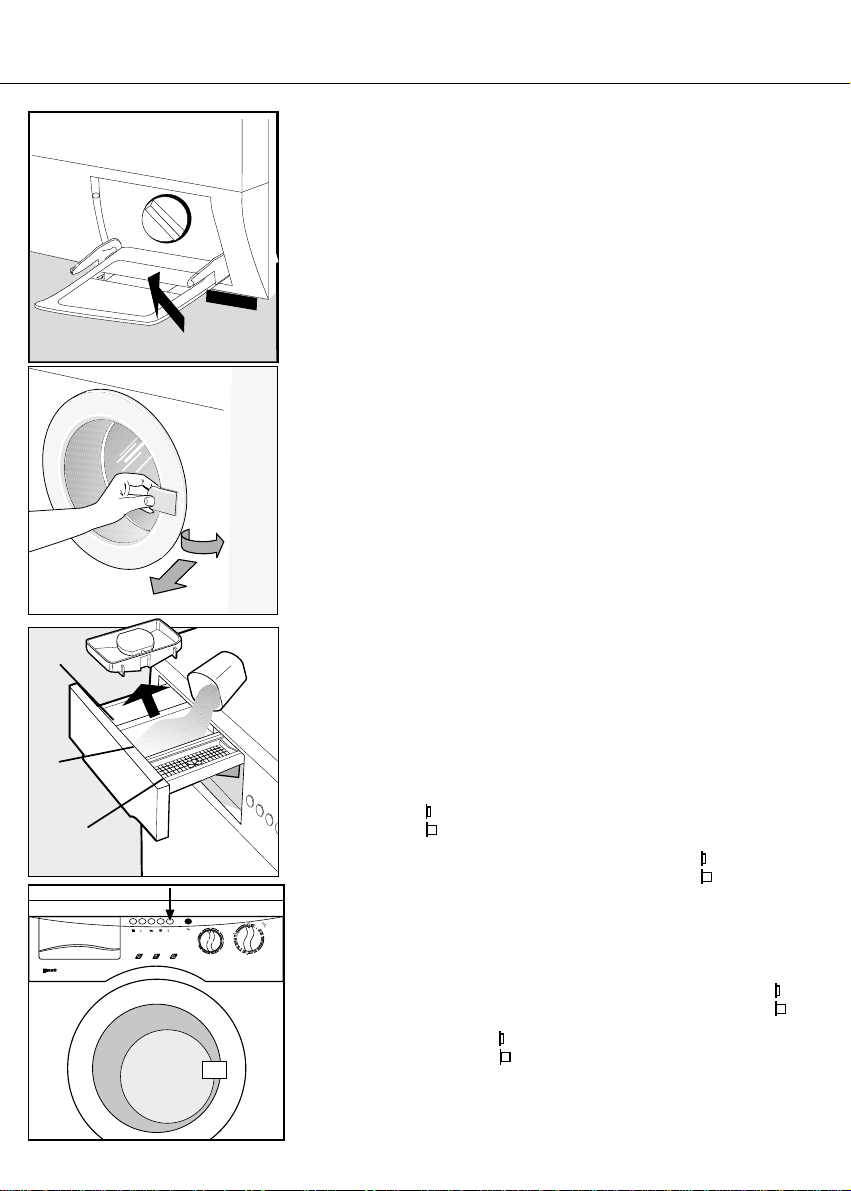
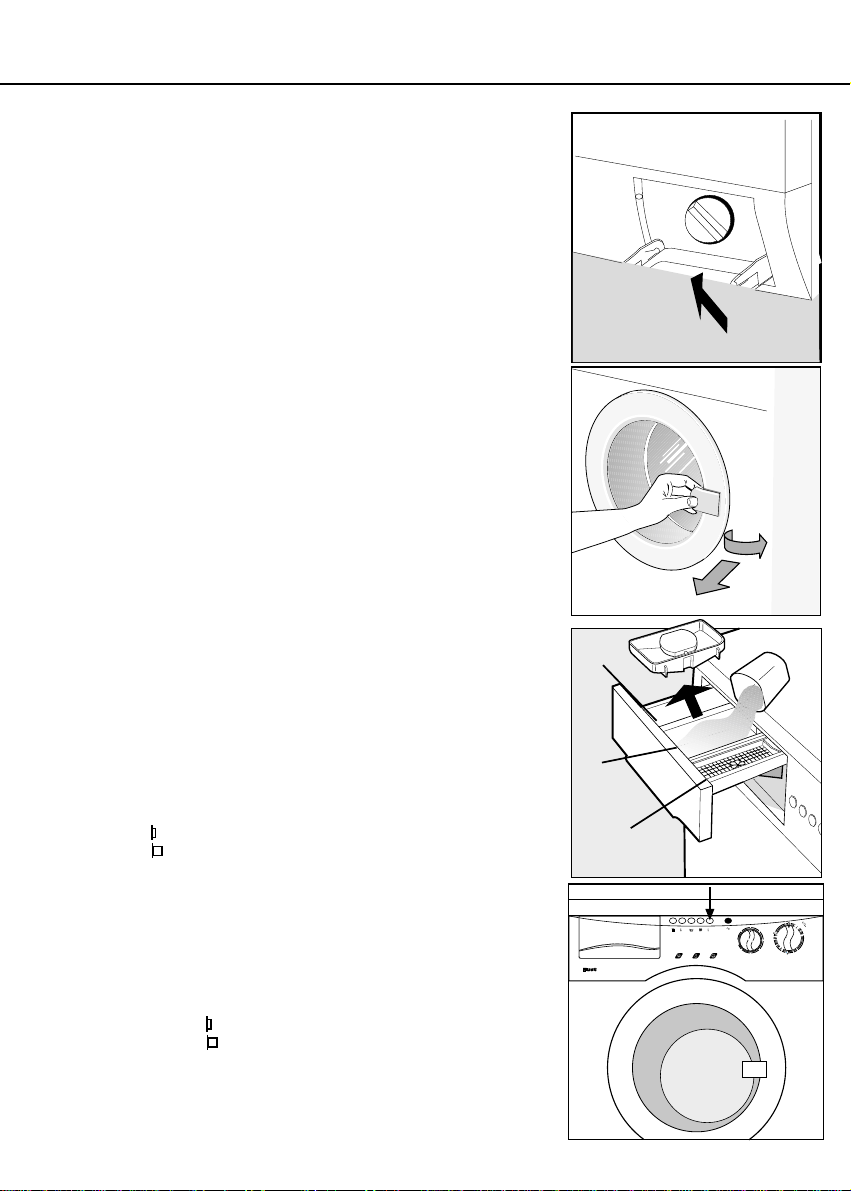
11 charge du linge
Ouvrir le hublot en tirant la poignée.
Introduire la linge pièce par pièce, après
avoir eu soin d’’effectuer un triage selon
le type de tissu, la couleur et le degré
de souillure, chaque degrédemandant
un programme different de lessive.
Refermer le hublot; la machine ne
fonctionne pas si le portillon n’est pas
fermè. L’appareil est muni d’une sécurité
électrique qui empêche l’ouverture de
l’hublot si la machine est en
fonctionnement. Une fois la machine
éteinte, attendre 3 minutes avant de
pouvoir ouvrir l’hublot.
12 charge du detersif
La boîte àdétersif est située sur le front
antérieur de la machine. Le détersif pour le
prélavage ou pour le trempage (45 gr) doît
être versédans le compartiment de gauche
(1voir photo);le détersif pour la lessive (130
gr) sera versédans le compartiment central
(2voir photo); les éventuels produits contre
eaux dures, les apprêts, le bleu et le parfum
devront être versés dans le compartiment de
droite (3voir photo).
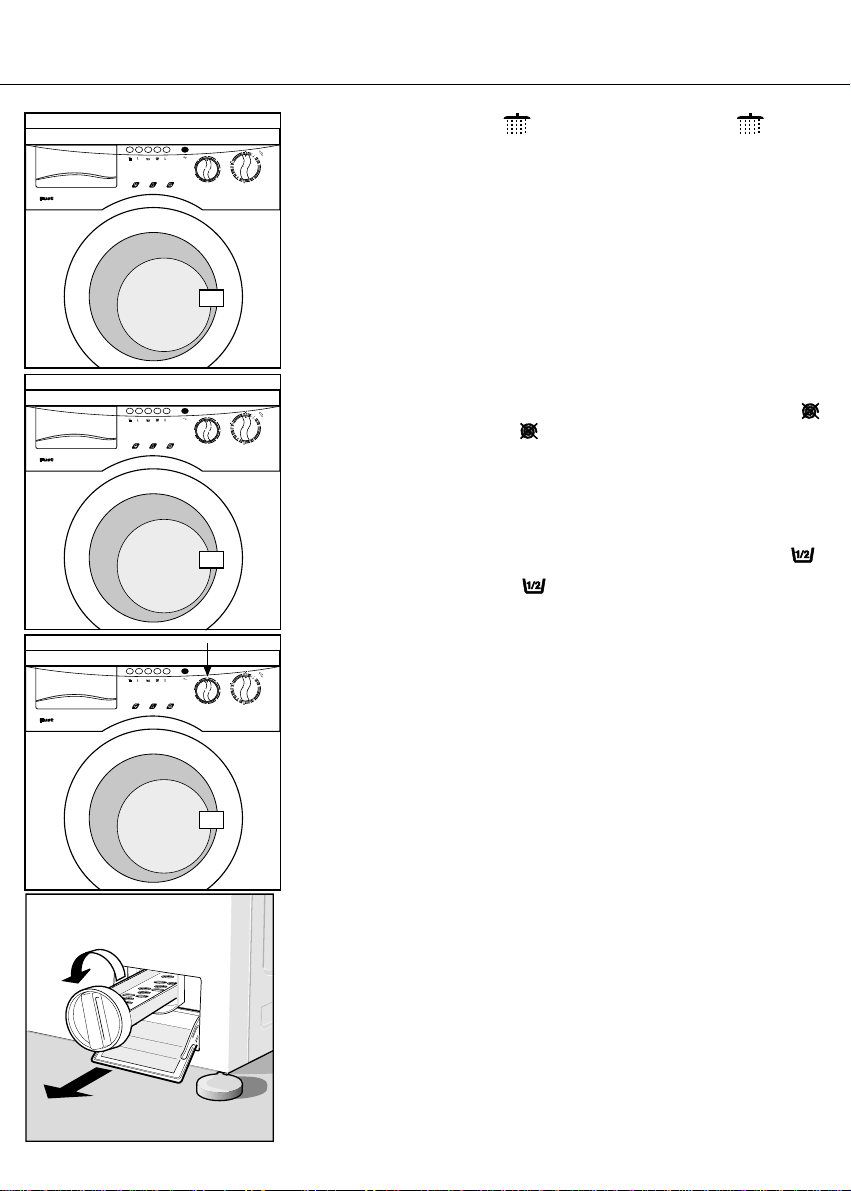
13 sélecteur de programme
Tourner (dans le sens des aiguilles de
la montre) le bouton du programmateur
jusqu’à ce que l’aiguille du bouton
corresponde avec le numero du
programme choisi, selon les indications
du tableau de l’avant-dernière page.Pour
la mise en marche de la machine,
enfoncer la touche
(marche-arrêt)
14 arrêt de la machine
Pour l’arret ou pour interrompre un
programme, enfoncer le touche
pour la remise en marche voir 13.
ON
OFF
1
2
3
10 avvertenze
Accertarsi che i valori della tensione e
della frequenza disponibili corrispondano
a quelli riportati sulla targhetta situata
sullo schienale della macchina.L’impianto
elettrico dell’utente deve essere
dimensionato per sopportare la corrente
massima indicata nella targhetta stessa.
11 carico biancheria
Aprire l’oblòtirando la maniglia.Introdurre
i panni capo per capo dopo averli divisi
secondo il tipo di tessuto, colore e grado
di sporco, in quanto richiedono
programmi di lavaggio diversi. Chiudere
lo sportello, la macchina non parte se lo
sportello non èchiuso. L’apparecchio è
munito di una sicurezza elettrica che
impedisce l’apertura dell’oblòse la
macchina èin funzione. Quando la
macchina si èfermata attendere 3 minuti
prima di aprire il portello oblò.
12 carico detersivo
La vaschetta detersivo si trova nel frontalino
della macchina, il detersivo per il prelavaggio
o per l’ammollo (45 gr) va versato nella
vaschetta di sinistra (1vedi foto); il detersivo
per il lavaggio (130 gr) nella vaschetta centrale
(2vedi foto); la vaschetta di destra (3vedi
foto) èriservata all’uso dell’ammorbidente che
ridona alla biancheria la morbidezza di cui è
stata privata nel processo di lavaggio.
13 scelta del programma e avvio
Scegliere il programma desiderato ruotando
la manopola fino a far coincidere l’indice con
il numero corrispondente al programma
desiderato. La macchina entra in funzione
premendo il pulsante
Attenzione - Per una migliore utilizzazione
della lavatrice Vi consigliamo di impostare i
programmi sempre a lavatrice spenta.
14 arresto macchina
A fine ciclo la macchina si arresta da sola
automaticamente. In caso di necessitàè
possibile arrestare la macchina manualmente,
in qualsiasi momento, premendo il pulsante
La macchina puòessere rimessa in funzione
riprendendo il ciclo dal punto in cui èstato
interrotto o, operando come al punto 12,
scegliendo un nuovo programma.
ON
OFF
ON
OFF
ON
OFF
Dipl.Ing.
NOVAMATIC
BAUMWOLLE
COTON SYNTHETIKS
SYNTHÉTIQUES WOLLE
LAINE
WA 110.1 S
12
3
6
7
8
10
4
5
12
11
9
30°
40°
50°
60°
70°
80°
90°
°C
EIN
AUS
500
1000
XXXXXXXXXXXXX
XXXX
MODEL
0000000000
XXXXXXXXXXXX