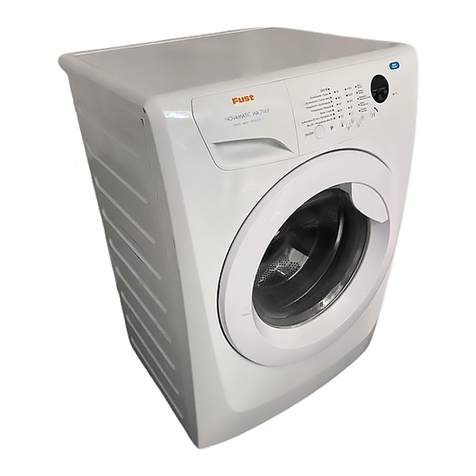
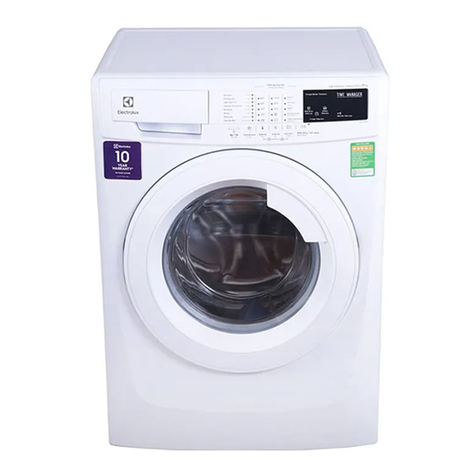
FUST NOVAMATIC WA 1268.3 Aqua-Stop User manual

Bedienungsanleitung
Waschmaschine
NOVAMATIC WA 1268.3
Aqua-Stop
Mode d‘emploi
Machine à laver
NOVAMATIC WA 1268.3
Aqua-Stop
Istruzioni per l‘uso
Lavatrice
NOVAMATIC WA 1268.3
Aqua-Stop
Operating instructions
Washing machine
NOVAMATIC WA 1268.3
Aqua-Stop
Service-Telefon: 0848 559 111
DE
FR
IT
EN

74
Index
Safety instructions
Attention
• Removing the transport safety bars!
• Please ensure you read the instructions carefully before using your machine.
• This washing machine is designed solely for the cleaning of laundry and garments equipped with, and
in accordance with the necessary HLCC labels, and during use must be protected from interference by
unauthorised persons (ie children).
• This washing machine should not be left unattended during use.
Attention
• This product must not be modified in anyway.
• Always switch of the cold water supply after using your machine.
INSTALLATION Safety instructions.................................................................... 74
Manual...................................................................................... 75
Removal of transport safety bars ............................................. 75
Electrical connection ................................................................ 76
Connection and installation...................................................... 76 - 77
Prior to the first wash................................................................ 77
INSTRUCTIONS Programme selection ............................................................... 78 - 79
Press buttons ........................................................................... 80 - 81
Fabric selection........................................................................ 81
Selecting a programme............................................................ 82 - 83
The digital display unit.............................................................. 83
The programme sequences ..................................................... 84
Changing the number of the rinse cycles................................. 85
Changing the water level in the rinse cycles............................ 86
Adding the correct amount of detergent................................... 87
Programme examples.............................................................. 88
CLEANING AND
MAINTENANCE Care instructions ...................................................................... 89
Removing lime stone................................................................ 89
Cleaning the water inlet sieve .................................................. 89
SUMMARY Problem checks........................................................................ 90 - 92
Opening the door in an emergency.......................................... 90
Emergency draining ................................................................. 90
Cleaning the drain pump.......................................................... 90
Symbols indicating a fault......................................................... 91
Stain removal ........................................................................... 93
HLCC labels............................................................................. 94
Tips........................................................................................... 95
Short manual............................................................................ 96
Attention
Every care was taken to respect the environment in the manufacture and packaging of this product.
Would you please ensure that the packaging and, when the time comes, the «old» machine are
disposed of according to the rules for protection of the environment. Detach the mains lead and remove
it together with the plug. Destroy the lock on the door. in this way you can prevent children from shutting
themselves in and the risk of suffocation!

75
Water inlet hose with
water retention protection
Manual
Detergent drawer
Emergency door
lock (s. p. 90)
Loading door
Drain lock cap
emergency drain
(s. p. 90)
Main switch
Control panel Mains cord Drain hose
Bogie Adjustor lever
Removal of transport safety bars
The transport safety bars must be removed before using your machine
(see Pic 1 - 3) or your machine could be severley damaged.
• Withdraw both bars from their sockets (Pic 1 - 2).
• Seal the holes with the plastic plugs provided (Pic 3).
• In the event of your machine having to be transported, ie moving house it is
essential for the transport bars to be put back into the machine.
• Drain any remaining water from the machine (see emergency draining page
90).
• In order to avoid any water leaking from your machine during transport, the
machine should always remain upright.
Pic 1
Pic 2
Pic 3

76
• Plug socket 230 V / 50 Hz
• Rated effect 2,2 kW
• Fuse: min. 10 A
• Kindly note the rating label on the back of the machine.
Electrical connection
Water inlet connection
• It is intended for cold-water connection only
• Screw the intake hose on to the tap.
• The washing machine is intended for a water pressure of 1 to 10 bar. If
the pressure exceeds 10 bar, a pressure reducing valve must be installed
in the water-line. If the pressure is less than 1 bar, the flowrate regulator
behind the strainer (in the water inlet connection of the machine) must be
removed.
• Check if all hose connections are leaktight.
Drain connection
• Do not kink the drain hose.
• Hang the drain hose over the edge of thge sink or wash basin. The bend
in the hose must not be raised more than 1 m above the surface on which
your machine stands (so that drainage can function properly).
• Secure the drain hose with the hose holder supplied. Pull the hose holder
to the centre of the hose bend onto the drain hose and secure against
slipping. If required, use a weight or any other suitable means to ensure
that the drain hose cannot slip.
• Tight connection to a non-ventilated drain requires special steps and
shoulde carried out by a plumber only.
Setting up and starting
• Ensure the unit is on an even, firm surface.
• All four screw-mounting feet must stand firmly on the floor.
• To set up the machine, adjust one or more of the screw-mounting feet by
loosening the counter-nuts.
• After adjusting the screw-adjustment feet, tighten the relative lock nuts
again in the direction of the arrows (with a SW 17 spanner).
• Turn on the tap and check the run off hose.
Connection and installation
Open the loading door to remove both the fill and drain hoses:
• connect machine to electricity supply
• turn on main switch and switch programme selector to position “ “,
• wait until the digital display “ 00 “ stops flashing
• now switch the programme selector to the “ “ symbol

77
Attention
• Always ensure the drain hose is free of obstructions of any kind, since this will have an adverse affect
on the smooth running of your machine.
• Only install your machine in a room protected from frost.
• Thecompany exceptsno responsibilityfor improperuse, ormaintenance workcarried outby unauthorised
service personnel resulting in water damage.
Connection and installation
Adjustor lever in position 1
Attention: This position is essential whenever the machine is started.
Check that
• the machine is standing evenly on the floor and that it cannot slip.
• the machine is connected to the mains.
• the water intake and runoff hoses are properly connected (see page 4).
1
2
If you have to move the machine to a new position, always disconnect from
the mains and disconnect the water intake and runoff hoses first.
When disconnecting the hoses do no forget that they might still contain some
water.
Adjustor lever in position 2 = moving position
The machine can now be rolled on the four casters.
Attention:
The washing machine must be properly installed and connected.
The washing machine was tested before leaving the factory. To make sure that any traces of water
used in the test are removed, wash for the first time without introducing any dirty linen.
• do not put any dirty linen into the machine
• open the water cock
• place 1/2 measuring cup of detergent (about 30-50 ml) in the chamber foreseen for the main detergent
• start the „easy-care / fine wash” programme at 60°C and let it run its course
The washing machine is now clean and ready for operation.
Prior to the first wash

78
Programme selection
Main switch
Before selecting any programmes, always turn on the main switch.
Attention: After completing a wash cycle, always turn OFF your machine
using the main switch.
Spin speed switch (variable):
This switch allows you to select the required spin speed at the end of each
wash cycle. Should you wish to finish a programme without spinning, select
position no spin “ “.
500
Ohne Schleu
dern
I0
Programme selector:
Attention: Before selecting a programme, the loading door must be firmly
closed!
• Turn programme selector to „ “ position
• Wait, until “ 00 “ stops flashing on the digital display unit
• Select the programme of your choice, with the appropriate water
temperature.
P1 whites / coloureds 30°C - 95°C
P2 easy-care fabrics cold - 60°C
P3 hand wash cold (pre-set)
P4 wool cold - 40°C
P5 silk 30°C (pre-set)
P6 quick wash 40°C (pre-set)
Each of this programme can be combined with the press buttons
at random (see p. 80 - 81).
P7 spin dry

79
Programme selection
Press buttons:
• These buttons must be activated, after having selected a programme.
• Once a button has been pressed, it takes 15 sec for it to be activated, this process is shown on
the digital display in 5 segments lasting 3 sec each every time a button is pressed, this process is
repeated.
Attention:
Once the 15 sec. have passed, and the programme has started it is no longer possible to change the
programme by means of the press buttons.
The selected programme and temperature are shown alternatively on the digital display.
Attention:
As soon as a wash cycle is started, the selected temperature is stored in the machines computer.
Therefore, if you change the temperature after the wash cycle has started, the machine will not
respond.
Should you wish to change the temperature during a wash cycle, please carry out the following
procedure.
• Switch the programme selector to position “”.
--> See programme “override” page 81
• Wait until the digital display showing “ 00 “ stops flashing
• Select programme with correct temperature, and start again.

80
Press buttons
With pre-wash
this is only effective within the area P1
Pressing this button adds a pre-wash to the standard or intensive wash
programme. This is indicated on the digital display with the „ “ symbol.
Press “ “ this button once more, and the pre-wash is erased. This is
indicated with the symbol on the display. Pressing this button also enables you
to override certain programme sections (see programme times page 81).
Delicates
this is only effective within the area P2
Pressing this button allows you to increase the water level in your machine (for
very delicate fabrics ie net curtains) and is indicated on the digital display with
the “ “ symbol. Press this button once more, and the water level will return
to normal “ “.
Rinse stop
this is effective within the area P1 to P6
Pressing this button, stops the programme in the last rinse cycle, and shows
the „ “ symbol on the digital display.
If you press this button once again within the 15 sec during programme
selection, the rinse stop is cancelled.
This option allows you to minimise the creasing of fabrics.
In order to finish the wash programme press button „Rinse stop“ once more.
Intensive programme
effective within the area P1 and P2
If you wish to activate any of the options described above, in addition to
button „Intensive“, you can do so but button „Intensive“ must be activated
FIRST.
• Press this button once, and you have selected the intensive programme
(= extended main wash, select the temperature of your choice)
The digital display shows the “ L “ symbol.
•Press this button twice, and your machine reverts to the standard
programme.

81
Press buttons
Delayed start
This procedure is effective at every stage of the wash cycle
Pressing this button enables you to delay the start from between 1 - 12 hours.
Each time this button is pressed the programme start will be delayed by one
hour. (Hours and minutes will be displayed alternatively.) Exceeding the 12
hour period, will automatically return the delay display to “ 00 h “.
Soak programme
this is effective within the area P1 and P2
Pressing this button activates a cold soak programme followed by a rinse
cycle. This is indicated by the „ “ symbol and “ 40 min “ on the display panel.
Repeated pressing of button allows you to increase the soak period by 10
min intervals up to max of 12 hours.
Should you wish to interrupt the selected soak period, press button again,
your machine will return to the standard soak period of “ 40 min “.
Press button once more and the soak programme is erased. Having
selected a soak programme, your machine will start the selected wash
programme as soon as the soak period is finished.
Override (stop after your machine has started to wash)
This procedure is effective at every stage of the wash cycle
For example reducing the rinse cycles, premature finish of the spin cycle etc.
Pressing button enables you to end any given wash programme manually.
The digital display provides you with step by step instructions.
Before carrying out the next steps, please ensure your machine has reached
the necessary safety levels,
ie should you wish to interrupt the main wash cycle, ensure the water is cooled
down and pumped out of the machine.
Fabric selection
Sorting the various types of fabric
• According to garment labels
• Extend of soiling
• Colours
New fabrics should be washed separately for the first time as they often contain excess dye.
Keep to the recommended capacities to ensure the most economic operation. Overloading the drum
reduces the washing efficiency.

82
Selecting a programme
Pre-wash and coloureds programme • P1 • 30 - 95°C
• Switch on main switch, close loading door
• Select spin speed
• Choose temperature (see HLCC care labelling guide) using programme
selector in area P1
• If desired, select additional functions (see p. 80 - 81)
Attention:
Normal soiled clothes, should never be washed in a pre-wash programme since
the standard wash programme will achieve the same results and save water,
detergent and energy.
Delicates programme • P2 • up to 60°C
• Switch on main switch, close loading door
• Select spin speed
• Choose temperature (see HLCC care labelling guide) using programme
selector in area P2
• If desired, select additional functions (see p. 80 - 81)
Hand wash programme • P3 • cold (pre-set)
• Switch on main swich, close loading door
• Max spin speed is automatically reduced to 500 rpm, regardless of the spin
speed selected.
• Using programme selector in area P3
• If desired, select additional functions (see p. 80 - 81)
Woollens programme • P4 • up to 40°C
• Switch on main switch, close loading door
• Max spin speed is automatically reduced to 500 rpm, regardless of the spin
speed selected.
• Choose temperature (see HLCC care labelling guide) using programme
selector in area P4
• If desired, select additional functions (see p. 80 - 81)
Silk wash programme • P5 • 30°C (pre-set)
• Switch on main swich, close loading door
• Max spin speed is automatically reduced to 500 rpm, regardless of the spin
speed selected.
• Using programme selector in area P5
• If desired, select additional functions (see p. 80 - 81)
Quick wash programme • P6 • 40°C (pre-set)
• Switch on main switch, close loading door
• Select spin speed
• Using programme selector in area P6
• If desired, select additional functions (see p. 80 - 81)
Additional spin programme • P7
• Switch on main switch, close loading door
• Select spin speed
• No additional functions can be selected with this programme

83
The digital display unit
Thedigital display informsyouduring programme selectionand throughout allthe wash programmesabout
the functions of your machine. While your machine is washing, these functions are displayed using various
symboles. The central diagram displays programme sequences and / or programme selection times. The
bottom half of the display shows the selected programme and the selected temperature alternatively.
Start delay is displayed in the same section.
Programme intervention (alterations)
• Return programme selector to position “ “
- Refer to instructions P. 81 “programme override”.
Selecting a programme
Pre-wash • normal water level
Main wash • normal water level
Main wash • water level high
Rinse
Rinse stop
Spin
Programme selection times
and programme sequences
(page 84)
The symbols
Rinse stop
Water level high
Rinse
Normal water level
Pump on
Water flow interrupted
Programme and temperature display
Faults display
Delayed start display
Soak programme
Conditioning rinse
Intensive programme
Programme selection times
and programme sequences
Open the door
Spin
Temperature
Pre-wash
Main wash
Intensive programme
Conditioning rinse
Pump on
Open the door
Programme & Temperature display
faults display
Delayed start display
L
h
C
min
%

84
The programme sequences
P1, P2, P6 Main wash (standard water level)
Cold fill
Washing and heating up to 40°C
(P1 Component programme, P2 Component programme and P2 Economy
programme only)
Washing and heating up to selected temperature
extended wash cycle
(this is not available if you have selected P1 standard programme)
Pump on
P3, P4, P5 Main wash
Cold fill
Washing and heating up to selected temperature
Washing
Pump on
Rinse cycle
Rinse cycle if selected (s. P. 85)
Pump on with spin (short)
Rinse cycle if selected (s. P. 85)
Pump on with spin (short)
Rinse cycle (automatic)
Pump on with spin (short)
Rinse cycle
Pump on with spin (short)
Rinse cycle with cold fill via detergent drawer compartment III (conditioning rinse)
Pump on
Spin
Spin cycle, if you have washed in P1, P2 and P6 a spin speed between
500 and 1100 rpm can be selected
Pump on
Spin cycle, if you have washed in P3, P4 and P5 spinning occurs at
500 rpm only, regardless of the selected spin speed
Pump on

85
Changing the number of rinse cycles
Rinse cycles standard setting: 3 rinse cycles
Whites, coloureds and delicates (P1 / P2):
possible variations: soft water (0 - 10° dH) 4 - 5 rinse cycles
normal water (10 - 16° dH) 3 - 4 rinse cycles
hard water (16° dH and above) 2 - 3 rinse cycles
Hand wash and woollens programme (P3 / P4):
possible variations: normal water (10 - 16° dH) 3 rinse cycles
hard water (16° dH and above) 2 rinse cycles
In the silk wash programme (P5) are 3 rinse cycles and in the quick wash
programme (P6) are 2 rinse cycles pre-set and cannot be changed.
How to alter the standard (3) rinse cycles
• Main switch on
• Turn programme selector to “ “ position
• Press button and simultaneously for 3 seconds
--> your digital display will show the “ - - “ symbol flashing.
• Turn programme selector to P1, P2, P3 or P4
--> your digital display will show the selected programme (see symbols).
• Press button to increase or decrease the number of rinses required
--> This is indicated by the number of flashing bars on your digital display unit.
• Press button for two seconds, this stores the selected number of rinses in
your machine
--> The bars stop flashing
• Turn programm selector to “ “ position
• Select required programme - see P. 78 - 79
Please note that all manual programme alterations are stored in your machines
computer.
These alterations are no longer indicated on the digital display once a standard
programme has been re-selected.
To return to standard programm, re-set and save the programm.
Programme intervention
• You can interrupt the selected rinses before they are stored in your machine by
returning the programme selector to position “ “.
2 rinse cycles
3 rinse cycles
4 rinse cycles
5 rinse cycles

86
Changing the water level in the rinse cycles
Water level standard setting: normal
Whites, coloureds and delicates (P1 / P2):
possible variations: soft water raised water level
normal or hard water normal water level
How to alter the „normal“ water level
• Main switch on
• Turn programme selector to “ “ position
• Press button and simultaneously for 3 seconds
--> The digital display will show the “ - - “ symbol flashing.
• Turn programme selector to P1 or P2
--> The digital display will show the selected programme (see symbols).
• Press button to raise or lower the “normal” water level
--> This is indicated by “flashing waves” on the digital display.
• Press button for two seconds, to store the selected water level
--> The “waves” stop flashing
• Turn programme selector to “ “ position
• Select required programme - see P. 78 - 79
Please note that all manual programme alterations are stored in your machines
computer.
These alterations are no longer indicated on the digital display once a standard
programme has been re-selected.
To return to standard programm, re-set and save the programm.
Programme intervention
• You can interrupt the selected water level before it is stored in your machine by
returning the programme selector to position “ “.
normal
raised

87
Adding the correct amount of detergent
Using the correct amount of detergent, is determined by the following factors:
• size and type of your washing machine
• your water supply (hard or soft water)
• degree of soiling of your laundry
• amount of fabric in your drum
• type and brand of detergent used
Before adding detergent please check if
• Your washing machine is loaded to its max capacity
--> this saves energy and water
• Your laundry is badly soiled ie greasy, ground in dirt etc
• The amount of detergent to be used tallys with the type of water (ie hard / soft) according to
detergent manufacturers instructions
• The detergent is suitable for the selected programme, temperature, and type of fabric to be
washed.
Protection of the environment
Your washing machine protects the environment, by saving up to 30 % of detergent because:
• Your machine is fitted with an ECO - Valve
(This prevents any unused detergent from being discharged)
• The amount of powder needed as indicated by detergent manufacturers on their packaging is
designed for 5 kg machines
--> Your machine however has a max capacity of 3 kg.
--> Use less for smaller quantities.
I
0
II
I
III
Compartment I
pre-wash, bleach or spotting agents
Compartment II
main-wash
Compartment III
conditioner, softening agents
Advise
The manufacturer recommends for an additional water softening devise to be fitted to your machine, if
you live in an area with “normal” water, since this significantly reduces the amount of detergent needed
(see soft water).

88
Programme examples
programme temperature press button capacity
max. kg
cumpting rate
time
min energy
kWh water
litres
heavily soiled withes
with pre-wash P 1 95° C + 3 150 1.20 39
heavily soiled withes
without pre-wash P 1 95° C 3 120 0.85 36
normally soiled withes
with pre-wash P 1 95° C 3 110 1.10 39
normally soiled withes
without pre-wash P 1 95° C 3 70 0.80 36
heavily soiled coloureds P 1 60° C 3 115 0.48 36
normally soiled coloureds P 1 60° C 3 70 0.46 36
not fast-dyed heavily
soiled coloureds P 1 40° C 3 105 0.35 36
not fast-dyed normally
soiled coloureds P 1 40° C 3 60 0.33 36
heavily soiled
easy-care fabrics P 2 40° C 1.5 85 0.25 33
normally soiled
easy-care fabrics P 2 40° C 1.5 60 0.23 33
heavily soiled delicates P2 40° C + 1.5 98 0.40 38
normally soiled
delicates/curtains P2 40° C 1.5 73 0.38 38
hand wash P3 cold 1 32 0.02 36
woollens P 4 30° C 1 50 0.15 40
silk P 5 30° C 1 47 0.18 40
quick wash P 6 40° 1.5 38 0.21 25
soak programme with rinse
cycle and wash-programme
following P1 / P2 + 3---

89
Warning: Before starting cleaning, maintenance and removal of faults, pull the mains plug out of
the socket and close the water-tap!
Advise:
Remove the detergent drawer for cleaning at regular intervals
• Pull out the drawer.
• Lift the drawer slightly, and remove completely.
• Clean detergent drawer with warm water.
• Remove siphon cover and clean with warm water.
• Clean the filler channel for softener if necessary with a bottle brush and remount
siphon cover.
• When drawer removed check if there is any remaining detergent in the shaft of
the drawer and clean if necessary.
• Clean housing, control panel and loading door with a soft cloth.
Removing lime stone
Ifyouhave usedthecorrectamount ofdetergent,de-scalingshould notbenecessary.
However, should it be required use corrosion proof de-scaler for washing machines
only.
Cleaning the water inlet sieve
• Turn off water tap, and disconnect inlet hose from tap
• Remove the two piece safety ring by pressing sideways, and pull out plug
• Lift off the large sieve for cleaning
• Replace the sieve, and the two piece safety ring
• Connect inlet hose to water tap, and check for leaks.
Cleaning and maintenance
I0
I
0

90
Problem checks
Warning: Before starting cleaning, maintenance and removal of faults, pull the mains plug out of
the socket and close the water-tap!
Opening the door in an emergency
• Switch off main switch
• If there is water in the machine (see emergency draining)
--> DANGER: The water could be very hot!
• Ensure the drum has stopped rotating
• The emergency door opener (see picture) must be accessible at all times even
with built in machines. Pull the switch downwards using a screwdriver or needle to
carry out this procedure (see picture).
• The door flicks open
Emergency draining
If the programme is interrupted by a malfunction or in some other way the water
remaining in the machine can be removed through a hose.
• Use a coin to remove the cover disc from this drain lock cap.
• Once the hose has been folded out to its full length the water in the machine can
be drained out into an appropriate container.
Important: If the failure occurs during the heating phase it is essential that you allow
the water to cool before draining to avoid the danger of scalding.
• Replace the hose into the rear of the cap.
Warning
Cleaning of drain pump only necessary in case of faults, if the
symboles indicating the fault F2 or F4.
Cleaning the drain pump
The drain pump must only be opened, when the machine is empty.
• Press in the outer ring of the locking plug (see Pic 1)
• and turn anticlockwise 1/4 turn (see Pic 2).
Press once again and turn another 1/4 turn, to release the plug.
• in order to close, turn drain filter twice to the right
(turn - push - turn).
Pflegeleicht/Feinwäsche
P
2
P
3
äsche
Wolle
P
1
95
kalt
5060
70
80
90
20
30
40
6050
20
30
kalt
udern
Zeitvor
5
°C
h°C
min
P
1
1

91
Problem check list
Symbols indicating a fault
• Close the loading door properly
F3 / • Check water inlet hose (the machine is not getting enough water, open the tap fully)
• Inlet sieve blocked (cleaning - see P. 89)
• Turn off main switch, wait a few moments and turn back on or turn programme selector to “ “
position
F4 The water level is too high, when you switch on the machine
• Wait until the machine has stopped pumping out water, or until the water level has returned
to normal (this is announced by a “clicking” noise)
• Turn programme selector to “ “ position
• Turn off main switch on the machine
• Check drainage system (see P. 90)
• Turn on main switch
• Turn programme selector to spin programme P7 (water remaining in the machine will be
pumped out) or carry out emergency draining - see P. 90
• start the programm
• If the same fault occurs again
--> Turn off cold tap, and remove plug from socket; Contact your customer service, carry out
emergency draining (see P. 90), use emergency door opener (see P. 90) to remove washing
from machine.
F2 The washing solution is discharged very slowly, or not at all
• Turn off main switch
• Clean drain pump (see P. 90)
• Check drain hose for blockage
• Turn on main switch
• If this procedure has cured fault F2, it is possible that fault F4 may arise due to water level in
the machine being too high, this can be eliminated by carrying out procedure as described in
F4.
• start the programm
• If fault F2 occurs again
--> Turn off cold tap, and remove plug from socket; Contact your customer service, carry out
emergency draining (see P. 90), use emergency door opener (see P. 90) to remove washing
from machine.
Attention: When attempting to rectify the following faults, the plug must be removed from
mains socket, and the water tap turned off.
Should the display show the following error codes: F1, F5 - F8, F0, F II, FC they can be deleted as
mentioned below:
• Turn on main switch
• Programm timer to P2 °C
• Press button and simultaneously until the display shows “00” (approx. 3 sec)
You can restart the washing machine now.
Attention: If the display shows one of these error codes again, please contact your customer
service, carry out emergency draining and use emergency door opener if necessary to remove
washing (see P. 90).
Summary The water protection device has been activated!
• Turn off cold fill tap
• Turn off main switch
• Contact your customer service, carry out emergency draining and use emergency door opener if
necessary to remove washing (see P. 90).

92
Problem check list
Faults possible causes Solving the problem
drum stationary
no spin
machine moves, does not stand
properly
little or no detergent enters the machine
conditioner in the machine at
programme start
conditioner compartment flooded
traces of water on floor
washing not cleaned
washing is damaged
powder residues in washing
The water is not pumped off
• no electricity supply
• no programme selected
• loading door open
• no spin selected “ “
• the washing is unevenly distributed
• does not stand correct on the floor
• detergent drawer blocked
• incorrect programme selection
• to much conditioner in compartment III
• intake valve blocked
• excess lather dripping from machine
• detergent drawer open
• inlet hose leaking
• drain trap fitted incorrectly
• to much or to little detergent
• incorrect programme selection
• incorrect temperature selection
• certain stains remain
• sharp object in drum
• sharp object in clothing
• faulty fabrics
• interrupted water supply
• detergent in conditioning drawer
• water is too soft
• the run off system is blocked or the hose
has a kink
• the lye pump is clogged
• plug in another socket check fuse
• select programme (see P. 78 - 79)
• close loading door
• select spin from 500 - 1100 rpm
• if the laundry is unevenly distributed,
the machine will automatically return to
the wash cycle for a short period, until
the spin cycle can commence. If this
is not possible the programme will end
without spinning.
--> loosen the washing by hand, and
select spin programme P7 once more.
• adjust machine properly - see
instruction page 76 - 77
• clean drawer (see P. 89)
• see programme selection (P. 78-79)
• fill to max. - line only
• clean detergent drawer and valve
(see P. 89)
• correct detergent dosage
• close drawer
• check connection of inlet hose on
machine and cold fill tap.
• see P. 90
• correct detergent dosage (see P. 87)
• see P. 78 - 79
• see P. 78 - 79
• see P. 93
• check inside drum
• check pockets
• claim from fabric manufacturer
• check water supply
• clean detergent drawer (see P. 89)
• add extra rinse cycles or raise water
level during rinse cycles (P. 84 - 86)
• check hose and runoff
• Clean lye pump (see page 87)
If your washing machine fails to operate correctly after having carried out the procedures listed above, please
contact your customer service.
Table of contents
Other FUST Washer manuals

FUST
FUST WA 112.2 S Parts list manual

FUST
FUST WA 1657 User manual

FUST
FUST NOVAMATIC WA 720 E User manual

FUST
FUST NOVAMATIC WA714.1 E User manual

FUST
FUST NOVAMATIC WA 712E User manual

FUST
FUST NOVAMATIC WA 110.1 S Parts list manual

FUST
FUST NOVAMATIC WA914.1E User manual

FUST
FUST NOVAMATIC WA 126 E User manual

FUST
FUST NOVAMATIC WA 714 E User manual

FUST
FUST NOVAMATIC WA 914 E User manual