GÜDE Li-Ion 108 Wiring diagram

#58011 Li-Ion 108
#58014 Li-Ion 180
©Güde GmbH & Co. KG - Birkichstrasse 6 - D-74549 Wolpertshausen - Deutschland
Deutsch – DE 3
Originalbetriebsanleitung
AKKUSCHRAUBER
English – GB 7
Translation of original operating instructions
CORDLESS DRILL/DRIVER
Français – FR 11
Traduction du mode d’emploi d’origine
TOURNEVIS Á ACCU
Čeština – CZ 15
Překlad originálního návodu k provozu
AKU ŠROUBOVÁK
Slovenčina – SK 19
Preklad originálneho návodu na prevádzku
AKKU SKRUTKOVAC
Nederlands – NL 23
Vertaling van de originele gebruiksaanwijzing
SCHROEVENDRAAIERS
Italiano – IT 27
Traduzione del Manuale d’Uso originale
CACCIAVITI
Magyar – HU 31
Az eredeti használati utasítás fordítása
AKKUS CSAVAROZÓTürkçe - TR

# 58011
1
1
2 3
4
5
6
7
8
9
10
# 58014
1
2 3
4
5
6
7
8
10
9
12
13
11
13
2

Einleitung
Damit Sie an Ihrem neuen Gerät möglichst lange Freude
haben, bitten wir Sie, die Betriebsanweisung und die
beiliegenden Sicherheitshinweise vor Ingebrauchnahme
sorgfältig durchzulesen. Ferner wird empfohlen, die
Gebrauchsanweisung für den Fall aufzubewahren, dass
Sie sich die Funktionen des Artikels später nochmals ins
Gedächtnis rufen möchten. Im Rahmen ständiger
Produktweiterentwicklung behalten wir uns vor zur
Verbesserung technische Änderungen umzusetzen.
Bei diesem Dokument handelt es sich um die
Originalbetriebsanweisung.
Lieferumfang
Nehmen Sie das Gerät aus der Transportverpackung und
prüfen Sie die Vollständigkeit und das Vorhandensein
folgender Teile:
# 58011 AKKUSCHRAUBER LI-ION 108
•Kunststoffkoffer
•6 Metallbohrer in den Größen von 1-6 mm
•6 Biteinsätze incl. Aufnahme
•Ladegerät
•Bedienungsanleitung
# 58014 AKKUSCHRAUBER LI-ION 180
•Kunststoffkoffer
•6 Metallbohrer in den Größen von 1,5-6 mm
•6 Biteinsätze (PH1/2, PZ1/2, Schlitz 5/6)
•Bithalter
•Ladegerät
•Bedienungsanleitung
Sollten Teile des Lieferumfangs fehlen oder beschädigt
sein, wenden Sie sich bitte an Ihren Händler.
Gerätebeschreibung
Lithium-Ionen Akkuschrauber mit Soft Griff. Lithium Ionen
Technologie für schnelles, flexibles und einfaches
Arbeiten.
Abb. 1:
1. Drehmomenteinstellung
2. Schnellspannbohrfutter
3. Drehrichtungsschalter
4. Ein-/Ausschalter
5. Akku
6. Ladegerät
7. Ladekabel
8. Rasttaste
9. LED-Licht
10. Akku-Kapazitätsanzeige
11. Gangwahlschalter (nur #58014)
12. Magnethalter (nur #58011)
13. Ladeanzeige
Technische Daten
AKKUSCHRAUBER LI-ION 108 #58011:
Akkuspannung: 10,8 V
Akku-Kapazität: 1,35 Ah
Drehzahl-Bereich: 0-600 min-1
Drehmoment Stufen: 15 + 1
Max. Drehmoment: 12 Nm
Bohrfutter Spannbereich: 1,5 – 10 mm
Ladedauer: 3 – 5 h
Gewicht: 2,1 kg
Abmessung: L: 210 x B: 60 x H: 200 mm
AKKUSCHRAUBER LI-ION 180 #58014:
Akkuspannung: 18 V
Akku-Kapazität: 1,3 Ah
Leerlaufdrehzahl 1/2 Gang: 0-330 / 0-1300 min-1
Drehmoment Stufen: 19 + 1
Max. Drehmoment: 28 Nm
Bohrfutter Spannbereich: 1,0 – 10 mm
Ladedauer: 1 h
Gewicht: 3 kg
Abmessung: L: 220 x B: 80 x H: 245 mm
Allgemeine Sicherheitshinweise
Lesen Sie diese Betriebsanleitung sorgfältig. Machen Sie
sich mit den Bedienelementen und dem richtigen
Gebrauch des Gerätes vertraut. Bewahren Sie die
Betriebsanleitung für eine spätere Verwendung sicher auf.
Sicheres Arbeiten
Halten Sie Ihren Arbeitsbereich in Ordnung!
Unordnung am Arbeitsplatz kann Unfälle zur Folge haben.
Berücksichtigen Sie die Umgebungseinflüsse
Setzen Sie das Gerät nicht dem Regen aus.
Benutzen Sie das Gerät nicht in feuchter oder nasser
Umgebung. Sorgen Sie für gute Beleuchtung.
Benutzen Sie das Gerät nicht in der Nähe von brennbaren
Flüssigkeiten oder Gasen.
Korrekte Aufbewahrung!
Unbenutzte Geräte sollten an einem trockenen,
verschlossen Ort und außerhalb der Reichweite von
Kindern aufbewahrt werden
Überlasten Sie Ihr Gerät nicht!
Arbeiten Sie im angegebenen Leistungsbereich.
Benutzen Sie das richtige Gerät!
Benutzen Sie das Gerät nicht für Zwecke, für die sie nicht
bestimmt sind.
Pflegen Sie Ihr Gerät mit Sorgfalt!
Befolgen Sie die Wartungsvorschriften und Hinweise.
Halten Sie Handgriffe trocken und frei von Öl und Fett.
Seien Sie aufmerksam!
Achten Sie darauf, was Sie tun. Gehen Sie mit Vernunft
an die Arbeit. Benutzen Sie das Gerät nicht, wenn Sie
müde sind.
WARNUNG!
Der Gebrauch von anderem Zubehör kann eine
Verletzungsgefahr für Sie bedeuten.
Lassen Sie Ihr Gerät durch eine Fachkraft reparieren!
Dieses Gerät entspricht den einschlägigen
Sicherheitsbestimmungen. Reparaturen dürfen nur durch
eine Fachkraft ausgeführt werden, indem
Originalersatzteile verwendet werden, andernfalls können
Unfälle für den Benutzer entstehen.
Gerätespezifische Sicherheitshinweise
Schalten Sie vor Arbeiten das Gerät aus.
Tragen Sie eine Schutzbrille.
Gefahr durch rotierendem Bohrer.
Achten Sie darauf, dass in der Nähe stehende
Personen nicht durch wegschleudernde Teile getroffen
oder verletzt werden.
3

Warten Sie bis alle Teile des Geräts zum Stillstand
gekommen sind bevor Sie diese anfassen.
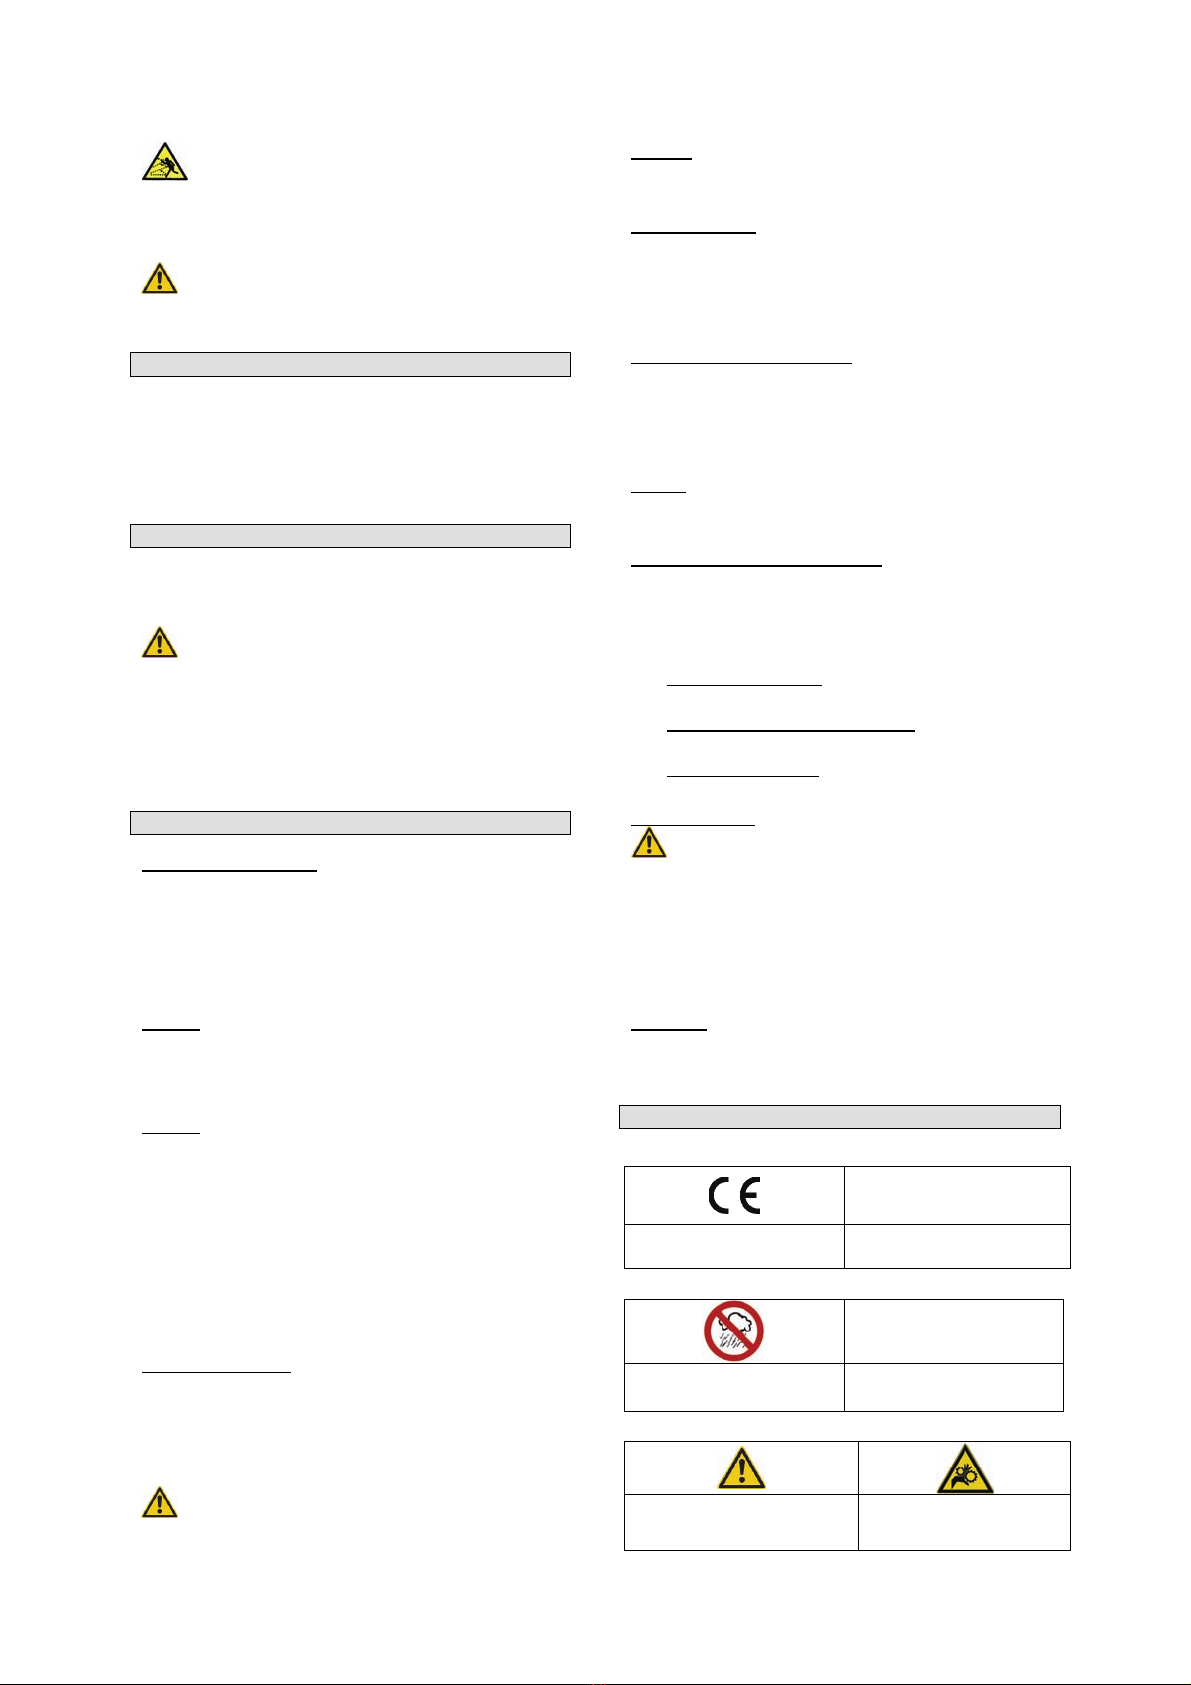
Setzen Sie das Gerät niemals Regen oder
Feuchtigkeit aus. Bewahren Sie das Gerät nur an einem
trockenem Ort auf.
Kindern oder Personen die mit dem Gerät nicht vertraut
sind und Personen mit eingeschränkten physischen,
sensorischen oder geistigen Fähigkeiten ist die Bedienung
des Gerätes zu untersagen.
Verwenden Sie ausschließlich Original-Zubehör.
Prüfen Sie vor der Inbetriebnahme die
Schrauberbits auf seinen festen Sitz.
Versuchen Sie nicht die Drehzahleinstellung des Motors
zu ändern. Falls ein Problem besteht wenden Sie sich an
eine Fachkraft.
Bevor Sie Löcher in eine Wand bohren, prüfen Sie
ggf. mit einem Leitungssucher, dass Sie nicht auf Strom,
Gas oder Wasser stoßen.
Bestimmungsgemäße Verwendung
Geeignet zum Eindrehen und Lösen von Schrauben,
sowie zum Bohren in Holz, Metall und Kunststoff.
Jeder darüber hinausgehende Gebrauch gilt als nicht
bestimmungsgemäß. Für daraus resultierende Schäden
oder Verletzungen haftet der Hersteller nicht. Bitte
beachten Sie, dass unsere Geräte bestimmungsgemäß
nicht für den gewerblichen Einsatz konstruiert sind.
Vor Inbetriebnahme
Der Akku wird nur zum Teil aufgeladen geliefert. Laden
Sie unbedingt vor der Erst-Inbetriebnahme den Akku
vollständig auf.
ACHTUNG:
•Laden Sie den Akku nur mit dem mitgelieferten
Ladegerät.
•Nur scharfe Bohrer, sowie einwandfreie und
geeignete Schrauberbits verwenden.
•Beim Bohren und Schrauben in Wänden und Mauern
diese auf verborgene Strom- Gas- und
Wasserleitungen überprüfen.
Betrieb
Laden des Akkus:
1. Lösen Sie den Akku von dem Gerät, indem Sie dabei
die Rasttasten (Abb. 1/8) drücken und den Akku nach
unten bzw. herausziehen.
2. Vergleichen Sie nun, ob die auf dem Typenschild des
Ladegerätes angegebene Netzspannung mit der
vorhandenen Netzspannung übereinstimmt.
3. Stecken Sie das Ladegerät in die Steckdose und
verbinden Sie das Ladekabel mit dem
Ladeanschluss.
#58011:
4. Wenn der Akku geladen wird, leuchtet die rote LED
(Abb. 1/10)
5. Nach der erfolgten Ladung leuchtet die grüne LED
(Abb. 1/10)
#58014:
4. Nach dem Einstecken des Ladegerätes leuchtet die
grüne LED.
5. Während des Ladevorgangs leuchtet die rote LED.
Anschließend „blinkt“ die rote LED.
6. Erlischt die rote LED, ist der Ladevorgang beendet.
Um eine lange Lebensdauer des Akkus zu garantieren,
sollten Sie für eine rechtzeitige Wiederaufladung des
Akkus sorgen.
Wenn der Akku kurz vor dem Leer werden ist, schaltet
dieser sich ab. Auf keinen Fall den Akkuschrauber
weiterhin benutzen. Dies kann die Lebensdauer des Akkus
drastisch verkürzen.
Drehmoment-Einstellung:
Das Drehmoment für eine bestimmte Schraubengröße
wird an der Drehmomenteinstellung (Abb. 1/1) angepasst.
Es hängt von mehreren Faktoren ab:
•Von der Art und Härte des zu bearbeitenden
Materials.
•Von der Art und der Länge der verwendeten
Schrauben.
•Von den Anforderungen, die an die
Schraubverbindung gestellt werden.
Die Drehmomenteinstellung nur bei Stillstand
des Akkuschraubers vornehmen.
Bohren:
Zum Bohren stellen Sie die Drehmomenteinstellung (Abb.
1/1) auf die letzte Stufe „Bohrer“.
Gangwahlschalter:
Betätigen Sie den Schalter nur bei Stillstand des
Akkuschraubers.
•Stufe Schrauben
Weniger Drehzahl, mehr Drehmoment.
•Stufe Bohren
Mehr Drehzahl, geringeres Drehmoment.
Drehrichtungsschalter:
Mit dem Schiebeschalter (Abb. 1/3) können Sie die
Drehrichtung einstellen. Sie können zwischen Rechts- und
Linkslauf wählen. Damit Getriebe Beschädigungen
vermieden werden, darf die Drehrichtung nur im Stillstand
des Gerätes umgestellt werden. Befindet sich der Schalter
in der Mittelstellung, ist der Ein-/Ausschalter blockiert.
Ein-/Ausschalter:
Je weiter Sie den Schalter (Abb. 1/4) drücken, desto höher
ist die Drehzahl des Akkuschraubers.
Akku-Kapazitätsanzeige:
#58011: Wenn Sie den Ein-/Ausschalter (Abb. 1/4)
drücken, zeigen Ihnen die LED´s (Abb. 1/10) den
Ladezustand des Akkus.
#58014: Wenn Sie die Taste neben der Akku-
Kapazitätsanzeige drücken, zeigen Ihnen die LED´s (Abb.
1/10) den Ladezustand des Akkus.
•Alle LED´s leuchten: der Akku ist voll aufgeladen.
•Das gelbe und rote LED leuchten: der Akku verfügt
über eine ausreichende Restladung.
•Das rote LED leuchtet: der Akku ist fast leer, laden
Sie den Akku auf.
Werkzeugwechsel:
Stellen Sie bei allen Arbeiten am Akkuschrauber
den Drehrichtungsschalter (Abb. 1/3) in die
Mittelstellung.
1. Drehen Sie das Bohrfutter (Abb. 1/2) so weit auf, um
das Werkzeug aufzunehmen.
2. Wählen Sie nun das geeignete Werkzeug aus und
schieben es soweit wie möglich in die Öffnung hinein.
3. Drehen Sie das Bohrfutter wieder fest zu und prüfen
Sie den festen Sitz des Werkzeuges.
LED-Licht:
Das LED-Licht (Abb. 1/9) ermöglich das zusätzliche
Ausleuchten der Schraub- bzw. Bohrstelle. Das LED-Licht
leuchtet automatisch, sobald der Ein-/Ausschalter betätigt
wird.
4

Kennzeichnungen
Produktsicherheit:
Produkt ist mit den einschlägigen
Normen der Europäischen
Gemeinschaft konform
Verbote:
Vor Regen und Feuchtigkeit
schützen!
Warnung:
Warnung/Achtung Warnung vor wegschleudernden
Teilen
Warnung! Rotierendes Werkzeug
Verletzungsgefahr!
Gebote:
Allgemeines Gebotszeichen Vor Gebrauch
Bedienungsanleitung lesen
Augen- und Gehörschutz
benutzen
Umweltschutz:
Abfall nicht in die Umwelt
sondern fachgerecht entsorgen.
Verpackungsmaterial aus
Pappe kann an den dafür
vorgesehen Recycling-Stellen
abgegeben werden.
Schadhafte und/oder zu
entsorgende elektrische oder
elektronische Geräte müssen an
den dafür vorgesehen Recycling-
Stellen abgegeben werden.
Ladegerät ist schutzisoliert.
Verpackung:
Vor Nässe schützen Packungsorientierung Oben
Interseroh-Recycling
Technische Daten:
Akku Bohrfutter Spannbereich
Drehzahl 1 Gang Getriebe Rechts/Links
Werkzeugfreies
Schnellspannbohrfutter Gewicht
EG-KONFORMITÄTSERKLÄRUNG
Hiermit erklären wir,
Güde GmbH & Co. KG
Birkichstrasse 6
D-74549 Wolpertshausen
Deutschland
dass die nachfolgend bezeichneten Geräte aufgrund ihrer
Konzipierung und Bauart sowie in den von uns in Verkehr
gebrachten Ausführungen den einschlägigen,
grundlegenden Sicherheits- und Gesundheits-
anforderungen der EG-Richtlinien entsprechen.
Bei einer nicht mit uns abgestimmten Änderung
der Geräte verliert diese Erklärung ihre Gültigkeit.
Bezeichnung der Geräte:
AKKUSCHRAUBER LI-ION 108
AKKUSCHRAUBER LI-ION 180
Artikel-Nr:
#58011
#58014
Einschlägige EG-Richtlinien:
2006/95 EG
2004/108 EG
2006/42 EG
2000/14/EG
1907/2006 EG
2002/95/EG ROHS
Angewandte harmonisierte Normen:
EN 55014-1:2006
EN 55014-2:1997+A1+A2
EN 60745-1 :2009
EN 60745-2-1 :2003+A11+A1+A12
EN 60745-2-2 :2003+A11+A1+A12
Zertifizierstelle:
TÜV Rheinland LGA Product GmbH
Tillystraße 2
D-90431 Nürnberg
Deutschland
Referenznummer:
#58011: 14703386006
#58014: SH09050410-011
Datum/Herstellerunterschrift: 30.07.2010
Angaben zum Unterzeichner: Geschäftsführer
Hr. Arnold
Technische Dokumentation: J. Bürkle FBL; QS
Gewährleistung
Die Gewährleistung erstreckt sich ausschließlich auf
Mängel, die auf Material- oder Herstellungsfehler
zurückzuführen sind. Bei Geltendmachung eines Mangels
im Sinne der Gewährleistung ist der original Kaufbeleg mit
Verkaufdatum beizufügen. Von der Gewährleistung
ausgeschlossen sind unsachgemäße Anwendungen, wie
z. B. Überlastung des Gerätes, Gewaltanwendung,
Beschädigungen durch Fremdeinwirkung oder durch
5

Fremdkörper. Nichtbeachtung der Gebrauchs- und
Aufbauanleitung und normaler Verschleiß sind ebenfalls
von der Gewährleistung ausgeschlossen.
Verhalten im Notfall
Leiten Sie die der Verletzung entsprechend notwendigen
Erste Hilfe Maßnahmen ein und fordern Sie schnellst
möglich qualifizierte ärztliche Hilfe an. Bewahren Sie den
Verletzten vor weiteren Schädigungen und stellen Sie
diesen ruhig.
Für einen eventuell eintretenden Unfall sollte immer
ein Verbandskasten nach DIN 13164 am Arbeitsplatz
griffbereit vorhanden sein. Dem Verbandskasten
entnommenes Material ist sofort wieder aufzufüllen.
Wenn Sie Hilfe anfordern, machen Sie folgende
Angaben:
1. Ort des Unfalls
2. Art des Unfalls
3. Zahl der Verletzten
4. Art der Verletzungen
Entsorgung
Die Entsorgungshinweise ergeben sich aus den
Piktogrammen die auf dem Gerät bzw. der Verpackung
aufgebracht sind. Eine Beschreibung der einzelnen
Bedeutungen finden Sie im Kapitel „Kennzeichnung“.
Entsorgung der Transportverpackung
Die Verpackung schützt das Gerät vor Transportschäden.
Die Verpackungsmaterialien sind in der Regel nach
umweltverträglichen und entsorgungstechnischen
Gesichtspunkten ausgewählt und deshalb recycelbar.
Das Rückführen der Verpackung in den Materialkreislauf
spart Rohstoffe und verringert das Abfallaufkommen.
Verpackungsteile (z.B. Folien, Styropor®) können für
Kinder gefährlich sein. Es besteht Erstickungsgefahr!
Bewahren Sie Verpackungsteile außerhalb der Reichweite
von Kindern auf und entsorgen Sie sie so schnell wie
möglich.
Anforderungen an den Bediener
Der Bediener muss vor Gebrauch des Gerätes
aufmerksam die Bedienungsanleitung gelesen haben.
Qualifikation
Außer einer ausführlichen Einweisung durch eine
sachkundige Person ist keine spezielle Qualifikation für
den Gebrauch des Gerätes notwendig.
Mindestalter
Das Gerät darf nur von Personen betrieben werden, die
das 16. Lebensjahr vollendet haben. Eine Ausnahme stellt
die Benutzung als Jugendlicher dar, wenn die Benutzung
im Zuge einer Berufsausbildung zur Erreichung der
Fertigkeit unter Aufsicht eines Ausbilders erfolgt.
Schulung
Die Benutzung des Gerätes bedarf lediglich einer
entsprechenden Unterweisung. Eine spezielle Schulung ist
nicht notwendig.
Reinigung
Halten Sie die Luftschlitze und das Gehäuse Staub- und
Schmutzfrei.
Verwenden Sie zur Reinigung ein weiches Tuch und eine
milde Seifenlösung. Vermeiden Sie den direkten Kontakt
von scharfen Reinigungsmitteln mit dem Gerät. Sie dürfen
keine aggressiven, flüchtigen oder ätzenden
Reinigungsmittel verwenden.
Das Gerät ist vor Feuchtigkeit und Staub zu schützen.
Bei längerer Nichtbenutzung das Gerät abgedeckt an
einem trockenem, sicheren Ort unzugänglich für Kinder
aufbewahren.
Service
Sie haben technische Fragen? Eine Reklamation?
Benötigen Ersatzteile oder eine Bedienungsanleitung?
Auf unserer Homepage www.guede.com im Bereich
Service helfen wir Ihnen schnell und unbürokratisch
weiter. Bitte helfen Sie uns Ihnen zu helfen. Um Ihr Gerät
im Reklamationsfall identifizieren zu können benötigen wir
die Seriennummer sowie Artikelnummer und Baujahr. Alle
diese Daten finden Sie auf dem Typenschild. Um diese
Daten stets zur Hand zu haben, tragen Sie diese bitte
unten ein.
Seriennummer:
Artikelnummer:
Baujahr:
Tel.: +49 (0) 79 04 / 700-360
Fax: +49 (0) 79 04 / 700-51999
6

Introduction
Please read thoroughly this operation manual and
attached safety instructions to enjoy your machine. We
further recommend to retain the operation manual for
future references. We reserve right to make technical
changes for the purpose of improvement in the course of
continuous product development.
This is the original operation manual.
Scope of supply
Unpack the appliance and check completeness and
delivery of the following components:
# 58011 CORDLESS DRILL/DRIVER LI-ION 108
•Plastic case
•6 metal drills of 1 – 6 mm
•6 bit extensions including fixing
•Charger
•original user guide
# 58014 CORDLESS DRILL/DRIVER LI-ION 180
•Plastic case
•6 metal drills of 1.5 – 6 mm
•6 bit extensions (PH1/2, PZ1/2, 5/6 groove)
•Bit holder
•Charger
•original user guide
Please contact your seller if you either miss some
components or the components are damaged.
Description of the appliance
Li-on cordless screwdriver with soft grip. Lithium-ion
technology for fast, flexible and simple working.
Pic. 1:
1. Torque adjustment
2. Quick chuck
3. Rotation direction switch
4. On/Off
5. Accumulator
6. Charger
7. Charger cable
8. Snap button
9. LED diode
10. Accumulator capacity signalling
11. Level selection switch (#58014 only)
12. Magnetic holder (#58011 only)
13. Charge level indicator
Technical data
CORDLESS DRILL/DRIVER LI-ION 108 #58011:
Accumulator voltage: 10.8 V
Accumulator capacity: 1.35 Ah
Speed range: 0-600 a min-1
Torque levels: 15 + 1
Max. torque: 12 Nm
Chuck fixing range: 1.5 – 10 mm
Charging time: 3 – 5 hours
Weight: 2.1 kg
Dimensions: l: 210 x w: 60 x h: 200 mm
CORDLESS DRILL/DRIVER LI-ION 180 #58014:
Accumulator voltage: 18 V
Accumulator capacity: 1,3 Ah
Idle speed at 1/2 level: 0-330 / 0-1300 min-1
Torque levels: 19 + 1
Max. torque: 28 Nm
Chuck fixing range: 1,0 – 10 mm
Charging time: 1 hours
Weight: 3 kg
Dimensions: l: 220 x w: 80 x h: 245 mm
General safety instructions
Read this user guide thoroughly. Make sure you know the
controls and correct use of the appliance. Store the user
guide safely for future reference.
Safe work
Keep your workplace tidy!
Disorder on workplace may result in injuries.
Consider surrounding conditions!
Do not expose to rain.
Do not use in moist or wet environment.
Provide good lighting.
Do not use close to flammable liquids or gases
Store your device properly!
The device, if not used, should be stored in a dry and
closed space, out of reach of children.
Do not overload your device!
Operate the appliance within specified working capacity.
Use correct device!
Do not use the device for purposes other than intended.
Use the right appliance!
Do not use the appliance for purposes for which it has not
been designed.
Take care of your appliance!
Observe maintenance directions and instructions.
Check appliance cable regularly and ask an authorized
specialist to replace the same if damaged.
Be careful!
Be aware of what you are doing. Approach your work with
sound mind. Do not use the device if you are tired.
WARNING!
Use of non-compliant accessories may result in an injury.
Have your device repaired by an electrician only!
This device complies to applicable safety provisions.
Repairs may be performed by an electrician with the use of
genuine spare parts, otherwise the user may be exposed
to injury hazard.
Safety instructions specific for this device
Switch the appliance off before working on it.
Wear protective glasses.
Risk from rotating drill.
Pay attention to prevent injury of persons standing
nearby and their hitting by thrown-off items.
Wait until all parts of the appliance stop before touching
any part of it.
Never expose the appliance to rain or moisture. To
be kept in a dry place only.
Children, persons not acquainted with the appliance and
persons with limited psychical, sensory or mental abilities
must not use this appliance.
Original accessories to be used only.
7

Check whether the screwdriver bit is fitted properly
before putting the appliance into operation.
Do not try to change the engine speed setting. Contact a
professional in case of problems.
Before drilling holes to a wall, make sure you are not
going to strike electric current, gas or water using a current
seeker if necessary.
Application according to intended use
Suitable for screwing and loosening of screws and drilling
to wood, metals and plastic materials.
Any other use contradicts to the intended use.
Manufacturer is not responsible for subsequent damage
and injuries. Please note the appliance is intended for
domestic use only.
Before putting into operation
The accumulator is supplied partially charged. It must be
charged to full extent before it is put into operation for the
first time.
CAUTION:
•Charge the accumulator only using a charged
included in the supply.
•Use only sharp drills and screw bits that are in a
perfect and appropriate condition.
•When drilling and screwing to walls, check whether
there are no electric lines or water piping or gas lines
in the wall.
Operation
Accumulator charging:
1. Disconnect the accumulator from the appliance by
pressing the snap button (pic. 1/8) and pull the
accumulator down.
2. Now compare the voltage on the charger type label
with the voltage of your electrical network.
3. Plug the charger and connect the charger cable with
the charger connector.
#58011:
4. Red LED diode is on when the accumulator is being
charged (pic. 1/10)
5. Green LED diode is on after charging is complete
(pic. 1/10)
#58014:
4. Green LED diode is on after plugging the charger.
5. Red LED diode is on during the charging process.
The red LED diode then starts “blinking“.
6. The charging process is complete when the red LED
diode turns off.
To ensure long service life of the accumulator, timely
charging should be provided at all times.
If the accumulator is shortly before being discharged, it
switches off. In any case, do not use the cordless
screwdriver any more. Doing so could dramatically reduce
the service life of the accumulator.
Torque adjustment:
Torque can be adjusted depending on the size of screws
on the torque adjustment device (pic. 1/1).
Torques depends on a number of factors:
•Type and hardness of material you are working with.
•Type and length of the screws that are used.
•Requirements imposed on the screwed joints.
Adjust the torque only when the cordless
screwdriver is idle.
Drilling:
To drill, adjust the torque (pic. 1/1) to the final “drilling“
level.
Level switching:
Switch only when the cordless screwdriver is idle.
•Screwing level
lower speed, higher torque.
•Drilling level
Higher speed, lower torque.
Rotation direction switching:
The rotation direction may be adjusted by the shift switch
(pic. 1/3). You can choose between the right and left
rotation. To prevent damage of the gearing, the rotation
direction may only be changed when the appliance is idle.
If the switch is in the central position, On/Off is blocked.
On/Off:
The more this switch (pic. 1/4) is pressed, the higher the
cordless screwdriver speed.
Accumulator capacity signalling:
#58011: After pressing On/Off (pic. 1/4), LED diodes (pic.
1/10) show the accumulator charging level.
#58014: After pressing the button next to the accumulator
capacity signalling, LED diodes (pic. 1/10) show the
accumulator charging level.
•All LED diodes are on: accumulator is charged to full
extent.
•Yellow and red LED diodes are on: accumulator is
charged to sufficient extent.
•Red LED diode is on: accumulator is almost
discharged - charging necessary.
Tools changing:
When working on the cordless screwdriver,
adjust the rotation direction switch (pic. 1/3) to the
central position.
1. Screw the chuck (pic. 1/2) out to remove the tool.
2. Now choose the appropriate tool and insert it as deep
in the hole as possible.
3. Screw the chuck tightly again and check whether the
tool is fitted tightly.
LED light:
LED light (pic. 1/9) enables additional lighting of the
screwing or drilling space. LED light is immediately
switched on after pressing On/Off.
Identification
Product safety:
The product complies with
relevant EU standards
Prohibitions:
Protect against rain and
moisture!
Warning:
Warning/caution WARNING! Rotating
appliance poses the risk of
injury!
8

Caution! Hurled objects!
Commands:
General prohibition sign Read operation manual
before use
Use goggles and ear
protection
Environment protection:
Dispose waste not to harm
your environment.
Packaging material from
cardboard can be recycled
in a collection point.
Defective and/or disposed
electric or electronic devices
must be delivered to relevant
collection points.
Charger includes protective
insulation
Packaging:
Protect against moisture Packaging must direct
upwards
Interseroh-Recycling
Technical data:
accumulator chuck – fixing range
speed single-speed gearbox
right/left
quick chuck without tools weight
EU DECLARATION ON CONFORMITY
The company
Güde GmbH & Co. KG
Birkichstrasse 6
D-74549 Wolpertshausen
Germany
hereby declares that the design and structure of the
devices listed below and in designs marketed conforms to
applicable basic requirements of the EU directives on
safety and hygiene.
This declaration on conformity becomes void in
case of a change to the device not consulted with
us.
Identification of the devices:
CORDLESS DRILL/DRIVER LI-ION 108
CORDLESS DRILL/DRIVER LI-ION 180
Order No.:
#58011
#58014
Applicable EU directives:
2006/95 EG
2004/108 EG
2006/42 EG
2000/14/EG
1907/2006 EG
2002/95/EG ROHS
Harmonized standards used
EN 55014-1:2006
EN 55014-2:1997+A1+A2
EN 60745-1 :2009
EN 60745-2-1 :2003+A11+A1+A12
EN 60745-2-2 :2003+A11+A1+A12
Certification authority:
TÜV Rheinland LGA Product GmbH
Tillystraße 2
D-90431 Nürnberg
Deutschland
Reference No.:
#58011: 14703386006
#58014: SH09050410-011
Date/signature of manufacturer: 30.07.2010
Information about signer: the executive
Mr Arnold
Technical documentation: J. Bürkle FBL; QS
Warranty
The warranty applies exclusively on material or production
defects. For warranty claims, please submit an original
proof of purchase with date of purchase indicated. The
warranty does not cover unprofessional use, such as
overloading, violent use, damage caused by third party or
a thing. The warranty also does not cover failure to comply
with the operation manual and normal wear and tear.
Emergency procedures
Administer first aid according to injury and call for qualified
medical assistance. Protect injured person against other
injuries and keep him/her in rest.
For reasons of potential injury, a first aid box
according to DIN 13164 must be available on
workplace. Replenish immediately material used from
the first aid box. If you require medical assistance,
give the following information:
1. Place of accident
2. Type of accident
3. Number of injured persons
4. Type of injury
9

Disposal
Disposal instructions are illustrated in the form of
pictograms on the device or packaging. Description of the
pictograms is given in "Identification" chapter.
Disposal of transport packaging
Packaging protects the device against damage during
transport. Packaging materials are usually selected
according to their effect on environment and disposal
methods and can therefore be recycled.
Returning of the packaging back to circulation saves
resources and costs for packaging disposal.
Parts of the packaging (e.g. foil, styropor) may be
dangerous for children. Risk of suffocation!
Keep these parts of the packaging out of reach of children
and dispose as soon as possible.
Operator requirements
The operators must thoroughly read operation manual
before use.
Qualification
Except for thorough training by an expert for use of the
device, no special qualification is required.
Minimum age
The device may be operated by persons over 16 years of
age. An exception is use by younger person if the use
takes place under supervision of an adult trainer in the
course of education.
Training
Use of the device requires corresponding guidance by an
expert or operation manual only. No special training is
required.
Cleaning
Keep the air holes and appliance body clean and with no
dust.
Use soft cloth and fine soap solution for cleaning. Avoid
direct contact of the appliance with aggresive cleaning
agents. Do not use aggresive, volatile or caustic products.
Protect the appliance against moisture and dust.
If not used for a longer period of time, store covered on
dry, safe place not accessible to children.
Service
Any technical questions? Complaint? Do you need
spare parts or operation manual?
Go to our website www.guede.com and the section
Service will help you quickly and without bureaucracy.
Please, help us to help you. In order to identify your device
in case of complaint, please indicate serial number, order
number and year of manufacture. All information is
available on the product label. To have all information
always at hand, put them down.
Serial number:
Order number:
Year of manufacture:
Phone: +49 (0) 79 04 / 700-360
Fax: +49 (0) 79 04 / 700-51999
10

Introduction
Afin de pouvoir profiter le plus longtemps possible de votre
nouveau Tournevis á accu , veuillez lire attentivement le
mode d’emploi et les consignes de sécurité jointes. Nous
vous recommandons également de conserver le mode
d’emploi pour une consultation ultérieure éventuelle. Dans
le cadre du développement continu de nos produits, nous
nous réservons le droit aux modifications techniques.
Ce document est un mode d’emploi original.
Contenu du colis
Sortez l’appareil de l’emballage de transport et contrôlez
l’intégrité et l’existance des pièces suivantes :
# 58011 TOURNEVIS Á ACCU LI-ION 108
•valise en plastique
•6 forets métalliques de 1 - 6 mm
•6 embouts bit avec fixation
•chargeur
•mode d’emploi original
# 58014 TOURNEVIS Á ACCU LI-ION 180
•valise en plastique
•6 forets métalliques de 1,5 - 6 mm
•6 embouts bit (PH1/2, PZ1/2, rainure 5/6)
•support des bits
•chargeur
•mode d’emploi original
En cas de manque ou d’endommagement de pièces,
veuillez contacter votre revendeur.
Description de l’appareil
Tournevis Accu Li-on avec support soft grip. Technologie
Lithium ion pour un travail rapide, flexible et facile.
Fig. 1:
1. réglage du couple de torsion
2. mandrin à serrage rapide
3. commutateur du sens des rotations
4. interrupteur marche/arrêt
5. accumulateur
6. chargeur
7. câble de chargement
8. bouton d‘enclenchement
9. Diode LED
10. signalisation de la capacité de l’accumulateur
11. commutateur de sélection du degré (uniquement
#58014)
12. support magnétique (uniquement #58011)
13. indicateur d’état de charge
Caractéristiques techniques
TOURNEVIS Á ACCU LI-ION 108 #58011:
Tension de l’accumulateur: 10,8 V
Capacité de l’accumulateur: 1,35 Ah
Gamme de tours: 0-600 min-1
Degrés du couple de torsion: 15 + 1
Couple de torsion maximal: 12 Nm
Gamme de fixation du mandrin: 1,5 – 10 mm
Durée de charge: 3 – 5 h
Poids: 2,1 kg
Dimensions: l: 210xl 60xh: 200 mm
TOURNEVIS Á ACCU LI-ION 180 #58014:
Tension de l’accumulateur: 18 V
Capacité de l’accumulateur: 1,3 Ah
Tours à vide au degré 1/2: 0-330 / 0-1300 min-1
Degrés du couple de torsion: 19 + 1
Couple de torsion maximal: 28 Nm
Gamme de fixation du mandrin: 1,0 – 10 mm
Durée de charge : 1 h
Poids: 3 kg
Dimensions : l: 220 x l: 80 x h: 245
mm
Consignes générales de sécurité
Lisez attentivement ce mode d’emploi. Familiarisez vous
avec les éléments de commande et l’utilisation correcte de
l’appareil. Conservez bien le mode d’emploi pour une
utilisation ultérieure !
Travail en sécurité
Maintenez votre lieu de travail en ordre !
Le désordre sur le lieu de travail et l’établi augmente des
risques d’accidents et de blessures.
Prenez en considération les conditions
atmosphériques.
N’exposez pas l’appareil à la pluie. Ne l’utilisez pas dans
un milieu humide ou mouillé. Assurez un éclairage
suffisant. N’utilisez pas l’appareil à proximité des liquides
ou des gaz inflammables.
Rangez l’appareil à un endroit sûr !
Si vous n’utilisez pas l’appareil, rangez-le dans une pièce
sèche, fermée à clé de façon à ce qu’il ne soit pas
accessible aux enfants.
Ne surchargez pas l’appareil !
Travaillez dans la gamme de puissance indiquée.
Utilisez l’appareil adéquat !
Utilisez l’appareil uniquement dans le but dans lequel il a
été conçu.
Utilisez l’outil adéquat !
N’utilisez pas l’outil dans le but pour lequel il n’a pas été
conçu.
Soyez attentifs. Faites attention à ce que vous faites.
Utilisez le bon sens. N’utilisez pas l’appareil si vous êtes
fatigués.
AVERTISSEMENT!
L’utilisation d’autres accessoires peut engendrer des
accidents.
Confiez la réparation de votre appareil à un électricien!
Cet appareil répond aux dispositions de sécurité
correspondantes. Les réparations doivent être confiées
uniquement à un électricien utilisant uniquement des
pièces détachées d’origine, faute de quoi l’utilisateur
s’expose à des risques d’accident.
Consignes de sécurité spécifiques pour l’appareil
Avant d’intervenir sur l’appareil, arrêtez-le.
Portez des lunettes de protection.
Danger émanant du foret en rotation.
Faites attention à ne pas blesser des personnes se
trouvant dans les alentours ou à éviter leurs blessures par
projection de pièces.
Avant de toucher toute partie de l’appareil, attendez que
toutes les parties de l’appareil soient arrêtées.
N’exposez jamais l’appareil à la pluie ou l’humidité.
Rangez-le uniquement dans un endroit sec.
11

L’utilisation de cet appareil est interdite aux enfants, aux
personnes qui n’ont pas pris connaissance de l’appareil,
ainsi qu’aux personnes avec capacité psychiques,
sensorielles ou mentales réduites.
Utilisez uniquement des accessoires d’origine.
Avant de mettre l’appareil en marche, vérifiez si le
bit du tournevis est bien fixé.
N’essayez pas de modifier le réglage des rotations du
moteur. Si vous avez un problème, faites appel à un
spécialiste.
Avant de percer un mur, vérifier si nécessaire par le
regard de conduite l’absence de courant électrique, de gaz
ou d’eau.
Utilisation en conformité avec la destination
Convient au vissage et desserrage des vis et pour le
perçage dans le bois, métal et plastique.
Toute autre utilisation est contraire à la destination. Le
fabricant décline toute responsabilité des dommages
consécutifs à une telle utilisation. Notez que nos appareils
ne sont pas conçus pour une utilisation industrielle.
Avant la mise en marche
L’accumulateur est livré partiellement chargé. Avant la
première mise en marche, chargez-le complètement.
ATTENTION :
•Chargez l’accumulateur uniquement avec le chargeur
fournit avec l’appareil.
•Utilisez uniquement des forets affûtées et parfaites et
des bits de vissage adéquats.
•Avant de percer et de visser dans un mur, vérifiez
l’absence de conduites électriques, d’eau ou de gaz.
Consignes de travail
Charge de l’accumulateur :
1. Débranchez l’accumulateur de l’appareil en appuyant
sur le bouton d’enclenchement (fig. 1/8) et en tirant
l’accumulateur vers le bas.
2. A présent, comparez la tension sur la plaque
signalétique du chargeur et la tension de votre
réseau électrique.
3. Branchez le chargeur au secteur et connectez le
câble d’alimentation et la fiche de chargement.
#58011:
4. Lors de la charge de l’accumulateur est allumé la
diode rouge LED (fig. 1/10)
5. A la fin de la charge, la diode LED verte s’allume (fig.
1/10)
#58014:
4. Après branchement du chargeur au secteur, la diode
LED verte s’allume.
5. Pendant la charge, la diode LED rouge reste allumée.
Ensuite, la diode LED rouge se met à clignoter.
6. Lorsque la diode LED rouge s’éteint, le procédé de
charge est terminé.
Afin d’assurer une longue durée de vie de l’accumulateur,
veillez toujours à charger à temps.
Lorsque l’accumulateur est presque déchargé, il s’arrête.
Dans ce cas, n’utilisez en aucun cas le tournevis. Vous
pourriez réduire considérablement la durée de vie de
l’accumulateur.
Réglage du couple de torsion :
Le couple de torsion se règle en fonction de la taille des
vis sur le dispositif de réglage du couple de torsion (fig.
1/1).
Le couple de torsion dépend de plusieurs facteurs :
•sur le type et la dureté du matériel avec lequel vous
travaillez.
•sur le type et la longueur des vis utilisées.
•sur les exigences à l’égard du boulonnage.
Procédez au réglage du couple de torsion
uniquement lorsque le tournevis accu est au repos.
Perçage:
Pour le perçage, réglez le couple de torsion (fig. 1/1) sur le
dernier degré „perçage“.
Commutateur des degrés :
Utilisez ce commutateur uniquement lorsque le tournevis
accu est au repos.
•Degré de vissage
tours plus petits, couple de torsion plus grand.
•Degré de perçage
tours plus grands, couple de torsion plus petit.
Commutateur du sens des rotations :
Le commutateur coulissant (fig. 1/3) permet de régler le
sens des rotations. Vous pouvez choisir entre la marche à
droite et à gauche. Afin d’éviter l’endommagement des
transmission, le changement du sens des rotations doit
être effectué uniquement lorsque l’appareil est au repos.
Lorsque le commutateur se trouve en position
intermédiaire, l’interrupteur marche/arrêt est bloqué.
Interrupteur marche/arrêt :
Plus vous appuyez sur cet interrupteur (fig. 1/4), plus les
rotations du tournevis accu seront élevées.
Signalement de la capacité de l’accumulateur :
#58011: Lorsque vous appuyez sur l’interrupteur
marche/arrêt (fig. 1/4), les diodes LED (fig. 1/10) indique le
niveau de charge de l’accumulateur.
#58014: Lorsque vous appuyez sur le bouton à côté de la
signalisation de capacité de l’accumulateur, les diodes
LED (fig. 1/10) vous indiqueront l’état de charge de
l’accumulateur.
•Toutes les diodes LED sont allumées : accumulateur
complètement chargé.
•Les diodes LED jaune et rouge sont allumées :
accumulateur suffisamment chargé.
•La diode LED rouge est allumée : accumulateur
presque vide, rechargez-le.
Remplacement des outils :
Lors des travaux sur le tournevis accu, réglez le
commutateur du sens des rotations (fig. 1/3) sur la
position intermédiaire.
1. Dévissez le mandrin (fig. 1/2) de façon à pouvoir
retirer l’outil.
2. A présent, choisissez l’outil adéquat et insérez-le au
maximum dans l’orifice.
3. Revissez fermement le mandrin et vérifiez si l’outil est
solidement fixé.
Lumière LED :
La lumière LED (fig. 1/9) sert d’éclairage supplémentaire
lors du perçage ou vissage. La lumière LED s’allume
automatiquement dès que vous appuyez sur l’interrupteur
marche/arrêt.
12

Symboles
Sécurité du produit :
Produit répond aux normes
correspondantes de la CE
Interdictions :
Protégez de la pluie et de
l‘humidité
Avertissement :
Avertissement/attention Avertisement ! L’appareil en
rotation représente un
risque de blessures!
Avertissement – éjection
d’objets
Consignes :
Marque d’interdiction générale Lisez le mode d’emploi
avant l’utilisation.
Utilisez un casque et des
lunettes de protection,
Protection de l’environnement :
Liquidez les déchets de
manière à ne pas nuire à
l’environnement.
Déposez l’emballage en
carton au dépôt pour
recyclage.
Déposez les appareils
électriques ou électroniques
défectueux et/ou destinés à
liquidation au centre de
ramassage correspondant.
Le chargeur est équipé
d’une isolation de
protection.
Emballage :
Protégez de l‘humidité Sens de pose
Interseroh-Recycling
Caractéristiques techniques :
accumulateur mandrin – gamme de
serrage
rotations Boîte de transmission à
simple réduction
droite/gauche
Mandrin à serrage rapide sans
outils Poids
DÉCLARATION DE CONFORMITÉ CE
Nous,
Güde GmbH & Co. KG
Birkichstraße 6
D-74549 Wolpertshausen
Déclarons par la présente que les appareils indiqués
ci-dessous répondent du point de vue de leur
conception, construction ainsi que de leur réalisation
mise sur le marché, aux exigences fondamentales
correspondantes des directives de la CE en matière
de sécurité et d’hygiène. Cette déclaration perd sa
validité après une modification de l’appareil sans
notre approbation préalable.
Désignation des appareils :
TOURNEVIS Á ACCU LI-ION 108
TOURNEVIS Á ACCU LI-ION 180
N° de commande :
#58011
#58014
Directives correspondantes de la CE :
2006/95 EG
2004/108 EG
2006/42 EG
2000/14/EG
1907/2006 EG
2002/95/EG ROHS
Normes harmonisées utilisées :
EN 55014-1:2006
EN 55014-2:1997+A1+A2
EN 60745-1 :2009
EN 60745-2-1 :2003+A11+A1+A12
EN 60745-2-2 :2003+A11+A1+A12
Lieu de certification :
TÜV Rheinland LGA Product GmbH
Tillystraße 2
D-90431 Nürnberg
Deutschland
N° de référence :
#58011: 14703386006
#58014: SH09050410-011
Date/Signature du fabricant: 30.07.2010
Titre du Signataire: gérant
Monsieur Arnold
Documents techniques : J. Bürkle FBL; QS
13

Garantie
La garantie s’applique exclusivement aux défauts
provoqués par un défaut de matériel ou un défaut de
fabrication. Lors de la réclamation pendant la durée de la
garantie, il est nécessaire de joindre de certificat d’achat
comportant la date d’achat.
La garantie n’inclut pas une utilisation incompétente telle
que – surcharge de la machine, utilisation de la force,
endommagement par une tierce personne ou un objet
étranger. Le non respect du mode d’emploi et du mode de
montage ainsi que l’usure normale de la machine ne sont
pas non plus inclus dans la garantie.
Conduite en cas d’urgence
Effectuez les premiers gestes de secours et appelez
rapidement les premiers secours.
Protégez le blessé d’autres blessures et calmez-le.
Pour des raisons de risque d’accident, le lieu de
travail doit être équipé d’une armoire à pharmacie
selon DIN 13164. Il est nécessaire de compléter
immédiatement le matériel pris dans l’armoire à
pharmacie. Si vous appelez les secours, fournissez les
renseignements suivants:
1. Lieu d‘accident
2. Type d‘accident
3. Nombre de blessés
4. Type de blessure
Liquidation
Les consignes de liquidation résultent des pictogrammes
indiqués sur l’appareil ou sur l’emballage. La description
des significations individuelles se trouve dans le chapitre
« Indications sur l’appareil ».
Liquidation de l’emballage de transport
L’emballage protège l’appareil de l’endommagement lors
du transport. En général, le matériel d’emballage est choisi
de façon à ce qu’il réponde aux règles de protection de
l’environnement et de liquidation des déchets, par
conséquent, il peut être recyclé.
La remise de l’emballage dans le circuit de matières
permet d’économiser des matières premières et de réduire
les déchets.
Des parties de l’emballage (telles que films, styropore)
peuvent être dangereux pour les enfants. Danger
d’étouffement !
Rangez les parties de l’emballage hors de portée des
enfants et liquidez-les le plus rapidement possible.
L’opérateur doit lire attentivement la notice avant d’utiliser
l’appareil.
Qualification
Mis à part l’instruction détaillée par un spécialiste, aucune
autre qualification spécifique n’est requise.
Âge minimal
L’appareil peut être utilisé uniquement par des personnes
de plus de 16 ans.
Exception faite des adolescents manipulant l’appareil dans
le cadre de l’enseignement professionnel sous la
surveillance du formateur.
Formation
L’utilisation de l’appareil nécessite uniquement l’instruction
par un spécialiste, éventuellement par la notice. Une
formation spéciale n’est pas nécessaire.
Nettoyage
Maintenez les orifices de ventilation et le corps de
l’appareil propres et sans poussières.
Utilisez pour le nettoyage un chiffon doux et une solution
savonneuse légère. Évitez le contact direct avec des
produits de nettoyage agressifs. Il est interdit d’utiliser des
produits agressifs, volatiles et caustiques.
Protégez l’appareil de l’humidité et de la poussière.
Si vous n’utilisez pas l’appareil pendant une durée
prolongée, rangez-le couvert à un endroit sec, sûr et
inaccessible aux enfants.
Service
Vous avez des questions techniques ? Une réclamation
? Vous avez besoin de pièces détachées ou d’un
mode d’emploi ?
Nous vous aiderons rapidement et sans bureaucratie
inutile par l’intermédiaire de nos pages Web
www.guede.com dans la rubrique Service. Aidez-nous
pour que nous puissions vous aider. Pour identifier votre
appareil en cas de réclamation, nous avons besoins du
numéro de série, numéro de produit et l’année de
fabrication. Toutes ces informations se trouvent sur la
plaque signalétique. Pour avoir ces informations toujours à
porté de main, veuillez les inscrire ici :
Numéro de série :
N° de commande :
Année de fabrication
Tél.: +49 (0) 79 04 / 700-360
Fax: +49 (0) 79 04 / 700-51999
14

Úvod
Abyste ze svého nového Aku šroubovák měli co možná
nejdéle radost, přečtěte si prosím před uvedením do
provozu pečlivěnávod k obsluze a přiložené bezpečnostní
pokyny. Dále doporučujeme, abyste si návod k použití
uschovali pro případ, že byste si později chtěli znovu
připomenout funkce výrobku. V rámci neustálého dalšího
vývoje výrobku si vyhrazujeme právo provádět technické
změny za účelem vylepšení.
U tohoto dokumentu se jedná o originální návod
k obsluze.
Objem dodávky
Přístroj vyjměte z přepravního obalu a zkontrolujte úplnost
a existenci těchto dílů:
# 58011 AKU ŠROUBOVÁK LI-ION 108
•plastový kufřík
•6 kovových vrtákůo velikostech 1 - 6 mm
•6 bitových nástavcůvčetněupnutí
•nabíječka
•originální návod k obsluze
# 58014 AKU ŠROUBOVÁK LI-ION 180
•plastový kufřík
•6 kovových vrtákůo velikostech 1,5 - 6 mm
•6 bitových nástavců(PH1/2, PZ1/2, drážka
5/6)
•držák bitů
•nabíječka
•originální návod k obsluze
Pokud díly v dodávce chybí nebo jsou poškozené, obraťte
se prosím na svého prodejce.
Popis přístroje
Aku-šroubovák Li-on s držadlem soft grip. Lithium iontová
technologie pro rychlou, flexibilní a jednoduchou práci.
Obr. 1:
1. nastavení krouticího momentu
2. rychloupínací sklíčidlo
3. přepínačsměru otáčení
4. spínačzap./vyp.
5. akumulátor
6. nabíječka
7. nabíjecí kabel
8. zaskakovací tlačítko
9. LED dioda
10. signalizace kapacity akumulátoru
11. přepínačpro volbu stupně(pouze #58014)
12. magnetický držák (pouze #58011)
13. ukazatel stavu nabití
Technické údaje
AKU ŠROUBOVÁK LI-ION 108 #58011:
Napětí akumulátoru: 10,8 V
Kapacita akumulátoru: 1,35 Ah
Rozsah otáček: 0-600 min-1
Stupněkrouticího momentu: 15 + 1
Max. krouticí moment: 12 Nm
Rozsah upnutí sklíčidla: 1,5 – 10 mm
Doba nabíjení: 3 – 5 h
Hmotnost: 2,1 kg
Rozměry: d: 210 x š 60 x v:
200 mm
AKU ŠROUBOVÁK LI-ION 180 #58014:
Napětí akumulátoru: 18 V
Kapacita akumulátoru: 1,3 Ah
Volnoběžné otáčky při stupni 1/2: 0-330 / 0-1300 min-1
Stupněkrouticího momentu: 19 + 1
Max. krouticí moment: 28 Nm
Rozsah upnutí sklíčidla: 1,0 – 10 mm
Doba nabíjení: 1 h
Hmotnost: 3 kg
Rozměry: d: 220 x š: 80x v: 245 mm
Všeobecné bezpečnostní pokyny
Tento návod k obsluze si pečlivěpřečtěte. Seznamte se
s ovládacími prvky a správným použitím přístroje. Návod
k obsluze bezpečněuschovejte pro pozdější použití.
Bezpečná práce
Udržujte své pracovištěv pořádku!
Nepořádek na pracovišti může mít za následek úrazy.
Berte ohled na vlivy okolí
Přístroj nevystavujte dešti.
Přístroj nepoužívejte ve vlhkém nebo mokrém prostředí.
Zajistěte dobré osvětlení.
Přístroj nepoužívejte v blízkosti hořlavých kapalin či plynů.
Svůj přístroj dobře ukládejte!
Přístroj, který nepoužíváte, byste měli uložit na suchém,
uzamčeném místěmimo dosah dětí.
Svůj přístroj nepřetěžujte!
Pracujte v uvedeném rozsahu výkonu.
Používejte správný přístroj!
Přístroj nepoužívejte k účelům, ke kterým není určen.
Používejte správný přístroj!
Přístroje nepoužívejte k účelům, ke kterým nejsou určeny.
Pravidelněkontrolujte prodlužovací kabel a v případě
poškození jej vyměňte. Rukojeti udržujte suché, beze stop
oleje a tuku.
VÝSTRAHA!
Použití jiného příslušenství může pro Vás znamenat riziko
úrazu.
Svůj přístroj nechte opravit jen u elektrikáře!
Tento přístroj odpovídá příslušným bezpečnostním
ustanovením. Opravy smí provádět pouze elektrikář
s použitím originálních náhradních dílů, jinak to může pro
uživatele znamenat riziko úrazu.
Bezpečnostní pokyny specifické pro přístroj
Před pracemi na přístroji jej vypněte.
Noste ochranné brýle.
Nebezpečí od rotujícího vrtáku.
Dávejte pozor, aby nedošlo k poranění osob,
stojících v blízkosti, nebo k jejich zasažení odhozenými
díly.
Než se jakékoliv součásti přístroje dotknete, vyčkejte, až
se zastaví všechny součásti přístroje.
Přístroj nikdy nevystavuje dešti ani vlhkosti.
Uchovávejte jej pouze na suchém místě.
Dětem, osobám, které nejsou s přístrojem seznámeny, a
osobám s omezenými psychickými, smyslovými nebo
duševními schopnostmi je obsluha tohoto přístroje
zakázána.
15

Používejte výhradněoriginální příslušenství.
Před uvedením do chodu prověřte, zda je bit
šroubováku dobře upevněn.
Nepokoušejte se měnit nastavení otáček motoru. Máte-li
problém, obraťte se na odborníka.
Před vrtáním otvorůdo stěny prověřte v případě
potřeby hledačem vedení, že nenarazíte na elektrický
proud, plyn nebo vodu.
Použití v souladu s určením
Vhodný k zašroubování a povolení šroubůa k vrtání do
dřeva, kovu a plastů.
Každé jiné použití je použití v rozporu s určením. Za
následné škody a úrazy výrobce neručí. Dbejte prosím na
to, že naše přístroje nejsou konstruovány pro průmyslové
použití.
Před uvedením do chodu
Akumulátor se dodává jen částečněnabitý. Před prvním
uvedením do chodu je nutno jej plněnabít.
POZOR:
•Akumulátor nabíjejte pouze nabíječkou, která je
součástí dodávky.
•Používejte pouze ostré vrtáky a bezvadné a vhodné
šroubovací bity.
•Při vrtání a šroubování do stěn a zdí zkontrolujte, zda
v nich nejsou ukryta elektrická vedení nebo
vodovodní či plynová potrubí.
Pracovní pokyny
Dobíjení akumulátoru:
1. Akumulátor odpojte od přístroje tak, že stisknete
zaskakovací tlačítko (obr. 1/8) a akumulátor
vytáhnete směrem dolů.
2. Nyní porovnejte napětí na typovém štítku nabíječky
s napětím Vaší elektrické sítě.
3. Nabíječku zasuňte do zásuvky a nabíjecí kabel
propojte s nabíjecí přípojkou.
#58011:
4. Při dobíjení akumulátoru svítí červená LED dioda
(obr. 1/10)
5. Po ukončení nabíjení svítí zelená LED dioda (obr.
1/10)
#58014:
4. Po zasunutí nabíječky do zásuvky svítí zelená LED
dioda.
5. Během dobíjení svítí červená LED dioda. Poté začne
červená LED dioda „blikat“.
6. Když červená LED dioda zhasne, je proces nabíjení
ukončen.
Aby byla zaručena dlouhá životnost akumulátoru, měli
byste zajistit vždy včasné dobití.
Je-li akumulátor krátce před vyprázdněním, vypne se. V
žádném případěuž aku-šroubovák nepoužívejte. Tím
byste mohli drasticky zkrátit životnost akumulátoru.
Nastavení krouticího momentu:
Krouticí moment se upraví podle velikosti šroubůna
zařízení pro nastavení krouticího momentu (obr. 1/1).
Krouticí moment závisí na několika faktorech:
•na druhu a tvrdosti materiálu, se kterým pracujete.
•na druhu a délce použitých šroubů.
•na požadavcích kladených na šroubové spojení.
Nastavení krouticího momentu provádějte pouze,
když je aku-šroubovák v klidu.
Vrtání:
Za účelem vrtání nastavte krouticí moment (obr. 1/1) na
poslední stupeň„vrtání“.
Přepínačstupňů:
Tento přepínačpřepínejte pouze, když je aku-šroubovák v
klidu.
•Stupeňšroubování
menší otáčky, větší krouticí moment.
•Stupeňvrtání
větší otáčky, menší krouticí moment.
Přepínačsměru otáčení:
Posuvným přepínačem (obr. 1/3) můžete nastavit směr
otáčení. Můžete volit mezi chodem vpravo a vlevo. Aby
nedošlo k poškození převodů, je dovoleno měnit směr
otáčení pouze za klidu stroje. Je-li přepínačve středové
pozici, je zablokovaný spínačzap./vyp.
Spínačzap./vyp.:
Čím více zatlačíte tento spínač(obr. 1/4), tím vyšší budou
otáčky aku-šroubováku.
Signalizace kapacity akumulátoru:
#58011: Když stisknete spínačzap./vyp. (obr. 1/4), ukáží
Vám LED diody (obr. 1/10) stav nabití akumulátoru.
#58014: Když stisknete tlačítko vedle signalizace kapacity
akumulátoru, ukáží vám LED diody (obr. 1/10) stav nabití
akumulátoru.
•Všechny LED diody svítí: akumulátor je plněnabitý.
•Svítí žlutá a červená LED dioda: akumulátor je
dostatečněnabitý.
•Svítí červená LED dioda: akumulátor je téměř
prázdný, dobijte jej.
Výměna nástrojů:
Při pracích na aku-šroubováku nastavte přepínač
směru otáčení (obr. 1/3) do středové polohy.
1. Sklíčidlo (obr. 1/2) vyšroubujte tak, abyste mohli
vyjmout nástroj.
2. Nyní vyberte vhodný nástroj a zasuňte jej co nejdále
do otvoru.
3. Sklíčidlo opět pevnězašroubujte a zkontrolujte, že
nástroj je pevněusazen.
LED světlo:
LED světlo (obr. 1/9) umožňuje přídavné osvětlení místa
šroubování či vrtání. LED světlo se automaticky rozsvítí,
jakmile stisknete spínačzap./vyp.
Označení
Bezpečnost produktu:
Produkt odpovídá
příslušným normám EU
Zákazy:
Chraňte před deštěm a
vlhkostí!
Výstraha:
Výstraha/pozor Výstraha! Rotující přístroj
představuje riziko úrazu!
16

Výstraha před odmrštěnými
předměty
Příkazy:
Všeobecná zákazová značka Před použitím si přečtěte
návod k obsluze
Používejte ochranné brýle a
sluchátka
Ochrana životního prostředí:
Odpad zlikvidujte odbornětak,
abyste neškodili životnímu
prostředí.
Obalový materiál z lepenky
lze odevzdat za účelem
recyklace do sběrny.
Vadné a/nebo likvidované
elektrické či elektronické
přístroje musí být odevzdány
do příslušných sběren.
Nabíječka má ochrannou
izolaci
Obal:
Chraňte před vlhkem Obal musí směřovat nahoru
Interseroh-Recycling
Technické údaje:
akumulátor sklíčidlo - rozsah upínání
otáčky jednostupňová převodovka
vpravo/vlevo
rychloupínací sklíčidlo bez
nástrojůhmotnost
PROHLÁŠENÍ O SHODĚEU
Tímto prohlašujeme my,
Güde GmbH & Co. KG
Birkichstrasse 6
D-74549 Wolpertshausen
Německo
že koncepce a konstrukce níže uvedených přístrojův
provedeních, která uvádíme do oběhu, odpovídá
příslušným základním požadavkům směrnic EU na
bezpečnost a hygienu.
V případězměny přístroje, která s námi nebyla
konzultována, ztrácí toho prohlášení svou
platnost.
Označení přístrojů:
AKU ŠROUBOVÁK LI-ION 108
AKU ŠROUBOVÁK LI-ION 180
Obj. č.:
#58011
#58014
Příslušné směrnice EU:
2006/95 EG
2004/108 EG
2006/42 EG
2000/14/EG
1907/2006 EG
2002/95/EG ROHS
Použité harmonizované normy:
EN 55014-1:2006
EN 55014-2:1997+A1+A2
EN 60745-1 :2009
EN 60745-2-1 :2003+A11+A1+A12
EN 60745-2-2 :2003+A11+A1+A12
Certifikační místo:
TÜV Rheinland LGA Product GmbH
Tillystraße 2
D-90431 Nürnberg
Deutschland
Referenční číslo:
#58011: 14703386006
#58014: SH09050410-011
Datum/podpis výrobce: 30.07.2010
Údaje o podepsaném: jednatel
pan Arnold
Technická dokumentace: J. Bürkle FBL; QS
Záruka
Záruka se vztahuje výlučněna vady materiálu nebo
výrobní vady. Při uplatňování reklamace v záruční době
přiložte originální doklad o koupi s datem koupě. Ze záruky
je vyloučeno neodborné použití jako např. přetížení
přístroje, násilné použití, poškození cizí osobou nebo
cizím předmětem. Nedodržení návodu k použití a návodu
k montáži a normální opotřebení je rovněž vyloučeno ze
záruky.
Chování v případěnouze
Zaveďte úrazu odpovídající potřebnou první pomoc a
vyzvěte co možná nejrychleji kvalifikovanou lékařskou
pomoc.
Chraňte zraněného před dalšími úrazy a uklidněte jej.
Kvůli případné nehoděmusí být na pracovišti vždy po
ruce lékárnička první pomoci dle DIN 13164. Materiál,
který si z lékárničky vezmete, je třeba ihned doplnit.
Pokud požadujete pomoc, uveďte tyto údaje:
1. Místo nehody
2. Druh nehody
3. Počet zraněných
4. Druh zranění
17

Likvidace
Pokyny pro likvidaci vyplývají z piktogramůumístěných na
přístroji resp. obalu. Popis jednotlivých významůnajdete
v kapitole „Označení“.
Likvidace přepravního obalu
Obal chrání přístroj před poškozením při přepravě.
Obalové materiály jsou zvoleny zpravidla podle jejich
šetrnosti vůči životnímu prostředí a způsobu likvidace a lze
je proto recyklovat.
Vrácení obalu do oběhu materiálu šetří suroviny a snižuje
náklady na likvidaci odpadů.
Části obalu (např. fólie, styropor) mohou být nebezpečné
pro děti. Existuje riziko udušení!
Části obalu uschovejte mimo dosah dětí a co nejrychleji
zlikvidujte.
Požadavky na obsluhu
Obsluha si musí před použitím přístroje pozorněpřečíst
návod k obsluze.
Kvalifikace
Kroměpodrobného poučení odborníkem není pro
používání přístroje nutná žádná speciální kvalifikace.
Minimální věk
Na přístroji smí pracovat jen osoby, jež dosáhly 16 let.
Výjimku představuje využití mladistvých, pokud se toto
děje během profesního vzdělávání za účelem dosažení
dovednosti pod dohledem školitele.
Školení
Používání přístroje vyžaduje pouze odpovídající poučení
odborníkem resp. návodem k obsluze. Speciální školení
není nutné.
Čištění
Větrací otvory a těleso přístroje udržujte čisté a bez
prachu.
K čištění používejte měkký hadřík a jemný mýdlový roztok.
Zabraňte přímému kontaktu přístroje s agresivními
čisticími prostředky. Nesmíte používat agresivní, těkavé a
žíravé čisticí prostředky.
Přístroj je třeba chránit před vlhkostí a prachem.
Pokud přístroj déle nepoužíváte, uložte jej zakrytý na
suchém, bezpečném, pro děti nepřístupném místě.
Servis
Máte technické otázky? Reklamaci? Potřebujete
náhradní díly nebo návod k obsluze?
Na naší domovské stránce www.guede.com Vám v
oddílu Servis pomůžeme rychle a nebyrokraticky. Prosím
pomožte nám pomoci Vám. Aby bylo možné Váš přístroj v
případěreklamace identifikovat, potřebujeme sériové číslo,
objednací číslo a rok výroby. Všechny tyto údaje najdete
na typovém štítku. Abyste měli tyto údaje vždy po ruce,
zapište si je prosím dole.
Sériové číslo:
Objednací číslo:
Rok výroby:
Tel.: +49 (0) 79 04 / 700-360
Fax: +49 (0) 79 04 / 700-51999
18

Úvod
Aby ste zo svojho nového Akku skrutkovac mali čo možno
najdlhšie radosť, prečítajte si, prosím, pred uvedením do
prevádzky pozorne návod na obsluhu a priložené
bezpečnostné pokyny. Ďalej odporúčame, aby ste si návod
na použitie uschovali pre prípad, že by ste si neskôr chceli
znovu pripomenúťfunkcie výrobku. V rámci neustáleho
ďalšieho vývoja výrobku si vyhradzujeme právo vykonávať
technické zmeny s cieľom vylepšenia.
Pri tomto dokumente ide o originálny návod na
obsluhu.
Objem dodávky
Prístroj vyberte z prepravného obalu a skontrolujte úplnosť
a existenciu týchto dielov:
# 58011 AKKU SKRUTKOVAC LI-ION 108
•plastový kufrík
•6 kovových vrtákov s veľkosťami 1 – 6 mm
•6 bitových násadcov vrátane upnutia
•nabíjačka
•originálny návod na obsluhu
# 58014 AKKU SKRUTKOVAC LI-ION 180
•plastový kufrík
•6 kovových vrtákov s veľkosťami 1,5 – 6 mm
•6 bitových násadcov (PH1/2, PZ1/2, drážka
5/6)
•držiak bitov
•nabíjačka
•originálny návod na obsluhu
Ak diely v dodávke chýbajú alebo sú poškodené, obráťte
sa, prosím, na svojho predajcu.
Popis prístroja
Aku-skrutkovačLi-on s držadlom soft grip. Lítiovo-iónová
technológia pre rýchlu, flexibilnú a jednoduchú prácu.
Obr. 1:
1. nastavenie krútiaceho momentu
2. rýchloupínacie skľučovadlo
3. prepínačsmeru otáčania
4. spínačzap./vyp.
5. akumulátor
6. nabíjačka
7. nabíjací kábel
8. zaskakovacie tlačidlo
9. LED dióda
10. signalizácia kapacity akumulátora
11. prepínačna voľbu stupňa (iba #58014)
12. magnetický držiak (iba #58011)
13. ukazovateľstavu nabitia
Technické údaje
AKKU SKRUTKOVAC LI-ION 108 #58011:
Napätie akumulátora: 10,8 V
Kapacita akumulátora: 1,35 Ah
Rozsah otáčok: 0 – 600 min-1
Stupne krútiaceho momentu: 15 + 1
Max. krútiaci moment: 12 Nm
Rozsah upnutia skľučovadla: 1,5 – 10 mm
Dĺžka nabíjania: 3 – 5 h
Hmotnosť:2,1 kg
Rozmery: d: 210ך: 60×v: 200 mm
AKKU SKRUTKOVAC LI-ION 180 #58014:
Napätie akumulátora: 18 V
Kapacita akumulátora: 1,3 Ah
Voľnobežné otáčky pri stupni 1/2: 0-330 / 0-1300 min-1
Stupne krútiaceho momentu: 19 + 1
Max. krútiaci moment: 28 Nm
Rozsah upnutia skľučovadla: 1,0 – 10 mm
Dĺžka nabíjania: 1 h
Hmotnosť: 3 kg
Rozmery: d: 220 × š: 80 ×
v: 245 mm
Všeobecné bezpečnostné pokyny
Tento návod na obsluhu si pozorne prečítajte. Oboznámte
sa s ovládacími prvkami a správnym použitím prístroja.
Návod na obsluhu bezpečne uschovajte pre neskoršie
použitie.
Bezpečná práca
Udržujte svoje pracovisko v poriadku!
Neporiadok na pracovisku môže maťza následok úrazy.
Berte ohľad na vplyvy okolia
Prístroj nevystavujte dažďu.
Prístroj nepoužívajte vo vlhkom alebo mokrom prostredí.
Zaistite dobré osvetlenie.
Prístroj nepoužívajte v blízkosti horľavých kvapalín či
plynov.
Svoj prístroj dobre ukladajte!
Prístroj, ktorý nepoužívate, by ste mali uložiťna suchom,
uzamknutom mieste mimo dosahu detí.
Svoj prístroj nepreťažujte!
Pracujte v uvedenom rozsahu výkonu.
Používajte správny prístroj!
Prístroj nepoužívajte na účely, na ktoré nie je určený.
Používajte správny prístroj!
Prístroje nepoužívajte na účely, na ktoré nie sú určené.
Buďte pozorní!
Dávajte pozor na to, čo robíte. K práci pristupujte rozumne.
Prístroj nepoužívajte, ak ste unavení.
VÝSTRAHA!
Použitie iného príslušenstva môže pre vás znamenaťriziko
úrazu.
Svoj prístroj nechajte opraviťlen u elektrikára!
Tento prístroj zodpovedá príslušným bezpečnostným
ustanoveniam. Opravy smie vykonávaťiba elektrikár
s použitím originálnych náhradných dielov, inak to môže
pre používateľa znamenaťriziko úrazu.
Bezpečnostné pokyny špecifické pre prístroj
Pred prácami na prístroji ho vypnite.
Noste ochranné okuliare.
Nebezpečenstvo od rotujúceho vrtáka.
Dávajte pozor, aby nedošlo k poraneniu osôb
stojacich v blízkosti alebo k ich zasiahnutiu odhodenými
dielmi.
Než sa akejkoľvek súčasti prístroja dotknete, vyčkajte, až
sa zastavia všetky súčasti prístroja.
Prístroj nikdy nevystavuje dažďu ani vlhkosti.
Uchovávajte ho iba na suchom mieste.
Deťom, osobám, ktoré nie sú s prístrojom oboznámené a
osobám s obmedzenými psychickými, zmyslovými alebo
19

duševnými schopnosťami je obsluha tohto prístroja
zakázaná.
Používajte výhradne originálne príslušenstvo.
Pred uvedením do chodu preverte, či je bit
skrutkovača dobre upevnený.
Nepokúšajte sa meniťnastavenie otáčok motora. Ak máte
problém, obráťte sa na odborníka.
Pred vŕtaním otvorov do steny preverte v prípade
potreby hľadačom vedenia, že nenarazíte na elektrický
prúd, plyn alebo vodu.
Použitie v súlade s určením
Vhodný na zaskrutkovanie a povolenie skrutiek a
na vŕtanie do dreva, kovu a plastov.
Každé iné použitie je použitie v rozpore s určením. Za
následné škody a úrazy výrobca neručí. Dbajte, prosím, na
to, že naše prístroje nie sú konštruované na priemyselné
použitie.
Pred uvedením do chodu
Akumulátor sa dodáva len čiastočne nabitý. Pred prvým
uvedením do chodu je nutné ho plne nabiť.
POZOR:
•Akumulátor nabíjajte iba nabíjačkou, ktorá je
súčasťou dodávky.
•Používajte iba ostré vrtáky a bezchybné a vhodné
skrutkovacie bity.
•Pri vŕtaní a skrutkovaní do stien a múrov skontrolujte,
či v nich nie sú ukryté elektrické vedenia alebo
vodovodné či plynové potrubia.
Prevádzka
Dobíjanie akumulátora:
1. Akumulátor odpojte od prístroja tak, že stlačíte
zaskakovacie tlačidlo (obr. 1/8) a akumulátor
vytiahnete smerom dole.
2. Teraz porovnajte napätie na typovom štítku nabíjačky
s napätím vašej elektrickej siete.
3. Nabíjačku zasuňte do zásuvky a nabíjací kábel
prepojte s nabíjacou prípojkou.
#58011:
4. Pri dobíjaní akumulátora svieti červená LED dióda
(obr. 1/10)
5. Po ukončení nabíjania svieti zelená LED dióda (obr.
1/10)
#58014:
4. Po zasunutí nabíjačky do zásuvky svieti zelená LED
dióda.
5. Počas dobíjania svieti červená LED dióda. Potom
začne červená LED dióda „blikať“.
6. Keďčervená LED dióda zhasne, je proces nabíjania
ukončený.
Aby bola zaručená dlhá životnosťakumulátora, mali by ste
zaistiťvždy včasné dobitie.
Ak je akumulátor krátko pred vyprázdnením, vypne sa. V
žiadnom prípade už aku-skrutkovačnepoužívajte. Tým by
ste mohli drasticky skrátiťživotnosťakumulátora.
Nastavenie krútiaceho momentu:
Krútiaci moment sa upraví podľa veľkosti skrutiek na
zariadení na nastavenie krútiaceho momentu (obr. 1/1).
Krútiaci moment závisí od niekoľkých faktorov:
•od druhu a tvrdosti materiálu, s ktorým pracujete.
•od druhu a dĺžky použitých skrutiek.
•od požiadaviek kladených na skrutkové spojenie.
Krútiaci moment nastavujte, iba keďje aku-
skrutkovačvypnutý.
Vŕtanie:
S cieľom vŕtania nastavte krútiaci moment (obr. 1/1) na
posledný stupeň„vŕtania“.
Prepínačstupňov:
Tento prepínačprepínajte, iba keďje aku-skrutkovač
vypnutý.
•Stupeňskrutkovania
menšie otáčky, väčší krútiaci moment.
•Stupeňvŕtania
väčšie otáčky, menší krútiaci moment.
Prepínačsmeru otáčania:
Posuvným prepínačom (obr. 1/3) môžete nastaviťsmer
otáčania. Môžete voliťmedzi chodom vpravo a vľavo. Aby
nedošlo k poškodeniu prevodov, je dovolené meniťsmer
otáčania iba pri pokojovom stave stroja. Ak je prepínačv
stredovej pozícii, je zablokovaný spínačzap./vyp.
Spínačzap./vyp.:
Čím viac zatlačíte tento spínač(obr. 1/4), tým vyššie budú
otáčky aku-skrutkovača.
Signalizácia kapacity akumulátora:
#58011: Keďstlačíte spínačzap./vyp. (obr. 1/4), ukážu
vám LED diódy (obr. 1/10) stav nabitia akumulátora.
#58014: Keďstlačíte tlačidlo vedľa signalizácie kapacity
akumulátora, ukážu vám LED diódy (obr. 1/10) stav nabitia
akumulátora.
•Všetky LED diódy svietia: akumulátor je plne nabitý.
•Svieti žltá a červená LED dióda: akumulátor je
dostatočne nabitý.
•Svieti červená LED dióda: akumulátor je takmer
vybitý, dobite ho.
Výmena nástrojov:
Pri prácach na aku-skrutkovači nastavte prepínač
smeru otáčania (obr. 1/3) do stredovej polohy.
1. Skľučovadlo (obr. 1/2) vyskrutkujte tak, aby ste mohli
vybraťnástroj.
2. Teraz vyberte vhodný nástroj a zasuňte ho čo
najďalej do otvoru.
3. Skľučovadlo opäťpevne zaskrutkujte a skontrolujte,
či je nástroj pevne usadený.
LED svetlo:
LED svetlo (obr. 1/9) umožňuje prídavné osvetlenie miesta
skrutkovania či vŕtania. LED svetlo sa automaticky
rozsvieti, hneďako stlačíte spínačzap./vyp.
Označenie
Bezpečnosťproduktu:
Produkt zodpovedá
príslušným normám EÚ
Zákazy:
Chráňte pred dažďom a
vlhkosťou!
20
This manual suits for next models
3
Table of contents
Languages:
Other GÜDE Drill manuals

GÜDE
GÜDE BSB 20-201 24K User manual

GÜDE
GÜDE 750 P User manual

GÜDE
GÜDE BS 18 II User manual

GÜDE
GÜDE GTB 16 LASER/550 W User manual

GÜDE
GÜDE SBM 710 E User manual

GÜDE
GÜDE BSA 12-201-20 K User manual

GÜDE
GÜDE BS 20-201-24 K User manual

GÜDE
GÜDE GTB 13/355 User manual

GÜDE
GÜDE 40122 User manual

GÜDE
GÜDE KH 20 E User manual