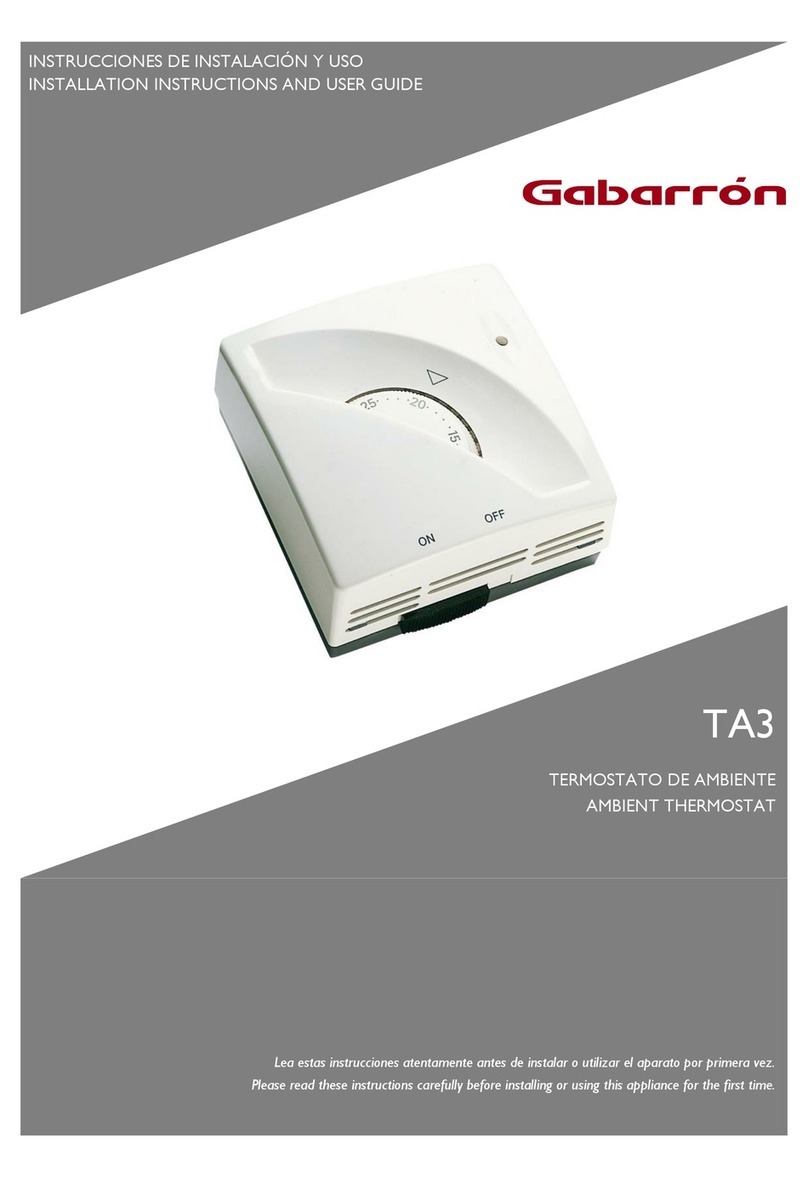
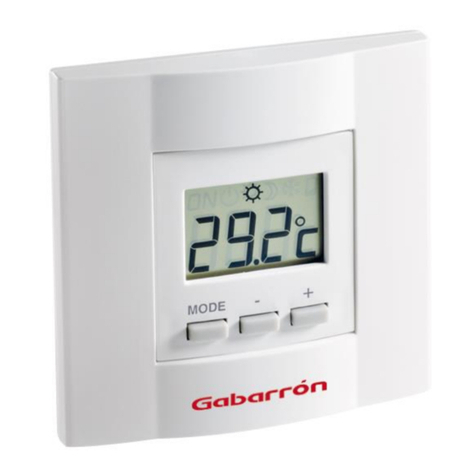
Gabarron CTP10 User manual

Aparato conforme a las exigencias de las directivas
2004/108/CE (Compatibilidad Electromagnética)
y 2006/95/CE (Seguridad baja tensión).
Debido a la evolución de las normas y del material, las características indicadas en el texto
y las imágenes de este documento solamente nos comprometen previa confirmación por nuestros
servicios.
www.elnur.es
elnur@elnur.es
Device complying with the requirements of directives
89/336/EEC (ElectroMagnetic Compatibility)
and 73/23/EEC modified 93/68/EEC (low voltage safety)
Because of changes in standards and equipment, the characteristics given in the text and
the illustrations of this document are not binding unless confirmed by our services.
*2701902_rev1*
Termostato programable
Programmable thermostat

INSTALACIÓN
Emplazamiento . . . . . . . . . . . . . . . . . . . . . . . pág. 4
Fijación . . . . . . . . . . . . . . . . . . . . . . . . . . . . . pág. 5
Conexión . . . . . . . . . . . . . . . . . . . . . . . . . . . . pág. 6
Sustituir un termostato 2 hilos o conectar
una caldera con entrada termostato ................. pág. 6
Sustituir un termostato 3 hilos ........................... pág. 6
Conectar a una caldera
sin entrada termostato....................................... pág. 7
Controlar los convectores eléctricos.................. pág. 7
Puesta en servicio . . . . . . . . . . . . . . . . . . . . pág. 8
Volver a los ajustes iniciales . . . . . . . . . . . pág. 11
UTILIZACIÓN
Ajuste hora . . . . . . . . . . . . . . . . . . . . . . . . . pág. 12
Ajuste de las temperaturas . . . . . . . . . . . . pág. 12
Programación . . . . . . . . . . . . . . . . . . . . . . . pág. 13
Modo automático . . . . . . . . . . . . . . . . . . . . pág. 14
Modo ausencia . . . . . . . . . . . . . . . . . . . . . . pág. 15
Modo manual . . . . . . . . . . . . . . . . . . . . . . . pág. 16
Economía o confort hasta el próximo
cambio de programa ....................................... pág. 16
Ajuste de una temperatura para
un intervalo 30 minutos a 72 horas ................. pág. 16
Modo paro . . . . . . . . . . . . . . . . . . . . . . . . . . pág. 17
Cambiar las pilas . . . . . . . . . . . . . . . . . . . . pág. 18
Características . . . . . . . . . . . . . . . . . . . . . . pág. 19
Descripción
- 2 - - 3 -
AUTO
PROG
Testigo de pilas
usadas Programa en curso
(ej.: confort)
Día en curso
Demanda
de calefacción
Perfil
del programa
Hora
Temperatura
(consigna
o medida)
Teclas
de ajuste
Modo automático
Confort
Ajuste
hora
Programación
Economía
Antihelada
Paro
Índice

- 4 - - 5 -
Levante la tapa con
un destornillador.
Saque las pilas entregadas con
el aparato (con el destornillador).
Conecte los hilos de control (ver siguiente capítulo)
y coloque el termostato en la pared.
Fíjelo con tornillos
y tacos o sobre una
caja de empotrar (➊,
60 mm de distancia
entre extremos).
Si es necesario, ciertas partes pueden
horadarse (➊) con alicates para dejar
pasar los cables de conexión.
Vuelva a colocar las pilas respetando
la polaridad (dirección).
Fijación
AUTO
PROG
1 2 3
2
2
AUTO
PROG
PRO
La sonda de medición de la temperatura está en
la caja, por lo tanto debe colocar la caja de empotrar
del termostato en:
- una pared accesible, a una altura de 1,50 m,
- alejado de fuentes de calor (chimenea, influencia
del sol) y de corrientes de aire (ventana, puerta).
IMPORTANTE: No instalar el termostato en una pared
en contacto con el exterior o con una pieza sin
calefacción (ej.: el garaje…).
Es imprescindible taponar (mástic) la salida del tubo
en la caja de empotrar con el fin de evitar movimientos
de aire parásitos que falseen la medición de la sonda.
Emplazamiento
1,50 m aprox.
Mín. 20 cm

N
N
L
L
convector(es)
Alimentación
de la bobina
del contactor
Zona 1
123
RCT
N
L
circulador
123
RCT
hilo a suprimir:
- resistencia anticipadora,
- conexión a tierra (hilo
verde / amarillo). hilos antiguo
termostato
123
RCT
- 6 - - 7 -
Caldera sin entrada termostato
Si la caldera no dispone de entrada
termostato, puede controlar
directamente el circulador de la caldera.
Controlar los convectores
eléctricos
Para controlar los convectores eléctricos
debe utilizar IMPERATIVAMENTE
un contactor de potencia
adaptado a la potencia total
que se debe manejar.
Conexión Por motivos de claridad, sólo debe tenerse en cuenta el principio de los esquemas.
No contienen las protecciones y otros accesorios exigidos por las normas.
Se debe respetar la norma UTE C15 y las reglas del oficio.
Es necesario que los aparatos conectados o cercanos no creen perturbaciones
demasiado fuertes (directivas 2004/108/CE).
Reemplazar un termostato 2 hilos o conectar
una caldera con entrada termostato
Corte la corriente.
Conecte los bornes 2 y 3 del termostato
a los dos bornes de la entrada
del termostato de la caldera.
Si es necesario, suprima el shunt
(hilo eléctrico) que conecta los dos
bornes de entrada del termostato.
Si la caldera posee una entrada
reloj, asegúrese de no confundirla
con la entrada del termostato.
Sustituir un termostato 3 hilos
Corte la corriente y desconecte el antiguo
termostato. Si este termostato posee una resistencia
anticipadora, suprima el hilo correspondiente.
Si el termostato existente está conectado a tierra
(hilo verde / amarillo), suprima el hilo correspondiente.
Conecte los 2 cables que
quedan a los bornes 2 y 3
del termostato.
123
RCT
suprimir
shunt
hilos a conectar
al termostato
no confundir con
la entrada del reloj
(en algunos modelos
de caldera)
Ejemplo de borne
de caldera

- 8 - - 9 -
Posicione el botón en Paro y
pulse 5 segundos la tecla derecha
hasta que aparezca H100 vx:xx
(menú de mantenimiento
reservado al instalador).
Pulse OK.
Aparece CF01 en la pantalla.
CF01 - Corrección de la medición
de la temperatura ambiente
Si existe una diferencia entre
la temperatura constatada
(termómetro) y la temperatura
medida y mostrada por el aparato,
este menú permite corregir
el desajuste de medición de
la sonda (de -4°C a +4°C por intervalos de 0,1°C).
Para realizar su elección pulse +ó -y OK para confirmar
y pasar al menú siguiente.
Puesta en servicio
5 seg.
CF02 - Opción de visualizar
la temperatura en modo
AUTO
Para realizar su elección pulse +ó -y OK para confirmar
y pasar al menú siguiente.
CF03 - Regulación
de la temperatura Confort
Para realizar su elección pulse +ó -y OK para confirmar
y pasar al menú siguiente.
Visualización permanente de la consigna
Temperatura mostrada
Visualización permanente
de la temperatura ambiente
Temperatura regulada por el termostato
Regulación de
la temperatura confort
Temperatura regulada por elemento
de calentamiento. En este caso, la
pantalla indica ON en periodo Confort.

- 10 - - 11 -
CF04 - Antigripado
del circulador
Para realizar su elección pulse +ó -y OK para confirmar
y pasar al menú siguiente.
CF05 - Estado del relé
al cabo de 3 meses sin pila
Para realizar su elección pulse +ó -y OK para confirmar
y pasar al menú siguiente.
Para salir del modo configuración, gire el botón.
Paso de antigripado
Antigripado
del circulador Antigripado activo (puesta en
marcha 1 minuto tras 24 h de paro)
Abierto (OFF)
Estado del relé al cabo
de 3 meses sin pila Cerrado (ON)
Funcionamiento hasta pilas totalmente
gastadas (estado del relé aleatorio)
Puede realizar un reinicio general para volver a
los ajustes de fábrica:
- los ajustes instalador (en gris en los menús
de puesta en servicio)
- la hora y el día,
- las temperaturas de consigna,
- la programación por defecto.
Posicione el botón en Paro y pulse
10 segundos la tecla izquierda
para visualizar init.
Pulse OK para confirmar o Cpara
anular.
Volver a la pantalla de modo paro.
10 seg.
Volver a los ajustes iniciales

- 12 - - 13 -
Posicione el botón en .
Los días parpadean.
Para realizar su elección pulse +
ó -y OK para confirmar y pasar
al ajuste siguiente.
Repita las operaciones para
ajustar las horas y los minutos.
Para salir del modo ajuste, gire el botón.
Posicione el botón en:
- para ajustar la temperatura
antihelada (de 5°C a 15°C, por
defecto 7°C),
- para ajustar la temperatura
economía (de 10°C a 30°C,
por defecto 15°C),
- para ajustar la temperatura confort (de 10°C a
30°C, por defecto 19°C),
Para realizar su elección, pulse +ó -.
Para salir del modo ajuste, gire el botón.
Ajuste hora
Ajuste de las temperaturas (consignas)
Día
Horas
Minutos
En la puesta en servicio, el programa “Confort de 6.00
a 23.00 h” se aplica a todos los días de la semana.
Para cambiar la programación,
posicione el botón en PROG.
La primera franja horaria parpadea.
Programación rápida:
Para aplicar el mismo programa al día siguiente, mantenga
pulsada la tecla OK 3 s aproximadamente hasta visualizar
el programa del día siguiente.
Para salir del modo programación, gire el botón.
Programación
1 h
de economía 1 h
de confort Ir al próximo
cambio
de programa
Validación
y paso al día
siguiente
1er
intervalo
horario
Hora del intervalo
consultado Día
Perfil del
programa

- 14 - - 15 -
Modo automático Modo ausencia
Este modo permite ajustar
una temperatura (de 5 a 15°C)
para un intervalo ajustable de 1
a 365 días.
En modo automático (AUTO),
pulse la tecla .
El número de días parpadea.
Para ajustar el número de días,
pulse +ó -.
Ejemplo:
salida el 10 de enero,
vuelta el 19 de enero, introduzca
9 días.
El funcionamiento automático
se volverá a activar el 19 de
enero a las 00.00 horas.
Confirme con OK.
La temperatura parpadea.
Para ajustar la temperatura, pulse
+
ó -.
Confirme con OK.
Para anular el modo ausencia (ejemplo: vuelta anticipada),
pulse la tecla Co gire el botón.
Posicione el botón en AUTO.
En la puesta en servicio, se muestra la temperatura
medida por el termostato (el símbolo aparece
encima de °C).
Pulse la tecla ipara visualizar la temperatura de consigna.
• Es posible invertir la visualización de la temperatura
(menú CF02 de la puesta en servicio):
- modo automático: temperatura de consigna
- pulsar la tecla i: temepratura medida
• Si no desea seguir un programa, puede pasar al modo
Economía permanente (botón en ), Confort
permanente ( ) o Antihelada permanente ( ).
Modo
ausencia
Modo manual confort
o economía (hasta cambio
de programa)
Modo manual temperatura
(30 minutos a 72 horas)
Hora
Consigna
en curso
(ej.: confort)
Día
Demanda de
calefacción
Temperatura
medida

( ) Hasta el próximo
cambio de programa
Este modo permite pasar del modo
confort a economía (o al revés)
hasta el próximo cambio de
programa.
Ejemplo:
cuando está en modo
economía, pulse la tecla para
pasar al modo confort.
Para anular este modo manual, pulse de nuevo la tecla
o gire el botón.
( ) Para un intervalo
ajustable de 30 minutos a
72 horas.
Este modo permite ajustar
una temperatura de consigna
para un periodo determinado.
En modo automático (AUTO),
pulse la tecla .
- 16 - - 17 -
Modo manual
Modo manual
en curso
La duración del modo manual
parpadea.
Para ajustar la duración deseada,
pulse +ó -(ej.: 1.30 h).
Confirme con OK.
La temperatura parpadea.
Para ajustar la temperatura
(de 10°C a 30°C), pulse +
ó -.
Confirme con OK.
Para anular el modo manual,
pulse la tecla Co gire el botón.
Para parar la calefacción
(por ejemplo, en verano).
Posicione el botón en .
El termostato muestra la
temperatura ambiente medida.
Nota:
El termostato posee una función antigripado que permite
reactivar el funcionamiento del circulador durante
1 minuto, en el caso de que no haya funcionado
durante las 24 horas anteriores (menú CF04 de
la puesta en servicio).
Modo manual
en curso
Temperatura
medida
Modo paro

- 18 - - 19 -
• Alimentación con 2 pilas alcalinas 1,5 tipo LR03 o
AAA (suministradas), autonomía superior a 2 años
con una utilización normal.
• Aislamiento clase II.
• Salida contacto inversor 2A máx., 230 V.
• Acción de tipo 1.C (microcorte)
• Regulación de tipo proporcional integral, base
de tiempo 15 min.
• Dimensiones: 135 x 81 x 22 mm.
• Índice de protección: IP 30.
• Fijación en pared o sobre caja de empotrar.
• Instalación en un medio con nivel de contaminación
normal.
• Temperatura de almacenaje: -10°C a +70°C.
• Temperatura de funcionamiento: 0°C a +40°C.
Características
A partir del momento en que
aparece el símbolo de desgaste
de las pilas, dispone de alrededor
de 3 meses para cambiarlas
(2 pilas alcalinas 1,5 V tipo LR03
o AAA).
Precauciones que deben tomarse:
- respetar las polaridades +/- al colocarlas en
el aparato,
- con el fin de proteger el medio ambiente, depositar
las pilas usadas en los puntos de recogida previstos
a tal efecto,
- no recargarlas,
- dispone de 45 s aproximadamente para cambiar
las pilas sin perder el ajuste de la hora (en caso
de reinicio, realice de nuevo el ajuste de la hora y la
fecha).
Cambiar las pilas
Testigo de pilas
usadas

INSTALLATION
Location . . . . . . . . . . . . . . . . . . . . . . . . . . . . . . 22
Mountings . . . . . . . . . . . . . . . . . . . . . . . . . . . . 23
Connection . . . . . . . . . . . . . . . . . . . . . . . . . . . 24
Replace a 2-wire thermostat or connect
a boiler with thermostat input................................... 24
Replace a 3-wire thermostat.................................... 24
Connect a boilerwithout thermostat input ................ 25
Control the electric convectors................................. 25
Starting up . . . . . . . . . . . . . . . . . . . . . . . . . . . . 26
Return to the initial settings . . . . . . . . . . . . . 29
USE
Time Setting . . . . . . . . . . . . . . . . . . . . . . . . . . 30
Setting the temperatures . . . . . . . . . . . . . . . . 30
Programming . . . . . . . . . . . . . . . . . . . . . . . . . . 31
Automatic mode . . . . . . . . . . . . . . . . . . . . . . . 32
Absence mode . . . . . . . . . . . . . . . . . . . . . . . . 33
Manual mode . . . . . . . . . . . . . . . . . . . . . . . . . . 34
Economy or comfort up
to next change of program....................................... 34
Setting a temperature for a period
of 30 minutes to 72 hours........................................ 34
Shutdown mode . . . . . . . . . . . . . . . . . . . . . . . 35
Changing the batteries . . . . . . . . . . . . . . . . . . 36
Characteristics . . . . . . . . . . . . . . . . . . . . . . . . 37
ContentsDescription
- 20 - - 21 -
AUTO
PROG
Battery level
indicator Current mode
(e.g. comfort)
Current day
Heating
demand mode
Program
profile
Time
Temperature
(set or
measured)
Adjustment
buttons
Automatic mode
Comfort
Time
setting
Programming
Economy
Frost
Protection
Shutdown

Lift off the cover by using
a screwdriver.
Remove the batteries supplied
with the unit (using the
screwdriver).
Connect the control wires (see next section) then place
the thermostat on the wall.
Secure it using the
screws and pegs or fit
onto a flush-mounted
box (➊, distance
between centres
60 mm).
Partitions (➋) that can be removed by pliers
are provided for passing the connection
wires if required.
Fit the batteries back, ensuring that they
are correctly fitted.
Mountings
AUTO
PROG
1 2 3
2
2
AUTO
PROG
PRO
- 22 - - 23 -
As the temperature measuring probe is in the unit, you
must install the thermostat flush-mounted box:
- on an accessible wall at a height of 1.50 m,
- away from heat sources (fireplaces, sunlight) and
draughts (windows, doors),
IMPORTANT: Do not install the thermostat on a wall
in contact with the outside or in an unheated room
(e.g. garage, etc.).
The sleeve output in the recess mounting box must
be plugged (mastic) in order to avoid unwanted air
movements that would distort the probe measurement.
Location
approx 1.50 m
min. 20 cm

N
N
L
L
convector(s)
power supply
of the contact
switch coil
Zone 1
123
RCT
N
L
circulator
123
RCT
Boiler without thermostat input
If the boiler does not have a thermostat input,
you can directly control the boiler's circulator
Control the electric convectors
To control electrical convectors,
you MUST use a power contact switch
that is suitable for the total power
to be controlled.
The diagrams provided are simplified for greater clarity.
The protective devices and other accessories required by the standards are not
illustrated. Standard UTE C15-100 and good practice must be complied
with.Connected or nearby equipment must not generate excessive interference
(directive 89/336/EEC).
wire to be removed:
- anticipator,
- earthed (green/yellow wire).
old thermostat’s
wire
123
RCT
- 24 - - 25 -
Connection
Replace a 2-wire thermostat or connect
a boiler with thermostat input
Turn off the current.
Connect thermostat terminals 2 and
3 to both terminals of the boiler
thermostat input.
If necessary, remove the shunt
(electric wire) connecting the two
thermostat input terminals. If the
boiler has a clock input, do not
mistake it for the thermostat input.
Replace a 3-wire thermostat
Turn off the current and disconnect
the oldthermostat. If this thermostat has
ananticipator, remove the correspondingwire.
If the present thermostat is earthed (green/yellow
wire), remove the corresponding wire.
Connect the 2 remaining
wiresto thermostat terminals
2 and 3.
123
RCT
remove
the shunt
wiresto be
connected to
the thermostat
do not confuse
with the clock input
(on some boiler models)
Example of a boiler
terminal box

CF02 - AUTO mode
temperature display option
Press +or -to make your choice, OK to confirm it and
go to the next menu.
CF03 - Control of the
Comfort temperature
Press +or -to make your choice, OK to confirm it and
go to the next menu.
Continuous display of the set-point
Temperature displayed
Continuous room temperature
display
Temperature controlled by the thermostat
Controlling the Comfort
temperature
Temperature controlled by the heating
element. Here, the display reads ON
during Comfort period.
- 26 - - 27 -
Turn the knob to Shutdown and
press the right-hand button for
5 seconds until H100 vx:xx is
displayed (maintenance menu
reserved for the installer).
Press OK.
The screen displays CF01.
CF01 - Correction of room temperature
measurement
If there is a difference between
the temperature noted
(thermometer) and the temperature
measured and displayed by
the unit, the menu acts on
the measurement of the probe so
as to compensate for this difference (from -4°C to +4°C
in steps of 0.1°C).
Press +or -to make your choice, OK to confirm it and
go to the next menu.
Starting up
5 sec.

You can carry out a general reset to return to the factory
settings:
- the installer settings (grayed out on the start up
menus)
- the time and day,
- set-point temperatures,
- default program.
Turn the knob to Shutdown then
press the left-hand button for
10 seconds until init is displayed.
Press OK to confirm or Cto
cancel.
Return to the shutdown mode
display.
10 sec.
Return to the initial settings
- 28 - - 29 -
CF04 - Circulator anti-seizing
Press +or -to make your choice, OK to confirm it and
go to the next menu.
CF05 - Relay status after
3 months of battery fault
Press +or -to make your choice, OK to confirm it and
go to the next menu.
Turn the knob to exit the configuration mode.
No anti-seizing
Circulator anti-seizing Anti-seizing enabled (start up
1 minute after 24 hoursshutdown)
Open (OFF)
Relay status after
3monthsof battery fault Closed (ON)
Operatesuntil battery iscompletely
flat (random relay status).

When starting up, the “Comfort mode from 6am to
11pm” program is applied to all the days of the week.
To change the programming,
turn the knob to PROG.
The 1st time slot flashes on and off.
Quick programming:
To apply the same program to the following day, press
and hold the OK button for approximately 3 seconds
until the program of the following day is displayed.
Turn the knob to exit the programming mode.
Programming
Economy mode
for 1 hourComfort
for 1 hourGo to the next
program change
Confirm and go
to the next day
1st time
slot
Time slot
consulted Day
Program
profile
- 30 - - 31 -
Turn the knob to .
The days flash.
Press +or -to make your
choice, OK to confirm it and go
to the next setting.
Repeat the operations to set
the hours and minutes.
Turn the knob to exit the setting mode.
Turn the knob to:
- to set the frost protection
temperature (5°C to 15°C, 7°C
by default),
- to set the economy
temperature (10°C to 30°C,
15°C by default),
- to set the comfort temperature (10°C to 30°C,
66.20°F by default),
Press +or -to make your choice.
Turn the knob to exit the setting mode.
Time Setting
Setting the temperatures (set-points)
Day
Hours
Minutes

Absence mode
This mode is used to set a
temperature (5 to 15°C) for
a period that can be set from 1
to 365 days.
From the automatic mode (AUTO),
press the button.
The number of days flash on and
off.
Press +or -to set the number of
days.
Example:
leaving on 10 January,
returning on 19 January, indicate
9 days.
Automatic operation will restart on
19 January at 00.00 h.
Press OK to confirm.
The temperature flashes on
and off.
Press +or -to set the temperature.
Press OK to confirm.
To cancel the absence mode (e.g. when returning
early), press the Cbutton or turn the knob.
- 32 - - 33 -
Automatic mode
Turn the knob to AUTO.
When starting up, the temperature measured by the
thermostat is displayed (the symbol appears above
the °C).
Press the button ito display the set-point temperature.
• The temperature display can be reversed (CF02 start
up menu):
- automatic mode: set-point temperature
- press i: measured temperature
• If you do not want to use a program, you can go to
continuous Economy mode (knob turned to ),
continuous Comfort mode ( ) or continuous Frost
Protection mode ( ).
Absence
mode
Comfort or economy
manual mode
(up to program change)
Manual temperature mode
(from 30 minutesto 72 hours)
Time
Current setting
(e.g. comfort)
Day
Heating
demand
mode
Measured
temperature

The manual mode period flashes
on and off.
Press +or -to set the period
required (e.g. 1.5 hours).
Press OK to confirm.
La température clignote.
Press +or -to set the temperature
from (10°C to 30°C).
Press OK to confirm.
To cancel the manual mode, press
the Cbutton orturn the knob.
To shut down the heating
(in summer, for example).
Turn the knob to .
The thermostat displays the room
temperature measured.
Note
The thermostat has an anti-seizing function that allows
the circulator operation to be restarted for 1 minute, if it
has not run within the previous 24 hours (CF04 start up
menu).
Manual mode is
the current mode
Measured
temperature
Shutdown mode
( ) Up to the next
program change
This mode is used to go from
comfort to economy mode (or
conversely) until the next program
change.
Example :
when in economy
mode, pressing the button
allows you to go to comfort mode.
To cancel the manual mode, press the button again or
turn the knob.
( ) For a period that can
be set from 30 minutes to
72 hours
This mode is used to set a set-point
temperature for a given period.
From the automatic mode (AUTO),
press the button.
- 34 - - 35 -
Manual mode
Manual mode is
the current mode

• Power supplied by two LR03 or AAA-type 1.5 V
alkaline batteries (supplied), autonomy greater than
2 years for normal use,
• Class II insulation
• Change-over contact output, 2 A max., 230 V
• Type 1.C action (brownout)
• Built-in proportional control, time basis 15 min.,
• Dimensions: 135 x 81 x 0.87 in
• Protection index: IP 30
• Wall mounting or on flush-mounted box
• Installation in an environment with normal pollution
levels
• Storage temperature: -10°C to +70°C
• Operating temperature: 0°C to +40°C
Characteristics
- 36 - - 37 -
From the moment the battery level
symbol appears, you have around
3 months to change them
(2 LR03 or AAA-type 1.5 V alkaline
batteries).
The following precautions must be respected:
- ensure that the +/- polarities are correct when the
batteries are fitted into the unit,
- do not dispose of used batteries in unauthorized
places (you should respect the environment by
taking the batteries to a suitable collection site),
- do not recharge them,
- you have approximately 45 seconds to change
the batteries before the time setting is reset to zero
(in this case, reset the time and date).
Changing the batteries
Battery level
symbol

- 39 -- 38 -
Table of contents
Languages:
Other Gabarron Thermostat manuals
Popular Thermostat manuals by other brands

Trane Technologies
Trane Technologies BAYSTAT152A Installation, operation and maintenance

Worcester
Worcester GREENSTAR 25 HE instruction manual

Siemens
Siemens RDH100 user manual

Peco
Peco Performance pro T4000 series quick start guide

Giacomini
Giacomini K492DY012 manual

TOTALINE
TOTALINE P710U--21NHP installation instructions