manuals.online logo
Brands
  1. Home
  2. •
  3. Brands
  4. •
  5. Sangamo
  6. •
  7. Thermostat
  8. •
  9. Sangamo CHOICE RSTAT8 User manual

Sangamo CHOICE RSTAT8 User manual

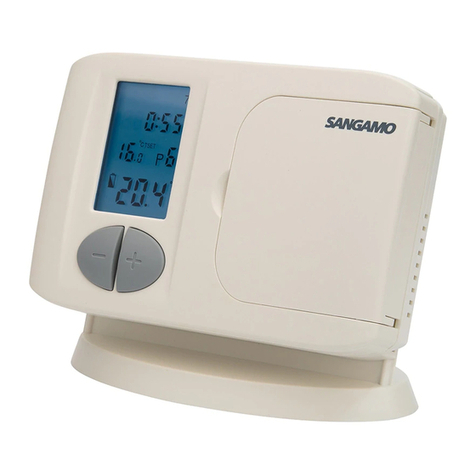
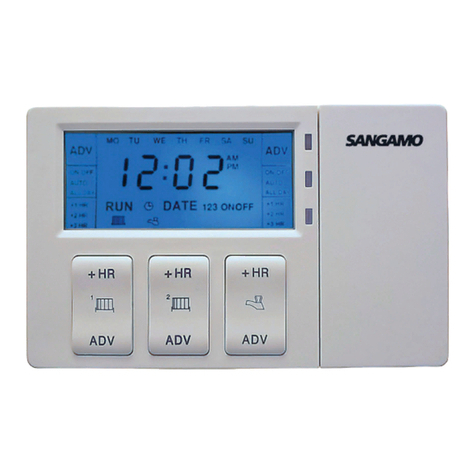
CHOICE RSTAT8
Digital Programmable Room
Thermostat
(2 wire, battery powered)
Introduction
The Choice RSTAT8 is a 2 wire, battery powered
programmable room thermostat. Being battery powered,
these models are suitable for replacing most existing
room thermostats.
The thermostat allows you to program and regulate your
heating system using up to 6 programmable events per
day.
The thermostat is easy to set up and provides clear
feedback to the user of the current time and temperature
and depending on the program settings will switch the
boiler or zone valve appropriately.
Features
• 24 or 7 day programmable
• Default adjustable program
• Permanent hold temperature
• Timed hold temperature
• Temporary temperature override
• Automatic Summer/Winter time change
• Low battery voltage indication
• Button press back-light operation
Installation
This product must be installed by a competent
person in line with the latest IEE regulations.
Isolate mains before commencing installation of the
product.
Using a screwdriver carefully depress the locking tab
at the top and separate the back plate from the fascia.
Unscrew and remove terminal cover to gain access to the
terminals.
Direct Wall Mounting
To ensure its correct operation the thermostat should be
mounted or situated approximately 1.3 metres above the
ooronaninternalwallandshouldbepositionedaway
from direct sunlight, heat sources and drafts.
Wiring Box Mounting
Thethermostatmaybetteddirectlyontoasinglegang
steelushwiringbox.Itmustnotbepositionedonan
unearthed metal surface.
Example circuit diagrams for typical installations are
shown below. For reasons of space and clarity not every
system can be shown
Insert Batteries
Withthefasciaunclippedfromitsbackplate,tsupplied
AA batteries into the battery compartment shown. All LCD
datawillash.PressSETtostoptheashing.
Retfasciatobackplatebyrstlocatingbottomcatches
and closing into position at the top.
Test Process
Press +or -buttons to temporarily adjust the set temper-
ature to stimulate product operation. A heating symbol
is displayed when the room temperature is below the set
temperature indicating the thermostat is calling for heat
from the boiler. Check the operation. Press SET to revert
to program operation.
User Instructions
What is a programmable room thermostat?
...an explanation for householders.
A programmable room thermostat is both a programmer
and a room thermostat. A programmer allows you to
set ‘ON and OFF’ time periods to suit your lifestyle. A
room thermostat works by sensing the air temperature,
switching on the heating when the air temperature falls
below the thermostat setting and switching it off once the
set temperature has been reached.
So, a programmable room thermostat lets you choose
what times you want the heating to be on, and what
temperatureitshouldreachwhileitison.Itwillallowyou
to select different temperatures in your home at different
times of the day (and days of the week) to meet your
particular needs.
Turning a programmable room thermostat to a higher
setting will not make the room heat up any faster. How
quickly the room heats up depends on the design of the
heating system, for example, the size of the boiler and
radiators. Neither does the setting affect how quickly
the room cools down. Turning a programmable room
thermostat to a lower setting will result in the room being
controlled at a lower temperature, and saves energy.
The way to set and use your programmable room
thermostatistondthelowesttemperaturesettingsthat
you are comfortable with at the different times you have
chosen, and then leave it alone to do its job. The best
waytodothisistosetlowtemperaturesrst,say18ºC
and then turn them up by one degree each day until you
are comfortable with the temperatures. You won’t have
to adjust the thermostat further. Any adjustments above
these settings will waste energy and cost you more money.
If your heating system is a boiler with radiators, there
will usually be only one programmable room thermostat
to control the whole house. But you can have different
temperatures in individual rooms by installing thermostatic
radiator valves (TRVs) on individual radiators. If you
don’t have TRVs, you should choose a temperature that
isreasonableforthe whole house.IfyoudohaveTRVs,
you can chose a slightly higher setting to make sure that
even the coldest room is comfortable, then prevent any
overheating in other rooms by adjusting the TRVs.
The time on the programmer must be correct. The
RSTAT9 automatically adjusts between spring and autumn
at the changes between Greenwich Mean Time and British
Electrical Connections
Once connections are made ensure you ret &
screw the terminal cover back into place.
Choice RSTAT8 controlling a typical combination boiler
installation - please refer to boiler manufacturers instruc-
tions
Choice RSTAT8 replacing a conventional room thermostat
on a fully pumped system with an existing programmer
and 3 port mid-position valve.
Choice RSTAT8 replacing a conventional room thermostat
on a fully pumped system with an existing programmer
and two spring return valves with auxiliary switches.
Choice RSTAT8 controlling a secondary heating zone on a
pumped system with existing programmer and two spring
return valves with auxiliary switches.
Choice
Rstat 8
Fit & forget...
Summer Time.
Programmableroomthermostatsneedafreeowofair
to sense the temperature, so they must not be covered
bycurtainsorblockedbyfurniture.Nearbyelectricres,
televisions, wall or table lamps may prevent the thermo-
stat from working properly.
Set
Temperature
Day of The
Week
Heating On
Time of Day
Program
Period
Actual Room
Temperature
Programme Settings
Clock Setting
1. Press CLOCKbuttononce,yearashes,press+or -
buttons to set year.
2. Press CLOCK button again, month ashes, press +
or -buttons to set month.
3. Press CLOCKbuttonagain,dayashes,press+or -
buttons to set day.
4. Press CLOCKbuttonagain,hourashes,press+or -
buttons to set hour.
5. Press CLOCK button again,minute ashes,press +
or -buttons to set minute.
6. Press SETbuttontoconrm,orjustwait15seconds,
itwillbeconrmedautomatically.
Program Setting/Review
1. Default program values are:
4. Press PROG button once to display P1 and clock
ashes, press  +or -buttons to set time (increment
10 minutes)
5. Press PROG button again and temperature ashes,
press +or -buttons to set temperature (increment
0.5°C)
6. Press PROG button again to display P2 and clock
ashes.SetP2–P6sameasP1
7. After setting P6, press PROG button and the current
dayordaygroup(1-7)willashagain.Returntostep2
to program other days.
8. After setting all programs, press SET button to con-
rmorwait15secondstoconrmautomatically.
9. In normal running status, you can press the PROG
button to review program information for current day or
day group.
Ifcurrentdayonlyisshowninitially(Unitisprogrammed
for 7 day cycle).
Ifdaygroup (1-7) isshown(Unit is programmedfor a
24 hour cycle).
Press +or -buttons to change the day to be reviewed.
Copy function
1. Hold COPY button for 3 seconds to display COPY and
day1ashes
2. Press +or -buttons to select the day which you want
to copy from, then press COPY button once, the day will
stopashing.
3. Press +or -buttons to select the day which you want
to copy to, press COPY button once to complete.
4. Press +or -buttons to select next day you want to
copy to, press COPY button again to complete.
5.Repeatabovestepstonish,thenpressSET button to
conrm,oryoucanwait15seconds,itwillbeconrmed
automatically.
Permanent Hold: Temperature is held indenitely
until user cancels
Press HOLD button once to display symbol,
Press +or -buttons to set the temperature, press PROG
button once.
Then press SET button to conrm or you can wait 15
secondstoconrmautomatically.
The setting will be kept until you exit by pressing SET
button.
If 1-7 are all selected then the 24hour cycle option is
active–eachdaysprogramswillbethesame.
Ifeitherof1,2,3,4,5,6,7isselectedthenthe7daycycle
optionisactive–eachdaysprogramscanbedifferent.
Dependant on your lifestyle, these default pro-
gram settings may be satisfactory.
2. Hold SET button, then press PROG button once , the
currentdayordaygroup(1–7)willash;
3. Press +or -buttons to change the day group (1-7) to
individual day to be set (1, 2, 3, 4, 5, 6, 7)
Day Group Cycle P1 P2 P3 P4 P5 P6
1-7 (default) 24hr 6:30 21°C 8:00 18°C 12:00 21°C 14:00 18°C 18:00 21°C 22:30 16°C
1,2,3,4 & 5 7 Day 6:30 21°C 8:00 18°C 12:00 21°C 14:00 18°C 18:00 21°C 22:30 16°C
6 & 7 7 Day 8:00 21°C 10:00 21°C 12:00 21°C 14:00 21°C 18:00 21°C 23:00 16°C
Hold Days: Temperature is held for a number of
days before returning to the programs
Hold HOLD button for 3 seconds to display d:01 and
symbol.
Press +or -buttons to select holding days from d:01
to d:99, then press PROG button once.
Then press SETtoconrmoryoucanwait15seconds
toconrmautomatically.
Press +or -buttons to set override temperature.
Thesettingwillbekeptuntilnishedtheholdingdays,
or you can press SET button to exit manually.
Hold Hours: Temperature is held for a number of
hours before returning to the programs
Press +or -buttons to set temperature,
Press CLOCK button, then +or -buttons to select time
rangefrom1–9hours.PressPROG button.
Then press SETbuttontoconrmoryoucanwait15
secondstoconrmautomatically.
Thesettingwillbekeptuntilnishedtheholdinghours,
or you can press SET button to exit manually.
Hold until next program: Make a temporary
change to the temperature
Press +or -buttons to set temperature, press PROG
button once.
Then press SETbuttontoconrmoryoucanwait15
secondstoconrmautomatically.Thesettingwillbe
kept until next program, or you can press SET button to
exit manually.
Set Temporary Temperature Default Settings :
Temperatures initially offered when + or - buttons
are pressed
Defaulttemperatureswhenrstpressingthe+or -
buttons
Hold SET and press +buttononcetoash22.0°,press
+or -button to set temporary override temperature (7
- 35°C, default is 22°C).
Hold SET and press -buttononcetoash18.0°C,press
+or -button to set temporary override temperature (7
- 35°C, default is 18°C).
SETbuttontoconrm,orjustwait15seconds,itwill
beconrmedautomatically
Additional Instructions
Switching Differential (on/off control) : The toler-
ance from the set temperature before the meas-
ured temperature signals the thermostat to switch
its output.
Press CLOCK button once, then press COPY button once
to display S: 1, press +or -buttons to change between
S:1 or S: 2, then press SETbuttontoconrm.
S: 1: differential is ±0.2°. When room temperature is
-0.2°C below setting temperature, it will display sym-
bol and boiler will turn on. When room temperature is
+0.2°C above setting temperature, symbol will disap-
pear and relay will turn off.
S: 2: differential is +0°C or -0.2°. When room
temperature is -0.2°C below setting temperature, it
will display symbol and boiler will turn on. When
room temperature is reached, i.e. +0.0°C, symbol will
disappear and relay will turn off.
LCD Back-light Operation
Press LIGHTbuttontoturnonback-light.Itwillturnoff
without pressing in 15 seconds.
Reset
1. Reset software: Press RESET button to return to
default values.
2. Reset hardware: Press SW11 key on the PCB to reset
the thermostat. The program settings are retained.
Power supply: 2x AA 1.5v batteries
Battery lifespan: 1 year
Temperature display range: 5 - 40°C (increment 0.1)
Temperature control range: 7 - 35°C (increment 0.5)
Program time increment: 10 minutes
Temperature accuracy: +/-1°C
Operating temperature: 0 - 45°C
Clock accuracy: <1sec / day
Specication
Protectionrating:IP30
Dimensions: 135 x 89 x 32mm
Mounting: Wall
Contact rating: 8(2), 250Vac (Volt free contact)
Insulationclass:2(doubleinsulated)
Flexible wire size: 0.5 - 2.5mm
Rigid wire size: 0.5 - 2.5mm
Approval Standards
EN60730-1
EN60730-2-7
EN60730-2-9
SERVICE AND WARRANTY
Your product is not user serviceable. PLEASE DO NOT TRY TO DISMANTLE THE UNIT.
This product is guaranteed by your supplier for 5 years from the date of manufacture. If it should become
defective please contact your installer or supplier for a replacement unit or visit www.sangamo.co.uk/returns
This product must meet Waste Electronic and Electrical Equipment Regulations (WEEE) for suitable environmental
recycling, recovery and/or disposal. End of life products should be handled in line with local regulations.
Alternatively return end of life product to Sangamo for correct disposal.
CUSTOMER CARE POLICY
As part of Sangamo’s continuous improvement program, the company operates a Customer Care policy. This
means we welcome your comments and complaints, as it can help us to improve our services to you, our
customer.
Duetoourpolicyofcontinuousproductimprovementanddevelopment,thespecicationsinthisguidemaybe
subject to change without prior notice.
Sangamo Limited
Industrial Estate, Port Glasgow,
Renfrewshire, PA14 5XG
Tel 01475 745131
Fax: 01475 744567
Email: [email protected]
Web: www.sangamo.co.uk
WEE/JH0069TY143761IssueA
Ifyouhaveaproblemorrequire
any further information please
contact our technical team on:
01475 745131
Other Sangamo Thermostat manuals

Sangamo RSTAT1 Guide

Sangamo

Sangamo RSTAT1 Guide

Sangamo choice pr 3 User manual

Sangamo

Sangamo choice pr 3 User manual

Sangamo CHPRSTATDP User manual

Sangamo

Sangamo CHPRSTATDP User manual

Sangamo CHOICE RSTAT5 Guide

Sangamo

Sangamo CHOICE RSTAT5 Guide

Sangamo CHOICE RSTAT9 User manual

Sangamo

Sangamo CHOICE RSTAT9 User manual

Sangamo RSTAT5 RF Quick start guide

Sangamo

Sangamo RSTAT5 RF Quick start guide

Sangamo Choice Rstat 3 Assembly Instructions

Sangamo

Sangamo Choice Rstat 3 Assembly Instructions

Sangamo Rstat8 User manual

Sangamo

Sangamo Rstat8 User manual

Sangamo Choice RSTAT5 RF User manual

Sangamo

Sangamo Choice RSTAT5 RF User manual

Sangamo Choice Rstat 7 Guide

Sangamo

Sangamo Choice Rstat 7 Guide

Sangamo CHPWIFI User manual

Sangamo

Sangamo CHPWIFI User manual

Sangamo Choice RSTAT5 RF User manual

Sangamo

Sangamo Choice RSTAT5 RF User manual

Popular Thermostat manuals by other brands

Ideal Heating QAA55 instructions

Ideal Heating

Ideal Heating QAA55 instructions

Comfort CP1820 owner's manual

Comfort

Comfort CP1820 owner's manual

VDH ALFA 71 user manual

VDH

VDH ALFA 71 user manual

Warm4Less One-Click user manual

Warm4Less

Warm4Less One-Click user manual

Veria Control ET45 installation guide

Veria

Veria Control ET45 installation guide

Braeburn 5020 user manual

Braeburn

Braeburn 5020 user manual

Heatmiser PRT-TS user manual

Heatmiser

Heatmiser PRT-TS user manual

Friedrich RT5 Installation, operation & application guide

Friedrich

Friedrich RT5 Installation, operation & application guide

Computherm q3rf operating instructions

Computherm

Computherm q3rf operating instructions

Carrier ComfortChoice Touch user guide

Carrier

Carrier ComfortChoice Touch user guide

KMC Controls FlexStat Operation guide

KMC Controls

KMC Controls FlexStat Operation guide

Robertshaw 300-204 operating instructions

Robertshaw

Robertshaw 300-204 operating instructions

Salus 091FLRF quick start guide

Salus

Salus 091FLRF quick start guide

Honeywell VisionPRO TH8000 Series operating manual

Honeywell

Honeywell VisionPRO TH8000 Series operating manual

Daikin One+ Homeowner's guide

Daikin

Daikin One+ Homeowner's guide

elsner elektronik KNX Touch One Style Technical specifications and installation instructions

elsner elektronik

elsner elektronik KNX Touch One Style Technical specifications and installation instructions

Vemer Dafne Wi-Fi user manual

Vemer

Vemer Dafne Wi-Fi user manual

Honeywell T8665A1002 - Digital Thermostat, 3h user guide

Honeywell

Honeywell T8665A1002 - Digital Thermostat, 3h user guide

manuals.online logo
manuals.online logoBrands
  • About & Mission
  • Contact us
  • Privacy Policy
  • Terms and Conditions

Copyright 2025 Manuals.Online. All Rights Reserved.