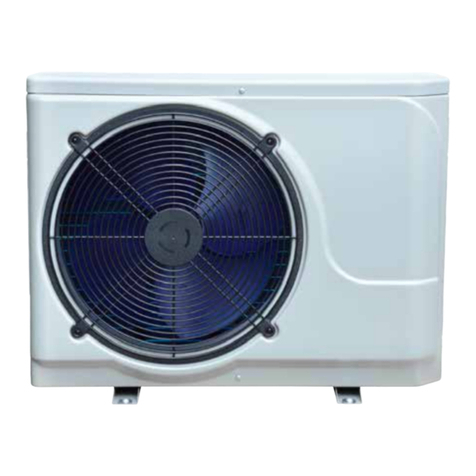
GalaxySpas SWIM SPA User manual

SWIM SPA PRE-DELIVERY GUIDE

Introducon
This guide has been designed to help
you plan and prepare for the delivery and
installaon of a Galaxy Swim Spa.
There are a number of important steps,
decisions and acons that must be taken prior
to delivery day to ensure a smooth delivery.
Please read through this guide thoroughly.
At the very end you will nd a check list
which will help you navigate next steps and
keep you on track.
2

3
Contents
Delivery Opons 5
Choosing Your Spa Placement 6
Fencing 7
Foundaon Requirements 8
Heat Pump Foundaon 9
Swim Spa Steps Foundaon 9
Drainage 9
Service Access 9
Cover Lier Clearance 9
Electrical Requirements 10
Recommended Cable Input Locaon 11
Posioning Requirements - Component Layouts and Measurements 12
Above Ground or In-Ground Opons, Building Regulaons & Consent 19
Out of Ground Installaon 19
In-Ground Installaon (Sinking) 19
Heat Pump Installaon Guide 20
Inial Start-Up Guide - Geng your Spa Pool Set Up for First Use 21
Pre-Delivery Plan and Checklist - Get Ready for Your Swim Spa’s Arrival 22

4

5
Delivery Opons
HIAB Truck
The most common delivery opon for a swim spa is a HIAB truck. A HIAB is a large delivery
truck with a crane arm that reaches a distance to 7m from where the truck can park and no
higher than 2m. This is oen the most cost eecve delivery opon as the HIAB and will
collect, deliver and li the Swim Spa into posion.
It is important to note that the HIAB truck will likely need to be able to t up a driveway to
reach the Swim Spa posion. The truck can be up to 2.5m wide and 9m long so navigang
narrow spaces will be dicult.
Bespoke Delivery
Somemes barriers can prevent this from a HIAB truck being a praccal opon so dierent
methods of delivery can be explored, such as a helicopter or crane.
For Swim Spas that need to reach over a house or from a distance greater then 7m, a crane is a
great opon. Cranes come in dierent sizes and can reach 40+ meters. Typically they will not t
up a driveway and will need to a space to park on the road. Addional factors to consider would
be power lines and somemes trac control. For crane deliveries, you will need to ensure the
access-way or driveway is able to withstand the weight of the truck and load.
A site check and quote will be organised for a bespoke delivery opon, please contact us for
specic details.
Collecon
If you have the ability to organise your own transport, free collecon can be arranged through
any of our naon wide depots. Please contact us for specic depot locaons.

6
Choosing Your Spa Placement
To make sure you have the best spa experience, the placement and orientaon of your
new Galaxy Swim Spa has to be carefully planned.
Factors to be considered:
• There should be no power lines or overhead cables anywhere near the Swim Spa.
• Are there any surrounding buildings or homes that may cause privacy issues?
• Can electrical cabling reach the pad posion to the switchboard/mains?
• Splashing while swimming is all part of the experience! Does your posioning oer
adequate drainage?
• Is there enough room within the total foundaon for other accessories such as steps, heat
pump and covers liers?
• Does the locaon oer access around the enre swim spa? Full perimeter access is advised.
• Do you have a view that you wish to look over while relaxing in the Swim Spa?
• Is there anything else that might make your surroundings more enjoying? For example a
deck or landscaping?
• Does posioning allow easy accessibility to the external drain valve and other
similar controls?

7
Fencing
To keep you and your loved ones safe, most councils will have rules where they want to see a
1.2m fence around your Swim Spa, especially if it’s installed below ground or decked around.
If your Swim Spa will be placed above ground, this may give you the opon to claim the ‘wall
of the Swim Spa’ as the fence, as it’s over 1.2m high. In this case, anything that can be used
to climb the wall such as steps, need to be removed when not in use. If you’re installing a heat
pump, make sure the piping is kept low to the ground and the unit is installed 1.2m from the
Swim Spa.
We highly recommend you to contact your council to discuss any fencing requirements for
your region - fencing is the responsibility of the home owner and we want you to have not
only the best, but also the safest spa environment.

8
Foundaon Requirements
Swim spas are heavy. They can weigh up to a tonne when empty, and can take 7000L+ of water
when full. You will require a builder to install a pad for the dimensions of the spa, wherever it is
going. It is not advised for a swim spa to go on decking as it cannot support the weight when full.
A foundaon for the swim spa will require at least a 150-200mm-thick steel reinforced,
cured concrete pad. We recommend an extra 100mm clearance on each side of the swim spa.
See below for the specic measurements for each model of Galaxy swim spa.
Concrete Pad Dimensions
Model Length Width
Calypso Minor 4400 mm 2250 mm
Calypso 4400 mm 2350 mm
Aurora 4400 mm 2250 mm
Atlas 5500 mm 2350 mm
Ursa 5500 mm 2250 mm
Hyperion 5900 mm 2350 mm
Mercury 5900 mm 2250 mm
Titan 8000 mm 2250 mm
Titan Major 8000 mm 2250 mm
Oberon 4600 mm 2350 mm
Prospero 5850 mm 2350 mm
Example:
Length
Width

9
Heat Pump Foundaon
If you are planning on installing a heat pump unit, you will also need a well-supported at
surface for this to sit on, ensuring it meets the airspace requirements. Heat pumps weigh up to
45kg, so we recommend a concrete foundaon for this as well.
2500mm
500mm
500mm
1200mm
Swim Spa Steps Foundaon
The swim spa’s steps are portable (can be manually moved around), however we recommend
they sit on a at surface to provide safe entry and exit from the swim spa.
3-Tier Steps Heat Pump Dimensions
Length: 600mm Length: 935mm
Width: 1160mm Width: 280mm
Height: 600mm Height: 535mm
Drainage
Ensuring there is adequate drainage around the swim spa is fundamental. Water run-o needs
to be directed away from the swim spa as ooding is not covered by warranty. Incorporang
drainage channels into the concrete slab is highly recommended.
Service Access
A minimum of 500mm clearance around all sides of the swim spa is required for service access.
If you are planning to sink your swim spa into a deck, you will need to ensure there is sucient
space for service agents to access the panels beneath the decking surface or add a removable
decking component.
Cover Lier Clearance
Our swim spa cover shelves require an 850mm minimum clearance at each of the short ends of
the swim spa.

10
Electrical Requirements
Providing Power to Your Spa - you will need to organise an registered electrician to survey your
house’s power supply. Galaxy Spas is not able to complete this work as we are not registered
electricians.
Swim Spa Model Amps Swim spas require a signicant amount of power and
need to be hardwired into your house’s power supply.
An electrician will be able to advise you on what will
be needed to ensure there is enough power supplied
to your home to allow a swim spa to be installed and
operated.
If your house can’t cost-eecvely support a 45 amp
power source, it is common to reduce the power
supply to a 32 amp maximum (this can be achieved
through the swim spa’s Gecko controller, and is made
easier when installed alongside a heat pump).
When you limit a swim spa’s ability to draw
power, the result will be a reducon on how many
components of the swim spa can be used. I.e. if
the swim spa draws 55 amps, then it will need all
that power to be able to use all the swim jets. If it is
limited to 32 amps, you will not be able to use all the
swimming jets at the same me.
Calypso Minor 20 - 32 amps
Calypso 45 - 55 amps
Aurora 45 - 55 amps
Atlas 45 - 55 amps
Ursa 45 - 55 amps
Hyperion 45 - 55 amps +
32 - 45 amps
Mercury 45 - 55 amps +
32 - 45 amps
Titan 45 - 55 amps
Titan Major 45 - 55 amps +
32 - 45 amps
Oberon 40 amps
Prospero 40 amps
There are two main ways to connect the swim spa power cable to the house’s power supply:
Cabinet Power Feed
The power cable is fed through the cabinet by drilling through the closest panel to your outdoor
electrical point and inserng a grommet. It is then run from the power source, through the
grommet in the cabinet and to the swim spa controller.
Concealed Power Feed
If you wish to conceal the power cable and plan to bring the feed up through the boom of the
swim spa, the inial wiring and conduit will need to be in place before delivery. Ensure your
cable comes up underneath the swim spa in the suggested input locaon.
When the swim spa arrives, have it lowered by the crane / HIAB onto supporng blocks or ice
bags and open the cabinet panel. Measure the same entry point and drill a hole the width of the
cable down through the base of the swim spa. Feed the cable up through the hole into the inside
and then remove the blocks and lower the swim spa gently onto the foundaon.

11
Recommended Cable Input Locaon
CALYPSOCALYPSO MINOR AURORA
ATLAS PROSPERO
OBERON
MERCURY
HYPERION
URSA
TITAN MAJOR
TITAN

12
Posioning Requirements -
Component Layouts and
Measurements
The orientaon of your swim spa is an important factor when thinking about where you want to
place it. Consider where the heat pump union is (if installing one) and where the electricity cable
point is, as well as the orientaon of the hydrotherapy seang. Personal factors should also be
taken into consideraon:
View - does the swim
spa oer the best view
available when sing in
the hydrotherapy seats?
Privacy - is the posion
of the swim spa protected
from the view / sight-lines
of neighbours and the
general public?
Weather - is the
swim spa protected
from the wind?
The table that follows outlines the measurements of your swim spa as well as the componentry
layouts and heat pump connecons. This is useful for understanding where to posion it on
your property.
Swim Spa Model Length Width Height
Calypso Minor 4400 mm 2250 mm 1280 mm
Calypso 4400 mm 2350 mm 1290 mm
Aurora 4400 mm 2250 mm 1520 mm
Atlas 5500 mm 2350 mm 1290 mm
Ursa 5500 mm 2250 mm 1290 mm
Hyperion 5900 mm 2350 mm 1290 mm
Mercury 5900 mm 2250 mm 1520 mm
Titan 8000 mm 2250 mm 1540 mm
Titan Major 8000 mm 2250 mm 1540 mm
Oberon 4600 mm 2350 mm 1540 mm
Prospero 5850 mm 2350 mm 1540 mm

13
CALYPSO
MINOR
500mm
Service Area
Control
Panel
Drain
Valve
Control
Box

14
ATLAS
500mm
Service Area
Control
Box
Control
Panel
Drain
Valve
Heat
Pump
Union
CALYPSO
500mm
Service Area
Control
Box
Control
Panel
Drain
Valve
Heat
Pump
Union

15
URSA
500mm
Service Area
Control
Box
Control
Panel
Drain
Valve
Heat
Pump
Union
AURORA
500mm
Service Area
Control
Box
Control
Panel
Drain
Valve
Heat
Pump
Union

16
HYPERION MERCURY
500mm
Service Area
Heat
Pump
Union
Control
Panel
Drain Valve
Control
Box Spa
Zone
Swim
Zone
Swim Spa
Drain Valve
500mm
Service Area
Heat
Pump
Union
Control
Panel
Drain
Valve
Swim Spa
Drain Valve
Control
Box

17
TITAN TITAN MAJOR
Control
Box
Control
Panel
Drain Valve
Control
Box
Spa
Drain
Valve
500mm
Service Area
500mm
Service Area
Heat
Pump
Union
Heat
Pump
Union
Control
Panel
Swim Spa
Drain Valve

18
OBERON PROSPERO
500mm
Service Area
500mm
Service Area
Heat Pump
Union
Heat Pump
Union
Drain
Valve
Drain
Valve
Control
Box
Control
Box
Control
Panel
Control
Panel

19
Above Ground or In-Ground
Opons, Building Regulaons
& Consent
Out of Ground Installaon
This is the most common form of installaon,
where the swim spa is placed on a concrete
foundaon.
Building Consent
As all of our swim spas are over 1.2m in
height, the swim spa’s walls act as its own
barrier or pool fence.
As such, there is no need to install a fencing
compound around the swim spa.
The steps must remain removable (not
aached or secured to the foundaon).
The heat pump must be posioned at least
1.2m away from the side of the swim spa
in order to prevent children using it as a
climbable object.
1200mm
1200mm
In-Ground Installaon (Sinking)
If you choose to sink the spa or build a deck
up around it, there are a few consideraons
you will need to take into account:
Building Consent
You will need to install a fence around your
swim spa and deck to prevent unaccompanied
minors climbing onto/into the pool.
This fence will require building consent.
Clearance
To allow for service access, you need to
ensure the decking has 500mm of access
around all sides of the swim spa.
Ensure decking supports are posioned this
same distance away from the side of the
swim spa.
It is common to install removable decking
around the swim spa.
The swim spa cover requires 300mm of
clearance from the top of the shell on each
side in order to install the lockable cover. If this
cannot be achieved, other measures might need
to be taken such as clipping it into the deck.
500mm
300mm

20
Heat Pump Installaon Guide
Placement
• Refer to the foundaon requirements
page.
• All our swim spas (excluding the Calypso
Minor) come pre-plumbed with the heat
pump unions. Refer to the schemac
layouts to see where the Heat Pump
unions are posioned.
2500mm
500mm
500mm
1200mm
Required Materials
• 40mm PVC pressure pipe - enough to suit
the plumbing conguraon of where your
heat pump sits in relaon to the Swim Spa.
• 40mm hole saw for cabinet drilling
• Hacksaw
• PVC pipe cement
Installaon
1 Ensure power is o and remove cabinet
where heat pump connecon sits.
2 Decide where the plumbing will come in
through the cabinet and drill 2 x 40mm
holes to accommodate the input and
output of the heat pump piping.
3 Close the two shut-o valves at either end
of the heat pump unions.
4 Plumb the correct unions from the heat
pump to the swim spa.
5 Purge air from the heat pump by loosening
the outlets unl water starts to drip, then
ghten back up.
6 Connect the power cable from the heat
pump into one of the 230V mains outlets
on the Gecko controller.
7 Connect the heat pump data cable to the
EXP2 data socket of the Gecko controller.
8 Restore power to the swim spa, and turn
on jets to ensure the water is owing and
free of air locks.
9 Use the Spa Choice manual to set user
controls for heat pump and set how it
works with the variable heater.
OUTLET
INLET
300MM
DATA
CABLES
CIRC
PUMP MAIN CIRCULATION LINE
OFF SHOOT
OUTLET
SLICE
VALVES
OFF SHOOT
INLET
Spa Choice
IN.YE5+IN.K806+3KW
Table of contents
Other GalaxySpas Heat Pump manuals
Popular Heat Pump manuals by other brands

STIEBEL ELTRON
STIEBEL ELTRON WPL 09 ICS classic Operation and installation

Toshiba
Toshiba MMY-MUP0801HT8P-E owner's manual

Nibe
Nibe AHP 10-300 Installer manual

ALLIANCE
ALLIANCE ALLPH90R410-INV Installation & operation manual

Gree
Gree A Series Installation, start-up and maintenance manual

Gree
Gree GWHD(18)ND3CO user guide