manuals.online logo
Brands
  1. Home
  2. •
  3. Brands
  4. •
  5. GARDIVAL
  6. •
  7. Garden House
  8. •
  9. GARDIVAL alpha Midi 200 User manual

GARDIVAL alpha Midi 200 User manual

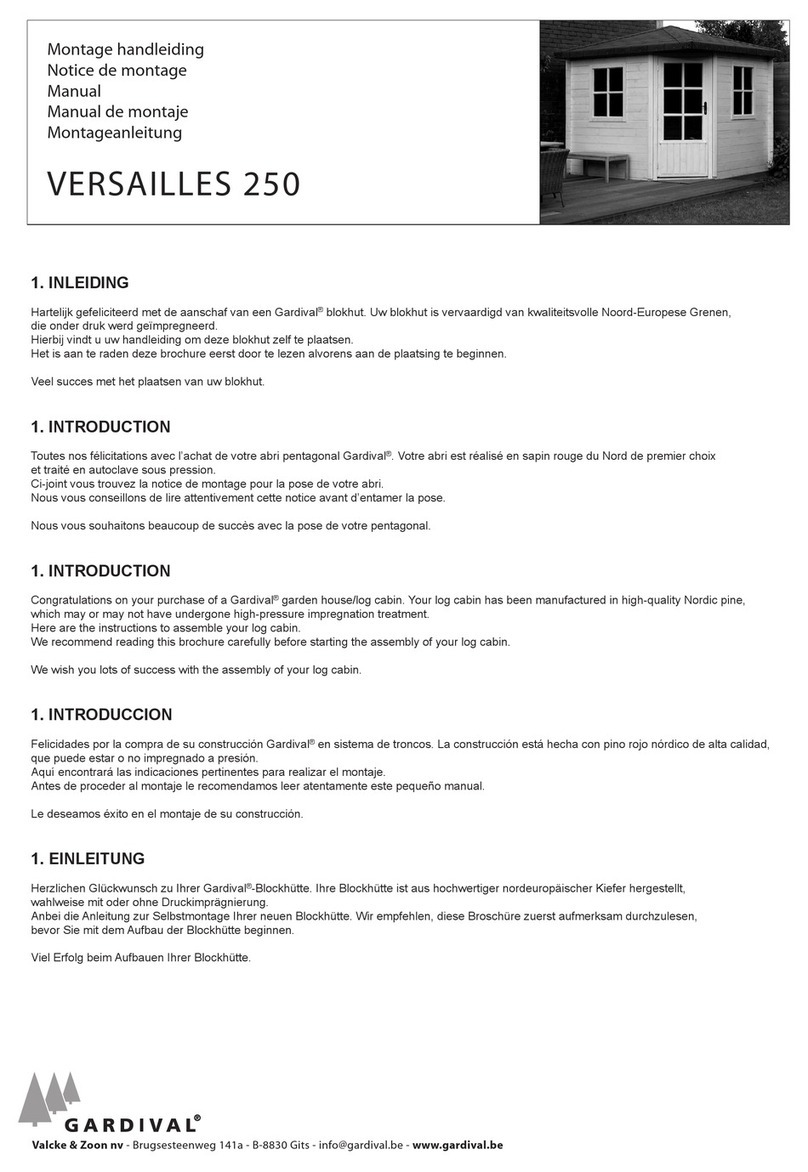
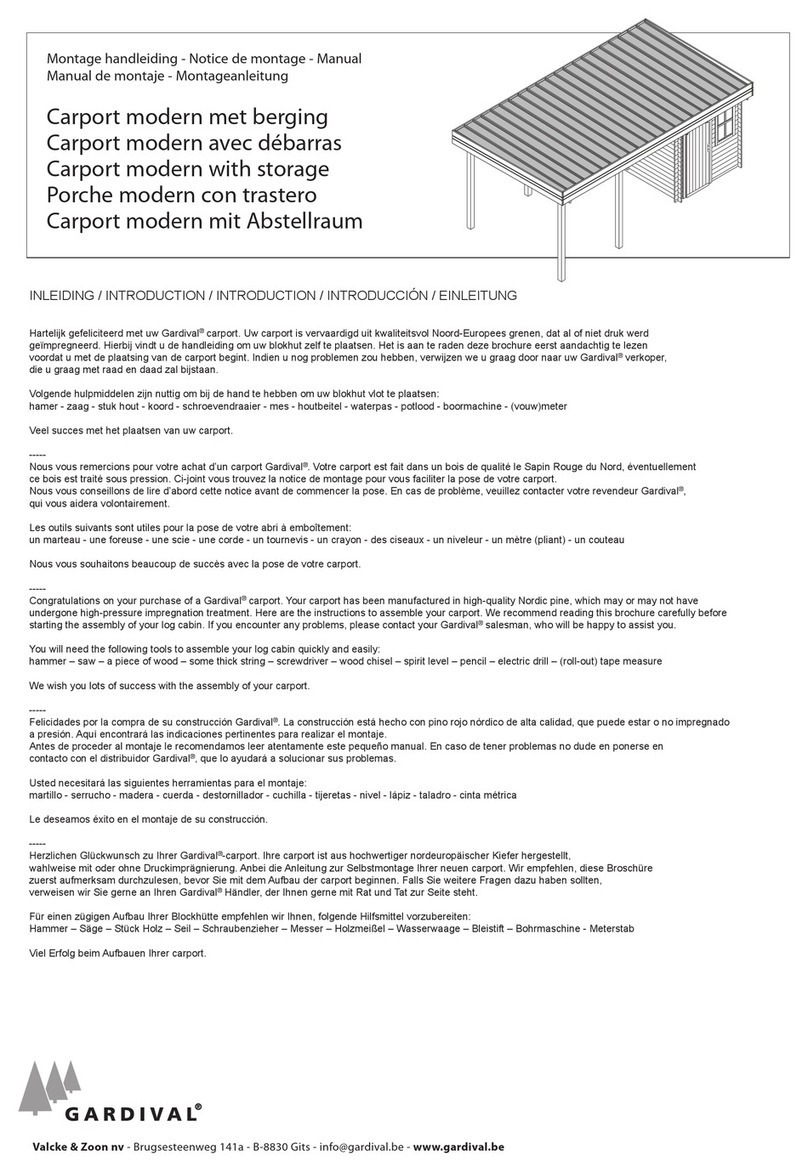
Montage handleiding - Notice de montage - Manual
Manual de montaje - Montageanleitung
Midi
200 / 250 / 300 / 350 / 420
VALCKE & zN NV - BRUGSESTEENWEG 141A - 8830 GITS - T +32 (0)51 21 13 48 - F +32 (0)51 21 07 64 - INFO@GARDIVAL.BE - WWW.GARDIVAL.BE
alpha
VALCKE & zN NV - BRUGSESTEENWEG 141A - 8830 GITS - T +32 (0)51 21 13 48 - F +32 (0)51 21 07 64 - INFO@GARDIVAL.BE - WWW.GARDIVAL.BE
INLEIDING / INTRODUCTION / INTRODUCTION / INTRODUCCIó N / EINLEITUNG
Hartelijk gefeliciteerd met uw Gardival®ALPHA. Uw tuinhuis ALPHA is vervaardigd uit kwaliteitsvol Noord-Europees grenen, dat al dan niet in druk werd
geïmpregneerd. Hierbij vindt u de handleiding om uw ALPHA zelf te plaatsen. Het is aan te raden deze brochure eerst aandachtig te lezen
voordat u met de plaatsing van de ALPHA begint. Indien u nog problemen zou hebben, verwijzen we u graag door naar uw Gardival®verkoper,
die u graag met raad en daad zal bijstaan.
Volgende hulpmiddelen zijn nuttig om bij de hand te hebben om uw ALPHA vlot te plaatsen:
hamer - zaag - stuk hout - koord - schroevendraaier - mes - houtbeitel - waterpas - potlood - boormachine - (vouw)meter
Veel succes met het plaatsen van uw ALPHA.
---
Nous vous remercions pour votre achat d’un ALPHA Gardival ®. Votre abri ALPHA est fait dans un bois de qualité le Sapin Rouge du Nord, éventuellement
ce bois est traité sous pression. Ci-joint vous trouvez la notice de montage pour vous faciliter la pose de votre ALPHA.
Nous vous conseillons de lire d’abord cette notice avant de commencer la pose. En cas de problème, veuillez contacter votre revendeur Gardival®,
qui vous aidera volontairement.
Les outils suivants sont utiles pour la pose de votre ALPHA à emboîtement:
un marteau - une foreuse - une scie - une corde - un tournevis - un crayon - des ciseaux - un niveleur - un mètre (pliant) - un couteau
Nous vous souhaitons beaucoup de succès avec la pose de votre ALPHA à emboîtement.
---
Congratulations on your purchase of a Gardival®ALPHA. Your ALPHA has been manufactured in high-quality Nordic pine, which may or may not have
undergone high-pressure impregnation treatment. Here are the instructions to assemble your ALPHA. We recommend reading this brochure carefully before
starting the assembly of your ALPHA. If you encounter any problems, please contact your Gardival®salesman, who will be happy to assist you.
You will need the following tools to assemble your ALPHA quickly and easily:
hammer – saw – a piece of wood – some thick string – screwdriver – wood chisel – spirit level – pencil – electric drill – (roll-out) tape measure
We wish you lots of success with the assembly of your ALPHA.
---
Felicidades por la compra de su construcción Gardival®en sistema ALPHA. La construcción ALPHA está hecho con pino rojo nórdico de alta calidad,
que puede estar o no impregnado a presión.. Aquí encontrará las indicaciones pertinentes para realizar el montaje.
Antes de proceder al montaje le recomendamos leer atentamente este pequeño manual. En caso de tener problemas no dude en ponerse en
contacto con el distribuidor Gardival®, que lo ayudará a solucionar sus problemas.
Usted necesitará las siguientes herramientas para el montaje:
martillo - serrucho - madera - cuerda - destornillador - cuchilla - tijeretas - nivel - lápiz - taladro - cinta métrica
Le deseamos éxito en el montaje de su construcción.
---
Herzlichen Glückwunsch zu Ihrer Gardival®ALPHA. Ihre ALPHA ist aus hochwertiger nordeuropäischer Kiefer hergestellt,
wahlweise mit oder ohne Druckimprägnierung. Anbei dieAnleitung zur Selbstmontage Ihrer neuen ALPHA. Wir empfehlen, diese Broschüre
zuerst aufmerksam durchzulesen, bevor Sie mit dem Aufbau der ALPHA beginnen. Falls Sie weitere Fragen dazu haben sollten,
verweisen wir Sie gerne an Ihren Gardival®Händler, der Ihnen gerne mit Rat und Tat zur Seite steht.
Für einen zügigen Aufbau Ihrer ALPHA empfehlen wir Ihnen, folgende Hilfsmittel vorzubereiten:
Hammer – Säge – Stück Holz – Seil – Schraubenzieher – Messer – Holzmeißel – Wasserwaage – Bleistift – Bohrmaschine - Meterstab
Viel Erfolg beimAufbauen Ihrer ALPHA.
INTRO
alpha
2
Belangrijk - Attention - Pay attention to - Aufpassen
Voorzichtig behandelen - Manipuler avec soin - Handle with care - mit Vorsicht zu behandeln
* Breekbaar - Fragile - Fragile - Brechbar
Niet kantelen
Pas d'inclinaison -
Don’t turn
keine Neigung
OK
*
*
*
*
Niet schuiven
Pas glisser
Don't slide
Nicht verschieben
Positioneer en plaats
Positionner et poser
Positioning and place
Positionierung und Platzieren
01
02
De Gardival blokhut wordt geplaatst op een houten vloer
Votre abri Gardival est posé sur un plancher de sol en bois
La construcción Gardival se monta sobre un suelo de madera
Die Gardival®-Blockhütte wird auf einem Holzboden aufgestellt
end piece / pieza final / endstück
connecting piece / pieza intermedia
eindstuk / pièce d’extrémité
tussenstuk /
pièce intermédiaire
Breedte tuinhuis / Largeur abri / Width of the garden house / Lateral de la construción / Breite der Blockhütte
Diepte tuinhuis / Profondeur abri / Depth of the garden house
Fachada de la construcción / Tiefe der Blockhütte
zwischenstück
end piece / pieza final / endstück
eindstuk / pièce d’extrémité
end piece / pieza final / endstück
eindstuk / pièce d’extrémité
end piece / pieza final / endstück
eindstuk / pièce d’extrémité
3
alpha
H
HH
H
03
De Gardival blokhut wordt geplaatst op een betonplaat
Votre abri Gardival est posé sur une dalle en béton
Your Gardival log cabin will be installed on a concrete foundation slab
La construcción Gardival séra montada sobre une solera de hormigón
Die Gardival®-Blockhütte wird auf einer Betonplatte aufgestellt
4
04
alpha
H
4 x H
Breedte tuinhuis / Largeur abri / Width of the garden house / Fachada de la construcción / Breite der Blockhütte
Diepte tuinhuis / Profondeur abri / Depth of the garden house
Lateral de la construcción / Tiefe der Blockhütte
""
""
houten vloer
plancher de sol en bois
Un suelo de madera
Holzboden
5
alpha
05
110mm
130mm
1. ZOEK DE STARTPLANKEN
(ZONDER GROEF ONDERAAN)
plaats deze planken als onderste laag
1. CHERCHEZ LES PLANCHES DE DÉPART
(SANS LANGUETTE EN DESSOUS)
mettez-les comme couche initiable
belangrijk!!!
important!!!
STARTPLANK
ZONDER GROEF
PLANCHE DE DÉPART
SANS LANGUETTE
06
07
alpha
Ø 3,5 x 25mm
6
""
HH
H
H
90°
90°
90°
08
09
Plaatsing op betonplaat
Poser sur une dalle en béton
Construction on a concrete foundation slab
Instalación sobre solera de hormigón
Aufstellen auf Betonplatte
Plaatsing op houten vloer
Poser sur un plancher de sol en bois
Instalación sobre suelo de madera
Aufstellen auf Holzboden
alpha
Ø 3,5 x 25mm
7
""
90°
H
H
H
H
H
H
Ø 4 x 60mm
*
8
10
11
Het deurkader steekt onderaan
een beetje uit. Bij een blokhut op
een betonplaat mag dat stukje
ingekort worden tot op de gewenste
hoogte. Bij plaatsing op een houten
vloer moet hieraan niet gezaagd
worden.
Les montants du cadre dépassent,
en bas de la porte. Si la pose se
fait sur une dalle en béton, vous
devez ajuster ce dépassement en
fonction de la hauteur nécessaire,
sur un plancher de sol en bois les
longueurs sont bonnes.
The doorframe overlaps slightly at
the bottom. If your log cabin is to
be placed on a concrete founda-
tion, this may be shortened to the
desired length. For construction on a
El marco de la puerta sobresale
un poco en la parte inferior. Si el
montaje se hace sobre un suelo de
hormigón, se deberá cortar hasta
alcanzar la altura deseada. Si se
coloca la construcción sobre un
suelo de madera las longitudes son
correctas. En caso de suelo de
madera las longitudes son correctas.
Der Türrahmen ragt im unteren
Bereich etwas hervor. Bei einer
Blockhütte auf einer Betonplatte
kann dieser Teil auf das gewünschte
Maß zurückgesägt werden. Wenn
Ihre Blockhütte auf einer Holzplatte
aufgebaut wird, muss dieser Bereich
nicht zurückgesägt werden.
Plaatsing op houten vloer
Poser sur un plancher de sol en bois
Instalación sobre suelo de madera
Aufstellen auf einem Holzboden
Plaatsing op betonplaat
Poser sur une dalle en béton
Construction on a concrete foundation slab
Instalación sobre solera de hormigón
Aufstellen auf einer Betonplatte
alpha
12
9
alpha
13
Teken twee lijnen op de twee
buitenvlakken van de hoekpalen
gemeten vanaf de basis
van de tand op 130mm.
Faites deux lignes sur côtés
éxterieurs des poteaux de coin
à 130mm, mésure du debut du
dent.
130mm
130mm
130mm
15
14
BELANGRIJK
WANNEER DE HOOGTELIJNEN
VERSCHILLEN OP DE TWEE ZIJDEN VAN
DE HOEKPAAL,
NEEM DAN DE HOOGSTE LIJN OM DE
HOEKPAAL AF TE ZAGEN.
IMPORTANT
SI LES LIGNES D'HAUTEUR SONT
DIFFÉRENTES SUR LES 2 CÔTÉS
DU POTEAU DE COIN,
PRENEZ LA PLUS HAUTE POUR SCIER
LE POTEAU.
130mm
130mm
AFZAGEN OP HOOGSTE LIJN
COUPER SUR LA LIGNE LA PLUS HAUTE
10
alpha
11
12
16
PLAATSEN HOEKPROFIEL
POSITIONNER PROFIL DE COIN
lengte A = lengte 1 -16mm
longueur A = longueur 1 - 16 mm
A. ZONDER VLOER
A. SANS PLANCHER DE SOL
1. LENGTE HOEKPROFIEL BEPALEN
1. déterminer longueur profil de coin
2. HOEKPROFIEL (4 STUKS) AFKORTEN
A (4x) = afkorten op lengte A
2. couper profil de coin (4 unités)
A (4x) = couper à longueur A
3. HOEKPROFIEL SCHROEVEN
schroef (4x60 verzinkt)
9x per hoekprofiel
3. visser profil de coin
vis (4x60 zinguée)
9x par profil de coin
B. MET VLOER
B. AVEC PLANCHER DE SOL
1. LENGTE HOEKPROFIEL BEPALEN
1. déterminer longueur profil de coin
2. HOEKPROFIEL (4 STUKS) AFKORTEN
A (4x) = afkorten op lengte A
2. couper profil de coin (4 unités)
A (4x) = couper à longueur A
3. HOEKPROFIEL SCHROEVEN
schroef (4x60 verzinkt)
9x per hoekprofiel
3. visser profil de coin
vis (4x60 zinguée)
9x par profil de coin
Ø 4 x 60mm alpha
Lengte A (hoge zijwand)
Lengte 1 (hoge zijwand)
AA A
±130mm
±65mm ±260mm
A
±130mm
±260mm±49mm
PLANK 130mm
PLANK 130mm
12
17
alpha
17
12
18
1. Schroef de bovenste twee planken 2 keer vast volgens de tekening in elke hoek.
1. vissez les duex planches plus hautes 2 fois dans le coin selon de plan.
2. Schroef de onderste plank 1 keer vast in elke hoek aan beide zijden.
2. vissez la planche la plus basse 1 fois dans le coin dans les deux sens
Ø 3.5 x 35mm
2x schroeven
2x visser
2x schroeven
2x visser
2x schroeven
2x visser
2x schroeven
2x visser
1.
2.
Ø 3.5 x 35mm
herverdelen en vastschroeven
re-positionner et visser
1.
1. Indien er een hoogteverschil is tussen 2 wanden moet men de planken
herverdelen waar de wand lager is. Schroef telkens elke plank 1 keer vast.
1. s'il y a une différence de hauteur entre 2 parois on doit re-positionner
les planches où le paroi est plus bas. Vissez chaque planche 1 fois.
Ø 4 x 60mm
20
19
13
Ø 3.5 x 35mm
alpha
14
12
21
alpha
Ø 3.5 x 35mm
16 x 95 x 700mm
16 x 95 x 700mm 2x2x
2x2x
23
22
15
alpha
Dakplanken / Le plancher de toit / Tablas de techo / Dachbretter
Ø 2.4 x 50mm
Ø 2.4 x 50mm
Zonder goten
Sans gouttières
Without gutters
Sin canalón
Ohne Dachrinnen
Met goten
Avec gouttières
With gutters
Con canalón
Mit Dachrinnen
25
24
16
Ø 4 x 40mm
alpha
Deurset en venster / Kit de la porte et fenêtres / Set de la puerta + ventanas / Türset und Fenster
De kruk, de slotplaat en de sleutel
zijn aan de binnenkant van de deur
bevestigd. Ter hoogte van het slot
dient men in de deurstijl een ope-
ning voor het slot te maken
(houtbeitel, boren).
La poignée, le cache-entrée et la
de la porte. Vous devez couper dans
le montant du cadre à la hauteur de
entrée (des ciseaux, une foreuse).
El set de la puerta lo encontrará
en la parte interior de la misma. Se
debe hacer un agujero en el marco
a la altura de la cerradura para el
completar el cierre de la puerta
(tijeras, taladro).
Der Türgriff, das Schlossblech und
der Schlüssel sind an der Innenseite
der Tür befestigt.Auf Höhe des
Schlosses muss im Türpfosten eine
Öffnung für das Schloss gemacht
werden (mit Hilfe eines Holzmeißels
oder Bohrers).
Binnenzicht
Vue intérieure
Interior view
Vista interior
Innenansicht
26
Shingels / Les shingles / Shingles / Tejas asfálticas / Schindel
±1,5cm
±4cm
±1,5cm
Zonder goten
Sans gouttières
Sin canalón
Ohne Dachrinnen
Met goten
Avec gouttières
Con canalón
Mit Dachrinnen
17
alpha
27
Windrichting
La direction du vent
Dirección del viento
die Windrichtung
18
alpha
28
Dakpanplaten / Panneaux de tuiles en acier / Steel tiles /
Paneles de tejas metálicas / Dachpfannenplatten aus Stahl
19
alpha
20
17
29
alpha
12
30
Ø 3.5 x 35mm
*
*
*
*
*
*
*
*
*
*
*
*
*
*
*
*
*
*
Behandeling / Traitement / Treatment / Tratamiento / Behandlung
Niet behandeld hout moet tegen ons guur klimaat beschermd worden.
Daarom raden wij u aan uw plaatselijke verdeler te contacteren voor de juiste houtbeschermingsprodukten.
Dans notre climat si rude le bois demande une protection qui le rend plus durable.
Si vous n’optez pas pour le bois traîté, veuillez contacter votre spécialiste pour le traitement le plus valable.
Untreated wood must be protected against our rough climate.
This is why we recommend contacting your local distributor for the most appropriate wood treatment and preservation products.
La madera no tratada debe ser protegida contra las inclemencias del medio ambiente.
Por esta razón le recomendamos contactar con su distribuidor para utilizar los productos protectores correctos.
Wir empfehlen Ihnen daher, Ihren Händler vor Ort zu kontaktieren, der Ihnen die geeigneten Holzschutzmittel empfehlen kann.
*Vastschroeven van raam -en deurkader
om de twee planken (binnenzijde).
*Visser le cadre de porte et fenêtre
tous les 2 planches (à l'intérieur)

This manual suits for next models

4

Other GARDIVAL Garden House manuals

GARDIVAL Vintage User manual

GARDIVAL

GARDIVAL Vintage User manual

GARDIVAL Vintage User manual

GARDIVAL

GARDIVAL Vintage User manual

GARDIVAL EXTERIOR User manual

GARDIVAL

GARDIVAL EXTERIOR User manual

GARDIVAL Carport modern with storage User manual

GARDIVAL

GARDIVAL Carport modern with storage User manual

GARDIVAL Vintage User manual

GARDIVAL

GARDIVAL Vintage User manual

GARDIVAL VERSAILLES 250 User manual

GARDIVAL

GARDIVAL VERSAILLES 250 User manual

Popular Garden House manuals by other brands

Select ISAAC E9682 Assembly manual

Select

Select ISAAC E9682 Assembly manual

Mercia Garden Products 0644LOG186-V4 General instructions

Mercia Garden Products

Mercia Garden Products 0644LOG186-V4 General instructions

Wolff Finnhaus Eleganto 3024 Technical Data/Assembly Instructions

Wolff Finnhaus

Wolff Finnhaus Eleganto 3024 Technical Data/Assembly Instructions

Forest TPCSUM88 quick start guide

Forest

Forest TPCSUM88 quick start guide

Palmako EL18-5733 installation manual

Palmako

Palmako EL18-5733 installation manual

Palmako PA44-3833 installation manual

Palmako

Palmako PA44-3833 installation manual

Lemeks Palmako EFR44-5357-2 Assembly, installation and maintenance manual

Lemeks

Lemeks Palmako EFR44-5357-2 Assembly, installation and maintenance manual

Best Barns Denver Assembly Book

Best Barns

Best Barns Denver Assembly Book

Outdoor Life Products KS3830 Assembly instructions

Outdoor Life Products

Outdoor Life Products KS3830 Assembly instructions

Best Barns Northwood Deluxe 10x10 Assembly Book

Best Barns

Best Barns Northwood Deluxe 10x10 Assembly Book

Dunster House G3-1824HPB installation manual

Dunster House

Dunster House G3-1824HPB installation manual

finnhaus ELEGANTO 2724 Technical Data/Assembly Instructions

finnhaus

finnhaus ELEGANTO 2724 Technical Data/Assembly Instructions

VERANDA JARDIN UB1212 Assembly manual

VERANDA JARDIN

VERANDA JARDIN UB1212 Assembly manual

Palmako ETTA ELD18-4533 installation manual

Palmako

Palmako ETTA ELD18-4533 installation manual

Reynolds Building Systems Jefferson Assembly Book

Reynolds Building Systems

Reynolds Building Systems Jefferson Assembly Book

Forest garden Overlap Apex Shed 6 X 4 quick start guide

Forest garden

Forest garden Overlap Apex Shed 6 X 4 quick start guide

Kiehn-Holz KH 44-031 manual

Kiehn-Holz

Kiehn-Holz KH 44-031 manual

Argos 01TDM1008DDFW-V2 General instructions

Argos

Argos 01TDM1008DDFW-V2 General instructions

manuals.online logo
manuals.online logoBrands
  • About & Mission
  • Contact us
  • Privacy Policy
  • Terms and Conditions

Copyright 2025 Manuals.Online. All Rights Reserved.