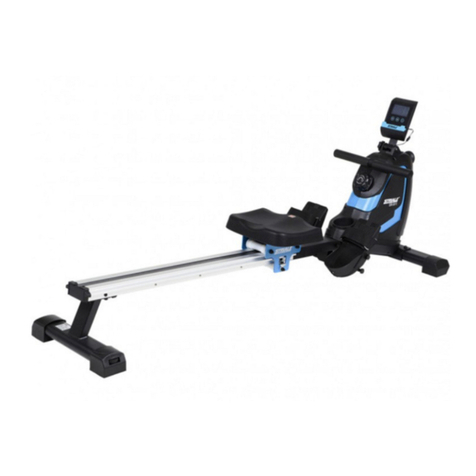
Garlando TOORX ROWERSEA COMPACT User manual

Ed : Rev : Cod :
MANUALE D’ISTRUZIONI
09/19 GRLDTOORXRWXSEC00

3
EXPLODED DRAWING
100
101
5
51
53
50
72
72
72
72
64
63
71
74
73
85
83
91
91
83
83
82
82
88
88
88
54
12
57
58
59
59
46
81 86
81
86
44
41
76
41
56
79
75
75
1
2
3
4
6
18
19
43
46
46
46
48
47
47
45
20
31
40
42
42
42
42
37
36
44
48
40
21
22
61
61
17
17
75
75
75
78
69
68
68
13
88
14
60
32
60
82
87
82
87
84
36
84
89
73
59
83
37
71
88
83
37
71
37
83
88
9
98
98
99
103
92
78
105
33
49
49
49
49
102
34
15
23 23
90
90
90
90
77
85
77
77
85
85
85
77
77
85
77
85
75
75
85
85
90
85 85
77
85
10
35
35
16
16
67
80
80
88
88
59
89
61
61
34
83
83
88
83
88
61
16
16
67
34
15
61
34
83
75
39
75
14
11
43
55
70
70
7
8
27
28
60
60
24
25
26
25
24
52
62
65
30
72
72
87
29
52
66
93
94
95
38
38
38
38 38
38
38
38
71
97
97
83
104
96

4
PARTS LIST
Part
Part Name
Spec.
Qty
Part
Part Name
Spec.
Qty
1
Main Frame
1
54
Meter
1
2
Front Support
1
55
Sensor Wire
2
3
Rail
1
56
Sensor Holder
1
4
Front post
1
57
Magnet
Φ6*5mm
1
5
Handlebar
1
58
Grommet
Ф12*11*Ф3
1
6
Meter Plate
1
59
Adjusting pad
4
7
Mounting Bracket
1
60
Bearing
6000zz
4
8
Tank Brace
1
61
Bearing
608zz
10
9
Impeller
1
62
Bolt, Flat Socket Head
M6 x 10mm
2
10
Seat Carriage
1
63
Bolt, Button Head
M10 x 115mm
1
11
Sensor Bracket
1
64
Bolt, Button Head
M10 x 105mm
1
12
Pedal Shaft
Φ12.7*440
1
65
Bolt, Button Head
M10 x 55mm
1
13
Rail Shaft
Φ16*114
1
66
Bearing Spacer
OD30*ID26*36
1
14
Idle Roller Long
Spacer
OD16*ID10.2*23
2
67
Bolt, Button Head
M8 x 135mm
2
15
Roller Long Spacer
OD12.7*ID8.2*71.5
2
68
Bolt, Button Head
M8 x 110mm
2
16
Roller Short Spacer
OD12.7*ID8.2*12
4
69
Bolt, Button Head
M8 x 70mm
1
17
Strap Pulley Spacer
OD12.7*ID8.2*28.6
2
70
Bolt, Button Head
M8 x 50mm
4
18
Upper Tank
1
71
Bolt, Button Head
M8 x 30mm
4
19
Lower Tank
1
72
Bolt, Button Head
M8 x 15mm
10
20
Rubber Ring Seal
1
73
Bolt, Button Head
M6 x 45mm
2
21
Fill Plug
1
74
Bolt, Button Head
M5 x 35mm
1
22
Fill Plug Seal
1
75
Bolt, Button Head
M6 x 15mm
16
23
Lower Pad
50*50*T2.0
4
76
Bolt, Button Head
M5 x 10mm
2
24
Strap/Bungee
Pulley Bushing
2
77
Stainless Screw,
Round Head
M3 x 20mm
12
25
Plastic Washer
Φ40*Φ20.5*2.0
2
78
Screw, Round Head
ST4.2 x 16mm
4
26
Shaft Retainer
Φ48*Φ20*17
1
79
Screw, Round Head
M4 x 12mm
1
27
Strap/Bungee
Pulley
Φ100*Φ28*90
1
80
Shoulder Bolt,
Button Head
Φ10*6.5*M8*18.5
2
28
Short Idle Roller
1
81
Lock Washer
OD15*ID10.5*T2.5
2
29
One-way Bearing
HF2016
1
82
Washer
OD20*ID10.5*T1.5
4
30
Spring Pin
Φ6 x 40mm
1
83
Washer
OD16*ID8.5*T1.5
12
31
Strap Pulley
POM
1
84
Washer
OD13*ID6.5*T1.5
2
32
Long Idle Roller
1
85
Washer
M3
24
33
Cushion pad
2
86
Acorn Nut
M10
2
34
Seat Roller
4
87
Nylock Nut
M10
3
35
Lower Seat Roller
2
88
Nylock Nut
M8
11
36
Moving Wheel
Φ22*6.5*30
2
89
Nylock Nut
M6
2
37
Bungee Pulley
Φ51.2*Φ8.5*14.7
4
90
Stainless Nylock Nut
M3
12
38
Spacer for Bungee
Pulley
Φ12 x Φ8.1 x
6.5mm
8
91
Large Washer
OD20*ID8.5*T1.5
2

5
39
Seat
PU
1
92
Large Washer
OD25*ID10.5*T2.0
1
40
Rail Bushing
Φ16 xΦ31.8 x
12.5
2
93
Impeller Seal
Φ50*Φ19*5
1
41
Meter Plate Bushing
Φ25.4*Φ8.2*10
2
94
Tank Seal
Φ40*Φ27.4*6.8
1
42
Stopper
Ф33*Ф8*13
4
95
Foam Spacer
Ф98*Ф28*20
1
43
Pedal
2
96
PC Plate
OD40*ID20*0.2
1
44
Pedal Strap
2
97
Roller Spacer
Φ8.1 x Φ10 x
13mm
2
45
Handlebar Seat
1
98
Idle Roller Short
Spacer
Φ14*1.5*19
2
46
End cap
30mm x 70mm
4
99
Stainless Washer
OD25*ID20.1*0.3
1
47
Rectangular Plug
40mm x 100mm
2
100
Syphon Pump
1
48
Rectangular Plug
30mm x 60mm
2
101
Funnel
1
49
Hexagon nut
M8
4
102
Knob
Ф60*M10
1
50
Strap
1
103
Knob Bolt
1
51
Bungee Cord
1
104
Combination Wrench
1
52
Needle Roller
Bearing
HK2010
2
105
Safety Pin
Ф10*119
1
53
Hand Grip
2

6
ASSEMBLY INSTRUCTIONS
NOTE: We recommend having 2 people to assemble the product.
Step 1:
1. Pull out safety pin (105) which is pre-assemble on the Main frame (1), and put the front support to the right
place as below illustration(A)(B),
2. Put the front post (4) to right place as below image (B)(C)
Step 2:
Tighten the knob (102) on the back side of front post(4)
105
2
4
3
1
AB
C
B
43
1
2
4
105
1

7
Step 3:
2
102
4

8
Connect the 2pc sensor wire (55) to meter (54).
Attach the computer (54) to meter plate (6), secure using two bolts (76)
6
76
55
6
5
55
54
104
5

9
COMPUTER INSTRUCTIONS
USING THE FITNESS METER
POWER ON:Move the handlebar or press any button.
POWER OFF: Automatically shuts off after 4 minutes of inactivity.
FUNCTION BUTTONS :
MODE : In the setting mode, press and release to select each function for preset target values for TIME, COUNT,
DISTANCE, CALORIES, and PULSE.
Press and release to select functions for display for TIME, COUNT, DISTANCE, CALORIES, and PULSE.
SET : In the setting mode, press to set target values. Press the button and hold it down for two seconds, the
meter will continue to add the values, release the button to stop.
RESET : In the setting mode, press the button to reset the setting values to zero.
Press the button and hold it down for two seconds to reset all functions to zero.
FUNCTIONS:
SCAN: Automatically scans TIME, COUNT, DISTANCE, CALORIES, and PULSE in sequence with a change every
six seconds. Press and release the MODE button until “SCAN” appears on display.
TIME: Displays the time from 1 sec. up to 99:59 minutes. Counts down from preset value.
COUNT : Displays the total number of strokes you have taken from zero to 9999 strokes. Counts
down from preset value.
DISTANCE: Displays distance from zero to 9999 meters. Counts down from preset value.
CALORIES: Displays the calories burned from zero to 9999 Kcal. Counts down from preset value.
The calorie readout is an estimate for an average user. It should be used only as a comparison between
workouts on this unit.
PULSE: Displays the heart rate, from 40 to 240 beats per minute.
To use this function, you must wear the HEART RATE TRANSMITTER around your chest so the receiver
which is built into the rower registers your heart rate from the HEART RATE TRANSMITTER for displaying.
Each heart rate signal will be accompanied with one “ “symbol flash.
NOTE: The HEART RATE TRANSMITTER is not a medical device. Maintaining a consistent signal can be
difficult due to the varying distances experienced during the rowing stroke. The pulse function is a great tool
to optimize your workout, but should be used as a reference only.
PRESET VALUES OPERATION: RATIONAL INSTRUCTIONS
You can pull on the HANDLEBAR (5) to power on the meter and workout with the meter directly. Or, you can
SET MODE RESET

10
preset the function values for counting down. Press and release the MODE button until “SCAN” does not
appear on display, the meter will enter setting mode. Use SET and RESET buttons to input the values, and
press MODE button to confirm. Or, just press the MODE button to skip the setting and move on to the next
function. After all the desired settings are chosen, begin pulling on the HANDLEBAR (5) to start the workout.
Time (1:00 to 99:00) Count (10 to 9990) Distance (100 to 9900 meter) Calories (10 to 9990 Kcal)
NOTE:
1. You may preset values for several functions. The preset function values will start to count down. When
you complete one of the preset functions, the value of this completed function will start to count up,
while the other preset functions will continue to count down.
2. The Meter will shut off automatically after 4 minutes of inactivity. All function values will be kept. You
can continue to work out with these function values. Or, press the RESET or MODE button and hold it
down for two seconds to reset all functions to zero.
HOW TO INSTALL AND REPLACE BATTERIES: AA Batteries
1. Open the Battery Door on the back of the meter.
2. The meter operates with two AA batteries (1.5V each), the batteries are not included. Refer to the illustration to
install or replace the batteries.
NOTE:
1. Do not mix a new battery with an old battery.
2. Use the same type of battery. Do not mix an alkaline battery with another type of battery.
3. Rechargeable batteries are not recommended.
4. Ultimate disposal of battery should be handled according to all state and federal laws and regulations.
5. Do not dispose of batteries in fire.

11
HOW TO FILL AND EMPTY THE TANK
1. Remove the FILL PLUG(21) from the UPPER TANK(18).
2. To fill with water, refer to illustration C. Place the FUNNEL(101) into the tank. Use a water cup, or
the SYPHON PUMP(100) and a bucket to fill the tank. Use Water Level Gauge on the side of tank to
measure volume of water in tank to the desired level.
3. To empty tank, refer to illustration D. Place a bucket next to the rower. Use the SYPHON PUMP(100) to
pump out the water from the tank into the bucket.
4. Once completed, insert the FILL PLUG(21) into the UPPER TANK(18). Please wipe excess water
from the frames after filling.
NOTE:1. Fill the tank with municipal water, do not use well water. If municipal water is unavailable, use
distilled water. Refer to the Maintenance section for recommendations on water treatment.
2. The water in the tank is not for human or animal consumption. Please dispose of the water
properly after removal from the tank.
WATER LEVEL
Refer to the detail view of illustration C. The Water Level Gauge is positioned on the side of the tank.
The maximum level to fill the tank is Level 6. DO NOT fill above the Maximum Level - this could void the
warranty. The standard calibration level is Level 6.
The amount of resistance is dictated by the amount of water in the tank. For example Level 2 of water
offer light resistance, Level 6 offers the heaviest resistance.
OPERATIONUC
100
18
C. D.
1
2
3
4
5
6
7
8
21
21
100
101

12
ADJUSTMENT GUIDE
❖MOVING THE MACHINE
❖ADJUSTING THE BALANCE
Adjust the Stand(59) below the Stabilizers of the
machine if the it is unbalanced during use.
❖STORAGE
1. To store the Rower, simply keep it in a clean dry place.
2. To avoid damage to the electronics, remove the batteries before storing the Rower for one year
or more.
3. Remove water from tank if storing the rower for more than a month without use.
59
59
To move the machine, lift up the Front Support
(2) until the Moving wheels(36) on the main
frame touch the ground. With the wheels on the
ground, you can transport the rower to the
desired location with ease.
4
36
2

13
Item Name
ST5887&ST5888 SPEC V1.0
Date
2018/9/25
Page
15
FUNCTION LIST:
A. Range:Rolling
B. 2 pcs 3# battery.
C. Main function:TIME、DISTANCE、CALORIE、SPM、STROKES、 TOTAL STROKES、WATT、PULSE、
Manual、INTERVAL 20-10、INTERVAL 10-20、INTERVAL CUSTOM、TARGET TIME、TARGET DISTANCE、
TARGET CALORIES、TARGET STROKES、TARGET PULSE
DISPLAY FU NCTION:
1.SPM:range from0~999。
2.TIME:range from 0:00~99:59,can count up and count down.
3.DISTANCE:0~9999 K / M, can count up and count down.
4.CALORIES:range from 0~9999,can count up and count down.
5.WATT:range from 0~999。
6.PULSE:P~30~230。
7.Manual:general mode
8.INTERVAL:intermittent resting exercise mode.
9.TARGET:target control mode.
10.METER/MILE
BUTTON FUNCTION:
1. SET KEY
A. Increase once press each time, long press for fast increase setting.
B. TIME setting range: 0:00~99:00(INTERVAL function increases by 0:01,TIME function increases 0:01 for
each time.)
C. CAL setting range: 0~9990 (Increase 10 for each adjustment)
D. DIST setting range: 0~9990 (Increase 10 for each adjustment)
E.STROKES setting range: 0~9990 (Increase 10 for each adjustment)
F.PULSE setting range: 30~230 (Preset value is 100, increase 1 for each adjustment)
G. In standby mode, with MODE KEY, press for 2 seconds can switch meter & mile.
2. MODE KEY
A. In function selection mode, press the button to confirm the function.
B. In setting mode, press the button to confirm the function.
C. In exercise mode, press the button into the pause mode.
H. In standby mode, with MODE KEY, press for 2 seconds can switch meter & mile.
3. RESET KEY
A. In function selection mode, press the button back to previous function.
B. In setting mode, press the button to clear the current set value.
C. In stop mode, press the button back to standby display.
D. When you press the button, there is “BI” sound to prompt.
E.Press three seconds can do TOTOAL RESET,electronic watch will clear current exercise value, except
TOTAL STROKES value
※TOTAL STROKES value will clear automatically when the power is pulled out.

14
POWER ON ,POWER OFF:
POWER ON :
Power the LCD, the screen will display for 2 seconds (picture 1) and has a long beep for 2 seconds at the same
time, then enter into standby mode.
Picture1
POWER OFF:
1. With any signal been transmitted into the monitor for 4 minutes, IC will enter into SLEEP mode.
2. With signal and keypad been transmitted, electronic watch will wake up.
OPERATION PROCEDURE
POWER ON :
When power on (or press MODE/RESET 3 seconds),buzzer rings 2 seconds,LCD display 2 seconds, then enter into
the standby mode.
1. Standby mode:
A. When power on, the console h enter into standby mode, MANUAL, INTERVAL, TARGET,TIME,DISTANCE,
CALORIE, PULSE, SPM, WATT, TOTAL STROKES, STROKES and SCAN will display 1 second in turn.
(picture 2~picture 12)
B. In standby mode, user don’t need to press any buttons. Electronic watch will enter into SLEEP when user don’t
transmit RPM signal and heart rate signal for 4 minutes.

15
Picture2 Picture3 Picture4 Picture5
Picture6 Picture7 Picture8 Picture9
Picture10 Picture11 Picture12
2. MANUAL:
A. In standby mode, with been RPM signal been transmitted, then QUICK START immediately, the buzzer beeps
at the same time.(picture 15~picture16)r
B. Or in standby mode, press MODE KEY, MANUAL blinks(picture 14), then press MODE KEY to start
MANUAL function,buzzer beeps for 1 minutes.
C. LCD screen display MANUAL,TIME, DISTANCE, CALORIES, PULSE, SPM, WATT, TOTAL STROKES
and STROKES start to count according to operation value and display. CALORIES, PULSE, SPM, WATT,
TOTAL STROKES and STROKES will switch to display in every 5 seconds (picture 15~16)。
D. When start exercising,user don’t need to press any buttons, with no RPM signal and heart rate signal been
transmitted for 4 minutes , then buzzer beeps 0.5 second and enter into standby mode.
E. When user is exercising, press MODE KEY, EXERCISE stop blinking, TIME,DISTANCE display current
exercise value. CALORIES, PULSE, TOTAL STROKES and STROKES switch display after 5 seconds,
PULSE display heart rate.(picture 17~18)。
F. When exercise stop and display STOP is blinking, press MODE KEY,electronic watch continues to perform

16
exercise picture. If user press RESET KEY in STOP,electronic watch enter into standby. If user don’t press
any buttons or finish training, electronic watch enter into standby.
Picture14 Picture15 Picture16
Picture17 Picture18
3. INTERVAL:
In standby mode, press MODE KEY and SET to switch and choose INTERVAL function,INTERVAL blinks(picture 19)
(1) INTERVAL 10/20
A. When INTERVAL is blinking,press MODE KEY,10/20 blinks(picture 20),press MODE KEY to start
10/20 function.
B. LCD ”READY” blinks,TIME display and count down from 3 to zero. (picture 21),buzzer beeps 0.5
second for each second.
C. After READY for 3 seconds,buzzer beeps 0.5 second, “WORK 01/08”(picture 22),TIME start to count
down from 10 to zero. TIME, DISTANCE, CALORIES, PULSE, SPM, WATT, TOTAL STROKES and
STROKES start to count according to operation value and display. CALORIES、PULSE、SPM、
WATT、TOTAL STROKES and STROKES will switch to display in every 5 seconds.

17
Picture19 Picture20 Picture21 Picture22
D. “REST 01/08”(picture 23),buzzer beeps 0.5 second for each second, TIME start to count down from 20
to zero. TIME, DISTANCE, CALORIES, PULSE, SPM, WATT, TOTAL STROKES and STROKES start
to count according to operation value and display. CALORIES, PULSE, SPM, WATT, TOTAL STROKES
and STROKES will switch to display in every 5 seconds,in the last 3 seconds “READY” flash.(picture
24)。
E. C and D repeat cycle, each cycle count plus 1 until “WORK 08/08”exercise,then enter into finish
screen, buzzer beeps 0.5 second. (picture 15~16)。
Picture23 Picture24 Picture25 Picture26
F. When end the training, STOP flashes. TIME and DISTANCE display training value,CALORIES,
PULSE, TOTAL STROKES and STROKES switch to display in every 5 seconds,PULSE display heart
rate, press MODE KEY at the same time,you can also perform INTERVAL 10/20 function. In the
training finished screen, if user press RESET KEY,electronic watch enter into standby, buzzer beeps 0.5
second. In the training finished screen, if user don’t press any buttons or finish training after 4 minutes,
electronic watch enter into standby, buzzer beeps 0.5 second.
G. During exercise, press MODE KEY, exercise stop and STOP flashes, TIME, DISTANCE display current
exercise value,CALORIES, PULSE, TOTAL STROKES and STROKES switch to display current

18
exercise value in every 5 seconds,PULSE display heart rate, and press MODE KEY at the same time,
electronic watch continues to perform exercise picture. If user press RESET KEY,electronic watch enter
into standby. In STOP state, if user don’t press any buttons or after finished training fro 4 minutes,
electronic watch enter into standby.
H. When WORK function start to work, user don’t need to press any buttons. with no RPM signal and heart
rate signal been transmitted after 4 minutes, the buzzer beeps 0.5 second and enter into standby mode
except REST.
(2) INTERVAL 20/10
A. When INTERVAL is flashing,press MODE KEY,press SET to switch and choose 20/10 function,
20/10 will flash (picture 27),and press MODE KEY to start 20/10 function.
B. When LCD “READY” is flashing,TIME display and count down from 3 to zero. (picture 21),
buzzer beeps 0.5 second for each second.
C. After READY for 3 seconds, buzzer beeps 0.5 second, “WORK 01/08”,TIME start to count down from
20 to zero (picture 28). TIME, DISTANCE, CALORIES, PULSE, SPM, WATT, TOTAL STROKES and
STROKES start to count according to operation value and display. CALORIES, PULSE, SPM, WATT,
TOTAL STROKES and STROKES switch to display for 5 seconds.
D. “REST 01/08”,buzzer beeps 0.5 second in every second, TIME start to count down from 10 to 0 (picture
19) . TIME, DISTANCE, CALORIES, PULSE, SPM, WATT, TOTAL STROKES and STROKES start to
count according to operation value and display. CALORIES, PULSE, SPM, WATT, TOTAL STROKES
and STROKES switch to display for 5 seconds, in the last 3 seconds “READY” flashes(picture 30)。
E. C and D repeat cycle, each cycle count plus 1 until “WORK 08/08”exercise,then enter into finish
screen, buzzer beeps 0.5 second. (picture 15~16)。

19
Picture27 Picture28 Picture29 Picture30
Picture31 Picture32
F. When end the training, STOP flashes. TIME and DISTANCE display training value,CALORIES,
PULSE, TOTAL STROKES and STROKES switch to display in every 5 seconds,PULSE display heart
rate, press MODE KEY at the same time,you can also perform INTERVAL 10/20 function. In the
training finished screen, if user press RESET KEY,electronic watch enter into standby, buzzer beeps 0.5
second. In the training finished screen, if user don’t press any buttons or finish training after 4 minutes,
electronic watch enter into standby, buzzer beeps 0.5 second.
I. During exercise, press MODE KEY, exercise stop and STOP flashes, TIME, DISTANCE display current
exercise value,CALORIES, PULSE, TOTAL STROKES and STROKES switch to display current
exercise value in every 5 seconds,PULSE display heart rate, and press MODE KEY at the same time,
electronic watch continues to perform exercise picture. If user press RESET KEY,electronic watch enter
into standby. In STOP state, if user don’t press any buttons or after finished training for 4 minutes,
electronic watch enter into standby.
G. When WORK function start to work, user don’t need to press any buttons. with no RPM signal and heart
rate signal been transmitted after 4 minutes, the buzzer beeps 0.5 second and enter into standby mode
except REST.
(3) INTERVAL CUSTOM

20
A. When “INTERVAL” is flashing, press MODE KEY, press SET to switch and choose CUSTOM
function,CUSTOM flashes,press MODE KEY and enter CUSTOM to set function.(picture 33)
B. “SET ROUND”,TIME display 01 to flash,press SET to setting ROUND,ROUND,and set range from
01~99,they can be set circularly, after press MODE KEY, buzzer beeps 0.5 seconds and enter into the
next option to set. (picture 34)
C. “SET WORK”,TIME display 0:05 and flash,press SET and set WORK TIME,WORK TIME,range
from 0:05~10:00,they can be set circularly,after press MODE KEY, buzzer beeps 0.5 second and enter
into the next option to set. (picture 35)
D. “SET REST”,TIME display 0:05 and flash, press SET and set REST TIME, REST TIME,range from
0:05~10:00,they can be set circularly,after press MODE KEY, buzzer beeps 0.5 second and enter into
exercise screen (picture 36)
Picture33 picture34 picture35 picture36
E. LCD screen display ”READY” flashing,TIME display and count down from 3 to zero, buzzer beeps 0.5
second in every second. (picture 21)
F. After READY 3 second,buzzer beeps 0.5 second display “WORK 01/XX”,TIME start to count down
according to the preset time,TIME, DISTANCE, CALORIES, PULSE, SPM, WATT, TOTAL STROKES
and STROKES count according to operation value and display. CALORIES, PULSE, SPM, WATT,
TOTAL STROKES and STROKES switch to display after 5 seconds. (picture 37)
G. “REST 01/XX”,buzzer beeps 0.25 second in every second (picture 38), TIME start to count down
according to the preset time of RESET. TIME, DISTANCE, CALORIES, PULSE, SPM, WATT, TOTAL
STROKES and STROKES count according to operation value and display. CALORIES, PULSE, SPM,
WATT, TOTAL STROKES and STROKES switch to display after 5 seconds, in the last 3 seconds
“READY”flashes.(picture 39)
H. C and D repeat cycle, each cycle counts will plus 1 until “WORK XX/XX”finished exercise,then enter
into finish screen, buzzer beeps 0.5 second.

21
Picture37 picture38 picture39
picture40 picture41
I. After end the exercise (picture 40~41),the screen display STOP is flashing. TIME, DISTANCE display
the finished value. CALORIES, PULSE, TOTAL STROKES and STROKES switch to display exercise
value when to be 5 second, PULSE display heart rate, press MODE KEY, at the same time,then user can
perform INTERVAL CUSTOM function again;In stop state, press RESET KEY,electronic watch enter
into standby, buzzer beeps 0.5 second;In STOP state, if user don’t press any buttons or after finished
training for 4 minutes, electronic watch enter into standby, buzzer beeps 0.5 second.
J. When user is exercising , press MODE KEY,exercise stop and display STOP is flashing. TIME,
DISTANCE display the current exercise value. CALORIES, PULSE, TOTAL STROKES and STROKES
switch to display current exercise value when it to be 5 second. PULSE display heart rate, press MODE
KEY at the same time,electronic watch continue to perform exercise screen, if press RESET KEY,
electronic watch enter into standby. In STOP state, if user don’t press any buttons or after finished training
for 4 minutes, electronic watch enter into standby.
K. When WORK start to work, user don’t press any buttons , with no RPM signal and heart rate been
transmit for 4 minutes, buzzer beeps 0.5 second and enter into standby.
4. TARGET:
IN standby mode, press “MODE” KEY, at the same time press”SET” key switch to choose “TARGET” function,
LCD flashing display”TARGET” (picture42)。
This manual suits for next models
2
Table of contents
Other Garlando Fitness Equipment manuals

