Gastrodomus MINI4 Specification sheet

INSTALLAZIONE – USO – MANUTENZIONE
INSTALLATION – USE – MAINTENANCE
AUFSTELLUNG – ANWENDUNG – WARTUNG
ELECTRIC CONVECTION OVEN
FORNO ELETTRICO A CONVEZIONE
ELEKTRISCHER KONVEKTIONSOFEN
MODELLO:
MINI2 – MINI4 – MINI6

Assicuratevi di leggere questo per la sicurezza
Leggere attentamente questa sezione prima di mettere in funzione il forno per acquisire familiarità con il
funzionamento e per evitare incidenti.
1. Essere sicuri di rispettarlo per la sicurezza
1.1 Avvisi sull'installazione
AVVERTENZE
Installazione del forno in un luogo libero da pioggia e neve e vicino all'estintore.
Un forno bagnato può essere fonte di scosse elettriche e il forno può essere danneggiato.
Assicurarsi che l'installazione sia conforme agli standard industriali. Un'installazione incompleta può causare
incidenti inciampanti, scosse elettriche, incendi o perdite d'acqua.
I piedini in gomma devono essere installati saldamente sull'apparecchiatura. Non utilizzare il forno senza
piedini.
Non installare alcuna apparecchiatura sul pavimento.
Non trasportare il forno da soli. Chiedere l'aiuto di un altro. Il forno non deve essere trasportato da una sola
persona, altrimenti potrebbe cadere e causare lesioni.
Assicurarsi di installare il forno su una superficie piana e solida. In caso contrario l'apparecchio potrebbe
rovesciarsi, causando lesioni o ustioni, oppure l'acqua all'interno dell'apparecchio potrebbe traboccare.
In caso di ustioni, raffreddare la parte interessata con acqua fredda e farla visitare immediatamente da un
medico.
Assicurarsi di lasciare uno spazio libero di almeno 10 cm tra l'unità e le pareti.
Una distanza insufficiente può causare problemi, il calore generato può danneggiare gli altri prodotti
presenti.
Rimuovere tutta la pellicola adesiva che ricopre la superficie del corpo prima dell'uso.
Assicurarsi di collegare il cavo di alimentazione in conformità con gli standard industriali.
Controllare l'alimentazione per vedere se può soddisfare le specifiche del forno. Il campo di tensione di lavoro
non può superare il ±10% quando il forno è in funzione.
La violazione di questa norma può causare scosse elettriche o incendi. Se non è possibile identificare le
specifiche dell'alimentatore utilizzato, consultare il fornitore.
Assicurarsi di collegare un filo di terra al forno.
Il funzionamento del forno senza messa a terra può causare scosse elettriche o incendi per un corto circuito.
Tra il forno e l'alimentazione deve essere installato un interruttore bipolare.
Non avvolgere il cavo di alimentazione, altrimenti si può provocare un incendio.

Non calpestare, stringere o torcere forzatamente il cavo di alimentazione; in caso contrario il cavo di
alimentazione può essere danneggiato, causando scosse elettriche o incendi.
Se il cavo di alimentazione è stato danneggiato, consultare il fornitore per la sostituzione.
1.2 Avvisi sul funzionamento
Non azionare alcun interruttore con la mano bagnata, altrimenti si può avere una scossa elettrica.
Non utilizzare combustibili (ad es. diluenti), gas combustibili o sostanze volatili in prossimità del forno; in caso
contrario si possono provocare esplosioni o incendi.
Non mettere nulla sul forno durante l'uso del forno. Il calore potrebbe causare deformazioni, crepe, ecc.
Fare attenzione a non scottarsi durante l'uso o subito dopo l'uso.
Le parti metalliche e la finestra di vetro dello sportello diventano estremamente calde durante l'uso; fare
attenzione a non toccarle durante l'apertura e la chiusura dello sportello.
Non immergere il riscaldatore. Se una goccia d'acqua entra nell'elemento riscaldante dalla parte di
collegamento, può causare un corto circuito o altri difetti.
Quando è caldo, non applicare acqua alla finestra di vetro. Potrebbe causare la rottura del vetro.
Durante il riscaldamento non toccare alcun punto, tranne l'impugnatura e l'interruttore, altrimenti si possono
verificare ustioni, poiché il corpo è molto caldo.
Se il forno è stato sommerso a causa di un disastro o di altri problemi, sostituire tutte le parti elettriche e il
cablaggio. In caso contrario, possono verificarsi scosse elettriche o incendi.
Mantenere i prodotti contenuti con le leggi sull'igiene alimentare.
Una manutenzione giornaliera inadeguata può causare incidenti.
Per le riparazioni, consultare un'officina specializzata o il negozio in cui è stato acquistato il forno.
Riparazioni incomplete possono causare scosse elettriche, ustioni, incendi o inciampi.
Se l'interruttore differenziale funziona frequentemente, consultare un'officina specializzata o il negozio dove
è stato acquistato il forno per le riparazioni.
Se si continua ad utilizzare il forno senza riparazione, si possono causare scosse elettriche o file.
Non smontare il forno, altrimenti si possono verificare incidenti.
Quando si rimuove lo sporco dal forno, non utilizzare prodotti chimici, come diluenti o benzene, altrimenti si
possono causare incidenti.
Non impilare il forno con tre o più pesi (120Kg(280lb)); altrimenti si possono causare incidenti o lesioni.
Pulire quotidianamente l'interno del magazzino; altrimenti si possono causare difetti o cattivi odori.
Si noti che un po' di vapore supplementare può essere rilasciato dal tubo di scarico dietro il forno.

2. Scopo dell'utilizzo del forno
Il forno è stato progettato per essere utilizzato solo per cuocere torte, torte salate, biscotti, pollame, carne
di manzo, maiale, pane, bistecche, ecc. Non utilizzare per altri scopi.
Non riscaldare le bevande gassate in lattine o bottiglie; altrimenti i contenitori possono esplodere, causando
lesioni.
3. Uso del forno
3.1 Preparativi prima dell'uso
①Montaggio dei piedi
I piedini sono posizionati all'interno dell'apparecchio e devono essere montati. Non utilizzare l'apparecchio
senza piedi.
Avvitare i piedini di supporto sul fondo dell'apparecchio.
Regolare l'altezza dell'apparecchio avvitando o svitando i piedini stessi.
②Posizionamento
Installare il forno su una superficie piana e solida.
③Rimuovere la pellicola protettiva
④Estrarre la teglia dal corpo e lavarla
⑤Pulire l'interno e l'esterno del forno con un panno umido. Quindi, strofinare con un panno asciutto.
⑥Collegamento elettrico
Prima di effettuare il collegamento assicurarsi che la tensione e la frequenza corrispondano a quelle indicate
sulla targhetta dell'apparecchio.
Posizionare un interruttore bipolare tra l'apparecchio e la rete accessibile dopo l'installazione, i cui contatti
hanno una distanza minima di apertura di 3 mm, con un ingresso adeguato.
L'apparecchio deve essere collegato alla linea di terra della rete.
L'apparecchio deve essere inserito in un sistema equipotenziale il cui rendimento deve essere
opportunamente controllato secondo quanto previsto dalla Norma. Questo collegamento viene effettuato
tra diversi apparecchi con il morsetto contrassegnato dal.
Il conduttore equipotenziale deve avere una sezione minima di 10 mm2.
Collegare il cavo di alimentazione alla fonte di alimentazione. Assicurarsi che il cavo di alimentazione sia
tenuto in posizione.
⑦Collegamento all'acqua (solo per MINI8)
Collegamento alla rete idrica:
Collegare i condotti di ingresso dell'acqua decalcificata posti sul retro del forno alla rete di distribuzione
specifica per mezzo di un filtro meccanico e di un rubinetto di intercettazione.

Prima di collegare i filtri far scorrere una certa quantità d'acqua per pulire il condotto da eventuali scorie
ferrose.
L'acqua deve avere una durezza compresa tra 0,5o-5oF per ridurre la formazione di depositi calcarei e un
valore di pressione compreso tra 0,5-2 bar.
La quantità d'acqua che deve essere vaporizzata all'interno del forno deve essere regolata tramite il
"microgavone" posto nella parte posteriore dell'apparecchio.
Regolare il micro rubinetto per iniettare solo un gocciolamento d'acqua sul ventilatore. Un eccesso d'acqua
può causare una quantità di condensa troppo elevata e inondare la camera di cottura.
Scarico dell'acqua di condensa:
Lo scarico dell'acqua di condensa del vapore è posizionato nella parte posteriore del forno e deve essere
collegato con un tubo rigido o flessibile e convogliato ad uno scarico aperto. Il suo diametro non deve essere
inferiore a quello dell'attacco dello scarico e la lunghezza non deve essere superiore a un metro.
Il tubo di scarico deve rimanere almeno 20 cm al di sotto dell'attacco dello scarico per facilitare il deflusso
verso il basso.
Evitare strozzature sui condotti flessibili o sui gomiti per i condotti metallici, lungo tutto il percorso dello
scarico.
3.2 Istruzioni per l'uso
Si noti che la funzione "Cottura a convezione" e la funzione "Cottura a riscaldamento superiore" funzionano
in modo indipendente. Non è possibile utilizzare le due funzioni contemporaneamente.
3.2.1 Come usare il timer
①Impostare la manopola dell'interruttore orario sul numero che indica il tempo di cottura in base al cibo
che si sta per cucinare.
②Impostare il timer ruotandolo in senso orario. Il forno si spegnerà automaticamente al termine del tempo
selezionato e suonerà un campanello.
③The Il forno può essere spento manualmente durante la cottura ruotando il Timer in senso antiorario nella
posizione "0".
3.2.2 Cottura a convezione
①Accendere il forno.
②Impostare il controllo della temperatura sulla temperatura desiderata (0-300°C).
③Ruotare il timer sull'ora desiderata(0-120min). La spia della temperatura, la spia del timer e la spia interna
sono accese.
④La spia della temperatura si spegne quando la temperatura sale alla temperatura desiderata. Poi si
accenderà quando la temperatura si abbasserà. Questo processo verrà fatto circolare automaticamente.
3.2.3 Utilizzo della funzione vapore (solo per MINI8)
①Accendere il forno.
②Impostare il controllo della temperatura sulla temperatura desiderata (0-300°C).

③Ruotare il timer sull'ora desiderata(0-120min). La spia del timer, la spia della temperatura e la lampada
interna sono accese.
④Premere il pulsante del vapore, inietta l'umidità all'interno della camera di cottura tramite impulsi
manuali. La spia del vapore è accesa.
Nota:
Non premere il pulsante per un lungo periodo di tempo.
Un po' di vapore in più può essere rilasciato da un tubo di scarico dietro il forno.
3.2.4 Uso del riscaldatore superiore per la cottura (solo per MINI8)
①Accendere il forno.
②Impostare il controllo della temperatura del riscaldatore superiore sulla temperatura desiderata (0-300°C).
③Ruotare il timer sull'ora desiderata(0-120min). La spia del riscaldatore superiore, la spia del timer e la spia
interna sono accese.
④La spia del riscaldatore superiore si spegne quando la temperatura sale alla temperatura desiderata. Poi
si accenderà quando la temperatura si abbasserà. Questo processo verrà fatto circolare automaticamente.
4. Manutenzione del forno
Sostituzione dell'acqua
①Spegnere l'interruttore di alimentazione e scollegare il cavo di alimentazione dall'alimentazione.
②Aprire lo sportello e lasciarlo aperto per almeno 10 minuti per abbassare la temperatura nel forno.
③Pulire il forno con un panno umido.
5. Conservazione del forno
①Quando non viene utilizzato, spegnere l'interruttore di alimentazione e scollegare il cavo di alimentazione
dalla rete.
②Imballate il cavo di alimentazione e mettete il pacco sul corpo.
③Coprire il corpo con un sacchetto di plastica e imballarlo in una scatola di cartone ondulato. Conservarlo
in un luogo con bassa umidità.

6. Specifiche tecniche
Model
MINI2
MINI4
MINI6
Alimentazione
220-240 V
220-240 V
220-240 V
Potenza assorbita
2670W
2670W
2670W (per il riscaldatore
elettrico) + 2000W (per la
resistenza superiore)
Potenza della
lampadina
30W
30W
30W
Safety device
Temperature fuse 330
°
C
Temperature fuse 330
°
C
Temperature fuse 330
°
C
Funzioni
Riscaldatore a
convezione
Riscaldatore a
convezione
Riscaldatore a convezione
Circuiti elettrici
MINI2

MINI4
MINI6

ENGLISH
1. Be Sure to Comply with This for Safety
1.1 Notices on installation
WARNINGS
Installing the oven, in a location free from rain and snow, and near the fire extinguisher.
A wet oven can be a source of electrical shock and the oven can be damaged.
Be sure to install complying with industry standards. Incomplete installation can cause stumbling accidents,
electrical shock, fire or water leakage.
The rubber feet must be installed on the equipment firmly. Do not use the oven without feet.
Do not install any equipment on the floor.
Do not carry the oven by yourself. Ask for another’s help. The oven should not be carried by one person;
otherwise it may be dropped and cause injury.
Be sure to install the oven on a flat and solid surface. Otherwise the unit may topple over, causing injury or
burns, or water in the unit may overflow.
If someone suffers burns, cool the affected part with cold water and have them see a doctor immediately.
Be sure to provide with clearance of at least 4 inches (10cm) between the unit and walls.
Insufficient clearance may cause generated heat to damage the other ambient products.
Remove all the adhesive film which cover the body surface before using.
Be sure to connect the power cord complying with industry standards.
Check the power supply to see if it can satisfy the specification of the oven. The working voltage range can
not out of ±10% when the oven working.
Violating this standard can cause electrical shock or fire. If you cannot identify the specification of the power
supply used, consult the supplier.
Be sure to connect a ground wire to the oven.
Operating the oven without grounding it can cause electrical shock or fire by a short circuit.
A bi-pole switch must be installed between the oven and the power.
Do not bundle the power cord; otherwise a fire can be cause.
Do not step on, squeeze, or forcedly twist the power cord; otherwise the power cord can be damaged,
causing electrical shock or fire.
If your power cord has been damaged, consult the supplier for replacement.
1.2 Notices on operation
Do not operate any switch with a wet hand; otherwise, you can get an electrical shock.

Do not use combustibles (e.g., thinner), combustible gases, or volatile matter near the oven; otherwise
explosion or fire can be caused.
Do no put anything on the oven while using oven. The heat could cause deformation, cracking, etc.
Be careful not to burn yourself during use or immediately after use.
The metal parts and glass window of the door become extremely hot during use; be careful not to touch
them when opening and closing the door.
Do not immerse the heater. If a drop of water gets into the heating element from the connecting part, it may
cause a short circuit or other defects.
When hot, do not apply water to the glass window. It may cause the glass to break.
Do not touch any place except for the handle and switch during heating, otherwise you can suffer burns since
the body is very hot.
If the oven has been submerged due to a disaster or other problem, replace all electric parts and wiring.
Otherwise, electrical shock or fire can be caused.
Maintain the contents products with the food hygiene laws.
Inappropriate daily hygiene maintenance can cause accidents.
Consult a specialty repair shop or the store where you purchased the oven for repairs.
Incomplete repairs can cause electrical shock, burns, fire or stumbling.
If the earth leakage breaker operates frequently, consult a specialty repair shop or the store where you
purchased the oven for repair.
If you continue to use the oven without repair, electrical shocks or files can be caused.
Do not disassemble the oven; otherwise accidents can be caused.
When removing dirt on the oven, do not use chemicals, such as thinner or benzene; otherwise accidents can
be caused.
Do not stack the oven by three or more heavy (120Kg(280lb)); otherwise stumbling accidents or injuries can
be caused.
Clean the inside of the storage daily; otherwise defects or bad smell can be caused.
Note that some extra steam may be released from a drainage pipe behind the oven (for MINI8).
2. Purpose of Using the Oven
The oven was designed only to be used baking cakes, pies, cookies, poultry, beef, pork, bread, steak, etc. Do
not use for other purposes. Do not warm up carbonated drinks in cans or bottles; otherwise the containers
can explode, causing injuries.

3. Using the Oven
3.1 Preparations before using
① Feet assembly
The feet are placed inside the appliance and must be assembled. Do not use the appliance without feet.
Screw the support feet to the bottom of the appliance. Adjust the appliance height by screwing or unscrewing
the feet themselves.
② Positioning
Install the oven on a flat and solid surface.
③ Remove the protective film.
④ Take out the tray from the body and wash it.
⑤ Wipe the inside and outside of the oven with a damp cloth. Then, wipe with dry cloth.
⑥ Electrical connection
Before connecting make sure that the voltage and the frequency correspond to that stated on the Rating
Plate on the appliance.
Place a bi-polar switch between the appliance and the network accessible after installation, whose contacts
have a minimum opening distance of 3mm, with an appropriate input.
The appliance must be connected to the ground line of the network.
The appliance must be included in an equipotential system whose efficiency must be suitably checked
according to that stated in the Standard. This connection is carried out between different appliances with the
terminal marked by the.
The equipotential conductor must have a minimum section of 10 mm2.
Connect the power cord to the power supply source. Be sure the power cord is strongly kept in position.
⑦ Water connection (for MINI8 only)
Water connection to the network:
Connect the decalcified water inlet ducts placed on the back of the oven to the specific distribution network
by means of a mechanical filters and a cut-off cock.
Before connecting the filters let a certain quantity of water flow to clean the duct from any ferrous slag.
The water must have a hardness between 0.5o-5oF in order to reduce the formation of limestone deposits
and a pressure value between 0.5-2 bar.
The quantity of water which has to be vaporized inside the oven must be regulated by means of the “micro-
cock” placed in the rear part of the appliance.
Regulate the micro-tap to inject only a trickle of water on the fan. A excess of water can cause a quantity of
condensation too much elevated and flood the baking chamber.
Condensation water drain:

The draining of the steam condensation water is positioned in the rear part of the oven and is to be
connected with a rigid or flexible pipe and convoyed to an open drain. Its diameter must not be lower than
that of the drain attachment and the length not greater than one meter.
The drain pipe must remain at least 20 cm below the drain attachment in order to facilitate the down flow.
Avoid chokes on the flexible ducts or elbows for metallic ducts, along all the run of drain.
3.2 Instruction for Use
Note that the “Convection cooking” function and the “Upper heater cooking” function work
independently. You can not use the two functions at the same time.
3.2.1 How to use Timer
① Set the time switch knob to the number which indicates the cooking time according to the food you are
going to cook.
② Set the Timer by turning it clockwise. The oven will turn off automatically at the end of the selected
time and a bell will ring.
③The oven can be turned off manually during cooking by turning the Timer counter-clockwise to the “0”
position.
3.2.2 Convection cooking
① Turn on the power of the oven.
② Set the Temperature Control to desired temperature(0-300°C).
③ Turn the Timer to desired time(0-120min). The Temperature Light, Timer Light, and the inside lamp are
on.
④ The Temperature Light will be off when the temperature rise to the desired temperature. Then it will on
when the temperature lower down. This process will be circulated automatically.
3.2.3 Using steam function (For MINI8 only)
① Turn on the power of the oven.
② Set the Temperature Control to desired temperature(0-300°C).
③ Turn the Timer to desired time(0-120min). The Timer Light, Temp Light and the inside lamp are on.
④ Push the Steam Button, it injects humidity inside the baking chamber by manual pulses. The Steam light is
on.
Note:
Do not push the button for a long time.
Some extra steam may be released from a drainage pipe behind the oven.
3.2.4 Using Upper Heater for cooking (For MINI8only)
① Turn on the power of the oven.
② Set the Upper Heater’s Temperature Control to desired temperature (0-300°C).

③ Turn the Timer to desired time(0-120min). The Upper Heater’s Light, Timer Light, and the inside lamp are
on.
④The Upper Heater’s Light will be off when the temperature rise to the desired temperature. Then it will
on when the temperature lower down. This process will be circulated automatically.
4. Maintenance of oven
Replacing water
① Turn off the power switch and disconnect the power cord from the supply.
② Open the door and leave it for at least 10 minutes to lower the temperature in the oven.
③ Wipe the oven using a damp cloth.
5. Storing the oven
① When not in use, turn off the power switch and disconnect the power cord from the supply.
② Bundle up the power cord and put the bundle on the body.
③ Cover the body with a plastic bag and pack it in a corrugated cardboard box. Store it in a location with low
humidity.
6. Specifications
Model
MINI2
MINI4
MINI6
Supply voltage
220-240 V
220-240 V
220-240 V
Rated demanded
2670W
2670W
2670W (for convection
heater) + 2000W (for upper
heater)
Lighting Power
30W
30W
30W
Safety device
Temperature fuse 330°C
Temperature fuse 330°C
Temperature fuse 330°C
Functions
Convection heater
Convection heater
Convection heater

DEUTSCH
1. Seien Sie sicher, dass Sie dies aus Sicherheitsgründen einhalten
1.1 Hinweise zur Installation
WARNUNGEN
Installieren Sie den Ofen an einem regen- und schneefreien Ort und in der Nähe des Feuerlöschers.
Ein nasser Ofen kann eine Quelle für einen elektrischen Schlag sein und der Ofen kann beschädigt werden.
Achten Sie bei der Installation darauf, dass die Industrienormen eingehalten werden. Eine unvollständige
Installation kann zu Stolperunfällen, Stromschlag, Feuer oder Wasseraustritt führen.
Die Gummifüße müssen fest auf dem Gerät installiert werden. Verwenden Sie den Ofen nicht ohne Füße.
Installieren Sie die Geräte nicht auf dem Boden.
Tragen Sie den Ofen nicht selbst. Bitten Sie einen anderen um Hilfe. Der Ofen darf nicht von einer Person
getragen werden, da er sonst herunterfallen und Verletzungen verursachen kann.
Stellen Sie den Ofen unbedingt auf einer ebenen und festen Oberfläche auf. Andernfalls kann das Gerät
umkippen und Verletzungen oder Verbrennungen verursachen, oder es kann Wasser im Gerät überlaufen.
Wenn jemand Verbrennungen erleidet, kühlen Sie das betroffene Teil mit kaltem Wasser ab und lassen Sie
ihn sofort einen Arzt aufsuchen.
Achten Sie darauf, dass ein Abstand von mindestens 10 cm (4 Zoll) zwischen dem Gerät und den Wänden
eingehalten wird.
Ein unzureichender Abstand kann dazu führen, dass die erzeugte Wärme die anderen umgebenden Produkte
beschädigt.
Entfernen Sie vor der Anwendung den gesamten Klebefilm, der die Körperoberfläche bedeckt.
Vergewissern Sie sich, dass das Netzkabel den Industrienormen entspricht.
Überprüfen Sie die Stromversorgung, um zu sehen, ob sie die Spezifikationen des Ofens erfüllen kann. Der
Arbeitsspannungsbereich kann nicht von ±10% abweichen, wenn der Ofen funktioniert.
Ein Verstoß gegen diese Norm kann einen elektrischen Schlag oder Brand verursachen. Wenn Sie die
Spezifikation des verwendeten Netzteils nicht identifizieren können, wenden Sie sich an den Lieferanten.
Vergewissern Sie sich, dass ein Erdungsdraht an den Ofen angeschlossen ist.
Der Betrieb des Ofens ohne Erdung kann durch einen Kurzschluss einen elektrischen Schlag oder Brand
verursachen.
Ein zweipoliger Schalter muss zwischen dem Ofen und dem Netzteil installiert werden.
Das Netzkabel darf nicht gebündelt werden, da es sonst zu einem Brand kommen kann.
Treten Sie nicht auf das Netzkabel, quetschen Sie es nicht und verdrehen Sie es nicht mit Gewalt; andernfalls
kann das Netzkabel beschädigt werden, was zu einem elektrischen Schlag oder Brand führen kann.
Wenn Ihr Netzkabel beschädigt wurde, wenden Sie sich an den Lieferanten, um Ersatz zu erhalten.

1.2 Hinweise zum Betrieb
Betätigen Sie keinen Schalter mit nasser Hand, da Sie sonst einen elektrischen Schlag bekommen können.
Verwenden Sie keine brennbaren (z.B. Verdünner), brennbaren Gase oder flüchtigen Stoffe in der Nähe des
Ofens; andernfalls kann es zu einer Explosion oder einem Brand kommen.
Legen Sie während der Benutzung des Ofens keine Gegenstände auf den Ofen. Die Hitze könnte
Verformungen, Risse usw. verursachen.
Achten Sie darauf, sich während des Gebrauchs oder unmittelbar nach dem Gebrauch nicht zu verbrennen.
Die Metallteile und das Glasfenster der Tür werden während des Gebrauchs extrem heiß; achten Sie darauf,
sie beim Öffnen und Schließen der Tür nicht zu berühren.
Tauchen Sie das Heizgerät nicht ein. Wenn ein Wassertropfen aus dem Anschlussteil in das Heizelement
gelangt, kann dies einen Kurzschluss oder andere Defekte verursachen.
Wenn das Heizelement heiß ist, darf kein Wasser auf die Glasscheibe aufgebracht werden. Dies kann zum
Zerbrechen des Glases führen.
Berühren Sie während des Heizvorgangs keine Stelle außer dem Griff und dem Schalter, da Sie sich sonst
Verbrennungen zuziehen können, da der Körper sehr heiß ist.
Wenn der Ofen aufgrund einer Katastrophe oder eines anderen Problems untergetaucht wurde, ersetzen Sie
alle elektrischen Teile und Leitungen. Andernfalls kann ein elektrischer Schlag oder Brand verursacht werden.
Halten Sie die Inhaltsprodukte mit den Gesetzen zur Lebensmittelhygiene ein.
Eine unangemessene tägliche Wartung der Hygiene kann Unfälle verursachen.
Wenden Sie sich für Reparaturen an eine Fachwerkstatt oder an das Geschäft, in dem Sie den Ofen gekauft
haben.
Unvollständige Reparaturen können zu Stromschlag, Verbrennungen, Feuer oder Stolpern führen.
Wenn der Fehlerstromschutzschalter häufig betätigt wird, wenden Sie sich zur Reparatur an eine
Fachwerkstatt oder an das Geschäft, in dem Sie den Ofen gekauft haben.
Wenn Sie den Ofen ohne Reparatur weiter benutzen, können elektrische Schläge oder Dateien verursacht
werden.
Bauen Sie den Ofen nicht auseinander, da sonst Unfälle verursacht werden können.
Verwenden Sie beim Entfernen von Schmutz auf dem Ofen keine Chemikalien wie Verdünner oder Benzol;
andernfalls kann es zu Unfällen kommen.
Stapeln Sie den Ofen nicht um drei oder mehr schwere Teile (120Kg(280lb)); andernfalls kann es zu
Stolperunfällen oder Verletzungen kommen.
Reinigen Sie das Innere des Lagers täglich; andernfalls kann es zu Defekten oder schlechtem Geruch kommen.
Beachten Sie, dass aus einem Abflussrohr hinter dem Ofen etwas zusätzlicher Dampf austreten kann (bei
MINI8).

2. Zweck der Verwendung des Ofens
Der Ofen wurde nur zum Backen von Kuchen, Torten, Keksen, Geflügel, Rind- und Schweinefleisch, Brot,
Steak usw. konzipiert. Er darf nicht für andere Zwecke verwendet werden. Erwärmen Sie keine
kohlensäurehaltigen Getränke in Dosen oder Flaschen, da die Behälter sonst explodieren und Verletzungen
verursachen können.
3. Benutzung des Ofens
3.1 Vorbereitungen vor der Anwendung
① Montage der Füße
Die Füße befinden sich im Inneren des Geräts und müssen montiert werden. Verwenden Sie das Gerät nicht
ohne Füße.
Schrauben Sie die Stützfüße an die Unterseite des Geräts. Stellen Sie die Höhe des Geräts ein, indem Sie die
Füße selbst aufschrauben oder abschrauben.
② Positionierung
Stellen Sie den Ofen auf einer ebenen und festen Oberfläche auf.
③ Entfernen Sie die Schutzfolie.
④ Nehmen Sie das Tablett aus dem Körper heraus und waschen Sie es.
⑤ Wischen Sie die Innen- und Außenseite des Ofens mit einem feuchten Tuch ab. Wischen Sie anschließend
mit einem trockenen Tuch nach.
⑥ Elektrischer Anschluss
Vergewissern Sie sich vor dem Anschluss, dass die Spannung und die Frequenz mit der auf dem Typenschild
des Geräts angegebenen Spannung und Frequenz übereinstimmen.
Platzieren Sie zwischen dem Gerät und dem nach der Installation zugänglichen Netz einen zweipoligen
Schalter, dessen Kontakte einen Mindestöffnungsabstand von 3 mm haben, mit einem entsprechenden
Eingang.
Das Gerät muss an die Erdungsleitung des Netzes angeschlossen werden.
Das Gerät muss in ein Äquipotentialsystem eingebunden sein, dessen Wirkungsgrad entsprechend den
Angaben in der Norm in geeigneter Weise überprüft werden muss. Diese Verbindung wird zwischen
verschiedenen Geräten hergestellt, wobei die Klemme mit dem gekennzeichnet ist.
Der Äquipotentialleiter muss einen Mindestquerschnitt von 10 mm2 haben.
Schließen Sie das Netzkabel an die Stromquelle an. Achten Sie darauf, dass das Netzkabel fest in Position
gehalten wird.
⑦ Wasseranschluss (nur für MINI8)
Wasseranschluss an das Netzwerk:
Schließen Sie die auf der Rückseite des Ofens angeordneten Einlasskanäle für entkalktes Wasser mit Hilfe
eines mechanischen Filters und eines Absperrhahns an das spezifische Verteilungsnetz an.

Lassen Sie vor dem Anschluss der Filter eine bestimmte Menge Wasser fließen, um die Leitung von jeglicher
Eisenschlacke zu reinigen.
Das Wasser muss eine Härte zwischen 0,5o-5oF haben, um die Bildung von Kalksteinablagerungen zu
reduzieren, und einen Druckwert zwischen 0,5-2 bar.
Die Wassermenge, die im Inneren des Ofens verdampft werden muss, muss mit Hilfe des "Mikrohahns", der
sich im hinteren Teil des Geräts befindet, reguliert werden.
Regulieren Sie den Mikrohahn so, dass nur ein Tropfen Wasser auf das Gebläse gespritzt wird. Ein Überschuss
an Wasser kann eine zu hohe Kondensationsmenge verursachen und die Backkammer überfluten.
Kondenswasserablauf:
Die Ableitung des Dampfkondensationswassers befindet sich im hinteren Teil des Ofens und ist mit einem
starren oder flexiblen Rohr zu verbinden und in einen offenen Abfluss zu leiten. Sein Durchmesser darf nicht
kleiner als der des Ablaufstutzens und die Länge nicht größer als ein Meter sein.
Das Abflussrohr muss mindestens 20 cm unterhalb des Ablaufstutzens bleiben, um den Abfluss nach unten zu
erleichtern.
Vermeiden Sie Drosselungen an den flexiblen Kanälen oder Krümmern für metallische Kanäle entlang der
gesamten Abflussstrecke.
3.2 Gebrauchsanweisung
Beachten Sie, dass die Funktion "Konvektionskochen" und die Funktion "Oberhitzekochen"
unabhängig voneinander arbeiten. Sie können die beiden Funktionen nicht gleichzeitig verwenden.
3.2.1 Wie man den Timer benutzt
① Stellen Sie den Drehknopf der Zeitschaltuhr auf die Zahl, die die Kochzeit entsprechend dem
Lebensmittel angibt, das Sie kochen werden.
② Stellen Sie den Timer ein, indem Sie ihn im Uhrzeigersinn drehen. Der Ofen schaltet sich am Ende der
gewählten Zeit automatisch aus und es ertönt eine Glocke.
③Der Ofen kann während des Kochens manuell ausgeschaltet werden, indem der Timer gegen den
Uhrzeigersinn auf die Position "0" gedreht wird.
3.2.2 Konvektionskochen
① Schalten Sie den Ofen ein.
② Stellen Sie die Temperatursteuerung auf die gewünschte Temperatur (0-300°C) ein.
③ Drehen Sie den Timer auf die gewünschte Zeit (0-120min). Das Temperatur-Licht, das Timer-Licht und die
Innenlampe sind eingeschaltet.
④ Das Temperaturlicht wird ausgeschaltet, wenn die Temperatur auf die gewünschte Temperatur ansteigt.
Dann wird es eingeschaltet, wenn die Temperatur wieder sinkt. Dieser Prozess wird automatisch umgewälzt.
3.2.3 Using steam function (For MINI8 only)
① Schalten Sie den Ofen ein.

② Stellen Sie die Temperatursteuerung auf die gewünschte Temperatur (0-300°C) ein.
③ Drehen Sie den Timer auf die gewünschte Zeit (0-120min). Das Timer-Licht, das Temp-Licht und die
Innenlampe sind eingeschaltet.
④ Drücken Sie die Dampftaste, sie injiziert Feuchtigkeit in die Backkammer durch manuelle Impulse. Die
Dampf-Leuchte ist eingeschaltet.
Anmerkung:
Drücken Sie den Knopf nicht zu lange.
Aus einem Abflussrohr hinter dem Ofen kann etwas zusätzlicher Dampf austreten.
3.2.4 Verwendung der Oberheizung zum Kochen (nur für MINI8)
① Schalten Sie den Ofen ein.
② Stellen Sie die Temperatursteuerung der Oberheizung auf die gewünschte Temperatur (0-300°C) ein.
③ Drehen Sie den Timer auf die gewünschte Zeit (0-120min). Das Licht der Oberheizung, das Licht der
Zeitschaltuhr und die Innenlampe sind eingeschaltet.
④ Das Licht der Oberheizung wird ausgeschaltet, wenn die Temperatur auf die gewünschte Temperatur
steigt. Dann wird es eingeschaltet, wenn die Temperatur wieder sinkt. Dieser Prozess wird automatisch
umgewälzt.
4. Wartung des Ofens
Wasser ersetzen
① Schalten Sie den Netzschalter aus und trennen Sie das Netzkabel von der Stromversorgung.
② Öffnen Sie die Tür und lassen Sie sie mindestens 10 Minuten stehen, um die Temperatur im Ofen zu
senken.
③ Wischen Sie den Ofen mit einem feuchten Tuch ab.
5. Lagern des Ofens
① Schalten Sie bei Nichtgebrauch den Netzschalter aus und trennen Sie das Netzkabel von der
Stromversorgung.
② Bündeln Sie das Netzkabel und legen Sie das Bündel auf den Körper.
③ Decken Sie die Leiche mit einer Plastiktüte ab und verpacken Sie sie in einen Wellpappkarton. Lagern
Sie ihn an einem Ort mit geringer Luftfeuchtigkeit.

6. Technische data
Model
MINI2
MINI4
MINI6
Supply voltage
220-240 V
220-240 V
220-240 V
Rated demanded
2670W
2670W
2670W (for convection
heater) + 2000W (for upper
heater)
Lighting Power
30W
30W
30W
Safety device
Temperature fuse 330°C
Temperature fuse 330°C
Temperature fuse 330°C
Functions
Convection heater
Convection heater
Convection heater

FAC-SIMILE
This manual suits for next models
2
Table of contents
Languages:
Popular Convection Oven manuals by other brands
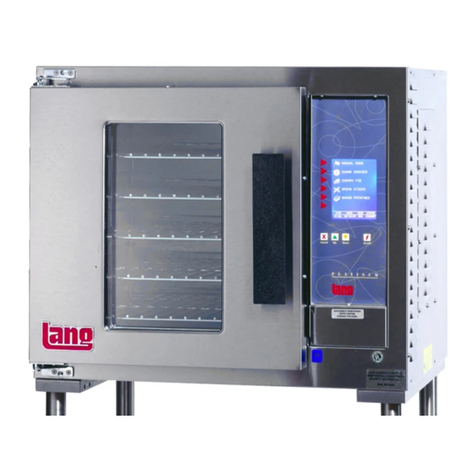
Lang
Lang ECOH-PT Installation and operation instructions
BEING
BEING BOF Series operating instructions

KitchenAid
KitchenAid KSEG700ESS user manual

Electrolux
Electrolux Air-O-Convect 269503 specification
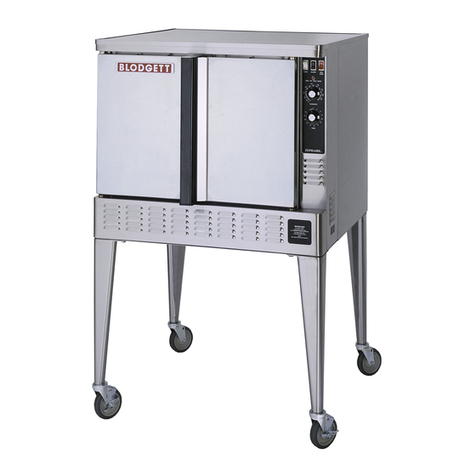
Blodgett
Blodgett ZEPHAIRE-G Installation operation & maintenance

turbofan
turbofan e31D4 Operation manual
