Gato Audio FM-9 User manual

FM-9
User Manual

Gato Audio FM-9
Page 2

User Manual
Page 3
Contents
Don’t be a stranger 4
Package contents 4
A few words on your new speakers 5
Installation 6
Wall mounting the FM-9 6
Mounting the driver grilles 7
Connecting your speakers 7
Placing the speakers 8
Adjusting the sound 9
Make it last! 10
If all else fails… 10
Technical specications 11

Gato Audio FM-9
Page 4
Don’t be a stranger
Thank you for purchasing the Gato Audio FM-9 high end on-wall loudspeakers. We are absolutely condent that it will bring you many
hours of listening pleasure.
We hereby cordially invite you to join the Gato Audio family by registering your product online. You may also consider signing up for our
newsletter to receive information about exciting new products, events and technical updates. We are also present on several social media
like Facebook, Twitter, Instagram, Google+ and LinkedIn.
All this and more on www.gato-audio.com
Our very best,
Gato Audio
Package contents
Please check that the following is included in the two packages:
• 2 Gato Audio FM-9 speakers
• 2 front grille sets
• 4 pads
• 2 drilling templates
• This manual - which you should be reading now

User Manual
Page 5
A few words on your new speakers
A good cabinet is the essential foundation of any loudspeaker. The FusedMass cabinets in the Gato Audio FM series incorporate several
noteworthy details. The cabinets are made from high-density breboard and a layer of vibration dampening material. Parts of the cabinets
are made of up to six layers of mixed materials that together with heavy internal bracing, secures a very ecient resonance dampening
construction.
Excellent drivers are the foundation of true-to-life sound. The drivers’ capability to react instantly to the provided signal together with total
control of mechanical resonance is crucial. The drivers in the FM speaker series are carefully constructed to comply with our high demands
for technical quality. The midrange reproduction of any speaker is without discussion the most important, whether it is the reproduction
of vocals, a high-hat or drums, since all have important tonal information based in this frequency area. The bass/midranges are specially
designed for mid- and high frequency response providing a clean and dynamic impulse response second to none.
The unique state-of-the-art ring radiator tweeter not only yields a useful output far beyond the capability of the human ear, thereby
providing instruments with their natural harmonic structure, but it also adds the crucial benets of extremely low distortion and coloration
of the reproduced material.
The heart of any Gato Audio FM speaker is an advanced PurePhase crossover adorned with high quality components: Heavy gauge coils,
low-resonance capacitors and non-inductive resistors mounted on a high-quality berglass PCB.
Hundreds of hours have been spent designing the network to comply with the drivers’frequency response and impedance, while carefully
considering phase, resonance and impulse response. Finally, we trimmed the sound, not only providing a at frequency response but
providing a tantalizingly lifelike sound.
All of the above is draped in a beautiful exterior design, as small as possible and perfectly nished in handcrafted veneer or paint.
The supplied magnetic cloth grilles are designed to produce a minimum of coloration and distortion to the sound when mounted. Using
a small and close-tting frame clad in sound-transparent fabric ensures that any loss of audio detail is kept at a minimum, and that
diractions are well out of the critical midrange area. In addition, it oers protection for the drivers while enhancing both the beautiful
nish and the elegant, simple lines in the design even further.

Gato Audio FM-9
Page 6
Installation
Wall mounting the FM-9
Each FM-9 loudspeaker needs two screws to be mounted on to the wall. Use screws and wall plugs that t the material of your wall and
with a head smaller than 10 mm in diameter, but larger than 6 mm in diameter. Mount the screws with a distance of 350 mm from each
other. You can use the drilling templates included in the box. Attach the 4 pads as shown on the illustration below to protect your speaker
and your wall.
FM-9
Passive Loudspeaker
Copenhagen - Denmark
High
Neutral
Detail
Focus
350 mm
62 mm
78 mm
4 pads
Key hole bracket
for wall mounting

User Manual
Page 7
Mounting the driver grilles
The grilles are easily fastened to the speakers magnetically when the small magnets on the grille are aligned on top of the driver screws.
1.Place and hold the grille lightly on top of the driver as
shown below
2.Turn it clockwise or counter-clockwise until you can
feel the magnets attach to the screws below.
To detach the grille from the speaker simply turn the grille clockwise or counter-clockwise and remove it.
Connecting your speakers
Connecting your speakers to your amplier must only be performed with the amplier turned o. Otherwise damage may occur. Connect
the red speaker terminal (+) to the positive speaker output on your amplier. Now connect the white speaker terminal (-) to the negative
speaker output terminal on your amplier.

Gato Audio FM-9
Page 8
Placing the speakers
Just like with real estate, location is the most important factor when setting up a high-end audio system. Hanging speakers on a wall is
something that we would not recommend, but the FM-9 is specically designed to give the best performance hanging on the wall or at
least being very close to the wall.
• The basic setup should be an even-sided triangle with equal distance
between each speaker as well as the typical listening position.
• The FM-9 speakers are developed to give a wide dissipation and that
makes installation and set up easier than other types of loudspeakers.
We will however recommend to loosely place the FM-9 against the
wall so that height and distance between them can be adjusted before
drilling any holes in the wall.
• Hard surfaces like glass, stone and wooden oors create many
reections which can make midrange reproduction sound harsh and
with a blurry soundstage. These reections can be dampened with
curtains and carpets.
• Many soft surfaces, thick carpets and furniture may on the other
hand provide too much dampening. This may cause the midrange
reproduction to become“thin”and lacking in musical timing and
energy. In such cases, it is advised to remove some of the dampening
items.
In any case, time spent setting up your speakers is by far the most important adjustment parameter for your system. Room acoustics is a
complex eld with an almost innite number of variables. Please note that while a setup might work well in your listening room, it may not
be the perfect solution in other locations.
For the best results, mount the FM-9 on a solid wall with the tweeter approx. same height as your ears while seated in your typical listening
position. Take extra care to ensure that the speaker is securely mounted and there are no vibration between speakers and the wall, which
otherwise will cause resonances. Make sure that the screws and wall plugs used for hanging the FM-9 is the correct type for the specic
type of wall.

User Manual
Page 9
Adjusting the sound
A loudspeaker is only as good as your listening room allows it to be. First of all is the room acoustics which is inuenced by dimensions and
build materials. Secondly is the amount freedom it oers for the best possible placement of your speakers inside the room.
To accommodate some of the above compromises and to make installation and sound tuning of your new FM speaker easier and with a
better result, we have designed sound adjustments on the back of the speaker. The FM-9 oers three levels of each setting options;“Focus”
and “Detail”. Make sure that both options are set to“neutral” before you start adjusting the positioning of the speakers in your listening
room.
• Step 1: Initial setup:
Set up the speakers according to your wanted listening position, following the basic rules of the previous chapter “Placing the
speakers”.
• Step 2: Adjusting the setup:
The basic setup might not give you the best possible sound quality.
Select a few but well known pieces of your favourite music that can
help you determine when it sounds just right. Depending on how the
speaker interacts with your room the sound will be dierent. Here is a
basic guide to better positioning and sound tuning:
Bass: Moving the speaker away from a side wall and/or a corner will
clear out the bass and make the sound leaner and less involving. If you
are experiencing to have not enough bass, moving your speaker closer
to a side wall and/or corner might help.
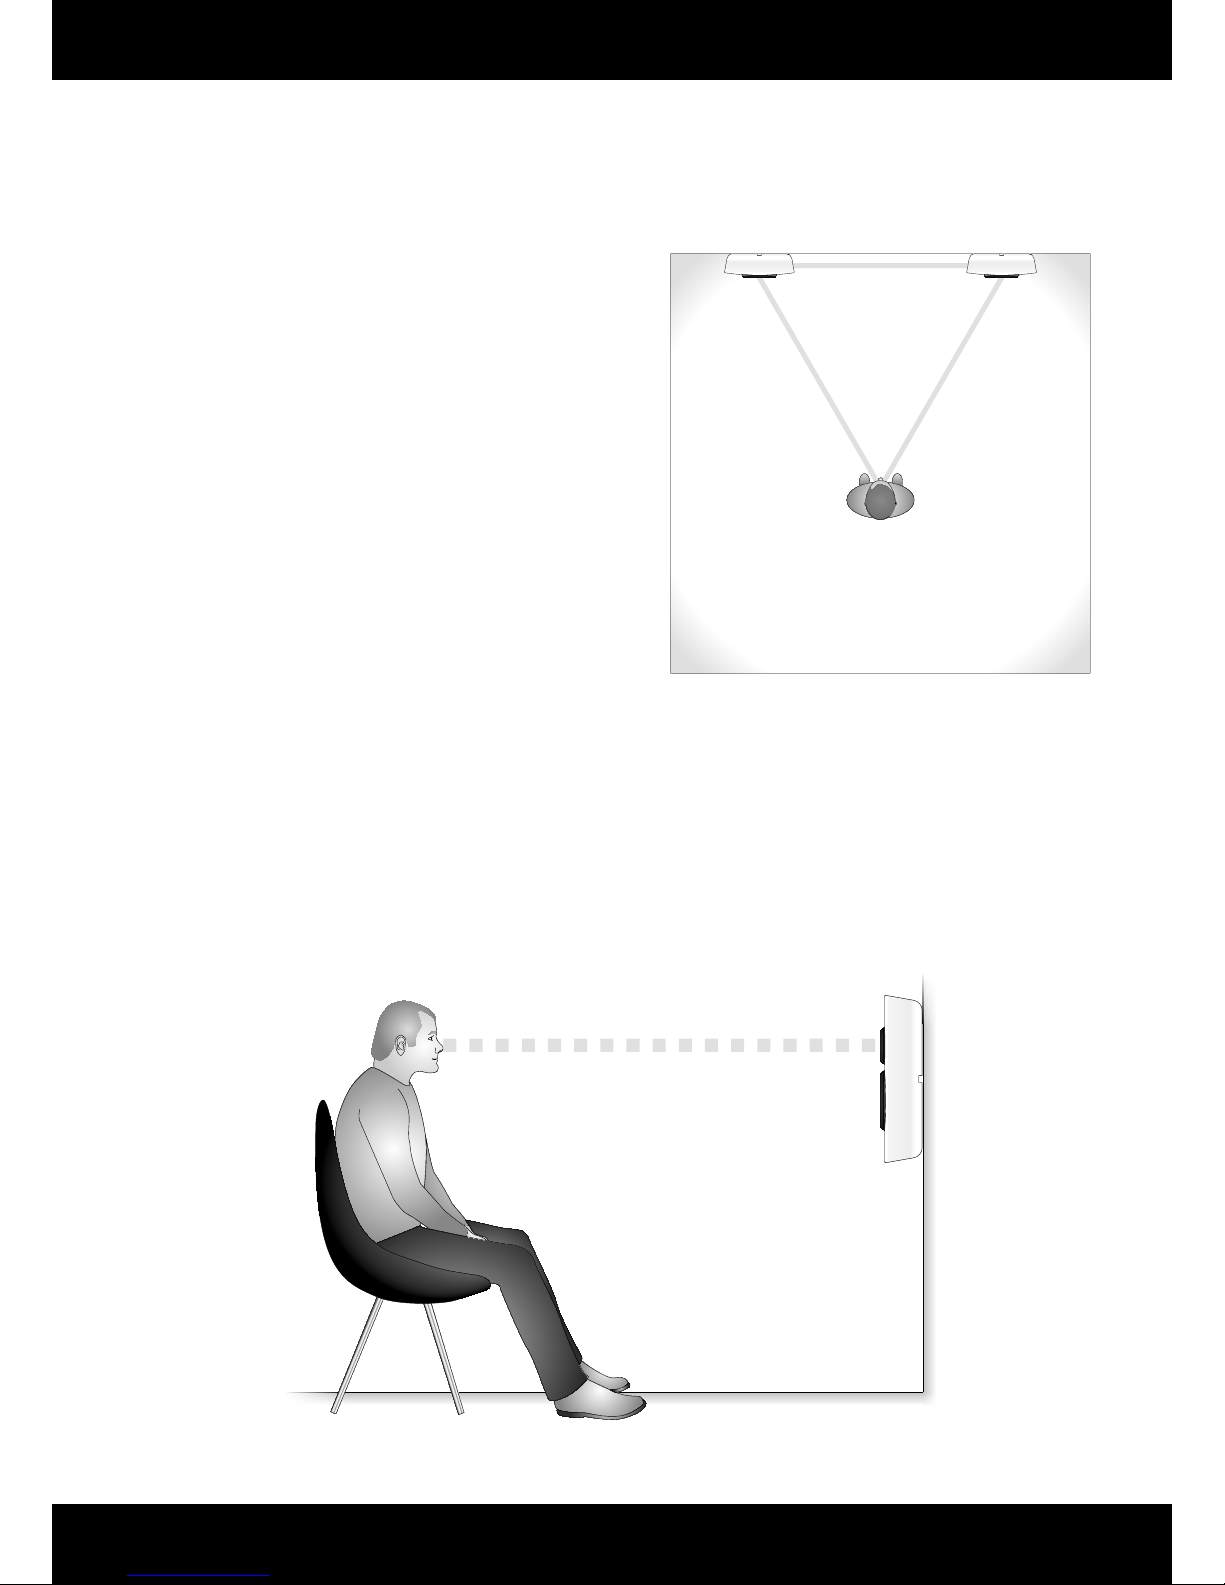
Soundstage: If your soundstage is unclear, the singer might be a bit
vague, woolly and too far behind the rest of the instruments in the
band – try to decrease the distance between your speakers which will
give a more direct sound from the speaker to you listening position. If
the soundstage and instruments are a bit compressed in the middle of
the speakers, try to increase the distance between the speakers and let
them play straighter into you listening room. Please note that even a
small adjustment of a few centimetres may make a huge dierence.
• Step 3: Adjusting the speaker:
When the optimum speaker position has been found, you still have
a way to adjusting the speaker a bit more. The three setting of each
“Focus” and “Detail” on the backside of the speaker may be applied to
get the last bit of performance from the setup.
“Focus” settings: If you lack a bit of “Focus”in the soundstage set this
to “High”. If voices and high pitched instruments are too much and
creates listening fatigue over longer periods set it to “Low”.
“Detail” setting: This adjusts the level of high frequencies and
overtones of any instrument. A natural level of overtones will enhance
the listening experience, pleasantly and relaxed. Too much detail will
draw the minds focus from the main part of the music, to some high
frequency details. Test each option to nd the most suitable setting for
your specic setup.
• Step 4: Wall mounting:
When the best possible sonic performance has been achived, drill
holes in your wall according the drawing of page 6 and the supplied
drilling templates.
High
Neutral
High
Neutral
High
Neutral
Detail
Detail
Detail
Focus
Focus
Focus
Both Focus and Detail is set to High
Both Focus and Detail is set to Low
Both Focus and Detail is set to Neutral

Gato Audio FM-9
Page 10
Make it last!
Please apply simple common sense to maintain the sound quality and lifespan of your Gato Audio speakers. Here are a few guidelines:
• Regular care: wipe the surfaces carefully by using a clean soft dry cloth
• Cleaning: if necessary, wipe the hard surfaces clean using a soft cloth dampened only with clean water.
• Grease stains or nger marks on the cabinets can be removed carefully with a clean soft cloth lightly dampened in a mix of clean
lukewarm water and a single drop of household washing-up liquid. Then wipe the surfaces dry using a soft dry cloth
• Be careful never to use hot water or any type of concentrated detergent, solvent, thinner, or any other volatile substance on the surfaces,
or you may cause permanent damage to the surface coating
• Keep the cabinets away from prolonged contact with rubber or PVC materials
• Do not expose the speakers to direct sunlight or other heat sources
If all else fails…
…don’t panic! Every Gato Audio product comes with a minimum 2-year warranty. See our website for details.
This warranty does not cover damage or wear directly or indirectly caused by improper use, violence, tampering with or unauthorized
access to or servicing of any part of the product.
If you are in need of service or repair, please do not hesitate to contact us at hello@gato-audio.com or visit our website www.gato-audio.com
for more information.

User Manual
Page 11
110 mm
490 mm
355 mm
Technical specifications
Frequency response
Sensitivity (2.83 V)
Recommended amplier output
Nominal impedance
Connectors
Cabinet
Crossover
Drivers
High-Frequency
Mid & Low-Frequency
Weight & Dimensions
Weight
Dimensions
45 Hz – 35 kHz
86 dB
50 to 200 W
4 Ω
Gold plated binding post / 4mm plugs
Laminated FusedMass cabinet
Advanced PurePhase crossover technology
38mm ring radiator, powerful ferrite motor and optimised chamber
170mm mineral cone, low loss suspension, motor with shorting rings and optimised voice coil
10 Kg. / 22 lbs.

Gato Audio
Marielundvej 28
DK-2730 Herlev
Denmark
Phone: +45 4095 2205
www.gato-audio.com
510020 GA FM-9 MAN 1.1 1703
Table of contents
Other Gato Audio Speakers manuals