GE FH5 User manual

Food Freezers
Chest
Part No. 162D1522P005 Pub. No. 49-6945 1-34485-002 CG 11/97
Models:
FH5
FH7
FH10
FH15
FH22
Owner’s Manual
GE Quality Product

Customer Service Troubleshooting Tips Operating Instructions Safety Instructions
Installation Instructions
Congratulations!
You Are Now Part of the GE Family
Welcome to the GE family. We’re proud of our
quality products and we are committed to providing
dependable service. You’ll see it in this easy-to-use
Owner’s Manual and you’ll hear it in the friendly
voices of our customer service department.
Best of all, you’ll experience these values each time
you use your freezer. That’s important, because
your new freezer will be part of your family for
many years. And we hope you will be part of ours
for a long time to come.
We thank you for buying GE. We appreciate your
purchase, and hope you will continue to rely on us
whenever you need quality appliances for your home.
GE & You, A Service Partnership.
Safety Information
Safety Precautions . . . . . . . . . .3
Use of Extension Cords . . . . . .3
How to Connect Electricity . . . .4
Use of Adapter Plugs . . . . . . . .4
Operating Instructions
Starting the Freezer . . . . . . . . .5
Features . . . . . . . . . . . . . . . .5, 6
Defrosting Instructions . . . . . . .7
Care and Cleaning . . . . . . . .8, 9
Installation Instructions
Preparing to
Install the Freezer . . . . . . . . . .10
Troubleshooting Tips
Before You
Call For Service . . . . . . . . .10, 11
Customer Service
Product Registration . . . . . . . .13
Warranty . . . . . . . . . . . . . . . .15
Service Telephone
Numbers . . . . . . . . . . . . . . . . .16
FOR YOUR RECORDS
Write the model and serial numbers here:
##
You can find them on a plate located at the top outside rear center
of the freezer.
Staple sales slip or cancelled check here.
Proof of the original purchase date is needed to obtain service
under the warranty.
Inside you will find many helpful hints on how to use and maintain
your freezer properly. Just a little preventive care on your part can
save you a great deal of time and money over the life of your freezer.
You’ll find many answers to common problems in the
Before You
Call For Service
section. If you review our chart of
Troubleshooting Tips
first, you may not need to call for service at all.
READ THIS MANUAL
IF YOU NEED SERVICE
If you do need service, you can relax knowing help is only a phone
call away. A list of toll-free customer service numbers is included in
the back section. Or,
in the U.S.,
you can always call the GE Answer
Center® at 800.626.2000, 24 hours a day, 7 days a week.
In Canada,
call 1-800-361-3400.
2
IMPORTANT!
Fill out and return the Consumer Product Registration Card that
is packed with this product. If you cannot find it, please send in the
duplicate card printed in the back of this manual.

Customer ServiceTroubleshooting Tips
Operating Instructions
Safety Instructions Installation Instructions
IMPORTANT SAFETY INFORMATION.
READ ALL INSTRUCTIONS BEFORE USING.
WARNING!
Use this appliance only for its intended purpose as described in this Owner’s Manual.
SAFETY PRECAUTIONS
When using electrical appliances, basic safety precautions should be followed, including the following:
■
■This freezer must be properly installed and
located in accordance with the Installation
Instructions before it is used.
■
■The freezer should not be recessed or built-in—
it is designed for free-standing installation only.
■
■Do not allow children to climb, stand or hang
on the shelves in the freezer. They could damage
the freezer and seriously injure themselves.
■
■After your freezer is in operation, do not touch
the cold surfaces, particularly when hands are
damp or wet. Skin may stick to these extremely
cold surfaces.
■
■Do not store or use gasoline or other flammable
vapors and liquids in the vicinity of this or any
other appliance.
■
■Unplug the freezer before cleaning, making
repairs or changing the light bulb.
NOTE: We strongly recommend that any servicing be performed
by a qualified individual.
■
■Turning the control to the
0
position does
not remove power to the light circuit on models
with interior light.
■
■Do not use any electrical device or any sharp
instrument in defrosting your freezer.
■
■Do not refreeze frozen foods which have
thawed completely.
■
■Caution should be used when removing the door
of a freezer. Particular caution should be used
when removing the lid of a chest freezer, as most
chest freezer lids are under spring tension.
Instructions for removing the lid of your freezer
are located on the back of the freezer.
Contact the manufacturer’s representative for a
method of safe removal.
IMPORTANT: PROPER DISPOSAL OF THE FREEZER
Child entrapment and suffocation are not problems
of the past. Junked or abandoned refrigerators and
freezers are still dangerous…even if they will sit for
“just a few days.” If you are getting rid of your old
refrigerator or freezer, please follow the instructions
below to help prevent accidents.
Before You Throw Away Your Old Refrigerator
or Freezer:
■Take off the doors.
■Leave the shelves in place so that children may
not easily climb inside.
CFC Disposal
Your old freezer has a cooling system that used
CFCs (chlorofluorocarbons). CFCs are believed to
harm stratospheric ozone.
If you are throwing away your old freezer, make sure
the CFC refrigerant is removed for proper disposal
by a qualified servicer. If you intentionally release
this CFC refrigerant you can be subject to fines and
imprisonment under provisions of the Federal
Clean Air Act.
USE OF EXTENSION CORDS
Because of potential safety hazards under certain conditions, we strongly recommend
against the use of an extension cord.
However, if you must use an extension cord, it is absolutely necessary that it be a UL-listed (in the United
States) or a CSA-listed (in Canada), 3-wire grounding type appliance extension cord having a grounding
type plug and outlet and that the electrical rating of the cord be 15 amperes (minimum) and 120 volts. 3

4
Customer Service Troubleshooting Tips Operating Instructions Safety Instructions
Installation Instructions
Customer Service Troubleshooting Tips Installation Instructions Safety Instructions
Operating Instructions
Customer Service Troubleshooting Tips Installation Instructions Safety Instructions
Operating Instructions
IMPORTANT SAFETY INFORMATION.
READ ALL INSTRUCTIONS BEFORE USING.
WARNING!
HOW TO CONNECT ELECTRICITY
Do not, under any circumstances, cut or remove the third (ground) prong from the power cord. For
personal safety, this appliance must be properly grounded.
The power cord of this appliance is equipped with a
3-prong (grounding) plug which mates with a
standard 3-prong (grounding) wall outlet to
minimize the possibility of electric shock hazard
from this appliance.
Have the wall outlet and circuit checked by a
qualified electrician to make sure the outlet is
properly grounded.
If the outlet is a standard 2-prong wall outlet, it
is your personal responsibility and obligation to
have it replaced with a properly grounded 3-prong
wall outlet.
The freezer should always be plugged into its own
individual electrical outlet which has a voltage rating
that matches the rating plate.
This provides the best performance and also
prevents overloading house wiring circuits which
could cause a fire hazard from overheated wires.
Never unplug your freezer by pulling on the power
cord. Always grip plug firmly and pull straight out
from the outlet.
Repair or replace immediately all power cords that
have become frayed or otherwise damaged. Do not
use a cord that shows cracks or abrasion damage
along its length or at either end.
When moving the freezer away from the wall, be
careful not to roll over or damage the power cord.
USE OF ADAPTER PLUGS
(Adapter plugs not permitted in Canada)
Because of potential safety hazards under certain conditions, we strongly recommend against
the use of an adapter plug.
However, if you must use an adapter, where local
codes permit, a
temporary connection
may be made
to a properly grounded 2-prong wall outlet by use
of a UL-listed adapter available at most local
hardware stores.
The larger slot in the adapter must be aligned with
the larger slot in the wall outlet to provide proper
polarity in the connection of the power cord.
When disconnecting the power cord from the
adapter, always hold the adapter in place with one
hand while pulling the power cord plug with the
other hand. If this is not done, the adapter ground
terminal is very likely to break with repeated use.
If the adapter ground terminal breaks,
DO NOT USE
the freezer until a proper ground has been
established.
Attaching the adapter ground terminal to a wall outlet
cover screw does not ground the appliance unless the
cover screw is metal and not insulated, and the wall
outlet is grounded through the house wiring. You should
have the circuit checked by a qualified electrician to make
sure the outlet is properly grounded.
Read and follow this Safety Information carefully.
SAVE THESE INSTRUCTIONS

Customer ServiceTroubleshooting Tips
Operating Instructions
Safety Instructions Installation Instructions
About the operation of your freezer.
Starting the Freezer
Clean the inside of the freezer with a mild solution of baking soda and water
(see
Care and Cleaning
).
If the lid was removed, make sure all wires are reconnected.
Connect cord to power outlet.
Set the temperature monitor (on some models) to “ ” (off).
Move the temperature control to
4.
This is the normal setting for safe, long-term
freezing. For colder temperatures turn to a higher number.
Allow freezer to operate for at least two hours before placing food inside.
Set the temperature monitor (on some models) to “11” (on).
7
6
5
4
3
2
1
5
Temperature Monitor
(on some models)
An alarm sounds if the temperature in the
freezer rises 12°F. (-11°C.) or is higher than
normal for the selected setting. The alarm,
on the lower right side of the freezer next to
the temperature control, is controlled by a
3-position switch.
“ ” prevents the alarm from sounding
when the freezer is warm (during cool-
down, when defrosting, or during initial
start-up).
“
√
” causes the alarm to sound regardless
of temperature. Test the alarm system
regularly—at least once a month.
“11” is the setting for normal freezer use. Be
sure to return the switch to “11” when the
freezer has cooled down after defrosting.
The alarm may sound if the temperature
control is turned to a much colder setting,
as from
2
to
5.
It may also sound if a large
amount of unfrozen food is added at one
time, causing the freezer temperature to rise.
456
7
0
1
2
3
1
1
4
7
1
456
7
0
1
23
Temperature Control
Freezing temperature selection is made by
setting the control from
1
to
7
(coldest).
Normal safe freezing level is obtained by
setting the control at
4.
Turning the temperature control all the way
to the left or past
0
until it clicks stops the
cooling process but does not shut off power
to the freezer.
Some models have a preset temperature and
no control knob.

Customer Service Troubleshooting Tips Operating Instructions Safety Instructions
Installation Instructions
Customer Service Troubleshooting Tips Installation Instructions Safety Instructions
Operating Instructions
Customer Service Troubleshooting Tips Installation Instructions Safety Instructions
Operating Instructions
About the operation of your freezer.
6
Built-In Lock
(on some models)
Keeps your frozen food supply secure.
Keep the key out of reach of children and away
from the freezer.
Sliding Basket
(on some models)
Keeps frequently-wanted foods within easy
reach; can be moved aside to make foods
below more readily accessible.
Some models have two or three baskets.
Defrost Water Drain
Up-front drain with hose adapter speeds
emptying of defrost water.
Interior Light
(on some models)
Turns on when the lid is opened; turns off
when the lid is closed.

Customer ServiceTroubleshooting Tips
Operating Instructions
Safety Instructions Installation Instructions
7
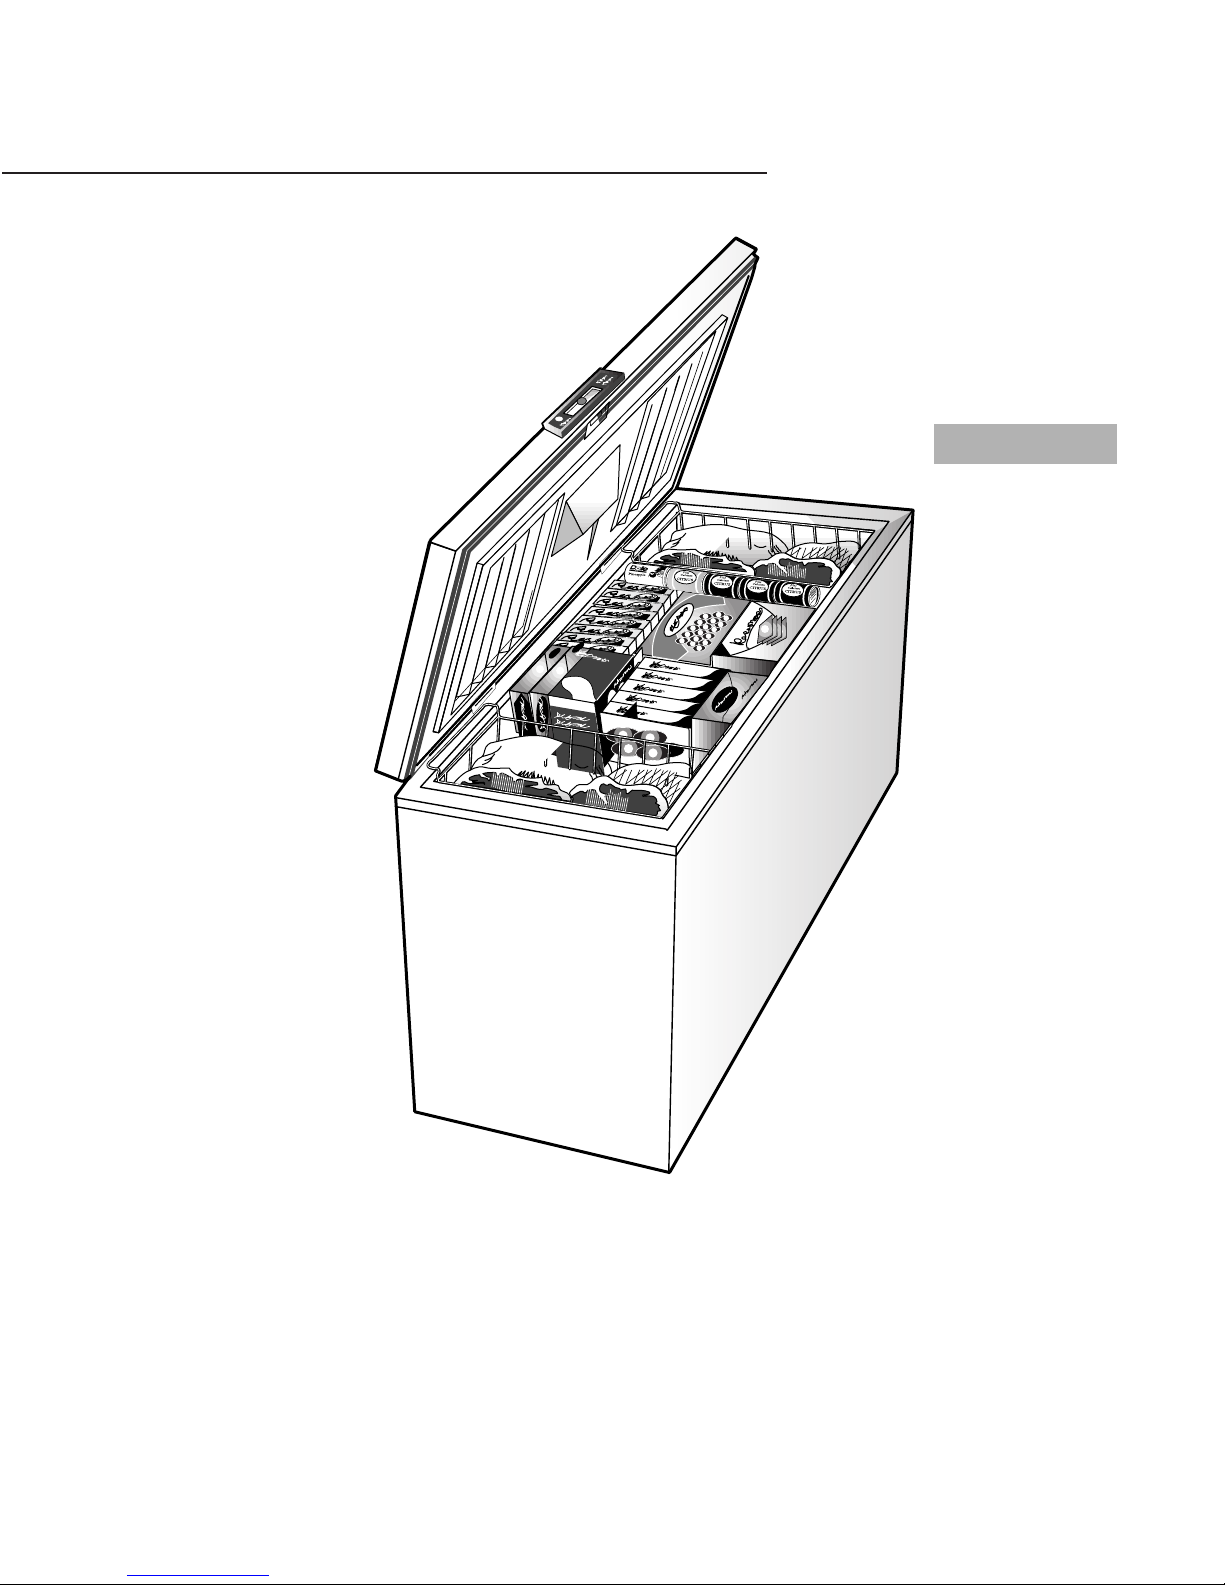
Defrosting instructions.
Do not use any electrical device in
defrosting your freezer.
Depending on the climate you live in,
humidity and usage, your freezer may need
defrosting only once or twice a year. If
possible, choose a time to defrost when
food supply is lowest.
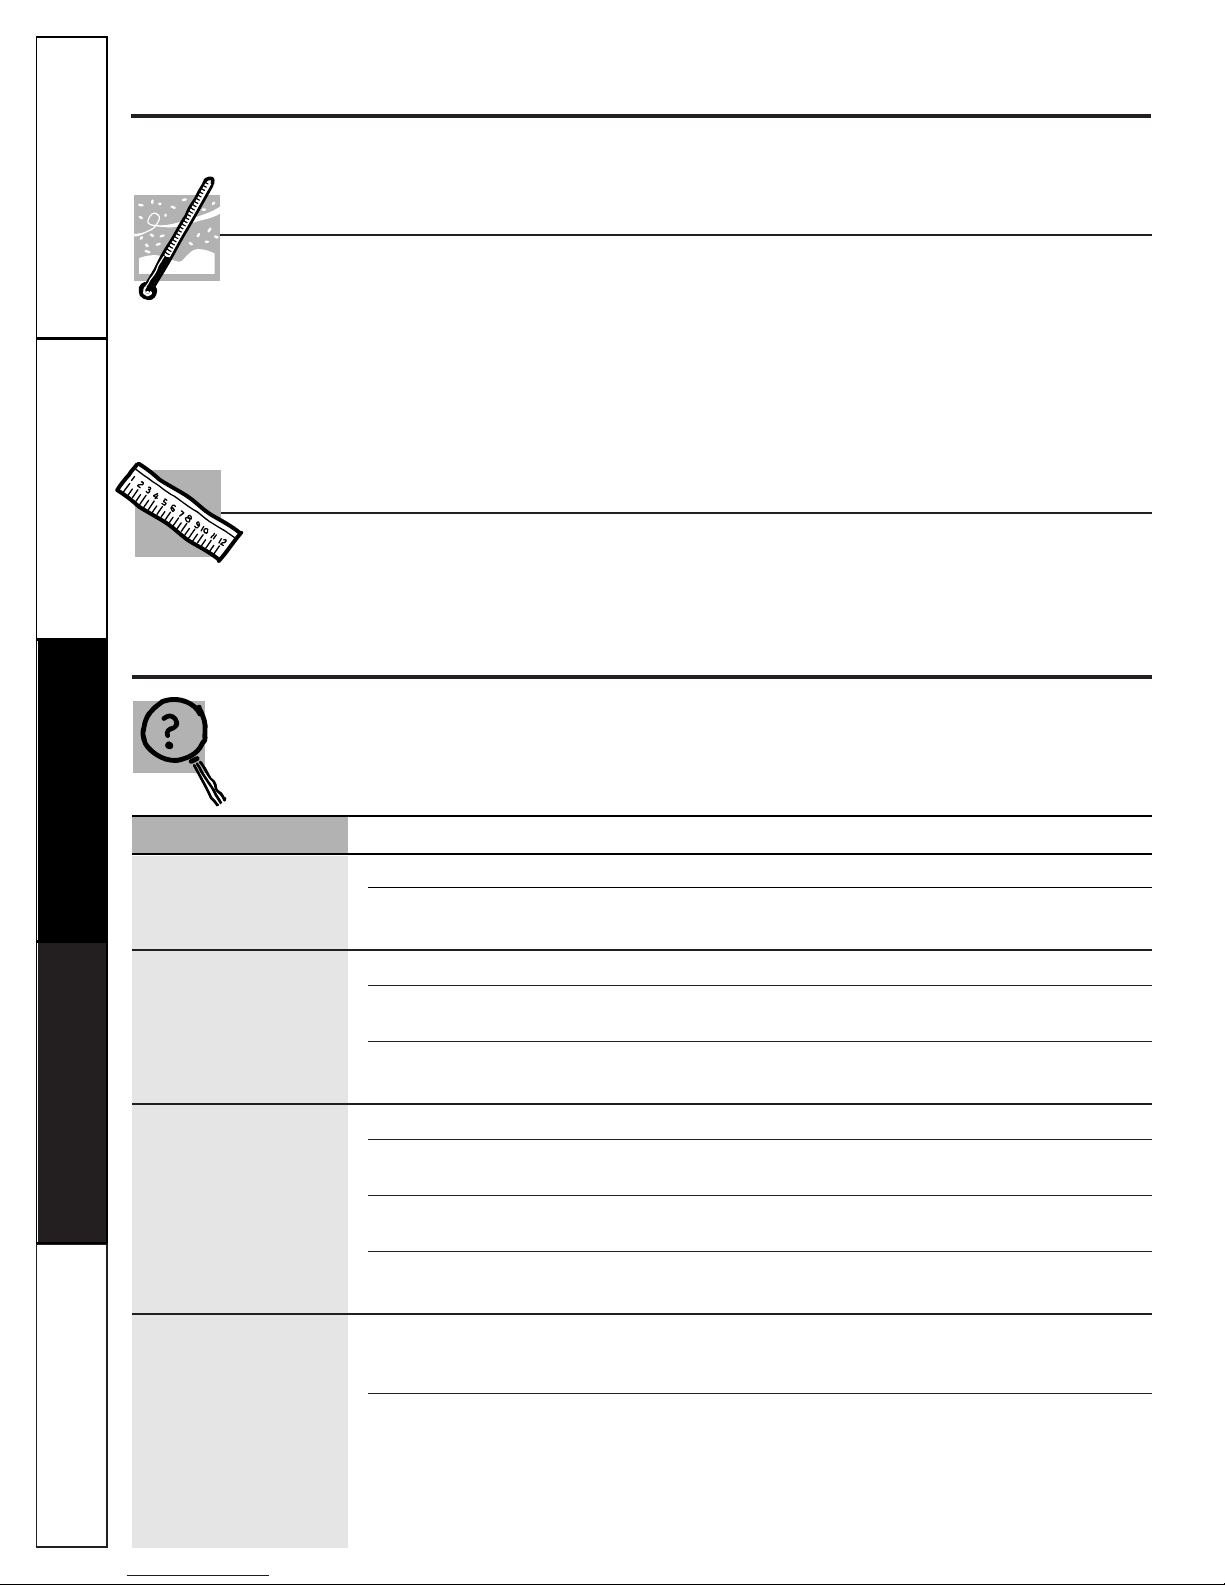
The Fastest Way to Defrost
Defrosting can be done quickly and easily
by scraping freezer surfaces with a plastic
scraper or wooden spatula when frost is
more than 1/4″(6 mm) thick.
DO NOT use an ice pick or sharp edged
instrument as it may damage or scratch the
freezer.
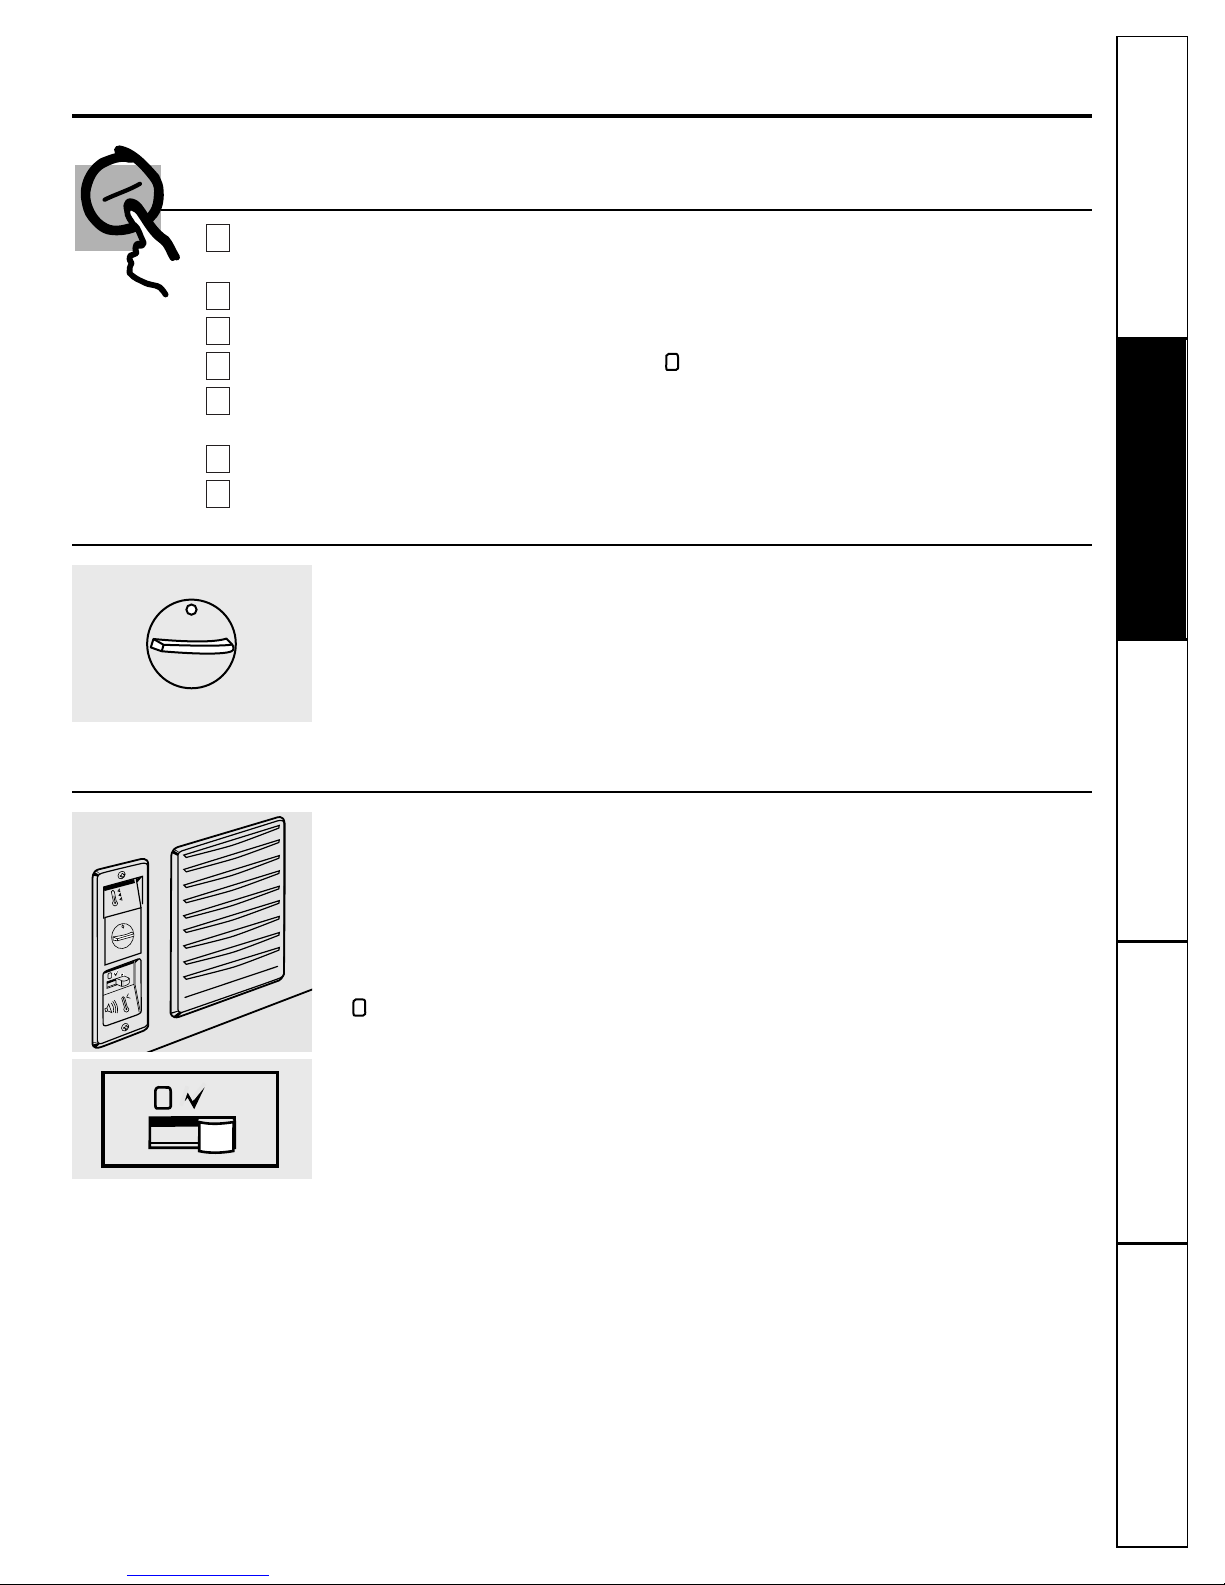
For Periodic Complete Cleaning and Frost Removal
If frost is too thick or too hard to be
scraped, we suggest you do the following:
Remove power cord from outlet.
Remove all food from freezer. Food
may be temporarily stored in large
corrugated paper boxes, insulated
bags, towels or wrapped in newspapers
to preserve coldness.
Your freezer has a defrost water drain at
the front and a hose adapter
(connector) that is packaged in a plastic
bag with this Owner’s Manual. Attach
this hose connector to any common
garden hose. Remove the drain cap on
the front of the freezer and slip the
other end of the hose connector into
the drain plug.
After attaching the hose, remove the drain plug
inside the cabinet. Sponge remaining moisture
from the bottom of the freezer.
Defrosting will take less time if you have
the freezer lid open and remove large,
loose pieces of frost before they melt, or
add pans of hot water.
NOTE:
Water may drip from the back
flange of the lid cover during defrosting.
This is normal. Ice builds up in the lid
insulation when the lid is open for
adding or removing food and melts
during the defrosting operation.
After frost is completely removed, rinse
the inside of the freezer with a solution
of warm water and baking soda [about
one tablespoon (15 ml) of soda to each
quart (liter) of water]. Rinse with clean
water and wipe dry.
DO NOT
use harsh or
gritty cleaners in the interior.
WARNING: When cleaning in the vicinity of
electrical parts (lamps, switches, controls, etc.)
wring excess moisture out of sponge or cloth so
that it will be barely damp to prevent water or
liquid from getting into any electrical part and
causing a possible shock hazard.
Replace the drain plug inside the
cabinet and the cap on the defrost drain.
Fold over and dry the gasket on the
hinge side of the lid.
Plug in the freezer at the electrical
outlet. Turn the temperature control to
its regular position and return food to
the freezer.
8
7
6
5
4
3
2
1

Customer Service Troubleshooting Tips Operating Instructions Safety Instructions
Installation Instructions
Customer Service Troubleshooting Tips Installation Instructions Safety Instructions
Operating Instructions
Customer Service Troubleshooting Tips Installation Instructions Safety Instructions
Operating Instructions
Care and cleaning of the freezer.
8
In Case of Extended Power Failure
■Keep freezer lid closed. Your freezer will
keep food frozen for 24 hours provided
warm air is not admitted.
■If freezer is out of operation for 24 hours
or more, add dry ice. Leave ice in large
pieces. Add more ice as required.
WARNING: Handling of dry ice can cause
freezing of the hands—gloves or other protection
is recommended.
■If dry ice is not available, move food to a
frozen food locker temporarily—until
power is restored.
Cleaning Your Freezer
■
Outside.
Protect the paint finish. The
finish on the outside of the freezer is a
high quality, baked-on paint finish. With
proper care, it will stay new-looking and
rust-free for years. Apply a coat of
appliance polish wax when the freezer is
new and then at least twice a year.
Appliance polish wax also works well to
remove tape residue from freezer
surfaces.
Keep the finish clean.
Wipe with a clean
cloth lightly dampened with appliance
polish wax or mild liquid dishwashing
detergent. Dry and polish with a clean,
soft cloth. Do not wipe the freezer with a
soiled dishwashing cloth or wet towel. Do
not use scouring pads, powdered cleaners,
bleach, or cleaners containing bleach.
CAUTION: Care should be taken in moving the
freezer away from the wall. All types of floor
coverings can be damaged, particularly cushioned
coverings and those with embossed surfaces.
■
Inside.
Clean the inside of your freezer at
least once a year. We recommend that the
freezer be unplugged before cleaning. If
this is not practical, wring excess moisture
out of sponge or cloth when cleaning in
the vicinity of switches, lights or controls.
Use warm water and baking soda
solution—about a tablespoon (15 ml)
of baking soda to a quart (liter) of water.
Rinse thoroughly with water and wipe dry.
Do not use cleaning powders or other
abrasive cleaners.
An open box of baking soda in the freezer
will absorb stale freezer odors. Change
the box every three months.

Customer ServiceTroubleshooting Tips
Operating Instructions
Safety Instructions Installation Instructions
Preparing for Vacation
To maintain freezer in operation during
vacations, be sure your house power is not
turned off. For sure protection of freezer
contents, you may want to ask a neighbor to
check the power supply and freezer
operation every 48 hours.
For extended vacations or absences, you
may prefer to move your frozen foods to a
storage locker temporarily. If your freezer is
to be left empty, disconnect power cord
plug from wall outlet. To prevent formation
of odors, place open box of baking soda in
freezer and leave freezer lid open.
When the freezer is not operating, it can be
left in an unheated house or room without
damage to cabinet or mechanism.
Preparing to Move
Disconnect the power cord plug from the
wall outlet. Remove foods, defrost and
clean the freezer.
Secure all loose items such as grille and
shelves by taping them securely in place to
prevent damage.
Be sure freezer stays in upright position
during actual moving and in van. The
freezer must be secured in van to prevent
movement. Protect outside of freezer with
blanket.
9

Customer Service Troubleshooting Tips Operating Instructions Safety Instructions
Installation Instructions
Customer Service Troubleshooting Tips Installation Instructions Safety Instructions
Operating Instructions
Customer Service Troubleshooting Tips Installation Instructions Safety Instructions
Operating Instructions
Preparing to install the freezer.
Read these instructions completely and carefully.
Freezer Location
Your freezer should be conveniently located for
day-to-day use in a dry, well-ventilated room.
For most efficient operation, it should not be
located where the air temperature around the
freezer is higher than 110°F. (43°C.) or colder
than 32°F. (0°C.).
Be sure to install your freezer on a floor strong
enough to support it when it is fully loaded.
The freezer must be solidly positioned on the floor if
it is to function at its best. Shims may be used to
accomplish this wherever the floor is too uneven. If
the place selected for the freezer is damp or moist,
place 2 X 4’s (51 mm X 102 mm) under its entire
length to assure adequate support.
Clearances
Allow 3″(76 mm) on all sides for proper air
circulation.
Before you call for service…
Troubleshooting Tips
Save time and money! Review the charts on the following
pages first and you may not need to call for service.
Problem Possible Causes What To Do
Freezer does not
Freezer is unplugged. •Push the plug completely into the outlet.
operate
The fuse is blown/circuit •Replace fuse or reset the breaker.
breaker is tripped.
Freezer starts
Lid left open. •Check to see if package is holding lid open.
too frequently
Too frequent or too long
lid openings.
Temperature control •See
About the operation of your freezer.
set too cold.
Freezer operates
Lid left open. •Check to see if package is holding lid open.
too long
Too frequent or too long
lid openings.
Temperature control •See
About the operation of your freezer.
set too cold.
Inadequate air circulation •See
Preparing to install the freezer.
space around cabinet.
Noisy operation
Floor may be weak, causing •Placing 2 X 4’s (51 mm X 102 mm) under the length of
or cabinet vibrates
freezer to vibrate when the freezer will help support it and may reduce vibration.
compressor is on.
Cabinet is not positioned •Adjust legs. See
Preparing to install the freezer.
Or use
solidly on floor. shims for uneven floor.
10

11
Problem Possible Causes What To Do
Freezer temperature
Lid left open. •Check to see if package is holding lid open.
too warm
Too frequent or too long
lid openings.
Temperature control not •See
About the operation of your freezer.
set at cold enough setting.
Foods defrosting
Freezer is unplugged. •Push the plug completely into the outlet.
The fuse is blown/circuit •Replace fuse or reset the breaker.
breaker is tripped.
Lid left open. •Check to see if package is holding lid open.
Too frequent or too long
lid openings.
Freezer temperature
Temperature control •See
About the operation of your freezer.
too cold
set too cold.
Moisture forms on
Not unusual during •Wipe surface dry.
outside of cabinet
periods of high humidity.
Interior light does
No power at outlet. •Replace fuse or reset the breaker.
not work
Freezer is unplugged. •Push the plug completely into the outlet.
(on some models)
Light bulb burned out. •Replace bulb.
Lid won’t fully
Package holding lid open.
close by itself
Slow starting time
Built-in overload protection.
after being off
Excessive frost
Lid left open. •Check to see if package is holding lid open.
build-up
Too frequent or too long
lid openings.
Not unusual during
periods of high humidity.
Alarm sounds
Freezer has not yet cooled •Set the temperature monitor to “ ” (off) temporarily
(on some models)
down after temperature control until new cold level is reached.
is turned to a colder setting.
A lot of frozen food added at •Set the temperature monitor to “ ” (off) temporarily
one time will raise freezer until temperature returns to normal for the selected
temperature. setting.
Customer ServiceTroubleshooting Tips
Operating Instructions
Safety Instructions Installation Instructions

12
Customer Service Troubleshooting Tips Operating Instructions Safety Instructions
Installation Instructions
Customer Service Troubleshooting Tips Installation Instructions Safety Instructions
Operating Instructions
Customer Service Troubleshooting Tips Installation Instructions Safety Instructions
Operating Instructions
Notes.

13
General Electric Company
Warranty Registration Department
P.O. Box 34070
Louisville, KY 40232-4070
GE Service Protection Plus™
GE, a name recognized worldwide for quality and dependability, offers you Service
Protection Plus™—comprehensive protection on all your appliances—No Matter
What Brand!
Benefits Include:
• Backed by GE
• All brands covered
• Unlimited service calls
• All parts and labor costs included
• No out-of-pocket expenses
• No hidden deductibles
• One 800 number to call
You will be completely satisfied with our service protection or you may request your money back
on the remaining value of your contract. No questions asked. It’s that simple.
Protect your refrigerator, dishwasher, washer and dryer, range, TV, VCR and much more—any brand!
Plus there’s no extra charge for emergency service and low monthly financing is available. Even icemaker
coverage and food spoilage protection is offered. You can rest easy knowing that all your valuable
household products are protected against expensive repairs.
Place your confidence in GE and call us in the U.S. toll-free at 800-626-2224
for more information.
*All brands covered, up to 20 years old, in the continental U.S.
We’ll Cover Any Appliance.
Anywhere. Anytime.*
Please place in envelope and mail to:
✁Cut here

Consumer Product Ownership Registration
Model Number Serial Number
Important
Mail
Today!
GEAppliances
General Electric Company
Louisville, Kentucky 40225
First
Name
Mr. ■■Ms. ■■Mrs. ■■Miss ■■
Street
Address
City
State
Date Placed
In Use
Month Day Year
Zip
Code
Apt. #
Last
Name
Phone
Number _ _
Consumer Product Ownership Registration
Dear Customer:
Thank you for purchasing our product and thank you for placing your
confidence in us. We are proud to have you as a customer!
Follow these three steps to protect your new appliance investment:
Complete and
mail your Consumer
Product Ownership
Registration today.
Have the peace of
mind of knowing we
can contact you in
the unlikely event of
a safety modification.
After mailing
the registration
below, store this
document in a safe
place. It contains
information you
will need should
you require service.
Our service number
is 800-GE-CARES
(800-452-2737).
Read your Owner’s
Manual carefully.
It will help you
operate your new
appliance properly.
If you have questions,
or need more
information call the
GE Answer Center®
800.626.2000.
Important: If you did not get a registration card with your product,
detach and return the form below to ensure that your
product is registered.
12 3
Model Number Serial Number
✁Cut here
14

Freezer Warranty
(For customers in the United States)
All warranty service provided by our Factory Service Centers,
or an authorized Customer Care
®
technician. For service,
call 800-GE-CARES.
Warranty may vary in Canada. See your approved GE dealer
for details.
For The Period Of: GE Will Replace, At No Charge To You:
One Year Any part
of the freezer which fails due to a defect in materials or workmanship.
From the date of the
During this
full one-year warranty,
GE will also provide,
free of charge,
all labor
original purchase
and in-home service to replace the defective part.
Five Years Any part of the sealed refrigerating system
(the compressor, condenser, evaporator
From the date of the
and all connecting tubing) which fails due to a defect in materials or workmanship.
original purchase
During this
five-year warranty,
GE will also provide,
free of charge,
all labor and
in-home service to replace the defective part.
One or Five Years Food which has spoiled because of a manufacturing defect
either in: a) any part of the
From the date of the
freezer within one year from the date of original purchase, or b) any part of the sealed
original purchase
refrigerating system within five years from the date of original purchase.
Not to exceed
(Limited warranty) the cumulative limit specified below.
Freezer Capacity Cumulative Limit
14.9 cu. ft. and smaller $100.00
15.0 cu. ft. and larger $150.00
Within 30 days after food spoilage occurs, you must provide satisfactory proof of the
spoilage
to a Factory Service Center, an authorized Customer Care® servicer or the
dealer from whom the freezer was purchased.
■Service trips to your home to teach you how to use the
product.
■Improper installation.
■Failure of the product if it is abused, misused, or used for
other than the intended purpose or used commercially.
■Food spoilage caused by:
a) Power interruption from the utility.
b)Blown fuse, open circuit breaker or other power
disconnection on the owner’s premises.
c) Freezer not operating because of abnormally low
electric power voltage or inadequate house wiring.
■Replacement of house fuses or resetting of circuit
breakers.
■Damage to the product caused by accident, fire, floods or
acts of God.
■Incidental or consequential damage to personal property
caused by possible defects with this appliance.
What GE Will Not Cover:
This warranty is extended to the original purchaser and any succeeding owner for products purchased for home
use within the USA. In Alaska, the warranty excludes the cost of shipping or service calls to your home.
Some states do not allow the exclusion or limitation of incidental or consequential damages. This warranty gives
you specific legal rights, and you may also have other rights which vary from state to state. To know what your
legal rights are, consult your local or state consumer affairs office or your state’s Attorney General.
Warrantor: General Electric Company. Louisville, KY 40225
Customer ServiceTroubleshooting Tips
Operating Instructions
Safety Instructions Installation Instructions
15

Customer Service Troubleshooting Tips Operating Instructions Safety Instructions
Installation Instructions
Customer Service Troubleshooting Tips Installation Instructions Safety Instructions
Operating Instructions
Customer Service Troubleshooting Tips Installation Instructions Safety Instructions
Operating Instructions
Printed in the United States
16
Service Telephone Numbers
GE Answer Center
®
In the U.S.: 800.626.2000
The GE Answer Center® is open 24 hours a day, 7 days a week.
In Canada,
contact: Manager, Consumer Relations, Camco Inc., Suite 310, 1 Factory Lane,
Moncton, N.B. E1C 9M3.
In-Home Repair Service
In the U.S.: 800-432-2737
Expert GE repair service is only a phone call away.
In Canada,
call 1-800-361-3400.
Special Needs Service
In the U.S.: 800.626.2000
GE offers, free of charge, a brochure to assist in planning a barrier-free kitchen for persons
with limited mobility.
In the U.S., call 800-TDD-GEAC (800-833-4322).
In Canada,
contact: Manager, Consumer Relations, Camco Inc., Suite 310, 1 Factory Lane,
Moncton, N.B. E1C 9M3.
Service Contracts
In the U.S.: 800-626-2224
Purchase a GE service contract while your warranty is still in effect and you’ll receive a
substantial discount. GE Consumer Service will still be there after your warranty expires.
In Canada,
call 1-800-461-3636.
Parts and Accessories
In the U.S.: 800-626-2002
Individuals qualified to service their own appliances can have parts or accessories sent directly
to their homes (VISA, MasterCard and Discover cards are accepted).
Instructions contained in this manual cover procedures to be performed by any user. Other servicing
generally should be referred to qualified service personnel. Caution must be exercised, since
improper servicing may cause unsafe operation.
Customers
in Canada
should consult the yellow pages for the nearest Camco service center.
Service Satisfaction
If you are not satisfied with the service you receive from GE:
First,
contact the people who serviced your appliance.
Next,
if you are still not pleased,
in the U.S.,
write all the details—including your phone number—
to: Manager, Consumer Relations, GE Appliances, Appliance Park, Louisville, KY 40225; or,
in Canada,
to Director, Consumer Relations, Camco Inc., Suite 310, 1 Factory Lane, Moncton,
N.B. E1C 9M3.
Finally,
if your problem is still not resolved, write Major Appliance Consumer Action Program,
20 North Wacker Drive, Chicago, IL 60606 (U.S. only).

Congélateurs
Coffres
Pièce N
O
162D1522P005 Pub. N
O
49-6945 1-34485-002
Modèles:
FH5
FH7
FH10
FH15
FH22
Manuel d’utilisation
Électroménagers GE

Félicitations!
Désormais vous faites partie de la famille GE.
Bienvenue dans la famille GE. Nous sommes fiers de
la qualité de nos produits et de la fiabilité de notre
service après-vente. Vous le constaterez dans le
présent manuel, facile à utiliser, et dans la voix
amicale de notre personnel du service à la clientèle.
Mais, surtout, vous le constaterez chaque fois que
vous vous servirez de votre congélateur. C’est
important, car votre nouveau congélateur fera partie
de votre famille pendant des années. Et nous
espérons que vous ferez partie de la nôtre pendant
longtemps aussi.
Nous vous remercions de votre achat GE, et espérons
qu’à l’avenir vous penserez à nous chaque fois que
vous aurez besoin d’un électroménager de qualité.
GE et vous, un partenariat de service.
Mesures de sécurité
Mesures de sécurité . . . . . . . . .3
Cordons prolongateurs . . . . . . .3
Raccordement électrique . . . . .4
Fiche d’adaptation . . . . . . . . . .4
Fonctionnement
Mise en marche
du congélateur . . . . . . . . . . . . .5
Caractéristiques . . . . . . . . . .5, 6
Directives de dégivrage . . . . . .7
Entretien et nettoyage . . . . .8, 9
Installation
Préparatifs pour l’installation
du congélateur . . . . . . . . . . . .10
Conseils de dépannage
Avant d’appeler
un réparateur . . . . . . . . . .10, 11
Service à la clientèle
Garantie . . . . . . . . . . . . . . . . .15
Numéros de service . . . . . . . .16
À CONSERVER SOIGNEUSEMENT
Transcrivez les numéros de modèle et de série ici.
##
Ils sont inscrits sur une plaque située à l’extérieur, au centre de
l’arrière du congélateur.
Agrafez ici votre facture ou une copie de votre chèque.
Pour bénéficier de réparations sous garantie, il faut fournir une
preuve de la date d’achat d’origine.
Vous y trouverez de nombreux conseils pour l’utilisation et
l’entretien de votre congélateur. Ces quelques mesures préventives
vous permettront d’économiser du temps et de l’argent, et, ainsi, de
prolonger la vie de votre congélateur.
Vous trouverez des solutions aux problèmes courants que vous
pourriez rencontrer dans la section
Avant d’appeler un réparateur.
Et, en consultant d’abord nos
Conseils de dépannage,
vous pourrez
peut-être éviter de faire appel à un réparateur.
LISEZ VOTRE MANUEL
SI VOUS AVEZ BESOIN DE SERVICE
Si vous avez besoin de service, vous savez que vous n’avez qu’à
nous téléphoner. Vous trouverez à la fin du présent manuel les
numéros sans frais du service à la clientèle.
Aux États-Unis,
vous
pouvez appeler 24 heures par jour, 7 jours par semaine au GE
Answer Center®, 800.626.2000.
Au Canada,
appelez le
1-800-361-3400.
2
Service à la clientèle Conseils de dépannage Fonctionnement Mesures de sécurité
Installation

MESURES DE SÉCURITÉ IMPORTANTES.
LISEZ D’ABORD TOUTES LES DIRECTIVES.
AVERTISSEMENT!
N’utilisezcetélectroménager que pour l’usage auquel il est destiné, comme expliqué dans le présent manuel.
MESURES DE SÉCURITÉ
Lorsque vous utilisez un appareil électrique, observez toujours les mesures de sécurité de base,
y compris les suivantes.
■
■Installez le congélateur conformément aux
directives d’installation avant de l’utiliser.
■
■Le congélateur le devrait pas être mis dans un
renfoncement ni encastré. Il est conçu seulement
pour une installation non-encastré.
■
■Ne laissez pas les enfants grimper, s’asseoir, se
tenir debout ni se pendre aux clayettes du
congélateur. Ils pourraient endommager le
congélateur et se blesser gravement.
■
■Après la mise en route du congélateur, ne
touchez pas les surfaces froides de celui-ci, surtout
si vous avez les mains humides ou mouillées. La
peau risque d’adhérer à ces surfaces très froides.
■
■N’entreposez et n’utilisez pas d’essence ou autres
vapeurs et liquides inflammables à proximité de cet
appareil ou de tout autre appareil électroménager.
■
■Débranchez votre congélateur avant de le nettoyer
ou de le réparer, et avant de remplacer l’ampoule.
REMARQUE : Nous vous recommandons vivement de confier
toute réparation à un technicien qualifié.
■
■Lorsque vous réglez la commande sur
0
(éteint),
le courant alimentant le circuit électrique de
l’ampoule n’est pas coupé sur les modèles avec
une lampe intérieure.
■
■N’utilisez jamais un dispositif électrique ni un
ustensile tranchant pour dégivrer votre congélateur.
■
■Ne recongelez pas les aliments surgelés qui ont
complètement dégelé.
■
■Soyez prudent lorsque vous enlevez la porte d’un
congélateur. Soyez particulièrement prudent
lorsque vous enlevez le couvercle d’un
congélateur coffre puisque la plupart de ceux-ci
sont à ressort.
Vous trouverez des directives pour enlever le
couvercle de votre congélateur à l’arrière de
l’appareil.
Communiquez avec un représentant du fabricant
pour connaître la meilleure méthode permettant
d’enlever le couvercle.
IMPORTANT : COMMENT VOUS DÉBARRASSER
CONVENABLEMENT DE VOTRE CONGÉLATEUR
Les enfants pris au piège ou morts d’asphyxie sont
toujours d’actualité. Les réfrigérateurs et congélateurs
abandonnés sont toujours aussi dangereux, même si
on n’attend que «quelques jours» pour s’en
débarrasser. Si vous ne gardez pas votre ancien
réfrigérateur ou congélateur, veuillez suivre les
directives ci-dessous afin de prévenir les accidents.
Avant de vous débarrasser de votre ancien
réfrigérateur ou congélateur :
■Démontez les portes.
■Laissez les clayettes en place afin d’empêcher les
enfants de grimper à l’intérieur.
Se débarrasser du CFC
Votre ancien congélateur a un système de
refroidissement qui a utilisé les CFC
(chlorofluorocarbones). Les CFC sont jugés
nocifs pour l’ozone stratosphérique.
Si vous vous débarrassez de votre ancien
congélateur, assurez-vous que le frigorigène avec
CFC soit enlevé correctement par un technicien
qualifié. Si vous libérez intentionnellement ce
frigorigène avec CFC vous pouvez être soumis aux
contraventions et à l’emprisonnement sous
provisions du Clean Air Act fédéral.
CORDONS PROLONGATEURS
Nous vous recommandons fortement de ne pas utiliser de cordons prolongateurs à cause des risques
potentiels qu’ils présentent dans certaines conditions.
Toutefois si vous décidez d’utiliser tout de même un cordon prolongateur, il est absolument nécessaire
qu’il s’agisse d’un cordon à 3 fils avec mise à la terre pour appareils électroménagers homologué UL
(aux États-Unis) ou homologué CSA (au Canada), pourvu d’une fiche et d’une prise mises à la terre
de 15 ampères (minimum) et de 120 volts.
Service à la clientèleConseils de dépannage
Fonctionnement
Mesures de sécurité Installation
3

4
MESURES DE SÉCURITÉ IMPORTANTES.
LISEZ D’ABORD TOUTES LES DIRECTIVES.
AVERTISSEMENT!
RACCORDEMENT ÉLECTRIQUE
Ne coupez ni retirez en aucun cas la troisième broche (mise à la terre) de la fiche du cordon
d’alimentation. Pour votre sécurité, cet appareil doit être correctement mis à la terre.
Le cordon d’alimentation de cet appareil est muni
d’une fiche à 3 broches (mise à la terre) qui se
branche dans une prise murale ordinaire à 3
alvéoles (mise à la terre) pour réduire au minimum
les risques de chocs électriques.
Faites examiner la prise de courant et le circuit par
un électricien qualifié pour vous assurer que la prise
est correctement mise à la terre.
Si la prise murale est du type standard à 2 alvéoles, il
vous incombe de la faire remplacer par une prise à 3
alvéoles correctement mise à la terre.
Le congélateur doit toujours être branché dans sa
propre prise de courant, dont la tension nominale est
identique à celle indiquée sur la plaque signalétique.
Cette précaution est recommandée pour garantir
un rendement optimum et éviter une surcharge des
circuits électriques de la résidence, ce qui pourrait
créer un risque d’incendie par surchauffe des fils.
Ne débranchez jamais le congélateur en tirant sur le
cordon d’alimentation. Saisissez fermement la fiche
du cordon et tirez droit pour la retirer de la prise.
Réparez ou remplacez immédiatement tout cordon
effiloché ou endommagé. N’utilisez pas un cordon
fendillé ou présentant des signes d’usure.
Lorsque vous déplacez votre congélateur du mur,
faites attention de ne pas le faire rouler sur le cordon
d’alimentation afin de ne pas l’endommager.
FICHE D’ADAPTATION
(Fiches d’adaptation non permises au Canada)
Nous vous recommandons fortement de ne pas utiliser une fiche d’adaptation à cause des risques
potentiels qu’elle présente dans certaines circonstances.
Toutefois, si vous décidez d’utiliser tout de même
une fiche d’adaptation, vous pouvez effectuer un
raccordement temporaire,
si les codes locaux le
permettent, dans une prise de courant à 2 alvéoles
adéquatement mise à la terre en utilisant une fiche
d’adaptation homologuée UL, en vente dans la
plupart des quincailleries.
La fente la plus longue de la fiche doit être alignée
avec la fente la plus longue de la prise murale afin
d’assurer la polarité appropriée pour le
branchement du cordon d’alimentation.
Lorsque vous débranchez le cordon d’alimentation
de la fiche d’adaptation, saisissez toujours la fiche
d’une main pendant que vous tirez sur la fiche du
cordon d’alimentation de l’autre. Sinon,
la borne de mise à la terre de la fiche d’adaptation
risque de casser avec le temps.
Si la borne de mise à la terre de la fiche casse,
N’UTILISEZ PAS
l’appareil tant qu’une mise à la terre
adéquate n’aura pas été rétablie.
Le fait de fixer la borne de mise à la terre de la fiche
d’adaptation à la plaque de la prise de courant n’assure
pas automatiquement la mise à la terre de l’appareil. Il
faut que la vis soit en métal, non isolée, et que la prise de
courant soit mise à la terre par l’entremise du câblage de
la résidence. Faites vérifier le circuit par un électricien
qualifié pour vous assurer que la prise est adéquatement
mise à la terre.
Veuillez lire et suivre attentivement ces mesures de sécurité.
CONSERVEZ CES DIRECTIVES
Service à la clientèle Conseils de dépannage Fonctionnement Mesures de sécurité
Installation
Other manuals for FH5
2
This manual suits for next models
4
Table of contents
Languages:
Other GE Freezer manuals

GE
GE FCM22L Operating instructions

GE
GE GE Profile FCM5SAWH User instructions

GE
GE FUM14SVRWW Assembly instructions

GE
GE FCM15SUWW Assembly instructions

GE
GE MONOGRAM ZIF36NM User instructions

GE
GE FUM15 Original instructions

GE
GE FCM20SU Manual

GE
GE FH25 User manual

GE
GE FUF21 Operating instructions

GE
GE FCM7DAWH User instructions