manuals.online logo
Brands
  1. Home
  2. •
  3. Brands
  4. •
  5. GE
  6. •
  7. Microwave Oven
  8. •
  9. GE JKP61G User manual

GE JKP61G User manual

-
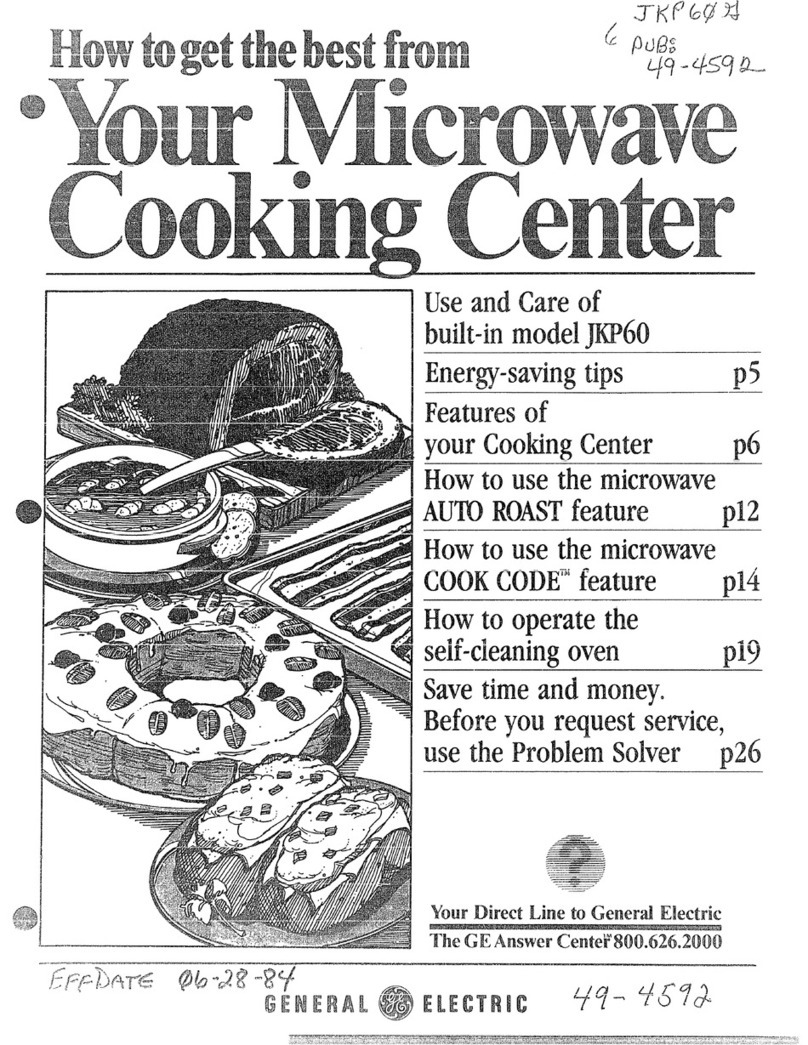
How from
w
UseandCareof
model
Features pti
AUTOROASTfeature p8
CODETMfeature p14
Howtooperatethe
loweroven p24
Usethe Solver
~
m
~
Line to
-
me
i
Red. ‘thisbook Gmfully.
His intendedto help youoperate
and maintain your new Cooking
Center properly.
Keepit handy for answersto your
questions.
If youdon’tunderstand something
or need more help, write (include
yourphone number):
Consumer Affairs
General Electric Company
Appliance Park
Louisville, KY40225
-whitedown the model and
mid Jnlm-dm’s.
Youll find them on alabel on the
front of the lower oven behind the
door.
These numbers are also on the
Consumer Product Ownership
Registration Card that came with
your Cooking Center. Before
sending in this card, please write
these numbers here:
Use these numbers in any corres-
pondence or servicecalls con-
cerning your Cooking Center.
Be sure your oven is regishmx.1.
It is important that we, the manu-
facturer, know the location of your
Cooking Center should aneed
occur for adjustments.
Your supplier is responsible for
registering you as the owner,
Please check with your supplier to
be sure he has done so; also send in
your Consumer Product Ownership
Registration Card, If you move, or
if you are not the original purchaser
please write to us, stating model
and serial numbers. This appliance
must be registered.Pleasebe Icer-
tainthat it k.
Write to:
General Electric Company
Range Product Service
Appliance Park
Louisville, KY 40225
H‘youreceived adtlmaged
oven. ● ●
immediately contact the dealer (or
builder) that sold you the Cooking
Center.
save time and money.
Before you request service,check
the ProblemSolveron page 29. It
lists minor causes of operating
problems that you can correct
yourself.
The electric outputofthis
microwaveovenis 625 watts.
mibw iS ch~md
tthe o
The panel displays four 8’sand all
of the oven functions on the lower
portion. After 15seconds, all lights
disappear and “PF” appears in the
upper portion. Touch the CLEAR/
OFF pad and oven is ready for use
and the clock can be set.
If power is disrupted at any time,
the above sequence reoccurs, and
you must reset CLOCKafter
touching CLEAR/OFF,
(a) Do Not Attempttooperate this
oven with the door open sinceopen
door operation can result in harmful
exposure to microwave energy. It is
important not to defeat or tarnper
with the safety interlocks.
(b) Do Not Place any object
between the oven front face and the
door or allow soil or cleaner
residue to accumulate on sealing
surfaces.
(c) Do Not (@mate the oven if it is
damaged. It is particularly impor-
tant that the oven door close prop-
erly and that there is no damage to
the:
(1) door (bent),
(2) hingesand latches (broken or
loosened),
(3) door sealsand sealing surfaces.
(d) The Oven Should PM be
adjusted or repaired by anyone
except properly qualified service
personnel.
T
@Make sure all utensils used in
your microwave oven are labeled
“suitable for microwaving”. Check
your Cookbook for specifictest
to determine “microwave-safe”
utensils.
@Paper towe]s, wax paper, and
plastic wrap can be used to cover
dishes in order to retain moisture
and prevent spattering.
@Some microwaved foods require
stirring, rotating, or rearranging.
Check your Cookbook for specific ,.~.
instructions. ..........
-’%%
@Some foods such as unshelled
eggs and hot dogs must be pierced $$&,
to allow steam tc escape during ~)
,>:-.<
-=:::.
cooking,
~WuresofYourOwn .........6
CookingCompleteReminder. ...6
TouchControl Panel ...........7
Au~ornaticRoasting&
Guide ..................8, 9
Defrosting. .................10
TimeCook . . . . . . . . . . .......11
AUTOSTART...............H
TempCook/Hold . . . . . .......12
.Minute/SecondTimer. ........13
COOKCODETfi’ControI.. .....14
COOKCODETMControl Guide. .15
SafetyInstructions ..........3-5
Features . . . . . . . . . . . . . . . . . . . .6
OvenContro.k . . . . . . . ........6
—OvenLight . . . . . . . . . . .......17
-=----OvenShelves . . . . . . . . .......17
—IbfinuteTimer, Clock,
.AutomaticOven Timer .. ....17
aking . . . . . . . . . . . . . .. .....18
BakingGuide . . . . . . . . .......19
Roasting ....................20
RoastingGuide. . . . . . . .......21
Broiling . . . . . . . . . . . . .......22
BroilingGuide ..............23
Self-CleanOperation......24,25
BeforeUsing Your
CookingCenter ............2
Energy-SavingTips ...........5
Model&Serial Number
Location . . . . . . . . . . ........6
Care ofYourCooking Center. ..26
Limp Replacement...........27
O\VJIT/em
Duct . . . . . . .......27
ChfenThermostat
,%djustment...............27
-hClcanhg Guide .............28
--2..
;+ The Problem Solver ......,29, 30
‘“-’~fl~o~]iJ~fz~~ervi~e ....,.....31
.<y:.-iirr~,~i~y...........Back Cover
.- .]
Mkn using electrical appliances
basic safety precautions should
be followed, including the
foilowing:
WARNING—TO reduce the
electricshock,fire,
injuryto persons or exposureto
excessivemicrowaveenergy:
49 Usethis applianceonlyfor its
intendeduse as describedin this
manual.
@Besure your applianceis prop-
erlyinstalledand groundedby a
qualif~edtechnicianin accordance
with the providedinstallation
instructions.
~This appliancemust becon-
nectedto agrounded, metallic,
permanent wiringsystem,or an
equipmentgrounding conductor
should be run with the circuit
conductorsand connectedto the
equipmentgroundingterminalor
lead on the appliance.
&This applianceshouldbe ser-
vicedonly by qualilledserviceper-
sonnel.Contact nearestauthorized
servicefacilityfor examination,
repair or adjustment.
@Beforeperformingany
service,DISCONNECT THE
OVEN POWER SUPI%X AT
THE HOUSEHOLD DR3TRI-
BUTICJNPANEL BY RE-
MOVING THE FUSE OR
SWITCHING OFF THE CR-
CXJITBREAKER.
@Do not coveror blockany
openingson the appliance.
aI Do not use outdoors.
sDo not operate this appliance
if it is not workingproperly,or if
it has been damaged or dropped.
63 As with any appliance,close
supervisionis necessarywhen used
by chiklren.
@13Mm’tallow to cM@b9
stmlldor hang on the door. They
$xNdd the Gwen.
@m-l Ii’lotkm%? akin%’===
chikhen should nbe leftalone
or unattended in area where
applianceis in use.Theyshould
neverbe allowedto sit or stand on
any part of the appliance.
@Cfimm’r+i: m) No%’STORE
rrm!w$ W? m
m
AN o’vEN=- ON
THE OVEN‘IDREACH r
COULD BE
WMMOproper clothing. Loose
fitting or hanginggarmentsshould
neverbe wormwhile’usingthe
appliance.Flammablematerial
could be;gnitedif brought in con-
tact with hot heatingelementsand
may causeseverebums.
@uUmlydry
moist or damp potholderson hot
surfacesmay resultin burns from
steam. Do not let potholders
touch hot heatingeltiments.Do
not use atowelor other bulky
cloth.
@Never use your fox’
m’ the I!x3@m.
@Do not shin? m3k-
ri$als the oven.
@Keep hood and $pwase
cleanto maintain good venting
and to avoid greasefires.
@lh rHwinking grease or
other auwi-
n’ndate the oven k
@Do nU!M3wgrt?ast?
fown cm be SE-m9th”
6X-WIby ckx!ingdkm
tw’ld
@CX.3dk.hgpork follow our
directionsexactly and alwayscook
the meat to at least 170°.This
assuresthat, in the remote possi-
bilitythat trichina may be present
in the meat, it willbe killedand
meat willbe safe to eat.
(continued next page]
*Do notouchheating ekments
or insof mm. These
surfacesmaybe hot enough toburn
eventhoughthey are dark in color.
During and after use, do nottouch,
or letclothingor other flammable
materialscontactany interior area
of theoven;allowsufficienttime
forcooling, first.
Other potentiallyhot surfaces
includetheovenventopenings
and surfacesnear the openings,
crevicesaround the ovendoor and
theedgesof the door window.
Remember: The inside surfaceof
the ovenmay be hot when the door
isopened. oven
@Read and followthe specific
“PRECAUTKINS TO AVOID
POSSIBLE EXPOSURE TO
EXCESSIVE MICROWAVE
ENERGY” foundon page 2.
@Toreduce the risk of fire in the
ovencavity:
—Donotovercookfood. Carefully
attendapplianceif paper, plastic,
or other combustiblematerials are
placed insidethe ovento facilitate
cooking.
—Removewire twist-ties from
paper or plastic bagsbefore placing
bag in oven.
—Donot use your microwaveoven
to dry newspapers.
—Paper towels, napkins andwax
paper.Recycledpaper products
can contain metalflecks which
maycause arcing or ignite. Paper
productscontainingnylon or nylon
filamentsshould be avoided, as
theymay also ignite.
—Donot pop popcorn in your
microwave oven unless in aspecial
microwavepopcorn accessory or
unlessyou use popcorn labeled for
use in microwaveovens.
—Donot operate the oven while
empty to avoiddamagetothe
ovenandthedangeroffire.If by
accidentthe ovenshouldrun empty
aminuteor two, no harm is done.
However,try to avoidoperatingthe
ovenempty at all times—itsaves
energy and prolongslifeofthe
oven.
—Ifmaterials insidethe oven
should ignite, keep ovendoor
closed, turn ovenoff, and
disconnectthe power cord, or shut
offpower at the fuse or circuit
breaker panel.
@Some productssuchaswhole
eggsandsealedcontainers-for
example, closed glassjars—may
explodeand shouldnotbe heated in
this oven.
@Avoidheatingbabyfoodin
glassjars, evenwithouttheirlids;
especiallymeatandeggmixtures.
@Seedoorsurfacecleaning
instructionsonpage26.
43Don’tdefrostfrozen
beverages
in narrow neckedbottles
(especiallycarbonated beverages).
Even if the container is opened,
pressure can build up. This can
cause the container to burst,
resulting in injury.
@Use metal only as directed in
Cookbook. Foil strips as used on
meat, roasts are helpfid when used
as shownin Cookbook.
TV dinners maybe microwavedin
foiltraysless than 3/4”high. When
usingmetal in microwaveoven,
keep metal (except for DOUBLE
DUTYTM
she~t)atleast1inch
awayfromsidesofoven.
@Cookingutensilsmaybecome
hotbecause ofheat transferred
from the heated food. Potholders
maybe neededtohandletheutensil.
@Sometimes,theovenfloor
canbecometoohottotouch.Be
careful touching the floor during
and after cooking.
4
@FQodscookedinliquids(such
as pasta)may tend to boil over
more rapidly than foodscontaining
less moisture. Shouldthisoccur,
refer to page 26 for instructionson
howto clean the inside of the oven.
@Do notuseathermometerin
food youare microwavingunless
that thermometer is designedor
recommended foruse in the
microwaveoven.
@Removethetemperature
probefromtheovenwhennot
usingitto cook with. If youleave
the probe insidethe ovenwithout
inserting it in foodor liquid, and
turn on microwaveenergy,it can
create electrical arcing in the oven
and damage ovenwalls.
@Boilingeggsisnot
recommendedinamicrowave
oven.Pressure can build up inside
eggyolk and may cause it to burst,
resultingin injury.
@Foodswithunbroken
outer‘&skin”
such as potatoes,
sausages,tomatoe~,apples,
chicken livers and other giblets,
and eggyolks(seeprevious
caution) shouldbe pierced to allow
steamto escape during cooking.
@PlasticUtensils—Plastic
utensilsdesigned for microwave
cookingare very useful, but should
be used carefully.Even microwave
plastic may not be as tolerant of
—
overcookingconditions as are glass
or ceramic materials and may
softenor char if subjectedto short
periods ofovercooking. In longer
exposuresto overcooking,the food
and utensilscould ignite. For these
reasons: 1)Use microwaveplastics
only and use them in strict
compliance with the utensil
manufacturer’srecommendations.
2) Do not subjectempty utensilsto
microwaving.3) Do not permit
children to use plastic utensils
without complete supervision.
--
*‘g~oila~]fyWMng pouches
andtightly C1OSMIplastic bags
shouldbe slit, pierced or ventedas
directed in Cookbook If theyare
not, plastic could burst during
or immediately after cooking,
possiblyresulting in injury. Also,
plasticstorage containers shouldbe
atleastpartially uncoveredbecause
theyform atight seal. Vi’hen
cookingwith containers tightly
coveredwith plastic wrap, remove
co~’eringcarefully and direct steam
awayfrom hands and face.
@Spontaneous boiling-Under
certainspecial circumstances,
liquidsmay startto boil during or
shortlyafter removalfrom the
microwaveoven. Toprevent burns
from splashing liquid, stir the
liquidbriefly beforeremovingthe
containerfrom the microwaveoven.
@Use of the DOUBLE DUTYTM
sheifaccessory.(Seeyour
Cookbook for proper use.)
—Removethe shelffrom oven
whennot in use.
–Do not store or cook with shelf
onfloor of oven. Product damage
mayresult.
–Use potholders when handling
theshelf and utensils. They may
behot.
—Donot use microwave
browningdish on shelf. The shelf
couldoverheat. Use of shelfwith
AutomaticCooking feature isnot
recommended.
JJy$yfy oven:
~Stand away from the oven
when opening oven door. The hot
air or steam which escapes can
cause burns to hands, face
andlor eyes.
@Don%heat unopened food
containers in the oven. Pressure
could hdd up and the container
could burst cawing an injury.
@Keep ovenventducts
unobstructed.
@Keep ovenfree from grease
buildup.
@Place ovenrack in desired
position while ovenis cool. If racks
must be handled when hot, do not
let potholder contactheatingunits
in the oven.
*Pulling out shelfto the shelf
stopis aconveniencein lifling
heavyfoods. It is also aprecaution
againstburns from touchinghot
surfacesof the door or ovenwalls.
@When using cookingor
roastingbags in oven, followthe
manufacturer’sdirections.
‘@ Do notuseyourovento dry
newspapers. If overheated,they
can catch fire. ow
@Do notcleandoorgasket.The
door gasketis essential for agood
seal. Care shouldbe takennotto
rub,.damage or movethe gasket.
@Do notuseovencleaners.No
commercial ovencleaner or oven
liner protectivecoating ofany kind
shouldbe used in or around any
part ofthe oven.
@Clean only parts listed in this
Use and Care Book.
@Beforeself-cleaningtheoven,
removebroiler pan and other
utensils.
@Listenforfan—a fan noise
shouldbe heard sometime during
the cleaning cycle.If not, call for
service before self-cleaningagain.
C130khg
@Use proper powerlevelas
recommended and DO NOT
OVERCOOK.
@Do not operatethe ovenwhile
empty.If by accidentthe oven
shouldrun empty aminuteor two,
no harm is done. However,try to
avoidoperating the ovenempty at
alltimes—savesenergy and also
ensures good long-termlife ofoven.
ov
cooking
@Preheat the ovenonly when
necessary. Most foodswill cook
satisfactorilywithoutpreheating. If
youfind preheating is necessary,
keep an eyeon theindicator light,
and put food in the ovenpromptly
after the lightgoesout.
*Alwaysturn ovenOFF before
removingfood.
@Don’topen the ovendoor any
more oflen than necessary during
baking. If you do haveto open it,
close it as soon aspossible.
@Be sure to wipeup excess
spillagebefore self-cleaning
operation.
@Cook complete ovenmeals
insteadofjust onefood item.
Potatoes,other vegetables,and
some desserts willcook together
with amain-dish casserole, meat
loaf, chicken or roast. Choose
foodsthat cook at the same
temperature in approximatelythe
same time.
~Use residual heat in oven
whenever possibleto finish
cooking casseroles, ovenmeals,
etc. Also, add rollsor precooked
desserts to warm oven, using
residualheat to warm them.
5
—
—LLL
L
2.
3
. .
4.
5.
6.
‘7.
8.
9.
10.
H.
12.
Door Handle.Pulltoopen
door.Doormustbesecurely
latchedforovento operate.
Inside Door Latches.
Windowwith Metal $hiekl.
Allowscookingtobeviewed
whilekeepingmicrowaves
confinedinoven.
Light.
Antenna Cover.
Protectsthemicrowaveenergy
distributingsystem.Donot
removethecover.Youwill
damagetheoven.
Oven Vent.
OvenFloor.
MI(3WH3ERMOMETERTM
temperatureprobe.
ReceptacleforTemperature
Probe.
DOIJBLE-DUTYTMshelf. Lets
youmicrowaveseveralfoodsat
once.Do notuseshelfwithout
plasticspacersinplaceas shown.
(SeeSafetyInstructionsfor
specialinstructions.)Whenthis
shelfis notin use, pleaseremove
fromtheoven.
ReadoutDisplayand Touch
ControkPads.
Cooking(hide. Quickreference
ix Codesformanyfrequently
]reparedfoods.
1@k’-’t
((’(1“*
r
IllfYrIL.9%. \-’dim-l “4?)
4
1
(
ModelandSerialNunrbers-
located at right side of lower
oven frame.
Shelf Support.
OvenShelves.
OvenFrame.
Door Gasket.
window.
Oven Set (CHean)hobo
t .,
cooking CWnpk!teR?mimk?l’
(For all AUTO ROAST codes
except Code6, TIME COOK,
I’EMP COOK,DEFROST and
COOK(XIIIEYMcycles:)
To remind you that you have food
in the oven, the oven willbeep once
aminute until you either open the
door or touch the CLEAR/OFF
pad.
13.
14.
15.
16.
17.
18.
19.
23.
24.
25.
26.
2’7.
28.
Owen “ON”Light.
OvenTemp(Clean)Knob.
OvenCyclingLight.
Automatic OvenTimer,C1OCIK,
Minute Timer.
Oven ‘1’imer(Clean) Dial.
Latch Release Button. Door Liner.
BroilerPm andRack. Ama-
29.
30.
31.
32.
20.
21.
22.
Latch.
SeN-CleaningOvenClean
Light.
Lock Light. Oven LightSwitch-Door.
-%?4z
Wan Vent.
6
—
—
●
2.
3.
4.
5.
~
-6.
7.
8*
.—
..
—-
1
DISPLAY. Displays time of’
day, time or temperature dur-
ing cooking functions, power
levelbeing used, cooking mode
and instructions.
POWER LEVEL.Touch this
pad before entering another
power level number if you want
to change from automatic
Power Level 10(HIGH) for
cooking or Power Level 3
(LOW) for defrosting.
START. After all selectionsare
made, touch this pad to start
oven.
CLEAR/OFF. When touched,
it shuts off the oven and erases
all settings (except time of
day).
MIN/SEC TIMER. This fea-
ture uses no microwave energy.
It functions as either akitchen
timer, as aholding period after
defrost or as adelay timer
before time or temperature
cooking. (See page 13.)
CLOCK.Touch this pad to
enter time of day or check time
of day while microwaving. To
set clock, first touch CLOCK
pad and then enter time of day.
For example, if time is 1:30,
touch number pads 1, 3, and O
and 1:30willappear in display.
“Start” will flash on display
directing you to tough START
thus setting the clock. To reset
or cb.angetime, simply repeat
above process.
NIJMBERPADS. Touch these
pads to enter cooking, defrost-
ing time, time of day, tempera-
ture, Power Leveland COOK
CODET”Codes.
AUTOSTART.
program your oven to begin
cooking at apreset time of
day—up to a12hour delay.
(Seepage 11.)
COOK CODE’MCONTROL.
Use this pad as ashort-cut
method for entering cooking
time and power level.(See
page 14.)
AUTO ROAST. Insert Probe,
touch this pad, and desired
number pad for Code to slow-
cook or temperature cook meat
with automatic preset program.
(See page 8.)
TIME COOK. Microwave for
apreset amount of time using
automatic Power Level 10
(or change power levelafter
entering cooking time. See
page 11.)
@
/
o
.----:
a)
—0
—
-—
%i.?aw“-
—— -—-
——-—
—
—
&.
-
—
W
—”.-..—
—
-
..-.——
-
~
—
-
-
E
—
—
—
—
F–
~
-
-
—
E
=k
E
—
—
—
—
~
—
12. DEFROST. Gentle, generally
uniform thawing at automatic
Power Level3, (or change
power levelafter entering
defrosting time. See page 10.)
13. TEIWPCOOK/HOLD. Use
the temperature probe to cook
by using apreset tempera-
ture. Once oven reaches preset
temperature, it switchesto
HOLD setting and.maintains
that temperature until you
touch the CLEAR/OFF pad.
(See page 12.)
~y--
—.
—.
—
—
—
—–
-
-
-
E
-
——
—–
—
—
—
--
—-
—
-T
-
—.
—
—
7
SeeAutoRoastGuideam page !$.
Auto Roast t.westhe temperature
pmheto cook tothe desiredserving
temperature.UnlikeTempCook/
Hold, whichuses asinglepower
level,AMo Roast is designedto use
upto 3power settingswhichauto-
maticallyswitchduringroasting,
forevenandtendercookingresults
withoutovercooking.
H
Sc
Just as in conventional roasting,
only tender roasts should be Auto
Roasted until specified internal
temperatures are reached. Less
tender roasts should be microwaved
bytime, according to the Cookbook
which comes with your oven. Com-
plete information on preparing
roasts for microwaving is in your
Cookbook.
mtP1’epiweRmsts
fAUtO
Place tender beef roasts on trivet in
microwave-safe dish. Insert probe
from the front horizontally into
center meaty area not touching
bone or fat. Cover with wax paper.
Poultry, pork or ham roasts need
no trivet. Add 1/2cup water to roast
dish, cover with plastic wrap. (For
cooking bag method, see Cook-
book.) Insert probe into center
meaty area.
Place meat in oven with probe to
the right. Insert cable end of probe
firmly into receptacle on oven wall.
8
Step 1: Touch AUTO ROAST Pad.
Display flashes ENTER CODE.
Touch number pad 3. “START”
flashes. Touch START.
Step2:Display shows internal food
temperature counting up.
Step 3: Oven monitors internal
temperature, automatically
switching to lower power as meat’s
temperature rises. This helps pre-
vent toughening or overcooking.
Step 4: After temperature is
reached, oven switchesta H(OLD
for 1hr., then shuts off. Hold pre-
vents overcooking while keeping
meat warm.
Step 5: Display willshow “End”.
Step 6: Open door or touch
CLEAIZ/OFF pad.
—
.-
25-1o
3
Well s
M:
4
P1
‘:::::, I~I~:I~J~
“
I I .
[ns
h
20
20
*~ecommended beforesefing.
andJ4mww’s
Q. Whywasn’tmy roastfully
cookedeventhough thetempera-
tureon the displaywas correctand
Auto Roast was completed.
A. The temperature probe must be
properly inserted when you Auto
Roast. Check your Cookbook to
—seewhat you might have done
wrong.
—Q. Do some types of trivets work
than others?
yes. Flat giatrivetsgenerally
provide more browning to the
bottom of meats than plastic
trivets. Also, ceramic ridge-
bottomed roasting dishes usually
work weI1.Plastic trivets may
require meat to be turned over
more often than glass trivets do
because the grid design and legslet
the bottom of the meat stay cooler
than glass trivets do.
Q. WhenI’mcooking withAuto
Roast, whydoesn’tmy roastccm-
tinueio cook duringthe holding
time?
A. Whenyourfoodreachesfin-
ishedtemperature,theovenauto-
maticallyswitchesto alowerpower
level.The even temperature that’s
maintained in the food during this
holding period keeps it warm
without overcooking.
9
(AutoRoastCode6)
Here’showtoAutomaticSimmera
fewpopularfoods.SeeyourCook-
bookformorecookingguides,recipes
andtechniques.
SetAutoSimmerlikeyou do Auto
Roastexcepttouchnumberpad6.
STARTflashes.TouchSTARTand
displayshowstemperatureuntilfood
reaches18(F.
Ovenswitchesto IJOLI)whenfood’s
internaltemperaturereaches180°
and maintainsthat temperatureuntil
food isdone. If stirringis recom-
mended,you can resetthe oven by
retouchingSTART. TouchCLEAR/
OFF when cookingisftisbed.
AutomaticSimmerChide
SI
2 3
.—
The Defrost settingis designedfor
speedythawingoffrozenfoodsand
isme of the greatadvantagesof a
microwavemm.
e~~wLevel~iautomatically
set for defrosting, but you may
change this for more flexibility.
~See your Cookbook for
defrosting help.
When the oven completes defrost-
ing, it automatically shuts off. R
willthen display “End” and beep
onceaminute until you either open
the door or.touch the CLEAR/ OFF
pad.
To become better acquainted with
the defrost functions, defrost frozen
pork chops using the following
steps.
Step 1:Place package of frozen
chops in the oven and closedoor.
Step2:TouchDEFROST.Display
reads:0and PowerLevel-3isauto-
maticallysetin the ovenbutdoes
notappear on display.ENTER
DEF. TIME flashes.
Step 3:Touch 8,0 and Ofor 8min-
utes. DEF. TIME and 8:00are
displayed. If you wish to change
Power Level, touch POWER
LEVEL pad and then new number.
,,: .
Step4:Touch START. T~mecounts
down on display. When cycleis
completed, the oven si~nalsand
automatically shuts off:
Step 5:Turn package over, close
door and repeat Steps 2,3 and 4.
Step&Whenovensignalsand
shutsoff,displaywillshow“End”.
Step 7:Open door or tou&
CLEAR/OFF pad. Remove
package and separate chops to
finish defrosting. :L
r
Defrosting’Tips ‘“
eFoods fr~zen-in paper or plastic
can be defrosted in the package.
eFor even defrosting, many’foods
need to be broken up or separated
part of the way through the defrost-
ing time.
e~omemade dinners can@frozen
in shallow foil trays and heated for
later use. (Do not heat on ~OUBLE
DUTYMshelf.) TV dinne@!canbe
microwaved using wire shelfif
metal tray is returned to b6x b,efore
placing on wi~eshelf. Select ’foods
which microwave well. :, I
,,
@Pre-packaged frozen dinners can
be defrosted:and microwavecl.
eCheck your Cookbook for other
defrosting tips.
WdiAmw#ws
Q. When Ipress STARI”,Ihear a
dull thumpingnoise. Whatis it?
A. This sound is normal. It is let-
ting you know the oven is using a
Power Levellower than HIGH.
Q. GUIIDefrost smallitems in a
hurry?
A. Yes,but they willneed more
frequent atfention than usual. Raise
the Power Level after entering the
time by touching POWER LEVEL
and 7or 10.Power Level 7cuts the
time about in $4;Power Level 10
cuts the time to approximately 1/3.
During either, rotate or stir food
frequently.
Q. CarrIopen Wdoor during
DEFROST to checkon the pro-
gressof my food?
A. Yes.You may open the door at
any time during microwaving. To
resume defrosting, close the door
and press START.
Q. Why don’tthe defrostingtimes
in the Cookbook seemrightfor
my food?
A. Cookbook times are average.
Defrosting,tim.ccan vary according
to the temperature in your freez~r.
Set your oven for the time indicated
in your Cookbook. If your food is
still not completely thawed at the
end of that time, re-set your oven
and adjust the time accordingly.
Q. CanIselectaPower LeveIother
than automaticPower Level3for
defrosting.?
A. Yes.Some smaller foods maybe
defrosted quicker on higher Power
Levelsbut for even, carefree defrost-
ing, Power Level3is suggested.
Check the chart in the Cookbook
for specifictimes and Power Levels.
—
—-- Thel’irneCook featureahws you
—toplwsd the cookingti
Power Level 10is automatically set
or time cooking, but you may
change this for more flexibility.
Seeyour Cookbook.
When the oven completes Time
Cooking, it automatically shuts off.
It willthen display “End” and beep
once aminute iniil you either ope-n
the door or touch the CLEAR/
OFF pad.
To become better acquainted with
Time Cook function, make acup of
coffeeby using the following steps.
—Step1:Fillacup2/3 fullof
.
..—
,
—,
add 1teaspoonofinstant
-?==
coffeeandstirto-dissolve.Usea
cupthathasnometaldecoration
andismicrowavesafe.Placecup
inovenandclosedoor.
Step 2: Touch TIME COOK. The
display shows :0, ENTER COOK
TIME flashes. Power Level 10is
automatically set, but does not
appear on display.
Step 3: Selectyour time. Touch 1,
2, and Ofor aminute and 20 sec-
onds. TIME COOK and 1:20are
displayed.
If another Power Levelisdesired,
touch POWER LEVEL and the
number although Power Level 10
(HIGH) is preferred for this cup
of coffee.
Step 4: Touch START. Time
counting down shows on display.
Step 5: When time is up, the oven
sounds, oven light and fan shut off.
The display willshow “End”.
Step 6: Open the door or touch
CLEAR/OFF pad.
How to use Au’1’o START
The AUTO STfeallows
you to programyourovenlo begin
cooking at apresettimeof day-
up toIa12hour delay.
TO U$e AUTO START
Step 1: Enter your desired cooking
program.
Step 2: Touch AUTO START pad
(instead of START pad).
Step 3: Enter the time you want the
oven to start. (Be sure your micro-
wave oven clock shows the correct
time of day).
Step 4: Touch START pad.
The oven willautomatically start at
the desired time.
Qa.mkms andAnswers
Q.Iset my oven for the time called
for in the recipe but at the end of
the time allowed, my dish wasn’t
done. What happened?
A. Since house power varies due to
time or location, many Time Cook
recipesgiveyou atime range to
prevent overcooking. Set the oven
for minimum time, test the food for
doneness, and cook your dish a
little longer, if necessary.
Q. Iwant to cook on aPower
Level other than HIGH, what do I
need to do?
A. To change the Power Level,
touch the POWER LEVEL pad
after entering desired cooking time.
Enter the desired number and then
touch START.
Q. Can Iinterrupt my Time Cook
function to check the food?
A. Yes.To resume cooking, simply
closethe door and touch START.
NOTE: Microwave power willnot
come on until you are ready. You
must touch START for cooking to
begin.
Q. Itouched the number pads and
selected my power level. When I
toucbedSTART, however,my oven
didn’tcome on. Whynot?
A. The TIME COOK pad must be
touched before setting the number
pads or elseyour oven willnot
begin cooking.
Q. Itried to change Power Level
but the display changed back to
cookingtime. Why?
A. After touching Power Level pad
you only have 4seconds to enter the
number. Try setting controls again.
~
——
—.
—
—
—
—
—.
~.
——
—
—–
—
—
—
—.
—
—
-. .-
E=
...
-.
.
——.
14Kia-:-
—
—
—
—.
—
—.
—
—
Cby Temperature
For many foods, internaltempera-
tureis the besttest of doneness. 1
Step 4: Touch POWER LEVEL
pad. P-10 shows on display. Touch
5for MEDIUM power. P-5 shows
on display and then display reverts
back to set finished temperature.
QuestionsandAnswers
Q. After Ifollowed thesteps and
touchedSTART, asignalsounded
and oven did notstart.what is
Roastsor poultry are cookedto
yourpreferencewhentemperature
cooking. Heatingor reheating
foods accuratelyto aservingtem-
peratureyoudesireis simpleand
easy.
wrong?
A. If you set the temperature either
below 90° or greater than 199°the
oven will not start. To re-enter,
touch CLEAR/ OFF pad and begin
TernpCook/Holdtakesthe guess-
workout of cookingbecausethe
ovenautomaticallyswitchesto
HOLD settingafterreachingthe
presetfood temperatureandmain-
tainsthat temperatureuntilyou
touchthe CLEAR/OFF pad.
steps again.
Q. Arethereanyfoods Ican’t
TempCook?
A. Yes,Delicate butter icings, ice
cream, frozen whipped toppings,
etc., soften rapidly at warm tem-
peratures. Batters and doughs as
wellas frozen foods are also diffi-
cult to cook preciseiywith the
probe. It is best to Time Cook these
foods.
The temperature probe is afood
thermometer that gaugesthe
internal temperature of your food;
it must be used when using Temp
Cook/ Hold or Auto Roast. Follow
the directions for use and insertion
on page 8.
How to Temp cook
aRolled Beef Rib Roast
to Medum
Step 1: Insert temperature probe as
directed in Cookbook and attach
probe securely in oven wall. Close
the door.
Q. Why did “PR OB” flash onthe
displayafterItouched Start?
Step 5:Touch START. After food
reaches 90°, display shows temper-
ature of food counting up. A, “PR OB” willflash on the dis-
play if you have not securelyseated
ihe-end of the probe into the recep-
tacle in the oven wall or if you
touch TEMP COOK/HOLD and
have forgotten to use the probe.
Step 6: When 130°is reached, the
oven willsound and display HOLD.
The oven willthen hold the
temperature.
Step 7:Touch the CLEAR/OFF to
stop the cycle. Q. CanIleaveriiyprobein the
oven if it’s’notinsertedin the food’? @
—..
A. No. If the probe is left inside the
Step 8: Remove probe and food
from the oven.
Cookkg Tips
@Use alower power levelsetting;
it willheat evenly even though
requiring more time.
oven, touching the oven wall, and
not inserted in food, you may
damage the oven.
Q. Can ITemp Cook different
portions of’food at different
temperatures? ——.
@Be surefrozen food has been
completely defrosted before insert-
ing probe. Probe may break off if
used in frozen foods.
Step 2: Touch TEMP COOK/
HOLD. ENTER TEMP COOK
flashesand the digit portion of
the display is blank.
A. Yes.The temperature probe
givesyou the freedom to cook dif-
ferent portions of food at different
temperatures to suit individual
eating styles. Simply place the
probe in the food and change the
temperature setting as needed.
eAlways insert probe into the
center of meaty areas; take care not
to touch the fat or the bone.
~Insert probe as horizontally as
possible into foods as directed in
the recipes. Make sure the handle
does not touch the food.
Step 3: Touch i, 3,0 for 130°.130
shows on display. Power Level 10is
automatically set in oven but does
not appear on display,
eUse the clip to keep the probe in
place while heating.
acoverfoods as directed in Cook.
book for moisture control and
quick heating. _-:\
Al!ikv
—The MHN/SEC hasthree
—timingfunctions:
The h41N/SEC TIMER operates
without microwave energy.
How to Time aPhone
call
1. Touch NIIN/SEC TIMER pad.
The display shows :0 and ENTER
TIh4E flashes.
2. Touch number pads 3,0 and O
(for 3minutes and no seconds).
Display shows 3:00.
3. Touch START. Display shows
time counting down.
4. When time is up, oven signals
and display shows time of day.
aHOLD mm
The Minute/ Second Timer can also
be used to program “hold time”
between microwave cooking func-
tions. The time can range from one
—~~~fi~~t. 99 minutes and 99 sec-
—---—
---+’AHOLD, or “standing” time—--—-.
~may be found in some of your own
recipes or Cookbook.
To set the oven to delay cooking up
to 99 minutes follow Steps 1and 2
to enter hold time. Then touch
TIME COOK pad and enter time
before pressing START.
How tIM’OS$ Hold and ‘mm?
Cmk
Let’ssay you want to defrost a
frozen casserole for 15minutes,
hold for 10minutes and then Time
Cook for 25 minutes. Here’show
to do it:
Step 1:Take casserole from freezer
and place it in the oven.
,F%ep2: DEFROST pad.
—
The display shows :0and ENTER
DEF. TIME flashes.
Step 3: Touch pads 1,5,0 and Ofor
15minutes defrosting time. 15:00
appearson display.(Defrostingis
automaticallyseton PowerLevel
3butcan bechangedbytouching
POWER LEVELpad and the new
PowerLevel.)
Step 4: Set standing or hold time
by touching MIN/ SEC TIMER.
:0appears on display and ENTER
TIME flashes.
Step 5:Touch 1,0,0 and Oto hold
for ten minutes. 10:00appears on
display.
Step 6: Touch TIME COOK pad.
The display shows :0 and ENTER
COOK TIME flashes.
Step 7; Touch 2, 5,0 and Ofor
twenty-fiveminutes of cooking
time. 25:00appears on display.
~;: TOuch;TART. 15:00
counting down shows on display.
As each function is automatically
performed oven display shows
instructions entered and the func-
tion. While cooking, you may
touch appropriate pad to recall
times you set.
Step 9: When time is up, the oven
sounds, oven light and fan shut off.
The display willshow “End”.
Step 10:Openthe door or touch
CLEAR/OFF pad.
Questions and hSW6XS
Q. What willhappenif Iaccidern-
Mly reversemy defrost,Md and
cook instructions?
A. Theovenautomaticallyrear-
rangesyourprogram.Defrosting
alwayscomesfirst,thenhold,and
then thecookingfunction.
Q. CanIdefrostand hold only?
A. Yes. Sometimes you may only
wafit to defrost afood, hold it, and
cook it later. All you need to do is
program in Defrost and amount of
time. Then program Hold and the
amount of time. Be sure to put the
thawed dish in the refrigerator
promptly.
NOTE: Let foods remain at room
temperature only as long as safe.
Times willvary.
Q. Iprogrammedmy ovenfor a
specificdefrostingtime but it
defrostedlongerthannecessary.
Whathappened?
A. When instructions conflict, the
oven carries out the last instruction.
Youmay haveset the oven to defrost
for 4minutes, hold for 2minutes,
and then defrost for 6minutes. In
this case, the oven would defrost
for 6minutes and hold for 2min-
utes and ignore your first defrost
instruction.
——
~..——
=-.—
E
—
~
~
—
—
—
—
—
~
t—
—
—
—
—
—
—
—
E
—
—
—
—
—
—
—
The COOKCODET”Control pro-
videsashort-cut method for
entering time and the Power Level
on your microwave oven. Cooking
Codes are only used for recipes
which need little or no attention,
and which require no change of
power levelduring cooking.
Recipes which require additional
ingredients, attention or change of
power levelduring microwaving
should be cooked in the usual
manner. Also, recipes with cooking
time of lessthan one minute or
more than 99 minutes can not use
Cooking Codes.
To understand the Cook Code con-
trol, it is important to know what
the numbers mean and what the
sequence is. The first and second
numbers, if setting a3digit Cook-
ing Code, indicate the amount of
time you.desire; the last control
entry number is always the Power
Level. For example, 125means
COOKING CODE
2-Digit
Time in Power Level
Minutes High (10)
How to set
COOK CODETMControl
Poven for COOK
CODETMControl operation is easy.
Follow these simple steps.
Step 1:Touch COOK COD.E.
ENTER CODE flashes.
12minutes at Power Level5. NOTE:
Your oven can only be programmed
to 99 minutes when using the Cook
Code control and the highest Power
Levelis 10which is represented by
“O”.When setting a2digit Cook
Code control entry, the first is time,
the second is power level. For
example, 50 means 5minutes at
Power Level 10.
On the following page is shown
many frequently prepared foods
and their codes. It’seasy, though,
to make Cooking Codes for many
other recipes. Just selectone or two
digits representing the length of
cooking time desired, and afinal
digitfor the Power Levelrequired.
The Cooking Codes given on the
chart are for the minimum time
needed, to avoid overcooking which
can dry out food and make it taste-
lessand tough. If you feel that
more cooking is needed, add addi-
tional time by changing the first
digit of the Code. You cannot add
seconds to the cycletime—Cooking
Codes are for whole minutes only.
If your recipe callsfor Power Level
changes or different amounts of
time needed between addition of
ingredients, you may set one Cook-
ing Code for the first part of the
recipe, then after completion, set
another Cooking Code for that
period of time and Power Level.
Remember that Cooking Codes are
for microwaving by time only. If
you are microwaving by tempera-
ture, you must use th~ Temp Cook
or Auto Roast function.
When the oven completes COOK
CODETMprogram, it automatically
shuts off. It willthen display “End”
and beep once aminute until you
either open the door or touch the
CLEAR/OFF pad.
COOKING CODE
3-lXgit
Time in Power Level
Minutes Nled (5)
Step2:Enterthe propercode.For
example,arecipecallingfor 12min-
utes cooking ti~e at Po-werLevel
10would be 120. 120appears on
the display panel.
14
A?3a$i
WES.
,#-
——
Step 3:Touch START. Display will
show time countinq down a-rid-
COOK TIME. -
———
.——.—
~
.-
Detachand Tapeto InsideCabinetDoor or OtherProminentPlace
COOK COD3YMControl feature givesyou an
easy automatic way to accurately set microwave time
for foods requiring only one power leveland little
attention during cooking. The Chart below shows
frequently prepared foods and the suggestedCook-
ing Codes to use with each. For specificinformation
on stirring, turning or rotating, check the Microwave
Guide and Cookbook which comes with your micro-
wave oven. Always use microwave-safecontainers
and microwave techniques as described in the
Cookbook.
To set Cooking Codes for many other foods or
recipesrefer to page 14in this Useand Care Book.
COOKCODE’MCodes givenare for minimum time.
Check and add time if necessaryto complete
cooking.
Appetizers(Warming)
Dip (Cream Cheese)
1/2cup 25
1cup 45
Dips(Sour Cream)
~/2cup 13
1cup 23
Pastry Bites(Reheating)
2Servings 17
4Servimzs 10
BreadsandDesserts
Apples
(2) 40
Bran Muffins
(5-6) 37
Brownies(Mix) 60
Cakes(Mix)
(16cup fluted mold) 110
CheeseBread, Yeast
(1 loaf) 105
ChocolateChip Bars 5
Nut Bread(Mix)
(1 loaf) 97
Pudding’Mix(3 oz. pkg.) 60
Beverages
Coffee,Soup
(1 cup) 10
MilkBases
(1 cup) 28
Frozen Foods (Defrost)
Note:Tiw.esgivenbeloware for entiredefostcycle.Usu-
allyfood must be rotated, broken up or turned overwhile
defrosting.Check Cookbook for specificinformation.
Cake, WholeIced 23
Chicken,Cut-up
(2%-3%Ibs.) 143
DessertTopping, Whipped 13
Doughnuts or Pastries
(24) 13
Fish Fillets
(1H).) 83
Hamburgers
{2b.) 123
Pie, Fruit Filling
(Whole) 83
Roast
(4-5lbs.) 403
Steak or Chops
(2 lbs.) 83
15
IVIeats/MainDishes
Bacon
2Slices
4Slices
Chicken
8-10pieces
2pities
4pieces
Chuck Roast
(3lbs.)
Eggs,Baked
2Eggs
Eggs,Scrambled
2Eggs
Entrees,Frozen
8OZ.
16OZ.
2lbs.
Fish Fillets
(1lb.)
I?ranks(in bun)
2
4
Meat Loaf
(1%lbs.)
Sausage(Raw)
4Patties
4Links
SwissSteak
(2lbs.)
Frozen TV Dinner
28
30
24
7
665
25
2
5
1
2
60
1
3
1
3
2
706
(oz.) 1
Vegetables(Fresh)
Beans,Green
(1 lb.)
Broccoli
(1%-1%lbs.)
Spears
cut
Cauliflower,Head
Corn on Cob
(4)
Potatoes
(4)
Squash
(1lb.)
Zucchini
(1lb.)
.—
—
1
1
1
?2
1
1
1
1
1
Vegetables(Frozen)
10OZ.pkg. 70
—–
-- Youroven idesigm?d!tgive you
the best results ibaking, broi
MidImMJtirlgWhena.lsed43sr’ecorn-
Emk?d.Before using your’ ovels~
read the directions for setting and
own Light
Lightcomes on automatically when
door is opened or use switch on
windowdoor to turn it on when
door is closed.
ovenSI-M
When the shelvesare correctly
placed on shelf supports they are
designedwith stop-locks to prevent
them from coming out of the oven
or tilting when food is placed on
them.
TO REMOVE,liup rear of shelf
and pull forward with stop-locks
along top of shelfsupport.
shelfPositions
The oven has four shelf supports
marked A(bottom), B, Cand D
(top). Shelf positions for cooking
food are suggested on Baking,
Roasting and Broilingpages.
Awmlaticoven‘mmM,
mute Timer
E!i!E!Y
l—
—
—
W—
—
—
—
E
—
—
—
—
—
U
—
—
8
-
—
.—
TOREPLACE,insert shelf with
stop-locksresting on shelf supports
—and push toward rear of oven until
it falls into correct position under
—shelfsupports.
OvenTimer Controls are designed ‘k
to automaticallystart and stopcer-
tain ovenfunctions(TIMEBAKE
or CLEAN).Dialsaretimed bya
specialClockwithindexmarks
(denotingnumerals)and hands.
(For locationseepage6.)
TOSET CLOCK,push in the
center knob of Minute Timer and
turn the Clock hands to correct
time, then let knob out.
TO SET MINUTE TIMER9 turn
knob to desired minutes. (Knob
must be out to set Minute Timer.)
Minute Timer will buzz when time
has finished and must be turned off
manually.
Use the Microwave Oven Clock for
easv reference to time of dav.
.d
.—
—
HtYw$0 set
IAmrovenfor
SeeBaking Guide on page W.
Step 1:Place shelf on embossed
shelf support “?3”or as indicated
on Baking Chart, page 19.
Step 2: After making sure that the
oven door is closed, turn the OVEN
SET Knob to BAKE. Oven “On”
Light will come on and remain on
as long as OVEN SET Knob is
on WAKE.
Step 3: Turn OVEN TEMP Knob
to the temperature called for in
recipe. Oven Cycling Light comes
on and remains on until preset oven
temperature is reached. It reappears
each time oven temperature drops
below preset temperature.
Step 4: You may set your Minute
Timer to the desired cooking time
as indicated in your recipe. If your
cooking time is longer than sixty
minutes, Minute Timer must be
reset.
Most foods cook satisfactorily with-
out preheating. If preheating is
required, put your dish promptly in
the range after Oven Cycling Light
goes out.
Step 5:Place food insidethe oven..
Make sure at least 1“of space is left
between the cooking container and
the oven wall for proper heat circu-
lation. Closethe oven door.
NOTE: Avoid openingyour oven
door frequently. This could cause
undesirable results in your baking.
Only check foods at the minimum
time of the recipe. Then cook
longer if necessary.
Step 6: When the BAKE cycleis
complete, turn off heat. When
cooking food for the first time in
your oven, use the time on your
recipe as aguide. Be sure foods are
done before removingfrom oven.
Howtmm Bake
YourAutomatic Oven Timer con-
trols your Time Bakefeature.
When you Time Bake, your oven
can be preset to start and stop
automatically if you are not home.
Step 1:Be sure the range Clock
showscorrect time of day since
Clock controls the Oven Timers.
Start dial pointer must indicate
same time of day as on Clock. If
you want the oven to turn on at a
later time, set that time by pushing
in knob on Start dial and turn
pointer to time that you want oven
to start. (There’sno need to set
Start dial when starting time is the
present time of day.)
Step 2:To determine Stop time,
add the food’scooking time to time
set on Start dial. Push in knob on
Stop dial and turn pointer to time
oven is to turn off.
Step 3:Turn OVEN SET Knob to
TIME BAKE. Oven “On” Light
comes on immediately even ifthe
Start time is later.
Step 4:Turn OVEN TEMP Knob to
temperature setting. Oven Cycling
Light comes on even though heat is
not on in the oven if alater start
time is used. Your oven automati-
cally turns on and off at the times
you set.
Step 5:Removefood and turn OVEN
SET Knob to OFF.
-.
Ag
o(
rc
nfp
g
C
A
B
B
B
B
BB
B
A
A
B
A
C
B
20-40
45-55
20-30
45-60
45-60
45-60
10-25
20-30
S
S
400°-4750
350°-4000
400°-450”
350°
400°-4250
375°
350°-375”
375°-4250
375°-4250
350°-3750
325°-3750
375°-4000
325°-3500
G
P5
B
B
(s30-55
10-15
45-60
C
S
s
~
O
A,B
B
B
B
B
B
B
C
Bc
c
c
c
C
R
D4, C
3
B
350°-4000
300°-3500
325°
400°-4250
325°-3500
400°-4250
400°-4250
450°
—
325°-4000
325°-3750
300°-3500
—
P
S
S
S
4
B,A
B
3
3
c
4, C
3
M
*M
p
S
S
.—.———...
Step 1:Check the weight of the
meat and place, fat sideup, on
the rack in the broiler pan that
came with your range. This helps
the meat to baste itself.
Step2: Use shelfposition“A”
or “B”; or theoneindicatedon
RoastingGuide,page21.Place
OvenShelfoncorrect embossed
shelfsupport,Forverytallroqsts,
removesecondovenshelf.
Step 4:Close the oven door and
turn the OVENSET Knobto
BAKE.Oven“On”Lightcomes
on and stayson untilOVENSET
Knobis turned to OFF. Oven
CyclingLightcomesGn.and
remainson untiltemperatureis
reached.
Step5:Placeyourmeatinsidethe
oven,makingsurethepan is not
touchingthe ovenwallsor door.
Step3:Turnthe OVENTEMP
Knobto 325°.(Theexceptionis
smallpoultrywhichis roastedat
3750.)
Step 6:Turn offthe heatwhenthe
roastingcycleiscomplete.
cooking Tips
*Be meat iscooked to your
satisfaction. Most meats continue
to cook slightlywhilestanding after
being removed from the oven. This
should be taken into consideration
when determining your cooking
time.
eAlwaysuse aroasting pan that
fits the sizeof your meat. Aroast
placed in apan too small for its size
willdrip overthe edge.
eYOU
maycook frozen meat roasts
without thawing. However, you
must allow more cooking time. For
large roasts, add 10-25,minutes per
pound. For roasts under 5pounds,
add 10minutes per pound.
eS1OW down sbrowning
onturkeys,youcanuseafoil“tent”.
Thetent-shapedfoilshouldbelaid
looselyoverthepoultryso the heat
cancirculateunderthefoil.
eMostfrozen poultry should be
thawed before cooking to ensure it
is done evenly. Some, however, can
be cooked successfullywithout
thawing. Check the packer’s label
for specificdirections.
A?s#
—
—
20
4#x%
-
—
—
—
—
Psf
A
b
rt
dt
s
3. d n
4. StandingTime
t
tt
c
moretimethangiveninchartfor
refrigerated(10min.perlb.forroastsurider$lbs.). Defrost
poultrybeforeroasting.
ApproxhnateRoastingTime, Internal
Type
~tO5-lbs. 6tO$-b.
s
ss
p
IUnder10lbs. 10to15lbs.
Ham,
b 5
35
10to15lbs. OverKlbs. Inthigh:
—
—
—
....—--—-.
—.—
.—
e
—
m
_A–——
E
—
—
-
-
-
-
-..
#
F
—
-
-.–
—
-
~

Other GE Microwave Oven manuals

GE JNM7196SFSS User manual

GE

GE JNM7196SFSS User manual

GE Appliances DVM1950 User manual

GE

GE Appliances DVM1950 User manual

GE JVM7195 User manual

GE

GE JVM7195 User manual

GE Spacemaker JVM1665DN Manual

GE

GE Spacemaker JVM1665DN Manual

GE JVM1660CB002 User manual

GE

GE JVM1660CB002 User manual

GE Spacemaker JVM172J User manual

GE

GE Spacemaker JVM172J User manual

GE Spacemaker JVM1730 User manual

GE

GE Spacemaker JVM1730 User manual

GE Spacemakerll JEM26WH User manual

GE

GE Spacemakerll JEM26WH User manual

GE MW636 User manual

GE

GE MW636 User manual

GE Spacemaker JNM1951DR Manual

GE

GE Spacemaker JNM1951DR Manual

GE EM159KZ3 User manual

GE

GE EM159KZ3 User manual

GE SPACEMAKER JVM61 Installation instructions

GE

GE SPACEMAKER JVM61 Installation instructions

GE Spacemaker JVM1752SPSS Manual

GE

GE Spacemaker JVM1752SPSS Manual

GE JVM290 User manual

GE

GE JVM290 User manual

GE JEM23G Installation instructions

GE

GE JEM23G Installation instructions

GE Appliances JVM1730 User manual

GE

GE Appliances JVM1730 User manual

GE Profile Advantium SCA2001KSS User guide

GE

GE Profile Advantium SCA2001KSS User guide

GE Spacemaker II JEM31H User manual

GE

GE Spacemaker II JEM31H User manual

GE JVM1790SK - Profile 1.7 cu. Ft. Convection... User manual

GE

GE JVM1790SK - Profile 1.7 cu. Ft. Convection... User manual

GE Spacemaker JVM150H User manual

GE

GE Spacemaker JVM150H User manual

GE PEM10 User manual

GE

GE PEM10 User manual

GE SpacemakerXL JVM3660 User manual

GE

GE SpacemakerXL JVM3660 User manual

GE WES1130DMBB - 1.1 Cu. Ft. Countertop Microwave... User manual

GE

GE WES1130DMBB - 1.1 Cu. Ft. Countertop Microwave... User manual

GE JE1232K Use and care manual

GE

GE JE1232K Use and care manual

Popular Microwave Oven manuals by other brands

Sharp R-190HK/HW Operation manual

Sharp

Sharp R-190HK/HW Operation manual

Daewoo KOR-63350S Service manual

Daewoo

Daewoo KOR-63350S Service manual

Pando PHM9500 user manual

Pando

Pando PHM9500 user manual

Bosch HMT75M654K Instructions for use

Bosch

Bosch HMT75M654K Instructions for use

Panasonic NN-S554MF Service manual

Panasonic

Panasonic NN-S554MF Service manual

Panasonic NNSD986S - MICROWAVE OVEN 2.2CUFT Service manual

Panasonic

Panasonic NNSD986S - MICROWAVE OVEN 2.2CUFT Service manual

LG LMV1765 Series owner's manual

LG

LG LMV1765 Series owner's manual

Daewoo KOR-6NMB1 Operating instructions & cook book

Daewoo

Daewoo KOR-6NMB1 Operating instructions & cook book

Pelgrim MAG528RVS Instructions for use

Pelgrim

Pelgrim MAG528RVS Instructions for use

Franke FMW 250 CR G Instructions for using

Franke

Franke FMW 250 CR G Instructions for using

IKEA FINSMAKARE manual

IKEA

IKEA FINSMAKARE manual

Kleenmaid MWK200X Technical instructions

Kleenmaid

Kleenmaid MWK200X Technical instructions

Bosch BFL524MS0 User manual and installation instructions

Bosch

Bosch BFL524MS0 User manual and installation instructions

IFB 17PG1S owner's manual

IFB

IFB 17PG1S owner's manual

AEG MSB2547D user manual

AEG

AEG MSB2547D user manual

Sharp Carousel R-1871 installation guide

Sharp

Sharp Carousel R-1871 installation guide

Dometic DMW10W owner's guide

Dometic

Dometic DMW10W owner's guide

LG MH6344W owner's manual

LG

LG MH6344W owner's manual

manuals.online logo
manuals.online logoBrands
  • About & Mission
  • Contact us
  • Privacy Policy
  • Terms and Conditions

Copyright 2025 Manuals.Online. All Rights Reserved.