manuals.online logo
Brands
  1. Home
  2. •
  3. Brands
  4. •
  5. GE
  6. •
  7. Microwave Oven
  8. •
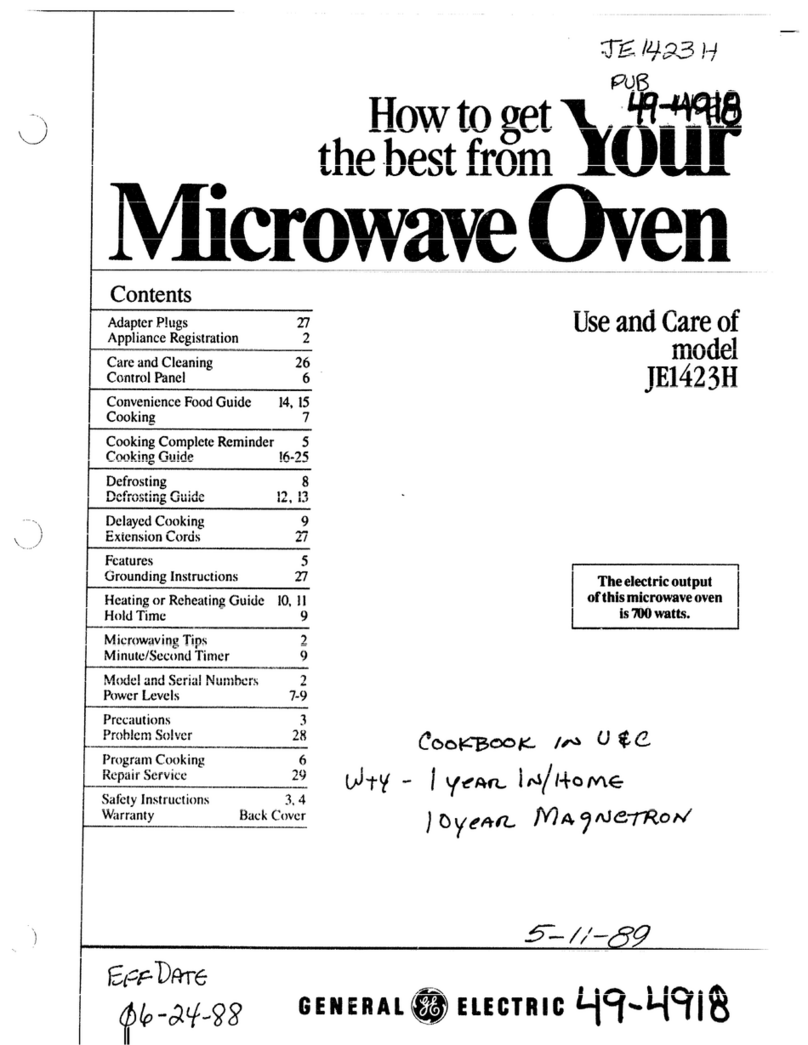
  9. GE Monogram Spacemaker II JEM33L User manual

GE Monogram Spacemaker II JEM33L User manual

MOn’og
‘.
useandCarechide
fixqmwm
s
MOven
,I,
I:. ..
,-
,-
k.:
I1
I
~.. .-
.: . ‘ , ~..——
I
*
!., 1. .
- - _—
.
i..... ..
--..-—....
——... ..— ..-
----—--—-
.-.-.—
--—
.—. . . —,.—..—.—
.——-.
.
——.. .. —.
... .
Yournew Monogrammicrowaveovenmakes an
eloquentstatementof style,convenienceam.1kitchen
planningflexibility.Whetheryou chose it for its
purity of design,practicalcookingfeaturesor
assiduousattentionto detail—orfor all of these
reasons—you’llfind thatyourMonogrammicrowave
oven’ssuperiofblend of form and functionwill
delightyou for years to come.
The Monogrammicrowave oven was designedto
provide the flexibility to blendin with your kitchen
cabinetry.
co
AdapterPlugs .............................32
Add 30 Seconds..........................13
AluminumFoil .......................5, 17
ApplianceRegistration .................3
Auto Cook............o................22–27
Auto Defrost .........................16, 17
Auto Reheat .....,..............21, 22,25
Auto Roast............................18, 19
Auto Simmer...............................19
Auto Start....................................13
Automatic Cooking
Control Guide...................26, 27
Care and Cleaning ,.....................30
Clock.............................................8
Consumer Services .....................34
Containers and Covers................25
Control Panel ............................8,9
Cool~ingbyTime..................1~~13
CookingComplete Reminder .......9
cook
..............................25-29
Defrosting byTime...........””.””.”..”~o
Delayed Cooking ........................10
Double DLIShelf
..........S+6,9, 11,21, 22,26, q&
ExpCoFeature .................13
Extcnsioll Cords ~7
........................... *
Feat
.........................................9
tfjI’OUINiiIl~
~IIStl
...] , 3
The informationon thefollowingpageswill helpyou
operateand maintainyourmicrowaveovenproperly.
Optionalf!wessory —
An InstallationKitis availableat extra costfrom your
Monogramsupplier.
JX-29W InstallationKMconvertsthis ovento a
built-inwall oven.
This can be obtainedfrom aMonogramdealer.
For alistingof dealers—orif you have other
questions—pleasecall the GE AnswerCenter”
(800.626.2000).”
Hold Time...................................10
Installation............................31,32
MicrowavingTips.........................7
Minute/SecondTimer ...........10, 11
Model and SerialNumber
Location................................3,9
Oven Lamp Replacement ...........31
Popcorn.................................11, 13
Power Levels
....................7, 8, 10, 1 1
Precautions to AvoidPossible
Exposure to Excessive Microwave
Energy,,,..0.....................................3
Problem Solver...........................33
Program CoO~llg..oo......................7
Safety Instructions....................4–6
Temperature Cook ................14, 15
TemperatU1-eProbe
.................5,8-10, 14,15,18-19,30
Warranty .....................................35
Mkp output
ofthis ois8watts.
(HW-705TestProcedure)
f-’;
/——
..’-.-/
——--
-”.....—----
-...-— --...-,..—
,
1
3
Before ‘usingyouroven~
!t’w3d.thisbook carefully.
itis intendedto help you operate and maintain your
newmicrowaveoven properly.Keep it handy for
answersto yourquestions.
Ifyou don’tunderstandsomethingor need more help,
write(includeyour phonenumber):
ConsumerAffairs
GE Appliances
AppliancePark
Louisville,KY 40225
wdown the model and serialnumbers.
You’llfind themon alabelinsidethe oven.These
numbersare also on the ConsumerProductOwnership
RegistrationCard that came withyour microwave
oven.Before sendingin this card, please write these
numbershere:
MNu
SeNu
Use thesenumbersin any correspondenceor service
callsconcerningyour microwaveoven
Myoureceivedadamagedoven... Savetand money.
●
Immediatelycontact the dealer (or builder)that sold you Before you request service...
theoven. Check the Problem Solver in this book. It listscauses of
minoroperating problems that you can correct yourself.
Be sureyourmicrowaveoveniregistered.
It is important [!MIwe know the location of your microwave oven should aneed occur for adjustments.
Yosupplier isresponsible for registering you as the owner. Pleasecheck with your supplierto be surehe has done
so;also send inyour ConsumerProductOwnershipRegistrationCard. If you move, or if you are not the original
purchaser. piease write to LIstating model and serial numbers.
Thisappliancemust be registered.Please be certain that it is.
\\[l.i[c(0:(j~ ~p13]iaIlces,R~~~ep~-~duc~Service,ApF’Louisville, KY 40225
TOAVOID
‘HI IENERGY
(c) Do FJot@e~4~k the oven if it is damaged. Ris
particularly important t t o d c
praWt i n d t t
(d(
(~) hillqes and latches (oloosened)
(dsasealing surfaces.
(d) l%e OVen IVOtbe adjusied or repaired by
anyone except properly qualified service personnel.
p.J~~T.if you are still not pleased, write all the
dctails-including yphone number-to:
~jiilll~lgcl-,ConsUnlerRelations, GE Appliances
Appliance I%rk,Louisville, KY 40225
FINALLY, if your problem is still not resolved, write:
M;ijol-AlConsumer Action Panel
~(j~xJO1-~11Wacker Drive, Chicago, IL 6/
5
.—
.
—“..—.—- -—-.. -...—. ---—.-.. . . . . . .-.— —-,.-., -—.
—- —
.- . .
—— .- . . —— —- ———-— . . . , . .————— - .
.
,.—-
-- -..
.. .
..
.
all before-usingthis
~Do notMpower cord hang over edge d’ tabk
or counter.
Whus
elec
applbasa
precshb folinct
fob
~Do notoperatethis
ap
i i ha
dapco p i i i nw
proiih b d o d
~A~~~~~–Toredllce~heriskof
bueleshfiintpe
eSdscini t C
aClseotb
oexptexcmicen
~~ea~ and fo~~owthe spe“precautions to
Avoid Possible Exposure to Excessive Microwave
Energy” on the previous pa
CJThis apsbso b
quspeCn
ausf f exr
oadjustment.
oThappmbgroCo
ontpro
grounded outlet. See GI-OUnd@
Instrsec
oAs waapcsi
newu b c
~U-thappo fiinu a
desc
i
th
maDn u cor
chem
ovai t appT
micr
ovispecdeth
ocofoainintf~abo
induus
~Trtroi i t oc
—novfCa
apip p o o c
maa pi t otf
co
~For best plug this appliance into
ioekeoutprfli
o@@Moo fotrioci
bre
—R
wire twfp o p
0
-.+~=+:-
bbep b io-:
-:
—n u y miotd
ne
~Do not this appo asiM
olothappo iaccwt
proInstIns[
—nurepproducts. R
pton awpc c
mfwmc a oi
Pprcon o n f
sbavatmai
—Do notpop popcorn iyour miel”owaw oven
unless iasmipa
o u y u polfui
mio
—Do notopotatoes.They couidckhydrak
and catch Icdty o
(
\‘)
------
/
.’ . .
.. . - .—.
.. - . ..—-
—-
!)
—. . .
—Do notuse the oven for stpurD
nlepaprocoutofi
tovwhn iu
—matino shigk
ovdoclo
turn oven off, and disconnect
power cord, or shut off power at the fuse or circuit
breaker panel.
sSoprosawhe a se
contaexacljar
expashn b hei t mic
o~suu o tmicocore
iinj
~Avheabfiglja
even
witthliespma e
mix
sDodeffrbevina
nebot(espcarbev
Evi[coniopprcb
uThccatcontbupo
resuiirl
~UmeOnadiri t bat
prowymico
Tdinmamiciftrl
dYhi-retfcoare
u-{boWhusmei t mic
OVkeme(otmeshal
~ii:jfrsioov
*comay become M
IXXoh~tl”;HfIk
hc:
foPholmay be
nculd tohmllc theCO(AWW”C.
sThen u athi
fyamiut t
ideorefui t
mio
~Rttepfto
wn u i t cwIyl t
pi t owi i i t
foliatotmei
c c elai t oad
ow
~~]coocd
fmiciv u b s
b u caEmip
mn b atoo ovc a
mg 0 Cemaa ms
ocisutsp o o
Ilextovtfa
cociFtr1U
micploaut i
st
cowtcma
reco
2Dnse
cotmi~Dn p
chtu p cwc
sup
eWcop ftd
exa a c tmtai
ten
oal1Tat i
t~.pot t mb p
i t miwb k amwbs
te
QDo notbeggs hamkrwwaw? own. Pressure
w’i]~bup inside egg yolk and wi]l cause it 10
burst, possibly resulting in il~jury.
, ,
—----- ,/
..— —----------..—..—------
.,..-— —,......—-------—— --.-..,...-..
(continued)
ef+&Itall plastic wrap issuifui
micovChtpaf
prus
w
..~~Poboil
cespcirc
limstt bdu
oshafreft
micovTprb
fspllistli
brberet
conftmico
s
~~~oi]a
~oo~i~gpouches atic~
plabashb slpiovea
dirbpacItanplc
buduo immeafcopo
resi
inj
Alplstcon
shb alepaluncbet
foatiseWcowcon
tigcovwplwrreco
caradistafhaa f
QHfoods and steam can cm.u3e
bBcwoa
coo h fi
p b cp
abTp p
idsaf
haf
ouseotD D saccesswo
—Rtsfowniu
—nsocwsofo o
Prdmr
—p h whtsa
coTmb h
—n u mib d o s
Tscov
—tsowcot l
—st t sip p
i t otp p d Uo
sw A CARoP
feinre(tAC
ARoP
se
SAVET
—..——
—..— —
... ——.-
.“.-...—-—----.-.---—-
————-——-———————-----
..
........-.-——.—----
—
..-.
Iw(mTips
@Make sure all cookwareused in your microwave
oI,enis suitablefor ~i~rowaving. Mostglass
casseroles,cooking dishes,measuringcups, custard
CLlpottery or china dinnerwarewlliclldoes not
havemetallictrim or glaze with ametallic sheen
can be used. Some cookwareis labeled “suitable
fornlicrOWaVill,g.”
If’you are not
sureif adish is
microwave-safe,
usethis test:Place in
theoven boththe dish
yoL~are testingand
ag]MS measuring
CLfilwith one
sPapertowels,waxedpaper and plasticwrap can
beused to cover dishesin orderto retainmoistureand
preventspattering.Be sureto ventplasticwrap so
steamcan escape.
~Some microwavedfoodsrequirestirring~rotating
or rearranging.Checkthe Cookbooksupplied.
sSteambuilds up pressurein foods which are
tightlycoveredby askin or membrane. Pierce
potatoes,egg yolks and chickenlivers tOP
bu
If youuseameatthermometerwhilecooking,make
sureitissafeforuseinmicrowaveovens.
W]) Wtitethe
nwasLcup either in or nextto the dish. Microwave
1minuteat high. If the dish heats, itshould not be
usedfor microwaving. If the dish remains cool and
only the water in [heCLIpheats, then the dish is
l]licl-ow’:~i~e-st~~k.
Pmgl-’m Cl
USC y(]L~r‘l’oL1ch c~n[ro]pane][O AutoCook, Auto
R(xALReheat and Auto Dcfrosl-with the
~~vctlsctliJIthpo~Icvacooo heating
[imcs:to Temp C()()k&IHo]d.using yochof
IL’IIIpCI.;ItUrU:I()TiIIICCOok0TIIDefrost. using
IOU]”~hoi~~()/”jX)l\’~1”
iCV/-1-j(]OWt]O
;1iuhc)1cx(ccxiitmb3secLI
create yourown prog”amsto suityour individual
cooking style.For example:program ahold time
between Time Defrostand Time Cook I&11;set
Time Cook I&II for atwo-stageprogram using
differenttimes and power levels;or use the
lvIinute/SecondTimerto delay the startof a
cookingfunction, sLlchas Temp Cook &Hold.
r;/
..--. —-- - -------.—-,-., ----— —,——. —.
.. -.——
——.. ——.-..—-. —-... .-.
—- ... ,
..—..———.—
——
--
The T’ouchControlPanelallowsyou to set the oven controlswith
the touch of afinger.It’sdesignedto be easy to use and understand.
TIME COOK
[&II II J~~sT lm
rPOWER
LEVEL II ‘Jy:c I@@-
IS c c -( 6 D
AUTOCOOK
HllAu*EFlm
IIL‘“uTE IF=?---
---’-a$
13. TEMP COOK &HOI-D. Use the temperature
probe to cook by using apreset temperature. Clncefood
reaches preset temperature, oven switches to HOLD
setting and maintains that temperature until yoLltouch
the CLEAIUOFF pad.
14.ADD 30 SECOF.IDS.Press this pad to acid30
seconds to the cook time as it’scounting down.
15. AUrJXlROAST. Insert probe, touch this pacl,
and ciesirednumber pad for code to slow-cook or
temperature cook meat with automatic preset program.
16. AUTO REHEAT. Use Auto Reheat for quick
reheating of avariety of foods using different times and
prover levels.
17.CLOCK. TOUChthis pad to enter time of day or
check time of-clay while microwaving.To set clock,
firsttouch CL06K pad and then enter time of di}y.h. ,-.m
()
example. if time is 1:30, touch number pads 1,3, and O%.....~~
ancl“1:30” will appear in clisplay.Then touch START
... .—..—-— -.— —..-....—.—-..—— ..—..——
—.—... —..,. . ~.-——.——.—.
-.. —————... .. .-—————
—.,..-.....—————..—.-.—... .. ...
i
.-,...—
OF
cooking GNnpkte Reminder
fIJOI*all cookingfeaturesexceptAuto Roast c~
Tn.m
you thatyoLlhavefood in theoven, the
ovenwill beeponce aminuteuntilyoueither open the
ovendoor or touch the CLEAR/OFFpad,
—
-
-
1
/
I
@
iIu
7. ‘f’ouchControl Rind and Display. See Your
TOLIChControl Pane] section for instructions.
8. Door Open Button. Push to open door.
9. Glass cooking Tray.Tray must be in place
when using the oven. Cooking performance will be
unsatisfactory without the tray in place. The tmy may
be removed for cleaning.
~{).Automatic Cooking Guide. Quick refel-ence
codes for many frequently prepared foods.
pJQTE: R:ltillg~)lilte,oven vents(s) and oven light Cw.e
Iocatcd on the inside walls of the microwave oven.
9
J
-
-.——..—.—--------———..-..”.—. —--..-——-
— .......-.—— ———m..—-.—
--—-——————--.-—.-.-..— . .... - --——.—
The Timer uaHolding Time
The Minute/SecondTimerhasthree timing The Minute/SecondTimercan alsobe used to
functions: programa“holdingtilme”between microwave
~It operatesas aminutetimer. cookingfunctions.The timecan range from one
secondto 99 minutesand99 seconds.Aholding or
0It can be set to delay cooking. standingtime may be found in someof your own
eItcan be used as aholdsetting after defrosting. recipes or in the Cookbooksupplied.
The Minute/SecondTimeroperateswithout .
microwaveenergy.
How tTime a3-Phone Call ProgrammingDelayed.Cooking -.
Step 1: TouchMIN/SEC TIMER pad. To delaycookingup to 99 minutesand 99 seconds,
Step 2: Touch3and MINUTE pad (for 3minutes and toucheitherTIME COOK I&H, TEMP COOK &
no seconds). HOLD or AUTOROASTand entercook time,
Step 3: Touch START.Display showstime counting temperatureor code. TouchMIN/SEC TIMER and
down. The timer signalswhen time is up. enter numberof minutesto delay cooking.When
delayingTemp Cook& Hold or Auto Roast
cooking,be sure probeis in food. TouchSTART.
Timer willcount down to zero and cookingwill begin.
How tDeHold and Time fckmk
Let’s say you want to defrost afrozen casserole for
15minutes. hold for 10 minutes and then Time Cook
for 25 minutes. Here’s how to do it:
Step 1: Take casserole from I’reezerand place in oven.
n
,.. Step 2: Touch TIME
TIME DEFROST pad.
DEFROST
Step 4: Set standingor hold time
mpad
by totlchingMIN/SEC TIMER
Step 5: TOLICh1.0 and hlINUTE pad to hold for
ten minutes.
mS6Touch TIME
COOK I&Hpad.
S7: Toucil2.5 anciMINUTE pad for 25 minutes
of cooking time.
DStep S: Touch START.As
START each function is automatically
performed. oven ciisplayshows
instructions entered and the
function. When time is Lthe
OIIC1lsig11211sand Ilashes “End.”
..->
,, .,
.——...---.-—..-——————-—————— .-
—”—— ——
-—
iI
——
(
——. .——. .— ..— . . .
Questionsfad Answers
Q. What willhappen if 1accidentallyreversemy
defrost,hold and cook instructions?
A. The oven will automaticallyrearrangeyour
program.Defrosting will alwayscome first, then hoId,
and then the cooking function.
Q. Can 1defrost and hoki only?
A. Yes.Sometimes you may only want to defrost a
food,hold it, and cook it later.All you need to do is
programin defrost and amount of time. Then program
thehold time. Be sure to put the thawed dish in the
refrigeratorpromptly.
NOTE: Foodsthat spoileasily,suchas milk, eggs,
fish,stuffings,poultry andpork shouldnot be allowed
to sitout for more than one hour after defrosting.
Roomtemperaturepromotesthe growthof harmful
bacteria.
Q. 1programmedmy ovenfor aspecificdefrosting
timebut it defrostedlonger than necessary.What
happened?
A. When instructionsconflict,the oven carriesout the
lastinstruction.Youmay have set the oven to defrost
for4minutes,hold for 2minutes, andthen defrostfor
6minutes.In this case, the oven would defrostfor 6
minutesand hold for 2minutes.
F/am: “POP” flashes.After
4seconds, “START”
UseofthemetalDoubleDutyTh’shelfwithPopcorn flashes on display.
programisNOTrecommended.
o
--
~—*.T
..2*~&
‘:%~$-The Popcorn feature is designed to be used only
with prepackaged microwave popcorn weighing 3.0
m
Step 4: Touch START.The
to 3.’?ounces. popcorn sensor automatically
calculates the cookimztime.
Step 1: Remove the outer wrapper from the LJ
microwave popcorn. After the popcorn sensor
Step2:Open oven door and place package of popcorn detects steam, the oven
in the cenkn-of the oven floor as directed by the signals and displays
r~]:llllil”L~CtLl]ocl”’sinstructions. Close oven door. remaining cooking
m
Step 3: “r’OUdlPOPCORN pad. time needed.
POPCORN
nStep 5:When cooking
-<. is completed, the oven
signals and klashes“End.”
Open the door and remove
the popcorn,
—.
‘MO’}’Ytffid,jw!i the PProgram tPrasor Lcms.
II’y(}ur f“avpopin(completely popped. If your favorite popcorn is overcooked, there is
[ilcrc isL}simpILilj[S111(YOcnul
an
adjustment you can make.
-ILJi
,-.-——.....—---
— — . .... .. . . . .. . . . . . —.
—-
—
..—————.-.——---..— —._—
—
G BY
m‘cook I
Time CookMows you to microwavefor aselected
amount of time.
Power level 10(High)is recommendedfor most
cooking,but you may changethis for more flexibility.
See the Cookbook supplied.
To becomebetter acquaintedwith time cooking,make
acup of coffee by followingthe stepsbelow.
Step 1:Fill acup
2/3 full of water, add
1teaspoonof instant
coffee and stir to
dissolve. Use acup
that has no metal
decoration and is
microwave-safe (refer
to Microwaving Tips
section). Place cup in
oven and close door.
II A ,
Step 2: TouchTIME
COOK I&II pad.
mStep 3: Selectyourtime.Touch 1
andMINUTE pad for one minute.
Becauseautomaticpower level 10isrecommended
for thiscup of coffee,there is no need to changethe
powerlevel. (If power level 10is notappropriate,see
“How to ChangePower Level” below.)
~-= Step 4: Touchthe STARTpad.
1START I
Step 5: When time is up, the oven signalsand flashes
“End.” The oven, lightand fan shutoff.
Step 6: Open the door.
--
-.
How to ChangePower Level I-
..
.
After settingcookingtime, touchPOWER LEVEL
pad, then touch desirednumberfor new power
level.Then touch START. 0,.
‘“‘T- :
-
!&&>. ;
+ ...
uthe mcook 11Femme
The Time Cook Hfeature lets you set two time ~..
—
:-c-
ooking fknctions within one program. This is ideal if How to CMNlgePower Level
you want to change power levels during your cooking ;..
After settingcookingtime,touchPOWER LEVEL i-
operations. Here’s how to do it. pad,thentouch desirednumberfor new powerlevel. ;’:;
Step 1: Place food in oven in microwave-safe ~.
+
‘
LY)ntaincrand
CIOSCthe door, Step 7: Touch START.
1
,=.
~~~[z: ‘rOTIME COOK
-,..
Step 8: “POWER 10.”is displayed and “COOK .,.-
6Mi.
---
TIME 1“COd
wStep 9: At the end of .’COOK TIME I,’*the seconcl I
power ICVC1is displayed and “COOK TIME II” is I
!$fep~: ,%icx(yourfirs[cook (imc. For cxaJ
shco
down.
[011(:]1~1i[li~fOt1llilN]5SUXl
When time is up. [he oven siglm
$~tcp4: ‘1’oTICOOK I&11. TIN oven, ]ightand fan shut off.
step 5:.sctyOLl 1“second cook time .
:.; {{+?l <}: (-l~:~rl fjc [k polve[” l~~;~l .
~.
sand [lashes“End.”
,’
.—..—..
—.......—-———L.-....———. ..- —....-.—-..-...—..-..-.— ——— ——..—.-
-——
..m
- —-—
.-—
——-— —..—.—. ..—-.—
,, ..
.,--.
.—
cooking Tips
oUse alowerpower level;foods willheat more
evenly thoughrequiring moretime.
~Be sure frozen food has been completelydefrosted
before insertingprobe. Probe may break offif used in
frozen foods.
~Coverfoodslooselyfor moisturecontroland quick,
evenheating.
Questions and Answers
Q. Are there any foods 1can’t TempCook?
AYeDelbuicicrfr
whitopetsoraa w
tempeBatdoafrfoa
aldiftcprewtprI b
tTiCothfo
Q. Why did ‘TRObE” flash on the displayafter 1
touched the STARTpad?
A. “PRObE” will flash if you don’t seat the cable end
of the probe securely into the receptacle in the oven
wall or if you touch the TEMP COOK &HOLD pad
and forget to use the probe.
Q. Can 1leave my probe in the ovenif it’s n
insertedin iFood?
A. No, if it touchesthe oven wall, it may damage
the oven.
Q. Can 1TempCook different portions of food at
differenttemperatures?
A. Yes.The temperatureprobe gives you the freedom
to cook differentportions of food at different
temperaturesto suitindividualeating styles. Simply
place probe in food and change temperature setting
as needed.
‘\,
IL’
1.>;
.. ....—.—..+—----- —.... ...——.—.......—. ....-——— .. —.-.......
”.-
——
.. .. ——..— ..- ...
Auto Defrost
Withthe Auto Defrostfeature, Use the Auto DefrostGuideon the The oven calculatesdefrosting
the oven automaticallysets the nextpage. Enter the food weightin timeand changespower levels
defrostingtimes and power poundsand tenthsof apound (see duringdefrostingto giveeven
levelsfor you. ConversionGuidebelow).Then defrostingresults.
touch STARTpad.
How tSet Auto Defrost
Before you begin, checkthe guide located at front
of o\7enwhen you openthe door.It showsminimum
and maximum food weightsfor avariety of foods.
Youwill need to know your food weightbefore setting
Auto Defrost.
Step 1: Remove food from package,place in oven on
microwave-safedish and close door.
nStep 2: Touchthe AUTO
AUTO DEF. DEF.pad.
e%
fig--qp--)~)--) Step 3: Enter weight. For
example, touch number pads 1
l~~~m~ and2forweightof l.2Pounds
(1pound, 3ounces. See
Conversion Guide below.)
Step 4: TouchSTARTpad.
mCountingdown
Display showsdefrosttime
Twiceduring defrosting,
the oven beeps 4times
and ‘TURn” flashes.
Follow the directionsin
the Auto Defrost Guidefor
what to do at the first and
second signal.Then close the door and touch START.
(Defrostingcontinuesduring “TURn” disPlaY.)
When defrostingtimeiscompleted,“End” flashes and
oven beeps4times. “End” remains on display and
oven beeps every minuteuntil door is opened or
CLEAWOFF pad is touched.
Co(
If the weightof foodis statedin
poundsand ounces,the ounces
mustbe convertedto tenths
(.])Oapound.
OL
Pounds
l-~ .1
I
37
.1
4-5 .3
6-7 .4’
85
.-
9–1o.6
11 .7
12–13 .8
14-15 I.9 I\\.
I
I
!
1
., —.—.--..— .—. ---——
-—.—... .-...-.—---—----
..—.—
——. —-...—......-...
.- . . .-
RECOMMENDED IMIN.-MAX.
FOODS WEIGHT FIRST SIGNAL SECOND SIGNAL STAND TIME
chops I0.1 -6.0 lbso Turn over. Separateand shield 5minutes
where necessary.
Frankfurters,Sausage I0.1 -6.0 lbs. Separate. Removedefrosted 2minutes
pieces.
Ground Meat I0.1 -6.0 Ibs. ITurn over. Removedefrosted areas 5minutes
and break atmrt.
Beef Patties 0.1 -6.0 lbs. Turn over. Separatepatties. 5minutes
Roast 0.1 -6.0 lbs, Turn over and Shieldif necessary. 90 minutes
shield.
Ribs 0.1 -6.0 lbs. Turn over. Remove defrosted 10minutes
pieces. Shield if
necessary.
Steak I0.1 -6.0 lbs. ITurn over. I I 5minutes
sl0.1 -6.0 Ibs. ITurn over and Separate and remove 5minutes
separate. defrosted pieces.
.4%E%.i
Whole chic0.1 -6.0 Ibs. Turn over and Turn over and shield. 10minutes;
shield. run cold water
w: in cavity.
l-w-key Breast 0.1 -6.0 lbs. Turn over. Shield where 20 ninutes in
(brcnsl side UII) necessary. reftigeralor
CiukcflPieces I().1-6.0 Ibs. Turn over, ISepa”ateandrenlove 5minutes
defrosted pieces.
{’ornHCI(who0-6lb
Re
wrapper 10minutes;
and turn over. run cold water
in cavity,
l;iSlI f;ill(’[s (). 1-6.() Ibs. Turn over. Sea r5m
dep
Slll”ill1[). Scallops (I-6.()1(
sepal”ako Separate and remove 5minutes
defrosted pieces.
Jlrl)olr I‘isll (). I-6.() 11?s. TuI’13over and Hold under
shicld t:li1ancl cold running
head! water.
... ...--———-—.—... -..-.-—------------ ...... —..
————..—----—...
Auto Roastuses the temperatureprobe to cookto Just as in conventionalroasting,onlytenderroasts
the desired servingtemperature.Unlike Temp shouldbe Auto Roasteduntil specifiedinternal
Cook.&Hold, which usesasingle power level, temperaturesare reached.Less tenderroastsshouldbe
Auto Roastusesup to 3power settings which microwavedby time,accordingto the Cookbookthat
automaticallyswitch during roasting,thus comes with your oven.
providingeven, tender cookingresultswithout
overcooking.
Preparing Rwlst$ fAuto Roasting
roast in cooking
bag on trivetin
microwave-safe
dish. (Refer to
package instructions
for proper use of \
Place tenderbeef
cookingbag.) Insert
probe throughcooking bag horizontally into the
center meaty area not touchingbone or fat. Make
sure the handle does not touch the food or top or sides
of the oven.
Place pork roast
in cookingbag
and place in
microwave-safe
dish.
Place meat in
oven with probe
to the right. Insert
cable en~ of probe
firmly into
receptacle on
oven wall.
~tAdo Roast Bed’@
Step 1: TL)uchAUTO ROAST
pad. ‘1’ouchnumber pad 1.Touch
n
AUTO ROAST
s“l’AR~+(see the “ALItORoast n
~;uidc” f’orcomplete list of
Ilxx)mm(!ndcdUxlcs.)
Step 3: After a
pre-programmed
food temperature is
reached, oven beeps
4times and “HOLd”
appears on the display.
S4Food will be
held at this temperature
for 60 minutes. The
oven then beeps 4times
and “End” appears.
!;
I
. .
-.. . —.—..—..-----..-—
—-
—---_...———.... —
Ad.@ Roast Guide
~Place meatsin acookingbag in microwave-safe ~Recommendedcodesare shownon guidebehind
dish. (Referto packageinstructionsfor properuse of door,on front of oven.
cookingbag.) *Insertprobe as described elsewherein this section.
IMinimuml?inal IApprox.The I-I(M*
Minutes Doneness
Display
FoCode Temp. (minutesperpound)
Beef(5lb.max.)
TenderRoast
Medium
Well o
5-1o MEd
WELL
13-15
15-17
Pork(5lb.max.)
LoinRoast
Poultry(6lb.max.)
TurkeyBreast
(Insertprobehorizontally
intomeatiestarea.)
WELL
WELL
217
1
3185”F. 110-15
~RecomstatibeSe
(hto RoastCode4)
Total time includes time to bring food to 180°F.,and
hold at that temperature until done. Oven switchesto Hold
at 180°F.,and continues
holding at 180°F.until you
remove food and touch
CLEAR/OFF pad. If
stirring is recommended,
you can restart oven by
touching the STARTpad
A.
. . , --= -.. .
Set Auto Simmer iike
Auto Roast as explained
in this section. Display
Shows“’SUM”and
“CODE 4.” again.Touchc
pad after cooking.
(’h&k (Auto RoastCode4)
Doneness
Display
SIM
SIM
Approx,
“Hmdkhm comments
k!ef
f’ot It(
(-’1i
Addenoughliquidtojustcovermeat.Ifaddingvegetables,
makesuretheyarecompletelycoveredbyliquid.
Precookmeat.Placeprobe1inchfromtopsurface.Stirafter
Shours,ifpossibie.
Add4cupsliquid.Insertprobeintomeatiestareaofinnerthigh
frombelowendandparallelto leg.Turnoverafter1/2oftime.
%meprocedureasabove.
Add4cum liauid.
5
5
SIM
SIM
ISO°F,
1SOOF.
4-6
3
1sooF.
1N(
-M
..
Make stvegandmeatarecoveredbyliquid.Stir
every3hours.
Addenoughliquidtocoverpeasatleast2inches.Stirafter3houi-s.
—
7-
~.
]ISOL’F,
.— —..—.
BY
mm! Defrost (Power Le3)
TimeDefrostisdesignedforspeedythawingof
frozenfoodandis oneof thegreatadvantagesof
amicrowaveoven. .
UsetheTimeDefrostsettingtoquicklythawfoods
suchas bread,rolls,vegetables,fruitsandfrozen
ciinners.TheAuto Defrostsettingispreferredformeat
andpoultrybecausetheovensetsthedefrostingtime
andpowerlevelsforyou.
~Powerlevel3isautomaticallysetwhenyoupress
TIME DEFROSTpad,butYOUmaychangethisfor
moreflexibility.
oSeetheCookbookthatcomeswiththisovenfor
defrostingguides.
l-low to ChPoLe
After setting defrosting time.touch POWER
LEVEL pad, then touch desirednumbel-for
new power level. Then touch START.
Tobecomebetteracquaintedwiththedefrostfunction,
defrosta10oz.packageof frozenstrawberriesby
followingthestepsbelow.
Step1:Placepackageoffrozenstrawberriesin the oven
andclosedoor.Be surepackagecontainsno metal.
m
Step2: TouchTIMEDEFROST.
TIME
DEFROST
Step3: Selectonehalfofthetotaldefrostingtime
recommendedin theCookbooksupplied.Forexample,
touch4andMINUTEpad for4minutes.
m
Step4: TouchSTART.When
START thecycleis completed,theoven
signalsandflashes“End,”then
automaticallyshutsoff.
Step 5: Tum thepackageover,closethedool;anql“e!?eat
Steps2and 3to setremaininghalfof defrostingtnme
andtouchSTART.
Step 6: Whenthe oven signalsandflashes“End,”open
thedoor,removethepackageand separatestrawberries
tofinishdefrosting.
T
.-
0F(xds 1’1-()ZC ninpaper or p]asticcm be defrosted inQFamily-size.
(Ilcpik’kay. pre-packa:ed
~1‘f)rc\’cndcfros1in:, frozendinners can
>
/-;;’+ “’ bc defl.ostedand
Sol?ll! foods” Imxl 10 hc
I)l”okclllloSq):l
<,‘‘:’’?;q~.mic
If ~he
,, ,:, ,.>$..~>:s food is in afoil
1):11”[01(hL’\\’:I}’
thlU
[kdcl’rin[imu“contra
itto iiillicl-o~l~:ll~e-s:~feCiish.
oYour ~ook12001< has ack frostingguide.
...-——--—.-
-—.-

Other GE Microwave Oven manuals

GE Profile PVM9005SJSS Manual

GE

GE Profile PVM9005SJSS Manual

GE Spacemaker II JEM31F Installation instructions

GE

GE Spacemaker II JEM31F Installation instructions

GE Spacemaker JVM140K User manual

GE

GE Spacemaker JVM140K User manual

GE JE1530 Use and care manual

GE

GE JE1530 Use and care manual

GE spacemaker III User manual

GE

GE spacemaker III User manual

GE JES1224T Use and care manual

GE

GE JES1224T Use and care manual

GE JE1240L Use and care manual

GE

GE JE1240L Use and care manual

GE JNM7196SFSS Operating manual

GE

GE JNM7196SFSS Operating manual

GE JES1451DN User manual

GE

GE JES1451DN User manual

GE Spacemaker JVM1665DN Manual

GE

GE Spacemaker JVM1665DN Manual

GE DVM1665 User manual

GE

GE DVM1665 User manual

GE Spacemaker JVM1660 User manual

GE

GE Spacemaker JVM1660 User manual

GE JE1050GA User manual

GE

GE JE1050GA User manual

GE Spacemaker JNM1541DM User manual

GE

GE Spacemaker JNM1541DM User manual

GE JNM3161RFSS User manual

GE

GE JNM3161RFSS User manual

GE Appliances JES1451 User manual

GE

GE Appliances JES1451 User manual

GE PVM1790SRSS Instruction Manual

GE

GE PVM1790SRSS Instruction Manual

GE Spacemaker JVM2010DSWW Manual

GE

GE Spacemaker JVM2010DSWW Manual

GE Spacemaker JVM1540SNSS Manual

GE

GE Spacemaker JVM1540SNSS Manual

GE Appliances CEB1590 User manual

GE

GE Appliances CEB1590 User manual

GE JE1140BC User manual

GE

GE JE1140BC User manual

GE JE1660WB User manual

GE

GE JE1660WB User manual

GE JE710 User manual

GE

GE JE710 User manual

GE PVM9195SFSS Operating manual

GE

GE PVM9195SFSS Operating manual

Popular Microwave Oven manuals by other brands

Panasonic NN-SF460M Operating instructions and cookery book

Panasonic

Panasonic NN-SF460M Operating instructions and cookery book

Panasonic NN-CD767 operating instructions

Panasonic

Panasonic NN-CD767 operating instructions

Daewoo KOR-161G2 operating instructions

Daewoo

Daewoo KOR-161G2 operating instructions

Samsung M1927N Owner's instructions and cooking guide

Samsung

Samsung M1927N Owner's instructions and cooking guide

ACP ACE series Quick start & reference guide

ACP

ACP ACE series Quick start & reference guide

Gorenje BM201AG1BG instruction manual

Gorenje

Gorenje BM201AG1BG instruction manual

Zanussi ZM17TG user manual

Zanussi

Zanussi ZM17TG user manual

LG MJ3286BRUS owner's manual

LG

LG MJ3286BRUS owner's manual

AJ Madison HOR3001 installation instructions

AJ Madison

AJ Madison HOR3001 installation instructions

Sharp Carousel R-380J Operation manual

Sharp

Sharp Carousel R-380J Operation manual

iGenix IG3091 user manual

iGenix

iGenix IG3091 user manual

Blodgett accellis C70 Service and repair manual

Blodgett

Blodgett accellis C70 Service and repair manual

Vitek VT-1684 Manual instruction

Vitek

Vitek VT-1684 Manual instruction

Samsung CE113AEL Owner's instructions and cooking guide

Samsung

Samsung CE113AEL Owner's instructions and cooking guide

IKEA VARMA manual

IKEA

IKEA VARMA manual

Daewoo KOR-632G0S Service manual

Daewoo

Daewoo KOR-632G0S Service manual

Sharp R-28STM Operation manual

Sharp

Sharp R-28STM Operation manual

Simfer MD2500 user manual

Simfer

Simfer MD2500 user manual

manuals.online logo
manuals.online logoBrands
  • About & Mission
  • Contact us
  • Privacy Policy
  • Terms and Conditions

Copyright 2025 Manuals.Online. All Rights Reserved.